In the application of React Native, it is very complicated to add video call function from scratch. To ensure low latency and load balancing, we should also pay attention to managing user event status, which is very cumbersome. In addition, cross platform compatibility must be ensured.
Of course, there is a simple way to do this. In this tutorial, we will use Agora Video SDK to build a React Native video call App. Before delving into the work of the program, we will introduce the structure, setup and execution of the application. You can run a cross platform video call application in a few minutes through a few simple steps.
We will use Agora RTC SDK for React Native As an example. In this article, the version I use is v3 1.6.
Create an Agora account
- stay Voice network official website registration And log in to the background.
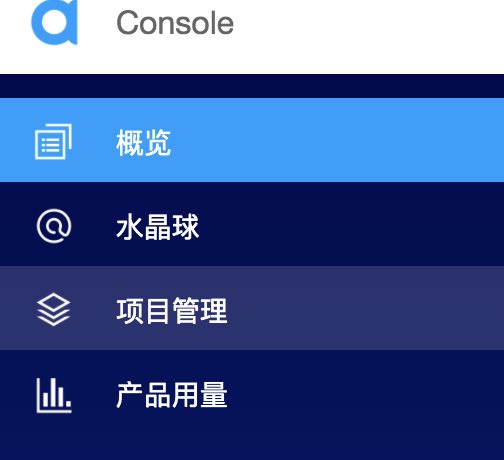
- Find the "project list" tab under "project management" and click the blue "create" button to create a project. (when prompted to use App ID + certificate, select use App Id only.) Remember your App ID, which will be used to authorize your request when developing the App.
Note: Token authentication is not used in this article. It is recommended that all RTE apps running in the production environment adopt Token authentication. For more information about Token based authentication in Agora platform, please search the keyword "Token" in the sound network document center and refer to relevant documents.
Example project structure
This is the structure of the application we are building:
.

├── android

├── components

│ └── Permission.ts

│ └── Style.ts

├── ios

├── App.tsx

.
Let's run this application
-
You need to install node of LTS version JS and NPM.
-
Make sure you There is an Agora account , set up a project and generate App ID.
-
Download and unzip the ZIP file from the main branch.
-
Run npm install to install App dependencies in the extracted directory.
-
Navigate to/ App.tsx, fill in the previously generated App ID into appid: "< yourappid >"
-
If you are building for iOS, open the terminal and execute CD iOS & & pod install
-
Connect your device and run NPX react native run Android / NPX react native run IOS to launch the application. Wait a few minutes to build and start the application.
-
Once you see the home screen on your phone (or simulator), click the start call button on the device. (iOS simulator does not support cameras, so physical devices should be used instead).
Through the above operations, you should be able to make video chat calls between two devices. The application uses channel-x as the channel name by default.
Applied working principle
App.tsx
This file contains all the core logic of video call in React Native video call App.
import React, {Component} from 'react'
import {Platform, ScrollView, Text, TouchableOpacity, View} from 'react-native'
import RtcEngine, {RtcLocalView, RtcRemoteView, VideoRenderMode} from 'react-native-agora'

import requestCameraAndAudioPermission from './components/Permission'
import styles from './components/Style'

/**
 * @property peerIds Array for storing connected peers
 * @property appId
 * @property channelName Channel Name for the current session
 * @property joinSucceed State variable for storing success
 */
interface State {
    appId: string,
    token: string,
    channelName: string,
    joinSucceed: boolean,
    peerIds: number[],
}

...
Let's start by writing the import statement. Next, define an interface for the application state, including:
-
appId: Agora App ID
-
Token: the token generated to join the channel.
-
channelName: channel name (users of the same channel can talk).
-
Joinsucceeded: stores the Boolean value of whether the connection was successful.
-
peerIds: an array used to store UID s of other users in the channel.
...

export default class App extends Component<Props, State> {
    _engine?: RtcEngine

    constructor(props) {
        super(props)
        this.state = {
            appId: YourAppId,
            token: YourToken,
            channelName: 'channel-x',
            joinSucceed: false,
            peerIds: [],
        }
        if (Platform.OS === 'android') {
            // Request required permissions from Android
            requestCameraAndAudioPermission().then(() => {
                console.log('requested!')
            })
        }
    }

    componentDidMount() {
        this.init()
    }

    /**
     * @name init
     * @description Function to initialize the Rtc Engine, attach event listeners and actions
     */
    init = async () => {
        const {appId} = this.state
        this._engine = await RtcEngine.create(appId)
        await this._engine.enableVideo()

        this._engine.addListener('Warning', (warn) => {
            console.log('Warning', warn)
        })

        this._engine.addListener('Error', (err) => {
            console.log('Error', err)
        })

        this._engine.addListener('UserJoined', (uid, elapsed) => {
            console.log('UserJoined', uid, elapsed)
            // Get current peer IDs
            const {peerIds} = this.state
            // If new user
            if (peerIds.indexOf(uid) === -1) {
                this.setState({
                    // Add peer ID to state array
                    peerIds: [...peerIds, uid]
                })
            }
        })

        this._engine.addListener('UserOffline', (uid, reason) => {
            console.log('UserOffline', uid, reason)
            const {peerIds} = this.state
            this.setState({
                // Remove peer ID from state array
                peerIds: peerIds.filter(id => id !== uid)
            })
        })

        // If Local user joins RTC channel
        this._engine.addListener('JoinChannelSuccess', (channel, uid, elapsed) => {
            console.log('JoinChannelSuccess', channel, uid, elapsed)
            // Set state variable to true
            this.setState({
                joinSucceed: true
            })
        })
    }

...
We define a class based component: variables_ engine will store the RtcEngine class instance imported from Agora SDK. This example provides the main methods that our application can call to use the functions of the SDK.
In the constructor, set the state variable and get permissions for the camera and microphone on Android. (we use the help function of permission.ts described below) when the component is mounted, we call the init function to initialize the RTC engine with the App ID. It can also enable video by calling the enableVideo method on the engine instance. (if this step is omitted, the SDK can work in pure audio mode.)
The init function also adds event listeners for various events in the video call. For example, the UserJoined event provides us with the UID when the user joins the channel. We store this UID in our state for later rendering of their videos.
Note: if users are connected to the channel before we join, then after they join the channel, each user will be triggered with a UserJoined event.
...
    /**
     * @name startCall
     * @description Function to start the call
     */
    startCall = async () => {
        // Join Channel using null token and channel name
        await this._engine?.joinChannel(this.state.token, this.state.channelName, null, 0)
    }

    /**
     * @name endCall
     * @description Function to end the call
     */
    endCall = async () => {
        await this._engine?.leaveChannel()
        this.setState({peerIds: [], joinSucceed: false})
    }

    render() {
        return (
            <View style={styles.max}>
                <View style={styles.max}>
                    <View style={styles.buttonHolder}>
                        <TouchableOpacity
                            onPress={this.startCall}
                            style={styles.button}>
                            <Text style={styles.buttonText}> Start Call </Text>
                        </TouchableOpacity>
                        <TouchableOpacity
                            onPress={this.endCall}
                            style={styles.button}>
                            <Text style={styles.buttonText}> End Call </Text>
                        </TouchableOpacity>
                    </View>
                    {this._renderVideos()}
                </View>
            </View>
        )
    }

    _renderVideos = () => {
        const {joinSucceed} = this.state
        return joinSucceed ? (
            <View style={styles.fullView}>
                <RtcLocalView.SurfaceView
                    style={styles.max}
                    channelId={this.state.channelName}
                    renderMode={VideoRenderMode.Hidden}/>
                {this._renderRemoteVideos()}
            </View>
        ) : null
    }

    _renderRemoteVideos = () => {
        const {peerIds} = this.state
        return (
            <ScrollView
                style={styles.remoteContainer}
                contentContainerStyle={{paddingHorizontal: 2.5}}
                horizontal={true}>
                {peerIds.map((value, index, array) => {
                    return (
                        <RtcRemoteView.SurfaceView
                            style={styles.remote}
                            uid={value}
                            channelId={this.state.channelName}
                            renderMode={VideoRenderMode.Hidden}
                            zOrderMediaOverlay={true}/>
                    )
                })}
            </ScrollView>
        )
    }
}
Next, there are ways to start and end video chat calls. The joinChannel method receives Token, channel name, other optional information and an optional UID (if you set UID to 0, the system will automatically assign UID to local users).
We also define a rendering method to display the buttons to start and end calls, as well as the video sources of local and remote users. We defined_ renderVideos method to render our video source, and use peerIds array to render in rolling view.
In order to display the video source of local users, we use < rtclocalview The surfaceview > component needs to provide channelId and renderMode. Users connected to the same channelId can communicate with each other, and renderMode is used to put video into the view or fill the view by zooming.
To display the video source of the remote user, we use < rtclocalview. Com in the SDK Surfaceview > component, which can obtain the UID, channelId and renderMode of the remote user.
Permission.ts
import {PermissionsAndroid} from 'react-native'

/**
 * @name requestCameraAndAudioPermission
 * @description Function to request permission for Audio and Camera
 */
export default async function requestCameraAndAudioPermission() {
    try {
        const granted = await PermissionsAndroid.requestMultiple([
            PermissionsAndroid.PERMISSIONS.CAMERA,
            PermissionsAndroid.PERMISSIONS.RECORD_AUDIO,
        ])
        if (
            granted['android.permission.RECORD_AUDIO'] === PermissionsAndroid.RESULTS.GRANTED
            && granted['android.permission.CAMERA'] === PermissionsAndroid.RESULTS.GRANTED
        ) {
            console.log('You can use the cameras & mic')
        } else {
            console.log('Permission denied')
        }
    } catch (err) {
        console.warn(err)
    }
}
Export a function to apply for the permission of camera and microphone to the operating system on Android.
Style.ts
import {Dimensions, StyleSheet} from 'react-native'

const dimensions = {
    width: Dimensions.get('window').width,
    height: Dimensions.get('window').height,
}

export default StyleSheet.create({
    max: {
        flex: 1,
    },
    buttonHolder: {
        height: 100,
        alignItems: 'center',
        flex: 1,
        flexDirection: 'row',
        justifyContent: 'space-evenly',
    },
    button: {
        paddingHorizontal: 20,
        paddingVertical: 10,
        backgroundColor: '#0093E9',
        borderRadius: 25,
    },
    buttonText: {
        color: '#fff',
    },
    fullView: {
        width: dimensions.width,
        height: dimensions.height - 100,
    },
    remoteContainer: {
        width: '100%',
        height: 150,
        position: 'absolute',
        top: 5
    },
    remote: {
        width: 150,
        height: 150,
        marginHorizontal: 2.5
    },
    noUserText: {
        paddingHorizontal: 10,
        paddingVertical: 5,
        color: '#0093E9',
    },
})
Style. The TS file contains the styles of the components.
This is the way to quickly develop a React Native video chat App. You can refer to Agora React Native API Reference Check out methods that can help you quickly add more features, such as mute the camera and microphone, set up video profile and audio mixing, and so on.
Get more documentation, demos, technical help
- Get SDK development documents, Access to the sound network document center.
- If you need to refer to various scene demos, Available at the download center.
- In case of development difficulties, You can visit the forum and post questions.
- Learn more about tutorials, RTE technology dry goods and technical activities, Accessible sound network developer community.
- Welcome to scan the code and follow us.