catalogue
1, Salt SSH
Salt SSH is a temporary alternative to minion installation on some hosts. Therefore, salt SSH can run independently without minion. During the interaction, SSH pass is used for password interaction and works in serial mode, so the performance is also slightly degraded.
##Install salt shh
[root@server1 salt]# yum install -y salt-ssh

##Set configuration file: / etc/salt/roster:
 10 server2:
 11   host: 192.168.1.12
 12   user: root
 13   passwd: 123456

##Conduct connection test
[root@server1 salt]# salt-ssh '*' test.ping -i
[root@server1 salt]# salt-ssh '*' cmd.run hostname -i
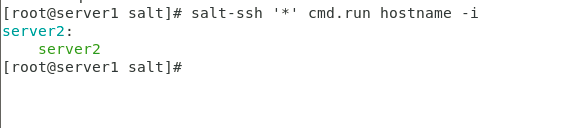 Figure 1 call results
2, Salt syndic
Function: syndic is a proxy server in salt, which is used to isolate master and minion. It is mainly used for cluster deployment.
Features: Syndic must run on the master and then connect to another topmaster.
Process: the sending status of the topmaster is transferred to the subordinate master through syndic, and the data transferred from minion to the master is also transferred to the topmaster through syndic. Topmaster does not know how many minions there are. But it requires: syndic and topmaster file_roots and pillar_ The directory of roots should be consistent.
 Figure 2 syndic structure
Service configuration:
##master end
##Install salt syndic
[root@server1 salt]# yum install -y salt-syndic

##Configure master profile
[root@server1 salt]# vim /etc/salt/master

##Document content:
syndic_master: 192.168.1.14    ##Specify topmaster

##Restart service

[root@server1 salt]# systemctl restart salt-master.service
[root@server1 salt]# systemctl start salt-syndic.service


##topmsater end
##Install msater
[root@server4 salt]# yum insatall -y salt-master

##Edit profile:
[root@server4 salt]# vim /etc/salt/master

##Profile content:
order_masters: true        ##Start topmaster service

##Restart the master service
[root@server4 salt]# systemctl restart salt-master.service

##Content detection
[root@server4 salt]# salt-key -L    ##view list
[root@server4 salt]# salt-key -A    ##Set permissions
[root@server4 salt]# salt '*' test.ping    ##test
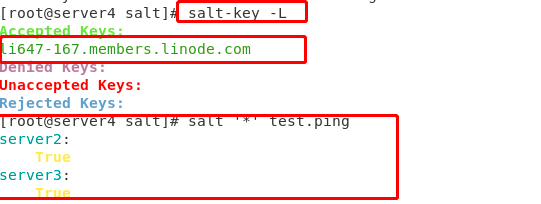 Fig. 3 test results
[note] in the above results, we can see that the list in server4(topmaster) is only li647, but the feedback results obtained during the information test are server2 and server3. This result proves that lib64 is similar to a proxy server proxy, and the final tube is still sent from the topmaster.
3, Salt API
In order to realize program development and third-party system integration, SaltStack officially provides a Salt API project in REST API format, which makes it easy to integrate Salt with third-party systems.
Using api interface to implement SaltStack push is a very convenient means to manage clusters. Three api modules are officially available:
rest_cherrypy,rest_tornado,rest_wsgi.
Official documents: https://docs.saltstack.com/en/latest/ref/netapi/all/index.html#all- netapi-modules
##Salt API configuration:

##Install the salt API service module on the master side:
[root@server1 ~]# yum install -y salt-api

##Generate key file (ssh authentication login is required during transmission):
[root@server1 ~]# cd /etc/pki/tls/private/
[root@server1 private]# openssl genrsa 2048 > locahost.key

##Generate CA certificate
[root@server1 ~]# cd /etc/pki/tls/certs/
[root@server1 certs]# make saltcert.crt

##Certificate configuration
[root@server1 master.d]# cd /etc/salt/master.d/
[root@server1 master.d]# vim api.conf

##content
rest_cherrypy:
  host: 192.168.1.11
  port: 8000
  ssl_crt: /etc/pki/tls/certs/saltcert.crt
  ssl_key: /etc/pki/tls/private/locahost.key

##Add certification file:
[root@server1 master.d]# vim auto.conf
##Document content:

  1 external_auth:
  2   pam:
  3     saltapi:
  4       - .*
  5       - '@wheel'
  6       - '@jobs'

##Create a user and specify a password
[root@server1 master.d]# useradd -s /sbin/nologin saltapi
[root@server1 master.d]# echo 123 | passwd --stdin saltapi

##Restart the service and view the port
[root@server1 master.d]# systemctl restart salt-master
[root@server1 master.d]# systemctl start salt-api
[root@server1 master.d]# netstat -anltupe | grep 8000

##Login query:

##Obtain authentication token:

[root@server1 master.d]# curl -sSk https://192.168.1.11:8000/login \
-H 'Accept: application/x-yaml' \
-d username=saltapi \
-d password=123\
-d eauth=pa

##Task push:
[root@server1 master.d]# curl -sSk https://172.25.0.1:8000 \
-H 'Accept: application/x-yaml' \
-H 'X-Auth-Token: 77e2b1de04b0dbc0a4bf11900712b83e4fa2c241'\  ##• token value is the toekn value obtained by the above command

-d client=local \
-d tgt='*' \
-d fun=test.ping
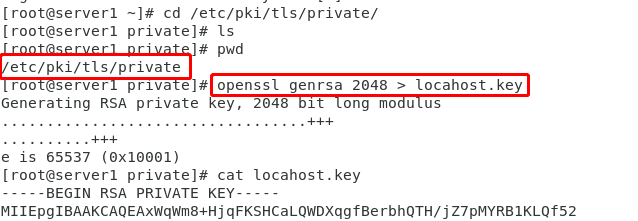 Figure 4 key generation
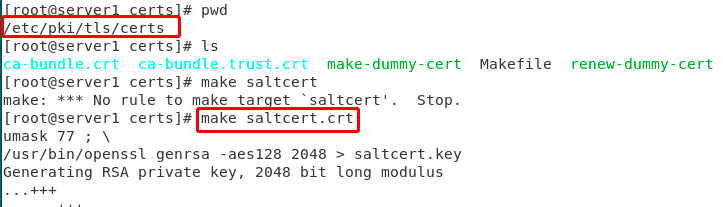 Figure 5 generating CA certificate
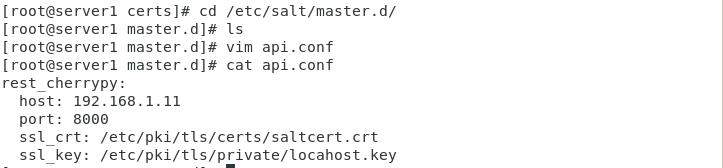 Figure 6 configuration authentication file
 Figure 7 creating login user and password
In the above experimental process, there are three separate modules. The small series is tested on the same host during the test. In order to prevent the interference of the experimental environment, readers can first restore the experimental environment to ensure that the environment is pure and does not interfere with the next experiment. If there is an error, we can also troubleshoot it well.