0. Premise preparation
a. Tencent cloud account (you can log in by scanning the code)
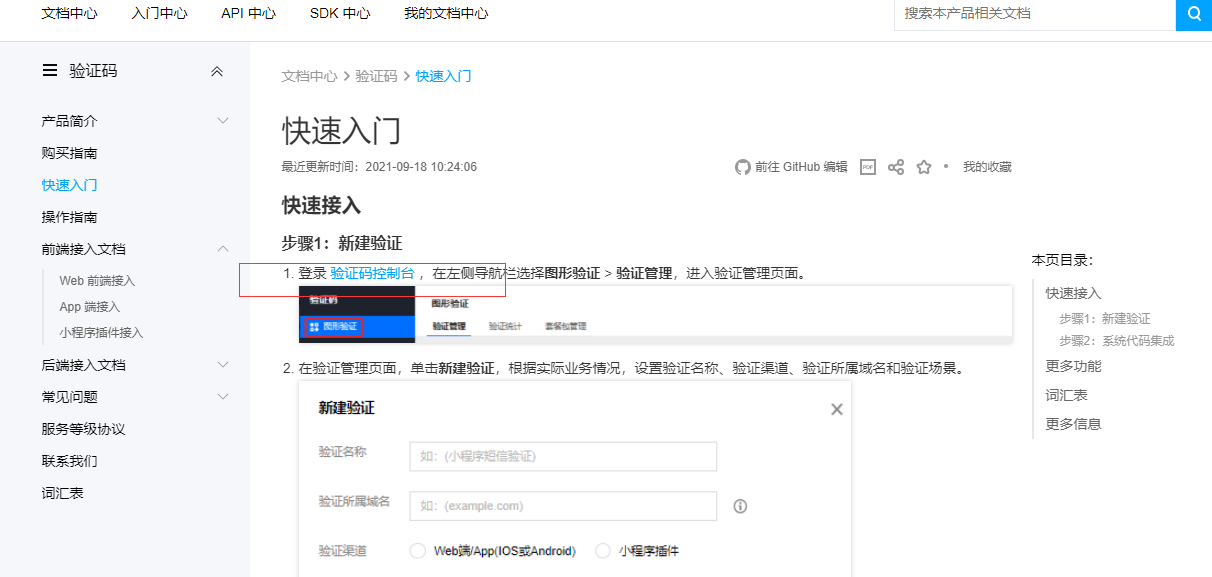
b. Quickly enter the waterproof wall document and click the link below
Waterproof wall (verification code) document https://cloud.tencent.com/document/product/1110/36841
c. Back end: self provided Django (preferably 2x)
e. The first time you use the waterproof wall, there will be a free package that can be used for seven days. When you get CaptchaAppId, there will be a pop-up window and click to get it.
Front end: Axios (direct entry)
axios.post('address', {key: 'Data I carried', key2: 'Carried data II'})
        .then((res) => {
        }) // This function will be triggered automatically after success
        .cache((errors) => {
        })// Failure will automatically trigger the function
1. Back end preparation
a. Generate an app (register in settings)
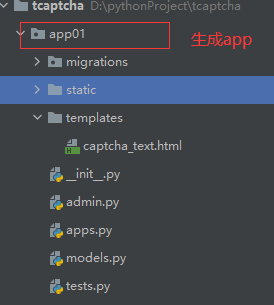
b. In URLs Generate a route in py file
path('tcaptcha_v1/', views.TCaptchaView, name='tcaptcha_v1'),c. Create an HTML: captcha_text.html
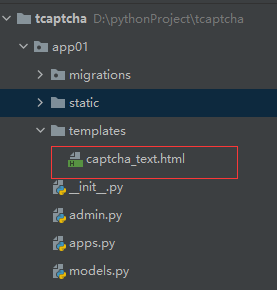
d. In view Write a view in the PY view
def TCaptchaView(request):
    '''
    tencent Waterproof wall test
    :param request:
    :return:
    '''
    return render(request, 'captcha_text.html')
2. Front end preparation
a.<!-- 1. Generate a common button and add some attributes. There are acquisition steps after CaptchaAppId -- >
<!--1.Generate a normal button and add some properties -->
<!--Clicking this element will automatically activate the verification code, This example uses button element, You can also use div,span etc.-->
<!--id :            (Immutable) Elemental ID, Value must be 'TencentCaptcha'-->
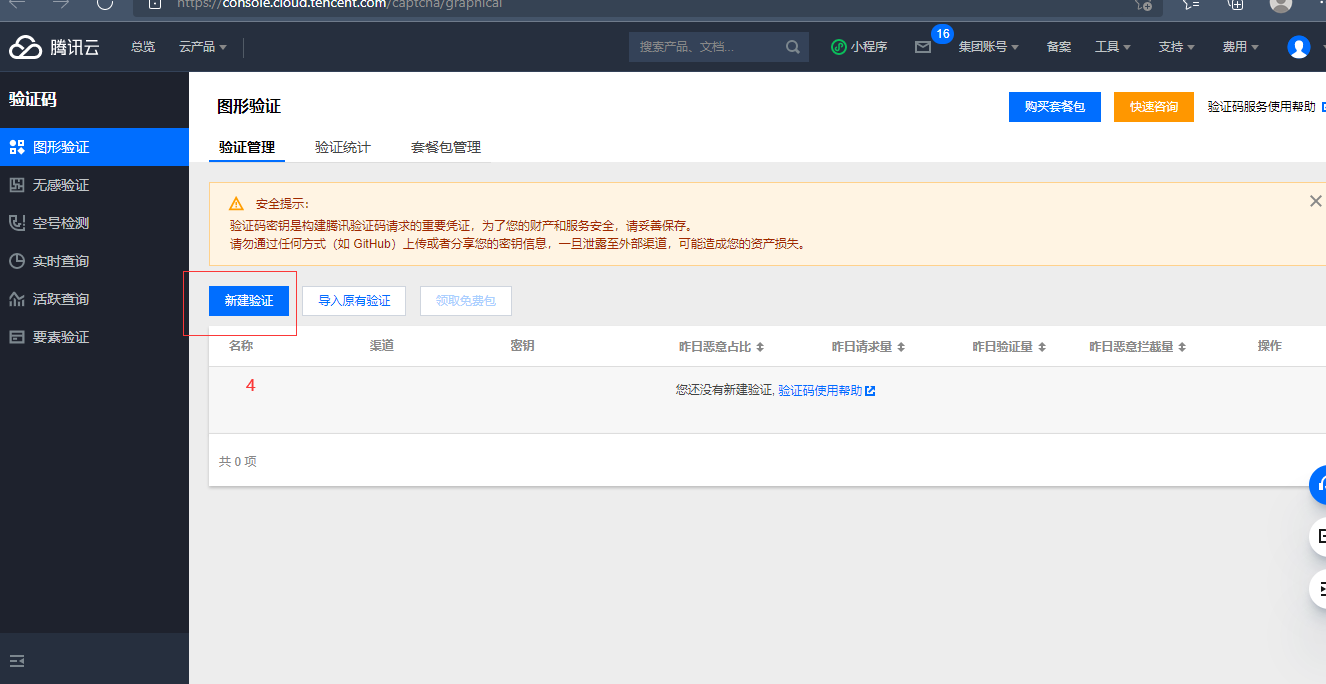
<!--data-appid :    (must) Verification Code CaptchaAppId, Get the verification code from Tencent cloud's verification code console,
                     [graphic verification] in the verification code console page>[Verification list.
                     If no new verification is created, please select the appropriate verification channel and verification scenario according to the business needs-->
<!--data-cbfn :     (must) Callback function name, The function name should be the same as data-cbfn identical-->
<!--data-biz-state :(Optional) Business custom transparent transmission parameters, It will be obtained in the callback function( res.bizState)-->
<button onclick="captcha_show()"
        id="TencentCaptcha"
        data-appid="Your verification code CaptchaAppId"
        data-cbfn="callbackName"
        data-biz-state="data-biz-state"
        type="button">Sign in
</button>
b.<!-- 2. Configuration js file -- >
<!-- If script Yes head Introduced in onerror The function needs to wait domready Rebinding element events in body Loading in without waiting -->
<!-- 2.to configure js file/You can also download to a local reference -->
<script src="https://ssl.captcha.qq.com/TCaptcha.js" onerror="TCaptchaLoadError()"></script>
c. Get captchaappid (skip if you have)
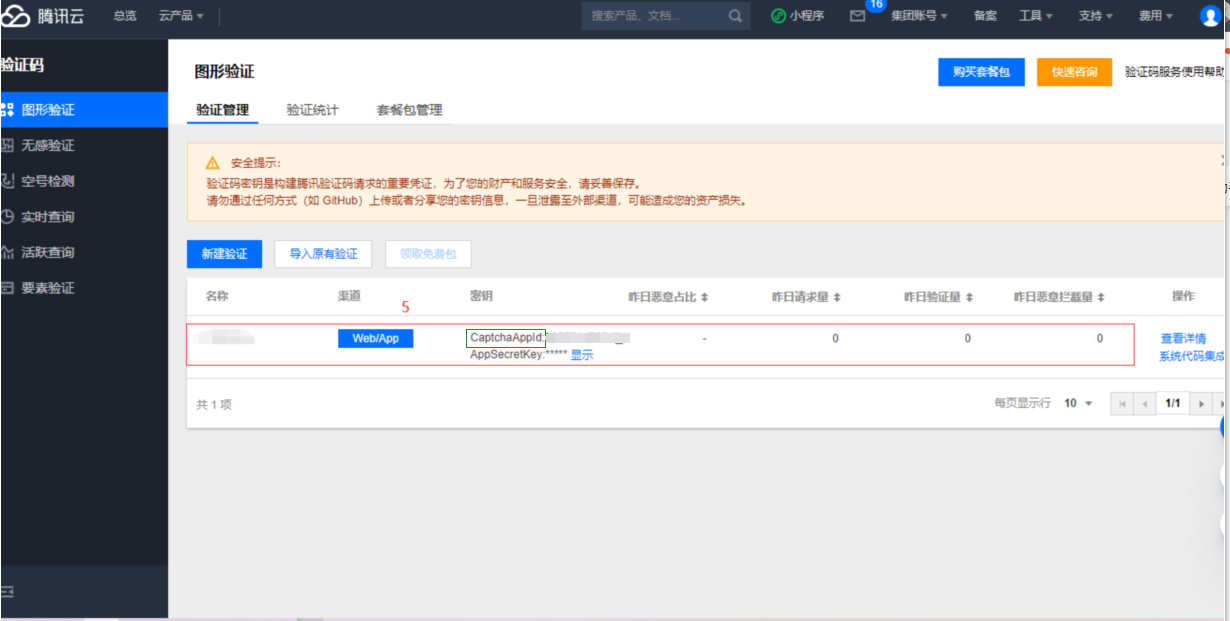
e.// 3. Configure the send message (CaptchaAppId) to add an onclick event to the button button
<script>
    // 3. Configure the sending message (CaptchaAppId) to add an onclick event to the button
    function captcha_show() {
        var captcha1 = new TencentCaptcha('2057744795', function (res) {
            console.log(res)
        })
        captcha1.show();
    }
</script>
Illustration:
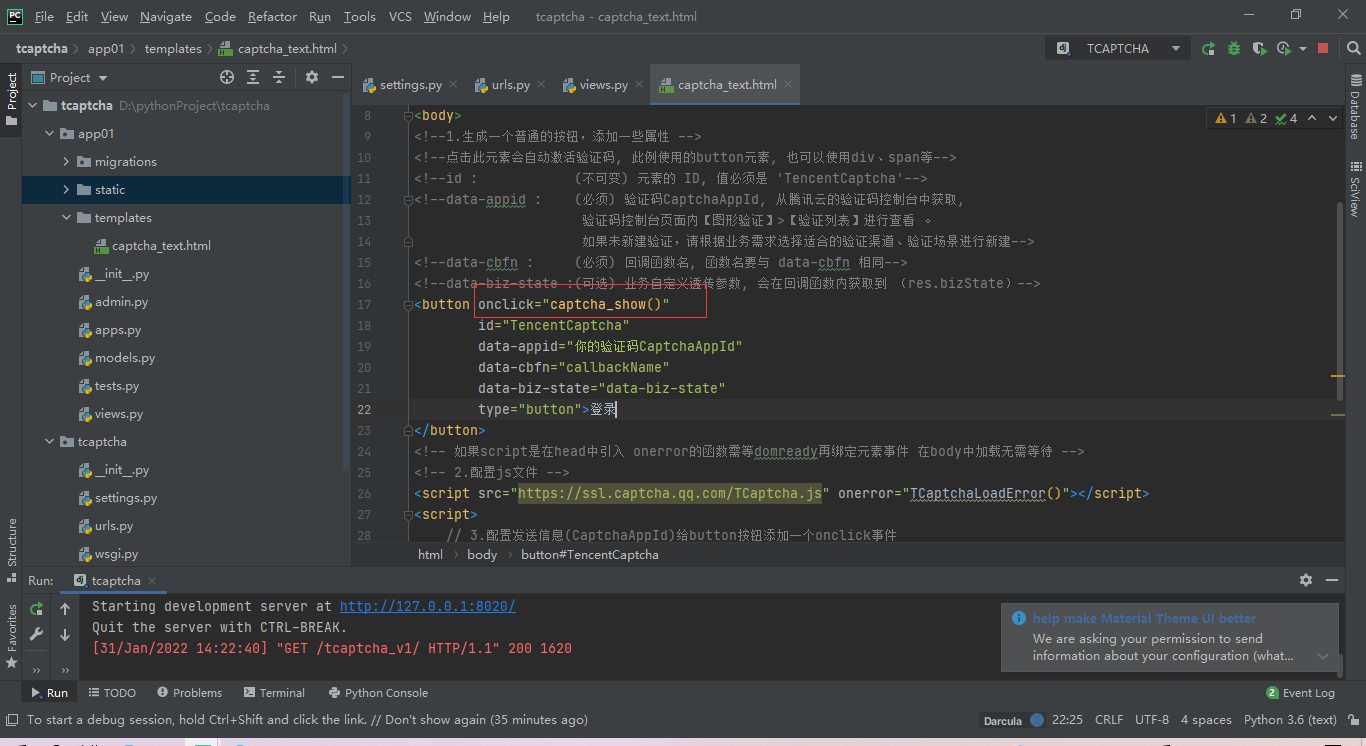
f. Oh, next, click the access page and click the button to see the waterproof wall
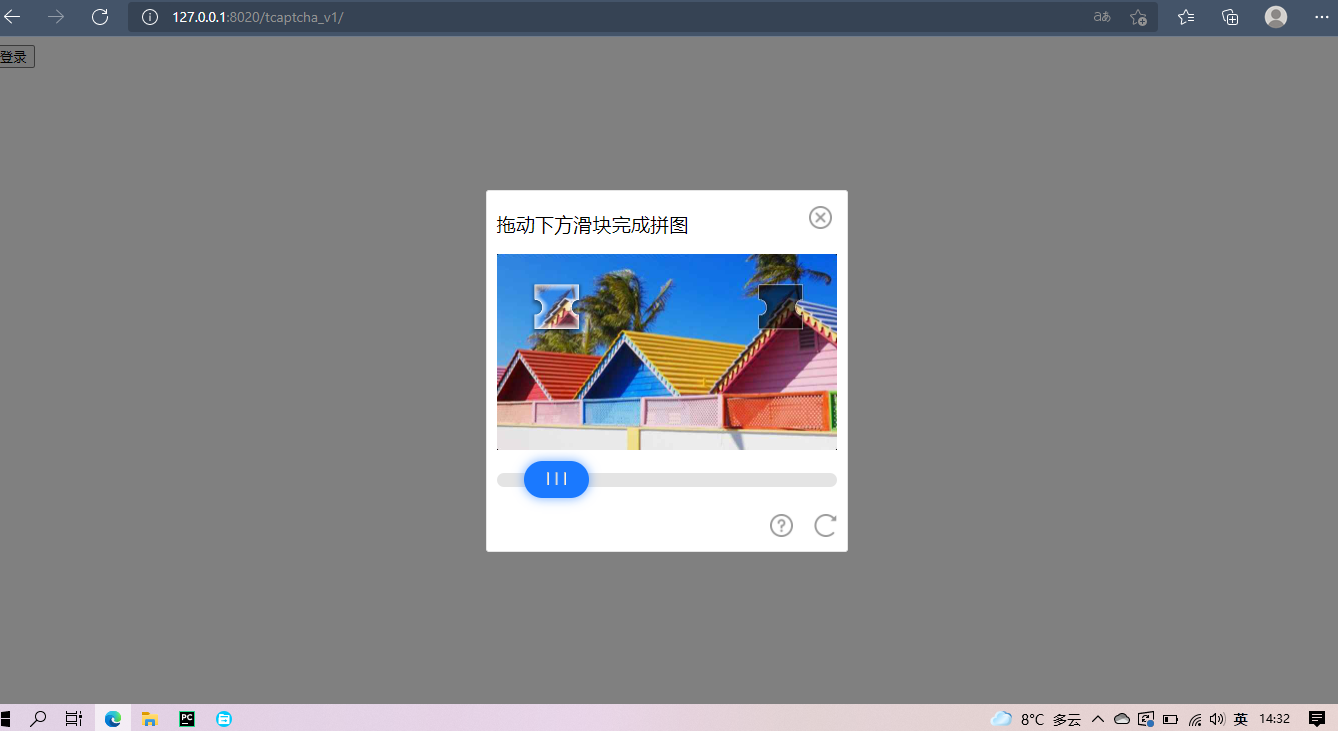
3, Reason for backend verification
Let me explain roughly why there should be back-end verification,
a. The above operations are just the connection between the front end and Tencent cloud waterproof wall. The front end sends requests. Remember the js we introduced. Sending through it will trigger the callback function only after successfully sliding into the card slot. It returns a res,
res returned

b. As we said earlier, so far, we only communicate with the waterproof wall at the front end. If the front end successfully returns a res, if not, nothing will be returned. Then the problem comes. Our back end doesn't know whether the verification is successful or not. If the current user doesn't slide successfully, the back end doesn't need to give data.
4: Back end verification
a. Back end document (python)
Back end verification document https://007.qq.com/python-access.html?ADTAG=acces.start
b. During verification, the front end sends a request to the back end to carry the data, and the back end sends a request to the waterproof wall for verification
| Field name | describe |
|---|---|
| aid (required) | We can configure it manually without front-end sending |
| AppSecretKey (required) | We can configure it manually without front-end sending |
| Ticket (required) | Verification code client verification callback ticket (generated dynamically and must be carried from the front end) |
| Randstr (required) | Random string of verification code client verification callback (generated dynamically and must be carried from the front end) |
| UserIP (required) | The IP address of the user submitting the verification (we can configure it manually without sending it from the front end) |
c. The back-end verification code, and the document is in python2 7. I changed a copy of Python 3
1. Front end modification (we send the front-end request to the back-end and use axios. Sending ajax will report an error, because at the beginning, we introduced the js file of the waterproof wall, which can not be mixed with ajax)
2. Front end html: I added an input, which is actually useless. After I finished writing the back end, I found that I forgot to verify the user name, and the others didn't move
3. In the JS part, axios is added and the function sent to the back end by post method (I have encapsulated it. If you want to use it in the project without separation of the back end, you can write logic directly in the corresponding place)
4. The complete code of the front end is as follows. Now captcha_text.html
{% load static %}
<!DOCTYPE html>
<html lang="en">
<head>
    <meta charset="UTF-8">
    <title>Title</title>
</head>
<body>
<!--1.Generate a normal button and add some properties -->
<!--Clicking this element will automatically activate the verification code, This example uses button element, You can also use div,span etc.-->
<!--id :            (Immutable) Elemental ID, Value must be 'TencentCaptcha'-->
<!--data-appid :    (must) Verification Code CaptchaAppId, Get the verification code from Tencent cloud's verification code console,
                     [graphic verification] in the verification code console page>[Verification list.
                     If no new verification is created, please select the appropriate verification channel and verification scenario according to the business needs-->
<!--data-cbfn :     (must) Callback function name, The function name should be the same as data-cbfn identical-->
<!--data-biz-state :(Optional) Business custom transparent transmission parameters, It will be obtained in the callback function( res.bizState)-->


user name:<input type="text">
<button onclick="captcha_show()"
        id="TencentCaptcha"
        data-appid="Your verification code CaptchaAppId"
        data-cbfn="callbackName"
        data-biz-state="data-biz-state"
        type="button">Sign in
</button>


<!-- If script Yes head Introduced in onerror The function needs to wait domready Rebinding element events in body There is no need to wait to load in -->
<!-- 2.to configure js file -->
<script src="https://ssl.captcha.qq.com/TCaptcha.js" onerror="TCaptchaLoadError()"></script>
<!-- Available on the official website axios Online address -->
<script src="https://unpkg.com/axios/dist/axios.min.js"></script>

<script>
    // 3. Configure the sending message (CaptchaAppId) to add an onclick event to the button
    function captcha_show() {

        var captcha1 = new TencentCaptcha('Your verification code CaptchaAppId', (res) => {
            // If it is successfully crossed, a ret: 0 will be returned
            if (res.ret === 0) {
                // Click the button button to send ajax to the background (carry bill / post request)
                verify_captcha(res.ticket, res.randstr);
            }
        })
        // Code of waterproof wall
        captcha1.show();
    }


    function verify_captcha(ticket, randstr) {
        axios.post('{% url 'tcaptcha_v1' %}',
            {
                ticket: ticket, // bill
                randstr: randstr, // Random string
            }
        )
            .then((res) => {  // This function will be triggered automatically after success
                console.log(res.data.static)
                if (res.data.static === 1) {
                    // The user successfully passed the slider authentication
                    alert('The user successfully passed the slider authentication')
                } else {
                    // Failed to open
                    alert('xxx coming')
                }
            })
            .cache((errors) => {  // Failure will automatically trigger the function
                console.log('Send error')
            })
    }
</script>

</body>
</html>
5. In the back end, a little logic is added to the view, and a utils is added Py file
view.py complete code
from django.shortcuts import render
from app01.utils import txrequest
from django.http import JsonResponse
import json


# Create your views here.

def TCaptchaView(request):
    '''
    tencent Waterproof wall test
    :param request:
    :return:
    '''
    if request.method == 'GET':
        return render(request, 'captcha_text.html')
    dic = {
        'static': 0
    }
    ret = json.loads(request.body)
    # print(ret.get)
    # Data sent from the front end (post)
    Ticket, Randstr = ret.get('ticket'), ret.get('randstr')
    ret = txrequest(Ticket, Randstr, request)
    if ret:
        # If the verification is successful, a static=1 is returned
        dic['static'] = 1
        return JsonResponse(dic)
    return JsonResponse(dic)
6. Create a utils in apps py
You need to find your own CaptchaAppId, AppSecretKey, and the AppSecretKey is under CaptchaAppId
import json
from urllib.parse import urlencode
from urllib.request import urlopen


def txrequest(Ticket, Randstr, request):
    params = {
        "aid": 'Your verification code CaptchaAppId',
        "AppSecretKey": 'Yours AppSecretKey',
        "Ticket": Ticket,
        "Randstr": Randstr,
        "UserIP": request.META.get('REMOTE_ADDR')  # The ip address is in META
    }
    url = "https://ssl.captcha.qq.com/ticket/verify"
    params = urlencode(params).encode()
    f = urlopen(url, params)
    content = f.read()
    res = json.loads(content)
    # {'response': '1', 'evil_level': '0', 'err_msg': 'OK'}
    if res:
        error_code = res.get('response')
        if error_code == '1':
            return True
        else:
            print("%s:%s" % (res.get('response'), res.get('err_msg')))
            return False
    else:
        print("There is a problem with the response data of the verification ticket")
        return False
7. Oh