This tutorial mainly introduces how to use the ruoyi framework to complete the whole process of login authorization of wechat applet.
catalogue
1, Register wechat applet account
3, Wechat applet authorization login process
4, Write wechat applet login authorization interface
5, Write a simple wechat applet login page
6, Test wechat authorized login interface
1, Register wechat applet account
Official registered address of wechat applet: https://mp.weixin.qq.com/cgi-bin/registermidpage?action=index&lang=zh_CN&token=
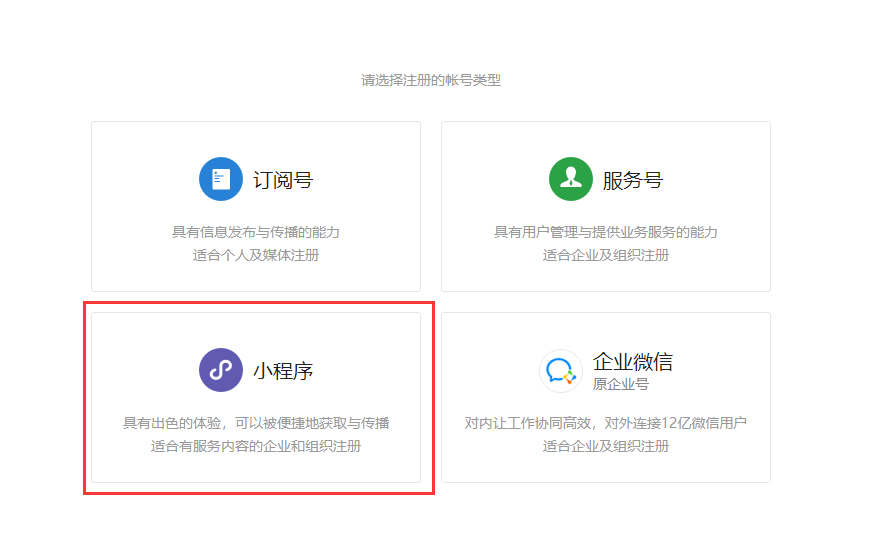
Note: fill in the mailbox that has not been registered by wechat public platform, wechat open platform and personal wechat binding
2, Get AppID and AppSecret

The AppSecret does not exist for the first time. You need to scan the code first and then generate it. Remember to save it later (if you forget, you can only reset the AppSecret)
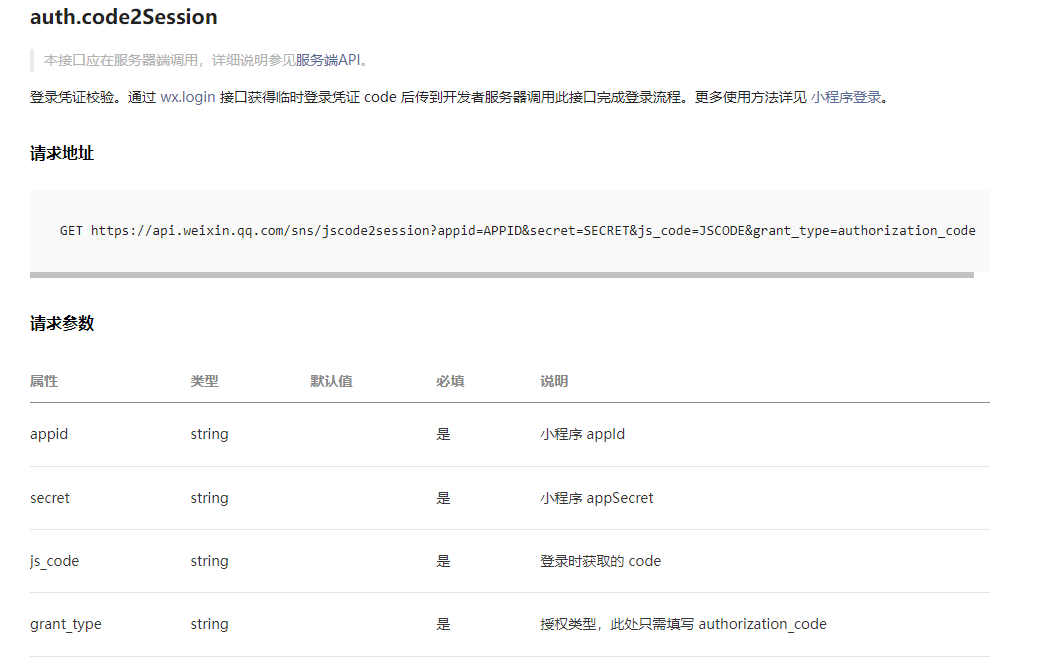
After getting the AppID and AppSecret, we can go to see the interface document provided by the official wechat applet to me.
3, Wechat applet authorization login process
Wechat applet authorization login interface document:
https://developers.weixin.qq.com/miniprogram/dev/framework/open-ability/login.html
Wechat applet login flow chart:
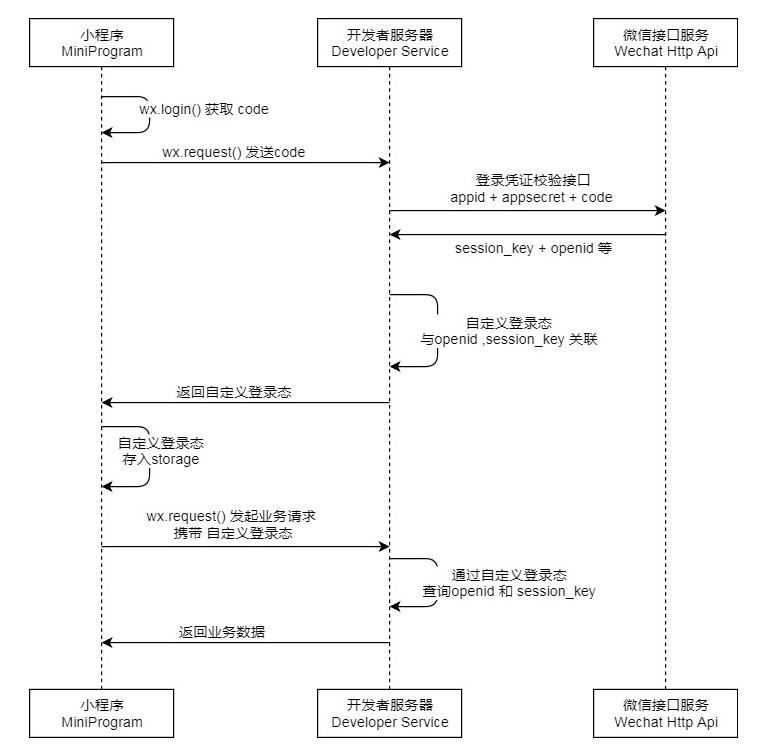
Step 1: call wx.login() Obtain the temporary login certificate code and return it to the developer server.
wx.login({
  success (res) {
    if (res.code) {
      //Initiate network request
      wx.request({
        url: 'https://example.com/onLogin',
        data: {
          code: res.code
        }
      })
    } else {
      console.log('Login failed!' + res.errMsg)
    }
  }
})
Step 2: call auth.code2Session Interface, in exchange for the user's unique ID OpenID, the user's unique ID UnionID under the wechat open platform account (if the current applet has been bound to the wechat open platform account) and the session key session_key.
Here, we need to write an authorization interface for wechat applet. The front end passes me a code parameter, and then calls the authorization interface officially provided to me through the interface we write, and fill in our appid, secret and code parameters.
IV. write wechat applet login authorization interface
Here, we use ruoyi open source framework (not separate version) to write wechat applet login authorization interface.
If by document address: http://doc.ruoyi.vip/
If by project address: https://gitee.com/y_project/RuoYi
For partners who will not start the ruoyi open source project, please refer to the ruoyi related tutorials I wrote before Teach you to start the ruoyi monomer project_ Ape Xiaobai's blog - CSDN blog_ If the project is started
If the third party used in depends on the toolkit:
    <dependencies>

        <!-- General tools-->
        <dependency>
            <groupId>com.ruoyi</groupId>
            <artifactId>ruoyi-common</artifactId>
        </dependency>

        <!--hutool Tool class-->
        <dependency>
            <groupId>cn.hutool</groupId>
            <artifactId>hutool-all</artifactId>
            <version>5.7.19</version>
        </dependency>
    </dependencies>
JAVA interface code
package com.ruoyi.wechat.controller;

import cn.hutool.core.util.StrUtil;
import cn.hutool.json.JSONObject;
import cn.hutool.json.JSONUtil;
import com.ruoyi.common.core.domain.AjaxResult;
import com.ruoyi.common.utils.http.HttpUtils;
import org.springframework.web.bind.annotation.GetMapping;
import org.springframework.web.bind.annotation.RequestMapping;
import org.springframework.web.bind.annotation.RestController;

import java.util.HashMap;
import java.util.Map;
import java.util.UUID;

/**
 * Wechat applet authorization interface
 */
@RestController
@RequestMapping("/api")
public class WechatController {
    /**
     * Wechat applet AppID
     */
    private final static String AppID = "Fill out your applet AppID";
    /**
     * Wechat applet AppSecret
     */
    private final static String AppSecret = "Fill out your applet AppSecret ";

 /**
     * @param code code obtained at login
     * @return
     */
    @GetMapping("/wxlogin")
    public AjaxResult getWechatLoginInfo(String code) {
        String url = "https://api.weixin.qq.com/sns/jscode2session";
        String params = StrUtil.format("appid={}&secret={}&js_code={}&grant_type=authorization_code", AppID, AppSecret, code);
        String json = HttpUtils.sendGet(url, params);
        JSONObject jsonObject = JSONUtil.parseObj(json);
        String session_key = (String) jsonObject.get("session_key");
        String openid = (String) jsonObject.get("openid");
        if (StrUtil.isEmpty(openid)) {
            return AjaxResult.error("Not obtained openid");
        }
        String token = UUID.randomUUID().toString();
        Map<String, Object> data = new HashMap<>();
        data.put("token", token);
        data.put("session_key", session_key);
        data.put("openid", openid);
        return AjaxResult.success(data);
    }

}
5, Write a simple wechat applet login page
index.wxml
<!--index.wxml-->
<view class="container">
  <view>
    <button open-type="getUserInfo" bind:tap="login" type="default">Wechat authorized login</button>
  </view>
</view>
index.js
 login(evt) {
    wx.getUserProfile({
      desc: 'Sign in', //Description information
      success: res => {
        // console.log(res);  Successful callback
        if (res.userInfo) {
          wx.login({
            success: ret => {
              // console.log(ret);
              var code = ret.code
              wx.request({
                url: 'http://localhost/api/wxlogin ', / / is only an example, not a real interface address
                data: {
                  code: code
                },
                success(res) {
                  console.log(res.data)
                  if (res.data.code == 0) {
                    console.log("Login succeeded");
                    wx.setStorageSync('token', res.data.data.token);
                    wx.setStorageSync('openid', res.data.data.openid);
                    wx.setStorageSync('session_key', res.data.data.session_key);
                    wx.navigateTo({
                      url: '/pages/hello/hello',
                    })
                  }else{
                    console.log("Login failed");
                  }
                }
              })
            }
          })
        }
      }
    })
  }
hello.wxml
<!--pages/hello/hello.wxml-->
<text>Login succeeded</text>
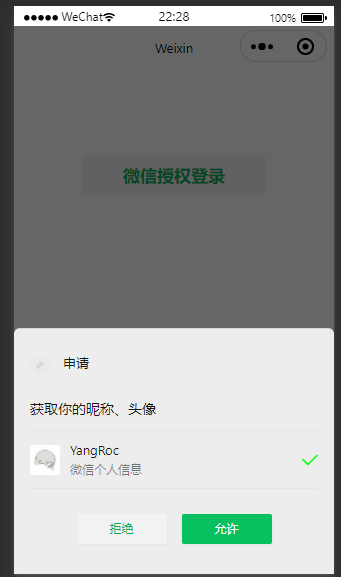
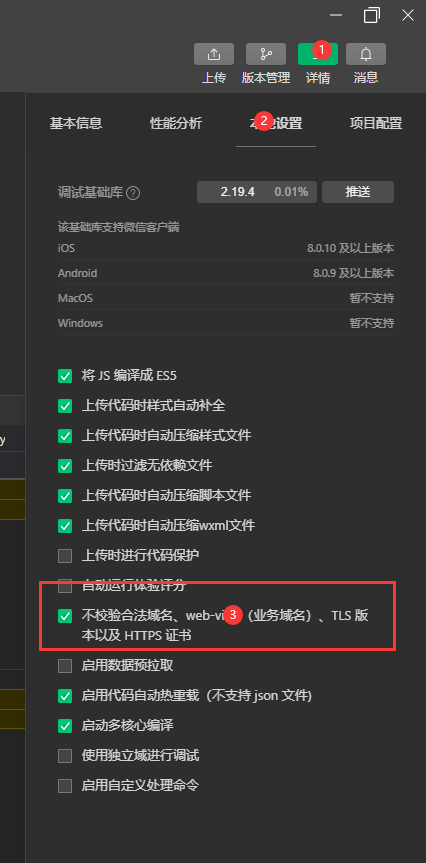
Note: when testing the local interface, you need to choose not to verify the legal domain name and https certificate
6, Test wechat authorized login interface
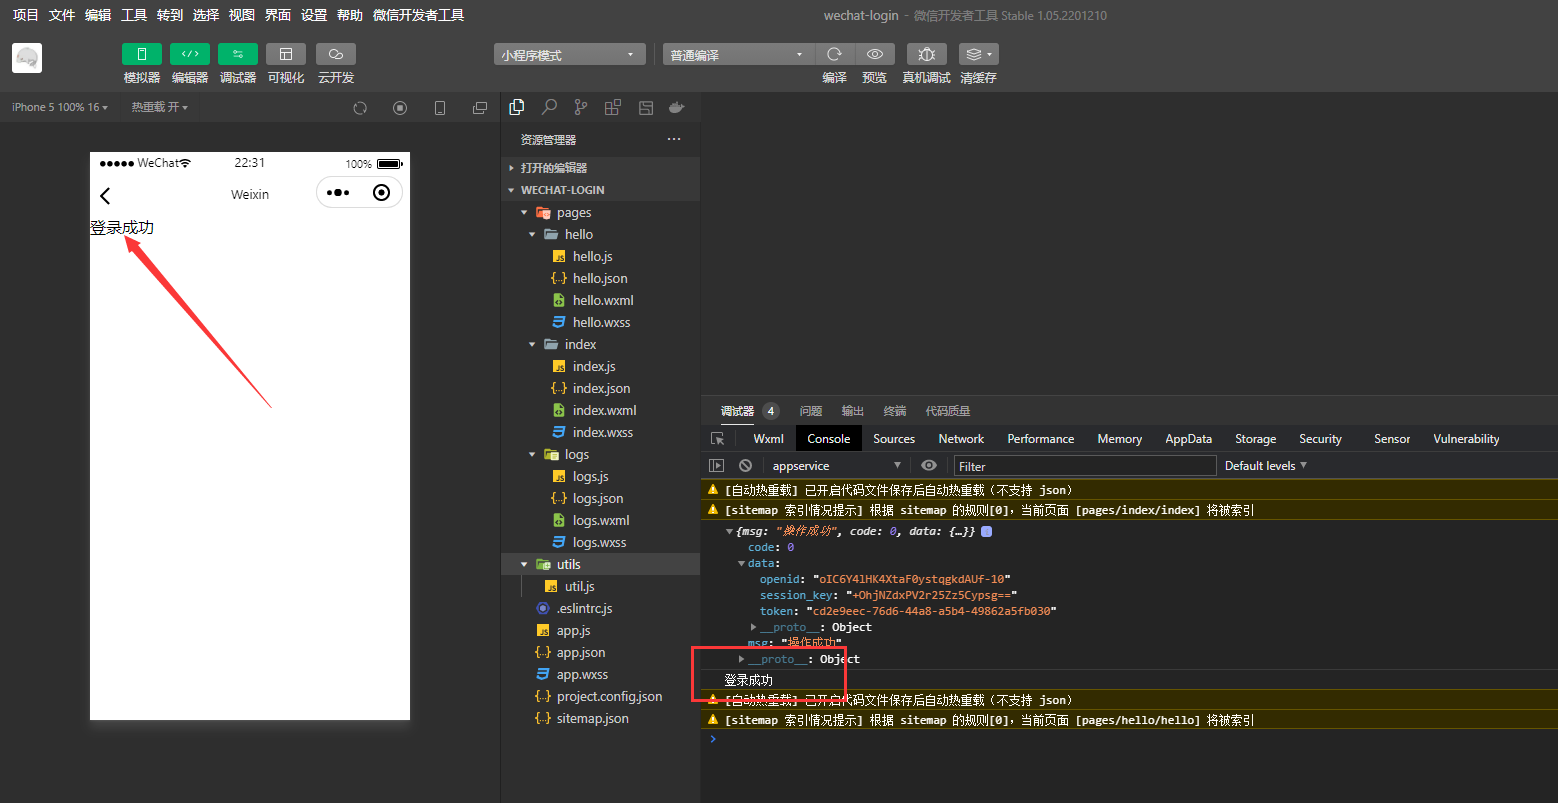
We can see that we have successfully completed the authorized login of wechat applet. This article is just a simple introductory tutorial.
