Use selenium+chromedriver+xpath to crawl dynamically loaded information
Use selenium to crawl dynamically rendered pages. Selenium is a browser automation testing framework and a tool for Web application testing. It can run directly in the browser and drive the browser to perform specified actions, such as click, drop-down, fill in data, delete cookie s and so on. It can also obtain the source code of the current page of the browser, Just like the user operates in the browser. The browsers supported by the tool include IE browser, Mozilla Firefox and Google Chrome.
Installing selenium module
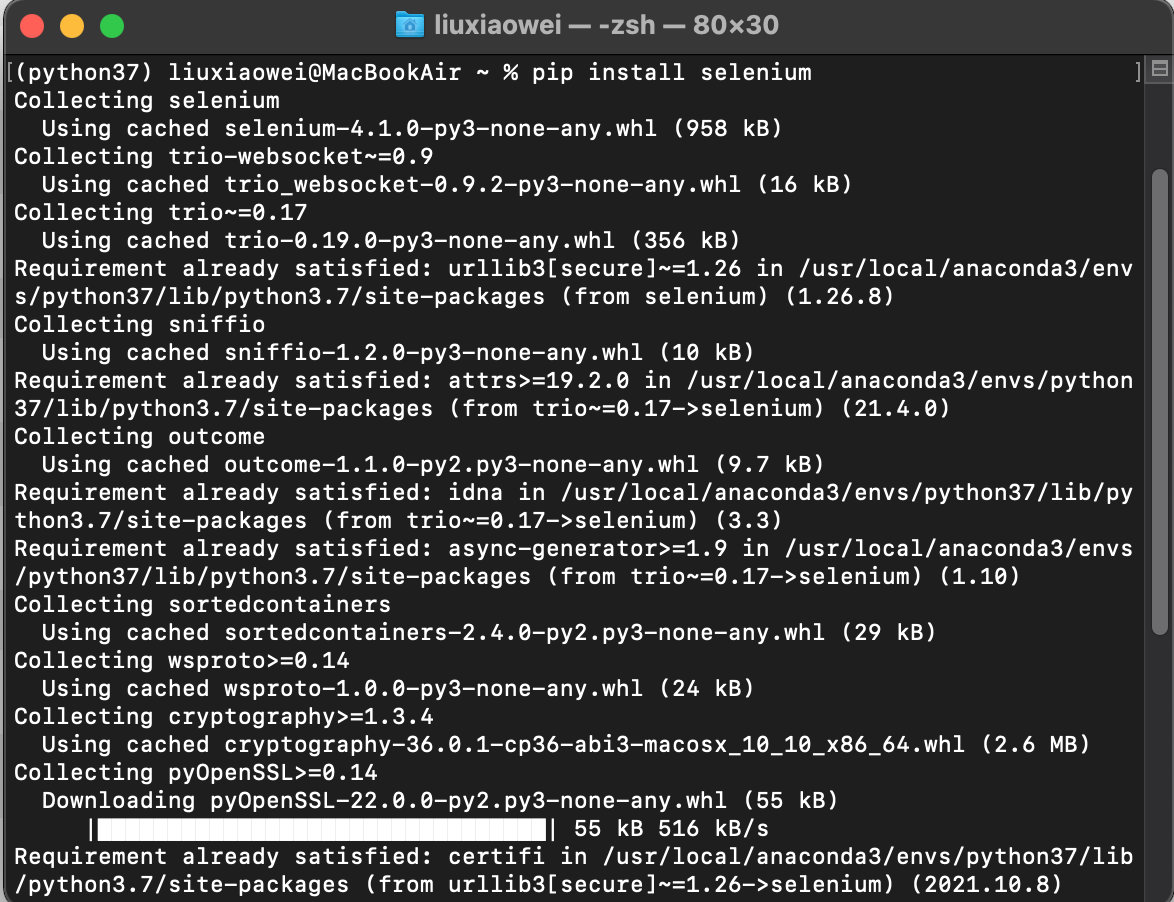
First open the Anaconda Prompt(Anaconda) command line window, then enter the "pip install selenium" command (if anaconda is not installed, you can execute the command to install the module in the cmd command line window), and then press the (enter) key, as shown in the following figure:

explain
selenium is available in many languages, such as Java, Ruby, Python, etc.
Download browser driver
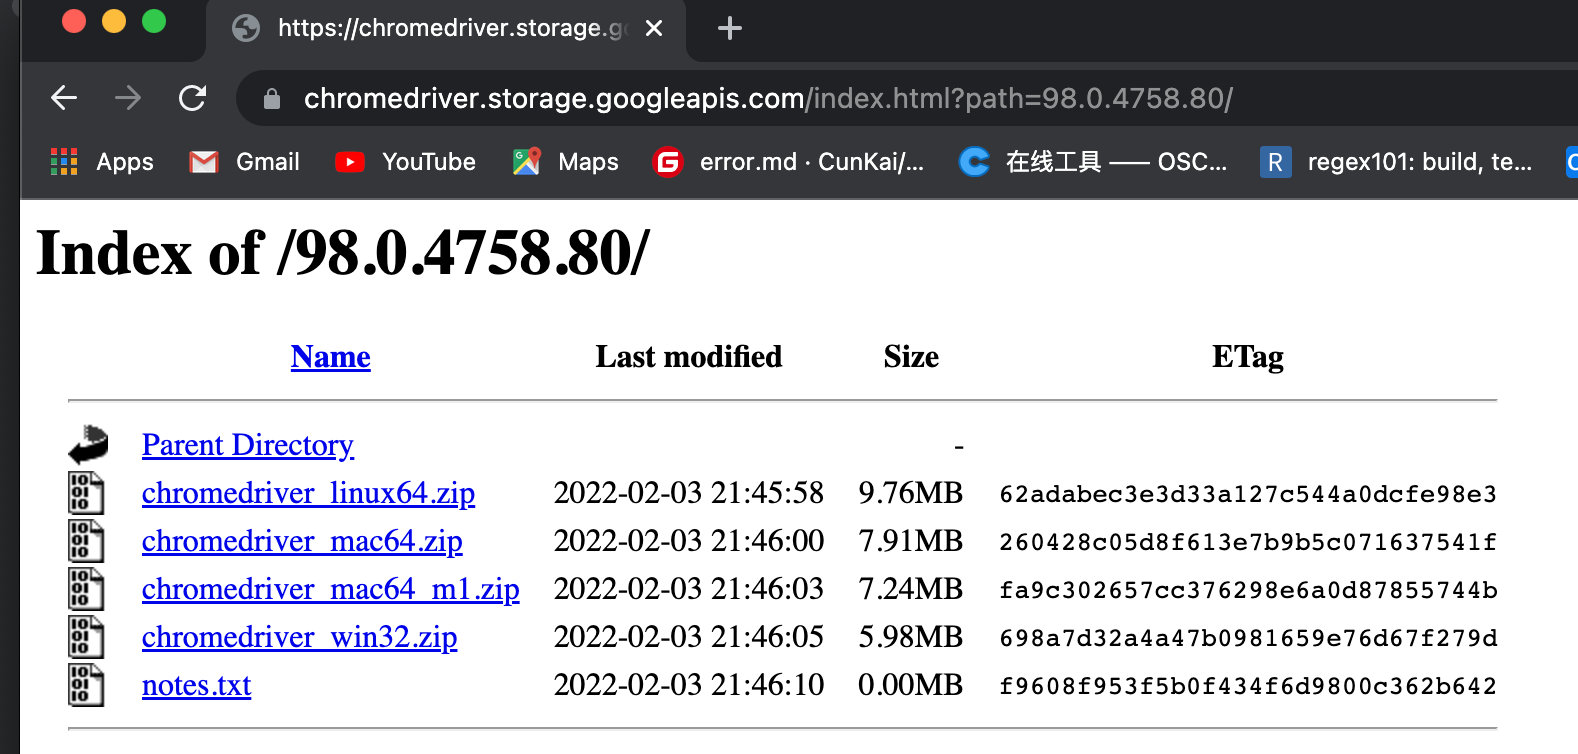
After the selenium module is installed, you need to select a browser and then download the corresponding browser driver. At this time, you can control the operation of the browser through the selenium module. Select Chrome browser Version 98.0.4758.80 (Official Build) (x86_64) here, and then click( http://chromedriver.storage.googleapis.com/index.html?path=98.0.4758.80/ )Download browser driver from Google browser driver. As shown below:

explain
When downloading Google browser driver, download the corresponding browser driver according to your computer system.
Use of selenium module
After downloading the Google browser driver, it will be named chromedriver Drag and drop the EXE file to the / usr/bin directory (the same level path of the python.exe file). Then you need to load the Google browser driver through Python code, so that you can start the browser driver and control the browser.
There are different drivers for different browsers. The following table lists different browsers and their corresponding drivers:
| Browers | Driver | Link |
|---|---|---|
| Chrome | Chromedriver(.exe) | http://chromedriver.storage.googleapis.com/index.html |
| Internet Explorer | IEDriverServer.exe | http://selenium-release.storage.googleapis.com/index.html |
| Edge | MicrosoftWebDriver.msi | http://go.microsoft.com/fwlink/?LinkId=619687 |
| Firefox | geckodriver(.exe) | https://github.com/mozilla/geckodriver/releases/ |
| PhantomJS | phantomjs(.exe) | http://phantomjs.org/ |
| Opera | operadriver(.exe) | https://github.com/operasoftware/operachromiumdriver/releases |
| Safari | SafariDriver.safariextz | http://selenium-release.storage.googleapis.com/index.html |
Obtain Jingdong commodity information. The example code is as follows:
#_*_coding:utf-8_*_
# Author: liuxiaowei
# Created on: 2/7/22 6:43 PM
# File: obtain Jingdong commodity information py
# IDE      : PyCharm

from selenium import webdriver  # Import browser driver module
from selenium.webdriver.support.wait import WebDriverWait  # Import wait class
from selenium.webdriver.support import expected_conditions as EC  # Waiting conditions
from selenium.webdriver.common.by import By                       # Node location

#from selenium.webdriver.chrome.service import Service

try:
    # Create Google browser driver parameter object
    chrome_options = webdriver.ChromeOptions()
    # Don't load pictures
    prefs = {"profile.managed_default_content_settings.images": 2}
    chrome_options.add_experimental_option("prefs", prefs)
    # Use headless no interface browser mode
    chrome_options.add_argument('--headless')
    chrome_options.add_argument('--disable-gpu')
    # Load Google browser driver
		driver = webdriver.Chrome(options = chrome_options, executable_path='chromedriver')
    # Request address
    driver.get('https://item.jd.com/12353915.html')
    wait = WebDriverWait(driver,10)    # Wait 10 seconds
    # Wait for the page to load the node with the class name of m-item-inner, which contains product information
    wait.until(EC.presence_of_element_located((By.CLASS_NAME,"w")))

    # Get all div nodes in the name node
    name_div1 = driver.find_element(By.XPATH,'//div[@class="sku-name"]')
    name_div2 = driver.find_element(By.XPATH, '//div[@class="news"]/div[@class="item hide"]')
    name_div3 = driver.find_element(By.XPATH, '//div[@class="p-author"]')
    summary_price = driver.find_element(By.XPATH, '//div[@class="summary-price J-summary-price"]')
    print('The title of the extracted goods is as follows:')
    print(name_div1.text)         # Print item title
    print('The extracted product slogan is as follows:')
    print(name_div2.text)         # Print message
    print('The extracted compilation information is as follows:')
    print(name_div3.text)         # Print editing information
    print('The extracted price information is as follows:')
    print(summary_price.text.strip('Price reduction notice'))       # Print price information
    driver.quit()  # Exit browser driver
except Exception as e:
    print('Display exception information!', e)
The running results of the program are as follows:
The title of the extracted goods is as follows:
Zero Basics Python(Python3.9 Full color version) (programming introduction project practice synchronization video)
The extracted product slogan is as follows:
Color codes are easier to learn. Python Programming from introductory to practical books, web crawlers, game development, data analysis and other in-depth learning. Free full video+Source code+After class questions+Physical wall chart+Learning application map+e-book+Book Q & A
 The extracted compilation information is as follows:
Tomorrow science and technology
 The extracted price information is as follows:
Jingdong price
¥ 72.00 [9.03 fracture] [price ¥79.80]
Common methods of selenium module
selenium module supports a variety of methods to obtain web page nodes, among which the commonly used methods are as follows:
Common methods and descriptions of obtaining web page nodes by selenium module
| common method | Description |
|---|---|
| driver.find_element_by_id() | The node is obtained according to the id, and the parameter is the value corresponding to the character type id |
| driver.find_element_by_name() | Get the node according to the name. The parameter is the value corresponding to the character type name |
| driver.find_element_by_xpath() | Get the node according to XPATH. The parameter is the value corresponding to the character type XPATH |
| driver.find_element_by_link_text() | Get the node according to the link text. The parameter is the character type link text |
| driver.find_element_by_tag_name() | Get the node according to the node name. The parameter is the character type node text |
| driver.find_element_by_class_name() | Get the node according to class. The parameter is the value corresponding to the character type class |
| driver.find_element_by_css_selector() | Get the node according to the CSS selector, and the parameter is the CSS selector syntax of character type |
explain
All the methods to obtain nodes in the above table are methods to obtain a single node. If you need to obtain multiple qualified nodes, you can add s after element in the corresponding method.
In addition to the above common methods of obtaining nodes, you can also use driver find_ The element () method obtains a single node and uses driver find_ The elements () method gets multiple nodes. Only when calling these two methods, you need to specify the by and value parameters. The by parameter indicates the method of obtaining the node, and value is the value corresponding to the acquisition method (which can be understood as a condition). The example code is as follows:
		# Get all div nodes in the commodity information node
  	name_div = driver.find_element(By.XPATH,'//div[@class="itemInfo-wrap"]').find_elements(By.TAG_NAME, 'div')

    # Extract and output the contents of a single div node
    print('The title of the extracted goods is as follows:')
    print(name_div[0].text)         # Print item title
    print('The extracted product slogan is as follows:')		 # Print product slogan
    print(name_div[1].text)
The running results of the program are as follows:
The title of the extracted goods is as follows:
Zero Basics Python(Python3.9 Full color version) (programming introduction project practice synchronization video)
The extracted product slogan is as follows:
Color codes are easier to learn. Python Programming from introductory to practical books, web crawlers, game development, data analysis and other in-depth learning. Free full video+Source code+After class questions+Physical wall chart+Learning application map+e-book+Book Q & A
 Tomorrow science and technology
explain
Find is used first in the above code_ The element () method obtains the whole node with the class value of "iteminfo warp", then obtains all nodes with the node name div through the find_elements() method, and finally obtains the text information in the first and second div of all divs through name_div [0]. Text and name_div [1]. Text.
The following are other properties and usage of By
| By attribute | Usage |
|---|---|
| By.ID | Indicates that the corresponding single or multiple nodes are obtained according to the ID value |
| By.LINK_TEXT | Indicates that the corresponding single or multiple nodes are obtained according to the link text |
| By.PARTIAL_LINK_TEXT | Indicates that the corresponding single or multiple nodes are obtained according to part of the link text |
| By.NAME | Obtain the corresponding single or multiple nodes according to the name value |
| By.TAG_NAME | Get single or multiple nodes based on node name |
| By.CLASS_NAME | Get single or multiple nodes according to the class value |
| By.CSS_SELECTOR | Obtain single or multiple nodes according to CSS selector, and the corresponding value is the position of string CSS |
| By.XPATH | According to by XPath gets the corresponding value string node position of single or multiple nodes |
When using selenium module to obtain the value corresponding to an attribute in a node, you can use get_ The example code is as follows:
# Get the href address in the specified node according to the XPath location
href = driver.find_element(By.XPATH, '//div[@id="p-author"]/a').get_attribute('href')
print('The address information in the specified node is as follows:')
The running results of the program are as follows:
The address information in the specified node is as follows:
https://book.jd.com/writer/%E6%98%8E%E6%97%A5%E7%A7%91%E6%8A%80_1.html
Summary
In this case, it should be noted that the path of the chromedriver must be specified when loading the browser driver. The syntax is as follows:
 # Load Google browser driver
driver = webdriver.Chrome(options = chrome_options, executable_path='chromedriver')  # The driver of this example is in the same way as the crawler 																																											 path