preface
In team development, in order to facilitate the management of maven import of each module, it is more convenient to build an enterprise private warehouse. This paper uses nexus to build private warehouses of maven and docker1, Docker Compose quickly builds nexus runnable environment
1. docker file directory structure
	docker # E:\docker directory
		- nexus  #  E:\docker\nexus directory
			- data #  E:\docker\nexus\data directory
		- docker-compose.yml  #  E:\docker\docker-compose.yml file
2. docker-compose.yml file
version: "3"

networks:
  backend:
    driver: bridge
services:
  # Maven docker private server warehouse
  nexus:
    image: sonatype/nexus3:latest
    container_name: nexus
    restart: always
    volumes:
    # -Host Directory: directory in container
      - ./nexus/data:/nexus-data
    ports:
      - 8081:8081
      - 8082:8082
      - 8083:8083
    networks:
      - backend
3. Run the docker compose command
docker-compose up -d nexus

# Use docker ps to view the running results
PS E:\docker> docker ps
CONTAINER ID   IMAGE                    COMMAND                  CREATED             STATUS          PORTS                                                           NAMES
b7ca82bda9e2   sonatype/nexus3:latest   "sh -c ${SONATYPE_DI..."   About an hour ago   Up 30 minutes   0.0.0.0:8081-8084->8081-8084/tcp, :::8081-8084->8081-8084/tcp   nexus
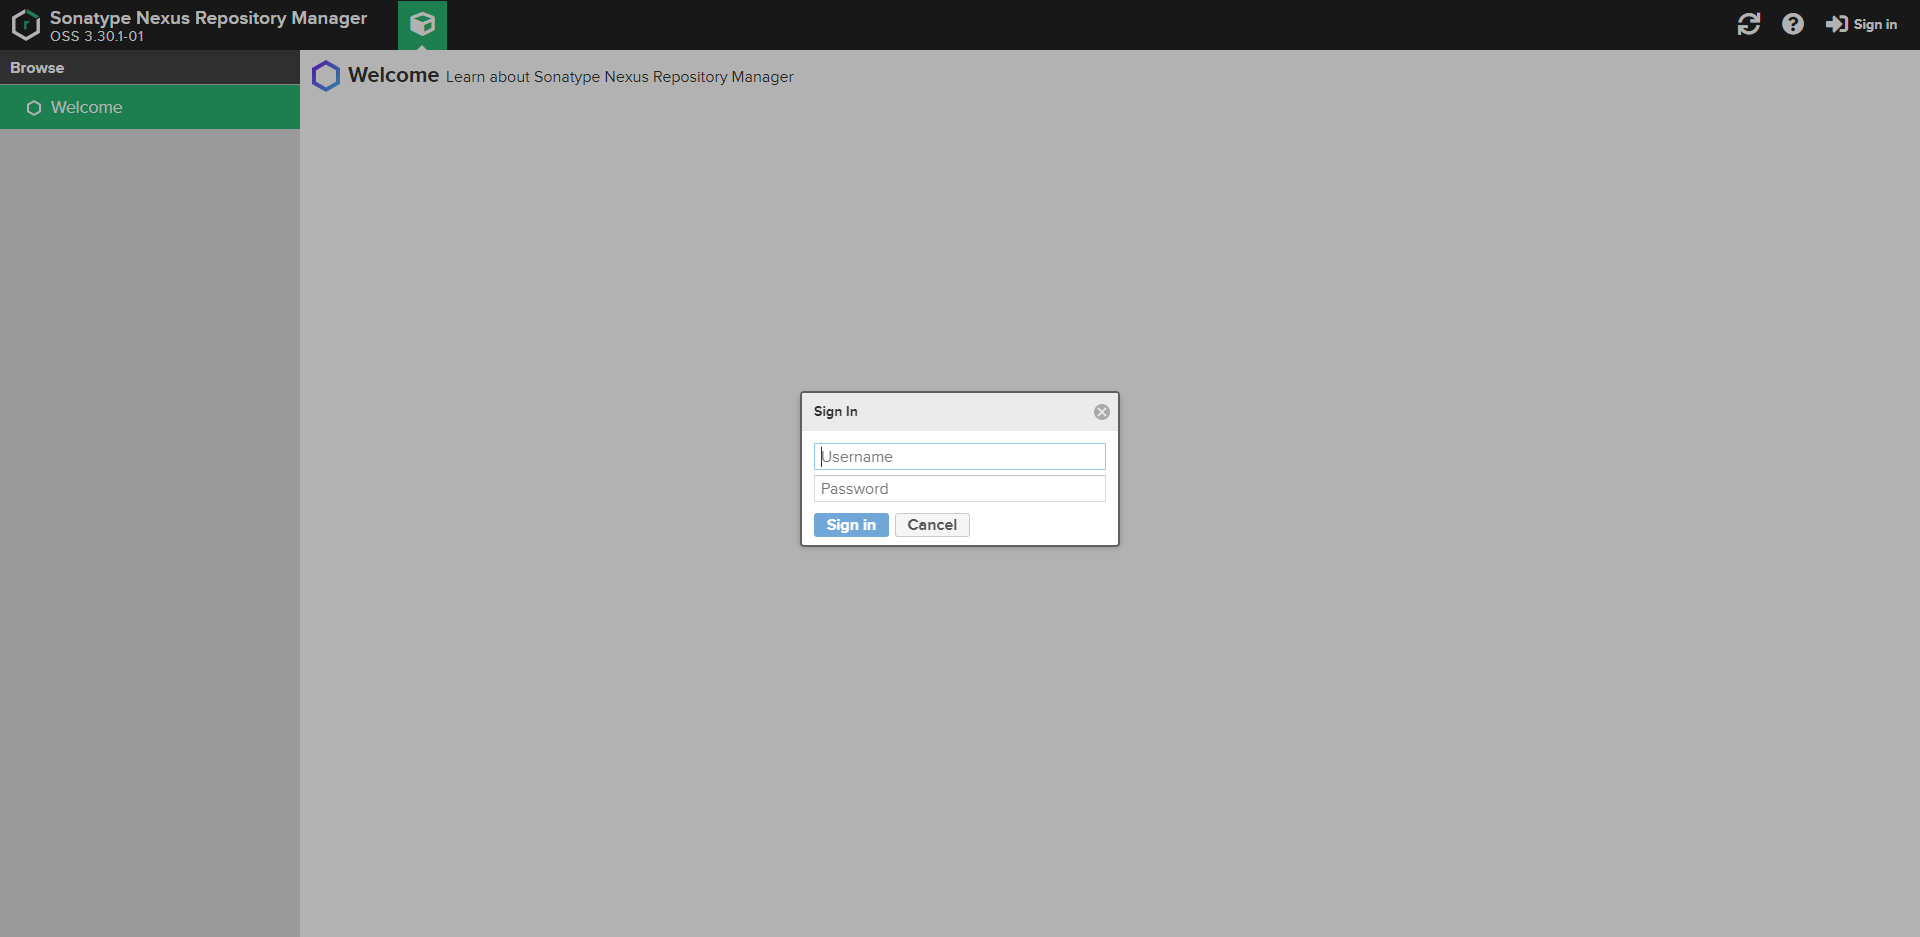
The browser accesses 127.0.0.1:8081, and the login interface will be displayed in a moment
The first login user name admin and the initial password are saved in E: \ docker \ nexus \ data \ admin Password open the file and the password is in it
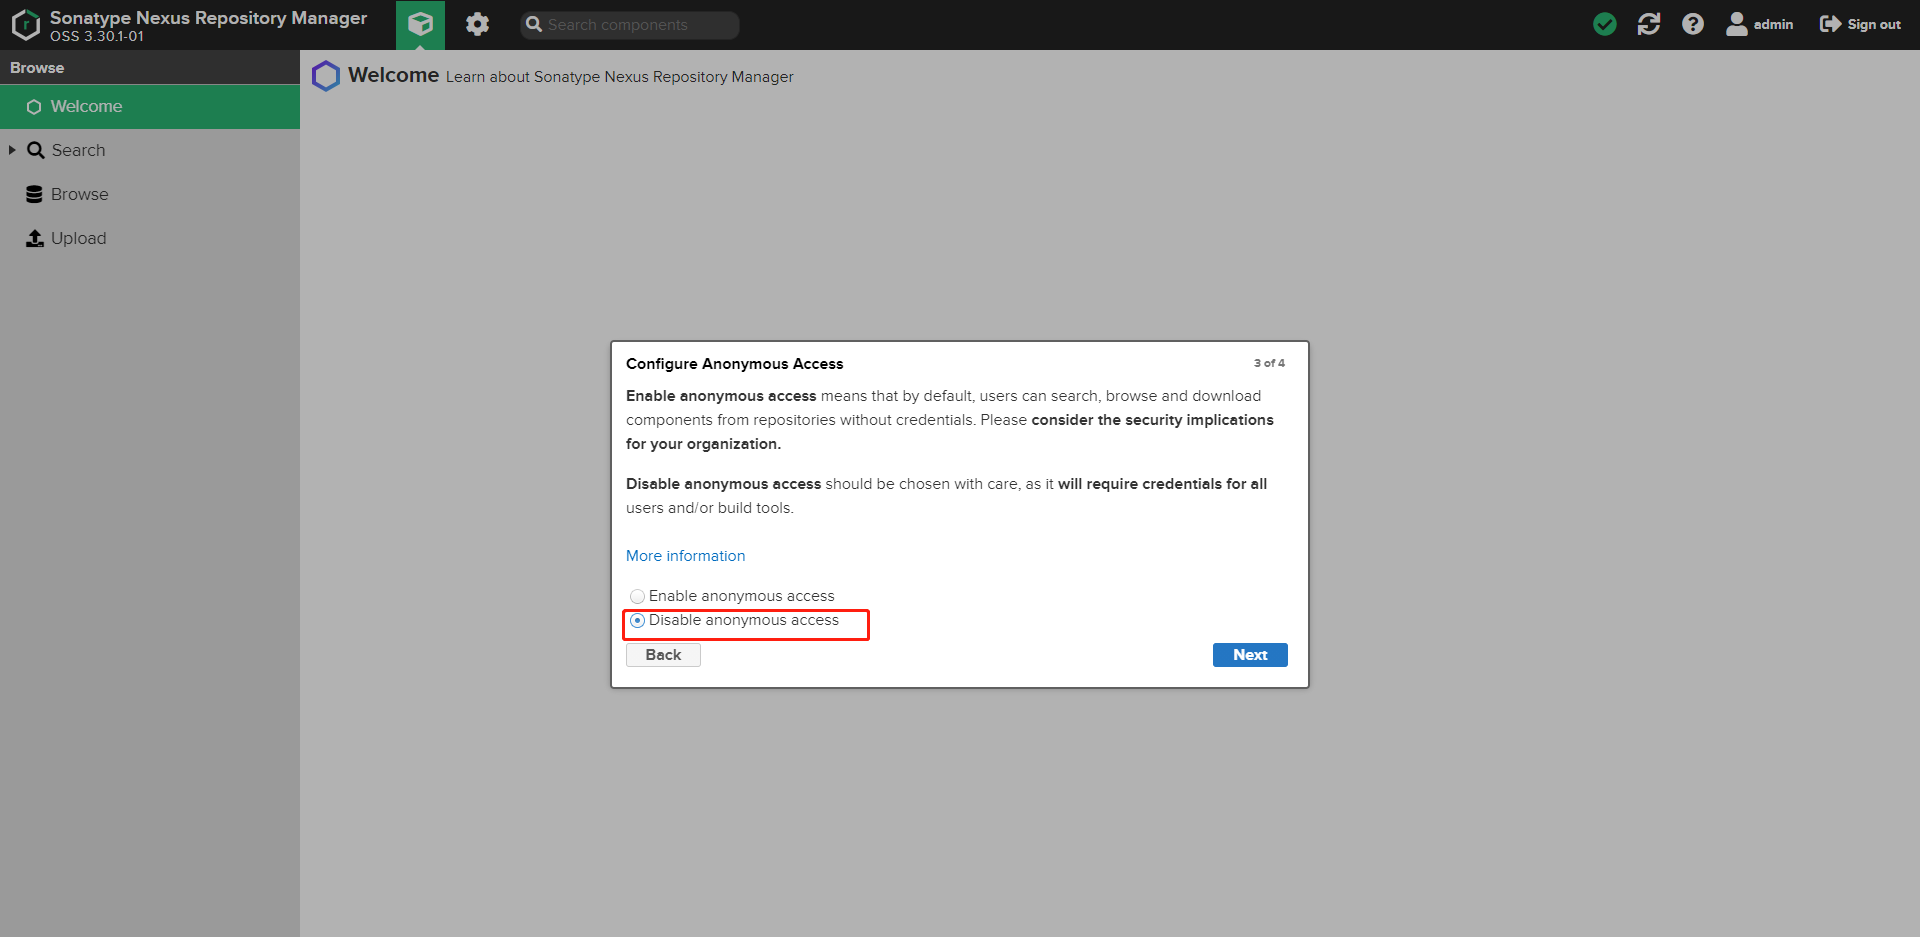
Select the second option to prohibit anonymous access to private warehouses
2, Configure nexus to create maven private warehouse
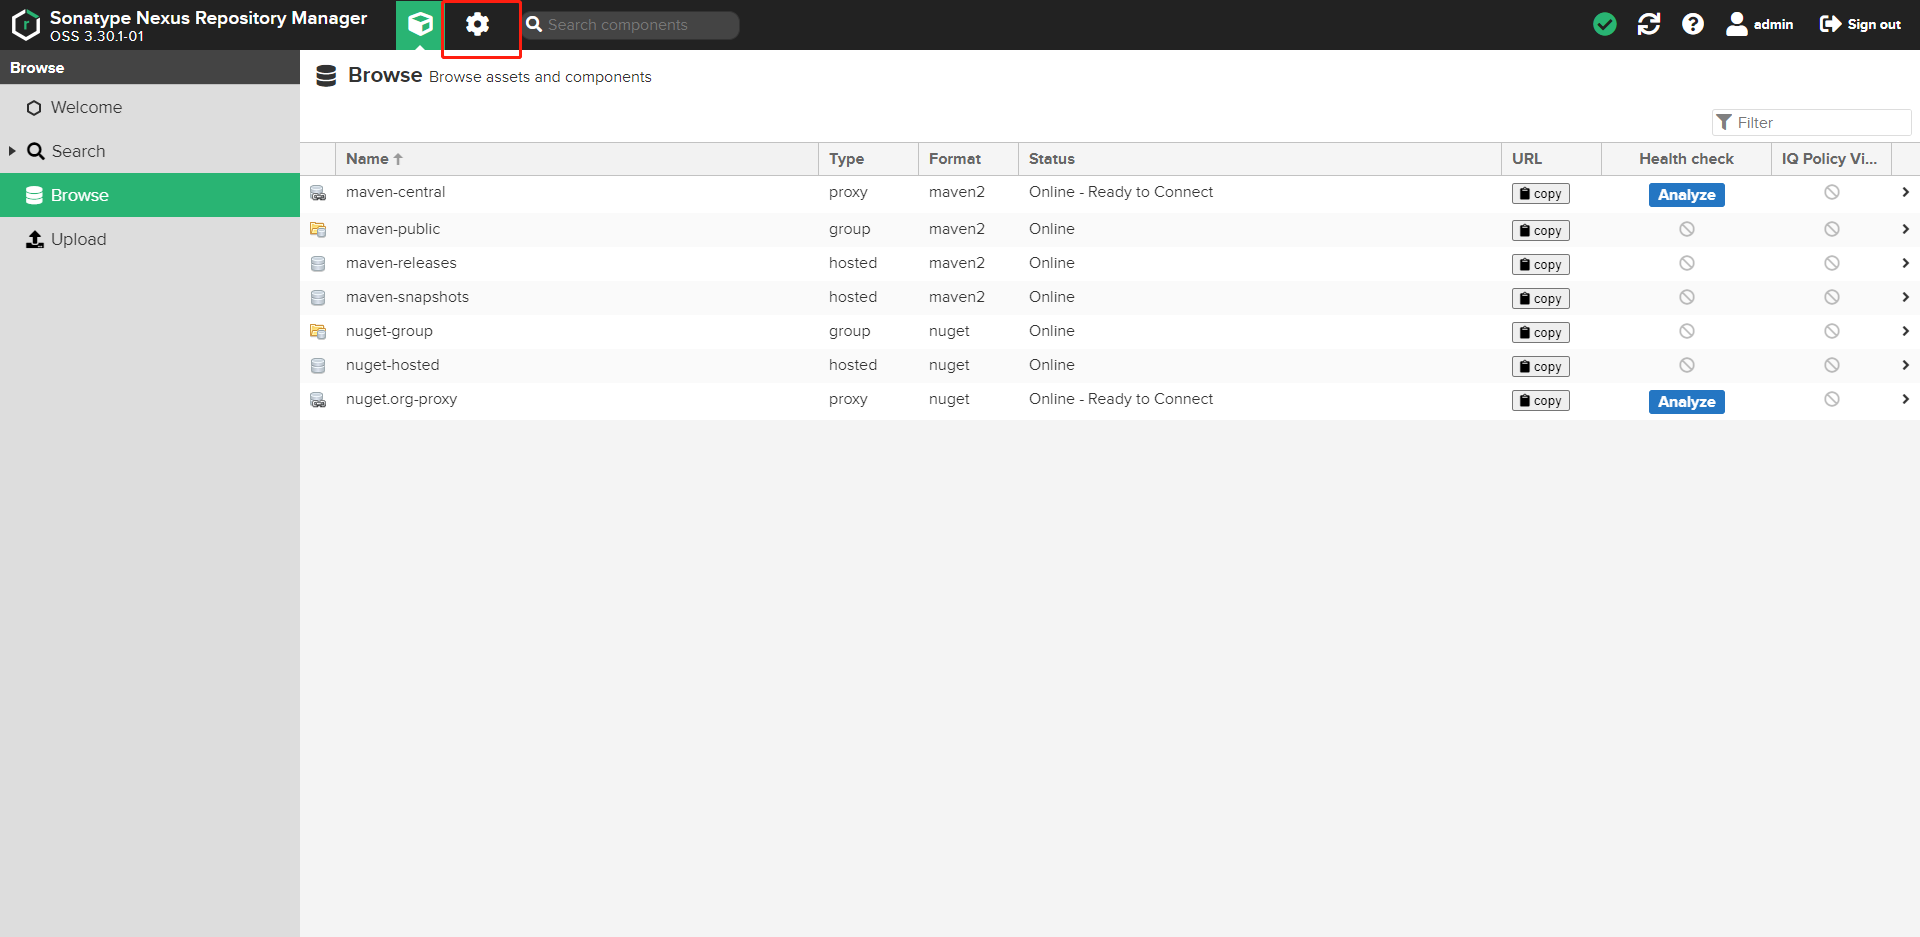
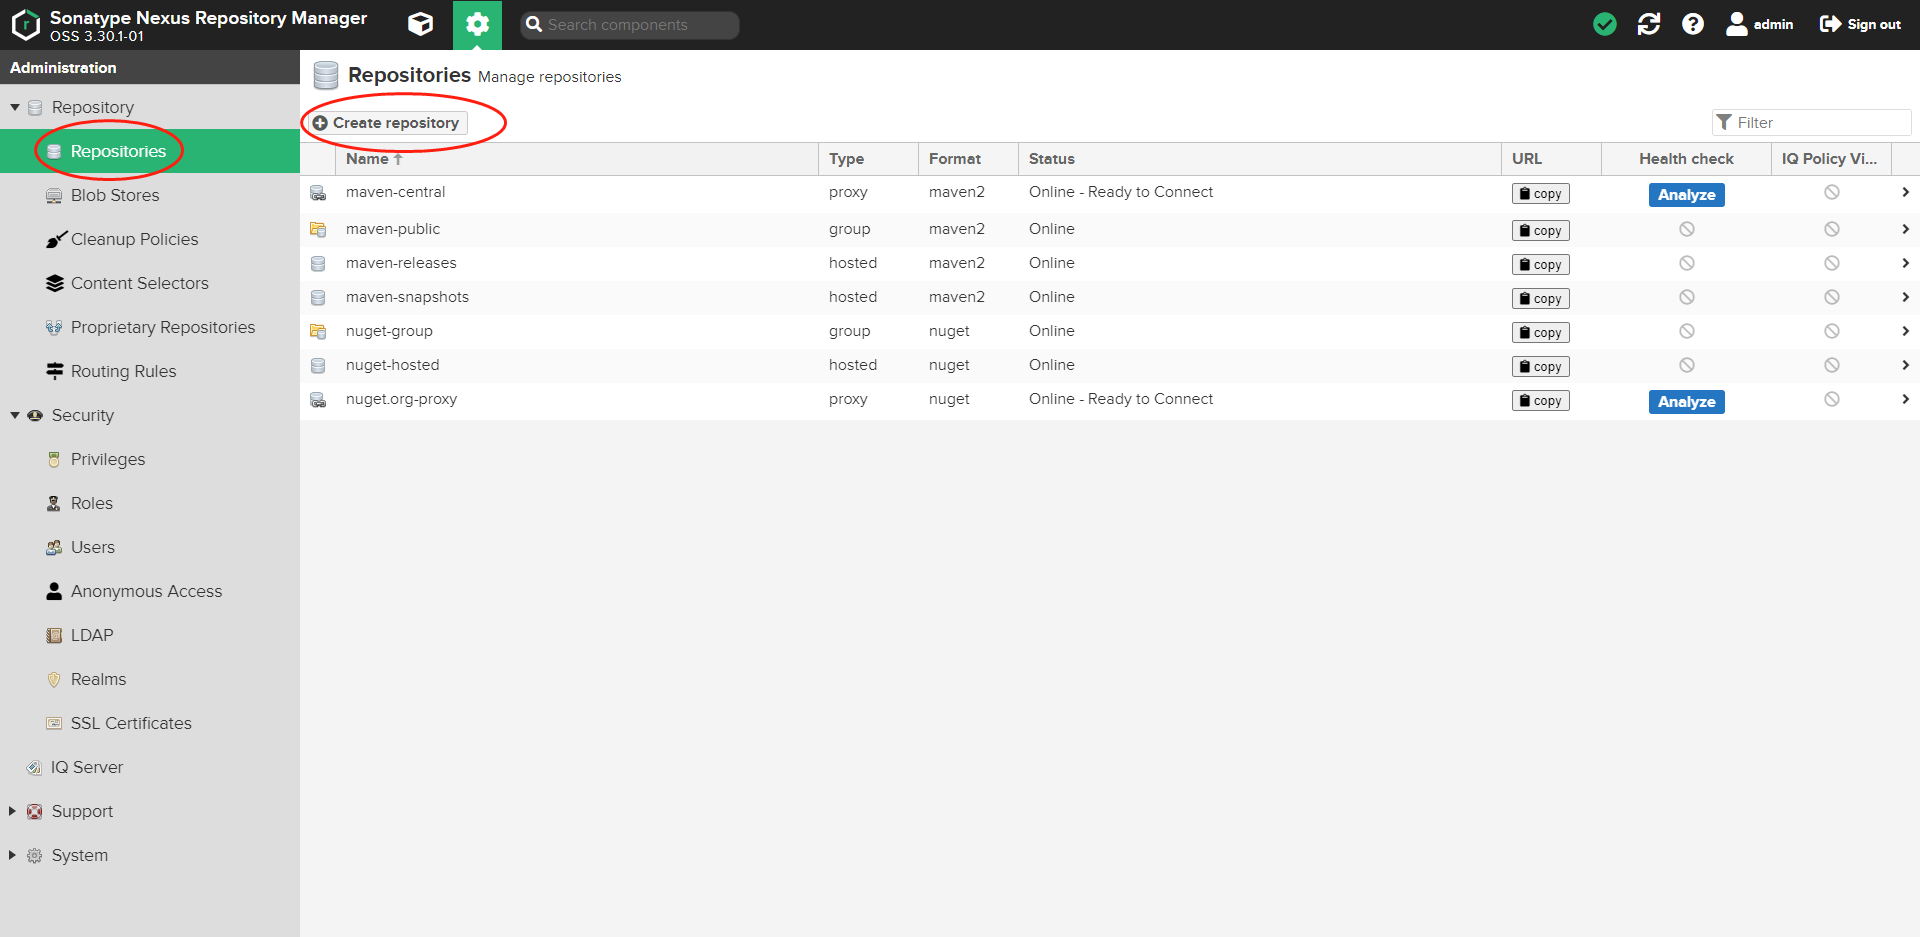
1. Click the red box to enter the create warehouse page
Take demo as an example to create demo snapshots, demo release, demo aliyun and demo central respectively
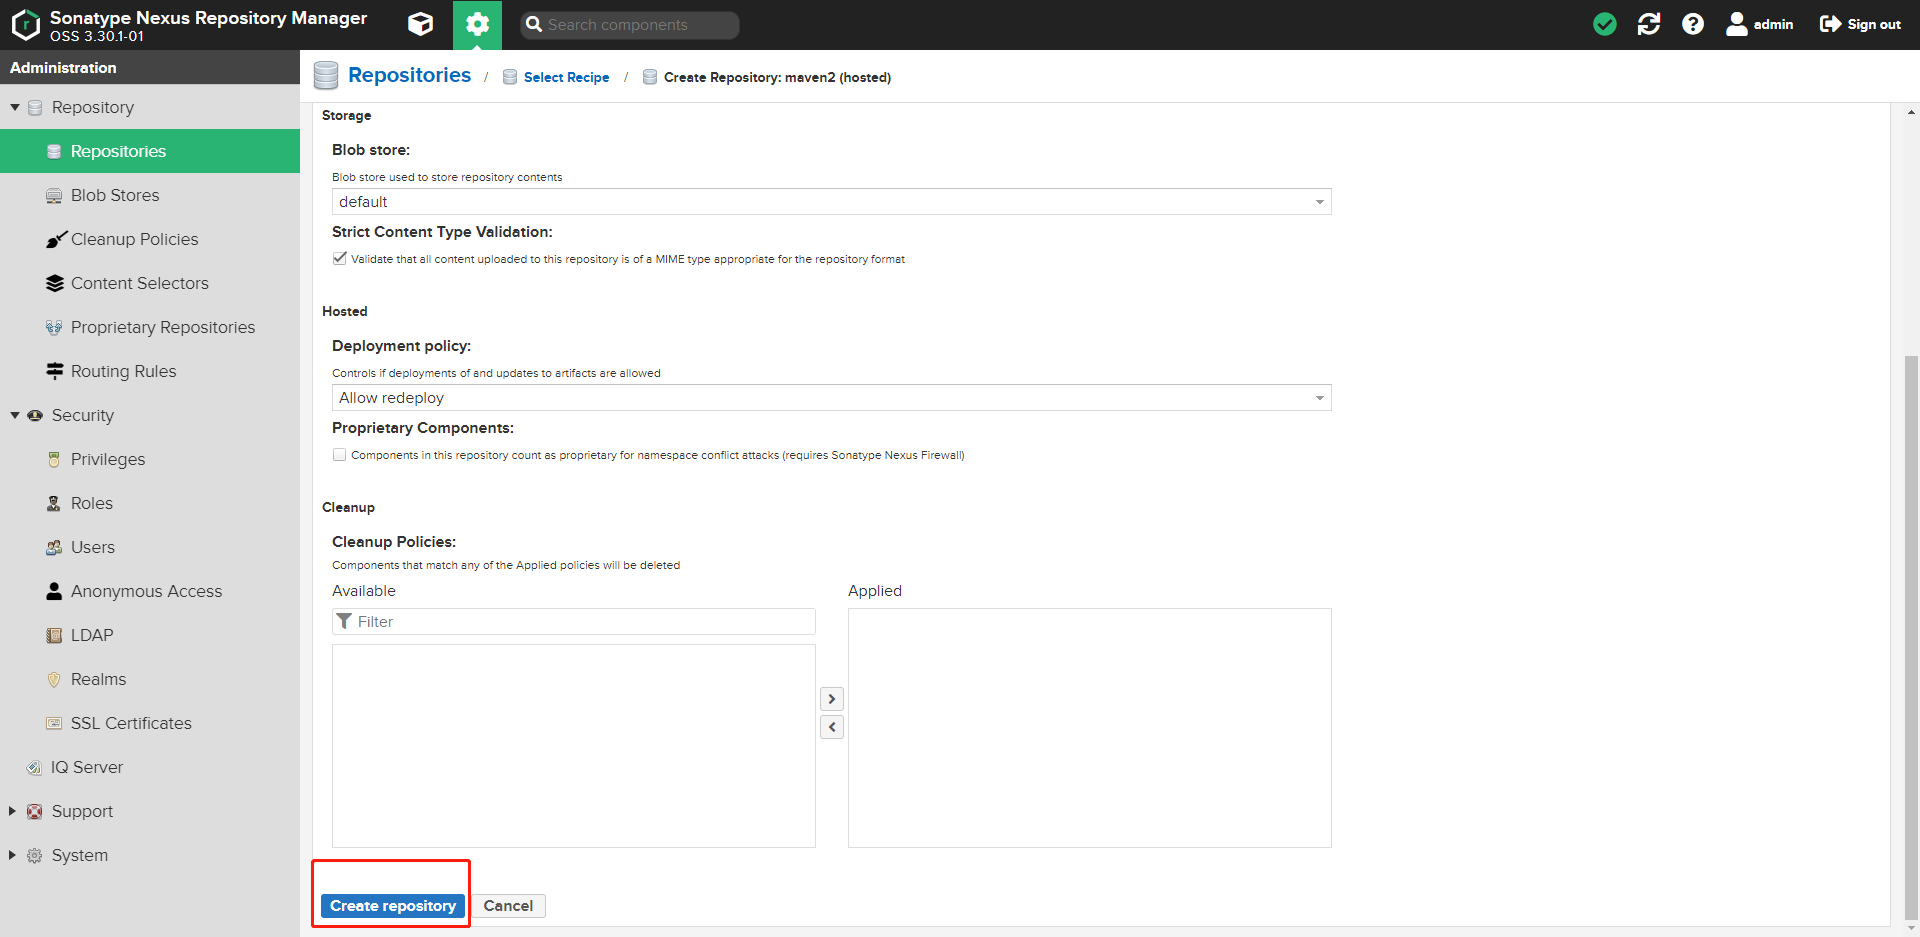
2. Click Create repository to create a warehouse
3. Click Maven 2 (hosted) to create a local warehouse
Select Create maven type
Group represents the concept of group
hosted stands for local warehouse
proxy represents a central warehouse, such as Alibaba cloud's warehouse

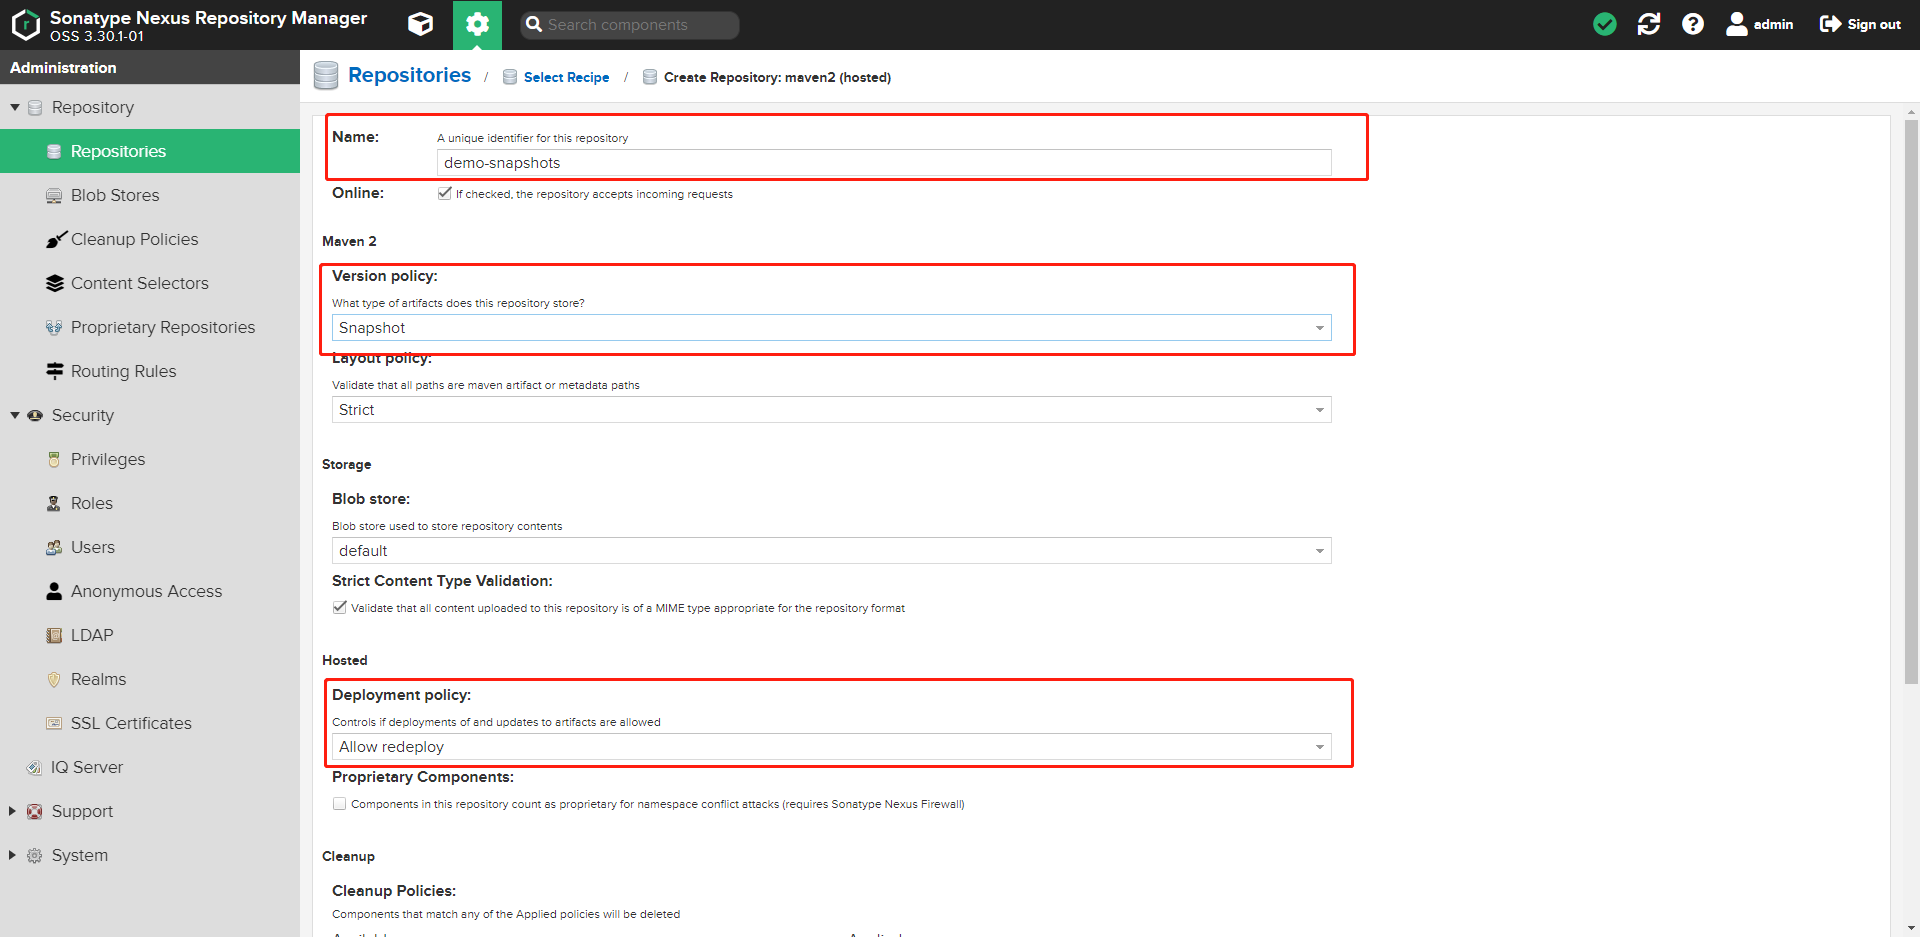
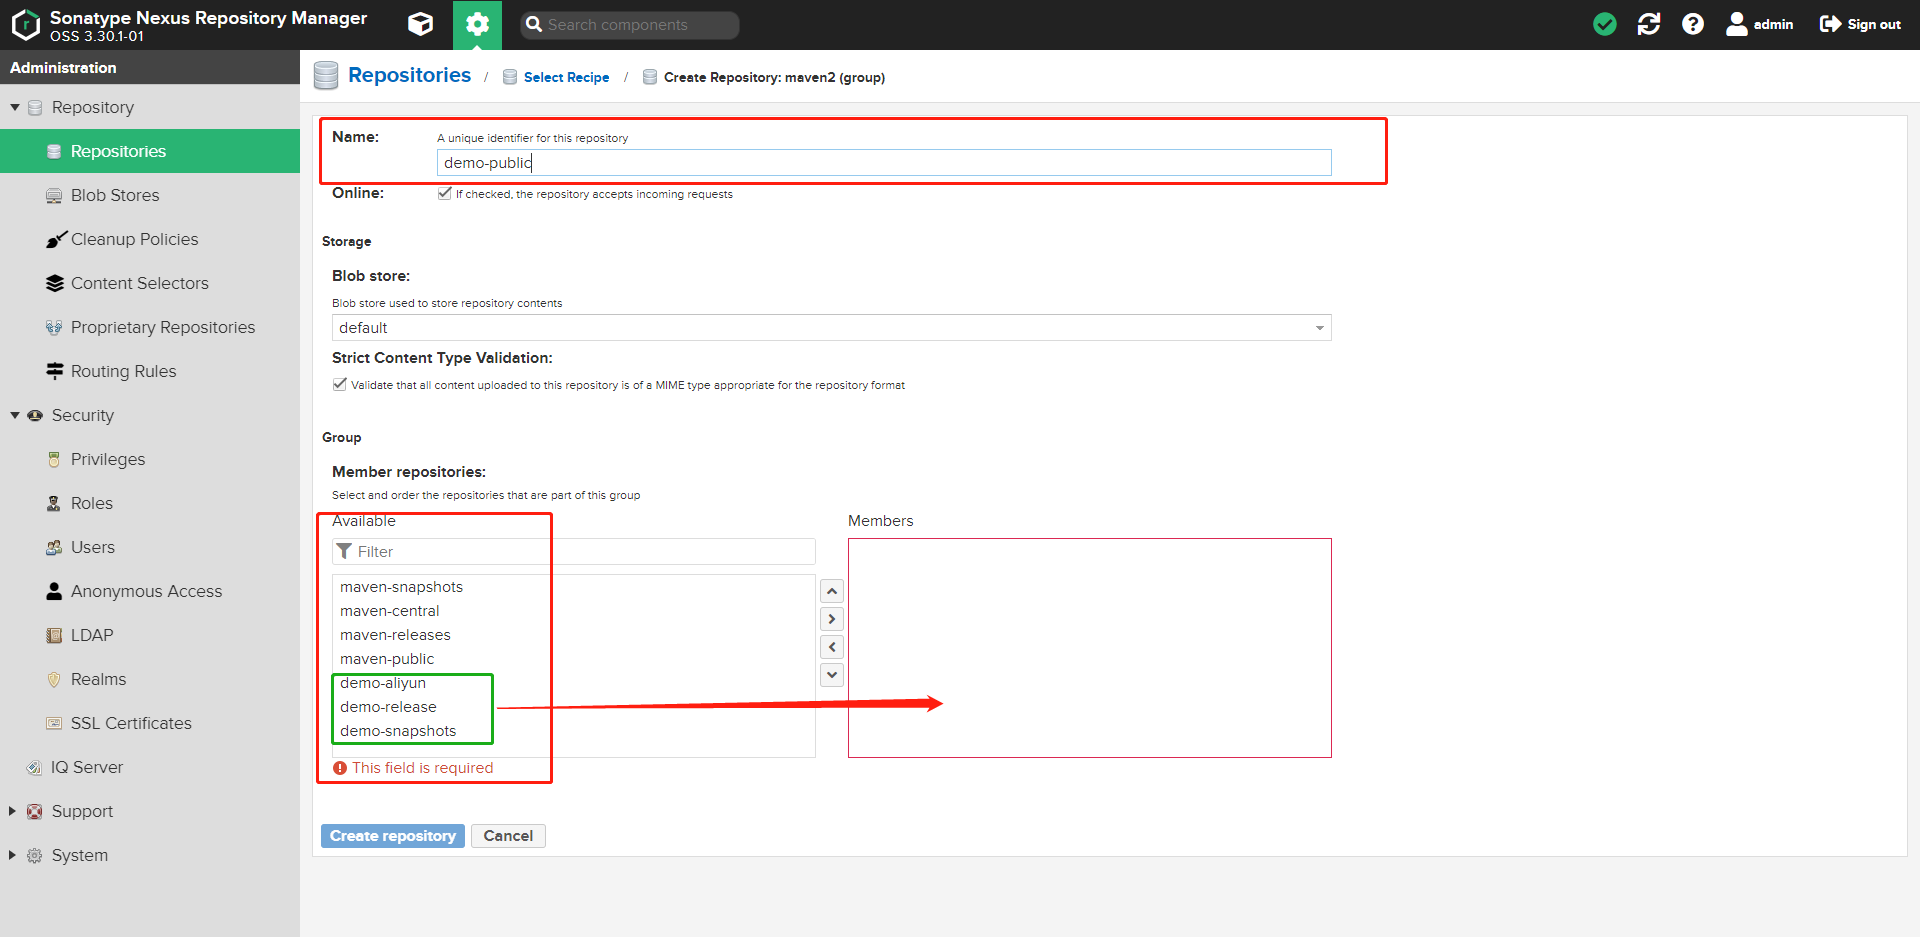
4. Fill in the red box
Name: demo snapshots warehouse name
Version policy: specify as the snapshot version warehouse
Deployment policy: select Allow redeploy
Finally, click Create repository to create a repository
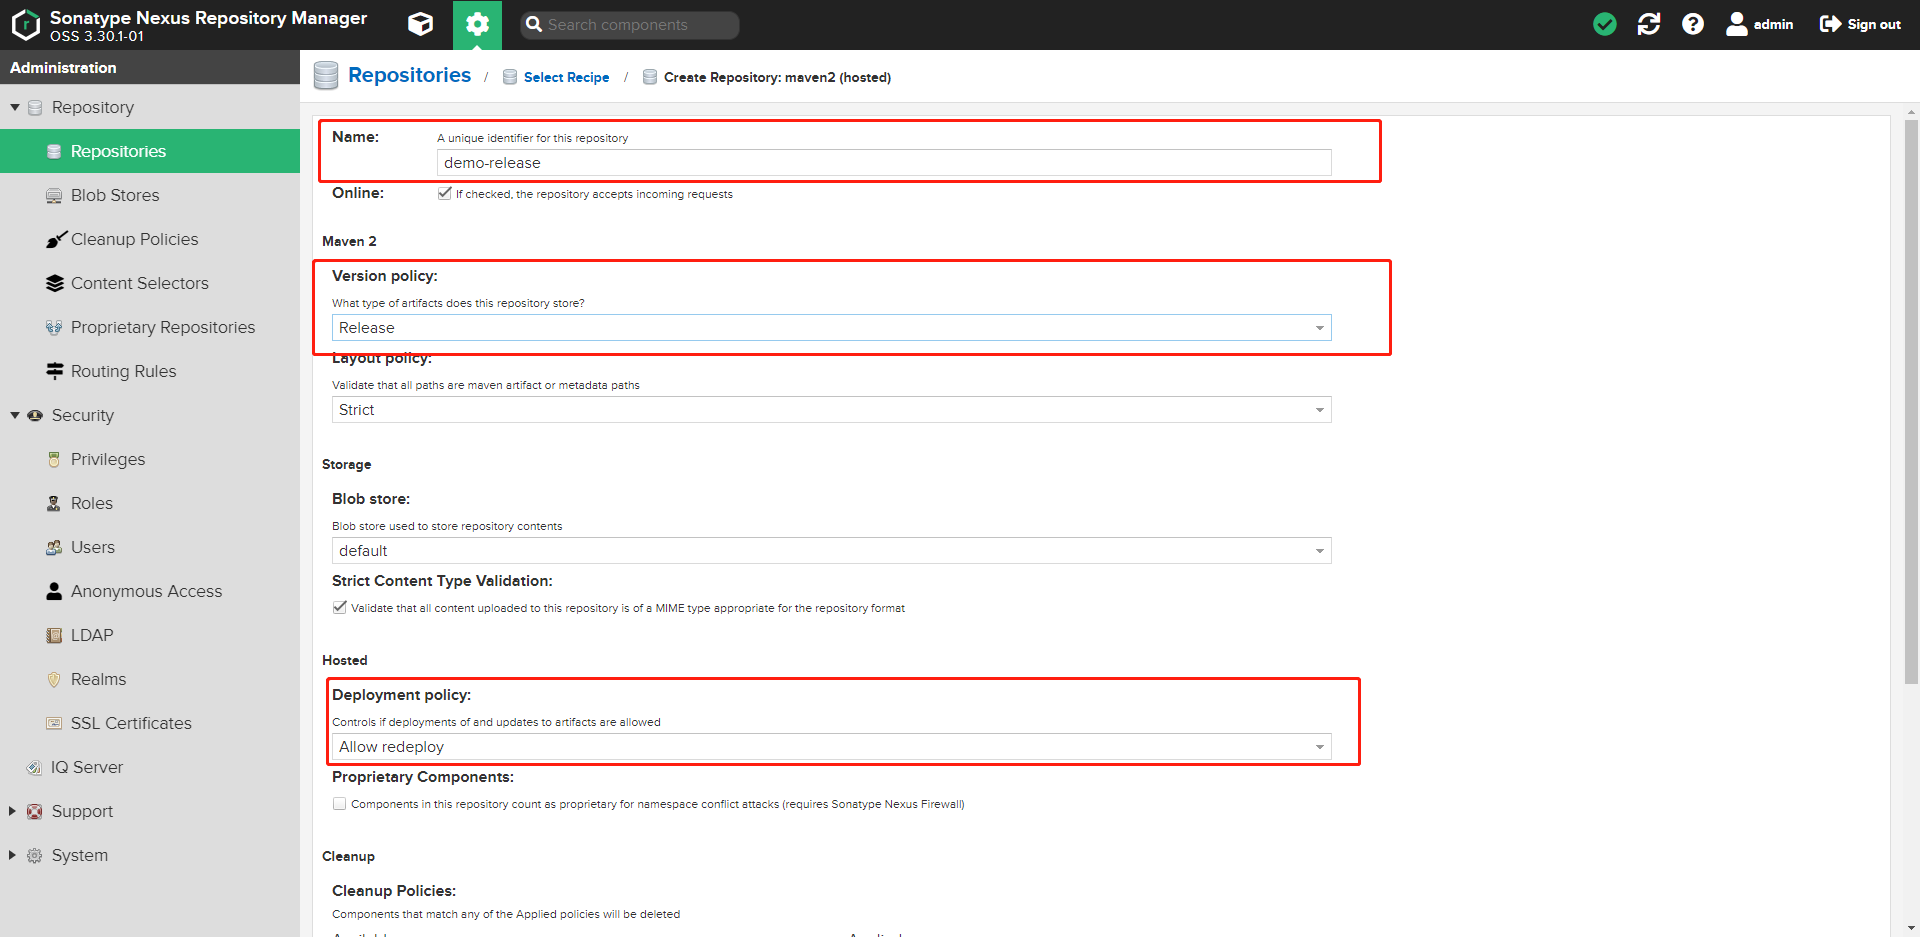
5. Create a demo release warehouse the same as the steps
Note: Release type is selected for Version policy
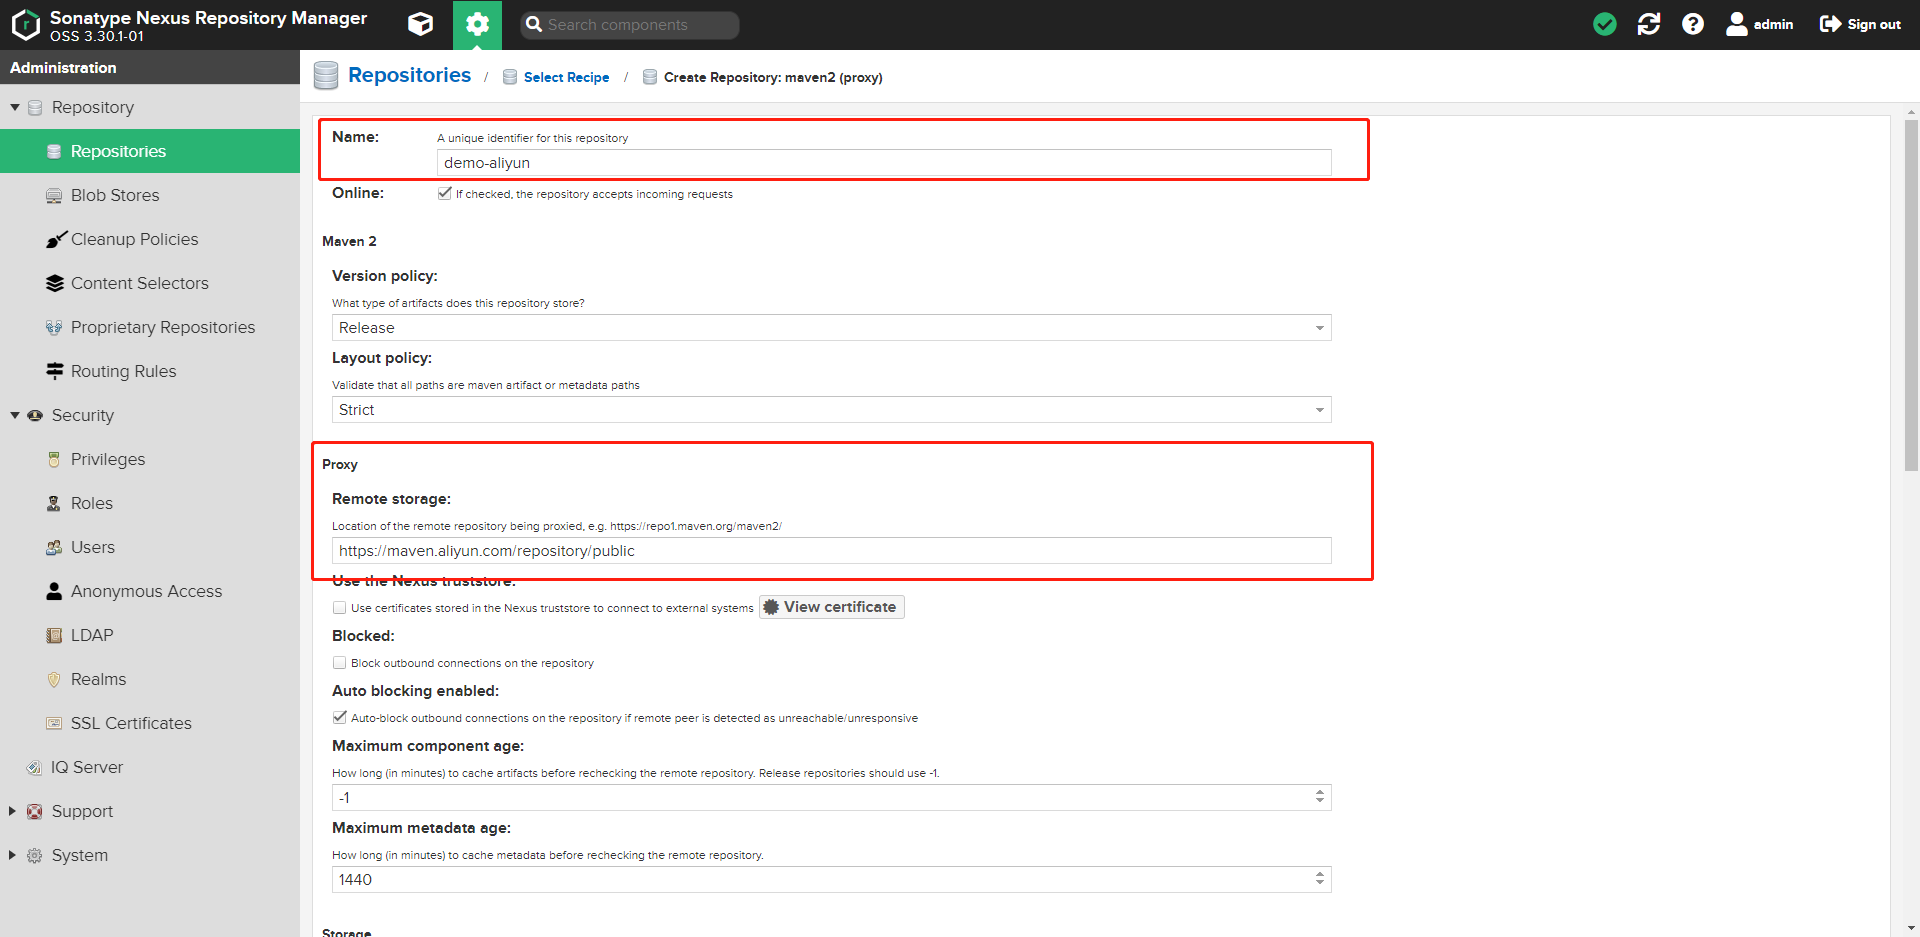
6. Click Maven 2 (proxy) to create a proxy warehouse
Note: Remote storage: fill in the address of Alibaba cloud Maven warehouse( https://maven.aliyun.com/repository/public )Access to foreign central warehouses is too slow
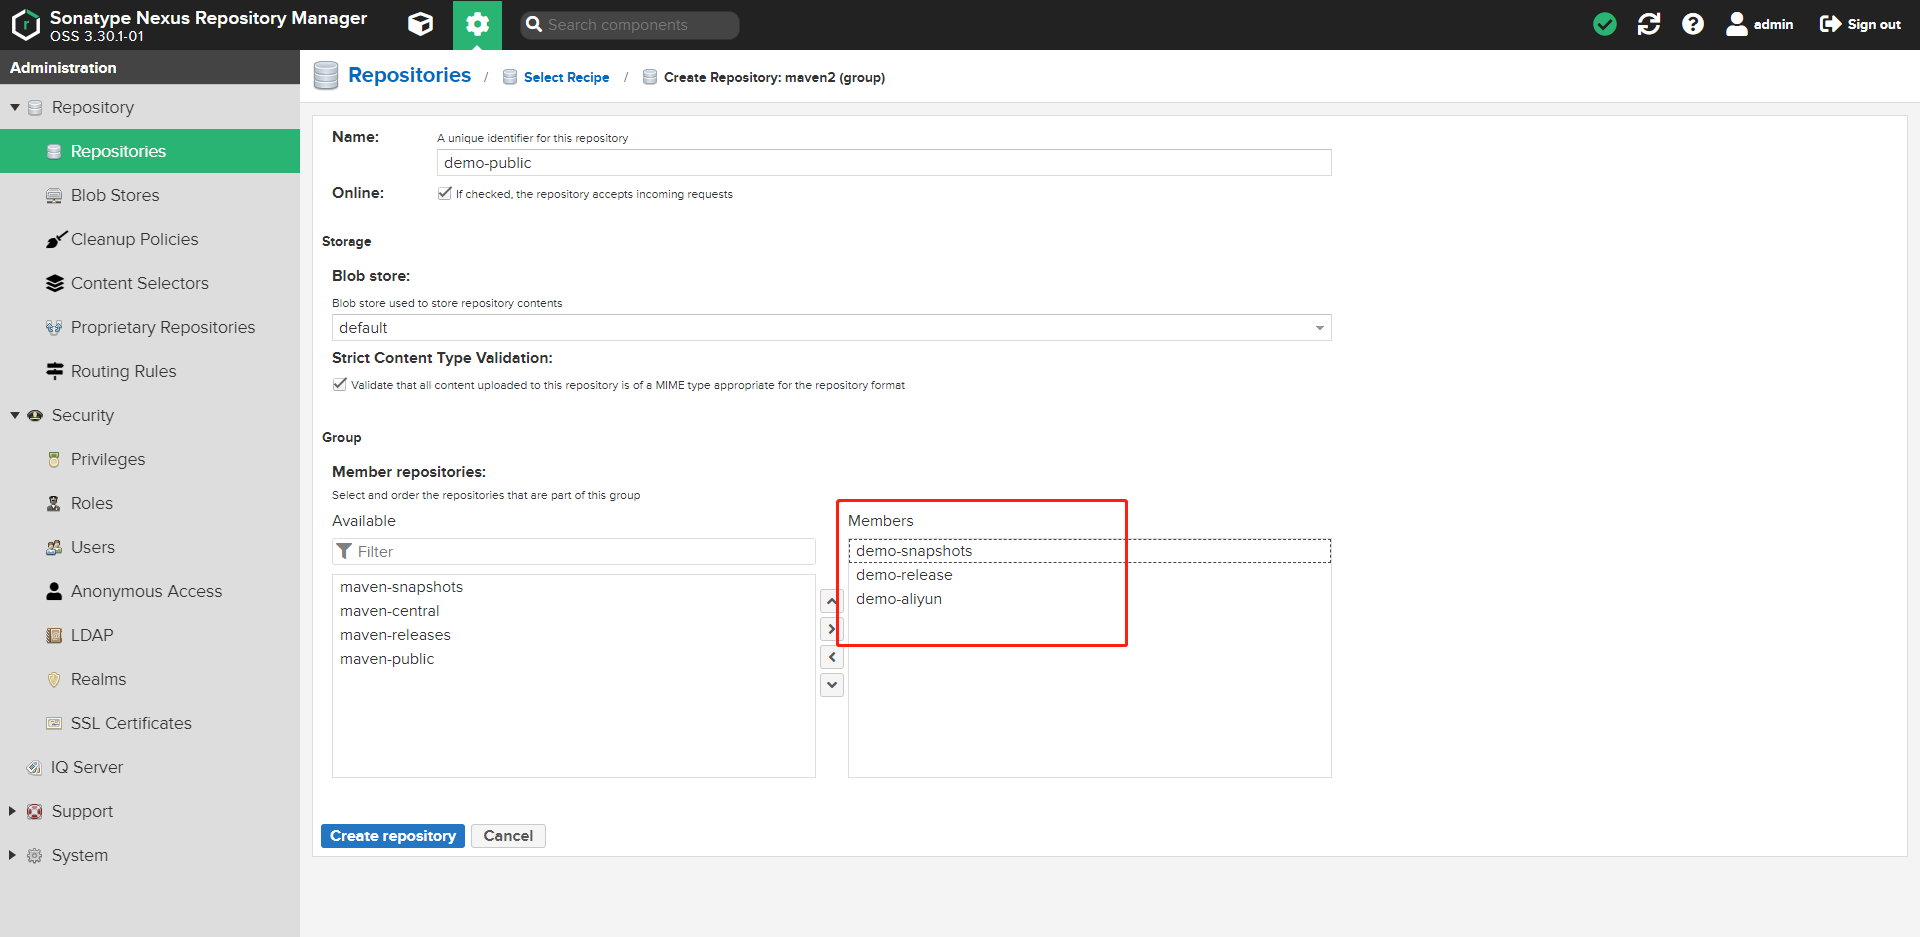
7. Click maven2(group) to create a warehouse group
Note: select the green box warehouse to the right area
The sequence is demo snapshots -- > demo release -- > demo aliyun
This means that maven searches the package in the above order at a time
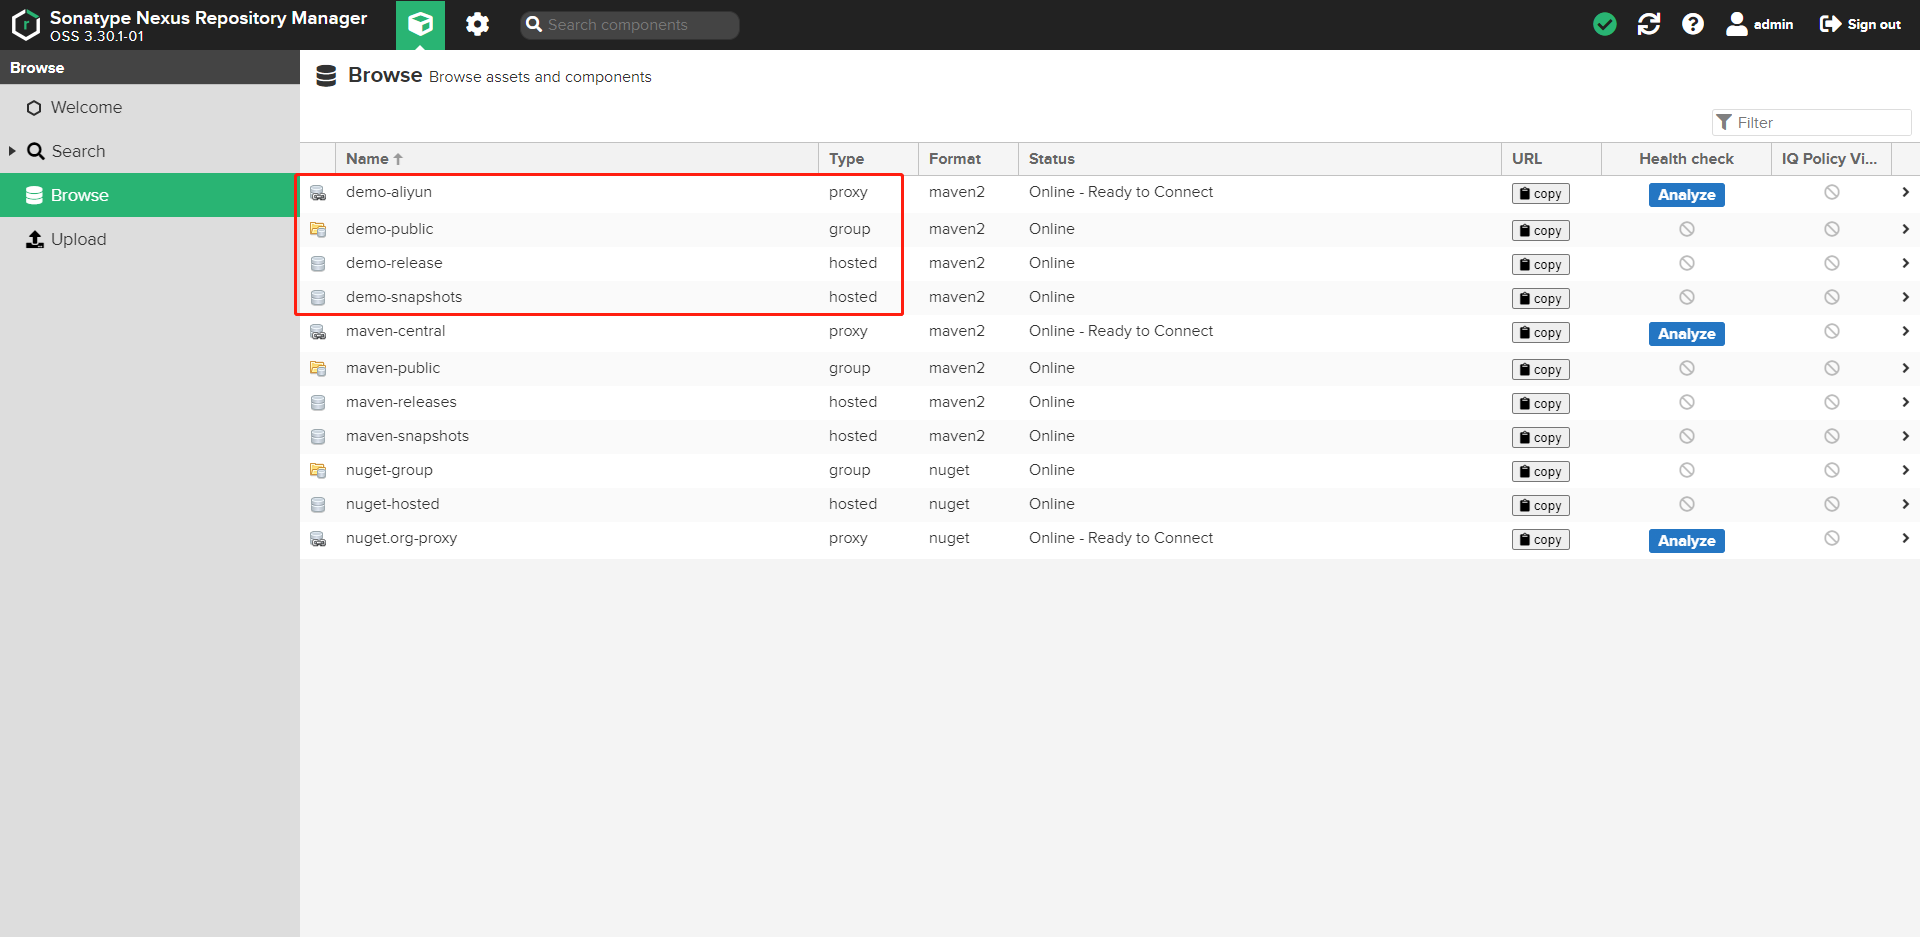
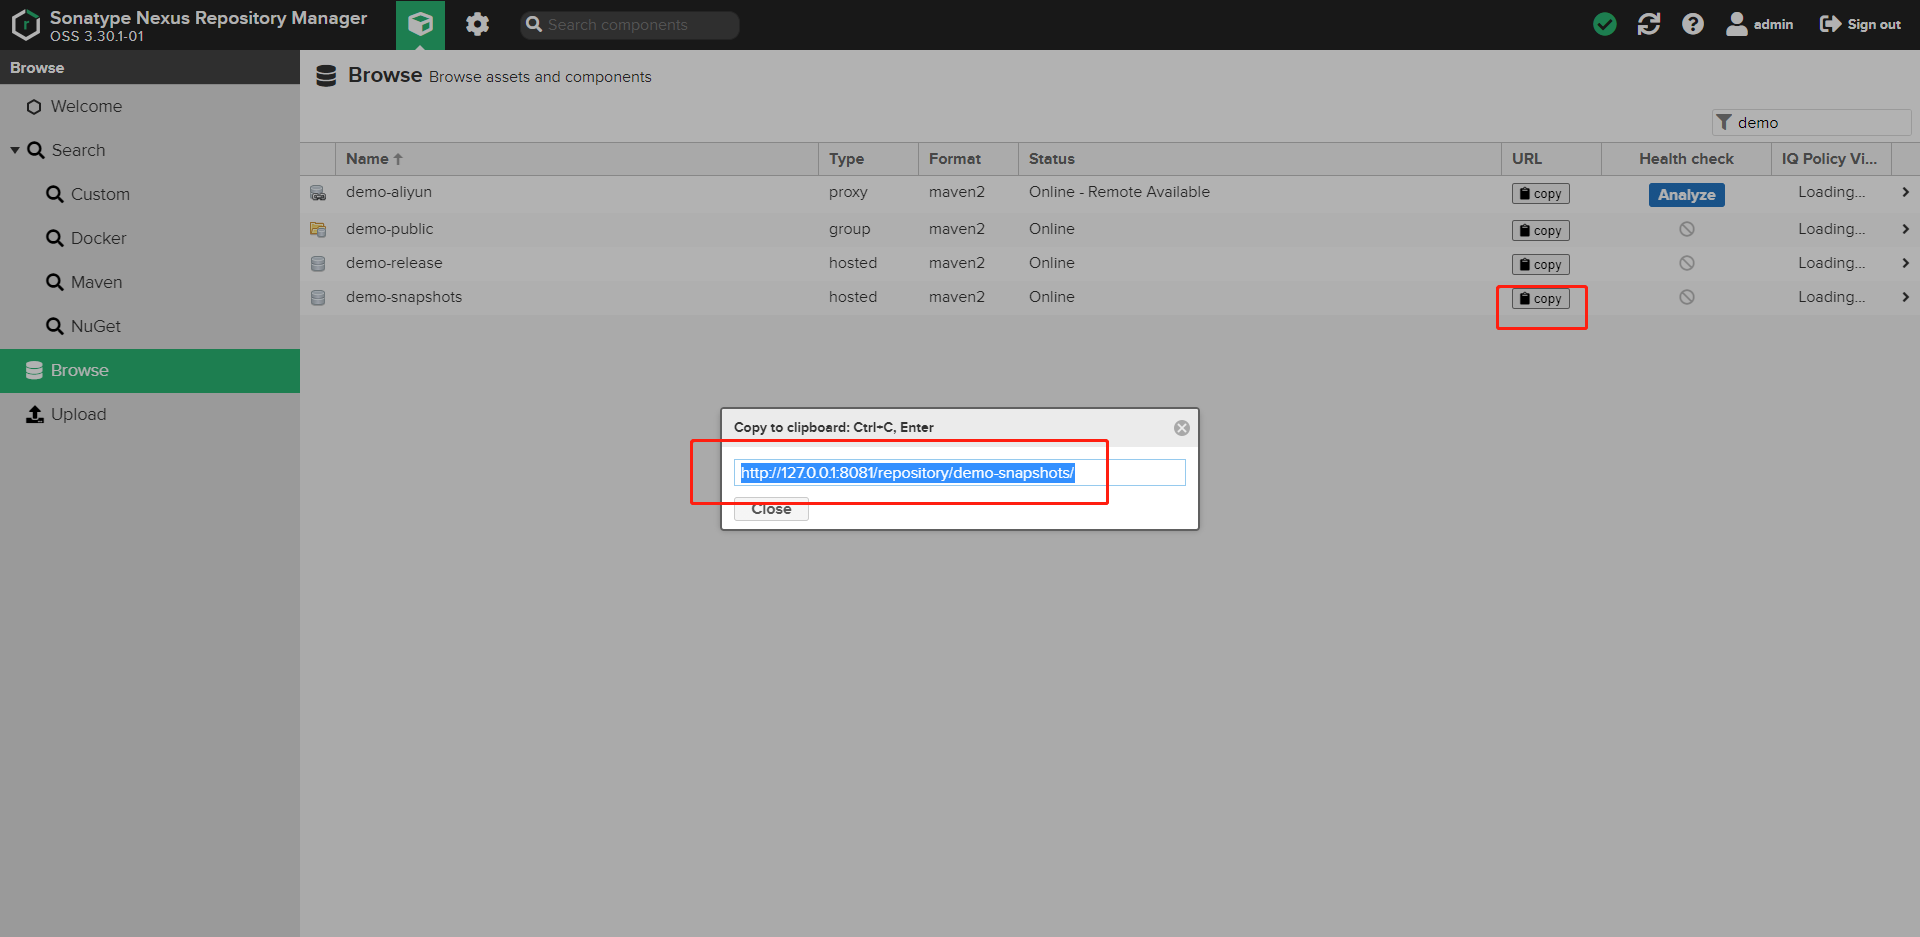
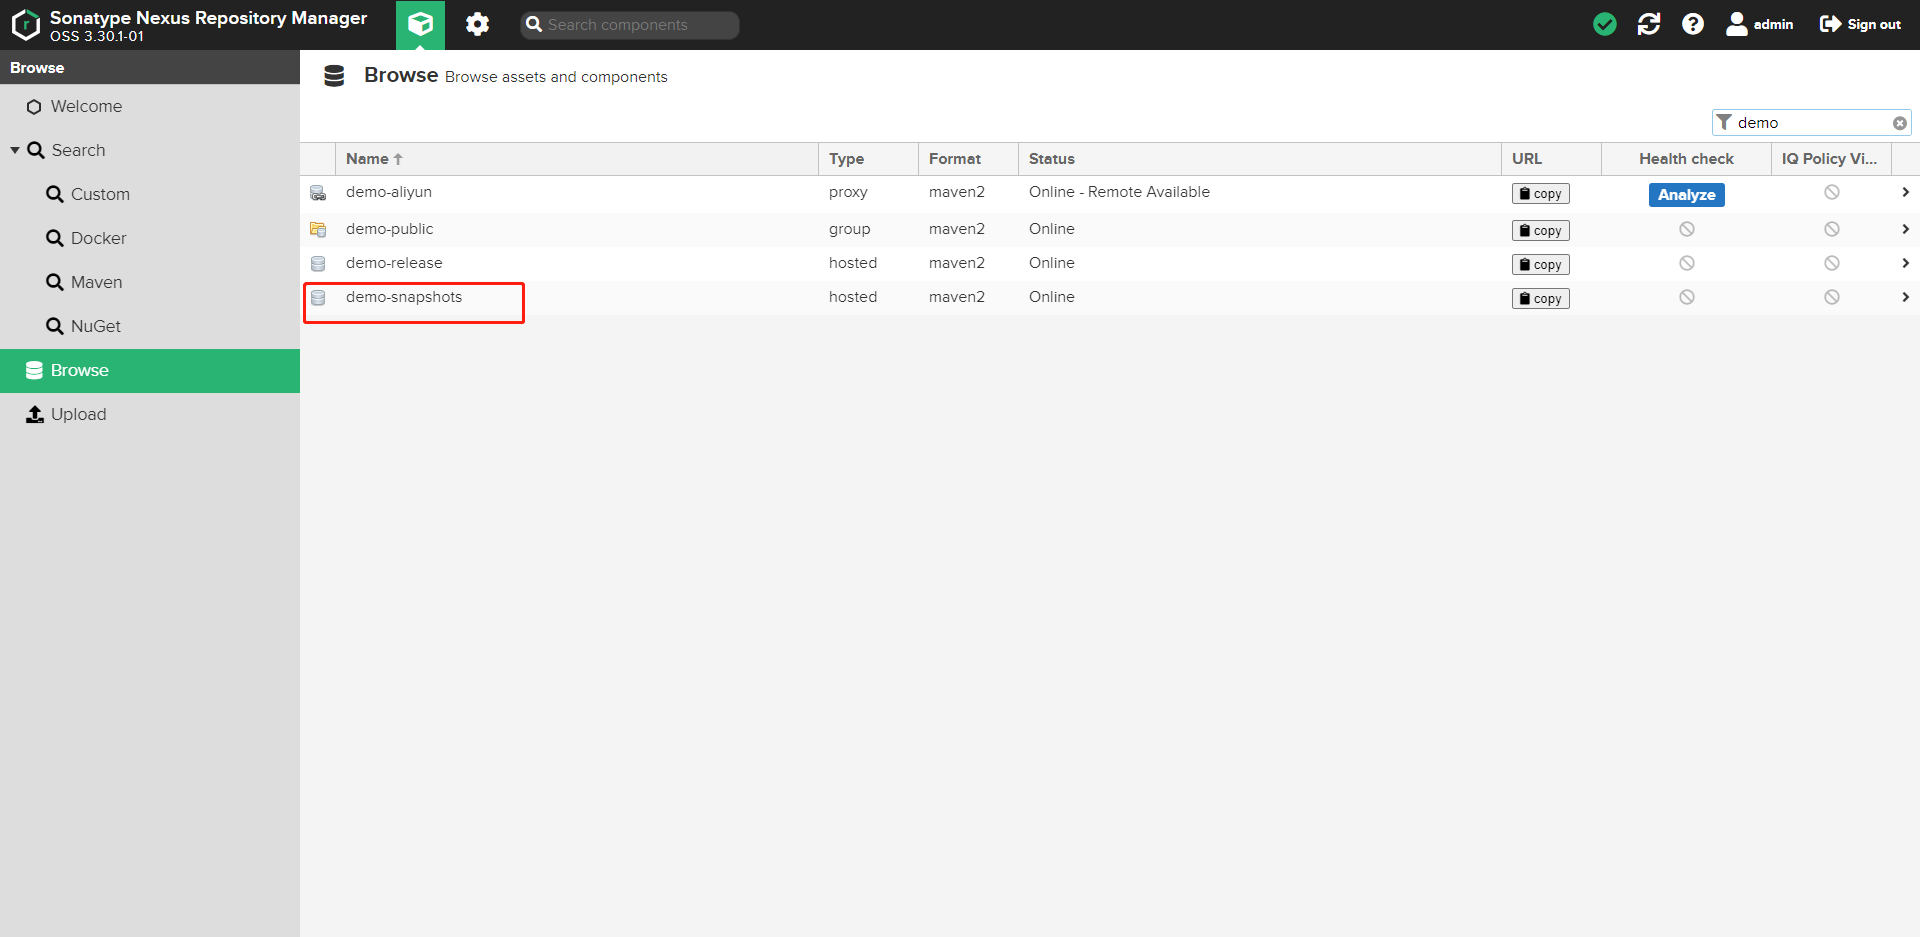
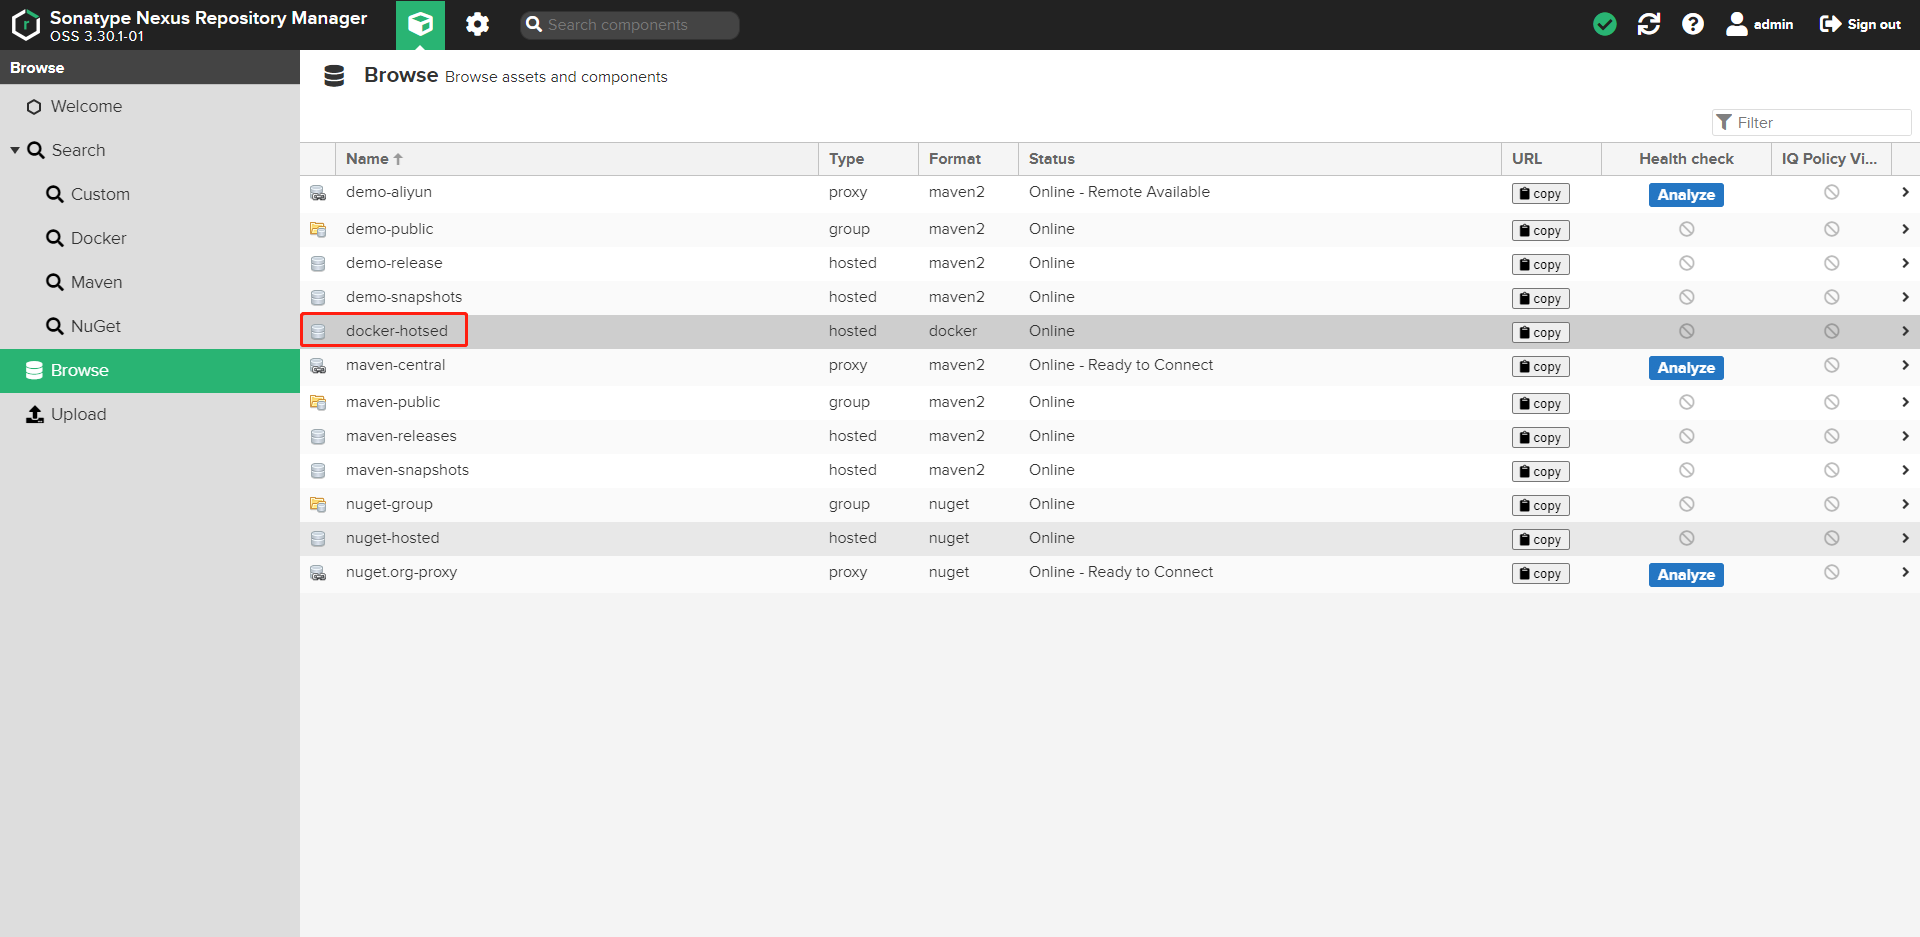
8. Go back to the home page to view the created directory
There are two hosted local warehouses, one proxy warehouse and one group. The other three warehouses provide external access addresses
3, Download and configure maven
1. Download maven
Click download (version: 3.6.3)
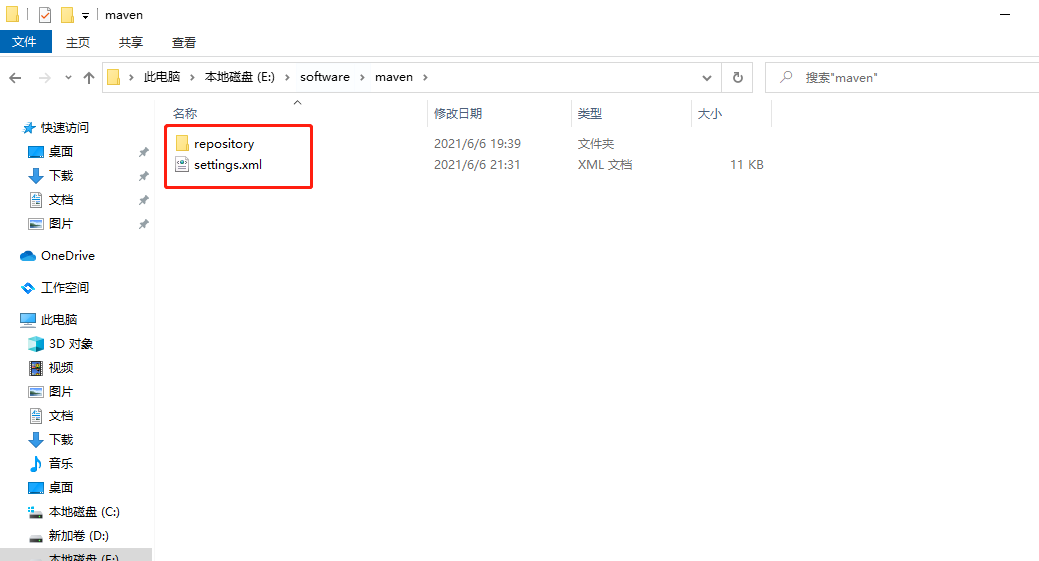
2. Create repository folder and settings XML file
settings. The XML file can be copied from the decompressed maven package. The details are in conf\settings.xml in the decompressed file xml
3. Configure settings XML file
The main configurations are < localrepository > XXXX < / localrepository >, < server > xxxxx < / server >, < mirror > XXXX < / mirror >
- localRepository: configure the directory address of the local repository, for example: E:\software\maven\repository
- server: configure the login user name and password of nuxus. Note that the id parameter should correspond to the configuration in the pom file
- Mirror: configure local mirror warehouse address
<?xml version="1.0" encoding="UTF-8"?>

<settings xmlns="http://maven.apache.org/SETTINGS/1.0.0"
          xmlns:xsi="http://www.w3.org/2001/XMLSchema-instance"
          xsi:schemaLocation="http://maven.apache.org/SETTINGS/1.0.0 http://maven.apache.org/xsd/settings-1.0.0.xsd">

  <localRepository>E:\software\maven\repository</localRepository>

  <servers>

    <server>
      <id>demo-snapshots</id>
      <username>admin</username>
      <password>133232</password>
    </server>

    <server>
      <id>demo-releases</id>
      <username>admin</username>
      <password>133232</password>
    </server>

  </servers>


  <mirrors>
     <mirror>
      <id>maven-releases</id>
      <mirrorOf>*</mirrorOf>
      <name>Human Readable Name for this Mirror.</name>
      <url>http://127.0.0.1:8081/repository/demo-public/</url>
    </mirror>
  </mirrors>

</settings>
4, Create Spring Boot sample code
1. Engineering structure
- Spring Boot : 2.5.0
- jdk:1.8
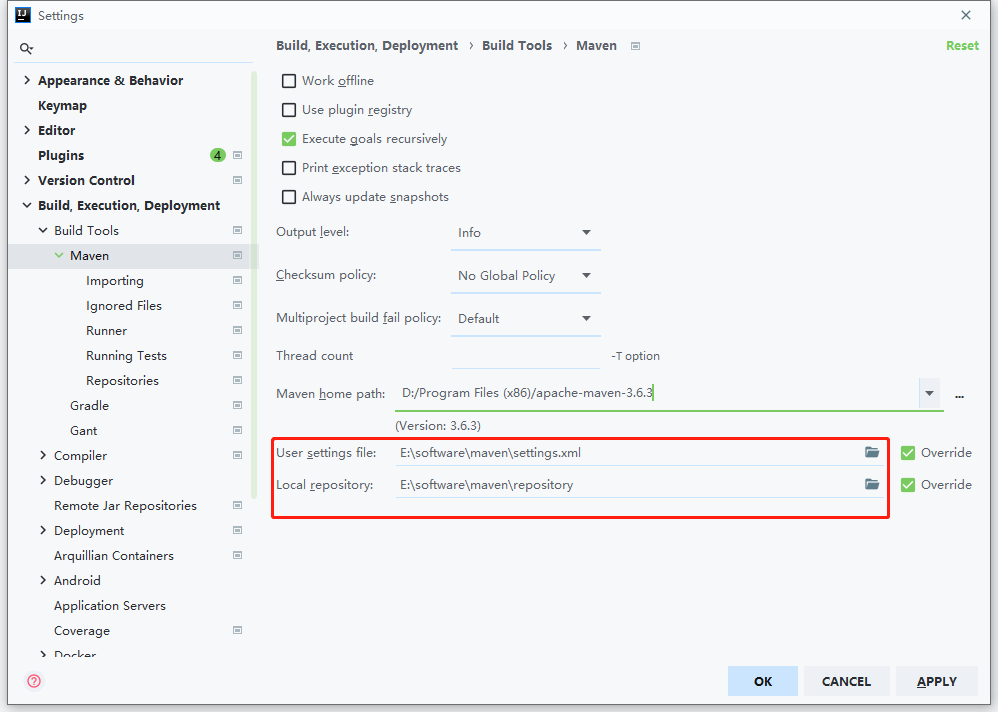
2. Set maven in the project
Note: modify the default Maven setting in the editor XML and repository files are set as custom configuration files
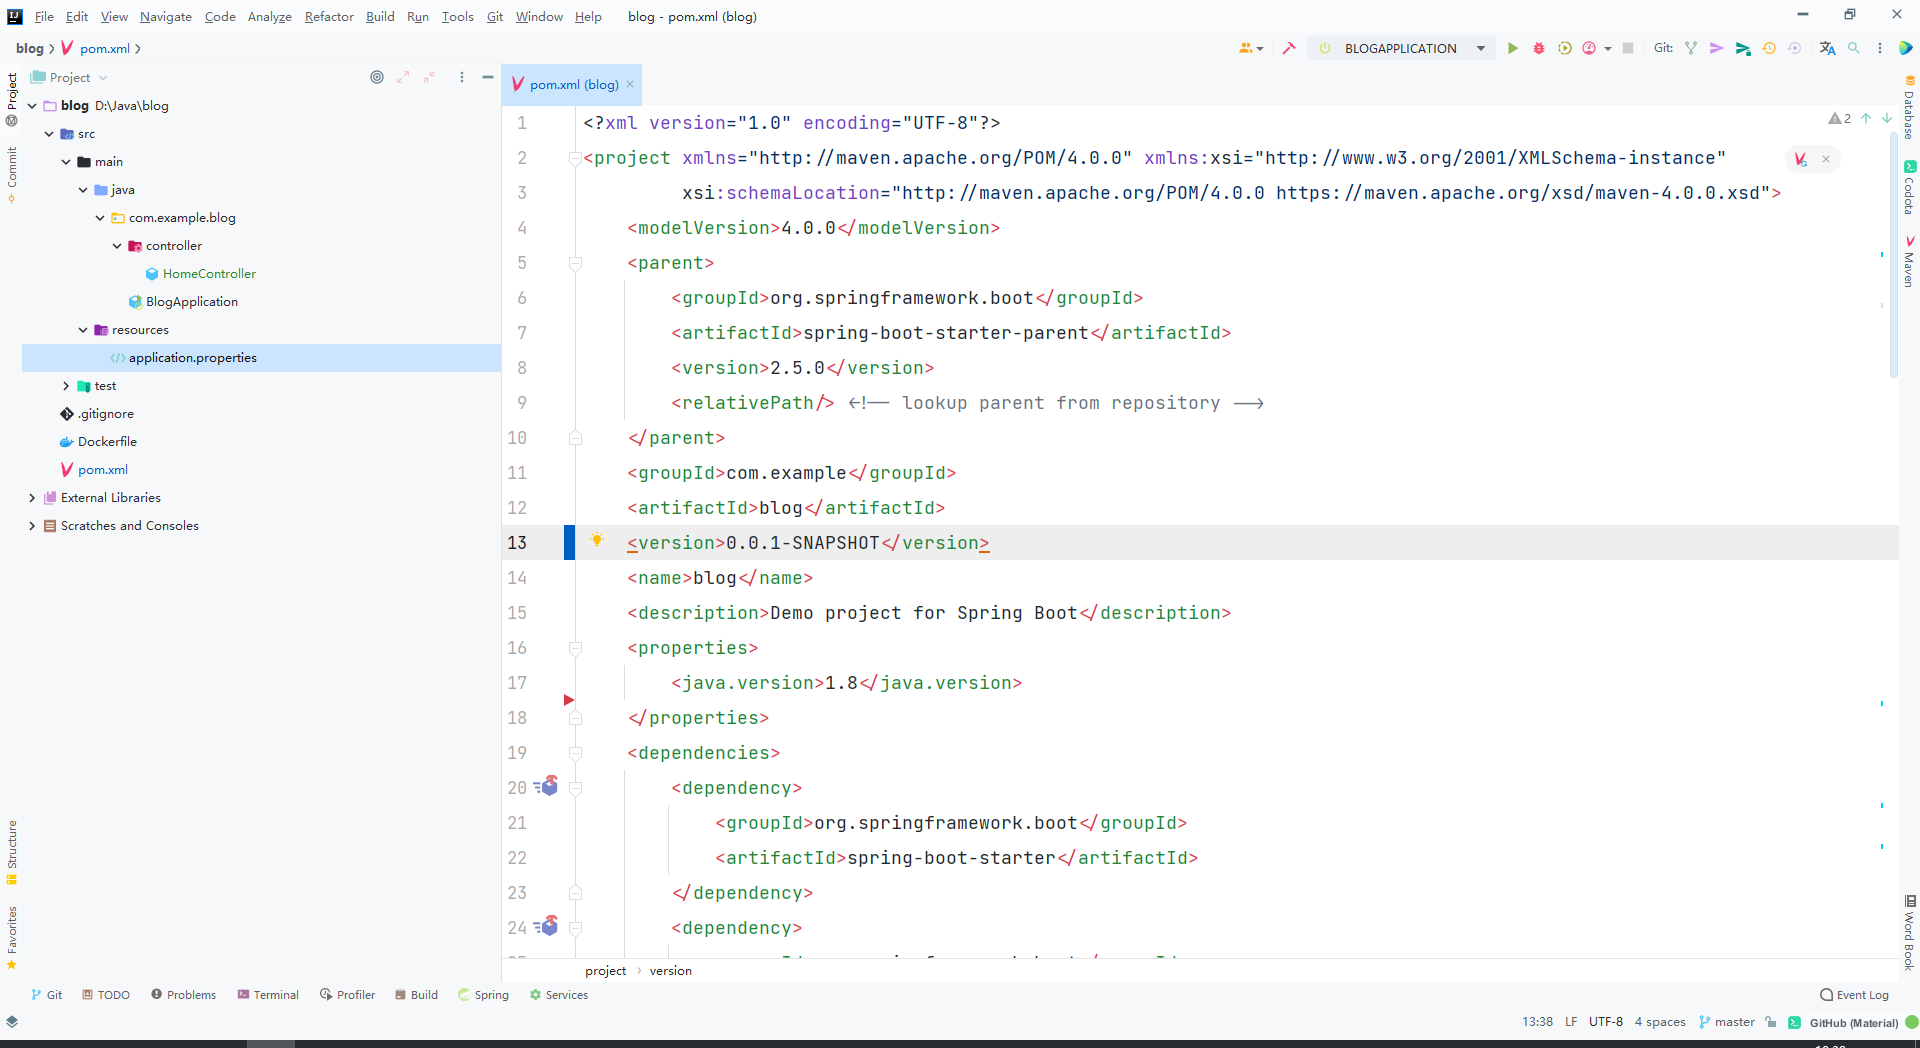
3. Set POM in the project xml
Note: replace 192.168.101.111 with your own local ip address
Add < DistributionManagement > XX < / DistributionManagement > configuration to pom
- id corresponds to maven configuration file settings id corresponding to server in XML
- The URL address corresponds to the URL in nexus, as shown in Figure 2. Click Copy to copy the warehouse address
<?xml version="1.0" encoding="UTF-8"?>
<project xmlns="http://maven.apache.org/POM/4.0.0" xmlns:xsi="http://www.w3.org/2001/XMLSchema-instance"
         xsi:schemaLocation="http://maven.apache.org/POM/4.0.0 https://maven.apache.org/xsd/maven-4.0.0.xsd">
    <modelVersion>4.0.0</modelVersion>
    <parent>
        <groupId>org.springframework.boot</groupId>
        <artifactId>spring-boot-starter-parent</artifactId>
        <version>2.5.0</version>
        <relativePath/> <!-- lookup parent from repository -->
    </parent>
    <groupId>com.example</groupId>
    <artifactId>blog</artifactId>
    <version>0.0.1-SNAPSHOT</version>
    <name>blog</name>
    <description>Demo project for Spring Boot</description>
    <properties>
        <java.version>1.8</java.version>
    </properties>
    <dependencies>
        <dependency>
            <groupId>org.springframework.boot</groupId>
            <artifactId>spring-boot-starter</artifactId>
        </dependency>
        <dependency>
            <groupId>org.springframework.boot</groupId>
            <artifactId>spring-boot-starter-web</artifactId>
        </dependency>

        <dependency>
            <groupId>org.springframework.boot</groupId>
            <artifactId>spring-boot-starter-test</artifactId>
            <scope>test</scope>
        </dependency>
    </dependencies>

    <build>
        <plugins>
            <plugin>
                <groupId>org.springframework.boot</groupId>
                <artifactId>spring-boot-maven-plugin</artifactId>
            </plugin>
        </plugins>
    </build>

	<!-- add to demo-snapshots Warehouse address and demo-release Warehouse address -->
    <distributionManagement>
    	<!--
         	 demo-snapshots The default user name and password of the warehouse are maven in setting.xml in server The configuration of the is as follows
          <server>
              <id>demo-snapshots</id>
              <username>admin</username>
              <password>133232</password>
          </server>
          -->
        <snapshotRepository>
        	<!--id Corresponding to maven in setting.xml In the file server Configured id-->
            <id>demo-snapshots</id>
            <!--url Corresponding to nexus in demo-snapshots The path to the folder-->
            <url>http://192.168.101.111:8081/repository/demo-snapshots/</url>
        </snapshotRepository>
        <!--
        	demo-releases The default user name and password of the warehouse are maven in setting.xml in server The configuration of the is as follows
          <server>
              <id>demo-releases</id>
              <username>admin</username>
              <password>133232</password>
          </server>
          -->
        <repository>
            <id>demo-releases</id>
            <url>http://192.168.101.111:8081/repository/demo-releases/</url>
        </repository>
    </distributionManagement>

</project>
Figure 2:
4. deploy uploads the code to maven's private warehouse
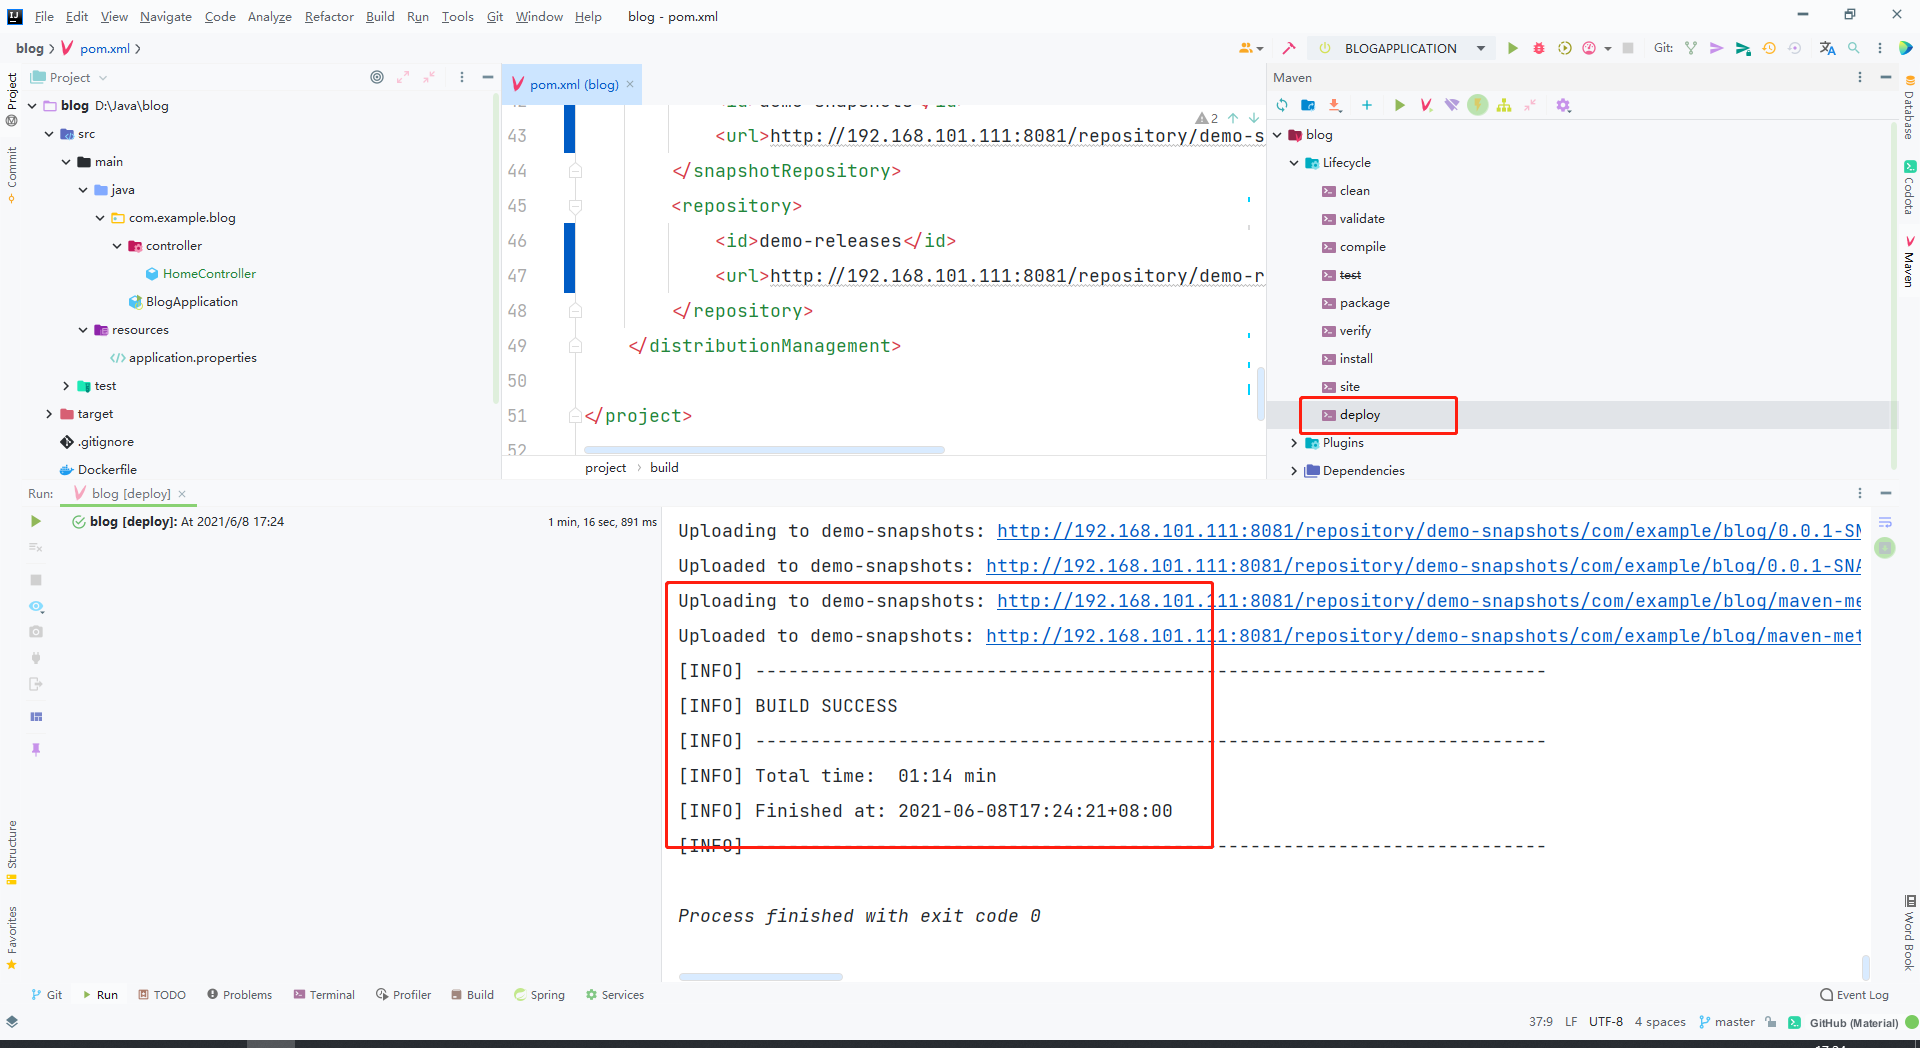
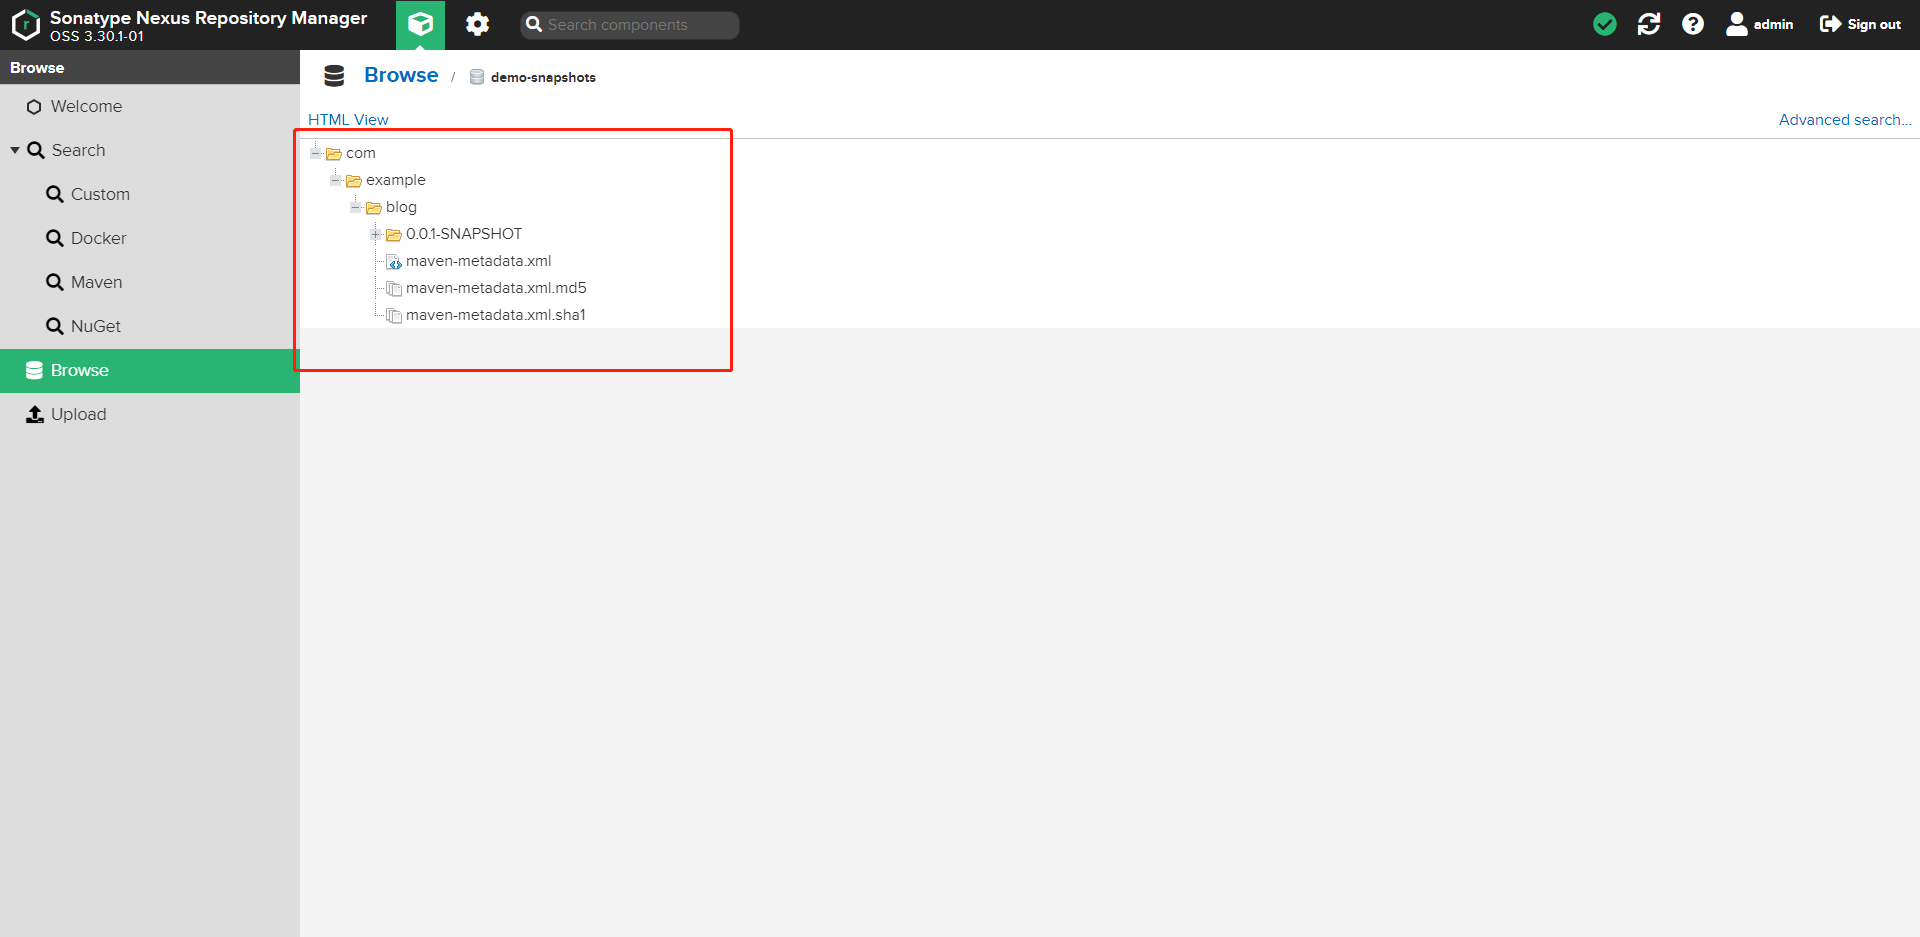
View the demo snapshots warehouse directory on nexus
See that the code has been uploaded to maven's private warehouse
!!! The above is the establishment and upload of maven private warehouse
5, Configure Docker private warehouse and upload packaged image
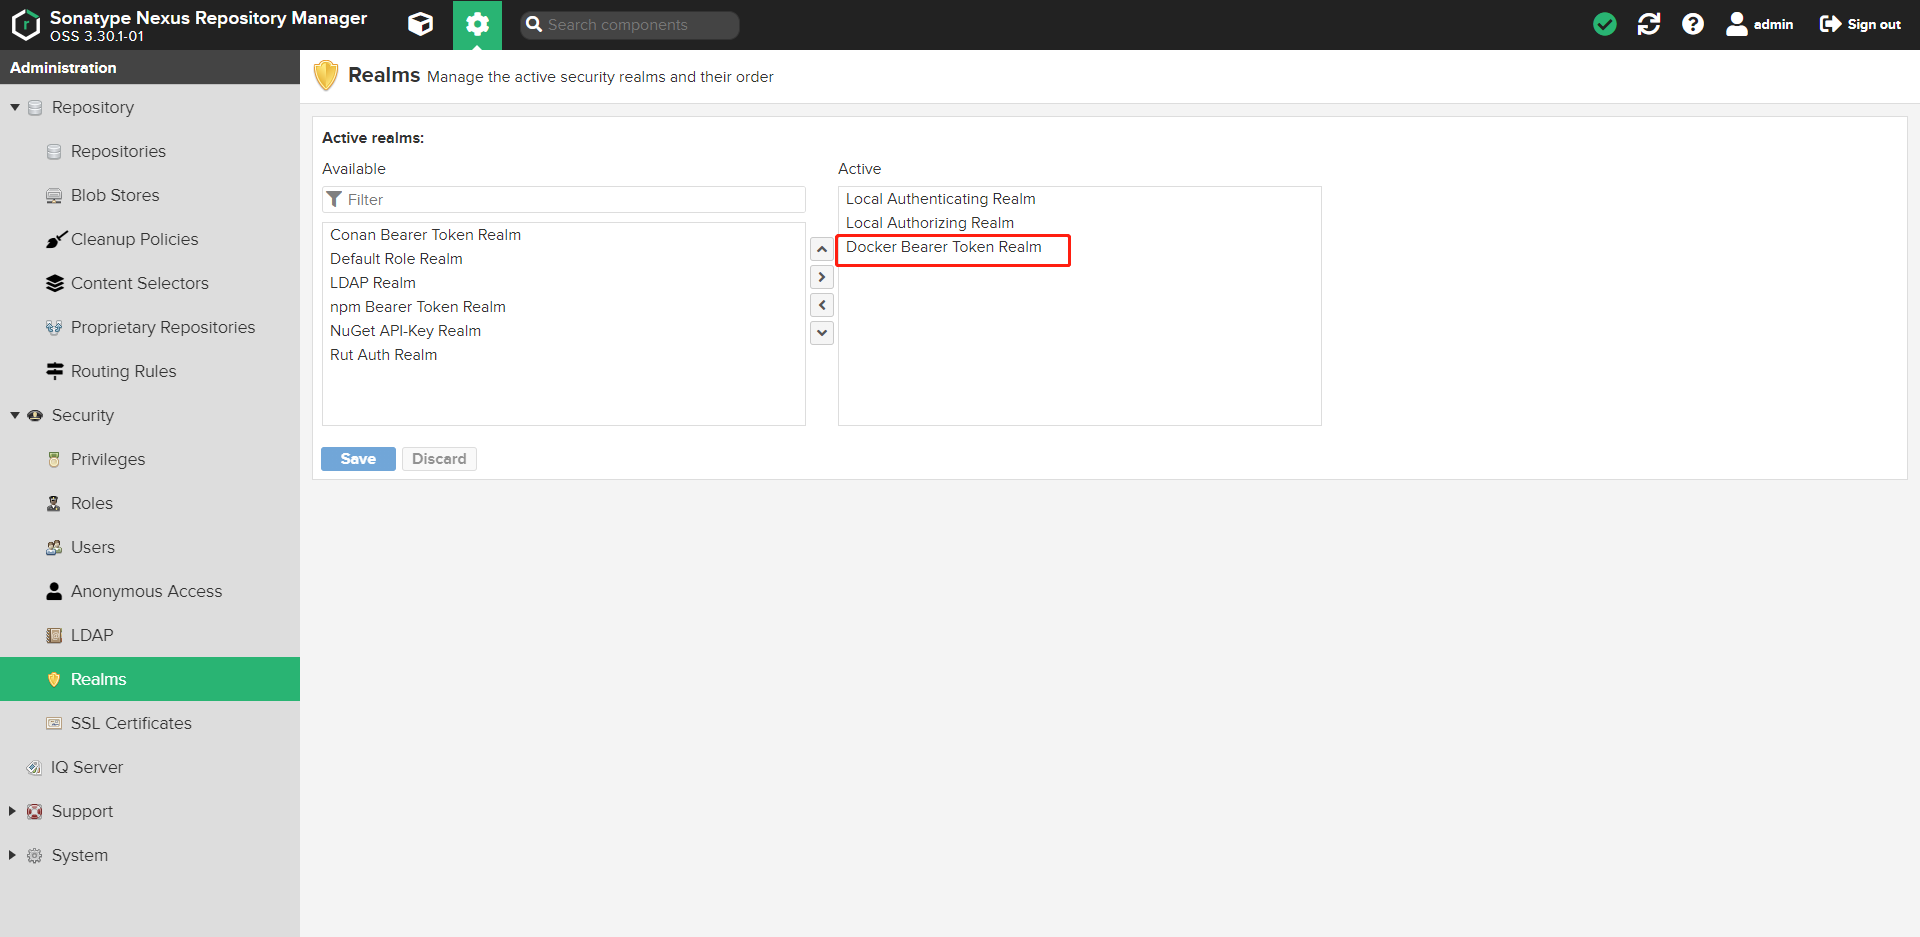
1. Set account verification type
Move Docker Bearer Token Realm from left to right
2. Add private warehouse address to docker configuration file
On Linux, such as Ubuntu configuration: / etc / docker / daemon json
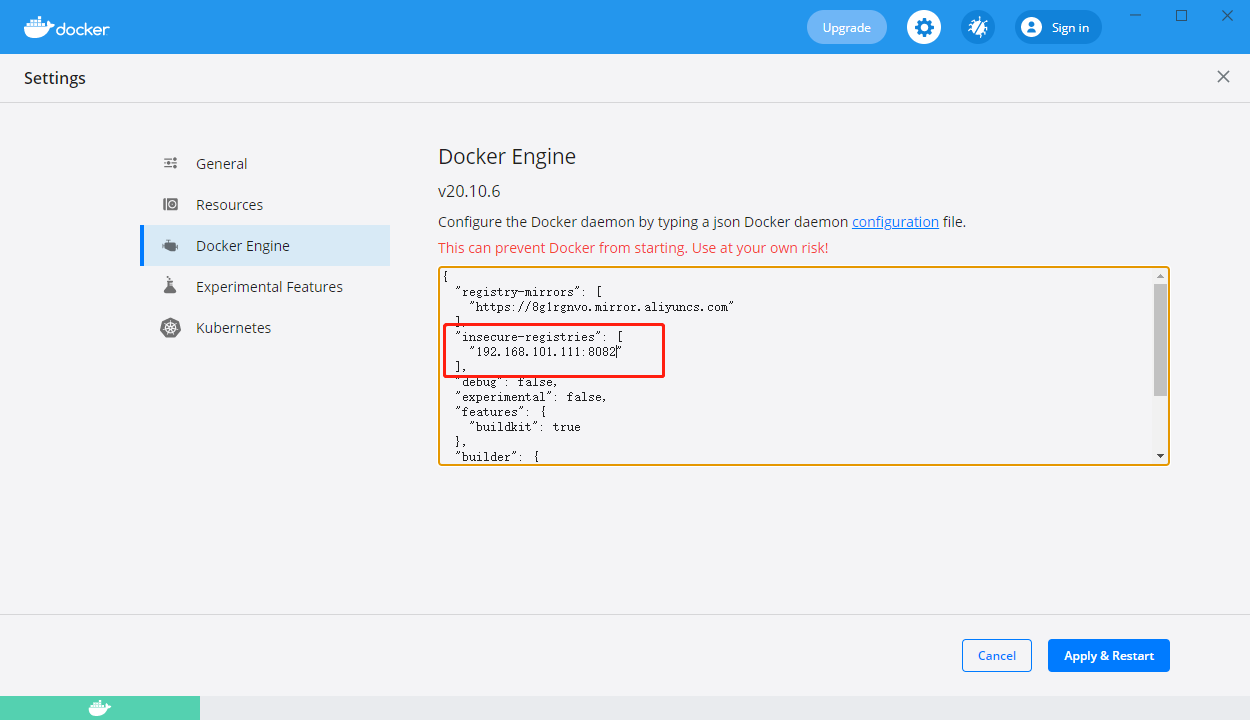
Note: replace the ip with your own local ip
 "insecure-registries": [
    "192.168.101.111:8082"
  ],
3. Configure POM in the sample code xml
<?xml version="1.0" encoding="UTF-8"?>
<project xmlns="http://maven.apache.org/POM/4.0.0" xmlns:xsi="http://www.w3.org/2001/XMLSchema-instance"
         xsi:schemaLocation="http://maven.apache.org/POM/4.0.0 https://maven.apache.org/xsd/maven-4.0.0.xsd">
    <modelVersion>4.0.0</modelVersion>
    <parent>
        <groupId>org.springframework.boot</groupId>
        <artifactId>spring-boot-starter-parent</artifactId>
        <version>2.5.0</version>
        <relativePath/> <!-- lookup parent from repository -->
    </parent>
    <groupId>com.example</groupId>
    <artifactId>blog</artifactId>
    <version>0.0.1-SNAPSHOT</version>
    <name>blog</name>
    <description>Demo project for Spring Boot</description>
    <properties>
        <java.version>1.8</java.version>
    </properties>
    <dependencies>
        <dependency>
            <groupId>org.springframework.boot</groupId>
            <artifactId>spring-boot-starter</artifactId>
        </dependency>
        <dependency>
            <groupId>org.springframework.boot</groupId>
            <artifactId>spring-boot-starter-web</artifactId>
        </dependency>

        <dependency>
            <groupId>org.springframework.boot</groupId>
            <artifactId>spring-boot-starter-test</artifactId>
            <scope>test</scope>
        </dependency>
    </dependencies>

    <build>
        <plugins>
            <plugin>
                <groupId>org.springframework.boot</groupId>
                <artifactId>spring-boot-maven-plugin</artifactId>
            </plugin>
<!--   docker Plug in configuration-->
            <plugin>
                <groupId>com.spotify</groupId>
                <artifactId>dockerfile-maven-plugin</artifactId>
                <version>1.4.13</version>
                <executions>
                    <execution>
                        <id>default</id>
                        <goals>
                            <goal>build</goal>
                            <goal>push</goal>
                        </goals>
                    </execution>
                </executions>
                <configuration>
                    <!--
                    Set here true The default username and password read is maven in setting.xml in server The configuration of the is as follows
                    <server>
                        <id>192.168.101.111:8082</id>
                        <username>admin</username>
                        <password>133232</password>
                    </server>
                    -->
                    <useMavenSettingsForAuth>true</useMavenSettingsForAuth>
                    <repository>192.168.101.111:8082/${project.artifactId}</repository>
                    <tag>${project.version}</tag>
                </configuration>
            </plugin>
        </plugins>
    </build>

    <distributionManagement>
        <snapshotRepository>
            <id>demo-snapshots</id>
            <url>http://192.168.101.111:8081/repository/demo-snapshots/</url>
        </snapshotRepository>
        <repository>
            <id>demo-releases</id>
            <url>http://192.168.101.111:8081/repository/demo-releases/</url>
        </repository>
    </distributionManagement>

</project>
4. Create Dockerfile under the project root directory
Note: the Dockerfile in the root directory is read by default
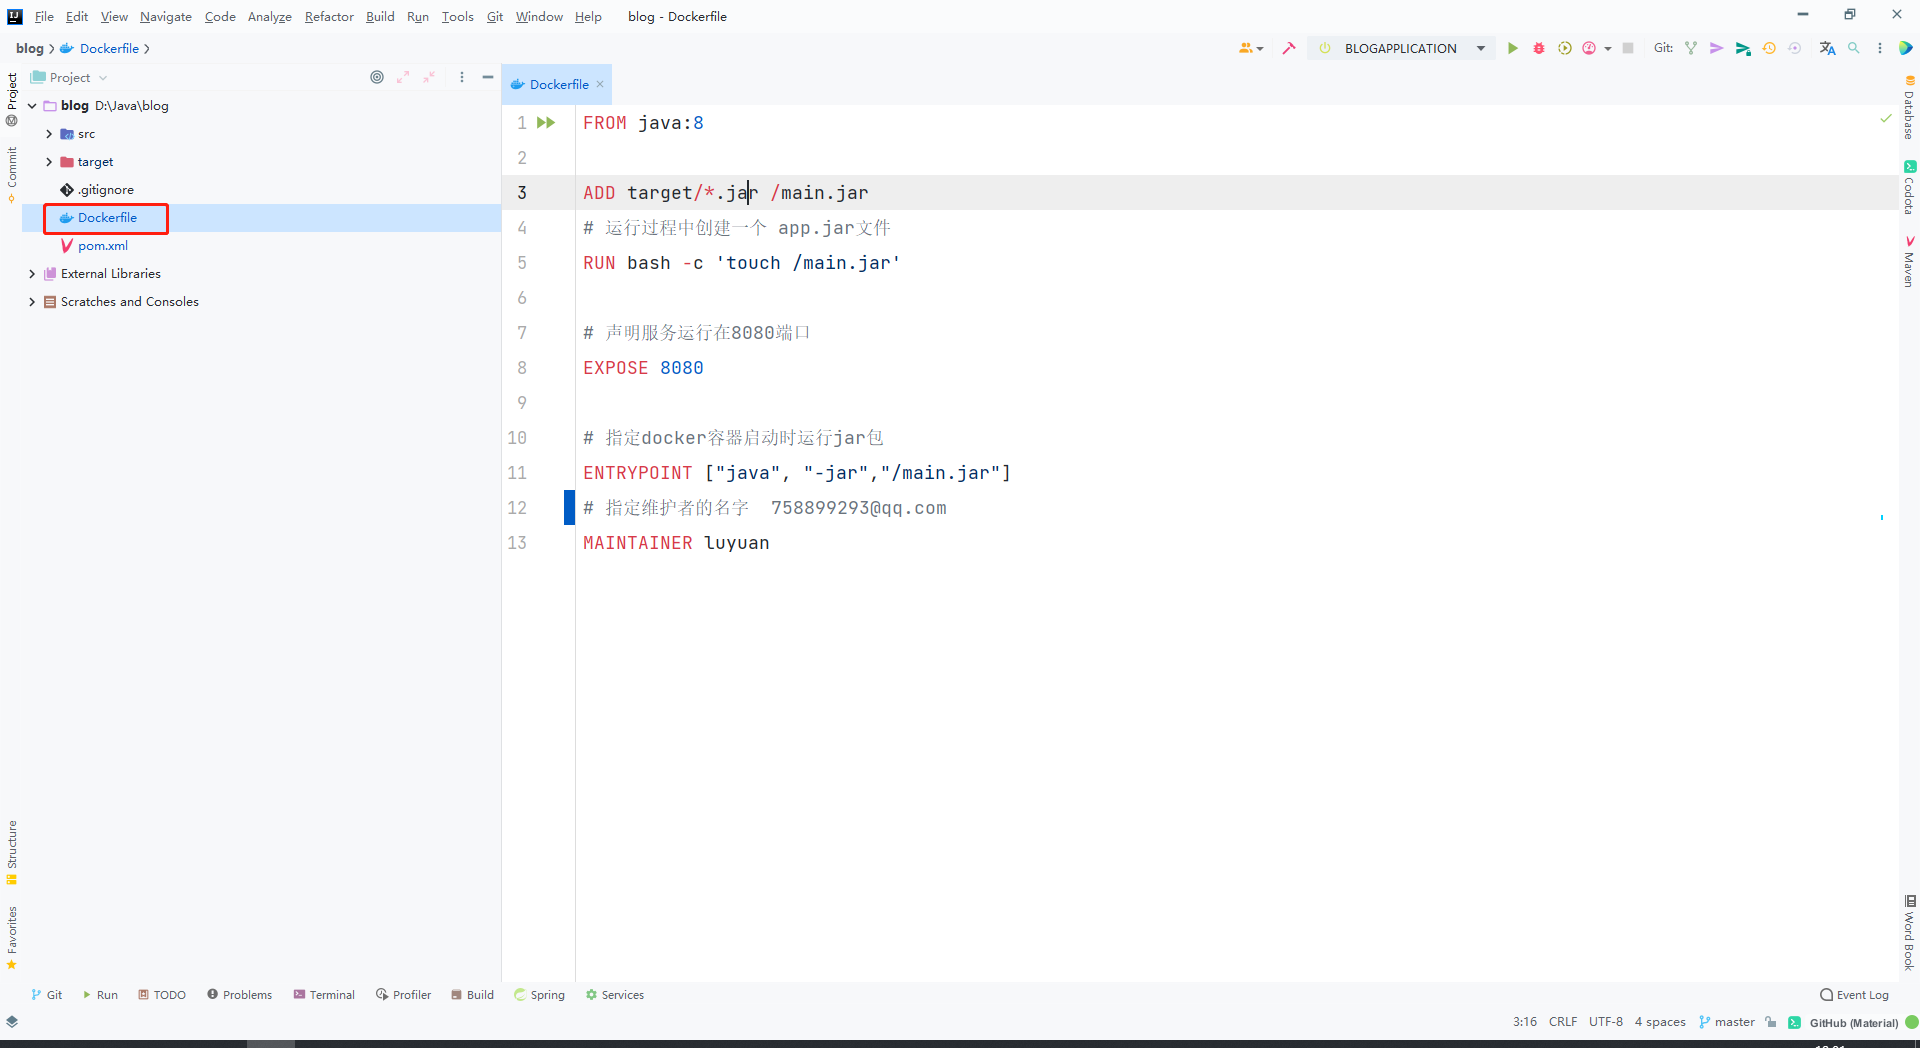
Dockerfile content
FROM java:8

ADD target/*.jar /main.jar
# Create an app during operation Jar file
RUN bash -c 'touch /main.jar'

# The claim service runs on port 8080
EXPOSE 8080

# Specify the jar package to run when the docker container starts
ENTRYPOINT ["java", "-jar","/main.jar"]
# Specifies the name of the maintainer 758899293@qq.com
MAINTAINER luyuan
5. Package the image and upload it to docker's private warehouse
Execute the package command to generate a docker local image
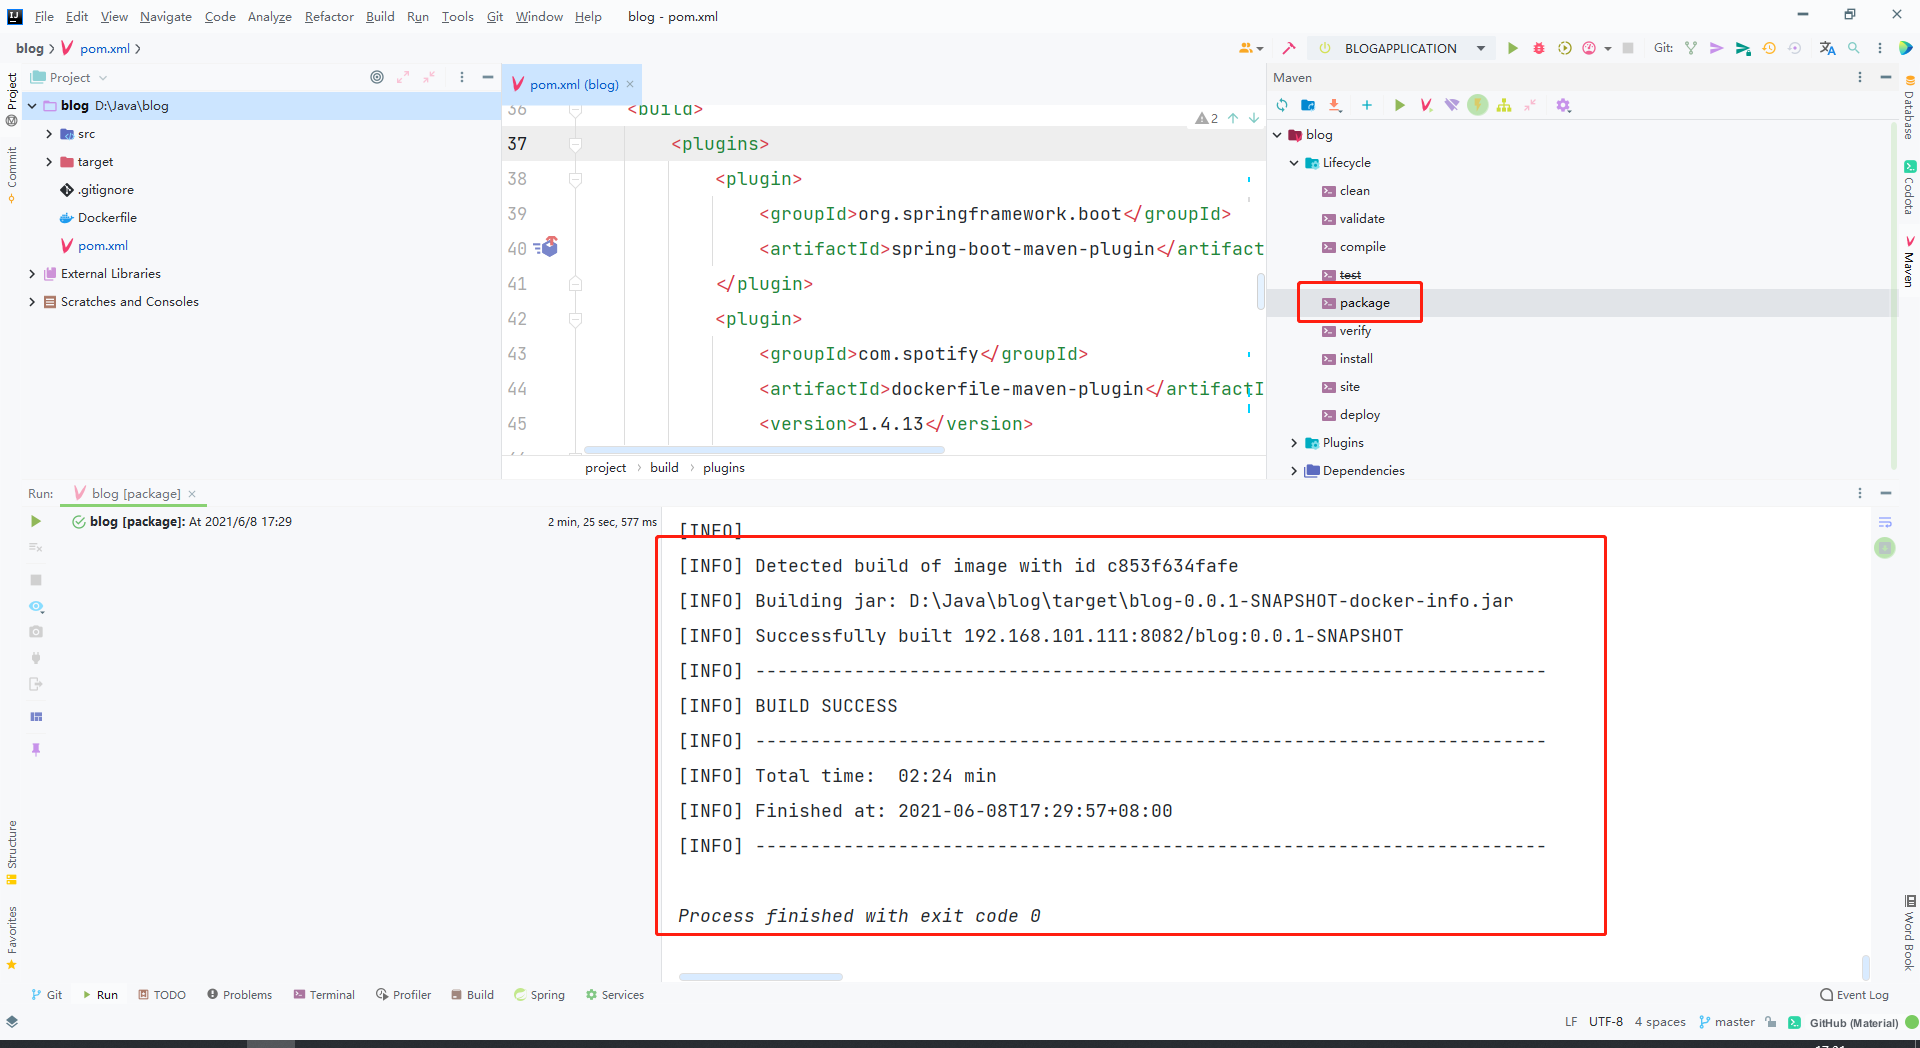
Execute dockerfile:push package and upload the local docker image to the private warehouse

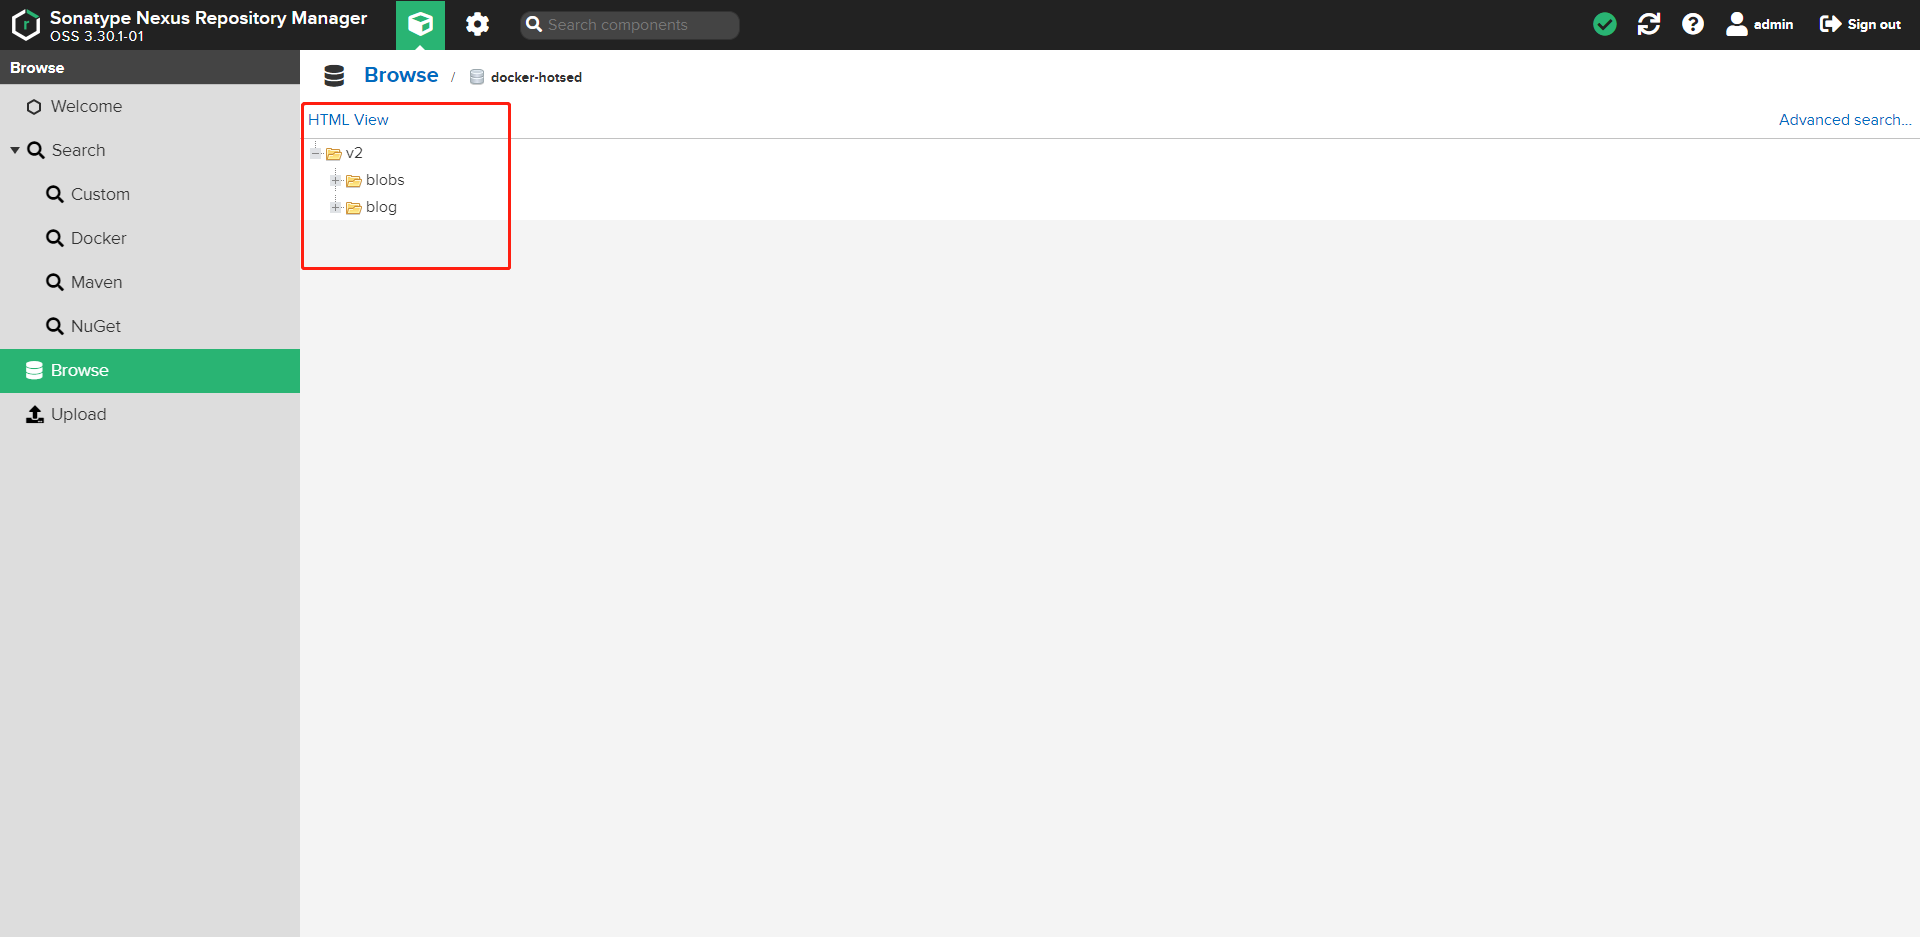
View the nexus docker warehouse directory
Package image uploaded successfully
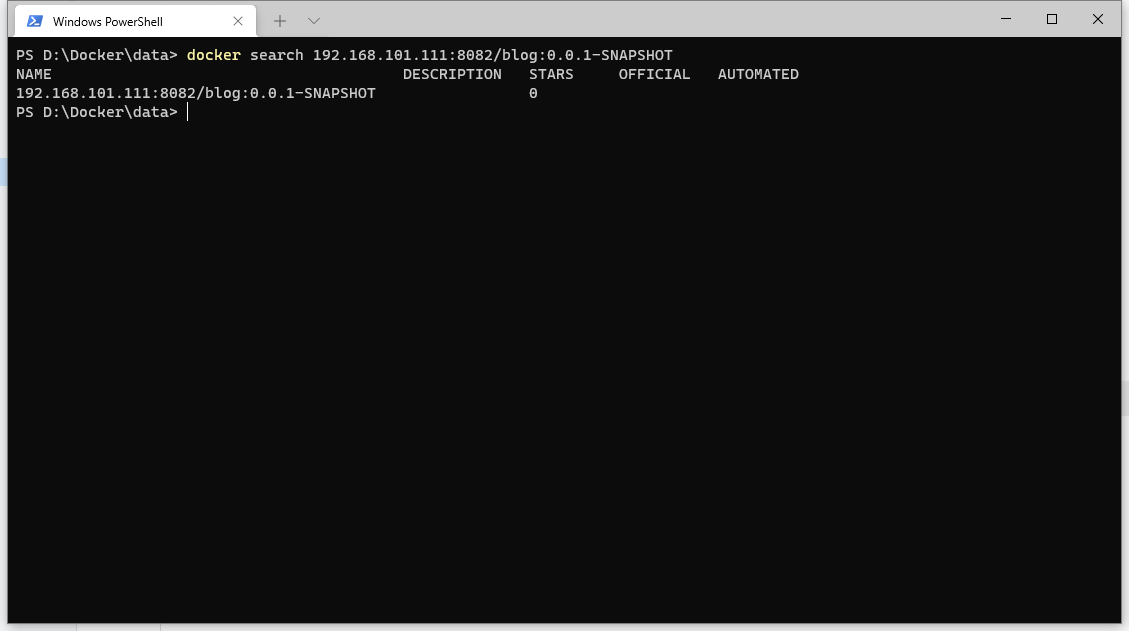
Search the image of docker private warehouse
summary
The above is a summary of my personal practice of building maven and docker private warehouses through nexus. I am also exploring and practicing. If there is any disclosure, please correct it in the comment area. thank you!