Preface
Recently, due to the needs of the project, the project needs to realize the function of websh connecting the terminal. Because of the first time to do this type of function, I first went to GitHub to find out if there is any ready-made wheel that can be used directly. At that time, I saw many projects in this area, such as GateOne, webssh, shellinabox, etc., which can well realize the functions of webssh, But it was not adopted in the end. The reason is that most of the underlying layers are written by python, which needs to rely on many files. This scheme can be used for its own use, which is fast and easy. However, when the project is used by users, users cannot always be required to include these underlying dependencies in the server, which is obviously unreasonable. So I decided to write a websssh by myself And open source as an independent project.
Technology selection
Because webssh needs real-time data interaction, it will choose WebSocket with long connection. For the convenience of development, the framework chooses spring boot. In addition, it also knows jsch of Java user connecting ssh and xterm.js of front-end shell page
Therefore, the final technology selection is SpringBoot+Websocket+jsch+xterm.js.
Import dependency
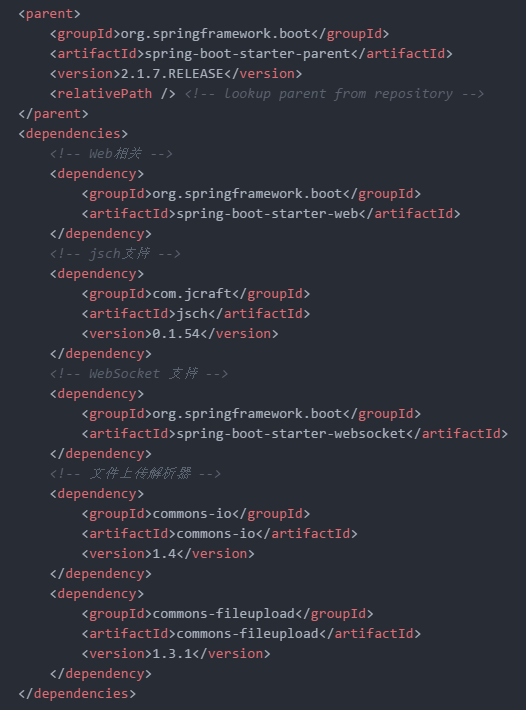
A simple case of xterm
Because xterm is a popular technology, many students do not have the knowledge support in this area. I also learned it temporarily to realize this function, so I will introduce it to you here.
xterm.js is a WebSocket based container, which can help us to implement the command line style in the front end. It's like when we usually connect to the server with SecureCRT or XShell.
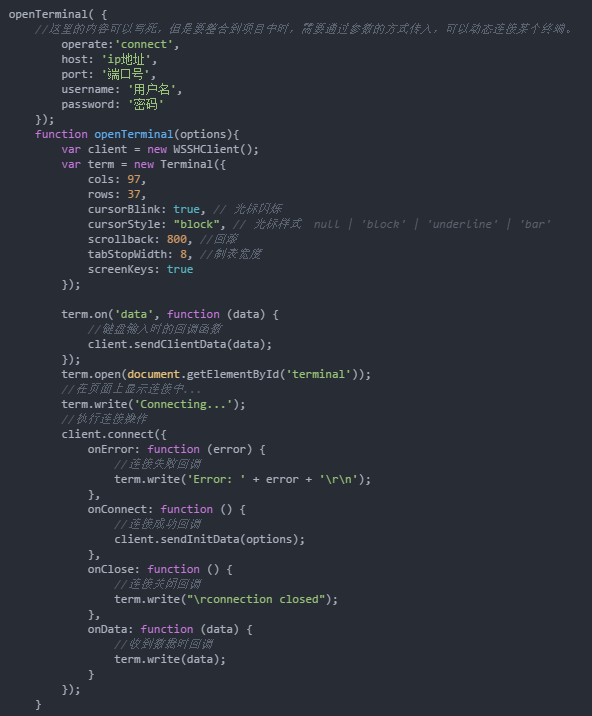
Here is the introduction case on the official website:
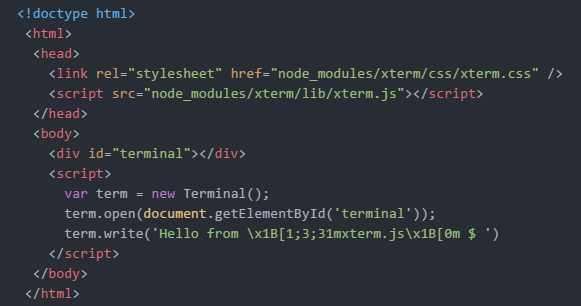
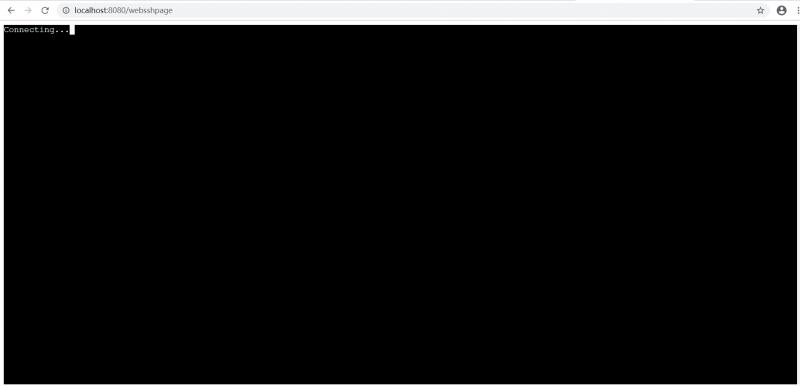
In the final test, the page looks like this:
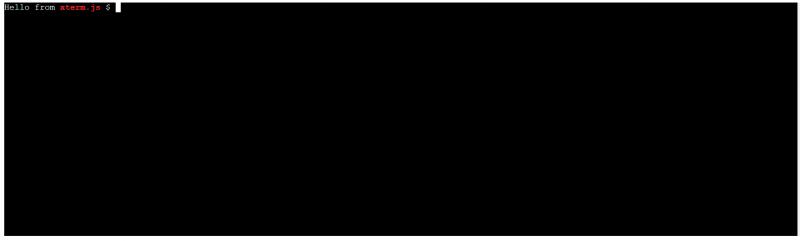
You can see that the page has appeared similar to the shell style, so continue to deepen according to this, and implement a webssh.
Backend implementation
As long as xterm only implements the front-end style, it can't really realize the interaction with the server, and the interaction with the server is mainly controlled by our Java back-end, so we start from the back-end and use jsch+websocket to realize this part.
1.WebSocket configuration
Because WebSocket is needed for real-time message push to the front end, students who don't know about WebSocket can go to learn about it by themselves first. This is just a little more. Let's start to configure WebSocket directly.
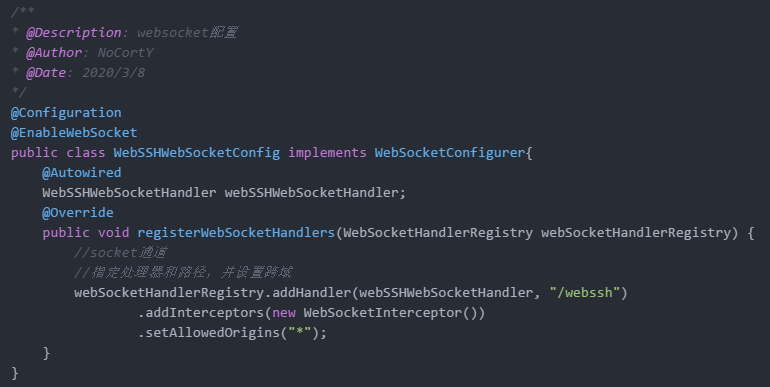
2. Implementation of handler and interceptor
Just now we have finished the configuration of WebSocket and specified a processor and interceptor. So the next step is the implementation of the processor and interceptor.
Interceptor:
public class WebSocketInterceptor implements HandshakeInterceptor {
	/**
 * @Description: Handler Pre processing call
 * [@Param](https://my.oschina.net/u/2303379): [serverHttpRequest, serverHttpResponse, webSocketHandler, map]
 * [@return](https://my.oschina.net/u/556800): boolean
 * [@Author](https://my.oschina.net/arthor): NoCortY
 * [@Date](https://my.oschina.net/u/2504391): 2020/3/1
 */
@Override
public boolean beforeHandshake(ServerHttpRequest serverHttpRequest, ServerHttpResponse serverHttpResponse, WebSocketHandler webSocketHandler, Map<String, Object> map) throws Exception {
    if (serverHttpRequest instanceof ServletServerHttpRequest) {
        ServletServerHttpRequest request = (ServletServerHttpRequest) serverHttpRequest;
        //Generate a UUID. Since it is a separate project and has no user module, you can use a random UUID
        //But if you want to integrate into your own project, you need to change it to your own user identification
        String uuid = UUID.randomUUID().toString().replace("-","");
        //Put uuid in websocketsession
        map.put(ConstantPool.USER_UUID_KEY, uuid);
        return true;
    } else {
        return false;
    }
}

@Override
public void afterHandshake(ServerHttpRequest serverHttpRequest, ServerHttpResponse serverHttpResponse, WebSocketHandler webSocketHandler, Exception e) {

}
}
Processor:
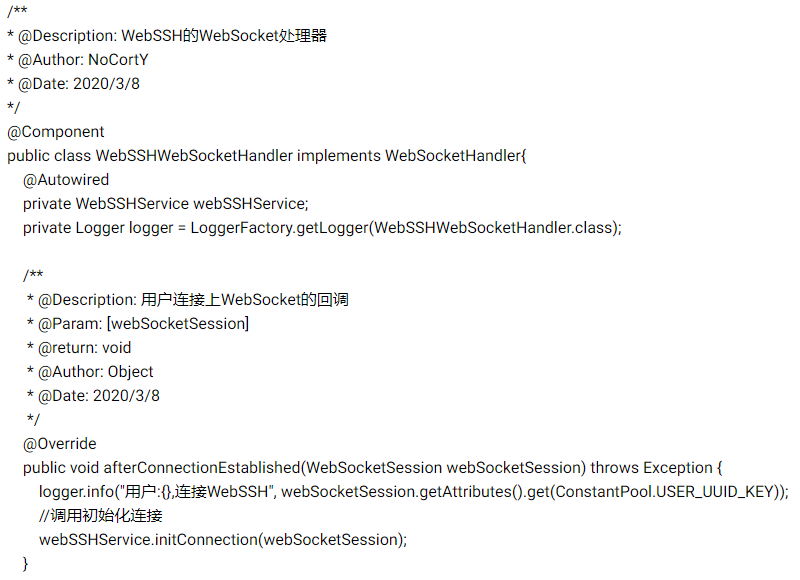
/**
 * @Description: Callback of received message
 * @Param: [webSocketSession, webSocketMessage]
 * @return: void
 * @Author: NoCortY
 * @Date: 2020/3/8
 */
@Override
public void handleMessage(WebSocketSession webSocketSession, WebSocketMessage<?> webSocketMessage) throws Exception {
    if (webSocketMessage instanceof TextMessage) {
        logger.info("user:{},dispatch orders:{}", webSocketSession.getAttributes().get(ConstantPool.USER_UUID_KEY), webSocketMessage.toString());
        //Call service to receive messages
        webSSHService.recvHandle(((TextMessage) webSocketMessage).getPayload(), webSocketSession);
    } else if (webSocketMessage instanceof BinaryMessage) {

    } else if (webSocketMessage instanceof PongMessage) {

    } else {
        System.out.println("Unexpected WebSocket message type: " + webSocketMessage);
    }
}

/**
 * @Description: Wrong callback occurred
 * @Param: [webSocketSession, throwable]
 * @return: void
 * @Author: Object
 * @Date: 2020/3/8
 */
@Override
public void handleTransportError(WebSocketSession webSocketSession, Throwable throwable) throws Exception {
    logger.error("Data transmission error");
}

/**
 * @Description: Connection closed callback
 * @Param: [webSocketSession, closeStatus]
 * @return: void
 * @Author: NoCortY
 * @Date: 2020/3/8
 */
@Override
public void afterConnectionClosed(WebSocketSession webSocketSession, CloseStatus closeStatus) throws Exception {
    logger.info("user:{}To break off webssh Connect", String.valueOf(webSocketSession.getAttributes().get(ConstantPool.USER_UUID_KEY)));
    //Call service to close the connection
    webSSHService.close(webSocketSession);
}

@Override
public boolean supportsPartialMessages() {
    return false;
}
}
It should be noted that the user ID I added to the interceptor is a random UUID. This is because as an independent websocket project, there is no user module. If you need to integrate this project into your own project, you need to modify this part of the code and change it to the user ID used to identify a user in your own project.
Business logic implementation of websssh (core)
Just now, we have realized the configuration of websocket, which is all dead code. The interface can be realized according to our own needs. Now we will implement the main business logic of the back end. Before realizing this logic, let's first think about what effect we want to achieve with websssh.
Here I make a summary:
- First we have to connect to the terminal (initial connection)
- Secondly, our server needs to process messages from the front end (receive and process front-end messages)
- We need to write back the messages returned by the terminal to the front end (data write back to the front end)
- Close connection
According to these four requirements, we first define an interface to make the requirements clear.
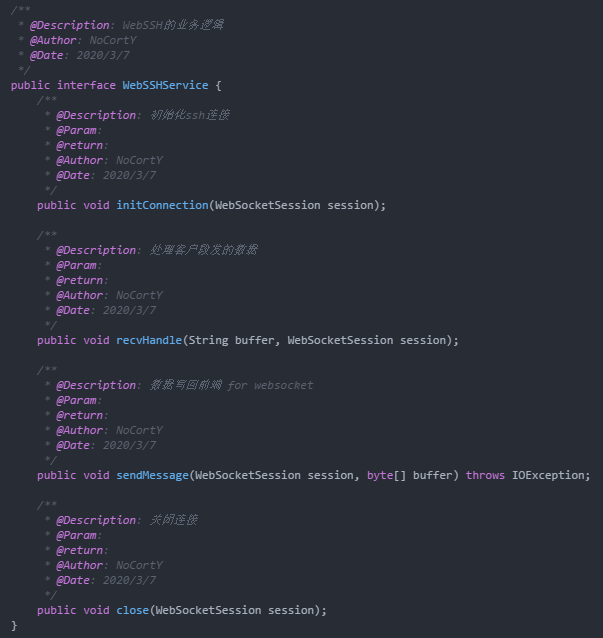
Now we can implement the functions we defined according to this interface.
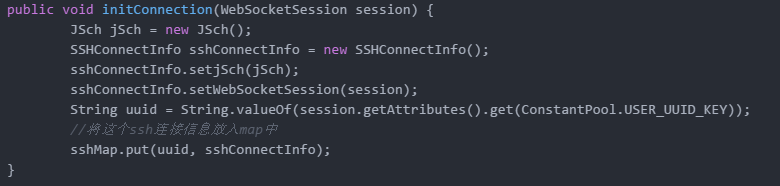
1. Initialize connection
Because our underlying layer relies on jsch implementation, we need to use jsch to establish the connection here. The so-called initial connection is actually to save the connection information we need in a Map, and there is no real connection operation here. Why not connect directly here? Because the front-end is only connected to WebSocket, but we need to send us the user name and password of linux terminal from the front-end. Without this information, we can't connect.
2. Processing the data sent by the client
In this step, we will be divided into two branches.
The first branch: if the client sends the user name, password and other information of the terminal, then we connect the terminal.
The second branch: if the client sends the command of the operating terminal, we will directly forward it to the terminal and obtain the execution result of the terminal.
Specific code implementation:

Data is sent to the front end through websocket

Close connection
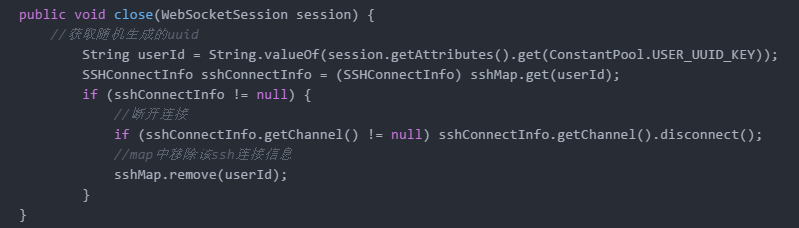
At this point, our whole back-end implementation is over. Due to the limited space, some operations are encapsulated as methods here, so we won't show them too much. Let's focus on the idea of logical implementation. Next we will implement the front end.
Front end implementation
The front-end work is mainly divided into the following steps:
- Implementation of page
- Connect WebSocket, receive and write back data
- Sending of data
- So let's do it step by step.
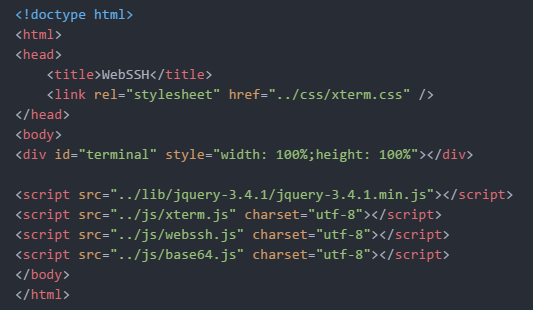
Page implementation
The implementation of the page is very simple. We just need to display the large black screen of the terminal on the whole screen, so we don't need to write any style, just create a div, and then put the terminal instance into the div through xterm.
Connect WebSocket and complete data sending, receiving and updating
Effect display
Connect
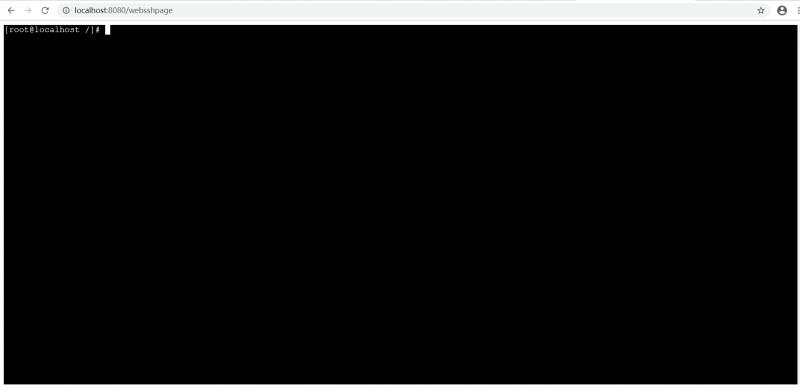
Successful connection
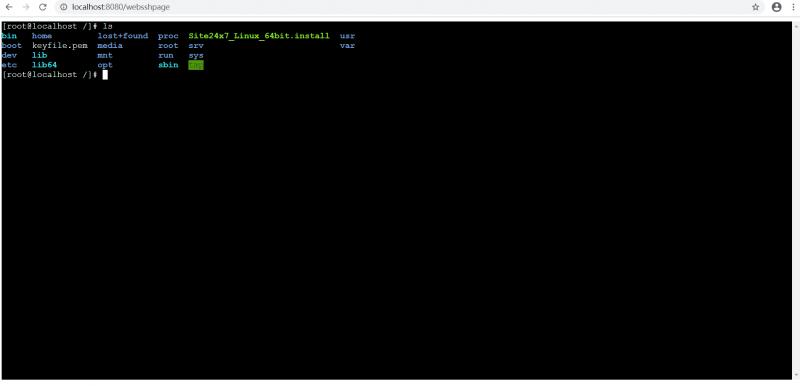
Command operation
ls command:
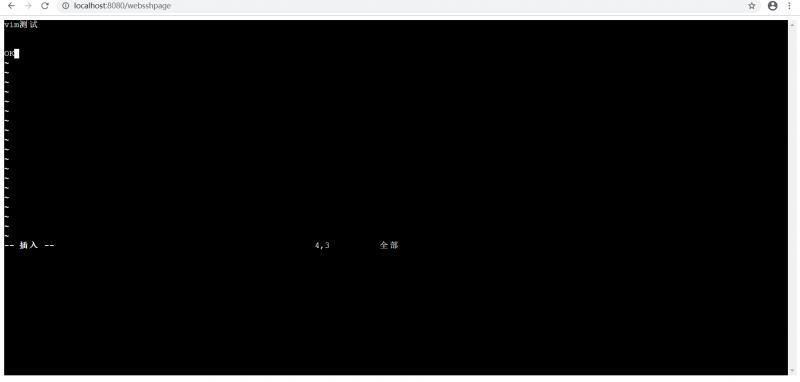
vim editor:
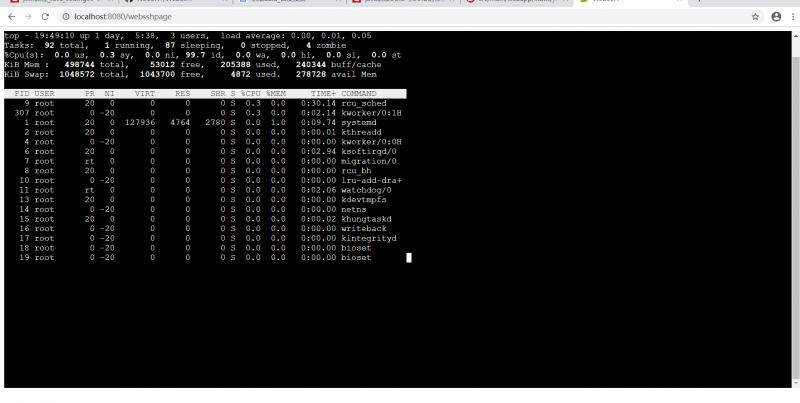
top command:
epilogue
In this way, we have completed the implementation of a webssh project without relying on any other components. The back-end is completely implemented in Java. Because of the use of spring boot, it is very easy to deploy.
However, we can also extend this project, such as adding upload or download files, just like Xftp, which can easily drag and drop upload and download files.
After this project, I will continue to update, and the above functions will be implemented slowly. Github: https://github.com/NoCortY/WebSSH
Original link: http://blog.objectspace.cn/2020/03/10/ implement a websssh project with pure Java/