Exploratory Brand Turnover

Modeled after
Need foundation
- Basic use of RecyclerView
Look at the gods of hong: Android RecyclerView uses fully analytical experiential art-like controls - Customize Layout Manager
You can see: Create your Layout Manager - Use of ItemTouchHelper and Implementation of Callback
You can see: ItemTouchHelper helps achieve drag-and-drop effects
The above is the basis for realizing the function of brand reversal through this article. It is also relatively simple. I believe that readers can learn the basic usage through the above three articles.
Purpose of this paper
- Review the basic usage of Recycler View.
- Consolidate LayoutManager customization in RecyclerView.
- Consolidate the use of ItemToucher in RecyclerView and the customization of ItemTouchCallBack.
Source address
Overall thinking
There are only a certain number of cards on the screen at any time (exploring 4 cards, including 4 cards in this article), destroying one after sliding, and creating one at the bottom. With this feature, we can use Recycler View's recycling and reuse mechanism to achieve this function. Then we need to customize Layout Manager to realize the layouts of cards. Finally, we use ItemTouchHelper and other callbacks to realize the removal of sliding cards and animation of sliding cards.
Concrete realization
Add dependency
Adding dependencies {} in app build.gradle
implementation 'com.android.support:recyclerview-v7:26.1.0'
implementation 'com.android.support:cardview-v7:26.1.0'
implementation 'com.github.bumptech.glide:glide:4.3.1'
annotationProcessor 'com.github.bumptech.glide:compiler:4.3.1'
I've upgraded to AS3.0 and can rely on implementations. It's said to be a little faster. If it's not 3.0, change implementations to compile s.
- recyclerview-v7 must be necessary
- glide is used to display pictures
- cardview is a card layout
Entity class User
Each Item needs to display data. For convenience, the image is directly local, so the resource ID of the image is recorded directly in the entity class.
public class User {

    private int photoResId;    //Resource ID of the picture
    private String name;        //Name
    private String sign;        //Personalized signature


    public User(int photoResId, String name, String sign) {
        this.photoResId = photoResId;
        this.name = name;
        this.sign = sign;
    }

    //Omit get,set
}
CardConfig Card Basic Parameter Configuration
/**
 * Initialize some configuration information, fixed data
 */
public class CardConfig {
    //Up to several Item s are displayed simultaneously on the screen
    public static int MAX_SHOW_COUNT;

    //Scale of each level is 0.05f, translation Y is 15 DP and translation Z is 0.5 dp.
    public static float SCALE_GAP;
    public static int TRANS_Y_GAP;
    public static int TRANS_Z_GAP;

    public static void initConfig(Context context) {
        MAX_SHOW_COUNT = 4;
        SCALE_GAP = 0.05f;
        //Here's how to convert dp to px
        TRANS_Y_GAP = (int) TypedValue.applyDimension(TypedValue.COMPLEX_UNIT_DIP, 15f, context.getResources().getDisplayMetrics());
        TRANS_Z_GAP = (int) TypedValue.applyDimension(TypedValue.COMPLEX_UNIT_DIP, 0.5f, context.getResources().getDisplayMetrics());
    }
}
Sketch Map

TRANS_Z_GAP is not marked because it is not easy to draw. The Z direction is perpendicular to the screen. Different Z of each card will have a sense of hierarchy. The bottom Z coordinate is the smallest and the top Z coordinate is the largest.
Basic layout
Layout of MainActivity
activity_main.xml
<?xml version="1.0" encoding="utf-8"?>
<RelativeLayout xmlns:android="http://schemas.android.com/apk/res/android"
    xmlns:app="http://schemas.android.com/apk/res-auto"
    xmlns:tools="http://schemas.android.com/tools"
    android:layout_width="match_parent"
    android:layout_height="match_parent"
    android:orientation="vertical"
    tools:context="com.fu.tantancard.MainActivity">

    <TextView
        android:id="@+id/tv_love_count"
        android:layout_width="wrap_content"
        android:layout_height="wrap_content"
        android:layout_alignParentBottom="true"
        android:layout_marginBottom="80dp"
        android:layout_marginLeft="60dp"
        android:text="like:0"
        android:textColor="@android:color/black"
        android:textSize="20sp" />

    <TextView
        android:id="@+id/tv_del_count"
        android:layout_width="wrap_content"
        android:layout_height="wrap_content"
        android:layout_alignParentBottom="true"
        android:layout_alignParentRight="true"
        android:layout_marginBottom="80dp"
        android:layout_marginRight="60dp"
        android:text="delete:0"
        android:textColor="@android:color/black"
        android:textSize="20sp" />

    <android.support.v7.widget.RecyclerView
        android:id="@+id/recycler_view"
        android:layout_width="match_parent"
        android:layout_height="match_parent">

    </android.support.v7.widget.RecyclerView>


</RelativeLayout>
Item card layout, where the outermost layout is CardView, because you can directly set the rounded corners, good-looking point.
item_card.xml
<?xml version="1.0" encoding="utf-8"?>
<android.support.v7.widget.CardView xmlns:android="http://schemas.android.com/apk/res/android"
    xmlns:app="http://schemas.android.com/apk/res-auto"
    android:layout_width="match_parent"
    android:layout_height="380dp"
    android:layout_marginLeft="5dp"
    android:layout_marginRight="5dp"
    android:layout_marginTop="10dp"
    app:cardCornerRadius="5dp">

    <RelativeLayout
        android:layout_width="match_parent"
        android:layout_height="wrap_content">

        <ImageView
            android:id="@+id/iv_photo"
            android:layout_width="match_parent"
            android:layout_height="300dp"
            android:background="#4cc6ff" />

        <ImageView
            android:id="@+id/iv_love"
            android:layout_width="70dp"
            android:layout_height="70dp"
            android:alpha="0"
            android:src="@mipmap/icon_love" />

        <ImageView
            android:id="@+id/iv_del"
            android:layout_width="70dp"
            android:layout_height="70dp"
            android:layout_alignParentRight="true"
            android:layout_marginRight="10dp"
            android:alpha="0"
            android:src="@mipmap/icon_del" />

        <TextView
            android:id="@+id/tv_name"
            android:layout_width="wrap_content"
            android:layout_height="wrap_content"
            android:layout_below="@id/iv_photo"
            android:layout_marginLeft="10dp"
            android:layout_marginTop="10dp"
            android:text="Rachel"
            android:textColor="#000000"
            android:textSize="18sp"
            android:textStyle="bold" />

        <TextView
            android:id="@+id/tv_sign"
            android:layout_width="wrap_content"
            android:layout_height="wrap_content"
            android:layout_below="@id/tv_name"
            android:layout_marginLeft="10dp"
            android:layout_marginTop="10dp"
            android:text="Other"
            android:textSize="10sp" />

    </RelativeLayout>

</android.support.v7.widget.CardView>
Basic operation of RecyclerView
Initializing UI and data in onCreate of MainActivity, and configuring RecyclerView, SwipeCard Layout Manager () is our custom Layout Manger, which is the key point. I'll talk about it later, first write it.
        initUI();
        mData = initData();
        //Basic configuration parameters for initialization cards
        CardConfig.initConfig(this);
        mRecyclerView.setLayoutManager(new SwipeCardLayoutManager());
        mAdapter = new CardAdapter();
        mRecyclerView.setAdapter(mAdapter);
Initialize UI and data
private void initUI() {
loveCount = 0;
delCount = 0;
tv_love_count = findViewById(R.id.tv_love_count);
tv_love_count.setText("like:" + loveCount);
tv_del_count = findViewById(R.id.tv_del_count);
tv_del_count.setText("delete:" + delCount);
this.mRecyclerView = findViewById(R.id.recycler_view);
}
private List<User> initData() {
List<User> datas = new ArrayList<>();
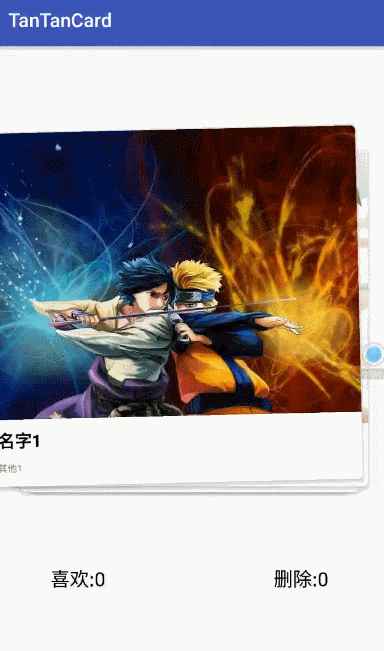
datas.add(new User(R.mipmap.pic1, "Name 1", "Other 1"));
datas.add(new User(R.mipmap.pic2, "Name 2", "Other 2"));
datas.add(new User(R.mipmap.pic3, "Name 3", "Other 3"));
datas.add(new User(R.mipmap.pic4, "Name 4", "Other 4"));
datas.add(new User(R.mipmap.pic5, "Name 5", "Other 5"));
datas.add(new User(R.mipmap.pic6, "Name 6", "Other 6"));
datas.add(new User(R.mipmap.pic7, "Name 7", "Other 7"));
datas.add(new User(R.mipmap.pic8, "Name 8", "Other 8"));
return datas;
}For the convenience of Adapter, it's written directly in MainActivity
    class CardAdapter extends RecyclerView.Adapter<CardAdapter.CardViewHolder> {

        @Override
        public CardViewHolder onCreateViewHolder(ViewGroup parent, int viewType) {
            View view = LayoutInflater.from(MainActivity.this).inflate(R.layout.item_card, parent, false);
            CardViewHolder holder = new CardViewHolder(view);
            return holder;
        }

        @Override
        public void onBindViewHolder(CardViewHolder holder, int position) {
            holder.tv_name.setText(mData.get(position).getName());
            holder.tv_sign.setText(mData.get(position).getSign());
            //Use Glide to load images
            Glide.with(getApplicationContext())
                    .load(mData.get(position).getPhotoResId())
                    .apply(new RequestOptions().transform(new CenterCrop()))
                    .into(holder.iv_photo);
        }

        @Override
        public int getItemCount() {
            return mData.size();
        }

        //Called when sliding right
        public void addLoveCount() {
            loveCount++;
            tv_love_count.setText("like:" + loveCount);
        }

        //Called when left sliding
        public void addDelCount(){
            delCount++;
            tv_del_count.setText("delete:" + delCount);
        }

        class CardViewHolder extends RecyclerView.ViewHolder {

            ImageView iv_photo;
            TextView tv_name;
            TextView tv_sign;
            ImageView iv_love;
            ImageView iv_del;

            public CardViewHolder(View itemView) {
                super(itemView);
                iv_photo = itemView.findViewById(R.id.iv_photo);
                tv_name = itemView.findViewById(R.id.tv_name);
                tv_sign = itemView.findViewById(R.id.tv_sign);
                iv_love = itemView.findViewById(R.id.iv_love);
                iv_del = itemView.findViewById(R.id.iv_del);
            }
        }
    }
Customizing Layout Manager to Realize Card Layout Layout
Create a new class SwipeCardLayoutManager and inherit RecyclerView.LayoutManager, then rewrite two methods:
- generateDefaultLayoutParams()
- onLayoutChildren()
Rewriting generateDefaultLayoutParams() generally requires the following.
    @Override
    public RecyclerView.LayoutParams generateDefaultLayoutParams() {
        return new RecyclerView.LayoutParams(ViewGroup.LayoutParams.WRAP_CONTENT, ViewGroup.LayoutParams.WRAP_CONTENT);
    }
The emphasis is on onLayoutChildren(), and the annotations are more detailed. The general idea here is that only Layout produces a certain number of cards (here are four), and then Layout needs to start at the bottom, because later drawing will cover the first drawing, there is a small trap, if the Z coordinates drawn later are smaller than the Z coordinates drawn first, then the first drawing will cover the visual drawing later, but in the touch events that need to be added later. When the post-drawing receives the event, the sliding card will be drawn below, not at the top. So here, draw from bottom to top, and the Z coordinates drawn later are larger than the Z coordinates drawn first.
Through recycler.getViewForPosition(position), you can get View from the buffer pool according to position, draw in the order of position = 3, 2, 1, 0, then slide a card from the upper layer, remove postion=0 from the array, then call adapter. notifySetChanged (), the corresponding onLayoutChildren() will also be called, and then redraw, and follow the data knot. The queue in the structure is the same, first in first out, but also need to pay attention to boundary issues, such as only two cards left, so we need to calculate the subscript position.
The latter is to adjust the size of the card according to the level, as well as the value of Y and Z coordinates, with the annotation code, it is easy to understand.
/**
     * Here we lay out the child view, that is, item.
     *
     * @param recycler
     * @param state
     */
    @Override
    public void onLayoutChildren(RecyclerView.Recycler recycler, RecyclerView.State state) {
        //Before layout, Detch all the sub-View s and put them in the Scrap cache
        detachAndScrapAttachedViews(recycler);

        //Get the total item number
        int itemCount = getItemCount();
        if (itemCount < 1) {//Without item, of course, there's no need for layout.
            return;
        }
        int bottomPosition;  //postion used to record the lowest view

        if (itemCount < CardConfig.MAX_SHOW_COUNT) {  //If the maximum quantity is not enough (4)
            //At the bottom, then, is the position corresponding to the last piece of data.
            bottomPosition = itemCount - 1;
        } else {
            //Otherwise, the bottom level is the position corresponding to the data in Article MAX_SHOW_COUNT(4)
            bottomPosition = CardConfig.MAX_SHOW_COUNT - 1;
        }

        /**
         * Here we start the layout and draw the sub-view
         * Note: Here we need to start drawing from the bottom, because only after drawing can we override the first drawing.
         *     When you slide, you slide the top layer, that is, you draw it later.
         * position It is also the number of layers.
         */
        for (int position = bottomPosition; position >= 0; position--) {
            //Find recycler according to position and ask itemview
            View view = recycler.getViewForPosition(position);
            //Add child View to RecyclerView
            addView(view);
            //Measure the child view and use Margin as part of the child control
            measureChildWithMargins(view, 0, 0);
            //The width gap getWidth() gets the width of the Recycler control, and getDecoratedMeasuredWidth(view) gets the width of the child view.
            int widthSpace = getWidth() - getDecoratedMeasuredWidth(view);
            //High void
            int heightSpace = getHeight() - getDecoratedMeasuredHeight(view);
            //Give the child view layout, this is in the middle.
            layoutDecoratedWithMargins(view, widthSpace / 2, 200,
                    widthSpace / 2 + getDecoratedMeasuredWidth(view),
                    getDecoratedMeasuredHeight(view) + 200);

            /**
             * Next, adjust the size of each itemview layer and the offset of the Y and Z axes.
             * The Scale of the top layer (Layer 0) is 1 and translation Y is 0.
             * In turn, each layer is lower than the upper one:
             * (1)Scale Difference 0.05f
             * (2)translationY Difference 7dp
             * (3)translationZ Difference 1dp
             *
             * Note: The last level, except for the horizontal direction, is the same as the previous level, so make a special judgement.
             */
            if (position > 0) {  //Is greater than 0 the top layer?
                //Down in turn, each floor should be reduced horizontally.
                view.setScaleX(1 - CardConfig.SCALE_GAP * position);
                if (position < CardConfig.MAX_SHOW_COUNT - 1) {
                    //If it's not the last level, it needs to be adjusted.
                    view.setScaleY(1 - CardConfig.SCALE_GAP * position); //Vertical Direction Reduction
                    view.setTranslationY(CardConfig.TRANS_Y_GAP * position); //Downward translation
                    view.setTranslationZ(CardConfig.TRANS_Z_GAP * (CardConfig.MAX_SHOW_COUNT - 1 - position));  //Z-axis translation
                } else {
                    //Otherwise, it's the last layer, consistent with the previous one.
                    view.setScaleY(1 - CardConfig.SCALE_GAP * (position - 1)); //Vertical Direction Reduction
                    view.setTranslationY(CardConfig.TRANS_Y_GAP * (position - 1)); //Downward translation
                    view.setTranslationZ(CardConfig.TRANS_Z_GAP * (CardConfig.MAX_SHOW_COUNT - 1 - (position - 1)));  //Z-axis translation
                }
            } else {
                //Otherwise, it's layer 0 (the top layer), just adjust the height of Z axis.
                view.setTranslationZ(CardConfig.TRANS_Z_GAP * (CardConfig.MAX_SHOW_COUNT - 1));  //Z-axis translation
            }
        }


    }
Design sketch 
Of course, we can't slide now. If we need to slide, we need ItemTouch Helper.
Customize ItemTouchHelper.Callback
Create a new class CardItemTouchCallBack and inherit ItemTouchHelper.Callback. Then you need to rewrite a lot of methods. The code is a little bit too much, but don't be afraid. With annotations, step by step, sliding events and animation of cards will be completed in this class.
public class CardItemTouchCallBack extends ItemTouchHelper.Callback {

    private static final String TAG = "CardItemTouchCallBack";

    private RecyclerView mRecyclerView;
    private MainActivity.CardAdapter mAdapter;
    private List mDatas;

    public CardItemTouchCallBack(RecyclerView recyclerView, MainActivity.CardAdapter adapter, List datas) {
        this.mRecyclerView = recyclerView;
        this.mAdapter = adapter;
        this.mDatas = datas;
    }

    /**
     * Whether to turn on drag-and-drop
     * true,open
     * false,Push back without opening up
     *
     * @return
     */
    @Override
    public boolean isLongPressDragEnabled() {
        return false;
    }

    /**
     * Whether to open sliding
     * true,open
     * false,Push back without opening up
     *
     * @return
     */
    @Override
    public boolean isItemViewSwipeEnabled() {
        return true;
    }

    /**
     * ItemTouchHelper Support for setting event direction, and you must override the current getMovementFlags to specify the supported direction
     * dragFlags  Represents the direction of drag, with six types of values: LEFT, RIGHT, START, END, UP, DOWN
     * swipeFlags Represents the direction of sliding, with six types of values: LEFT, RIGHT, START, END, UP, DOWN
     * Finally, create a Flag of direction through makeMovementFlags (dragFlag, swipe)
     */
    @Override
    public int getMovementFlags(RecyclerView recyclerView, RecyclerView.ViewHolder viewHolder) {
        /**
         * Since we don't need to drag and press for a long time, we can just pass in 0 directly, and pass in 0 means no listening.
         */
        int swipeFlags = ItemTouchHelper.LEFT | ItemTouchHelper.RIGHT | ItemTouchHelper.UP | ItemTouchHelper.DOWN;
        return makeMovementFlags(0, swipeFlags);
    }

    /**
     * Long press item to drag, and then drag to other items to trigger onMove
     * We don't need it here.
     *
     * @param recyclerView
     * @param viewHolder   Drag viewholder
     * @param target       viewholder for target location
     * @return
     */
    @Override
    public boolean onMove(RecyclerView recyclerView, RecyclerView.ViewHolder viewHolder, RecyclerView.ViewHolder target) {
        return false;
    }

    /**
     * Call when you slide item out of the screen
     *
     * @param viewHolder Sliding viewholder
     * @param direction  Sliding direction
     */
    @Override
    public void onSwiped(RecyclerView.ViewHolder viewHolder, int direction) {
        //To determine the direction of the drawing, 4 is on the left and 8 is on the right, and then you can do some data manipulation.
        switch (direction) {
            case 4:
                Log.d(TAG, "onSwiped: Slide out on the left");
                mAdapter.addDelCount();
                break;
            case 8:
                Log.d(TAG, "onSwiped: Slide out on the right.");
                mAdapter.addLoveCount();
                break;
        }
        //Remove this data
        Object remove = mDatas.remove(viewHolder.getLayoutPosition());

        /** This location can be used to load data, which can be added to mDatas later when sliding to the remaining four or more.*/
        //Here, for convenience, the elements removed are added to the end of the loop.
        mDatas.add(mDatas.size(), remove);

        //Refresh
        mAdapter.notifyDataSetChanged();
        //reset
        viewHolder.itemView.setRotation(0);
        if (viewHolder instanceof MainActivity.CardAdapter.CardViewHolder) {
            MainActivity.CardAdapter.CardViewHolder holder = (MainActivity.CardAdapter.CardViewHolder) viewHolder;
            holder.iv_love.setAlpha(0f);
            holder.iv_del.setAlpha(0f);
        }
    }

    /**
     * As long as you drag and slide an item, this method will be triggered, and it will always be triggered in the course of the action.
     * So the animation effect is achieved in this way.
     *
     * @param c
     * @param recyclerView
     * @param viewHolder
     * @param dX
     * @param dY
     * @param actionState
     * @param isCurrentlyActive
     */
    @Override
    public void onChildDraw(Canvas c, RecyclerView recyclerView, RecyclerView.ViewHolder viewHolder,
                            float dX, float dY, int actionState, boolean isCurrentlyActive) {
        super.onChildDraw(c, recyclerView, viewHolder, dX, dY, actionState, isCurrentlyActive);
        double swipeValue = Math.sqrt(dX * dX + dY * dY);   //Sliding distance from center
        double fraction = swipeValue / (mRecyclerView.getWidth() * 0.5f);
        //The maximum boundary correction is 1
        if (fraction > 1) {
            fraction = 1;
        }

        /**
         * Adjust the scaling, displacement, etc. of each subview
         */
        int childCount = recyclerView.getChildCount();  //Number of child view s
        isUpOrDown(mRecyclerView.getChildAt(childCount - 1));
        for (int i = 0; i < childCount; i++) {
            /** Take the child view and notice that i=0 is drawn first, so i=0 is the lowest view and i=3 is the top view.*/
            View childView = recyclerView.getChildAt(i);
            int level = childCount - i - 1;  //Conversely, level represents the number of layers, top of which is layer 0.
            if (level > 0) {
                //In the lower layer, the horizontal direction of each layer increases.
                childView.setScaleX((float) (1 - CardConfig.SCALE_GAP * level + fraction * CardConfig.SCALE_GAP));
                if (level < CardConfig.MAX_SHOW_COUNT - 1) {
                    //The 12 level
                    childView.setScaleY((float) (1 - CardConfig.SCALE_GAP * level + fraction * CardConfig.SCALE_GAP));
                    childView.setTranslationY((float) (CardConfig.TRANS_Y_GAP * level - fraction * CardConfig.TRANS_Y_GAP));
                    childView.setTranslationZ((float) (CardConfig.TRANS_Z_GAP * (CardConfig.MAX_SHOW_COUNT - 1 - level)
                            + fraction * CardConfig.TRANS_Z_GAP));
                } else {
                    //The bottom layer, the third layer, does not change, so there is no need to write here.
                }
            } else {
                //The zeroth level
                //Get the offset ratio in the horizontal direction
                float xFraction = dX / (mRecyclerView.getWidth() * 0.5f);
                //Boundary correction, positive and negative, because rotation has two directions
                if (xFraction > 1) {
                    xFraction = 1;
                } else if (xFraction < -1) {
                    xFraction = -1;
                }
                //The first layer rotates slightly as it slides left and right.
                childView.setRotation(xFraction * 15);  //The maximum rotation here is 15 degrees.

                if (viewHolder instanceof MainActivity.CardAdapter.CardViewHolder) {
                    MainActivity.CardAdapter.CardViewHolder holder = (MainActivity.CardAdapter.CardViewHolder) viewHolder;
                    if (dX > 0) {
                        //Slide right, show love
                        holder.iv_love.setAlpha(xFraction);
                    } else if (dX < 0) {
                        //Slide left and show the fork. Note that xFraction is negative here, so take the opposite.
                        holder.iv_del.setAlpha(-xFraction);
                    } else {
                        holder.iv_love.setAlpha(0f);
                        holder.iv_del.setAlpha(0f);
                    }
                }
            }
        }
    }

    @Override
    public float getSwipeThreshold(RecyclerView.ViewHolder viewHolder) {
        Log.i(TAG, "getSwipeThreshold: ");
        if (isUpOrDown(viewHolder.itemView)) { //If it's sliding up or down
            return Float.MAX_VALUE; //The return threshold is very high.
        }
        return super.getSwipeThreshold(viewHolder);
    }

    /**
     * Get swipe speed
     *
     * @param defaultValue
     * @return
     */
    @Override
    public float getSwipeEscapeVelocity(float defaultValue) {
        Log.d(TAG, "getSwipeEscapeVelocity: " + defaultValue);
        View topView = mRecyclerView.getChildAt(mRecyclerView.getChildCount() - 1);
        if (isUpOrDown(topView)) { //If it's sliding up or down
            return Float.MAX_VALUE; //The return threshold is very high.
        }
        return super.getSwipeEscapeVelocity(defaultValue);
    }

    /**
     * Getting the speed threshold of swipe
     *
     * @param defaultValue
     * @return
     */
    @Override
    public float getSwipeVelocityThreshold(float defaultValue) {
        Log.d(TAG, "getSwipeVelocityThreshold: " + defaultValue);
        View topView = mRecyclerView.getChildAt(mRecyclerView.getChildCount() - 1);
        if (isUpOrDown(topView)) { //If it's sliding up or down
            return Float.MAX_VALUE; //The return threshold is very high.
        }
        return super.getSwipeVelocityThreshold(defaultValue);
    }

    /**
     * Judge whether it's going up or down?
     */
    private boolean isUpOrDown(View topView) {
        float x = topView.getX();
        float y = topView.getY();
        int left = topView.getLeft();
        int top = topView.getTop();
        if (Math.pow(x - left, 2) > Math.pow(y - top, 2)) {
            //Horizontal direction greater than vertical direction
//            Log.i (TAG,'isUpOrDown: No');
            return false;
        } else {
            return true;
//            Log.i (TAG,'isUpOrDown: Yes');
        }
    }
}
Because we delete cards and data when we slide, we need to pass in data data and adapter, because the data change calls adapter. notify DataSetChanged () to update the interface.
Then talk about the difference between sliding Swipe and dragging Drag
Swipe is sliding, triggered without a long press, and can slide the child view out of the screen. After sliding out, the onSwipe method will be called.
Drag is a drag, which needs a long press to trigger. It can't move the child view out of the screen. Generally, it is used in the case of exchanging the position of the child view. After exchanging the position, onMove method is called.
So, according to our needs, we here isLongPress DragEnabled () returns false and closes drag and drop, isItemViewSwipeEnabled returns true and opens sliding.
getMovementFlags(): This method is used to set the direction of drag and drag, because we only need to slide, so we only set the direction of sliding, so that it can be left and right, without dragging, just pass in 0.
In the onSwiped callback method, there is a parameter direction, through which we can determine which direction the card slides out of the screen.
In the onChildDraw method, the animation of cards and the transparency changes of the icons in the upper left and right corners of cards are realized. It is easy to think that when we slide the top card, we need to produce a coefficient for other cards to use when they change, which forms a linear relationship. This proportional coefficient is obtained by dividing the displacement distance of the center point of the card by half the width of the Recycler View, which maximizes the animation effect of other cards when we draw half of the card onto the screen.
With the scale coefficient, we can change each card accordingly according to the number of layers it is in. We can see the code concretely with the annotations.
Then getSwipe Threshold, getSwipe Escape Velocity, getSwipe Velocity Threshold, these three functions are used to return the threshold of the corresponding parameters, to control some triggering conditions, add judgment in each function, if it slides up or down, it returns a large amount, and then it can not trigger onSwipe.
Network request loading data should be placed in onSwipe. When judging how many pieces of data there are, asynchronous request data, and then must be placed at the end of mDatas, because only the top four are displayed, so it can be like probing, forming a never-ending effect.
summary
When we deal with functions like Recycler View that need to be recycled and reused, we usually consider Recycler View first. It is not only very useful, but also has other powerful functions, such as custom layout manager, item touch monitor, etc. Also remember that in Layout Manager, only Layout gives us the number of Views we need, not all Layouts.