1. Enter Swiper's official website

2. Click to get Swiper and download Swiper

3. Unzip after downloading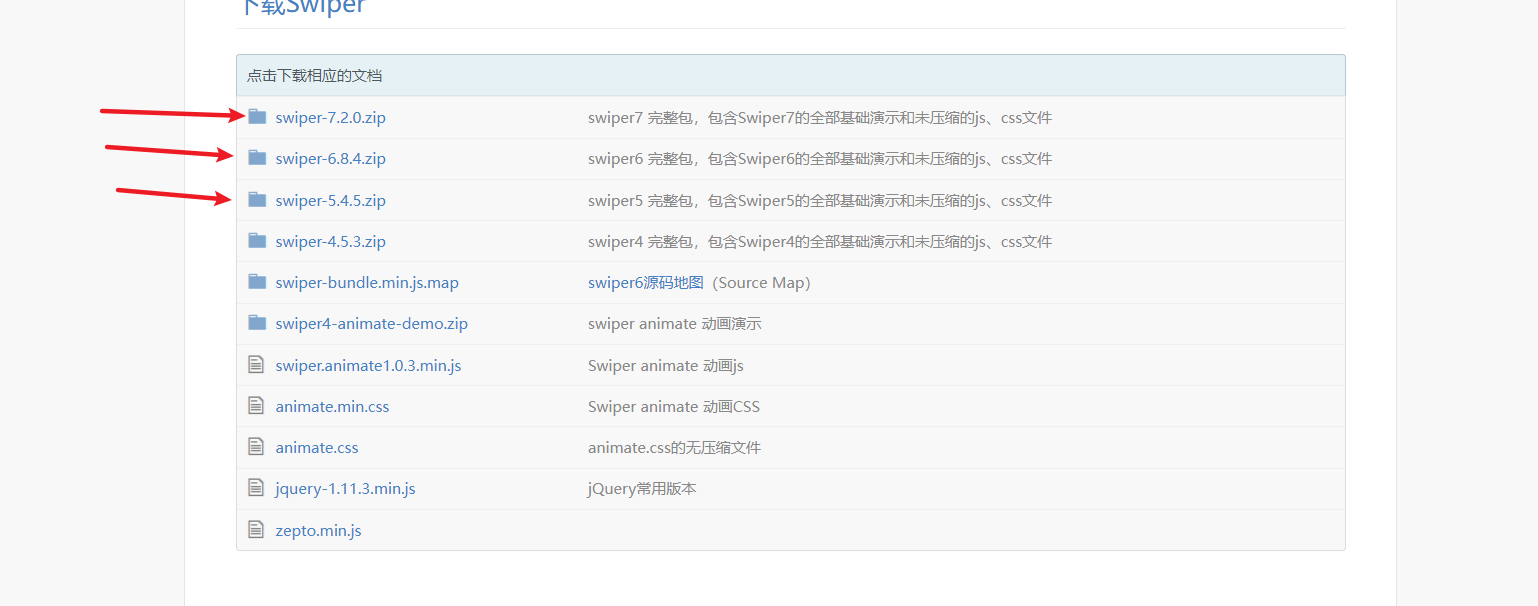
These three are different version numbers. You can download any one (the latest version shall prevail when the website is updated soon)
4. Find wiper-bundle.min.js and wiper-bundle.min.css
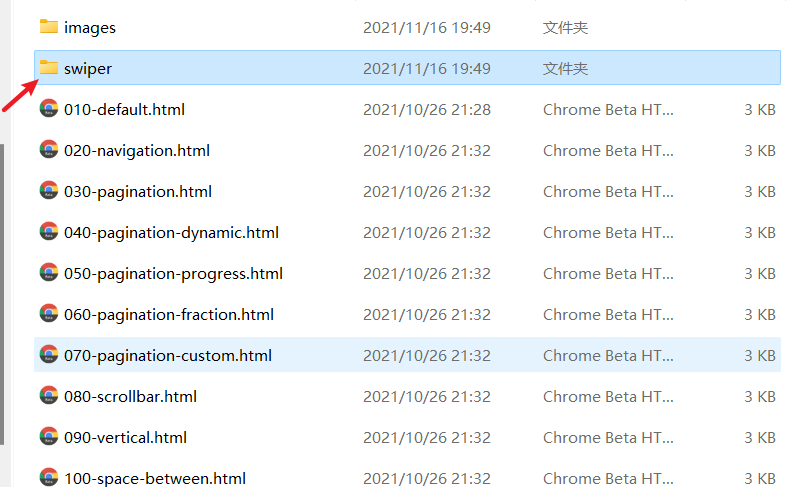
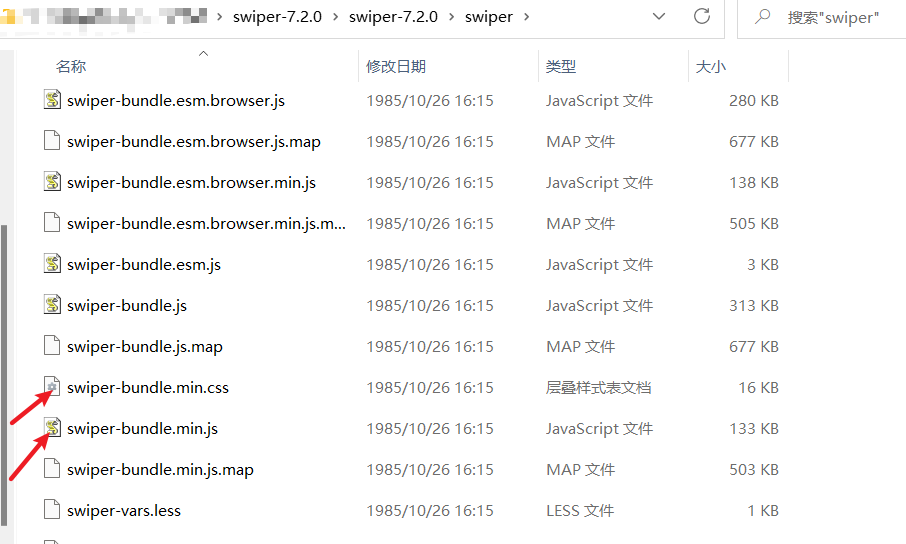
5. In the code that I need to use the carousel chart, I introduce swiper-bundle.min.js and swiper-bundle.min.css
<!DOCTYPE html>
<html lang="en">
<head>
    <meta charset="UTF-8">
    <meta http-equiv="X-UA-Compatible" content="IE=edge">
    <meta name="viewport" content="width=device-width, initial-scale=1.0">
    <title>Rotation chart</title>
    <link rel="stylesheet" href="../css/swiper-bundle.min.css">
    <script src="../js/swiper-bundle.min.js"></script>
</head>
<body>

</body>
</html>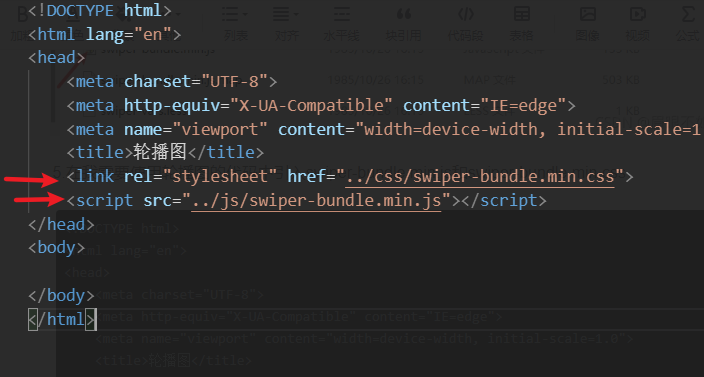
6. Go back to Swiper and click the use tutorial of Chinese tutorial

Copy the HTML content in step 2 and the initialization Swipe content into our code
<!DOCTYPE html>
<html lang="en">

<head>
    <meta charset="UTF-8">
    <meta http-equiv="X-UA-Compatible" content="IE=edge">
    <meta name="viewport" content="width=device-width, initial-scale=1.0">
    <title>Rotation chart</title>
    <link rel="stylesheet" href="../css/swiper-bundle.min.css">
    <script src="../js/swiper-bundle.min.js"></script>
</head>
<style>
    img {
        width: 100%;

    }
</style>

<body>
    <div class="swiper-container">
        <div class="swiper-wrapper">
            <div class="swiper-slide"><img src="../img/1.jpg" alt=""></div>
            <div class="swiper-slide"><img src="../img/2.jpg" alt=""></div>
            <div class="swiper-slide"><img src="../img/3.jpg" alt=""></div>
        </div>
        <!-- If pager is required -->
        <div class="swiper-pagination"></div>

        <!-- If you need navigation buttons -->
        <div class="swiper-button-prev"></div>
        <div class="swiper-button-next"></div>

        <!-- Scroll bar if required -->
        <div class="swiper-scrollbar"></div>
    </div>
</body>
<script>
    var mySwiper = new Swiper('.swiper-container', {
        direction: 'horizontal', // Horizontal switching options
        loop: true, // Loop mode options

        // If pager is required
        pagination: {
            el: '.swiper-pagination',
            clickable :true,
        },

        // If necessary, press the forward and backward buttons
        navigation: {
            nextEl: '.swiper-button-next',
            prevEl: '.swiper-button-prev',
        },

        // Scroll bar if required
        scrollbar: {
            el: '.swiper-scrollbar',
        },
        //Auto play
        autoplay: {
            delay: 3000,
            stopOnLastSlide: false,
            disableOnInteraction: true,
        },
    })
</script>

</html>
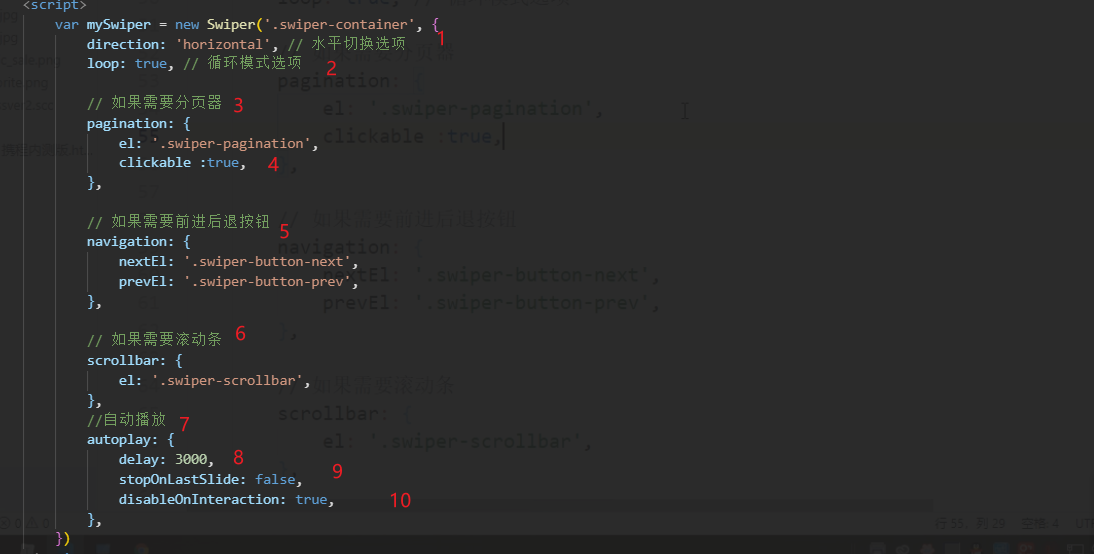
1.Swiper's sliding direction can be set as horizontal or vertical.
2. The loop mode is generally speaking whether to continue scrolling until the last picture (loop mode)
3. The pager, that is, the lower dot, is synchronized with the current number of pages (the current page is the first picture, and the pager will be on the first paging node)
4. Click the first node of the pager to jump to the corresponding picture
5. Forward and backward buttons are also navigation buttons
6. Lower scroll bar (can also be regarded as progress bar)
7. Automatic rotation
8. Interval
9. Whether the rotation to the last picture stops (it does not take effect in loop mode)
10. When the user clicks the rotation picture, do you want to stop the rotation
Pager, navigation button and scroll bar can be adjusted according to individual needs
In this way, our rotation map is ready, and many properties can be set. Friends can learn through the official website: Swiper Chinese network - carousel chart slide js plug-in, H5 page front-end development https://swiper.com.cn/