1, Variable storage review
1 global variable, local variable, heap, stack
1.1 global and local variables
Global variables: variables defined outside all functions are called global variables. By default, its scope is the whole program, that is, all source files, including. c and. h files.
Local Variable: a variable defined inside a function is called a Local Variable. Its scope is limited to the inside of the function. Leaving the inside of the function is invalid, and an error will be reported if it is used again.
1.2 heap and stack
Heap: the freely applied space grows from low to high according to the memory address. Its size is determined by the upper limit of system memory / virtual memory. It is slow, but has great freedom and large available space.
Stack: it stores Automatic Variables and grows from high to low according to the memory address. Its maximum value is determined at compile time. It is fast, but has poor freedom and small maximum space.
Memory allocation in STM32:
Memory high address
stack:
Temporarily created local variables are stored in the stack area.
When a function is called, its entry parameters are stored in the stack area.
When the function returns, its return value is stored in the stack area.
The local variables defined by const are stored in the stack area.
heap:
Heap area is used to store memory segments dynamically distributed during program operation, which can be increased or decreased.
malloc and other functions can be used to dynamically distribute memory.
The memory distributed by malloc function must be released with free, otherwise it will cause memory leakage.
Global area (static area)
The global area has bss segment and data segment, readable and writable.
① . bss segment
Uninitialized global variables are stored in bss segment.
Global variables initialized to 0 and static variables initialized to 0 are stored in bss segment.
. bss segment does not occupy executable file space, and its contents include operating system initialization.
② . data segment
The initialized global variables are stored in the data segment.
Static variables are stored in data segment.
. The data section occupies the executable file space, and its contents include program initialization.
The global variables defined by const are stored in rodata section.
Constant area
The string is stored in the constant area.
The contents of the constant area cannot be modified.
Memory low address
Code area
The program execution code is stored in the code area.
String constants may also be stored in the code area.
1.3 storage location of STM32 data
RAM (random access memory):
The stored contents can be accessed randomly by instructions. The data stored in RAM will be lost during power failure, so it can only be stored during startup and operation. RAM can be divided into two types: Dynamic RAM(DRAM) and Static RAM(SRAM). Stack, heap and global area (. bss segment and. Data segment) are stored in RAM.
ROM (read only memory):
You can only read data from it, not write data arbitrarily. Compared with RAM, ROM has the disadvantage of slow reading and writing speed. However, because it has the advantage that the data can remain unchanged after power failure, it is often used to store one-time written programs and data. For example, the chip of the main BIOS program is ROM memory. The contents of code area and constant area are not allowed to be modified, so they are stored in ROM.
2 output verification under Ubuntu
2.1 coding
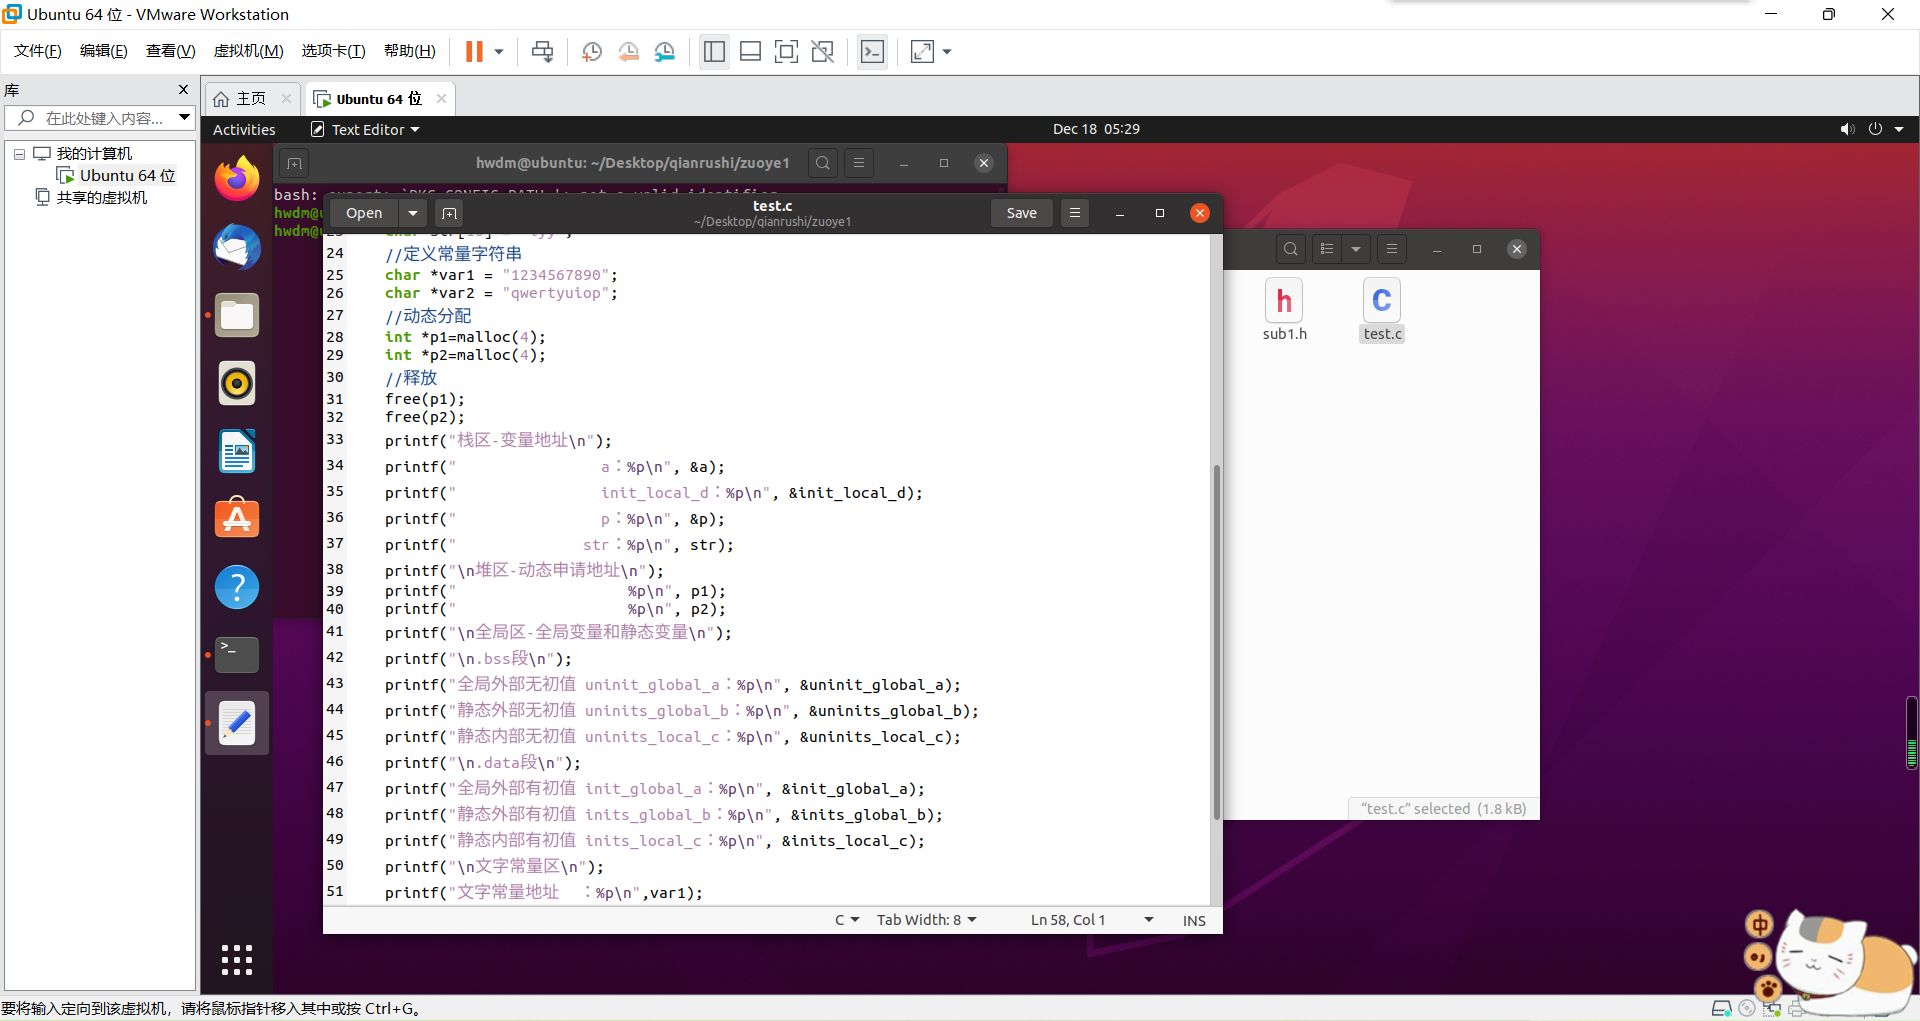
#include <stdio.h>
#include <stdlib.h>
//Define global variables
int init_global_a = 1;
int uninit_global_a;
static int inits_global_b = 2;
static int uninits_global_b;
void output(int a)
{
	printf("hello");
	printf("%d",a);
	printf("\n");
}

int main( )
{
	//Define local variables
	int a=2;
	static int inits_local_c=2, uninits_local_c;
    int init_local_d = 1;
    output(a);
    char *p;
    char str[10] = "lyy";
    //Define constant string
    char *var1 = "1234567890";
    char *var2 = "qwertyuiop";
    //Dynamic allocation
    int *p1=malloc(4);
    int *p2=malloc(4);
    //release
    free(p1);
    free(p2);
    printf("Stack area-Variable address\n");
    printf("                a : %p\n", &a);
    printf("                init_local_d: %p\n", &init_local_d);
    printf("                p: %p\n", &p);
    printf("              str: %p\n", str);
    printf("\n Heap area-Dynamic application address\n");
    printf("                   %p\n", p1);
    printf("                   %p\n", p2);
    printf("\n Global area-Global and static variables\n");
    printf("\n.bss paragraph\n");
    printf("Global external no initial value uninit_global_a: %p\n", &uninit_global_a);
    printf("Static external no initial value uninits_global_b: %p\n", &uninits_global_b);
    printf("Static internal no initial value uninits_local_c: %p\n", &uninits_local_c);
    printf("\n.data paragraph\n");
    printf("Global external initial value init_global_a: %p\n", &init_global_a);
    printf("Static external initial value inits_global_b: %p\n", &inits_global_b);
    printf("Static internal initial value inits_local_c: %p\n", &inits_local_c);
    printf("\n Text constant area\n");
    printf("Literal constant address     : %p\n",var1);
    printf("Literal constant address     : %p\n",var2);
    printf("\n Code area\n");
    printf("Program area address       : %p\n",&main);
    printf("Function address         : %p\n",&output);
    return 0;
}
2.2 verification
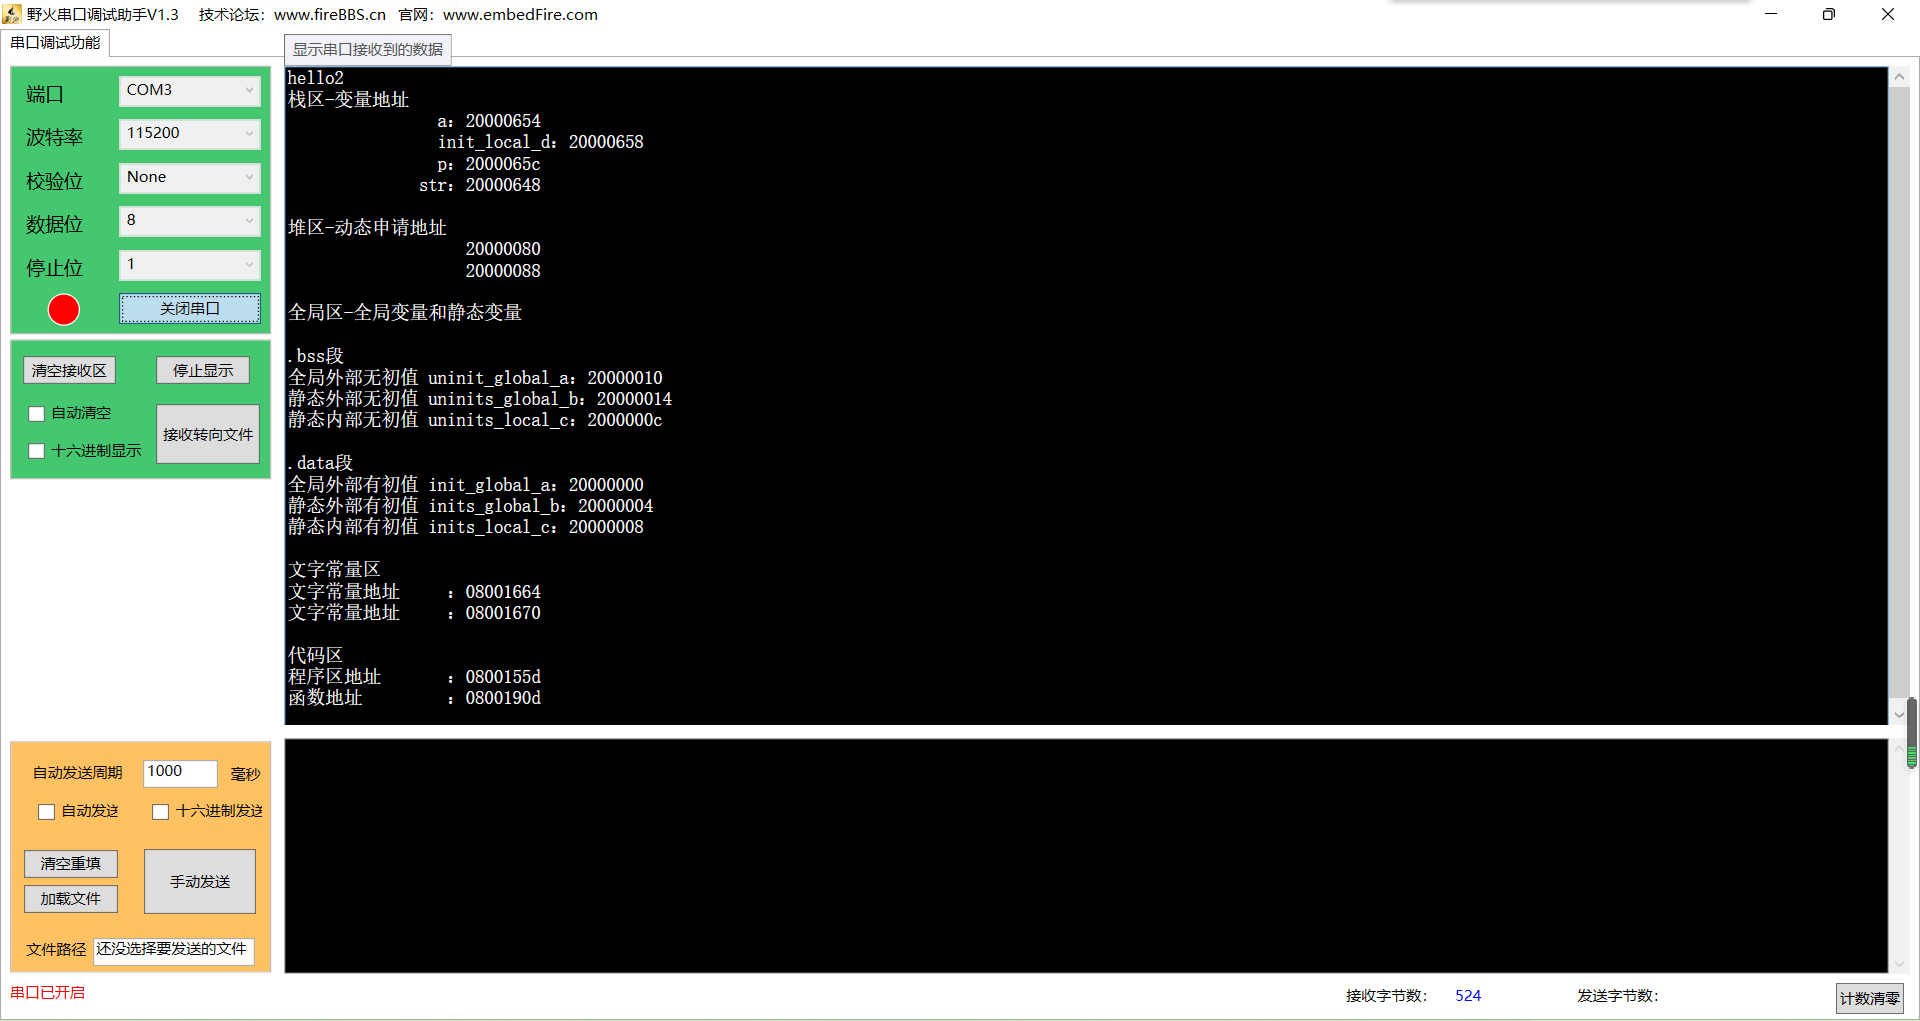
Enter command:
gedit test.c
Then enter the following command:
gcc test.c -o test
./test

It can be seen that the address value of Ubuntu in the stack area and heap area increases gradually from low address to high address.
3 Keil serial port verification
3.1 configuration Engineering
Tool test using STM32Cube serial communication
In this article, the serial communication project is slightly modified and run.
Redirect reference
Modify main c:
#include "main.h"
#include "usart.h"
#include "gpio.h"
#include <stdio.h>
#include <stdlib.h>
//Define global variables
int init_global_a = 1;
int uninit_global_a;
static int inits_global_b = 2;
static int uninits_global_b;
void output(int a)
{
	printf("hello");
	printf("%d",a);
	printf("\n");
}


/* Private includes ----------------------------------------------------------*/
/* USER CODE BEGIN Includes */

/* USER CODE END Includes */

/* Private typedef -----------------------------------------------------------*/
/* USER CODE BEGIN PTD */

/* USER CODE END PTD */

/* Private define ------------------------------------------------------------*/
/* USER CODE BEGIN PD */
/* USER CODE END PD */

/* Private macro -------------------------------------------------------------*/
/* USER CODE BEGIN PM */

/* USER CODE END PM */

/* Private variables ---------------------------------------------------------*/

/* USER CODE BEGIN PV */

/* USER CODE END PV */

/* Private function prototypes -----------------------------------------------*/
void SystemClock_Config(void);
/* USER CODE BEGIN PFP */

/* USER CODE END PFP */

/* Private user code ---------------------------------------------------------*/
/* USER CODE BEGIN 0 */

/* USER CODE END 0 */

/**
  * @brief  The application entry point.
  * @retval int
  */
int main(void)
{
  /* USER CODE BEGIN 1 */

  /* USER CODE END 1 */

  /* MCU Configuration--------------------------------------------------------*/

  /* Reset of all peripherals, Initializes the Flash interface and the Systick. */
  HAL_Init();

  /* USER CODE BEGIN Init */

  /* USER CODE END Init */

  /* Configure the system clock */
  SystemClock_Config();

  /* USER CODE BEGIN SysInit */

  /* USER CODE END SysInit */

  /* Initialize all configured peripherals */
  MX_GPIO_Init();
  MX_USART1_UART_Init();
  /* USER CODE BEGIN 2 */

  /* USER CODE END 2 */

  /* Infinite loop */
  /* USER CODE BEGIN WHILE */
 int a=2;
	static int inits_local_c=2, uninits_local_c;
    int init_local_d = 1;
    output(a);
    char *p;
    char str[10] = "lyy";
    //Define constant string
    char *var1 = "1234567890";
    char *var2 = "qwertyuiop";
    //Dynamic allocation
    int *p1=malloc(4);
    int *p2=malloc(4);
    //release
    free(p1);
    free(p2);
    printf("Stack area-Variable address\n");
    printf("                a: %p\n", &a);
    printf("                init_local_d: %p\n", &init_local_d);
    printf("                p: %p\n", &p);
    printf("              str: %p\n", str);
    printf("\n Heap area-Dynamic application address\n");
    printf("                   %p\n", p1);
    printf("                   %p\n", p2);
    printf("\n Global area-Global and static variables\n");
    printf("\n.bss paragraph\n");
    printf("Global external no initial value uninit_global_a: %p\n", &uninit_global_a);
    printf("Static external no initial value uninits_global_b: %p\n", &uninits_global_b);
    printf("Static internal no initial value uninits_local_c: %p\n", &uninits_local_c);
    printf("\n.data paragraph\n");
    printf("Global external initial value init_global_a: %p\n", &init_global_a);
    printf("Static external initial value inits_global_b: %p\n", &inits_global_b);
    printf("Static internal initial value inits_local_c: %p\n", &inits_local_c);
    printf("\n Text constant area\n");
    printf("Literal constant address     : %p\n",var1);
    printf("Literal constant address     : %p\n",var2);
    printf("\n Code area\n");
    printf("Program area address       : %p\n",&main);
    printf("Function address         : %p\n",&output);
    return 0;

  /* USER CODE END 3 */
}
Compile it.

After compilation, we can see that there are four Code segment sizes: Code, RO data, RW data and Zi data, where Code is the Code occupation size, RO data is a read-only constant, RW data is an initialized readable and writable variable, and Zi data is an uninitialized readable and writable variable.
We need to know how RAM and ROM are used, so we can use the following formula to calculate.
RAM = RW-data + ZI-data
ROM = Code + RO-data + RW-data
Flash=Code + RO Data + RW Data
3.2 burning operation
 Through the running results, it can be found that the address values of Ubuntu in the stack area and heap area increase from top to bottom, the address values of raspberry pie and stm32 stack area decrease from top to bottom, and the heap area increases from top to bottom. From each area, the address value decreases gradually from top to bottom, that is, the address of the stack area is the high address and the address of the code area is the low address.
2, Learning and practice of Clion editor
1 environment configuration
1.1 download Clion
Go to Clion's official website and download Clion's installation package.
Download link on Clion's official website
Note: select the installation path you are familiar with, because the subsequent environment configuration is best placed in the same folder to facilitate the addition of the environment variable path.
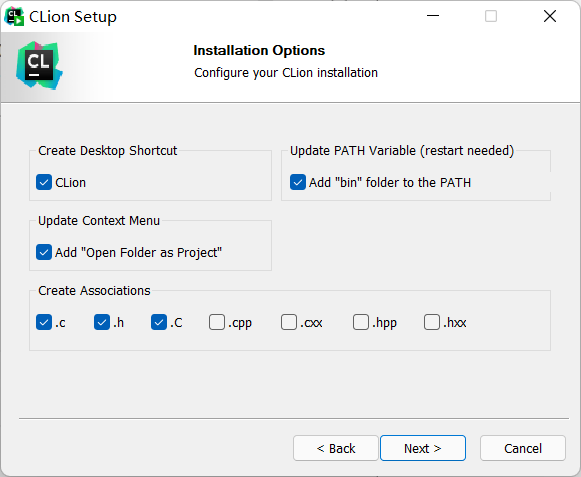
Check these items, and it will be more convenient to add one less bin into the path. Just keep going.
1.2 installation of Stm32cubeMX
Stm32subemx installation process and method
You can refer to my previous article to install stm32subemx.
1.3 installing arm none EABI GCC
It is also downloaded from the official website: GNU Toolchain | GNU Arm Embedded Toolchain Downloads – Arm Developer
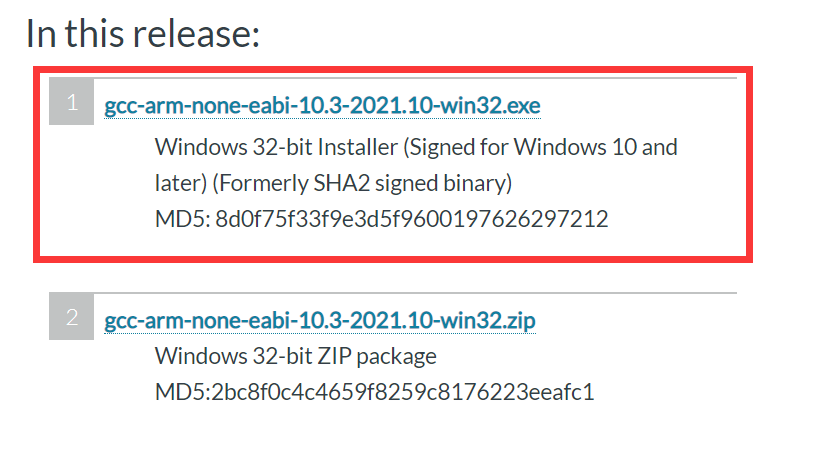
Install the version in the red box. Then you can install it directly. Note that the path is the same as Clion's path.
1.4 installing openocd
Download from the official website: Download OpenOCD for Windows
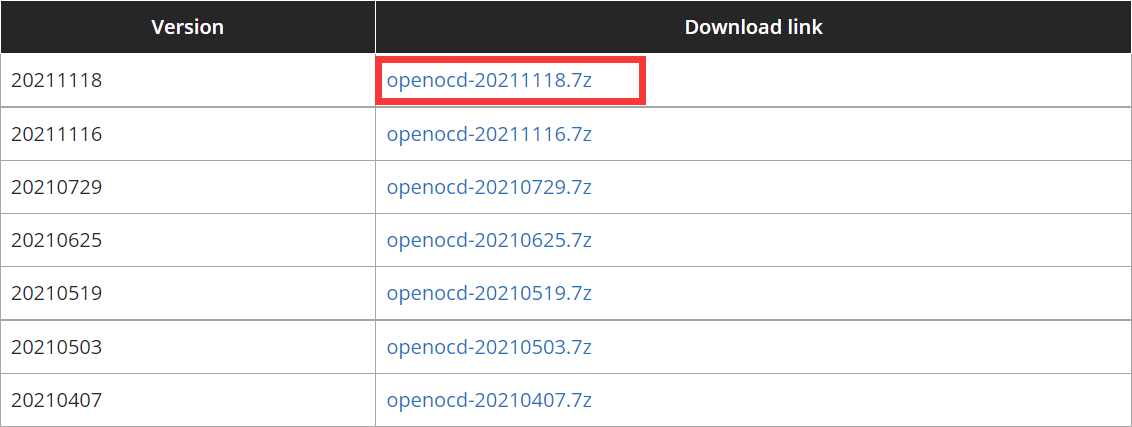
Download the latest version and unzip it to a folder under the same path.
1.5 installation of MinGW
Link: https://pan.baidu.com/s/1Z-vnPbXxer4ok5y27nL8jQ
Extraction code: 86hp
Extract the files from the network disk and extract them to the folder in the same path.
1.6 adding system environment variables
First, enter advanced system settings.
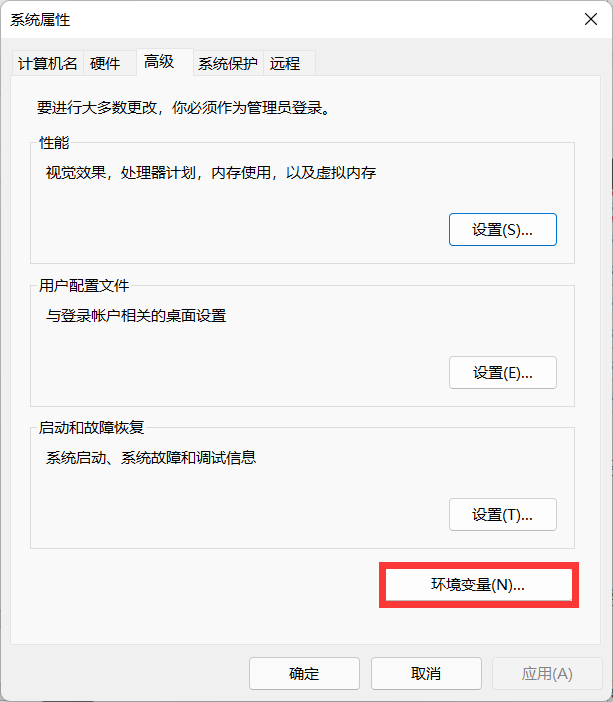
Click environment variables.

Select Path.
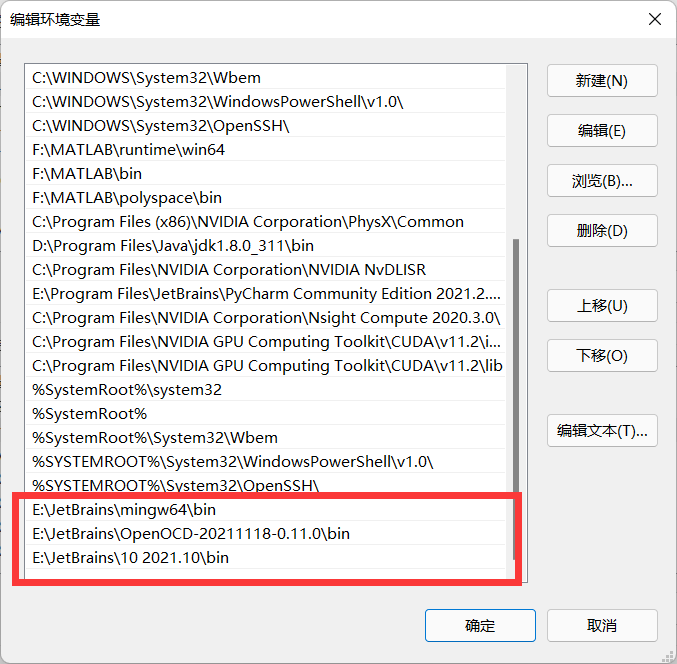
Add these bin files to complete the environment configuration.
2. Enter Clion and set relevant path
2.1 login to Clion
You can use github account or register JetBrains account.
2.2 configuring toolchains
After the project is established.
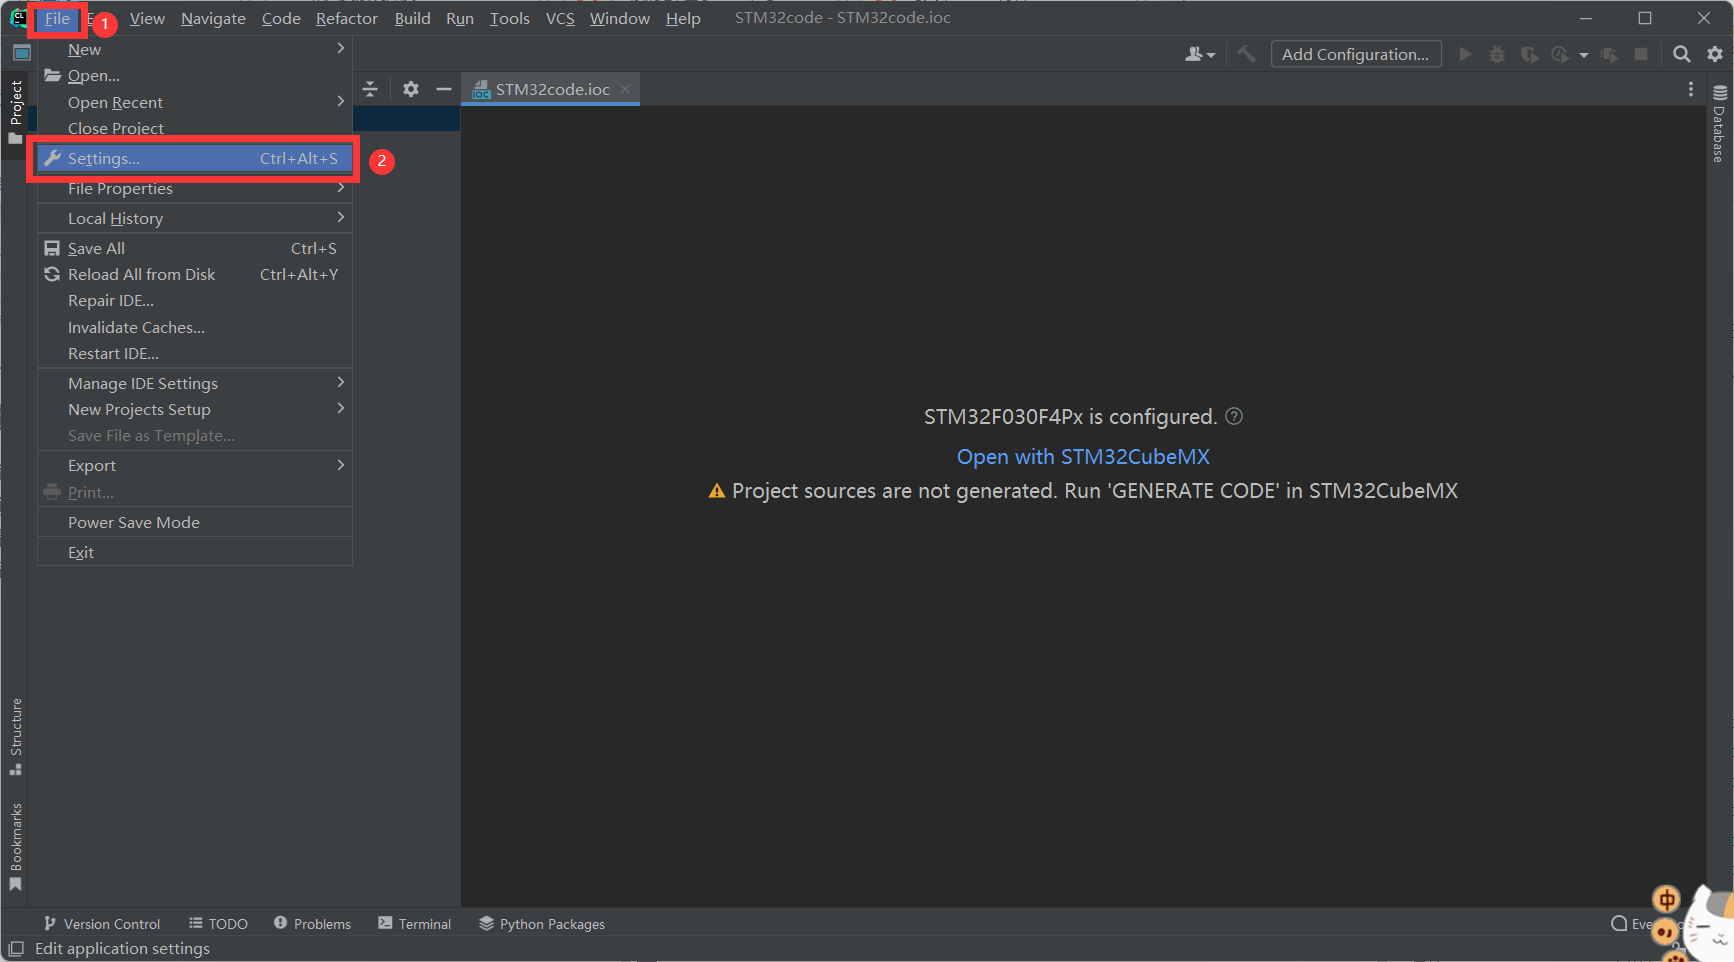
Enter Settings to start configuration.
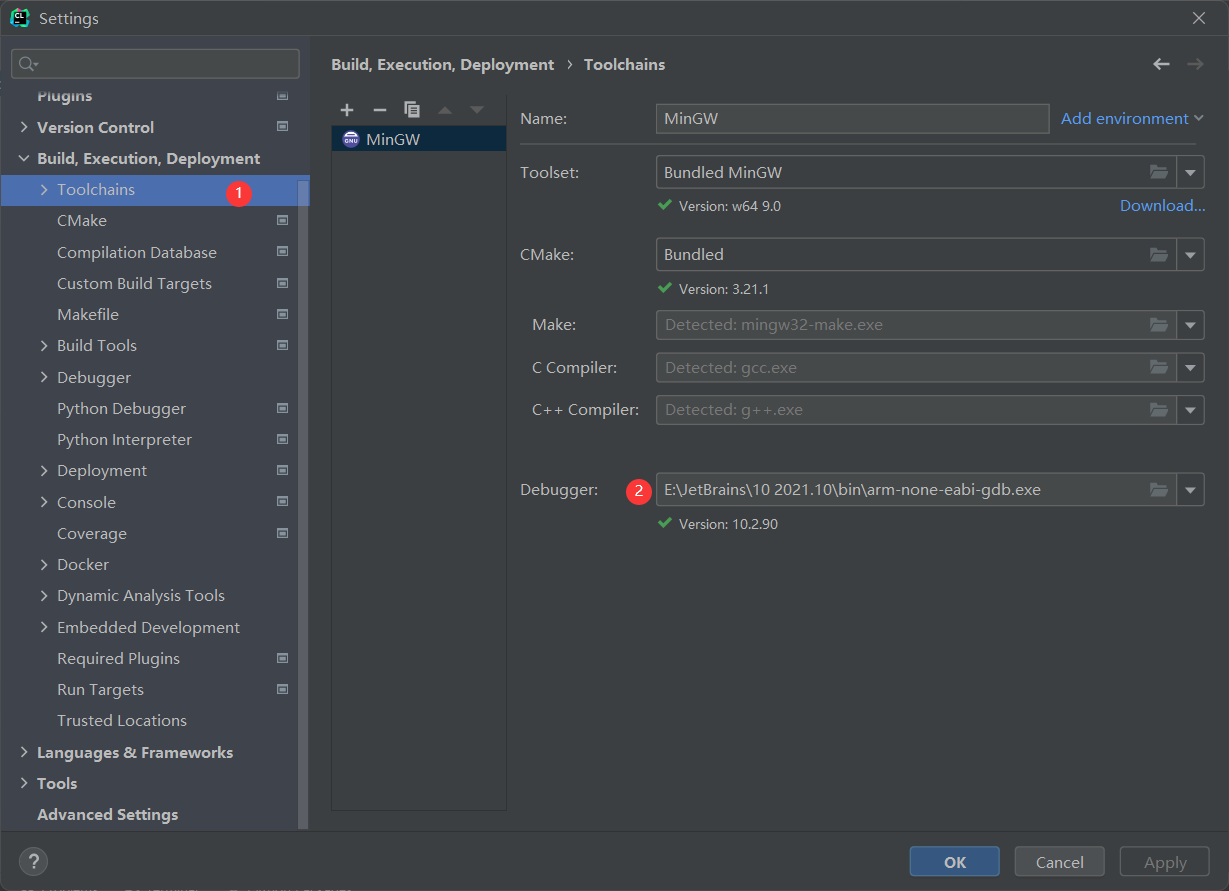 After entering the Toolchains, the previous MinGW should have automatically detected the settings when entering the Clion. We just need to change the Debugger to... \ 10 2021.10 \ bin \ arm none EABI GDB Exe (find this exe in the previous folder).
2.3 configuring cmake

After entering cmake, others will be detected automatically, and then we just need to select MinGW.
2.4 configuring Embedded Development
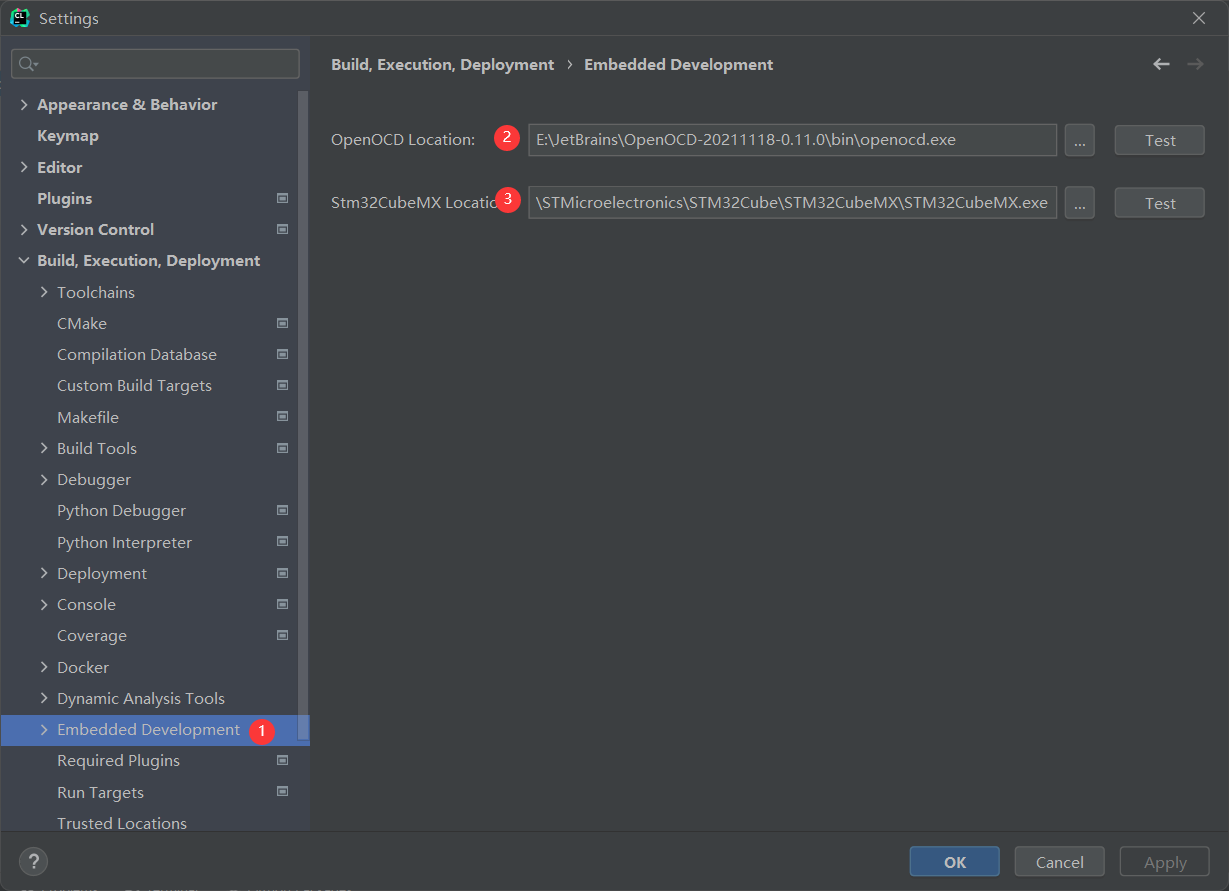
OpenOCD Location selection:
...\OpenOCD-20211118-0.11.0\bin\openocd.exe
Stm32CubeMX Location selection:
...\STMicroelectronics\STM32Cube\STM32CubeMX\STM32CubeMX.exe
3 construction works
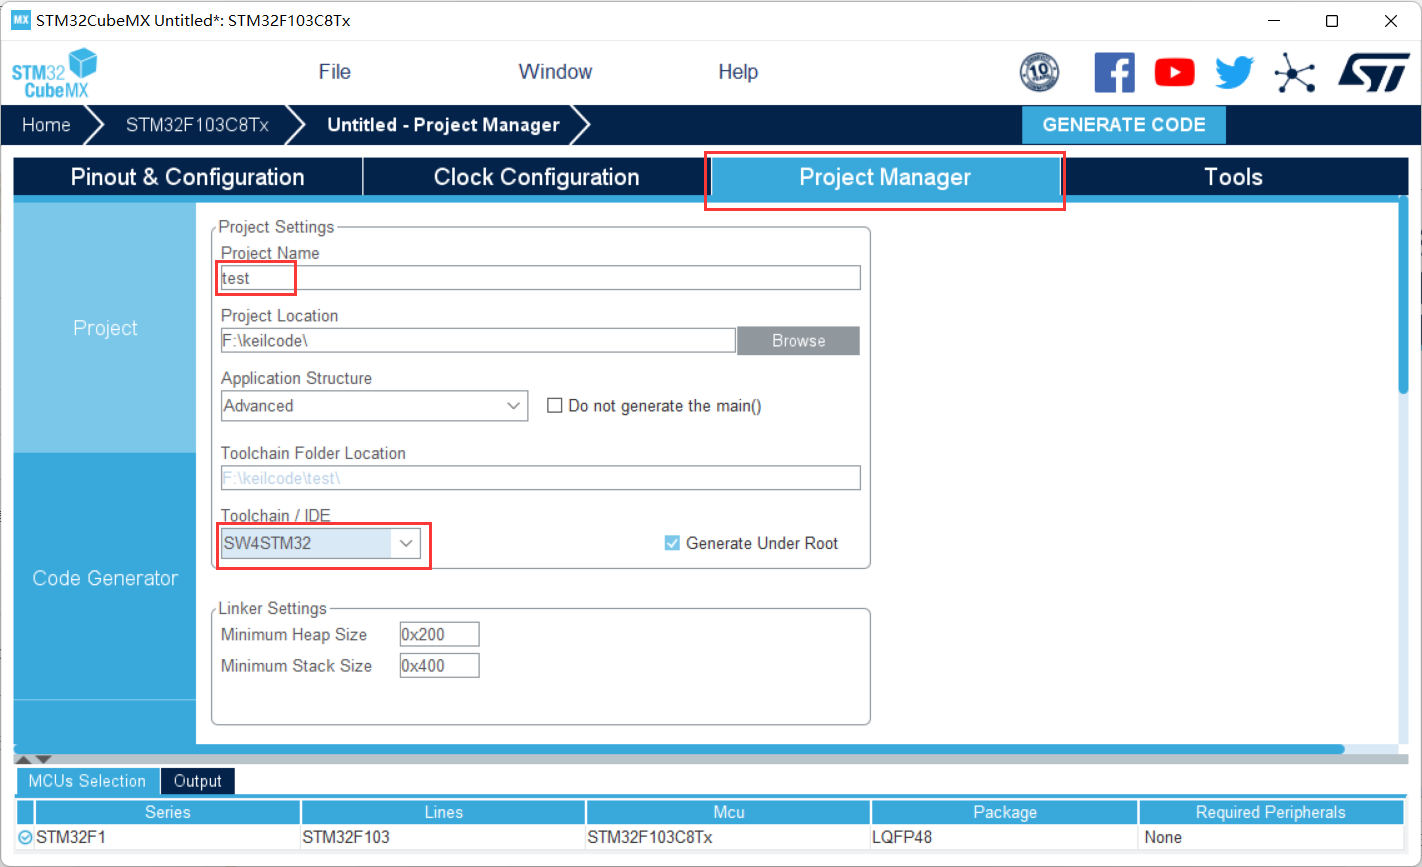
3.1 generate Stm32Cubemx program
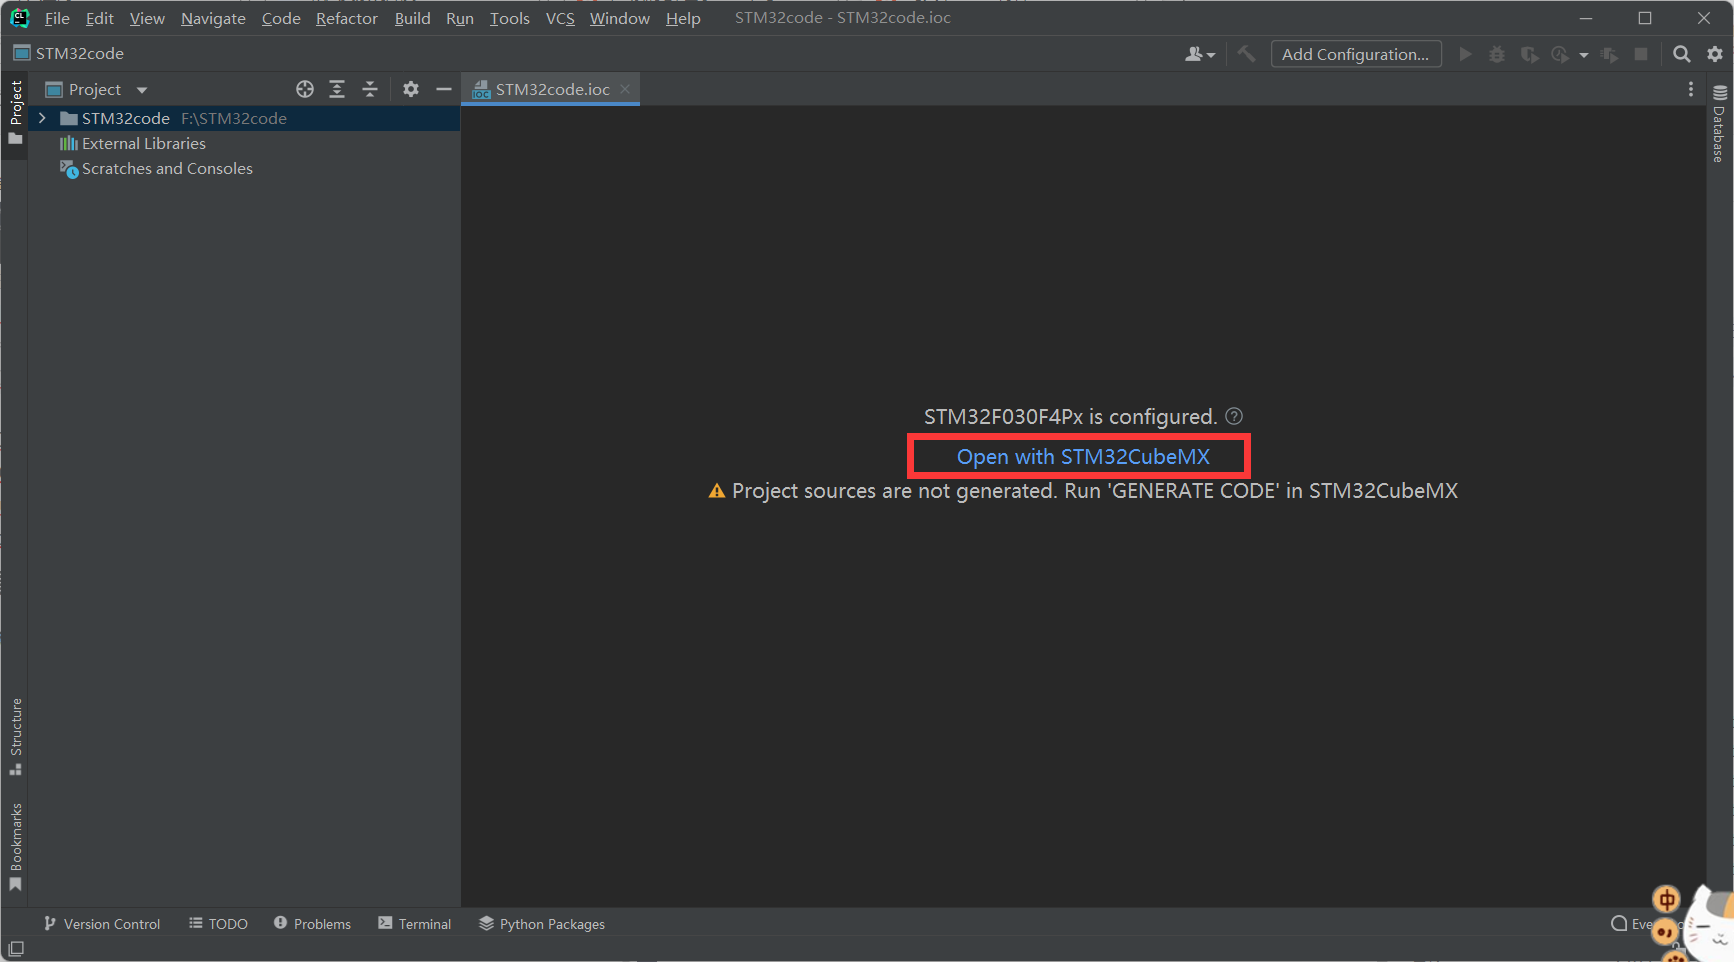
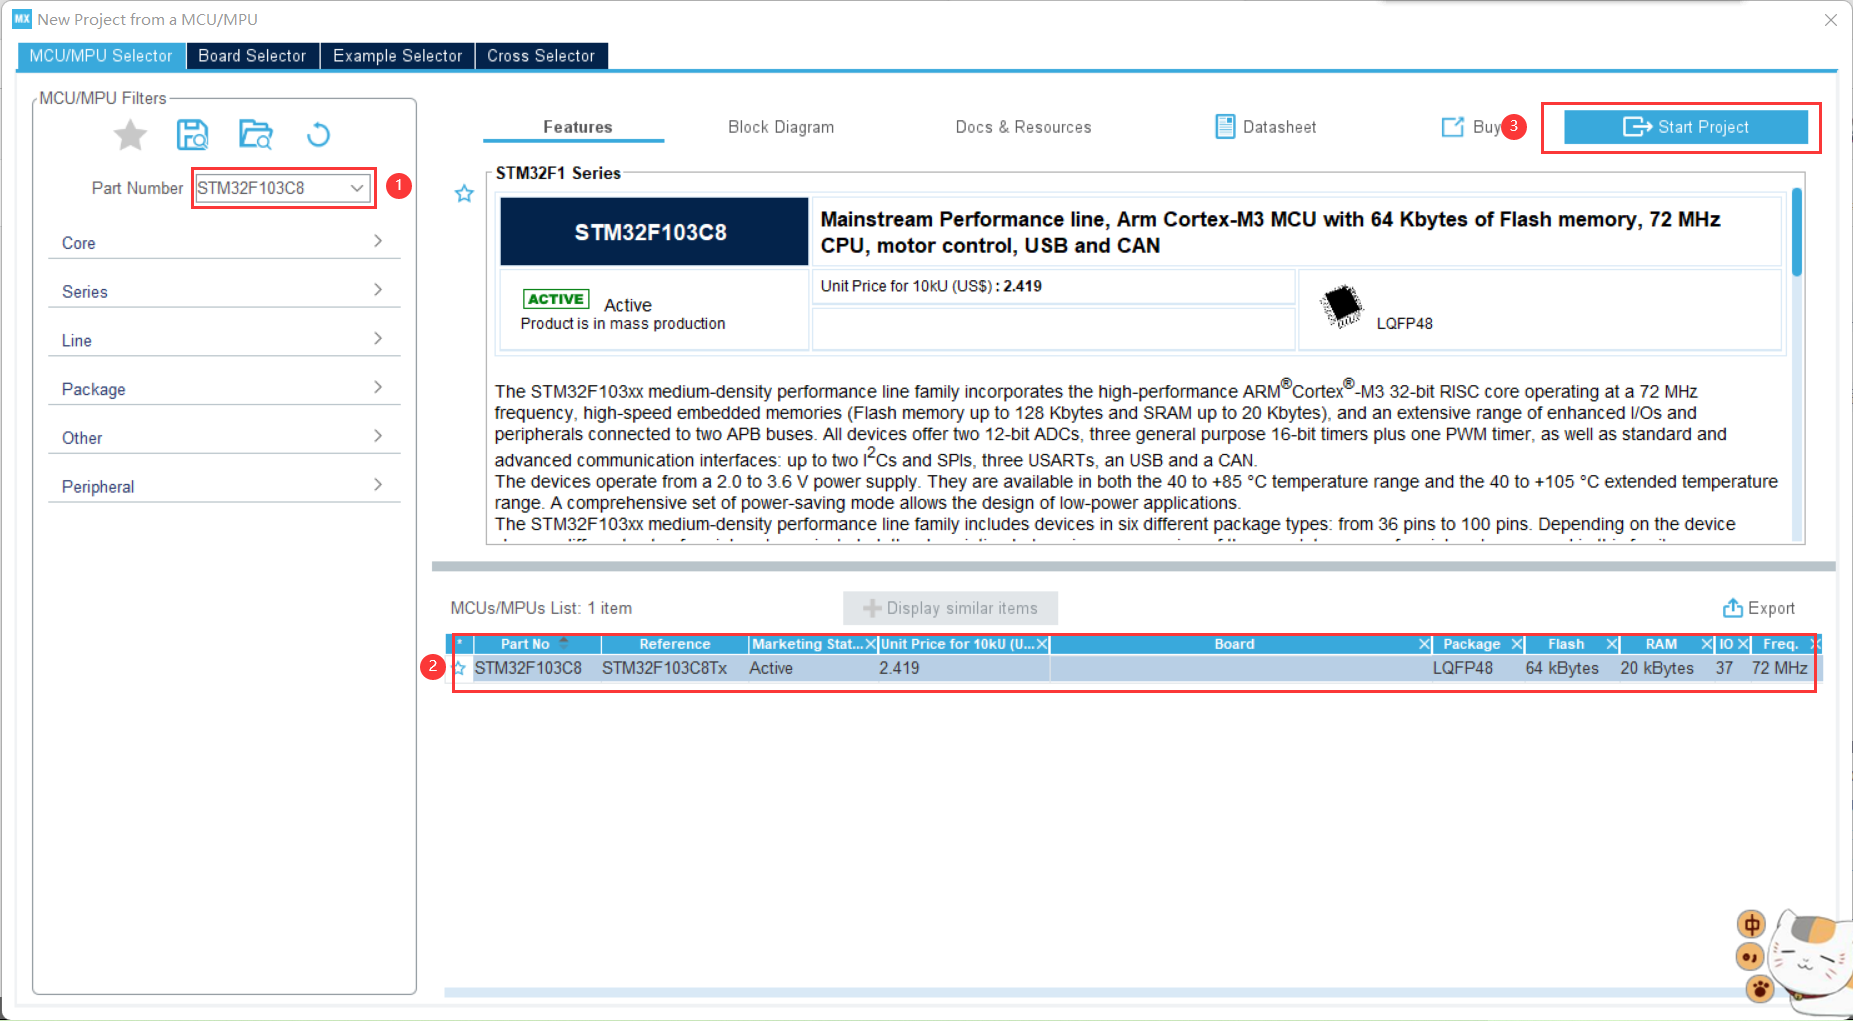
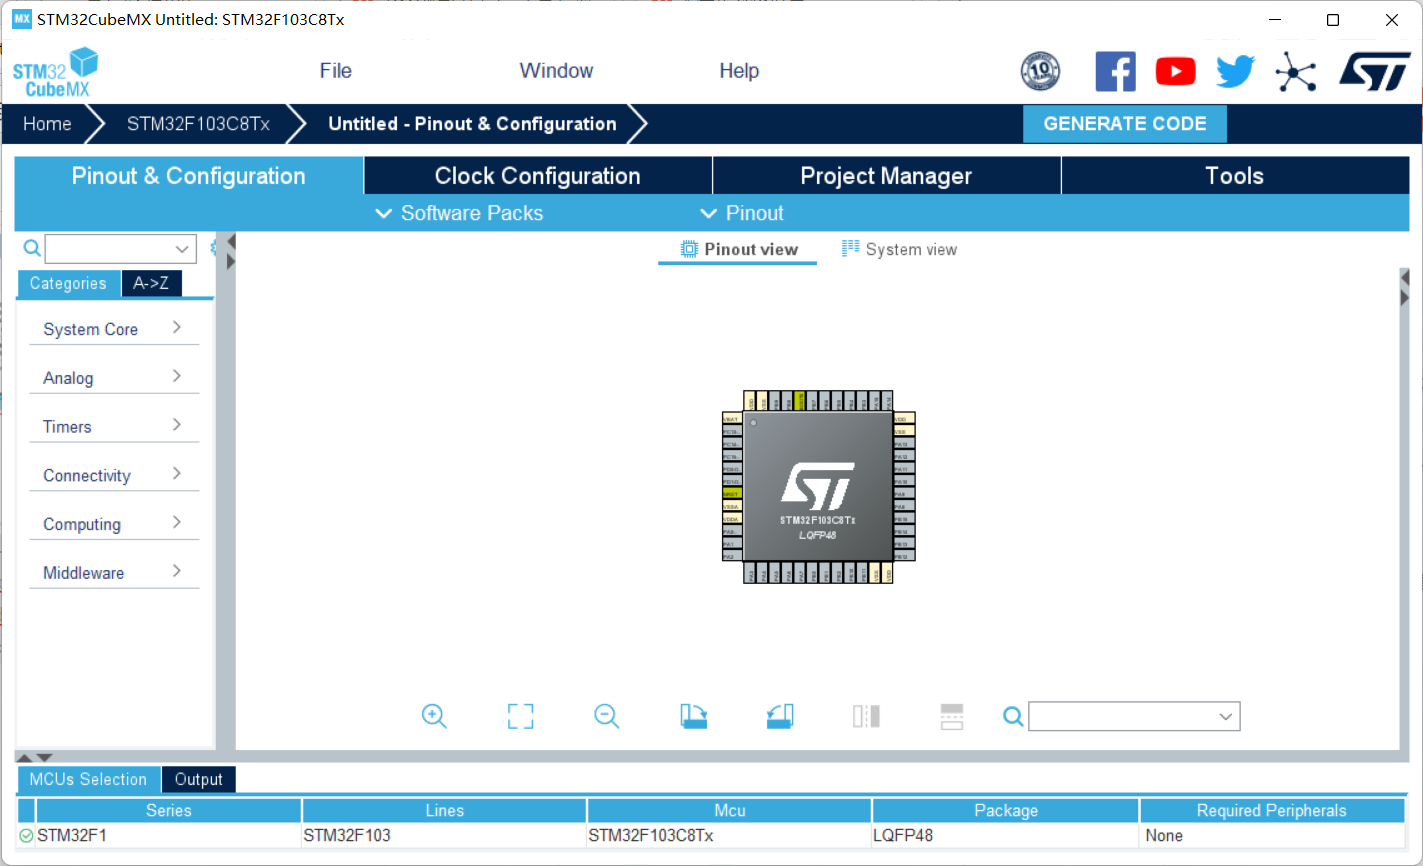
Click Open with STM32CubeMX to open the project.
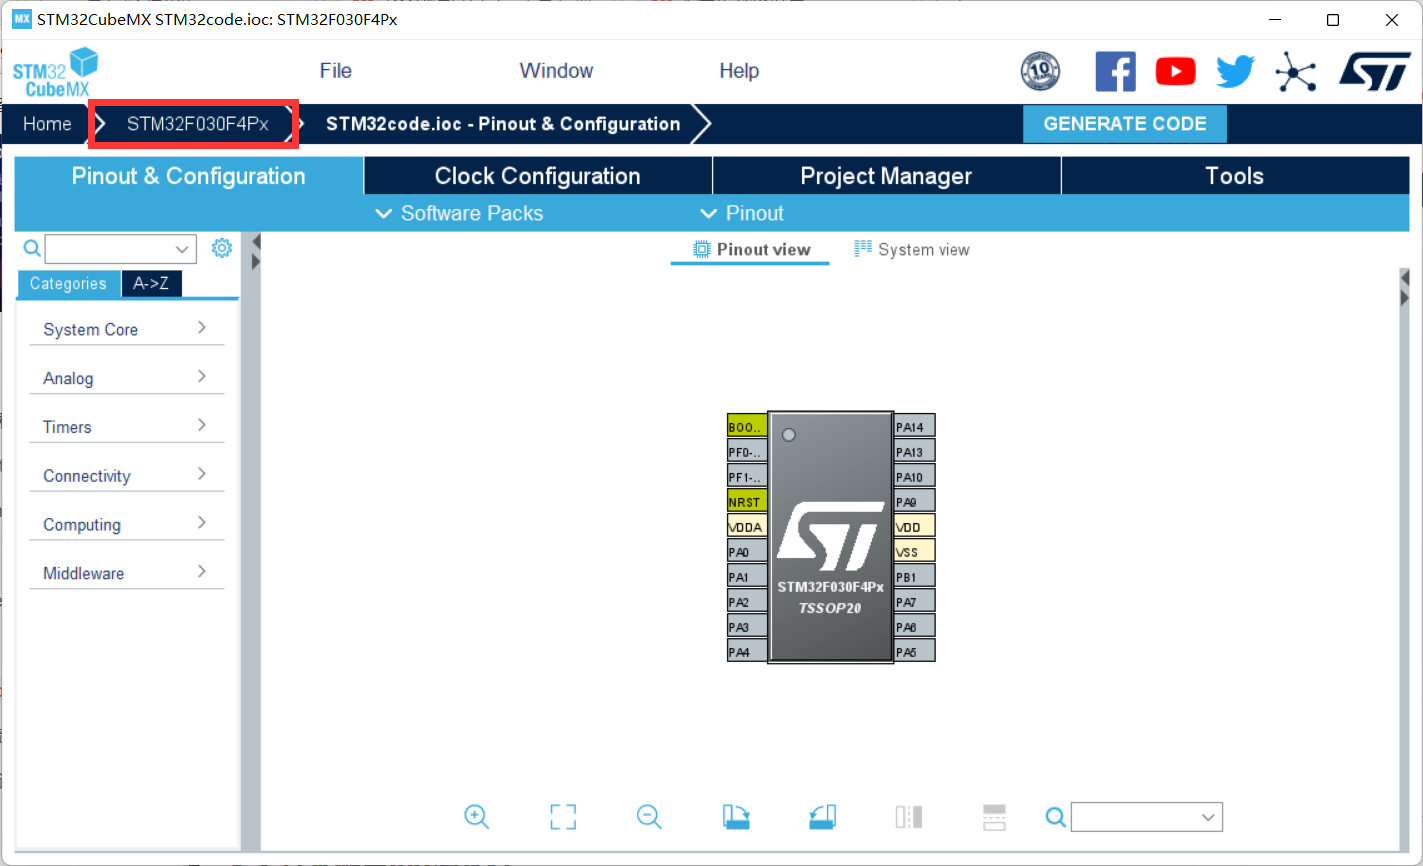
We change the chip stm32F103C8T6 we need to use.
3.2 configure LED water lamp
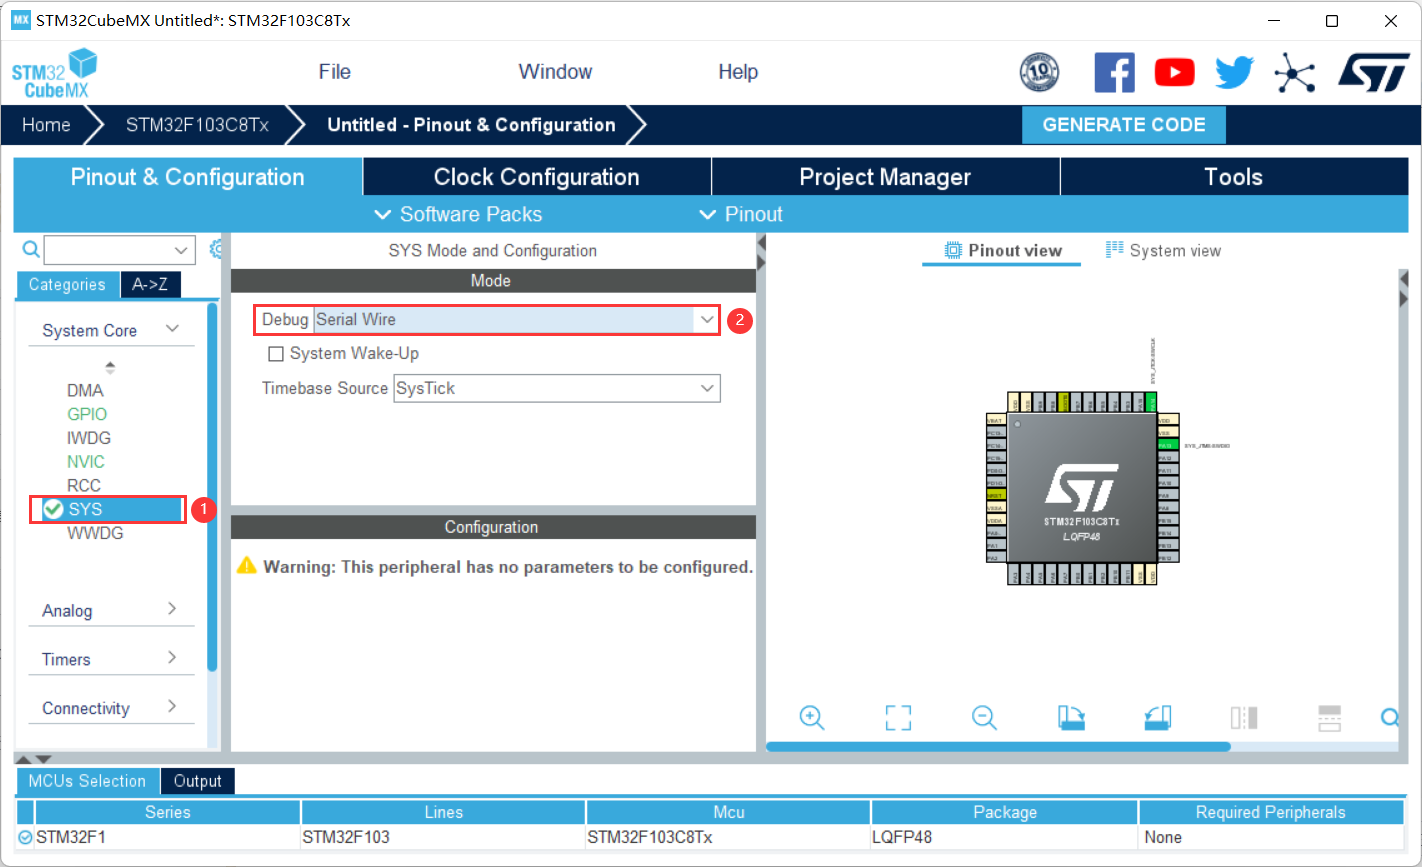
Configure SYS:
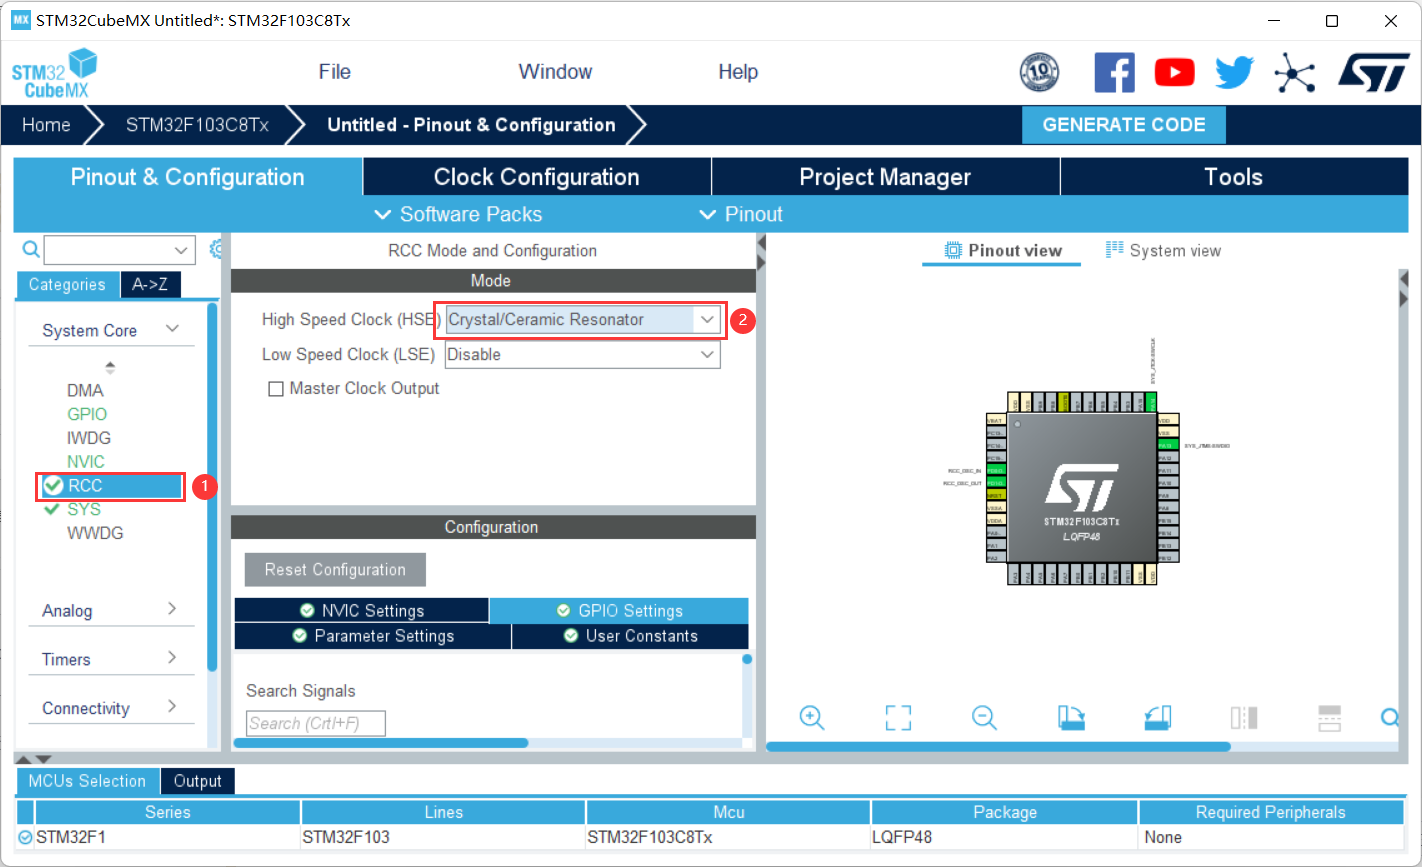
Configure RCC:
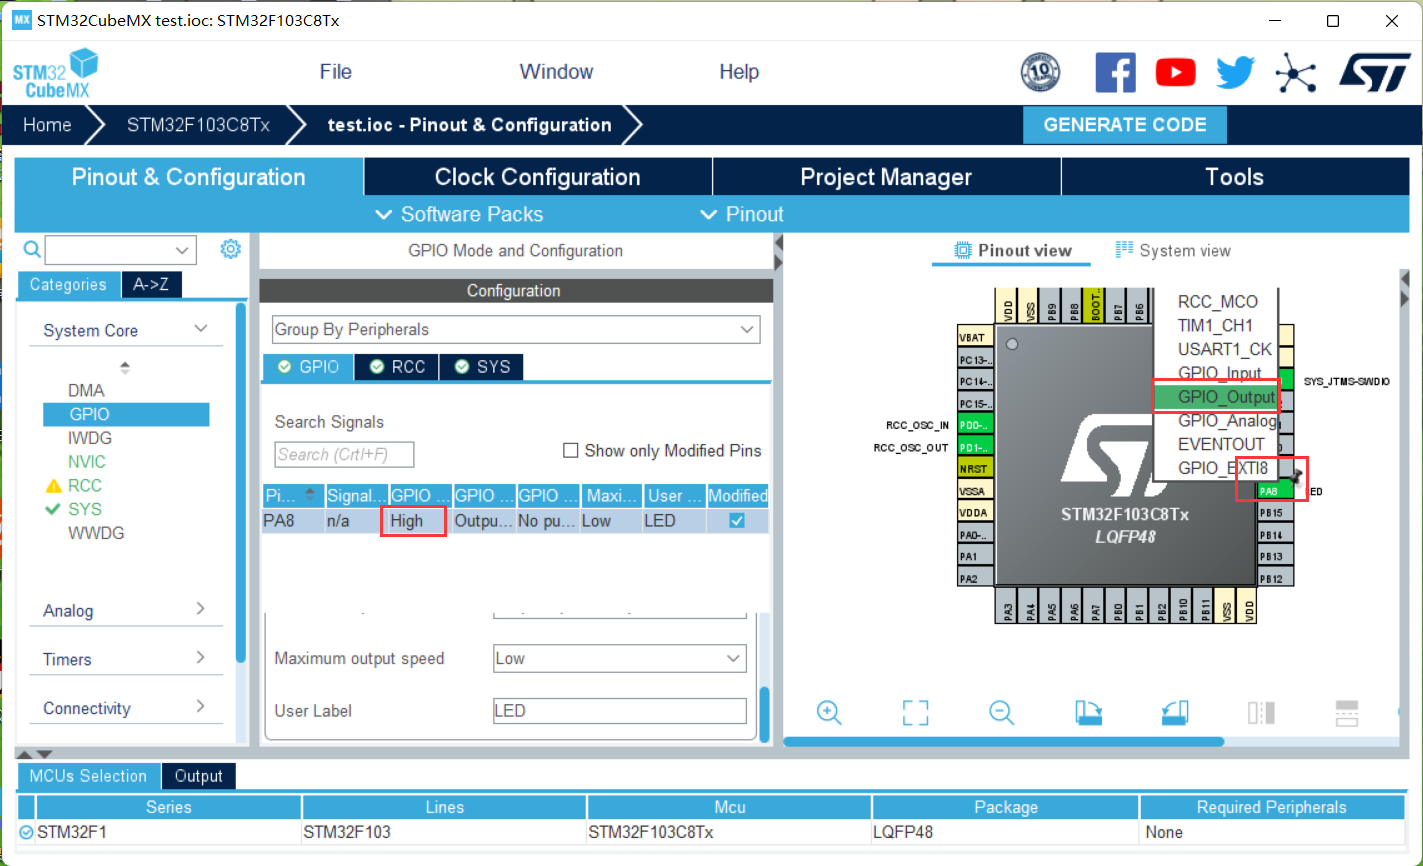
Setting pin: PA8
Build project:
3.3 adding and compiling code
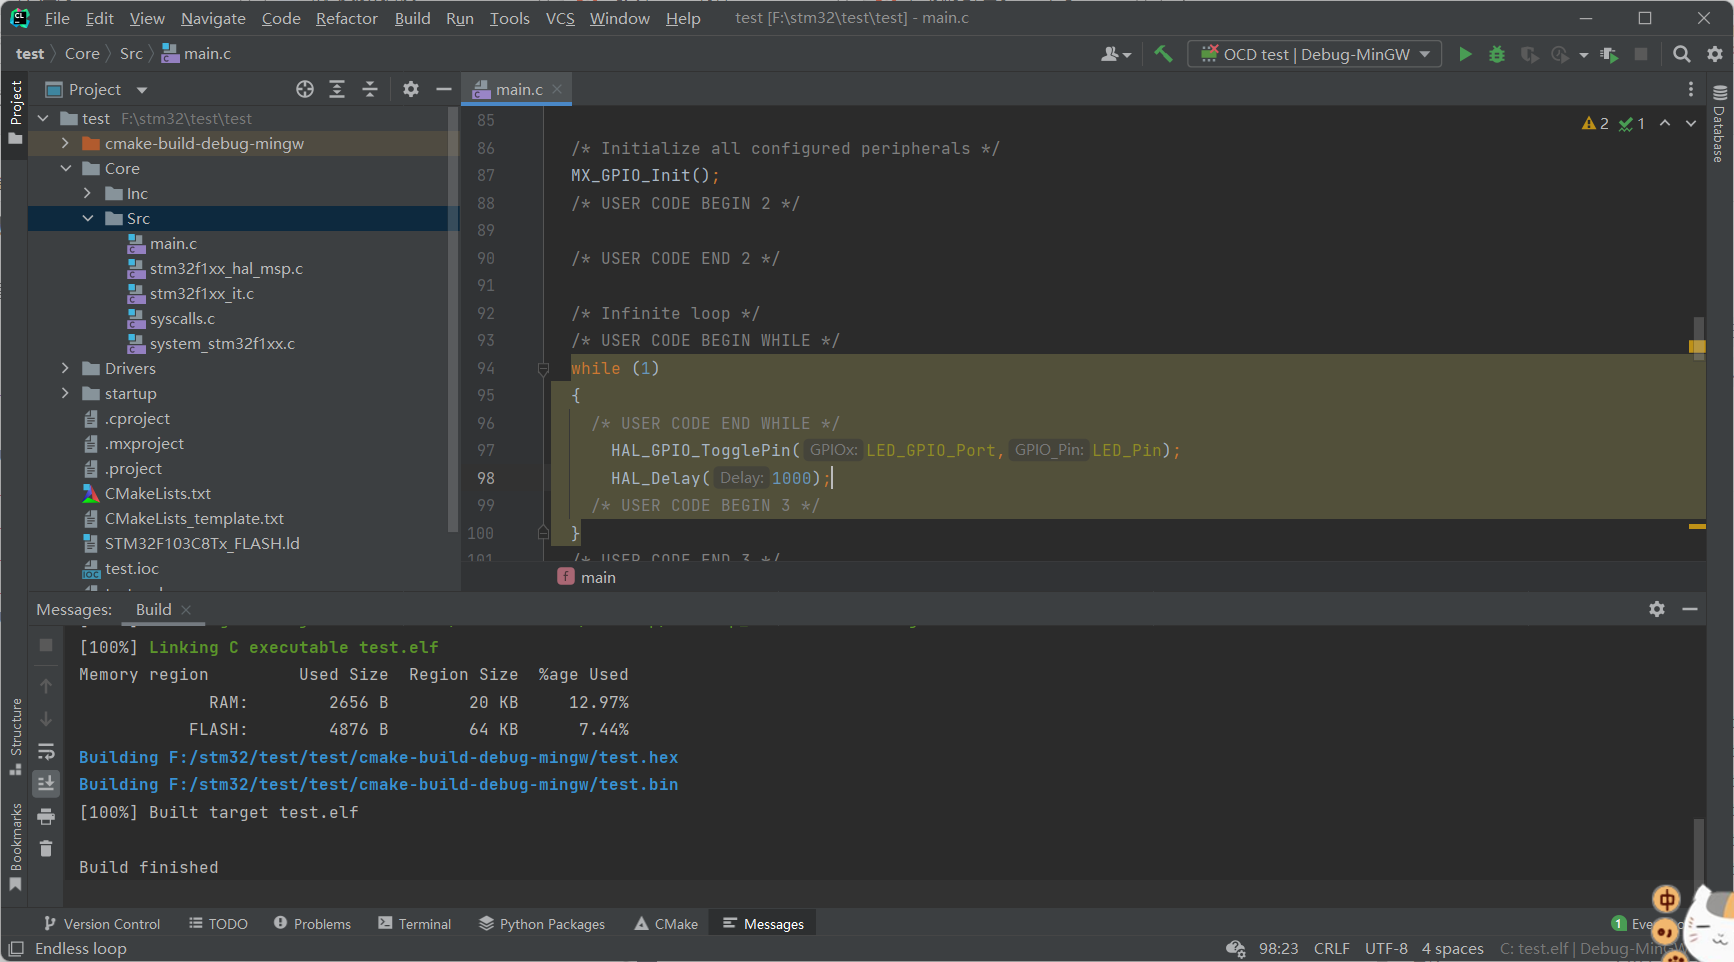
Modify the code here:
while (1)
  {
    /* USER CODE END WHILE */
      HAL_GPIO_TogglePin(LED_GPIO_Port,LED_Pin);
      HAL_Delay(1000);
    /* USER CODE BEGIN 3 */
  }
Then click the green hammer to compile.
4 burning operation
4.1 burning
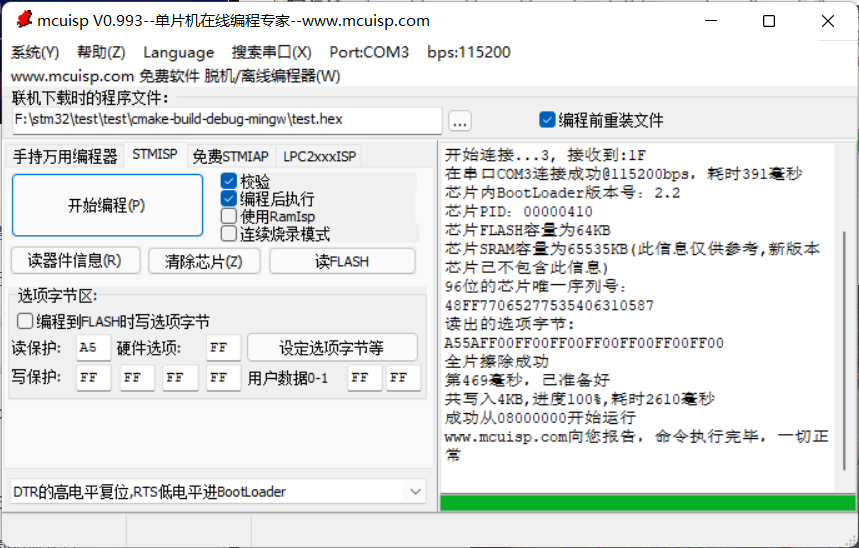
4.2 operation
Run successfully.
3, Summary
This experiment also learned a new IDE, which is very concise. At the same time, it can better complete the homework and can be used more in the future.