1. What is webpack?
- Concept: webpack (module bundler) is a module loader and packaging tool. It can use and process various resources, such as JS (including JSX), coffee, style (including less/sass), pictures, etc. as modules. It can have all the basic functions of Grunt or Gulp.
- Purpose: package various dependent files into a series of static resources.
- Front end Modularization:
- Modular specifications: ES6, CommonJS, CMD, AMD
- webpack can handle dependencies between modules.
- pack:
- Package various resources in webpack into one or more bundles.
- For example, in the process of converting esscript into JavaScript, the syntax of type 6 can also be compressed into esscript, and so on.
- Comparison with grunt/gulp
- grunt/gulp is used only when modularization is not used
- grunt/gulp puts more emphasis on the automation of front-end processes
- webpack puts more emphasis on modular development and management, while file compression, merging, preprocessing and other functions are only additional functions.
- In order to run normally, webpack must rely on the node environment. In order to run a lot of code normally, node environment must contain various dependent packages. npm (node package manager) is used to manage various packages on node.
2. webpack installation
-
Download node. If there is a node, check the node Version (node -v)
-
Global installation of webpack
//Global installation of webpack
npm install webpack@Version number -g
//View webpack version
webpack -v
-
Locally installed webpack
– save dev is a dependency during development and does not need to be used after the project is packaged.
cd Corresponding directory
npm install webpack@Version number --save-dev
-
Why do you need local installation after global installation?
- Directly execute the webpack command at the terminal, and use the globally installed webpack
- When in package When scripts are defined in JSON and include the webpack command, the local webpack is used
3. Basic use of webpack
Distribute - > distribution (package file)
Package command:
New version: webpack Packed File -o Packaged file
Automatically generate a main in the packaged file JS file
4,webpack.config.js and package JSON configuration
Create webpack config. JS file
const path=require("path");

module.exports={
  entry:"./src/main.js",
  output:{
    path:"./dist",
    filename:"boudle.js",
  },
}
npm init //Initialize and generate package json

//package.json
//start
{
  "name": "meetwebpack",
  "version": "1.0.0",
  "description": "",
  "main": "webpack.config.js",
  "scripts": {
    "test": "echo \"Error: no test specified\" && exit 1",
    "build":"webpack"
  },
  "author": "",
  "license": "ISC"
}
//end
npm install//Install dependency and generate node_modules,package-lock.json
//package. Alias scripts in JSON
"scripts": {
    "test": "echo \"Error: no test specified\" && exit 1",
    "build":"webpack"
  }
  //npm run build==webpack
/*Install the local webpack and the result is package JSON adds development time dependency
"devDependencies": {
    "webpack": "^3.6.0"
 }
 */

{
  "name": "meetwebpack",
  "version": "1.0.0",
  "description": "",
  "main": "webpack.config.js",
  "scripts": {
    "test": "echo \"Error: no test specified\" && exit 1",
    "build": "webpack"
  },
  "author": "",
  "license": "ISC",
  "devDependencies": {
    "webpack": "^3.6.0"
  }
}
//In the terminal, the webpack is global
noed_modules/.bin/webpack Or npm run build start-up webpack pack
package. When the scripts in JSON are executed, they will find the location of commands in a certain order
- First, we will look for the local node_ modules/. The corresponding command in the bin path.
- If it is not found, it will look in the global environment variable.
5. Configuration of using css file in webpack
-
loader
-
Install the required loader through npm
-
On webpack config. JS under the module keyword
-
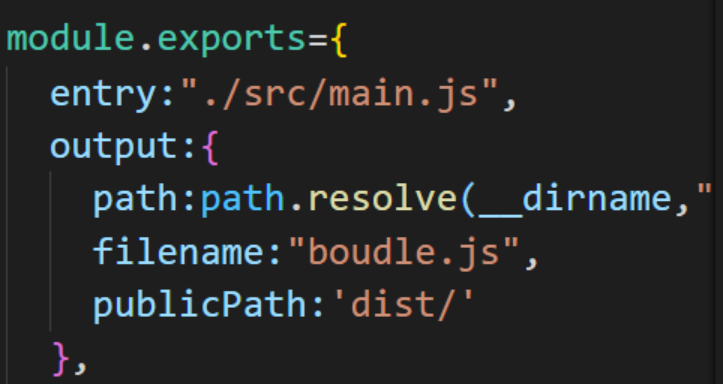
const path=require("path");

module.exports={
  entry:"./src/main.js",
  output:{
    path:path.resolve(__dirname,"dist"),
    filename:"boudle.js",
  },
  module:{
    rules:[
      {
        test:/\.css$/,

        use:['style-loader','css-loader']
      }
    ]
  }
}
-
-
The webpack loader reads from right to left, starting with 'CSS loader'. Then 'style loader'
6. Configuration of using lese file in webpack
Download less loader
npm install --save-dev less-loader less
Configuration, in webpack config. rules of module in JS
{
        test:/\.less$/,
        use:[
          {
            loader:"style-loader"
          },
          {
            loader:"css-loader"
          },
          {
            loader:"less-loader"
          },
        ]
      }
7. Processing of picture files
Download URL loader
npm install --save-dev url-loader
Configuration, in webpack config. rules of module in JS
{
test:/\.(png|jpg|gif)$/,
use:[
{
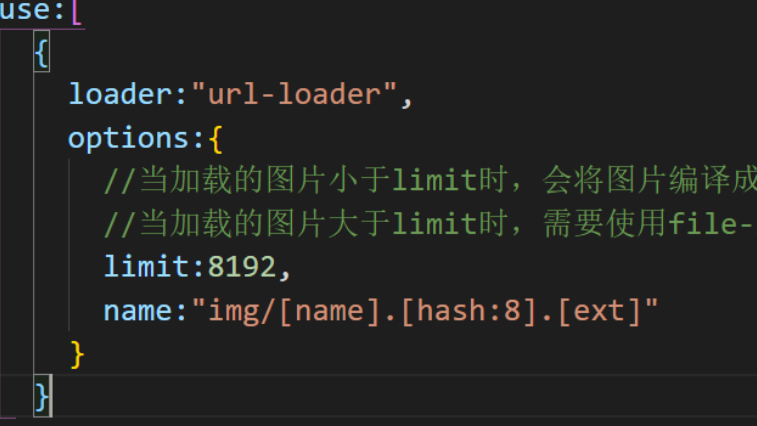
loader:"url-loader",
options:{
//When the loaded image is less than the limit, the image will be compiled into base64 format
//When the loaded image is greater than the limit, you need to use the file loader module to load it
limit:8192
}
}
]
}
When the loaded image is greater than the limit, you need to use the file loader module to load it
Download file loader
npm install file-loader --save-dev
One more picture file in dist folder
We can add the following options in options
-
img: folder to package files into
-
Name: get the original name of the picture and put it in this position
-
Hash: in order to prevent image name conflict, hash is still used, but we only keep 8 bits
-
ext: use the original extension of the picture
If the picture is not displayed, it is because the path used by the picture is incorrect.
-
By default, webpack will return the generated path directly to the consumer
-
But our whole program is packaged in the dist folder, so here we need to add another dist under the path/
-
On webpack config. JS plus publicPath
-
Configure the name in options and set the format of the packed name
8. babel from ES6 to ES5
Download the loader corresponding to babel
npm install --save-dev babel-loader babel-core babel-preset-es2015
9. Configuration process using vue
Using Vuejs, install vue first
npm install vue --save
-
Runtme only - > no template is allowed in the code
-
Runtime compiler - > there can be a template in the code, because there is a compiler that can be used to compile the template
10. Use of banner plugin
-
Concept: a plugin is a plug-in used to extend an existing architecture
-
The difference between loader and plugin
- Loader is used to convert a certain type of module. It is a converter or loader
- plugin is a plug-in. It is an extension of webpack itself and an extender
-
Use process:
- Install plugins required through npm
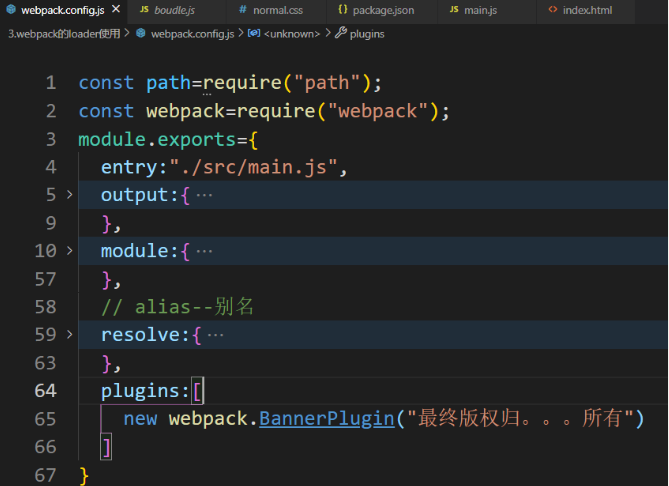
- On webpack config. Configure plug-ins in plugins in JS
-
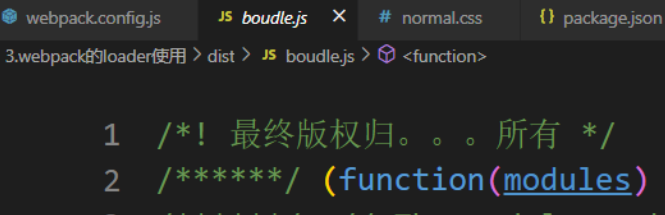
Add copyright plugin – BannerPlugin
-
It belongs to the plug-in of webpack
-
Modify webpack config. JS file
-
code:
const path=require("path"); const webpack=require("webpack"); module.exports={ entry:"./src/main.js", output:{ path:path.resolve(__dirname,"dist"), filename:"boudle.js", publicPath:'dist/' }, ... plugins:[ new webpack.BannerPlugin("The final copyright belongs to... All") ] } -
-
Use of HtmlWebpackPlugin
-
HtmlWebpackPlugin can index Package HTML into dist folder
-
effect:
- Automatically generate an index HTML file
- Automatically insert the packaged js file into the body through the script tag
-
Installation:
npm install html-webpack-plugin --save-dev
-
Modify webpack config. Contents of plugins in JS file
const HtmlWebpackPlugin =require("html-webpack-plugin") plugins:[ new webpack.BannerPlugin("The final copyright belongs to... All"), new htmlWebpackPlugin({ template:"index.html" }) ] -
Note: you need to delete the publicPath attribute previously added in output, otherwise there may be a problem with the src inserted into the script tag
-
-
Use of UglifyjsWebpackPlugin
-
Function: compress js and other files
-
Installation:
npm install uglifyjs-webpack-plugin@Version number --save-dev
-
Modify webpack config. JS file, using plug-ins
const UglifyWebpackPlugin =require("uglifyjs-webpack-plugin") plugins:[ new webpack.BannerPlugin("The final copyright belongs to... All"), new htmlWebpackPlugin({ template:"index.html" }), new UglifyWebpackPlugin( ) ] -
Effect: boudle Compressed JS
-
-
Build a local server with webpack dev server
-
webpack provides an optional local development server based on node JS build, internal use of the express framework, the browser can automatically refresh our modified results
-
install
npm install webpack-dev-server@Version number --save-dev
-
devserver is an option of webpack, and its properties can be set
- contentBase: which file to provide local service for. The default is the root file.
- Port: port number
- inline: real time page refresh
- historyApiFallback: in the SPA page, it depends on the history mode of HTML5
-
webpack.config.js file
devServer:{ contentBase:'./dist', inline:true } -
In package Configure another scripts in JSON: the – open parameter means to open the browser directly
"scripts": { "test": "echo \"Error: no test specified\" && exit 1", "build": "webpack", "dev":"webpack-dev-server --open" }, -
11. Profile separation
New folder build
– > new file base config. JS (there are some public configurations)
const path=require("path");
const webpack=require("webpack");
const HtmlWebpackPlugin=require("html-webpack-plugin")
module.exports={
  entry:"./src/main.js",
  output:{
    path:path.resolve(__dirname,"dist"),
    filename:"boudle.js",
    // publicPath:'dist/'
  },
  module:{
    rules:[
      {
        test:/\.css$/,
        //After parsing the css file, css loader uses import to load and returns the css code
        //Style loader adds the export of the module to the DOM as a style
        use:['style-loader','css-loader']
      },
      {
        test:/\.less$/,
        use:[
          {
            loader:"style-loader"
          },
          {
            loader:"css-loader"
          },
          {
            loader:"less-loader"
          },
        ]
      },
      {
        test:/\.(png|jpg|gif)$/,
        use:[
          {
            loader:"url-loader",
            options:{
              //When the loaded image is less than the limit, the image will be compiled into base64 format
              //When the loaded image is greater than the limit, you need to use the file loader module to load it
              limit:8192,
              name:"img/[name].[hash:8].[ext]"
            }
          }
        ]
      },
      {
        test:/\.js$/,
        exclude:/(node_modules|bower_compoments)/,
        use:{
          loader:'babel-loader',
          options:{
            presets:['es2015']
          }
        }
      }
    ]
  },
  // Alias -- alias
  resolve:{
    alias:{
      'vue$':'vue/dist/vue.esm.js'
    }
  },
  plugins:[
    new webpack.BannerPlugin("The final copyright belongs to... All"),
    new HtmlWebpackPlugin({
      template:"index.html"
    }),
  ],
}
– > create a new file prod.config JS (inside is the production configuration)
const UglifyWebpackPlugin=require("uglifyjs-webpack-plugin")
const webpackMerge=require("webpack-merge")
const baseConfig = require("./base.config")
module.exports=webpackMerge.merge(baseConfig,{
  plugins:[
    new UglifyWebpackPlugin()
  ],

})
– > create a new file dev.config JS (which is the development configuration)
const webpackMerge=require("webpack-merge")
const baseConfig = require("./base.config")
module.exports=webpackMerge.merge(baseConfig,{
  devServer:{
    contentBase:'./dist',
    inline:true
  }
})
install
npm install webpack-merge --save-dev
Function: webpack merge combines basic configuration with production configuration or development configuration
Finally: in package scripts configuration in JSON
"scripts": {
    "build": "webpack --config ./build/prod.config.js",
    "dev": "webpack-dev-server --open --config ./build/dev.config.js"
  }