catalogue
VTK compilation and environment construction
VTK compilation and environment construction
At present, some leaders have made mature fool configuration for this part. You can refer to this article: VTK + vs2019 (or other versions are available) fool type one-stop configuration_ Nancy_ Fair's blog - CSDN blog_ vs2019 vtk
VTK general rendering process

 https://blog.csdn.net/liushao1031177/article/details/115503446
VTK data type - vtkPolyData
Polygon dataset is mainly composed of vertices, multi vertices, lines, polylines and triangular zones.
Vertices, lines, and polygons constitute the smallest set of basic elements used to represent 0, 1, and 2-dimensional geometry. In particular, the triangle belt only needs N+2 points to express N triangles, and most graphics render the triangle belt very fast.
Use vtk's own polygon data
vtk comes with a lot of mature polygon data, including cylinder, sphere, cone and so on. We only need to set a few properties to create a model and display it with ready-made data. The following is the code for creating a display cone
void SimpleVtk()
{
vtkConeSource* source = vtkConeSource::New();
source->SetHeight(13);
source->SetRadius(5);
vtkPolyDataMapper* coneMapper = vtkPolyDataMapper::New();
coneMapper->SetInputConnection(source->GetOutputPort());
vtkActor* coneActor = vtkActor::New();
coneActor->SetMapper(coneMapper);
vtkRenderer* render = vtkRenderer::New();
vtkRenderWindow* renwin = vtkRenderWindow::New();
vtkRenderWindowInteractor* iren = vtkRenderWindowInteractor::New();
render->AddActor(coneActor);
render->SetBackground(0.8, 0.4, 0.4);
renwin->AddRenderer(render);
iren->SetRenderWindow(renwin);
iren->Initialize();
iren->Start();
source->Delete();
coneMapper->Delete();
coneActor->Delete();
render->Delete();
renwin->Delete();
iren->Delete();
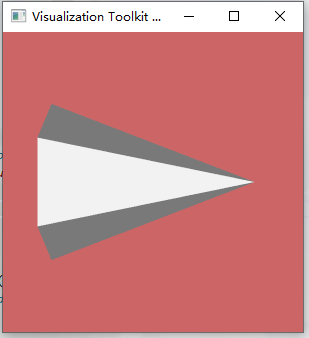
}First create the cone resource and set its properties, then pass it to the mapper, which passes the results to the rendering component for rendering display. The following are the results of the run:
Use your own data
Of course, sometimes the default model is not enough. We want to create the model ourselves. The following is the code for creating a tetrahedron:
void makePolyData()
{
	vtkPoints* points = vtkPoints::New();
	points->InsertNextPoint(0.0, 0.0, 0.0);
	points->InsertNextPoint(1.0, 0.0, 0.0);
	points->InsertNextPoint(0.0, 1.0, 0.0);
	points->InsertNextPoint(0.0, 0.0, 1.0);

	vtkTriangle* tran1 = vtkTriangle::New();
	tran1->GetPointIds()->SetId(0, 0);
	tran1->GetPointIds()->SetId(1, 1);
	tran1->GetPointIds()->SetId(2, 2);

	vtkTriangle* tran2 = vtkTriangle::New();
	tran2->GetPointIds()->SetId(0, 0);
	tran2->GetPointIds()->SetId(1, 1);
	tran2->GetPointIds()->SetId(2, 3);

	vtkTriangle* tran3 = vtkTriangle::New();
	tran3->GetPointIds()->SetId(0, 0);
	tran3->GetPointIds()->SetId(1, 2);
	tran3->GetPointIds()->SetId(2, 3);

	vtkTriangle* tran4 = vtkTriangle::New();
	tran4->GetPointIds()->SetId(0, 1);
	tran4->GetPointIds()->SetId(1, 2);
	tran4->GetPointIds()->SetId(2, 3);

	vtkCellArray* cells = vtkCellArray::New();
	cells->InsertNextCell(tran1);
	cells->InsertNextCell(tran2);
	cells->InsertNextCell(tran3);
	cells->InsertNextCell(tran4);

	vtkPolyData* source = vtkPolyData::New();
	source->SetPoints(points);
	source->SetPolys(cells);

	vtkPolyDataMapper* coneMapper = vtkPolyDataMapper::New();
	coneMapper->SetInputData(source);

	vtkActor* coneActor = vtkActor::New();
	coneActor->SetMapper(coneMapper);

	vtkRenderer* render = vtkRenderer::New();
	vtkRenderWindow* renwin = vtkRenderWindow::New();
	vtkRenderWindowInteractor* iren = vtkRenderWindowInteractor::New();

	render->AddActor(coneActor);
	render->SetBackground(0.8, 0.4, 0.4);

	renwin->AddRenderer(render);

	iren->SetRenderWindow(renwin);
	iren->Initialize();
	iren->Start();

	points->Delete();
	tran1->Delete();
	tran2->Delete();
	tran3->Delete();
	tran4->Delete();
	cells->Delete();
	source->Delete();
	coneMapper->Delete();
	coneActor->Delete();
	render->Delete();
	renwin->Delete();
	iren->Delete();
}
Firstly, create point resources and add coordinate points through InsertNextPoint method. Secondly, create four triangles of tetrahedron, set the index of points through getpointids() - > setid() method, and then add the four triangles into polygon cells through InsertNextCell method. Then add point resources and polygon cells to vtkPolyData, and put the Data into the rendering process to display the tetrahedron. The following are the output results:
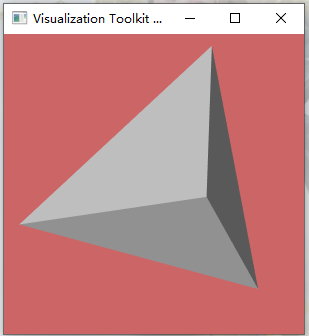
Obviously, this generation method is a little cumbersome. vtk you can add triangular bands into polygon cells. Generally, 3D models are composed of triangular bands, which save resources and render quickly. The following is the code of the triangle belt:
void makePolyData2()
{
	vtkPoints* points = vtkPoints::New();
	points->InsertNextPoint(0.0, 0.0, 0.0);
	points->InsertNextPoint(1.0, 0.0, 0.0);
	points->InsertNextPoint(0.0, 1.0, 0.0);
	points->InsertNextPoint(0.0, 0.0, 1.0);

	vtkCellArray* array = vtkCellArray::New();
	array->InsertNextCell(6);

	array->InsertCellPoint(1);
	array->InsertCellPoint(3);
	array->InsertCellPoint(0);
	array->InsertCellPoint(2);
	array->InsertCellPoint(1);
	array->InsertCellPoint(3);

	vtkPolyData* source = vtkPolyData::New();
	source->SetPoints(points);
	source->SetStrips(array);

	vtkPolyDataMapper* coneMapper = vtkPolyDataMapper::New();
	coneMapper->SetInputData(source);

	vtkActor* coneActor = vtkActor::New();
	coneActor->SetMapper(coneMapper);

	vtkRenderer* render = vtkRenderer::New();
	vtkRenderWindow* renwin = vtkRenderWindow::New();
	vtkRenderWindowInteractor* iren = vtkRenderWindowInteractor::New();

	render->AddActor(coneActor);
	render->SetBackground(0.8, 0.4, 0.4);

	renwin->AddRenderer(render);

	iren->SetRenderWindow(renwin);
	iren->Initialize();
	iren->Start();

	points->Delete();
	array->Delete();
	source->Delete();
	coneMapper->Delete();
	coneActor->Delete();
	render->Delete();
	renwin->Delete();
	iren->Delete();
}
Use InsertCellPoint method to add the index of the point to the triangle belt, and use SetStrips to add the triangle belt in the resource. The following is the rendering result:

Add vertex color
Now that we have successfully generated the tetrahedron, it is gray and obviously not very good-looking. The following is the code for adding color display. First, add vertex color:
void makePolyDataAndSetColor()
{
unsigned char red[3] = { 255, 0, 0 };
unsigned char green[3] = { 0, 255, 0 };
unsigned char blue[3] = { 0, 0, 255 };
vtkPoints* points = vtkPoints::New();
points->InsertNextPoint(0.0, 0.0, 0.0);
points->InsertNextPoint(1.0, 0.0, 0.0);
points->InsertNextPoint(0.0, 1.0, 0.0);
points->InsertNextPoint(0.0, 0.0, 1.0);
vtkCellArray* array = vtkCellArray::New();
array->InsertNextCell(6);
array->InsertCellPoint(1);
array->InsertCellPoint(3);
array->InsertCellPoint(0);
array->InsertCellPoint(2);
array->InsertCellPoint(1);
array->InsertCellPoint(3);
vtkUnsignedCharArray* pointsColors = vtkUnsignedCharArray::New();
pointsColors->SetNumberOfComponents(3);
pointsColors->InsertNextTypedTuple(red);
pointsColors->InsertNextTypedTuple(green);
pointsColors->InsertNextTypedTuple(blue);
pointsColors->InsertNextTypedTuple(red);
vtkPolyData* source = vtkPolyData::New();
source->SetPoints(points);
source->SetStrips(array);
source->GetPointData()->SetScalars(pointsColors);
vtkPolyDataMapper* coneMapper = vtkPolyDataMapper::New();
coneMapper->SetInputData(source);
vtkActor* coneActor = vtkActor::New();
coneActor->SetMapper(coneMapper);
vtkRenderer* render = vtkRenderer::New();
vtkRenderWindow* renwin = vtkRenderWindow::New();
vtkRenderWindowInteractor* iren = vtkRenderWindowInteractor::New();
render->AddActor(coneActor);
render->SetBackground(0.8, 0.4, 0.4);
renwin->AddRenderer(render);
iren->SetRenderWindow(renwin);
iren->Initialize();
iren->Start();
points->Delete();
array->Delete();
pointsColors->Delete();
source->Delete();
coneMapper->Delete();
coneActor->Delete();
render->Delete();
renwin->Delete();
iren->Delete();
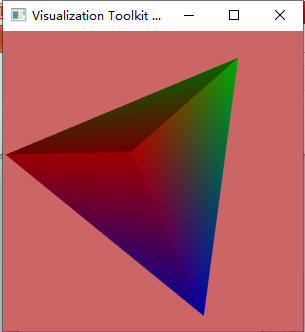
}Create a new unsigned char array as the color resource, and add the color to the color resource through the InsertNextTypedTuple() method. Then add vertex color resources to polyData through getpointdata() - > setscalars() method. The following is the rendering result:
Add face color
Of course, we can also add solid colors to each face:
void makePolyDataAndSetColor2()
{
	unsigned char red[3] = { 255, 0, 0 };
	unsigned char green[3] = { 0, 255, 0 };
	unsigned char blue[3] = { 0, 0, 255 };

	vtkPoints* points = vtkPoints::New();
	points->InsertNextPoint(0.0, 0.0, 0.0);
	points->InsertNextPoint(1.0, 0.0, 0.0);
	points->InsertNextPoint(0.0, 1.0, 0.0);
	points->InsertNextPoint(0.0, 0.0, 1.0);

	vtkTriangle* tran1 = vtkTriangle::New();
	tran1->GetPointIds()->SetId(0, 0);
	tran1->GetPointIds()->SetId(1, 1);
	tran1->GetPointIds()->SetId(2, 2);

	vtkTriangle* tran2 = vtkTriangle::New();
	tran2->GetPointIds()->SetId(0, 0);
	tran2->GetPointIds()->SetId(1, 1);
	tran2->GetPointIds()->SetId(2, 3);

	vtkTriangle* tran3 = vtkTriangle::New();
	tran3->GetPointIds()->SetId(0, 0);
	tran3->GetPointIds()->SetId(1, 2);
	tran3->GetPointIds()->SetId(2, 3);

	vtkTriangle* tran4 = vtkTriangle::New();
	tran4->GetPointIds()->SetId(0, 1);
	tran4->GetPointIds()->SetId(1, 2);
	tran4->GetPointIds()->SetId(2, 3);

	vtkCellArray* cells = vtkCellArray::New();
	cells->InsertNextCell(tran1);
	cells->InsertNextCell(tran2);
	cells->InsertNextCell(tran3);
	cells->InsertNextCell(tran4);

	vtkUnsignedCharArray* cellColors = vtkUnsignedCharArray::New();
	cellColors->SetNumberOfComponents(3);
	cellColors->InsertNextTypedTuple(red);
	cellColors->InsertNextTypedTuple(green);
	cellColors->InsertNextTypedTuple(blue);
	cellColors->InsertNextTypedTuple(red);

	vtkPolyData* source = vtkPolyData::New();
	source->SetPoints(points);
	source->SetPolys(cells);
	source->GetCellData()->SetScalars(cellColors);

	vtkPolyDataMapper* coneMapper = vtkPolyDataMapper::New();
	coneMapper->SetInputData(source);

	vtkActor* coneActor = vtkActor::New();
	coneActor->SetMapper(coneMapper);

	vtkRenderer* render = vtkRenderer::New();
	vtkRenderWindow* renwin = vtkRenderWindow::New();
	vtkRenderWindowInteractor* iren = vtkRenderWindowInteractor::New();

	render->AddActor(coneActor);
	render->SetBackground(0.8, 0.4, 0.4);

	renwin->AddRenderer(render);

	iren->SetRenderWindow(renwin);
	iren->Initialize();
	iren->Start();

	points->Delete();
	cellColors->Delete();
	tran1->Delete();
	tran2->Delete();
	tran3->Delete();
	tran4->Delete();
	cells->Delete();
	source->Delete();
	coneMapper->Delete();
	coneActor->Delete();
	render->Delete();
	renwin->Delete();
	iren->Delete();
}
This time, the getcelldata() - > setscalars() method is used to transfer the face color to each face. The rendering results are as follows:

You can also try to add vertex color and face color at the same time.