1, Basic concepts of applications and components in Vue
1. vue import
<script src="https://unpkg.com/vue@next"></script>
two MVVM design mode
- MVVM design mode, M - > model data, V - > view view, VM - > ViewModel view data connection layer.
3. Create a vue application
- Global API: createApp usage.
- Application API: mount usage.
- Option - Data: data usage.
- Option - DOM: template usage.
<!DOCTYPE html>
<html lang="en">

<head>
    <meta charset="UTF-8">
    <meta http-equiv="X-UA-Compatible" content="IE=edge">
    <meta name="viewport" content="width=device-width, initial-scale=1.0">
    <title>Document</title>
    <script src="https://unpkg.com/vue@next"></script>
</head>

<body>
    <div id="root"></div>
    <script>
        // createApp means to create a Vue application and store it in the app variable
        // The passed in parameter indicates how the outermost component of the application should be displayed
        const app = Vue.createApp({
            data() {
                return {
                    message: 'hello world'
                }
            },
            template: "<div>{{message}}</div>"
        });
        // vm represents the root component of Vue application
        // mount is used to replace innerHTML content of the specified DOM element with the template rendering result of root component applied by vue
        const vm = app.mount('#root');
    </script>
</body>

</html>
2, Understanding life cycle functions in Vue
- Life cycle function: a function that will be executed automatically at a certain time.
- Options - lifecycle hook.
1. beforeCreate
- Functions that are automatically executed before the instance is generated.
2. created
- Functions that will be executed automatically after the instance is generated.
- It means that the following contents have been configured: Data listening, calculation properties, methods, callback functions of event / listener.
- However, the dom has not been mounted yet. This phase allows http request operations to be performed.
supplement
-
ajax requests can be in created and mounted.
-
However, when the request is in created, the dom in the view is not rendered, and the real dom cannot be obtained
-
In mounted, the DOM has been rendered, so you can directly operate the dom.
- Note: mounted is not supported in server-side rendering, so created is used uniformly in server-side rendering.
- Regardless of server-side rendering, it is generally selected in mounted Data is requested during the cycle, because the current component has been mounted on the real element at the beginning of the cycle.
3. beforeMount
- A function that is automatically executed before component content is rendered to the page.
4. mounted
- A function that executes automatically after the component content is rendered to the page.
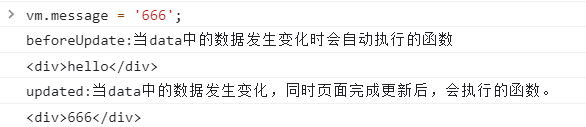
5. beforeUpdate
- A function that automatically executes when the data in data changes.
6. updated
- When the data in data changes and the page is updated, the function will be executed.
7. beforeUnmount
- Functions that are automatically executed before the component instance is unloaded.
8. unmounted
- After the component instance is unloaded, the dom is completely destroyed and the function is automatically executed.
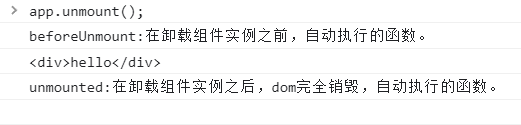
- Application API: unmount Uninstall the root component of the application instance.
Example:
<!DOCTYPE html>
<html lang="en">

<head>
    <meta charset="UTF-8">
    <meta http-equiv="X-UA-Compatible" content="IE=edge">
    <meta name="viewport" content="width=device-width, initial-scale=1.0">
    <title>Document</title>
    <script src="https://unpkg.com/vue@next"></script>
</head>

<body>
    <div id="root"></div>
    <script>
        const app = Vue.createApp({
            data() {
                return {
                    message: 'hello'
                };
            },
            methods: {
                showMessage() {
                    console.log(document.getElementById('root').innerHTML);
                }
            },
            beforeCreate() {
                console.log('beforeCreate:Before instantiation generation.');
            },
            created() {
                console.log('created:After instantiation generation');
            },
            beforeMount() {
                console.log('beforeMount:Before the component content is rendered to the page.');
                this.showMessage();
            },
            mounted() {
                console.log('mounted:After the component content is rendered to the page');
                this.showMessage();
            },
            beforeUpdate() {
                console.log('beforeUpdate:When data A function that executes automatically when data in changes');
                this.showMessage();
            },
            updated() {
                console.log('updated:When data The function that will be executed when the data in the page changes and the page is updated.');
                this.showMessage();
            },
            beforeUnmount() {
                console.log('beforeUnmount:Functions that are automatically executed before the component instance is unloaded.');
                this.showMessage();
            },
            unmounted() {
                console.log('unmounted:After uninstalling the component instance, dom Completely destroyed, automatically executed functions.');
                this.showMessage();
            },
            template: "<div>{{message}}</div>"
        });
        const vm = app.mount('#root');
    </script>
</body>

</html>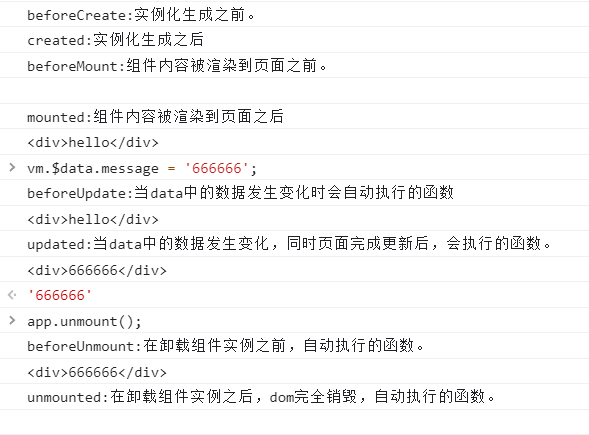
3, Common template syntax
1. Interpolation expression
- {{}: interpolation expression, which can write js expression.
2. v-html instructions
- v-html: update the innerHTML of the element, and insert the content as normal HTML.
data(){
    return {
        message: '<strong>hello</strong>'
    }
},
template: "<div v-html='message'></div>"
3. v-bind instructions
- v-bind: abbreviated as“ : ”, Used to dynamically bind one or more attribute s.
message: '666'
template: "<div v-bind:title='message'>hello</div>"

4. v-once instructions
- v-once: render elements and components only once (expressions are not required for use).
message: '666'
template: `<div v-once>{{message}}</div>`
- Note: if you change the value of message, DOM will not be re rendered.
5. v-if instructions
- v-if: renders elements conditionally based on the true and false values of the expression.
show: true
template: `<div v-if='show'>hello</div>`
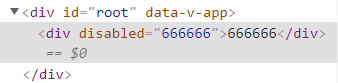
7. v-on instructions
- v-on: abbreviation @, used for binding event listening.
data() {
    return {
        message: 'hello'
    }
},
methods: {
    handleClick() {
        this.message = '666666';
    }
},
template: `<div v-on:click='handleClick'>{{message}}</div>`
-
Event modifier:. prevent - call event.preventDefault().
template: `<a href='https://www.baidu.com' @[event].prevent='handleClick'></a>`
8. Dynamic attributes
- Dynamic properties: using [] Package attribute, which is used to dynamically change the attribute name.
data() {
    return {
        message: 'hello',
        event: 'click',
        name: 'title'
    }
},
methods: {
    handleClick() {
        this.message = '666666';
    }
},
template: `<div
            :[name]='message'
            v-on:[event]='handleClick'>
            {{message}}
        </div>`
- Change name
- Change event
4, Data, methods, calculation properties, and listeners
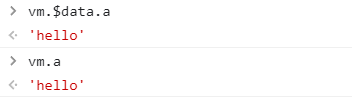
1. data option
- Data: type Function, which returns the data object of the component instance.
- After the instance is created, you can vm.$data Access the original data object.
- The component instance also proxies all the properties on the data object, so access vm.a Equivalent to access vm.$data.a.
data() {
    return {
        a: 'hello',
    }
}
2. methods option
- Methods: type {}, which is used to define some methods, such as the function executed when an event is triggered.
- this points to the vue instance (premise: not an arrow function).
- As long as the page is re rendered, it will be re executed.
data() {
    return {
        a: 'hello',
    }
},
methods: {
    handleClick(str1){
        this.a = str1;
    }
},
template: `<div @click='handleClick(66666)'>{{a}}</div>`
3. computed option
- computed: type {}. The result of calculating the property will be cached and will be recalculated only when the dependent responsive property changes.
data() {
return {
count: 2,
price: 5
}
},
computed: {
total(){
return this.count * this.price;
}
},
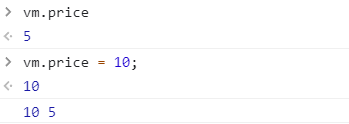
template: `<div>{{total}}</div>`4. watch option
- watch: type {[key: string]: string | Function | Object | Array}, listening for changes in responsive property.
- You can get the value after the change and the value before the change.
price: 5
watch: {
    price(current, prev){
        setTimeout(()=>console.log(current, prev),1000);
    }
}
five Differences between computed, methods and watch
5.1 computed and methods
- computed is a calculated attribute and methods is a method. Both of them can process the data in data and then output it.
- The difference is that the computed attribute is cached based on their dependencies. The computed attribute will be re evaluated only when its related dependencies change.
- For methods, as long as the page is re rendered, the methods call will always execute the function.
five point two computed and watch
- Similarities and differences:
- They are the implementation of the listener by vue, but computed is mainly used to process synchronous data.
- watch is mainly used to observe the change of a value to complete a complex business logic with high overhead, and can handle asynchronous operations.
- Application scenario:
- When we need to perform numerical calculations and rely on other data, we should use computed.
- When we need to perform asynchronous or expensive operations when data changes, we should use watch.
4, Style binding syntax
1. Change the style through class
1.1 the value is a string
<!DOCTYPE html>
<html lang="en">

<head>
    <meta charset="UTF-8">
    <meta http-equiv="X-UA-Compatible" content="IE=edge">
    <meta name="viewport" content="width=device-width, initial-scale=1.0">
    <title>Document</title>
    <script src="https://unpkg.com/vue@next"></script>
    <style>
        .red {
            color: red;
        }

        .green {
            color: green;
        }
    </style>
</head>

<body>
    <div id="root"></div>
    <script>
        const app = Vue.createApp({
            data() {
                return {
                    classString: 'red'
                }
            },
            template: `<div :class='classString'>hello</div>`
        });
        const vm = app.mount('#root');
    </script>
</body>

</html>
1.2 value as object
data() {
    return {
        classObject: { red: true, green: false }
    }
},
template: `<div :class='classObject'>hello</div>`
1.3 values are arrays
data() {
    return {
        classArray: ['red', 'green']
    }
},
template: `<div :class='classArray'>hello</div>`
1.4 including sub components
- Application API: component Register global components.
- Instance property: $attrs You can collect all the attributes passed from the parent component, except those that are not passed in the component props Defined (class and style Except).
When the subcomponent has only one element:
const app = Vue.createApp({
    data() {
        return {
            classString: 'red',
            classObject: { red: true, green: false },
            classArray: ['red', 'green']
        }
    },
    template: `
        <div :class='classArray'>hello</div>
        <demo class='red' />
    `
});
app.component('demo', {
    template: `
        <div>one</div>
    `
})
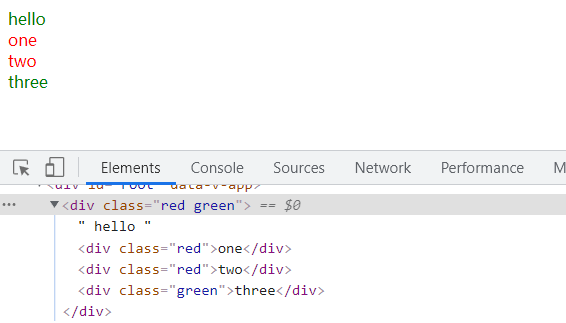
When a sub component has multiple components, $attrs is required:
data() {
    return {
        classString: 'red',
        classArray: ['red', 'green']
    }
},
template: `
    <div :class='classArray'>
        hello
        <demo :class='classString'/>
    </div>
`
});
app.component('demo', {
template: `
    <div :class='$attrs.class'>one</div>
    <div :class='$attrs.class'>two</div>
    <div class='green'>three</div>
`
})
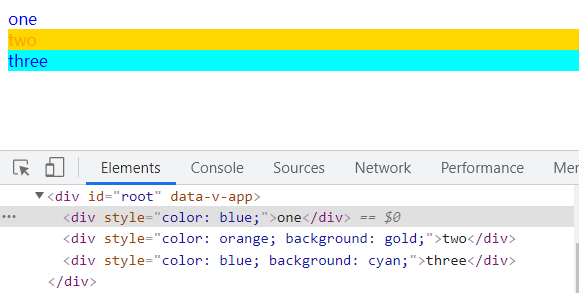
2. Modify style through inline style
- Values also have three forms: strings, objects, and arrays.
data() {
    return {
        styleString: 'color: blue',
        styleObject: {
            color: 'orange',
            background: 'gold'
        },
        styleArray: ['color: blue', 'background: cyan']
    }
},
template: `
    <div :style='styleString'>one</div>
    <div :style='styleObject'>two</div>
    <div :style='styleArray'>three</div>
`
5, Conditional rendering
1. v-if instructions
- Expressions render elements for true values and destroy elements for false values.
const app = Vue.createApp({
    data() {
        return {
            show: true
        }
    },
    template: `
        <div v-if='show'>hello</div>
    `
});
const vm = app.mount('#root');
2. v-show instruction
- If the expression is true, the element will be rendered normally, and if it is false, the element will add a style="display: none;" attribute.
template: `
    <div v-show='show'>hello</div>
`
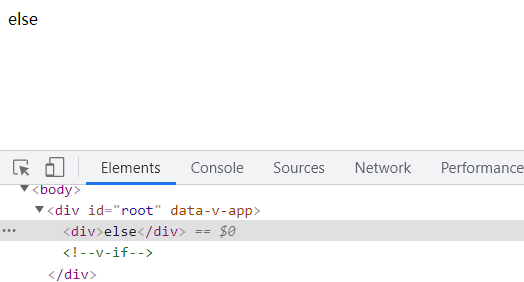
3. v-else instructions
-
No expression is required
-
Restriction: the previous sibling element must have v-if or v-else-if.
-
Usage:
by v-if perhaps v-else-if Add else block.
data() {
    return {
        show: false
    }
},
template: `
    <div v-if='show'>if</div>
    <div v-else>else</div>
`
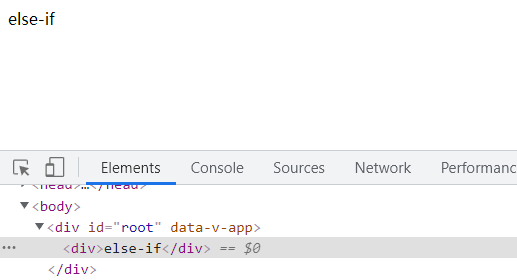
4. v-else-if instructions
-
Restriction: the previous sibling element must have v-if or v-else-if.
-
Usage:
express v-if 'else if block'. Can be called chained.
data() {
    return {
        showOne: false,
        showTwo: true
    }
},
template: `
    <div v-if='showOne'>if</div>
    <div v-else-if='showTwo'>else-if</div>
`
6, List loop rendering
1. v-for instructions
- The type of v-for can be used: array | object | number | string | iteratable.
- Purpose: render elements or template blocks multiple times based on source data.
1.1 circular rendering of arrays
- The accepted data are: value and index.
const app = Vue.createApp({
data() {
    return {
        listArray: ['a', 'b', 'c'],
    }
},
template: `
    <div v-for='(item, index) in listArray'>
        {{index}}--{{item}}
    </div>
`
});
const vm = app.mount('#root');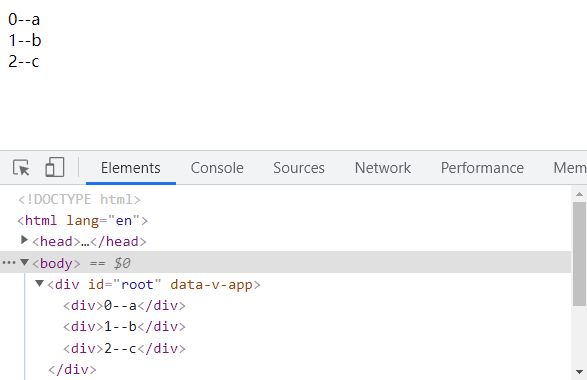
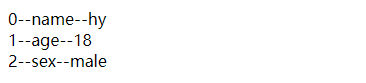
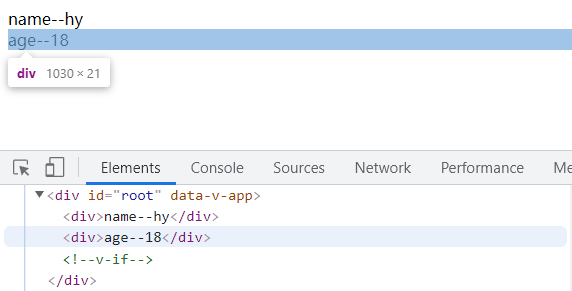
1.2 circular rendering of objects
- The accepted data are: value, key name and index.
data() {
    return {
        listObject: {
            name: 'hy',
            age: 18,
            sex: 'male'
        }
    }
},
template: `
    <div v-for='(item, key, index) in listObject'>
        {{index}}--{{key}}--{{item}}
    </div>
`
1.3 circular rendering of number
- The accepted data are: value and index.
- Start with 1.
template: `
    <div v-for='(item, index) in 3'>
        {{index}}--{{item}}
    </div>
`
1.4 special attribute key
- key is used to judge whether two nodes are the same when updating components. If they are the same, they will be reused. If they are different, they will delete the old ones and create a new one.
- If the key is not added, the components are reused in place by default. The added node will not be deleted, but the text value in the list item will be changed. However, the node operation is very performance-consuming.
template: `
    <div v-for='(item, index) in 3' :key='index'>
        {{index}}--{{item}}
    </div>
`
2. Array and object update detection
2.1 using arrays Change function
- push(): insert the last item.
- pop(): delete the last item.
- shift(): deletes the first item.
- unshift(): inserts the first item.
2.2 direct replacement array

2.3 directly update the contents of the array
2.4 add the content of the object directly
3. v-if and v-for are used simultaneously
- Priority ratio of v-for v-if should be high. You can't write them together.
- It can be implemented using < template > < / template >.
- template tag, a new tag provided by HTML5, is a parent container, which will be hidden when the page is loaded.
data() {
    return {
        listObject: {
            name: 'hy',
            age: 18,
            sex: 'male'
        }
    }
},
template: `
    <template v-for='(item, key) in listObject' :key='key'>
        <div v-if="key !== 'sex'">
            {{key}}--{{item}}
        </div>
    </template>
`
7, Event binding
1. Accept the event object
1.1 when parameters are not transmitted
data() {
    return {count: 0}
},
methods: {
    handleClick(event){
        console.log(event.target);
        this.count += 1;
    }
},
template: `
    <div>
        {{count}}
        <button @click='handleClick'>add</button>
    </div>

`
1.2 when transmitting parameters
- Use $event to pass native DOM event objects
methods: {
    handleClick(num, event){
        console.log(event.target);
        this.count += num;
    }
},
template: `
    <div>
        {{count}}
        <button @click='handleClick(2, $event)'>add</button>
    </div>

`
2. Multi event processor
- There can be multiple methods in an event handler, separated by a comma operator.
- Note: when calling, the function name should be followed by parentheses ().
methods: {
    handleClick1(){
        console.log(++this.count);
    },
    handleClick2(){
        console.log(--this.count);
    }
},
template: `
    <div>
        {{count}}
        <button @click='handleClick1(), handleClick2()'>add</button>
    </div>

`
3. Event modifier
- A modifier is represented by an instruction suffix beginning with a dot.
- . stop: prevent event propagation.
- . prevent: prevents the default behavior of events.
- . capture: use event capture mode.
- . self: click self to trigger.
- . once: triggered only once.
- . passive: commonly used to improve the performance of mobile terminals.
<!-- Prevent click event from continuing propagation -->
<a @click.stop="doThis"></a>

<!-- Submitting events no longer reloads the page -->
<form @submit.prevent="onSubmit"></form>

<!-- Use event capture mode when adding event listeners -->
<!-- That is, events triggered by internal elements are processed here first, and then handed over to internal elements for processing -->
<div @click.capture="doThis">...</div>

<!-- Only when event.target Is the handler that is triggered when the current element itself -->
<!-- That is, the event is not triggered from an internal element -->
<div @click.self="doThat">...</div>

<!-- The click event will only be triggered once -->
<a @click.once="doThis"></a>

<!-- Default behavior for scrolling events (Rolling behavior) Will be triggered immediately   -->
<!-- Without waiting `onScroll` Completion, promotion scroll Performance of  -->
<div @scroll.passive="onScroll">...</div>
4. Key modifier
- When listening for keyboard events, we often need to check the detailed keys.
- Commonly used are: enter, tab, delete (capture the delete and backspace keys), esc, space, up, down, left, right.
<!-- Only in `key` yes `Enter` Time call `vm.submit()` -->
<input @keyup.enter="submit" />
5. Other modifiers
- System modifier: ctrl,alt,shift,meta.
- Mouse button modifier: left,right,middle.
- .exact Modifier Allows you to control events triggered by a precise combination of system modifiers.
8, Use of bidirectional binding instructions in forms
- v-model Directive: create a two-way binding on a form control or component.
1. input(text )Bidirectional binding in text
- There is no need to write value. The bound data is value by default.
data() {
    return {message: 'hello'}
},
template: `
    <div>
        <input v-model='message'/>
        {{message}}
    </div>
`
2. textarea Bidirectional binding in multiline text
- There is no need to write value. The bound data is value by default.
- Interpolation does not work in the text area and should be used v-model Instead.
<textarea v-model='message'/>    // Correct writing

<textarea>{{message}}</textarea>    // Wrong writing
3. input(Checkbox )Bidirectional binding in check box
- Single check box, bound value is Boolean
data() {
    return {message: true}
},
template: `
    <div>
        <input type='checkbox' v-model='message' />
        {{message}}
    </div>
`
- Multiple check boxes are bound to the same array (you need to set the value value for the check box).
data() {
    return {message: []}
},
template: `
    <div>
        <input type='checkbox' v-model='message' value='xm'/>
        <input type='checkbox' v-model='message' value='hw'/>
        <input type='checkbox' v-model='message' value='ip'/>
        {{message}}
    </div>
`
- Modify the values when selecting and canceling. Here true-value and false-value Property does not affect the of the input control value Properties.
data() {
    return {
        message: 'yes'
    }
},
template: `
    <div>
        <input type='checkbox' v-model='message' true-value='yes' false-value='no' value='666'/>
        {{message}}
    </div>
`
4. input (Radio )Bidirectional binding in radio box
- message initially, you can give an empty string. If you give an array, it will also become a string.
data() {
    return {message: ''}
},
template: `
    <div>
        <input type='radio' v-model='message' value='xm'/>
        <input type='radio' v-model='message' value='hw'/>
        <input type='radio' v-model='message' value='ip'/>
        {{message}}
    </div>
`
5. select Select the bidirectional binding in the box
- Note that the v-model instruction is added to the select tag.
- Single choice
data() {
    return {message: ''}
},
template: `
    <div>
        <select v-model='message'>
            <option disabled value="">Please select one</option>
            <option>A</option>
            <option>B</option>
            <option>C</option>
        </select>
        {{message}}
    </div>
`
- When multiple selections are made, the multiple attribute is added on the select tag and bound to an array.
data() {
    return {message: []}
},
template: `
    <div>
        <select v-model='message' multiple>
            <option>A</option>
            <option>B</option>
            <option>C</option>
            <option>666666</option>
        </select>
        {{message}}
    </div>
`
- use v-for Dynamic options for rendering
data() {
    return {
        message: [],
        // String writing
        // options:[
        //     'A','B','C'
        // ]
        // Object writing
        options: [
            {value:'A',text:'A'},
            {value:'B',text:'B'},
            {value:'C',text:'C'}
        ]
    }
},
template: `
    <div>
        <select v-model='message' multiple>
            <option v-for='item in options' :value=item.value>{{item.text}}</option>
        </select>
        {{message}}
    </div>
`
6. Modifier
6.1 .lazy
- By default, v-model Every time input After the event is triggered, the value of the input box is synchronized with the data.
- add to lazy Modifier so that change Synchronize after the event (enter or lose focus).
<input v-model.lazy='message'/>

6. 2 .number
- number Modifier can convert the user's input value to numeric type.
template: `
    <div>
        <input v-model.number='message' type="number"/>
        {{typeof message}}
    </div>
`
6.3 .trim
- The trim modifier automatically filters the first and last white space characters entered by the user.
data() {
    return {
        message: ''
    }
},
template: `
    <div>
        <input v-model.trim='message'/>
        {{message}}
    </div>
`