In recent work, you need to optimize the previous web side code editor. As a back-end developer, although I'm not professional, I can only bite the bullet. After consulting a lot of materials, I still optimized some contents. Let's share them here. If there is something wrong, please forgive me. After all, it's very tired to play with pure hands, ha ha.
Reference Manual:
Vue codemirror GitHub address: https://github.com/surmon-china/vue-codemirror
codemirror Chinese document: https://olindk.gitbooks.io/codemirror/content/configuration.html
codemirror English document: https://codemirror.net/doc/manual.html#config
How to introduce Vue codemirror will not be written in detail. There are many online materials. There are also simple tutorials in Vue codemirror gitbub. This article only lists some functions that I think are very useful.
options configuration
The most important thing in codemirror is configuration. Here I will post the configuration I use first.
cmOptions: {
	theme: 'monokai',
	mode: '',
	readOnly: false,
	tabSize: 4, // Tab
	indentUnit: 2, // Indent digit
	lineNumbers: true,
	ineWiseCopyCut: true,
	viewportMargin: 1000,
	autofocus: true,
	autocorrect: true,
	spellcheck: true,
	specialChars: /[--?-??-?????-?]/g,
	specialCharPlaceholder: function (ch) {
	  let token = document.createElement("span");
	  let content = ".";
	  token.className = "cm-invalidchar";
	  if (typeof content == "string") {
		token.appendChild(document.createTextNode(content));
	  }
	  token.title = "\u" + ch.charCodeAt(0).toString(16);
	  token.setAttribute("aria-label", token.title);
	  return token
	},
	extraKeys: {
	  Tab: (cm) => {
		if (cm.somethingSelected()) {      // Text selection exists
		  cm.indentSelection('add');    // Indent text forward
		} else {                    // No text selection
		  cm.replaceSelection(Array(cm.getOption("indentUnit") + 1).join(" "), "end", "+input");  // Insert an indentUnit space at the cursor
		}
	  },
	},
	lint: false,
	// Code folding
	gutters: [
	  "CodeMirror-lint-markers",
	  "CodeMirror-linenumbers",
	  "CodeMirror-foldgutter"
	],
	lineWrapping: false,
	foldGutter: true, // Enable code folding in line slots
	autoCloseBrackets: true, // Auto close symbol
	autoCloseTags: true,
	matchTags: { bothTags: true },
	matchBrackets: true, // When the cursor clicks on the left and right sides of the brackets next to {,] the matching brackets},] will be highlighted automatically
	styleSelectedText: true,
	styleActiveLine: true,
	autoRefresh: true,
	highlightSelectionMatches: {
	  minChars: 2,
	  trim: true,
	  style: "matchhighlight",
	  showToken: false
	},
	hintOptions: {
	  completeSingle: false
	}
}
1) Automatic code prompt and completion
For code prompt and completion functions, you need to import the following files in codemirror/addon/hint directory
import 'codemirror/addon/hint/show-hint.css'
import 'codemirror/addon/hint/show-hint.js'
import 'codemirror/addon/hint/javascript-hint'
import 'codemirror/addon/hint/xml-hint'
import 'codemirror/addon/hint/sql-hint'
import 'codemirror/addon/hint/anyword-hint'
The code prompts that an event is required. I use the inputRead event here (other events can also be used, and the effect will be slightly different). When the supervisor hears the input, judge whether the prompt is required. Therefore, start this monitoring when the editor initialization is completed. Here, only the input of English letters is monitored. After the editor is initialized, the @ ready event will be triggered. Listen for the inputRead event in the onCmReady method. Then, as long as there is an English letter input, it will listen and automatically call cm's showHint method to prompt.
<codemirror
  ref="myCm"
  v-model="content"
  :options="cmOptions"
  @ready="onCmReady"
  @blur="onCmBlur"
  @mousedown.native="onMouseDown">
</codemirror>

onCmReady(cm) {
  // The cm object here is the codemirror object, which is equal to this$ refs. myCm. codemirror
  cm.on("inputRead", (cm, obj) => {
    if (obj.text && obj.text.length > 0) {
    let c = obj.text[0].charAt(obj.text[0].length - 1)
      if ((c >= 'a' && c <= 'z') || (c >= 'A' && c <= 'Z')) {
        cm.showHint({ completeSingle:false })
      }
    }
  })
}
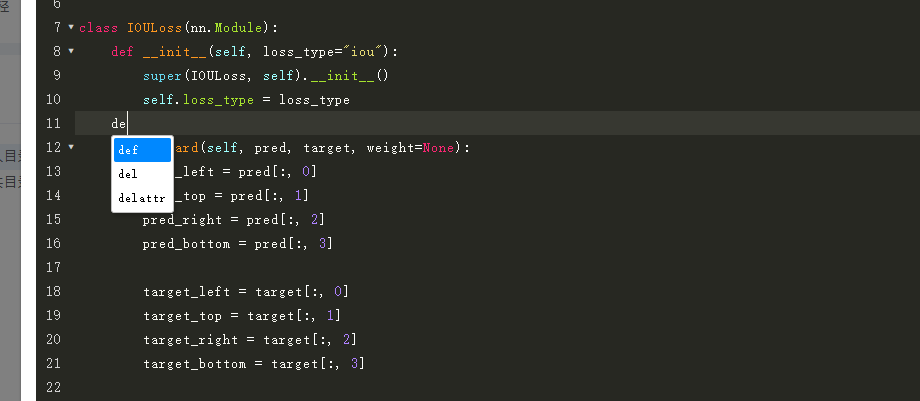
Hierarchy of prompt box
Basically, after adding the above content, there is a prompt function when writing code, but I encountered a problem that the prompt box does not come out, but after adding a log in the source code, I found that the prompt text is printed and correct, and later found that it is a hierarchy problem.
The style of the prompt box is as follows. The default z-index is 10, which is too small. I can't display it until it exceeds 2000.
.CodeMirror-hints {
  position: absolute;
  z-index: 10;
  overflow: hidden;
  list-style: none;

  margin: 0;
  padding: 2px;

  -webkit-box-shadow: 2px 3px 5px rgba(0,0,0,.2);
  -moz-box-shadow: 2px 3px 5px rgba(0,0,0,.2);
  box-shadow: 2px 3px 5px rgba(0,0,0,.2);
  border-radius: 3px;
  border: 1px solid silver;

  background: white;
  font-size: 90%;
  font-family: monospace;

  max-height: 20em;
  overflow-y: auto;
}
Final effect:
2) Code folding
Code folding is also a very important function. The following files need to be introduced.
Finally, don't miss the indent fold. I found that the python code couldn't be folded because I missed this file. It took a long time to debug the source code to find the reason, which wasted a lot of time! Of course, if you can't use it, you can't introduce it.
import 'codemirror/addon/fold/foldgutter.css'
import 'codemirror/addon/fold/foldcode'
import 'codemirror/addon/fold/foldgutter'
import 'codemirror/addon/fold/brace-fold'
import 'codemirror/addon/fold/comment-fold'
import 'codemirror/addon/fold/markdown-fold'
import 'codemirror/addon/fold/xml-fold'
import 'codemirror/addon/fold/indent-fold'
Several important parameters are as follows:
// Code folding
gutters: [
  "CodeMirror-lint-markers",
  "CodeMirror-linenumbers",
  "CodeMirror-foldgutter"
],
foldGutter: true, // Enable code folding in line slots
After these configurations are completed, the code should be able to be folded without additional writing js.
3) Display spaces as small red dots
Two important configurations:
**specialChars: * * regular expression to describe which special characters should be replaced with special placeholder. Usually used for special characters that cannot be printed. Default to/[- -?-???]/.
**specialCharPlaceholder: * * when a character matching specialChars is passed in, a DOM node for replacement is returned. The default is a red dot (·)
This function is also very interesting. In fact, it is very simple to turn it on. Just add the specialChars parameter and add spaces in the regular. However, the default style is ugly, which is a large and deep red dot, as shown in the following figure:
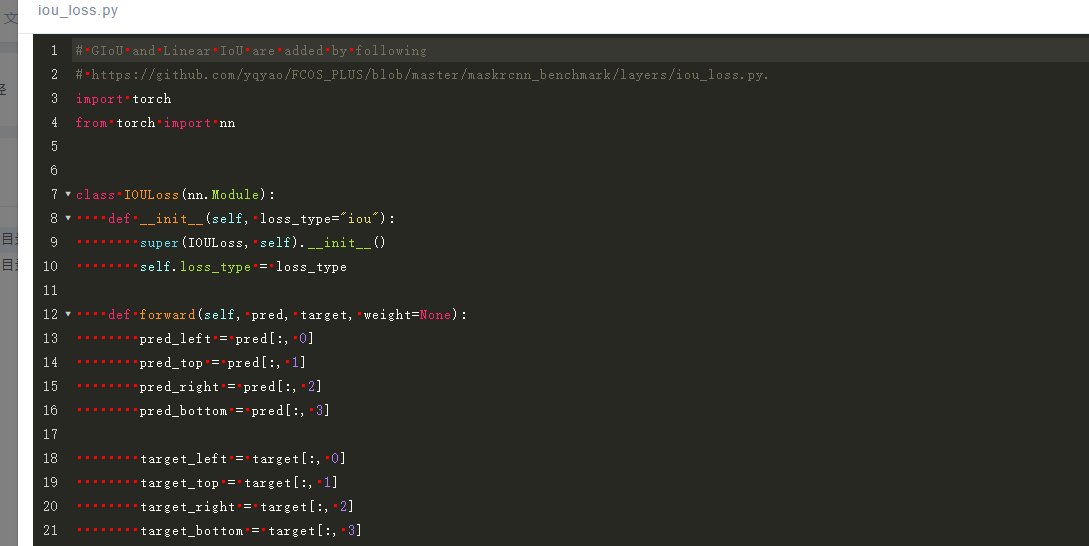
Therefore, it must be changed. Check codemirror Post the key source code, JS:
function defaultSpecialCharPlaceholder(ch) {
  var token = elt("span", "?", "cm-invalidchar");
  token.title = "\u" + ch.charCodeAt(0).toString(16);
  token.setAttribute("aria-label", token.title);
  return token
}

function elt(tag, content, className, style) {
  var e = document.createElement(tag);
  if (className) { e.className = className; }
  if (style) { e.style.cssText = style; }
  if (typeof content == "string") { e.appendChild(document.createTextNode(content)); }
  else if (content) { for (var i = 0; i < content.length; ++i) { e.appendChild(content[i]); } }
  return e
}
According to the defaultSpecialCharPlaceholder and elt methods in the source code, I customized the configuration of specialCharPlaceholder to replace the default space style. Some things I can't use, such as non string verification, are removed here. Then replace the large point with the small point and code it as, The customized configuration is as follows:
specialChars: /[--?-??-?????-?]/g,
specialCharPlaceholder: function (ch) {
  let token = document.createElement("span");
  let content = ".";
  token.className = "cm-invalidchar";
  if (typeof content == "string") {
	token.appendChild(document.createTextNode(content));
  }
  token.title = "\u" + ch.charCodeAt(0).toString(16);
  token.setAttribute("aria-label", token.title);
  return token
}
I didn't change the specialChars here by default, because the effect I want is not to display the red dot by default, and then turn it on when I want to display the red dot. So I added a switch. When it is set to true, add s (s means space) in the regular of specialChars, so that the space can be displayed as the small red dot I want.
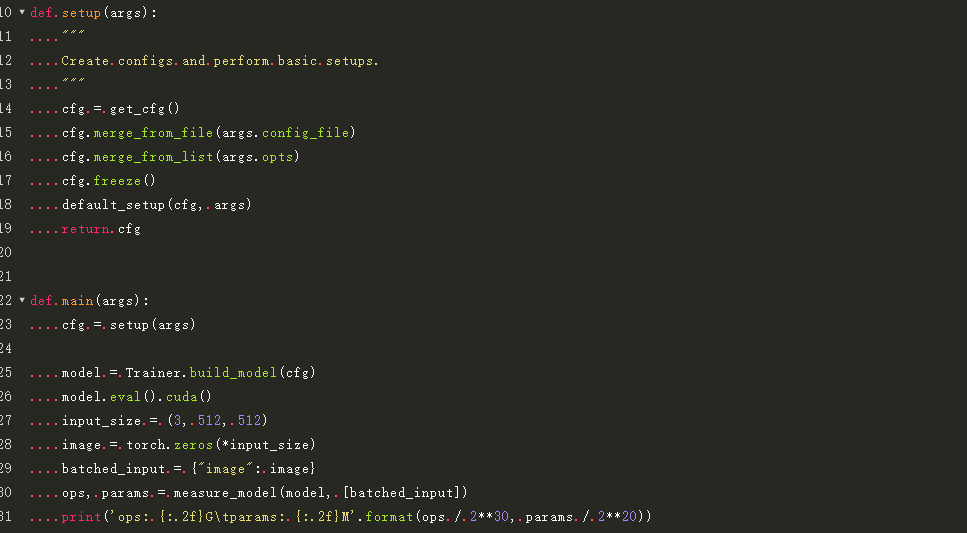
The style of CM invalidchar is also changed. The color is changed to light red, and the color code is: #909399
The final style is as follows:
 4) Replace tabs with 4 spaces
Add extraKeys configuration in options and modify the default tab behavior. As for the replacement with several spaces, it is controlled by the parameter indentUint.
The code is as follows. This paragraph was borrowed from an article when I first got the editor a long time ago.
extraKeys: {
  Tab: (cm) => {
	if (cm.somethingSelected()) {      // Text selection exists
	  cm.indentSelection('add');    // Indent text forward
	} else {                    // No text selection
	  cm.replaceSelection(Array(cm.getOption("indentUnit") + 1).join(" "), "end", "+input");  // Insert an indentUnit space at the cursor
	}
  }
}
5) When a word is selected, other identical words are highlighted
You need to import the following files and add option configuration:
import 'codemirror/addon/search/match-highlighter'

highlightSelectionMatches: {
  minChars: 2,
  trim: true,
  style: "matchhighlight",
  showToken: false
},
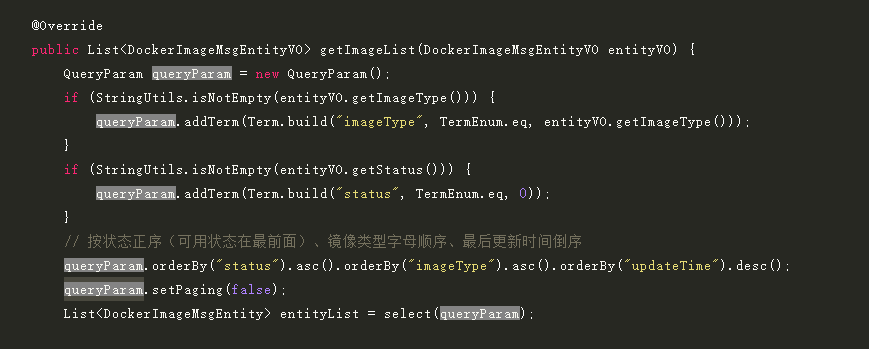
The showToken in highlightSelectionMatches should be configured as false. Otherwise, when inputting, the currently unfinished words will also be highlighted, which is very uncomfortable, as shown in the following figure:
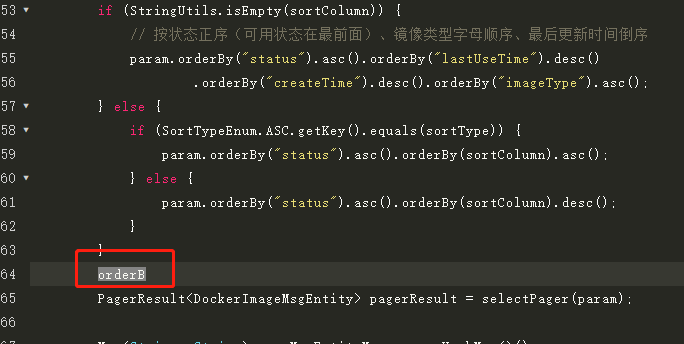
The final effect is as follows:
I changed the highlighted style here. In order to adapt to this theme, I redesigned the style of CM matchhighlight and modified its background color:
.cm-matchhighlight {
  background: #848484 !important
}
6) Automatically complete the parentheses, and when the * * * * cursor is on the left and right sides of the parentheses, automatically highlight the matching parentheses
Introduce the following files and add the option parameter:
import 'codemirror/addon/edit/matchbrackets'
import 'codemirror/addon/edit/closebrackets'

autoCloseBrackets: true, // Auto close symbol
matchBrackets: true, // When the cursor clicks on the left and right sides of the brackets next to {,] the matching brackets},] will be highlighted automatically
7) Other useful configurations
theme: Theme style, I use monakai,It depends on your personal preference
mode: This is very important. Different languages should use the corresponding language mode,In this way, you can highlight keywords! mode The list can be found in the Chinese and English manuals
lineWrapping: This should be configured as false,If configured as true,The style will be strange. The reason is unknown. Maybe it's the same as mine monakai About the subject? Someone who knows can tell me.
readOnly: Decide whether to read only
viewportMargin: How many lines are loaded at a time to prevent the file from being too large and the page from getting stuck
lineNumbers: Display rows

Of course, there are many useful functions, but I have enough for the time being, and I'm too lazy to continue to study others.