1. Template Grammar
1. Double brace expression
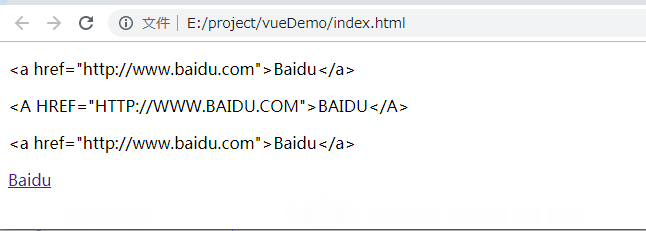
[Grammar:]
{{exp}}

//Used to enter data to a page, that is, to display data on a page.

[Examples:
<!doctype html>
<html lang="en">
<head>
    <meta charset="UTF-8">
    <meta name="viewport"
          content="width=device-width, user-scalable=no, initial-scale=1.0, maximum-scale=1.0, minimum-scale=1.0">
    <meta http-equiv="X-UA-Compatible" content="ie=edge">
    <title>Document</title>
</head>
<body>
<div id="test">
    <p>{{message}}</p>
    <p>{{message.toUpperCase()}}</p>
    <p v-text="message"></p>    <!--<p v-text="message"></p> Equivalent to <p>{{message}}</p>-->
    <p v-html="message"></p>
</div>
<script src="https://cdn.jsdelivr.net/npm/vue@2.5.16/dist/vue.js"></script>
<script type="text/javascript">
    var vm = new Vue({
        el: "#test",
        data: {
            message : '<a href="http://www.baidu.com">Baidu</a>'
        }
    });
</script>
</body>
</html>
2. Instructions
(1) Force binding data (v-bind)
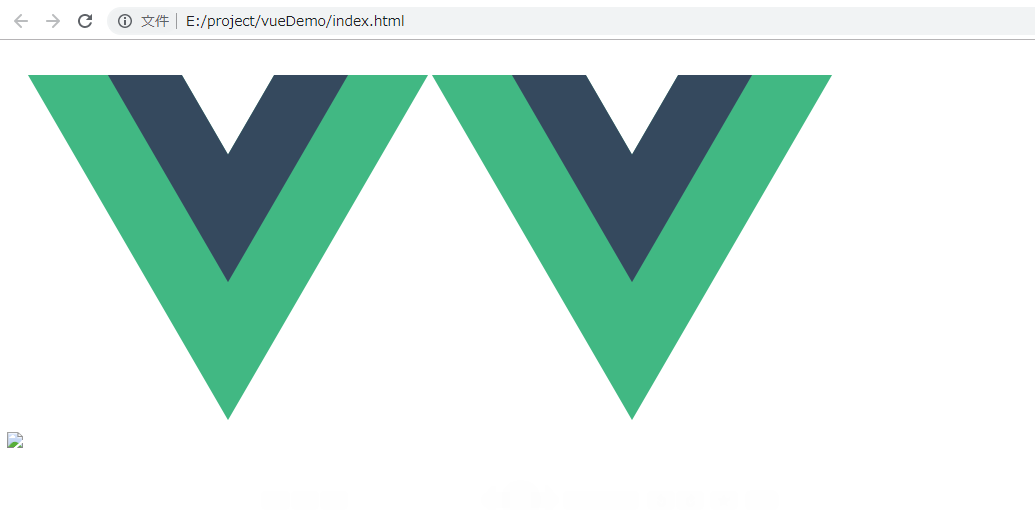
[Grammar:]
v-bind : xxx = 'yyy'
Or abbreviate it as:
:xxx = 'yyy'    // Where yyy is interpreted as an expression to execute

The attribute value used to bind a change, that is, to bind an attribute, and when the attribute value changes, the attribute changes.

[Examples:
<!doctype html>
<html lang="en">
<head>
    <meta charset="UTF-8">
    <meta name="viewport"
          content="width=device-width, user-scalable=no, initial-scale=1.0, maximum-scale=1.0, minimum-scale=1.0">
    <meta http-equiv="X-UA-Compatible" content="ie=edge">
    <title>Document</title>
</head>
<body>
<div id="test">
    <img src = "imgUrl" />
    <img v-bind:src="imgUrl" />
    <img :src="imgUrl" />
</div>
<script src="https://cdn.jsdelivr.net/npm/vue@2.5.16/dist/vue.js"></script>
<script type="text/javascript">
    var vm = new Vue({
        el: "#test",
        data: {
            imgUrl : 'https://cn.vuejs.org/images/logo.png'
        }
    });
</script>
</body>
</html>
(2) Binding event monitoring (v-on)
[Grammar:]
v-on : click = 'xxx'
//Or abbreviate it as:
@click = 'xxx'

//Used to bind callback functions where methods are written in vue's methods.

[Examples:
<!doctype html>
<html lang="en">
<head>
    <meta charset="UTF-8">
    <meta name="viewport"
          content="width=device-width, user-scalable=no, initial-scale=1.0, maximum-scale=1.0, minimum-scale=1.0">
    <meta http-equiv="X-UA-Compatible" content="ie=edge">
    <title>Document</title>
</head>
<body>
<div id="test">
    <button v-on:click = "sayHello();">Hello</button>
    <button @click = "sayHi(message);">Hi</button>
</div>
<script src="https://cdn.jsdelivr.net/npm/vue@2.5.16/dist/vue.js"></script>
<script type="text/javascript">
    var vm = new Vue({
        el: "#test",
        data: {
            message : "Hello World"
        },
        methods: {
          sayHello : function (event) {
              alert(this.message);
          },

          sayHi(msg){
              alert(msg);
          }
        }
    });
</script>
</body>
</html>
2. Computing attributes and monitoring
1. Computing attributes:
(1) Define the method of calculating attributes in vue's computed attribute object.
(2) The return value of the method is treated as an attribute and the result of the calculation is displayed on the page in the form of {{method name}} or v-model = "method name".
(3) Execution: when initialization or the value of an attribute changes.
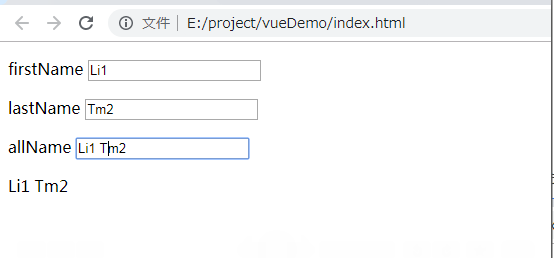
[Examples:
<!doctype html>
<html lang="en">
<head>
    <meta charset="UTF-8">
    <meta name="viewport"
          content="width=device-width, user-scalable=no, initial-scale=1.0, maximum-scale=1.0, minimum-scale=1.0">
    <meta http-equiv="X-UA-Compatible" content="ie=edge">
    <title>Document</title>
</head>
<body>
<div id="test">
    <p>firstName <input type="text" placeholder="firstName" v-model="firstName"/></p>
    <p>lastName <input type="text" placeholder="lastName" v-model="lastName"/></p>
    <p>allName <input type="text" placeholder="allName" v-model="allName"/></p>
    <p>{{allName}}</p>
</div>
<script src="https://cdn.jsdelivr.net/npm/vue@2.5.16/dist/vue.js"></script>
<script type="text/javascript">
    var vm = new Vue({
        el: "#test",
        data: {
            firstName : "Li",
            lastName : "Tom",
        },
        computed :{
            allName(){
                return this.firstName + " " + this.lastName;
            }
        }
    });
</script>
</body>
</html>
The initial interface is:
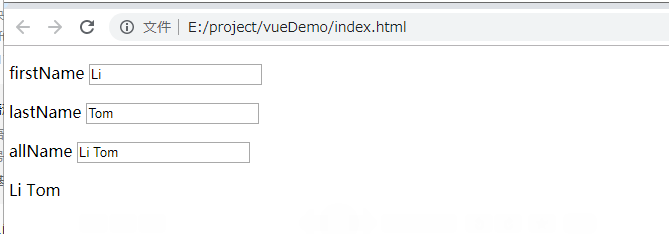
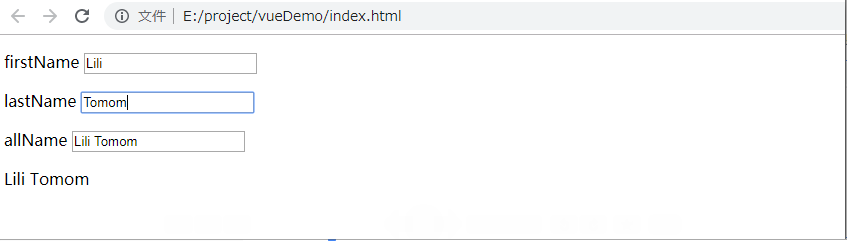
When you modify firstName or lastName, the data for allName changes.
Note:
The alteration to allName at this time will not affect the data in the bottom row (the setter method needs to be implemented for monitoring).
2. Monitoring (similar to calculating properties)
(1) Mode 1: Write it in the watch property of vue.
(2) Mode 2: Use $watch() for an instance of vue.The monitored property value needs to be written in the data.
(3) When the value of the monitored attribute is modified, all used places are automatically modified.
[Examples:
<!doctype html>
<html lang="en">
<head>
    <meta charset="UTF-8">
    <meta name="viewport"
          content="width=device-width, user-scalable=no, initial-scale=1.0, maximum-scale=1.0, minimum-scale=1.0">
    <meta http-equiv="X-UA-Compatible" content="ie=edge">
    <title>Document</title>
</head>
<body>
<div id="test">
    <p>firstName <input type="text" placeholder="firstName" v-model="firstName"/></p>
    <p>lastName <input type="text" placeholder="lastName" v-model="lastName"/></p>
    <p>allName <input type="text" placeholder="allName" v-model="allName"/></p>
    <p>{{allName}}</p>
</div>
<script src="https://cdn.jsdelivr.net/npm/vue@2.5.16/dist/vue.js"></script>
<script type="text/javascript">
    var vm = new Vue({
        el: "#test",
        data: {
            firstName : "Li",
            lastName : "Tom",
            allName : "xx"
        },
       watch : {
//             firstName : function(newValue, oldValue){  //This is not normally used
            firstName : function(value){
                   this.allName = value + " " + this.lastName;
               }
       }
    });
    vm.$watch('lastName', function(value){
        this.allName = this.firstName + " " + value;
    });
</script>
</body>
</html>
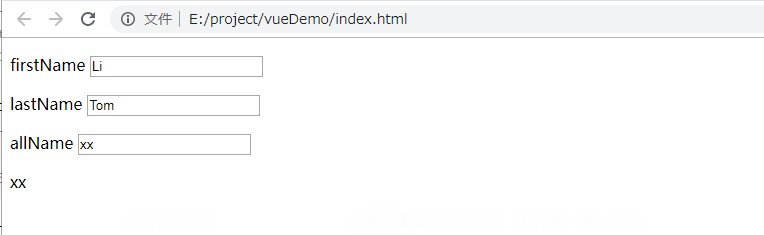
Initial interface:
When you modify firstName or lastName, the data for allName changes.
Note:
At this point, changes to allName affect the data in the bottom row.
3. getter, setter methods (by calculating attributes)
Both of these methods, when modifying the allName method, do not affect the values of firstName and lastName.Because the data is not associated with it.
You can use get, set methods (callback functions) to associate.
The get method, which calls back when an attribute is needed to return the value of the current attribute.
The set method monitors the current property value and calls back when the property value changes to update the current property value.
Note:
There is a cache for a computed property, and when you need to get the value of a property multiple times, only a getter calculation is performed once (only called once, the value is in the cache).
[Give an example;]
<!doctype html>
<html lang="en">
<head>
    <meta charset="UTF-8">
    <meta name="viewport"
          content="width=device-width, user-scalable=no, initial-scale=1.0, maximum-scale=1.0, minimum-scale=1.0">
    <meta http-equiv="X-UA-Compatible" content="ie=edge">
    <title>Document</title>
</head>
<body>
<div id="test">
    <p>firstName <input type="text" placeholder="firstName" v-model="firstName"/></p>
    <p>lastName <input type="text" placeholder="lastName" v-model="lastName"/></p>
    <p>allName <input type="text" placeholder="allName" v-model="allName"/></p>
    <p>{{allName}}</p>
</div>
<script src="https://cdn.jsdelivr.net/npm/vue@2.5.16/dist/vue.js"></script>
<script type="text/javascript">
    var vm = new Vue({
        el: "#test",
        data: {
            firstName : "Li",
            lastName : "Tom",
        },
        computed:{
            allName:{
                get(){
                    return this.firstName + ' ' + this.lastName;
                },
                set(value){
                    var names = value.split(' ');
                    this.firstName = names[0];
                    this.lastName = names[1];
                }
            }
        }
    });
</script>
</body>
</html>
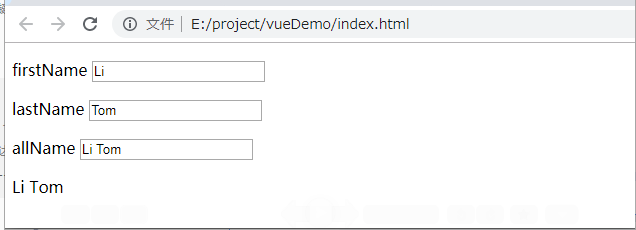
The initial interface is:
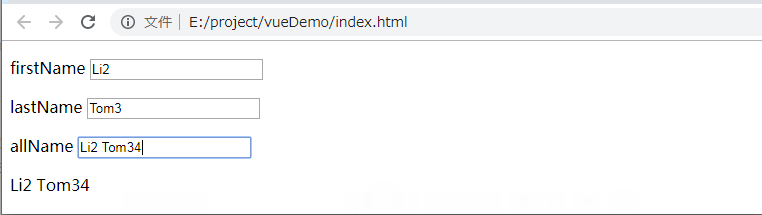
After modifying the value: Any name is modified, and the corresponding place is modified.
3. class, style binding
The style of an element in a page needs to be changed, and the class-style binding is the technology used to achieve dynamic style effects.Add styles dynamically.
1. class Binding
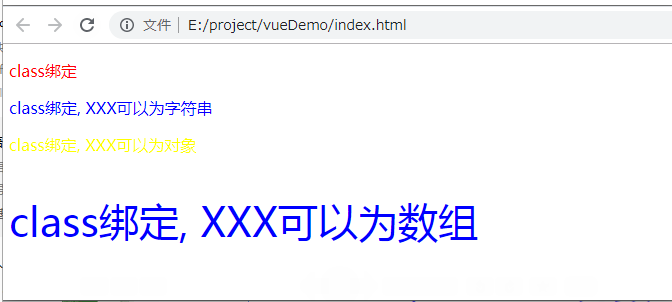
[Format:]
:class = 'XXX'
//Note:
    XXX Can be a string, an array, an object

[Examples:
<!doctype html>
<html lang="en">
<head>
    <meta charset="UTF-8">
    <meta name="viewport"
          content="width=device-width, user-scalable=no, initial-scale=1.0, maximum-scale=1.0, minimum-scale=1.0">
    <meta http-equiv="X-UA-Compatible" content="ie=edge">
    <title>Document</title>
    <style type="text/css">
        .a{
            color: red;
        }
        .b{
            color: blue;
        }
        .c{
            color: yellow;
        }
        .size{
            font-size: 40px;
        }
    </style>
</head>
<body>
<div id="test">
    <p class="a">class binding</p>
    <p class="a" :class="bClass">class binding, XXX Can be a string</p>
    <p class="a" :class="{c : isC, size : isSize}">class binding, XXX Can be Object</p>
    <p class="a" :class="['size', bClass]">class binding, XXX Can be an array</p>
</div>
<script src="https://cdn.jsdelivr.net/npm/vue@2.5.16/dist/vue.js"></script>
<script type="text/javascript">
    var vm = new Vue({
        el: "#test",
        data: {
            bClass : 'b',
            isC : true,
            isSize : false
        }
    });
</script>
</body>
</html>
2. style binding
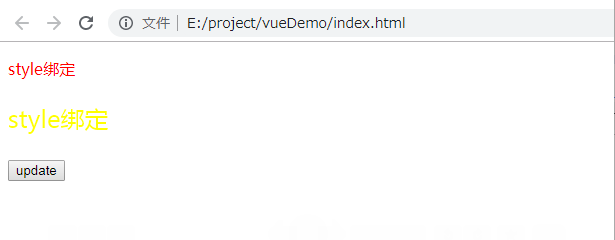
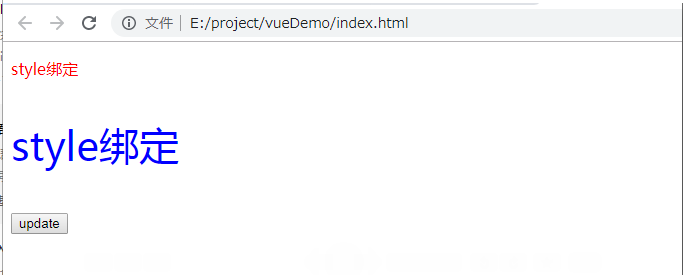
[Format:]
:style = "XXX"
//Note:
    XXX Refers to the object, that is, the form:  :style = "{color : xxx, fontSize : xxx}"

[Examples:
<!doctype html>
<html lang="en">
<head>
    <meta charset="UTF-8">
    <meta name="viewport"
          content="width=device-width, user-scalable=no, initial-scale=1.0, maximum-scale=1.0, minimum-scale=1.0">
    <meta http-equiv="X-UA-Compatible" content="ie=edge">
    <title>Document</title>
</head>
<body>
<div id="test">
    <p style="color : red">style binding</p>
    <p :style="{color : c, fontSize : fs + 'px'}">style binding</p>
    <button @click="update">update</button>
</div>
<script src="https://cdn.jsdelivr.net/npm/vue@2.5.16/dist/vue.js"></script>
<script type="text/javascript">
    var vm = new Vue({
        el: "#test",
        data: {
            c : 'yellow',
            fs : 24
        },
        methods: {
            update:function(event){
                this.c = 'blue',
                this.fs = 40
            }
        }
    });
</script>
</body>
</html>
Initial picture:
After clicking the button:
4. Conditional statement (conditional rendering), cyclic statement (list rendering)
1. Conditional statements (v-if, v-else, v-else-if)
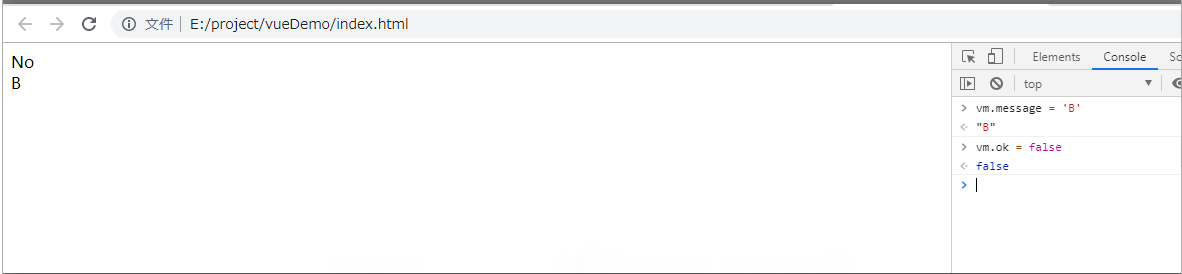
[Examples:
<!doctype html>
<html lang="en">
<head>
    <meta charset="UTF-8">
    <meta name="viewport"
          content="width=device-width, user-scalable=no, initial-scale=1.0, maximum-scale=1.0, minimum-scale=1.0">
    <meta http-equiv="X-UA-Compatible" content="ie=edge">
    <title>Document</title>
</head>
<body>
<div id="test">
    <div v-if="ok">Ok</div>
    <div v-else>No</div>
    <div v-if="message === 'A'">A</div>
    <div v-else-if="message === 'B'">B</div>
    <div v-else>C</div>
</div>
<script src="https://cdn.jsdelivr.net/npm/vue@2.5.16/dist/vue.js"></script>
<script type="text/javascript">
    var vm = new Vue({
        el: "#test",
        data: {
            message : "A",
            ok : true
        }
    });
</script>
</body>
</html>
Initial interface:

After changing the value:
2. v-show (similar to v-if)
The v-show usage is similar to v-if.
v-if removes the tag (and creates it when needed), while v-show hides the tag.
v-show is recommended when pages switch frequently.
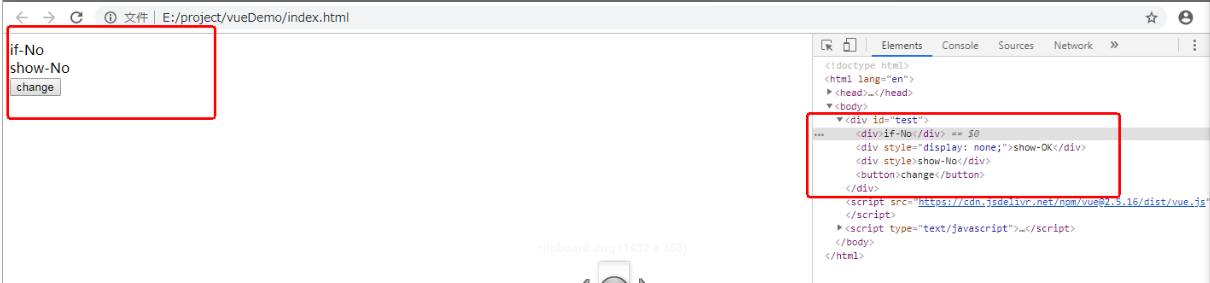
[Examples:
<!doctype html>
<html lang="en">
<head>
    <meta charset="UTF-8">
    <meta name="viewport"
          content="width=device-width, user-scalable=no, initial-scale=1.0, maximum-scale=1.0, minimum-scale=1.0">
    <meta http-equiv="X-UA-Compatible" content="ie=edge">
    <title>Document</title>
</head>
<body>
<div id="test">
    <div v-if="ok">Ok</div>
    <div v-else>No</div>
    <div v-show="ok">OK</div>
    <div v-show="!ok">No</div>
    <button @click="ok = !ok">change</button>
</div>
<script src="https://cdn.jsdelivr.net/npm/vue@2.5.16/dist/vue.js"></script>
<script type="text/javascript">
    var vm = new Vue({
        el: "#test",
        data: {
            ok : true
        }
    });
</script>
</body>
</html>
Initial interface:
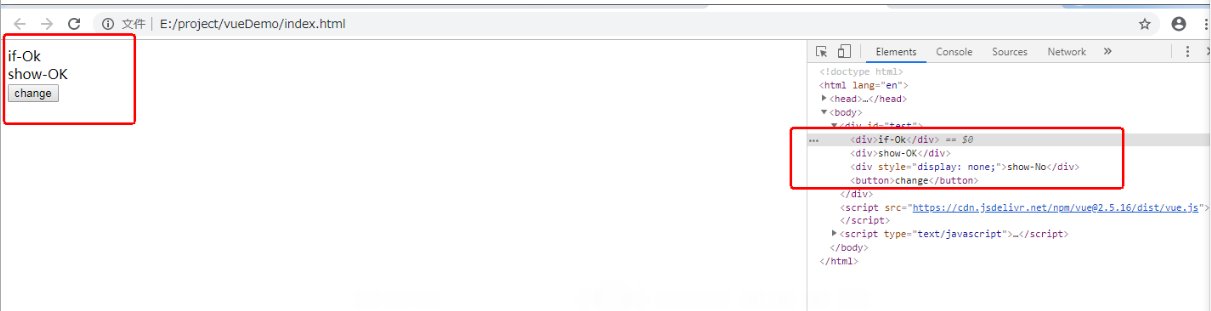
After clicking the button: (You can see that v-if is to remove the label, and v-show is to hide the label)
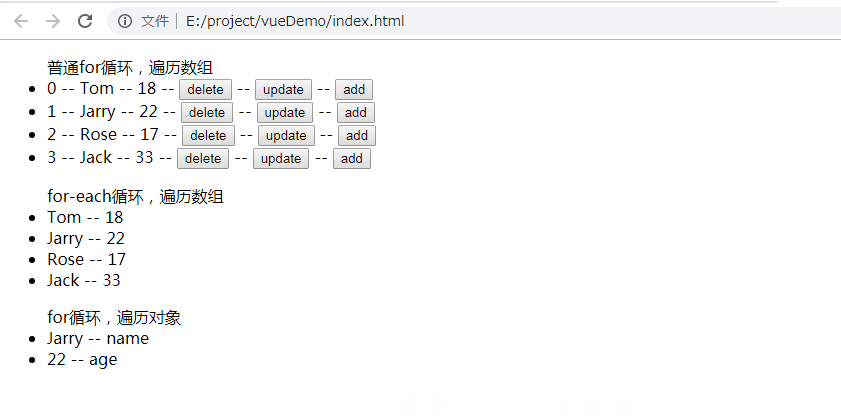
3,v-for
Used to traverse arrays or objects.
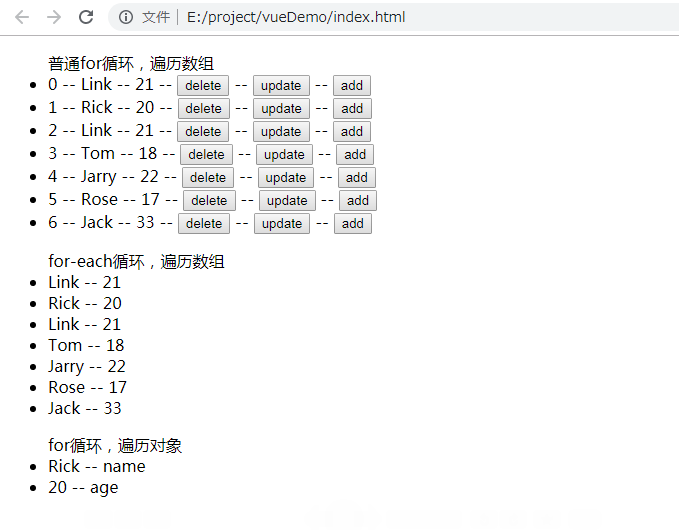
[Examples:
<!doctype html>
<html lang="en">
<head>
    <meta charset="UTF-8">
    <meta name="viewport"
          content="width=device-width, user-scalable=no, initial-scale=1.0, maximum-scale=1.0, minimum-scale=1.0">
    <meta http-equiv="X-UA-Compatible" content="ie=edge">
    <title>Document</title>
</head>
<body>
<div id="test">
    <!--
        vue It does not monitor changes within the array itself (as is normal), that is, changes the contents of the data inside the array, but the display of the array does not change (that is, does not update the page).
        //But vue provides some ways to change the internal data of an array, such as splice(), push(), and so on.
        //These methods invoke native methods to change values, then update the interface to achieve array changes.
    -->
    <ul>ordinary for Loop, traverse array
        <li v-for="(p, index) in persons" :key="index">
            {{index}} -- {{p.name}} -- {{p.age}}
            -- <button @click="deletePerson(index)">delete</button>
            -- <button @click="updatePerson(index)">update</button>
            -- <button @click="addPerson(index)">add</button>
        </li>
    </ul>

    <ul>for-each Loop, traverse array
        <li v-for = "p in persons">
            {{p.name}} -- {{p.age}}
        </li>
    </ul>

    <ul>for Loop, traverse objects
        <li v-for="(value, key) in persons[1]" :key="key">
            {{value}} -- {{key}}
        </li>
    </ul>
</div>
<script src="https://cdn.jsdelivr.net/npm/vue@2.5.16/dist/vue.js"></script>
<script type="text/javascript">
    var vm = new Vue({
        el: "#test",
        data: {
            persons : [
                {name: 'Tom', age: 18},
                {name: 'Jarry', age: 22},
                {name: 'Rose', age: 17},
                {name: 'Jack', age: 33}
            ]
        },
        methods: {
            deletePerson(index){
                this.persons.splice(index, 1);// Used to delete a data in an array at a specified location.
            },
            updatePerson(index){
                var person = {name: 'Rick', age: 20};
//              this.persons[index] = person; // At this point, only the value of some data in the array is changed, but the page does not refresh
                    this.persons.splice(index, 1, person); // Used to update a data in an array, which refreshes the page
            },
            addPerson(index){
                var person = {name: 'Link', age: 21};
                this.persons.splice(index, 0, person); // Used to add a data to an array
            }
        }
    });
</script>
</body>
</html>
Initial interface:
Add, delete, change the interface:
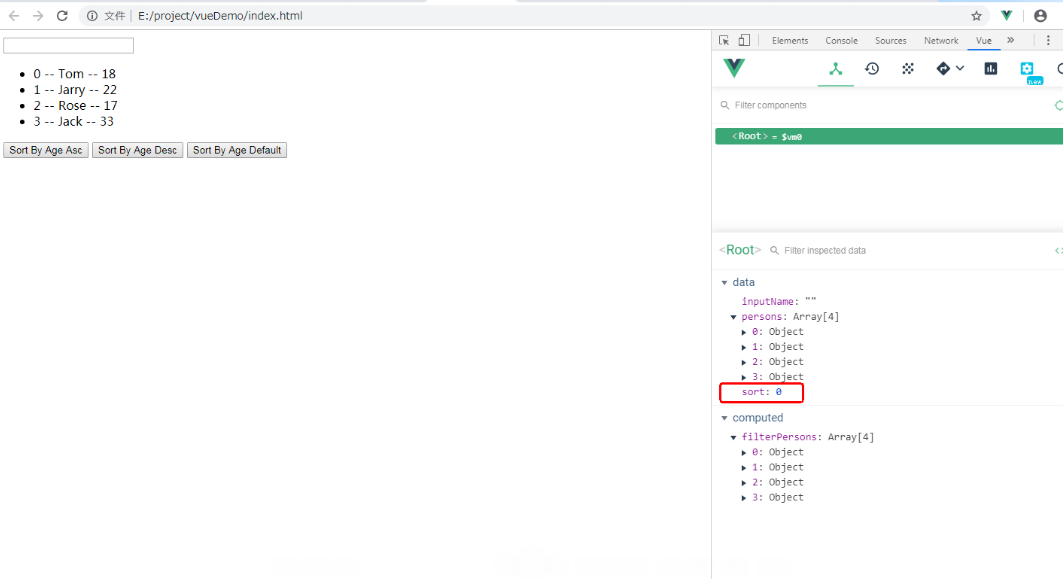
4. Supplementary v-for example: (Filter form data and sort arrays)
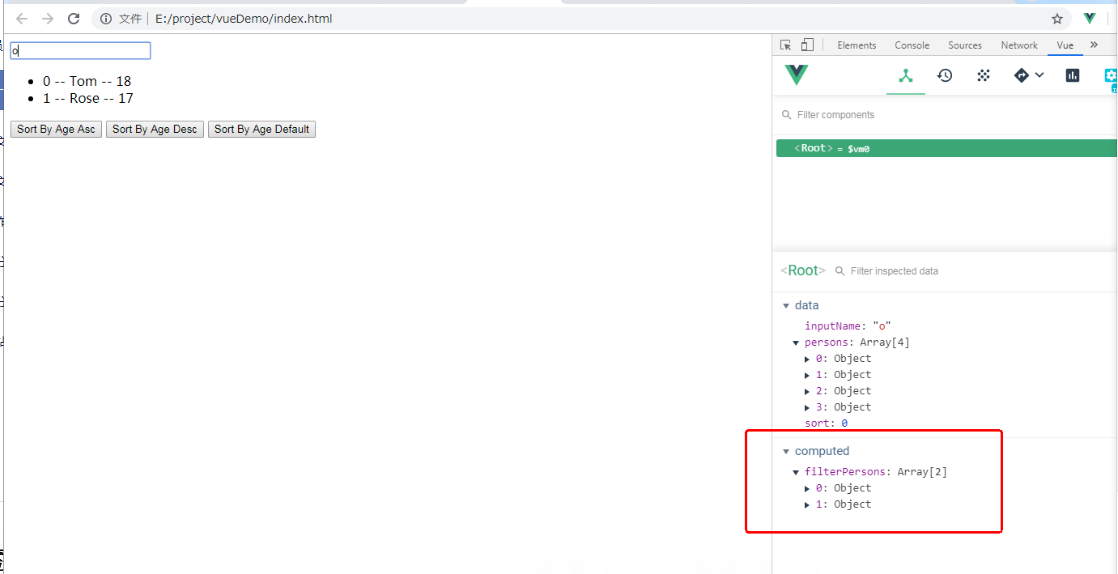
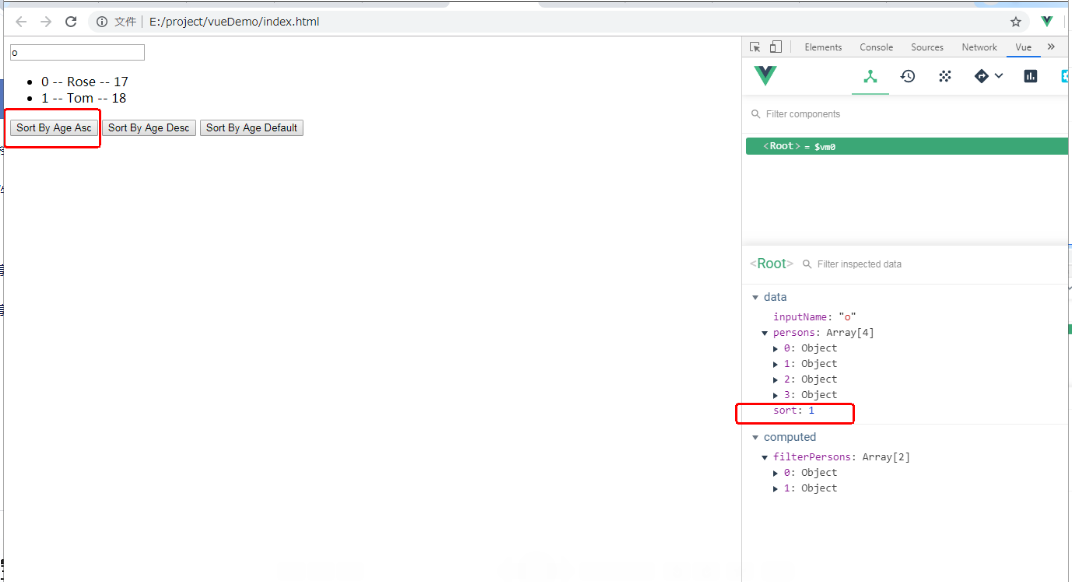
[Examples:
<!doctype html>
<html lang="en">
<head>
    <meta charset="UTF-8">
    <meta name="viewport"
          content="width=device-width, user-scalable=no, initial-scale=1.0, maximum-scale=1.0, minimum-scale=1.0">
    <meta http-equiv="X-UA-Compatible" content="ie=edge">
    <title>Document</title>
</head>
<body>
<div id="test">
    <input type="text" v-model="inputName"/>
    <ul>
        <!--
            //Show filtered array
        -->
        <li v-for="(p, index) in filterPersons" :key="index">
            {{index}} -- {{p.name}} -- {{p.age}}
        </li>
    </ul>
    <button @click="sortType(1)">Sort By Age Asc</button>
    <button @click="sortType(2)">Sort By Age Desc</button>
    <button @click="sortType(0)">Sort By Age Default</button>
</div>
<script src="https://cdn.jsdelivr.net/npm/vue@2.5.16/dist/vue.js"></script>
<script type="text/javascript">
    var vm = new Vue({
        el: "#test",
        data: {
            persons : [
                {name: 'Tom', age: 18},
                {name: 'Jarry', age: 22},
                {name: 'Rose', age: 17},
                {name: 'Jack', age: 33}
            ],
            inputName: '',
            sort: 0  // Used for sorting, 0 for default sorting, 1 for ascending, 2 for descending
        },
        computed: {
            filterPersons(){
                // Use filter Method Filter Array,filter Pages are not refreshed. To refresh a page, you need to reassign it to an array
                let fPersons = this.persons.filter(p => p.name.indexOf(this.inputName) != -1);
                if(this.sort == 1){
                    fPersons.sort(function(p1, p2){
                        return p1.age - p2.age;
                    });
                }else if(this.sort == 2){
                    fPersons.sort(function(p1, p2){
                        return p2.age - p1.age;
                    });
                }
                return fPersons;
            }
        },
        methods: {
            sortType(type){
                this.sort = type;
            }
        }
    });
</script>
</body>
</html>
Initial interface:
After entering a data (returning a filtered array):
Click the Sort button to sort by age:
5. Event handling
1. Listen for events
You can use the v-on directive to listen for DOM events and run some JavaScript code when triggered.
Take v-on:click for example:
(1) Default incoming event.
(2) With parameters, you can use $event to pass in.
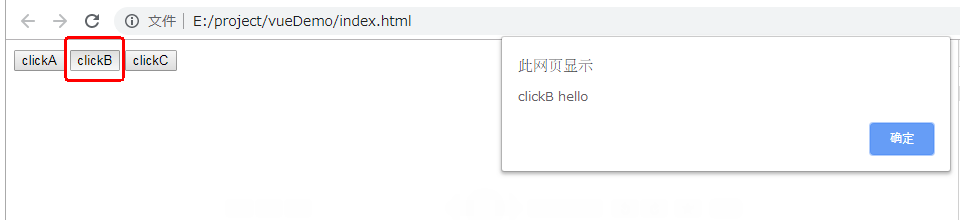
[Examples:
<!doctype html>
<html lang="en">
<head>
    <meta charset="UTF-8">
    <meta name="viewport"
          content="width=device-width, user-scalable=no, initial-scale=1.0, maximum-scale=1.0, minimum-scale=1.0">
    <meta http-equiv="X-UA-Compatible" content="ie=edge">
    <title>Document</title>
</head>
<body>
<div id="test">
    <button @click="showA">clickA</button>
    <button @click="showB('hello')">clickB</button>
    <button @click="showC('world', $event)">clickC</button>
</div>
<script src="https://cdn.jsdelivr.net/npm/vue@2.5.16/dist/vue.js"></script>
<script type="text/javascript">
    var vm = new Vue({
        el: "#test",
        data: {
            message : 'hello'
        },
        methods: {
            // Default incoming event
            showA(){
                alert(event.target.innerHTML);
            },
            showB(name){
                alert(event.target.innerHTML + " " + name);
            },
            // have access to $event afferent event
            showC(name, tt){
                alert(tt.target.innerHTML + " " + name);
            }
        }
    });
</script>
</body>
</html>
Click clickA: (using the default incoming event)

Click clickB: (using the default incoming event)
Click clickC: (event passed in with $event)

2. Event modifiers
Usually you need to call event.preventDefault() in the event handler to cancel the default event and event.stopPropagation() to cancel the bubble event.This is tedious to write, so vue provides event modifiers to simplify this operation.
[Common Event Modifiers)
.stop   // Cancel Event Bubble Mechanism
.prevent  // Prevent browser default behavior
.capture  // Use event capture mode to execute from outside to inside, then execute triggered events in a natural order.
.self  // Events only work on themselves
.once  // Click event will only trigger once

[For example:
    @click.prevent In .prevent
    //Equivalent to
    event.preventDefault();

[Example: Click BaiduA,Will jump link, Click BaiduB,BaiduC No jump.]
<!doctype html>
<html lang="en">
<head>
    <meta charset="UTF-8">
    <meta name="viewport"
          content="width=device-width, user-scalable=no, initial-scale=1.0, maximum-scale=1.0, minimum-scale=1.0">
    <meta http-equiv="X-UA-Compatible" content="ie=edge">
    <title>Document</title>
</head>
<body>
<div id="test">
    <a href="http://www.baidu.com" @click="testA">BaiduA</a>
    <a href="http://www.baidu.com" @click="testB">BaiduB</a>
    <a href="http://www.baidu.com" @click.prevent="testC">BaiduC</a>
</div>
<script src="https://cdn.jsdelivr.net/npm/vue@2.5.16/dist/vue.js"></script>
<script type="text/javascript">
    var vm = new Vue({
        el: "#test",
        data: {
            message : 'hello'
        },
        methods: {
            testA(){
                alert("hello");
            },
            // Unlink Jump Mechanism
            testB(){
                alert("hello");
                event.preventDefault();
            },
            testC(){
                alert("hello");
            }
        }
    });
</script>
</body>
</html>
3. Key modifiers
When processing keys, they are usually handled through event.keyCode.Similarly, vue provides simple writing.
[Common key modifiers:]
.enter   // Capture enter key
.tab   // Capture tab key
.delete  // Capture Delete and Backspace keys
.space  // Capture space key
.up  // Capture Upper Arrow Key
.down  // Capture Down Arrow Key
.left  // Capture left arrow key
.right  // Capture Right Arrow Key
.esc  // Capture esc key

[For example:
 @keyup.enter perhaps @keyup.13
 //Equivalent to
 event.keyCode === 13

[Examples:
<!doctype html>
<html lang="en">
<head>
    <meta charset="UTF-8">
    <meta name="viewport"
          content="width=device-width, user-scalable=no, initial-scale=1.0, maximum-scale=1.0, minimum-scale=1.0">
    <meta http-equiv="X-UA-Compatible" content="ie=edge">
    <title>Document</title>
</head>
<body>
<div id="test">
    <input type="text" @keyup="testA"/>
    <input type="text" @keyup="testB"/>
    <input type="text" @keyup.enter="testC"/>
    <input type="text" @keyup.13="testD"/>
</div>
<script src="https://cdn.jsdelivr.net/npm/vue@2.5.16/dist/vue.js"></script>
<script type="text/javascript">
    var vm = new Vue({
        el: "#test",
        data: {
            message : 'hello'
        },
        methods: {
            // Entering any key will pop up the window
            testA(){
                alert("hello");
            },
            // input enter Will pop-up window
            testB(){
                if(event.keyCode === 13){
                    alert("hello")
                }
            },
            // input enter Will pop-up window
            testC(){
                alert("hello");
            },
            // input enter Will pop-up window
            testD(){
                alert("hello");
            }
        }
    });
</script>
</body>
</html>
6. Form Input Binding
1. Role of v-model
(1) Bidirectional data bindings can be created on form elements <input>, <textarea>, and <select> using the v-model directive.It automatically selects the correct method to update elements based on the type of control.
(2) v-model is responsible for monitoring user input events and updating data.It ignores the initial values of the value, checked, selected attributes of all form elements and always uses the data of the Vue instance as the data source, so it can assign the initial values in the data.
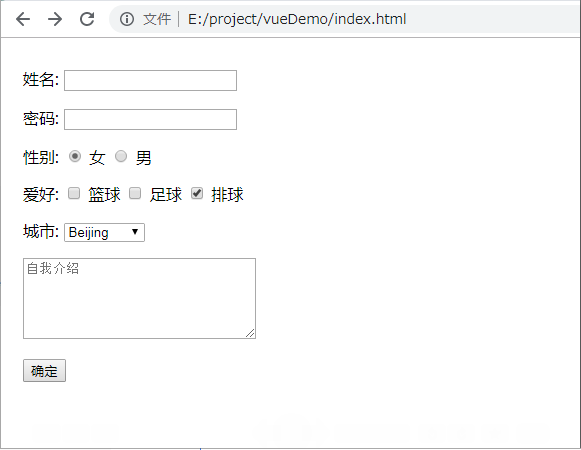
2. Examples of v-model bindings
[Example: Use v-model change value Value of)
<!doctype html>
<html lang="en">

    <head>
        <meta charset="UTF-8">
        <meta name="viewport" content="width=device-width, user-scalable=no, initial-scale=1.0, maximum-scale=1.0, minimum-scale=1.0">
        <meta http-equiv="X-UA-Compatible" content="ie=edge">
        <title>Document</title>
    </head>

    <body>
        <div id="test">
            <!--@submit.prevent Prohibit submission of forms-->
            <form action="XX" method="post" @submit.prevent="handleSubmit">
                <!-- Form fields can be used fieldset Wrap up labels and use them legend Tags explain the general content of the form.
                    fieldset By default, there is a border. legend There are also default styles, which can be cleared.
                -->
                <fieldset style="border:none">
                    <legend style="display:none">login form</legend>
                    <p>
                        <label for="name">Full name: </label>
                        <input type="text" id="name" v-model="userName" />
                    </p>
                    <p>
                        <label for="pw">Password: </label>
                        <input type="password" id="pw" v-model="password"/>
                    </p>
                    <p>
                        <!--
                            //For check boxes, the value of the v-model binding is related to the value of the value property.
                        -->
                        <span>Gender: </span>
                        <input type="radio" id="female" name="sex" value="female" v-model="sex"/>
                        <label for="female">female </label>
                        <input type="radio" id="male" name="sex" value="male" v-model="sex"/>
                        <label for="male">male </label>
                    </p>
                    <p>
                        <span>hobby: </span>
                        <input type="checkbox" name="favorites" id="basketball" value="basketball" v-model="favorites"/>
                        <label for="basketball">Basketball</label>
                        <input type="checkbox" name="favorites" id="football" value="football" v-model="favorites"/>
                        <label for="football">Football</label>
                        <input type="checkbox" name="favorites" id="volleyball" value="volleyball" v-model="favorites"/>
                        <label for="volleyball">Volleyball</label>
                    </p>
                    <p>
                        <span>City: </span>
                        <select v-model="city">
                            <option value="0">Not selected</option>
                            <!--For the selection box, v-model The binding of the value About, where v-bind binding value,Can be monitored value Changes-->
                            <option :value="p.id" v-for="(p, index) in citys">{{p.cityName}}</option>
                        </select>
                    </p>
                    <p>
                        <textarea id="desc" cols="30" rows="5" placeholder="Introduce oneself to" v-model="text"></textarea>
                    </p>
                    <button type="submit">Determine</button>
                </fieldset>
            </form>
        </div>
        <script src="https://cdn.jsdelivr.net/npm/vue@2.5.16/dist/vue.js"></script>
        <script type="text/javascript">
            var vm = new Vue({
                el: "#test",
                data: {
                    // Set Initial Value
                    userName: '',
                    password: '',
                    sex: 'female',
                    favorites: ['volleyball'],  //For check boxes, they should be saved as an array value Data
                    citys: [{
                        id: 1,
                        cityName: "Beijing"
                    }, {
                        id: 2,
                        cityName: "Shanghai"
                    }, {
                        id: 3,
                        cityName: "nanjing"
                    }],
                    city: '1',
                    text: ''
                },
                methods: {
                    handleSubmit() {
                        console.log(this.userName, this.password, this.sex, this.favorites, this.city, this.text);
                    }
                }
            });
        </script>
    </body>

</html>
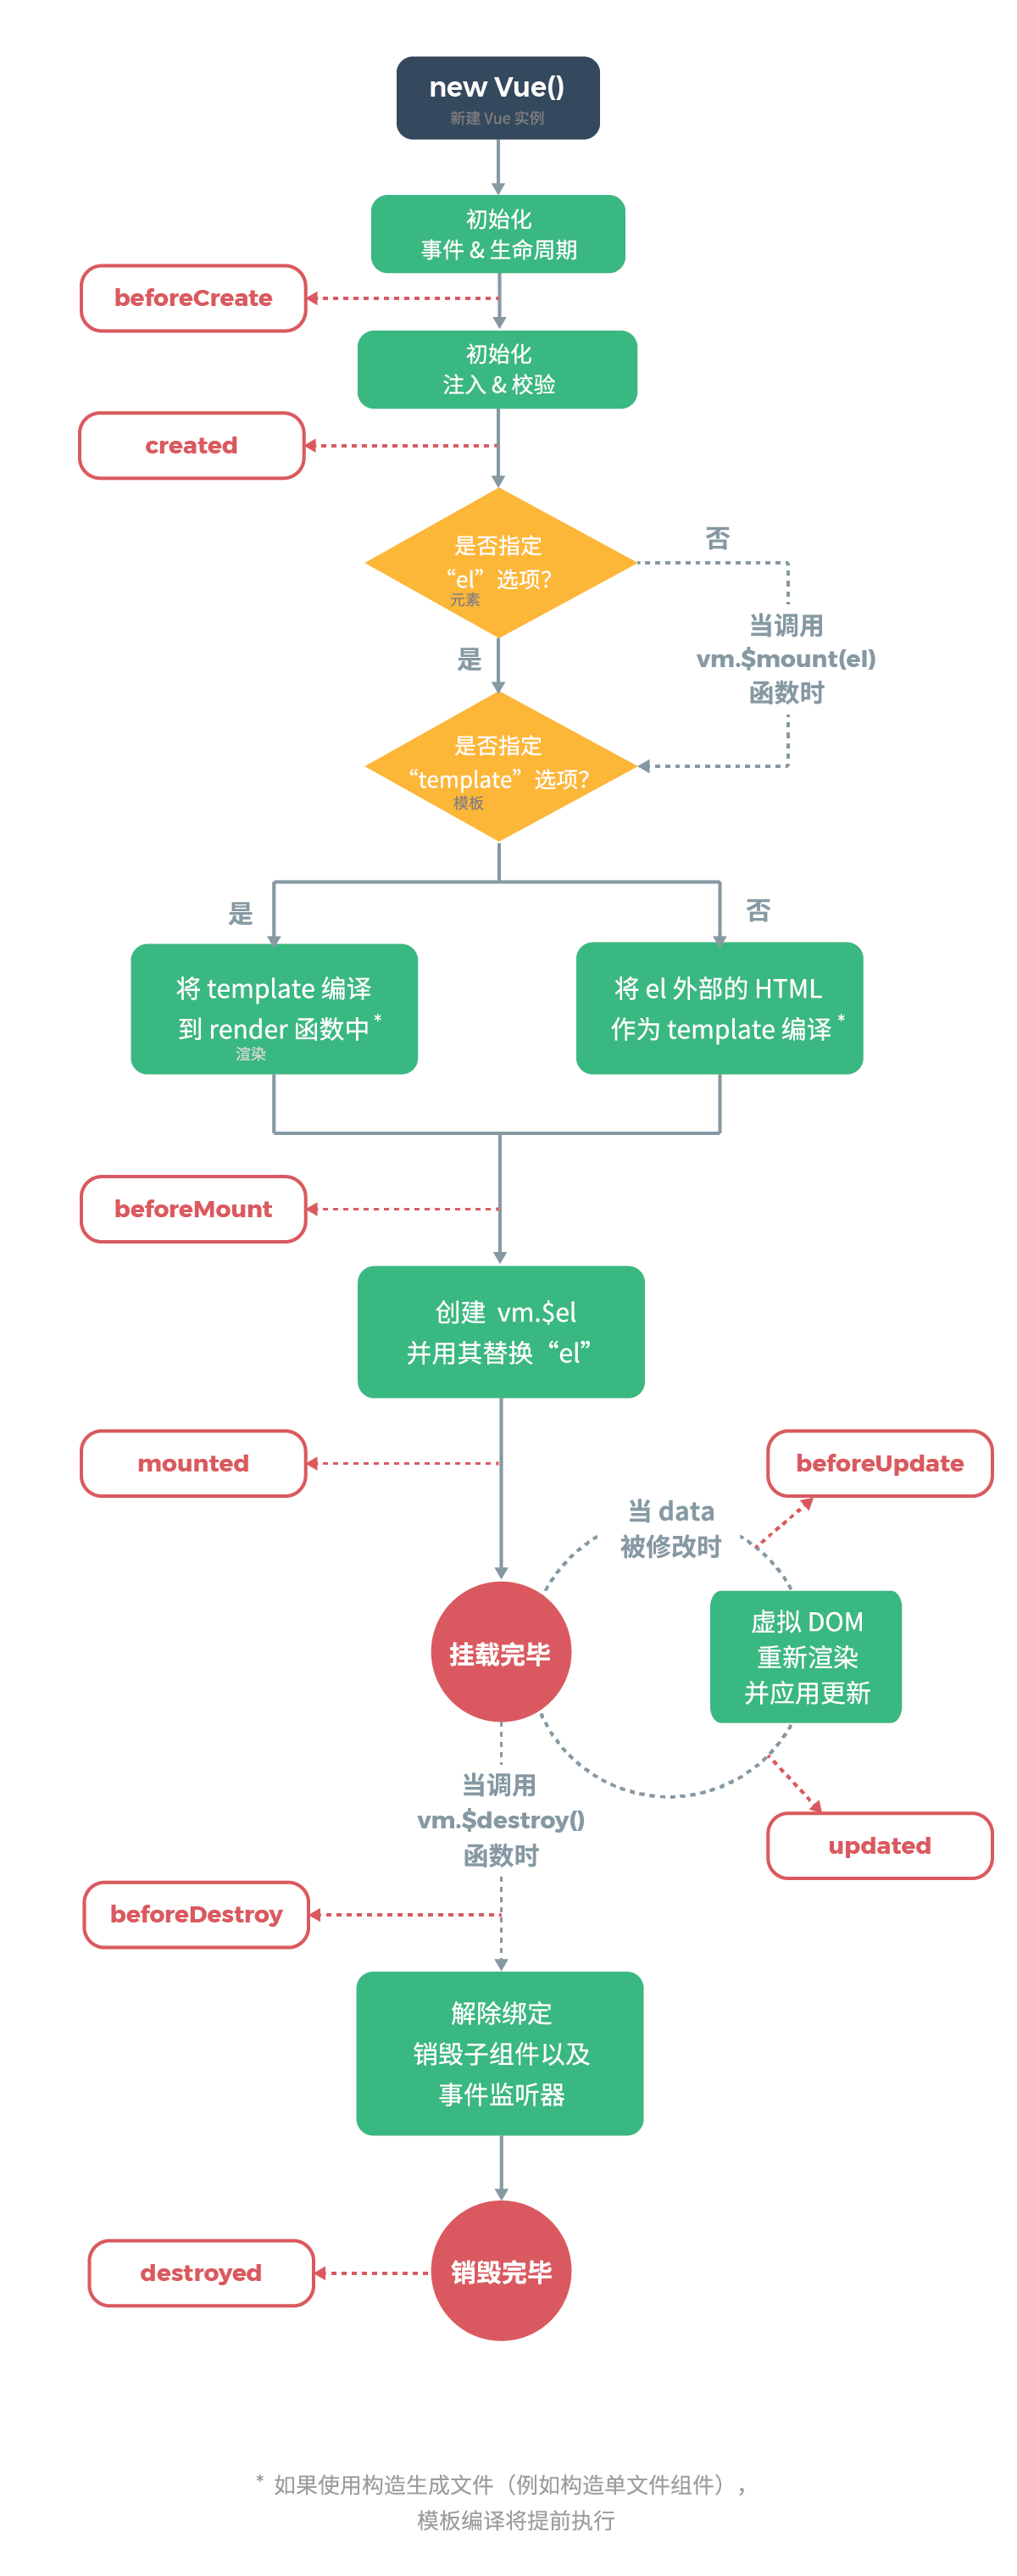
7. Life cycle
1. Initial phase (once execution)
(1)beforeCreate()
(2)created()
(3)beforeMount()
(4)mounted()
2. Update phase (n executions)
(1)beforeUpdate
(2)updated
3. Destroy phase (destroy vue instance once)
(1)beforeDestory
(2)destoryed
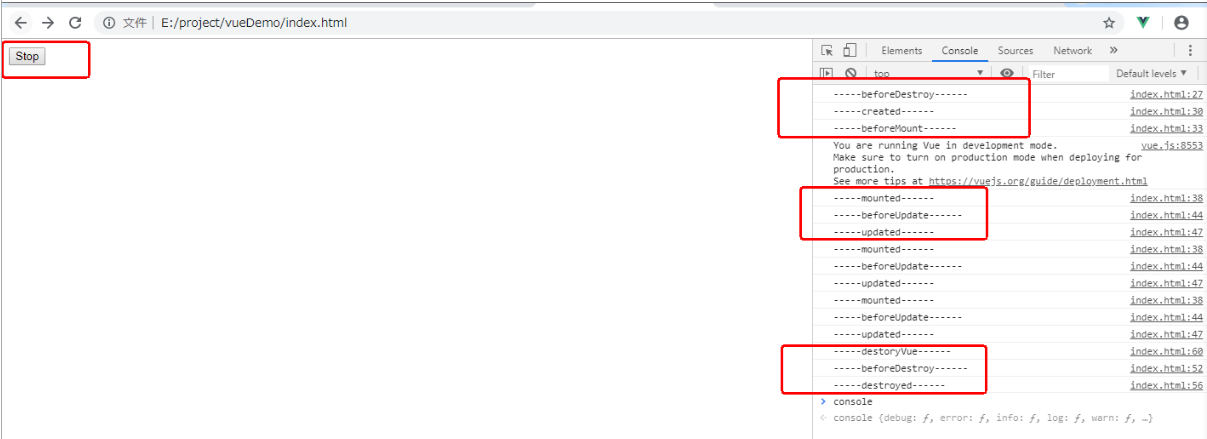
[Examples:
<!doctype html>
<html lang="en">

    <head>
        <meta charset="UTF-8">
        <meta name="viewport" content="width=device-width, user-scalable=no, initial-scale=1.0, maximum-scale=1.0, minimum-scale=1.0">
        <meta http-equiv="X-UA-Compatible" content="ie=edge">
        <title>Document</title>
    </head>

    <body>
        <div id="test">
            <!--After clicking the button, destroy vue Instance, timer will not be destroyed, you need to destroy it manually-->
            <button @click="destoryVue">Stop</button>
            <p v-show="show">Hello World</p>
        </div>
        <script src="https://cdn.jsdelivr.net/npm/vue@2.5.16/dist/vue.js"></script>
        <script type="text/javascript">
            var vm = new Vue({
                el: "#test",
                data: {
                    show: true,
                    setIntervalId: 0
                },
                // Initialization state
                beforeCreate(){
                    console.log('-----beforeDestroy------');
                },
                created(){
                    console.log('-----created------');
                },
                beforeMount(){
                    console.log('-----beforeMount------');
                },
                // mounted Initialized display called
                mounted(){
                    this.setIntervalId = setInterval(()=>{
                        console.log('-----mounted------');
                        this.show = !this.show;
                    }, 1000)
                },
                // Update Status
                beforeUpdate(){
                    console.log('-----beforeUpdate------');
                },
                updated(){
                    console.log('-----updated------');
                },
                // Destroy State
                beforeDestroy(){
                    // Manually Clear Timer
                    console.log('-----beforeDestroy------');
                    clearInterval(this.setIntervalId);
                },
                destroyed(){
                    console.log('-----destroyed------');
                },
                methods:{
                    destoryVue(){
                        console.log('-----destoryVue------');
                        // Destroy vue Example
                        this.$destroy();
                    }
                }
            });
        </script>
    </body>

</html>
The first step is to enter the initialization state. Since mounted contains a timer, the update state changes. After clicking the stop button, the vue destruction process starts.