I vue componentization idea
If we put all the processing logic of a page together, the processing will become very complex, and it is not conducive to subsequent management and expansion. If we split a page into small functional modules, each module completes the corresponding functions, and the components are independent of each other, Then the later maintenance and management of this page will become simple.
II To work with components
1. Create a component constructor
Call Vue The extend () method creates a component constructor
2. Register components
Call Vue The component () method registers the component
3. Use components
Use components within the scope of Vue instances
III Use of componentization
1. Basic use of componentization
<body>
    <div id="app">
      <!-- 3.Use components -->
        <my-cpn></my-cpn>
        <my-cpn></my-cpn>
        <my-cpn></my-cpn>
        <my-cpn></my-cpn>
      </div>

      <script src="./js/vue.js"></script>
      <script>
        //1. Create a component constructor object
        const cpnC = Vue.extend({
        template: ` <div>
            <h2>Title Title Title</h2>
            <p>Content content content</p>
            <p>Content ah ah ah</p>
            <p>Content content hey hey hey</p>
          </div>`
        })

        //2. Register components
        Vue.component('my-cpn',cpnC)//My CPN is the tag name of the component
        new Vue({ el: '#app' })
        const app = new Vue({
            el: '#app ', / / used to hang on the element to be managed
                            })
      </script>
</body>
Operation results: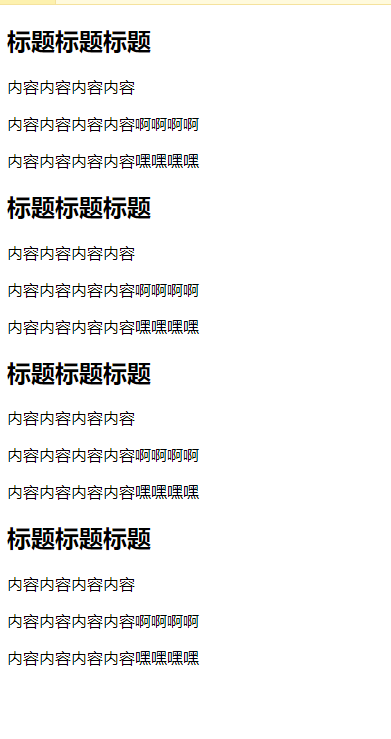
Step resolution: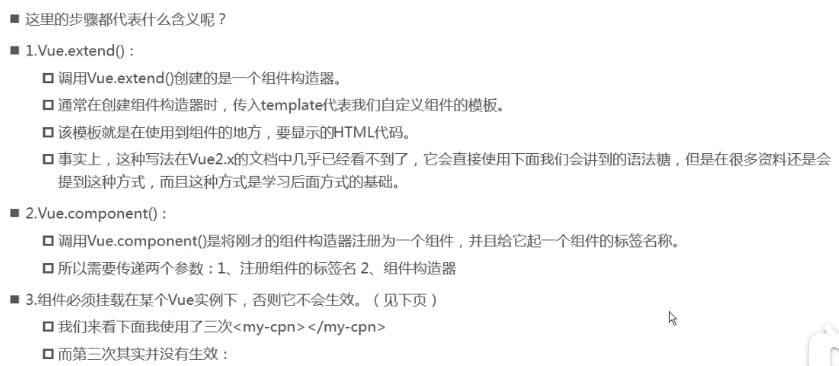
2. Global and local components
The above case is the global component used, which means that it can be used in multiple vue instances.
So what is a local component?
Register components in the instance. Local components commonly used in development. In addition, one instance is generally created, and multiple instances will not be created.
<body>
    <div id="app">
      <!-- 3.Use components -->
        <my-cpn></my-cpn>
        <my-cpn></my-cpn>
        <my-cpn></my-cpn>
      </div>

      <script src="./js/vue.js"></script>
      <script>
        //1. Create a component constructor object
        const cpnC = Vue.extend({
        template: ` <div>
            <h2>Title</h2>
            <p>Content content content</p>
            <p>Content content content hhhhh</p>
            <p>Content content hey hey hey</p>
          </div>`
        })

        //2. Register components

        const app = new Vue({
            el: '#app ', / / used to hang on the element to be managed
            components:{
              'my-cpn':cpnC
            }
                            })
      </script>
</body>
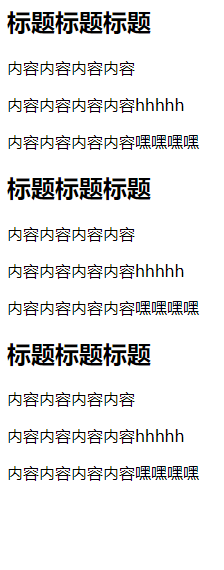
Operation results:
3. Parent and child components
3.1 distinction between parent and child components
There is a hierarchical relationship between components. The general hierarchical relationship is parent-child relationship.
How does that reflect the relationship between father and son?
Let the child component register in the components of the parent component.
3.2 syntax of registered components
<body>
    <div id="app">
      <!-- 3.Use components -->
        <my-cpn></my-cpn>
        <my-cpn></my-cpn>
        <my-cpn></my-cpn>
        <my-cpn></my-cpn>
      </div>

      <script src="./js/vue.js"></script>
      <script>
        //1. Create a component constructor object
        // const cpnC = Vue.extend()

        //2. Register components
        Vue.component('my-cpn',{
        template: ` <div>
            <h2>Title Title Title</h2>
            <p>Content content content</p>
            <p>Content ah ah ah</p>
            <p>Content content hey hey hey</p>
          </div>`
        })//My CPN is the tag name of the component
        const app = new Vue({
            el: '#app ', / / used to hang on the element to be managed

                            })
      </script>
</body>
This syntax sugar is equivalent to omitting the step of creating the component constructor object directly, and assigning the value of the template in the constructor to the registered component. The above example is a global component method.
For local components, just write the template content directly in the component in the instance.
<body>
    <div id="app">
      <!-- 3.Use components -->
        <cpn2></cpn2>
      </div>

      <script src="./js/vue.js"></script>
      <script>

        new Vue({ el: '#app' })
        const app = new Vue({
            el: '#app ', / / used to hang on the element to be managed
            components:{
              'cpn2':{
                template:
                `<div>
                  <h2>I'm Title 1</h2>
                  <p>I am the content</p>
                  </div>`
              }
            }
                            })
      </script>
</body>
Operation results: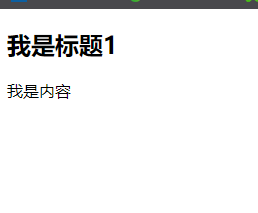
In this way, child components can be nested inside the parent component. The template will make the code look messy, so we need to separate the template.
Template separation method 1: write out the content with a script tag in front of the registered component. In the tag, type="text/x-template", define the id name, and reference the id name in the template in the components. (this method is generally not used)
<body>
  <div id="app">
    <!-- 3.Use components -->
      <cpn2></cpn2>
    </div>

    <script src="./js/vue.js"></script>

    <script type="text/x-template" id="cpn">
      <div>
        <h2>I'm the title</h2>
        <p>I am content..</p>
      </div>
    </script>

   <script>
      const app = new Vue({
          el: '#app ', / / used to hang on the element to be managed
          components:{
            'cpn2':{
              template:
                `#cpn`
            }
          }
                          })
    </script>
</body>
Operation results: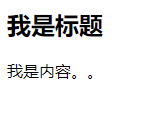
Template separation method 2: use the < template > < / template > tag in front of the registration interface, write the template content in the tag, and bind the id. This method is generally used for template separation.
<body>
  <div id="app">
    <!-- 3.Use components -->
      <cpn2></cpn2>
    </div>

    <script src="./js/vue.js"></script>

  <template id="cpn">
    <div>
      <h2>I'm the title</h2>
      <p>I am content..</p>
    </div>
  </template>

   <script>
      const app = new Vue({
          el: '#app ', / / used to hang on the element to be managed
          components:{
            'cpn2':{
              template:
                `#cpn`
            }
          }
                          })
    </script>
</body>
The results are the same.
3.3 communication between parent and child components
Child components cannot access parent components or vue instances, but in development, some data often needs to be transferred from the upper layer to the lower layer. For example, some content in a page does not need to be displayed by the parent component, but by the child components below the parent component. At this time, we will not let the child component send a request to the parent component, but let the parent component pass the data to the child component.
3.3.1 how to communicate between parent and child components?
- Pass data to subcomponents through props
- Send messages to parent components through events
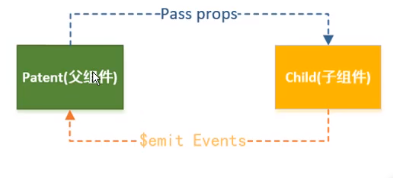
1. Transfer data to sub components through props
be careful:
- Template template must have a root element (div in code).
- If the attribute name of props is hump naming method, it should be written according to the attribute name corresponding to hump naming method when displaying the component label v-bind. (try to name it in lowercase)
<body>
    <div id="app">
        <cpn v-bind:cnames="names" :cmessage="message"></cpn>
      </div>

      <template id='cpn'>
        <div>
          <ul>
            <li v-for="item in cnames">{{item}}</li>
          </ul>
          <h2>{{cmessage}}</h2>
        </div>
      </template>

      <script src="./js/vue.js"></script>
      <script>
        // Father to son, props
        const cpn ={
          template:`#cpn`,
          props:['cnames','cmessage']
        }

          const app = new Vue({
            el: '#app ', / / used to hang on the element to be managed
            data: {
              message: 'Hello Vue!',
              names:['JD.COM','millet','Meituan']
            },
            components:{
              'cpn':cpn
            }
                            })
      </script>
</body>
Operation results: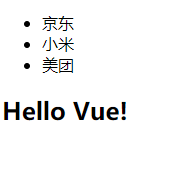
Code idea: first prepare data (message and names in the code) in the instance (parent component), register the child component cpn in the instance, add props and required variable names in the constructor of the child component, use these variables in the template, bind them in the vue instance and display them with component labels.
Of course, props can be an object, and there is a type restriction on the parameters passed in the object.
    const cpn ={
          template:`#cpn`,
          props:{
            //1. Type restrictions
            cnames:Array,
            cmessage:String
          }
        }
Or define a default value at the same time as the type limit.
 const cpn ={
          template:`#cpn`,
          props:{
            cmessage:{
              type:String,
              default:'aaaa',//Default value
              required:true//This sentence indicates that the value must be passed when the attribute is passed
            }
          }}
            cnames:{
              type:Array,
              default:[]//In vue2 There is no problem with this writing method in version 5.17
            }
If the type is an object or array, the default value must be a function with a return value.
 cnames:{
              type:Array,
              default(){
                return []
              }
            }
2. Send messages to parent components through events
This process is more common than that from parent to child, because some events usually occur in child components, such as user click events. The child component needs to tell the parent component that this event occurred and what the user clicked. The parent component requests new data according to the data transmitted by the child component.
For example: define several buttons in the sub component, click the button, and the console will return the clicked information
<body>
  <!-- Parent component template -->
    <div id="app">
        <cpn ></cpn>
      </div>

<!-- Subcomponent template -->
      <template id='cpn'>
        <div>
          <button v-for="item in categories" @click="btnclick(item)">{{item.name}}</button>
        </div>
      </template>

      <script src="./js/vue.js"></script>
      <script>
        //Subcomponents
        const cpn ={
          template:`#cpn`,
          props:{
           cnames:{
             type:Array
           } ,
           cmessage:{
             type:String
           }
          },
          data(){
            return{
              categories:[
                {id:'aaa',name:'Computer mobile phone'},
                {id:'bbb',name:'Popular recommendation'},
                {id:'ccc',name:'Household appliances'},
                {id:'ddd',name:'Office Supplies'},
              ]
            }
          },
          methods:{
            btnclick(item){
            console.log(item);
            }
          }
        }
        // Parent component
          const app = new Vue({
            el: '#app ', / / used to hang on the element to be managed
            data: {
              message: 'Hello Vue!',
              names:['JD.COM','millet','Meituan']
            },
            components:{
              'cpn':cpn
            }
                            })
      </script>
Custom launch event
Code idea: the method in the sub component defines a trigger event through $emit(). The name of the launch event is itemlick and the parameter is item. Define an event named cpnclick in the parent component to listen for (v-on) the launch event of the child component template.
<body>
  <!-- Parent component template -->
    <div id="app">
        <cpn @itemclick="cpnclick"></cpn>
      </div>

<!-- Subcomponent template -->
      <template id='cpn'>
        <div>
          <button v-for="item in categories" @click="btnclick(item)">{{item.name}}</button>
        </div>
      </template>

      <script src="./js/vue.js"></script>
      <script>
        //Subcomponents
        const cpn ={
          template:`#cpn`,
          props:{
           cnames:{
             type:Array
           } ,
           cmessage:{
             type:String
           }
          },
          data(){
            return{
              categories:[
                {id:'aaa',name:'Computer mobile phone'},
                {id:'bbb',name:'Popular recommendation'},
                {id:'ccc',name:'Household appliances'},
                {id:'ddd',name:'Office Supplies'},
              ]
            }
          },
          methods:{
            btnclick(item){
               this.$emit('itemclick',item)//Launch an event. The first parameter is the event name and the second is the event parameter
            }
          }
        }
        // Parent component
          const app = new Vue({
            el: '#app ', / / used to hang on the element to be managed
            data: {
              message: 'Hello Vue!',
              names:['JD.COM','millet','Meituan']
            },
            components:{
              'cpn':cpn
            },
            methods:{
              cpnclick(item){
                console.log('cpnclick',item)
              }
            }
                            })
      </script>
</body>
Open the web page and click a button at will. You can see the clicked information on the console
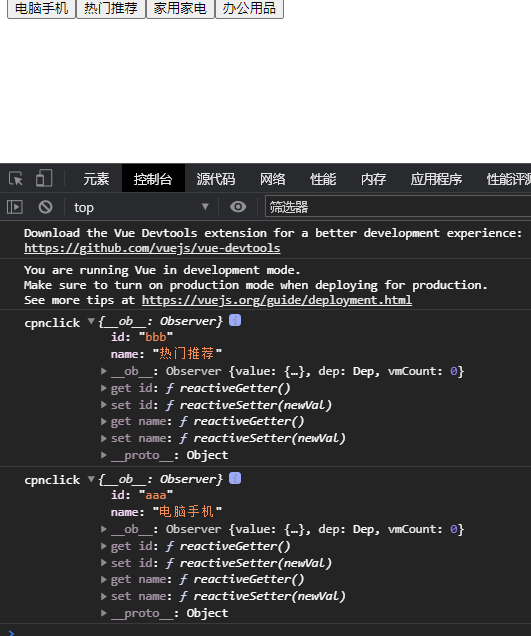
3.3.2 access method of parent-child components
The above parent-child communication methods send events to the parent component through the child component. In fact, we can directly let the parent component access the child component through the object, or the child component access the parent component through the object.
1. Parent component accesses child component: use $clidren or $refs
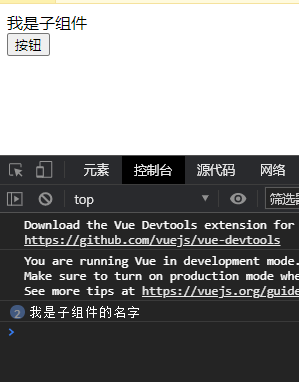
The parent component usually uses $refs to access the child component, which is a bit like class. $refs is an object type. By default, it is an empty object. When adding ref="aaa (id name)" to the component, this is called in the parent component$ refs. aaa. XXX can access the specified sub components and the properties in the sub components.
Take a chestnut
<body>
    <div id="app">
        <div>
          <cpn ref="aaa">
          </cpn>
          <button @click="btnclick">Button</button>
        </div>
      </div>
      <template id="cpn">
        <div>
          I am a subcomponent
        </div>
      </template>
      <script src="./js/vue.js"></script>
      <script>
          var app = new Vue({
            el: '#app ', / / used to hang on the element to be managed
            data: {
              message: 'Hello Vue!'//Define data
            },
            methods:{
              btnclick(){
               console.log(this.$refs.aaa.name)
              }
            },

            components:{
              cpn:{
                template:`#cpn`,
                data(){
                  return{
                    name:'I am the name of the subcomponent'
                  }
                },
              methods:{
                  showmessage(){
                    console.log('showmessage');
                  }
                }
              }
            }

                            })

      </script>
Operation result: after clicking the button
2. Child component accesses parent component: $parent
This is almost unnecessary. In this way, the reusability of sub components is not strong.
Supplement: you can access the root component with $root.