2. User defined instructions
2.1 registration of directives
The registration of user-defined instructions is divided into global registration and local registration. For example, registering a v-focus instruction is used to automatically obtain the focus when the page is loaded. That is, as long as no content is clicked after opening this page, the input box of this page should be in the focus state.
Syntax: Vue directive(id,definition). ID is the instruction's unique identifier, and the definition definition object is the instruction's related attribute and hook function. The format is as follows:
//Register a global custom directive v-focus
Vue.directive('focus',{
//Define object
})
You can also register local instructions and accept a direct option in the component or Vue constructor. The format is as follows:
var vm=new Vue({
	el:"#app",
	directives:{
		focus:{
		//Define object
		}
	}
})
2.2 definition object of instruction
We can pass in the definition definition object to give specific functions to the instruction.
An instruction definition object can provide the following hook functions:
- bind: only called once. It is called when the instruction is bound to the element for the first time. Here, one-time initialization can be set.
- Inserted: called when the bound element is inserted into the parent node (it can be called if the parent node exists).
- Update: called when the template of the bound element is updated, regardless of whether the binding value changes. By comparing the binding values before and after the update, unnecessary template updates can be ignored.
- componentUpdated: called when the template of the bound element completes an update cycle.
- unbind: called only once when the instruction is unbound from the element.
According to the requirements, complete the logic code in different hook functions, such as v-focus above. We want to call when the element is inserted into the parent node. A better hook function is inserted.
<p>When the page is loaded, input Element automatically gets focus</p>
<input v-focus>

<script>
    var vm=new Vue({
        el:"#app",
        data:{

        },
        directives:{
            //Register a local custom directive v-focus
            focus:{
                //Definition of instruction
                inserted:function(el){
                    //Focus element
                    el.focus();
                }
            }
        }
    })
</script>
Once the interface is opened, the input input box will automatically obtain the focus and become an inputable state.
2.3 instruction instance properties
In the hook function of the instruction, you can call the instruction instance through this.
- el: the element bound by the instruction, which can directly operate the DOM
- binding: an object containing the following properties.
- Name: instruction name.
- Value: the binding value of the instruction. For example, the binding value in v-my-directive="1+1" is 2
- oldValue: the previous value of the instruction binding. It is available in update and componentUpdated whenever possible, regardless of whether the value changes or not.
- Expression: instruction expression in string form. For example, the expression in v-my-directive="1+1" is "1 + 1"
- arg: parameter passed to the instruction; optional. For example, the parameter in v-my-directive: foo is "foo".
- Modifiers: an object that contains modifiers. For example, v-my-directive foo. In bar, the modifier object is {foo:true,bar:true}.
- Vnode: the virtual node generated by Vue compilation. (see VNode API for more).
- oldVnode: the previous virtual node, which is only available in the update and componentUpdated hooks
<div v-demo="{color:'green',text:'Custom instruction!'}"></div>

Vue.directive('demo',function(el,binding){
        //Set text and background colors in a simplified manner
        el.innerHTML=binding.value.text
        el.style.background=binding.value.color
    })
2.4 cases
2.4.1 drop down menu
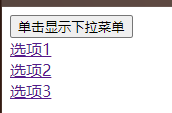
There are many common drop-down menus on Web pages. When you click drop-down, a drop-down menu will pop up.
<!DOCTYPE html>
<html lang="en">
<head>
    <meta charset="UTF-8">
    <meta http-equiv="X-UA-Compatible" content="IE=edge">
    <meta name="viewport" content="width=device-width, initial-scale=1.0">
    <title>Document</title>
    <script src="../vue.js" type="text/javascript" charset="utf-8"></script>
</head>
<body>
<div id="app">
    <!--Custom instruction v-clickoutside binding handleHide function-->
<div class="main" v-clickoutside="handleHide">
    <button @click="show=!show">Click to display the drop-down menu</button>
    <div class="dropdown" v-show="show">
        <div class="item"><a href="#"> option 1 < / a > < / div >
        <div class="item"><a href="#"> option 2 < / a > < / div >
        <div class="item"><a href="#"> option 3 < / a > < / div >
    </div>
</div>
</div>

<script>
    //Custom directive v-clickoutside
    Vue.directive('clickoutside',{
        /*Bind the click event on the document, so declare a function in the bind hook function
        documentHandler,And bind it as a handle to the click event of document
        documentHandler Function makes two judgments
        **/
        bind(el,binding){
            function documentHandler(e){
                /*The first is to judge whether the clicked area is inside the element where the instruction is located. If so, the jump function will not continue to execute
                *contains Method is used to determine whether element A contains element B. if it does, it returns true
                **/
                if(el.contains(e.target)){
                    return false;
                }
                /*The second is to judge whether the current instruction v-clickoutside has an expression. In this user-defined instruction
                The expression should be a function. After filtering the internal elements, clicking any external area should execute the function in the user expression
                So binding Value() is used to execute the function specified in methods in the current context
                **/
                if(binding.expression){
                    binding.value(e)
                }
            }
            el._vueMenuHandler_=documentHandler;
            document.addEventListener('click',el._vueMenuHandler_)
        },
        unbind(el){
            document.removeEventListener('click',el._vueMenuHandler_)
            delete el._vueMenuHandler_
        }
    })
    var vm=new Vue({
        el:"#app",
        data:{
            show:false
        },
        methods:{
            handleHide(){
                this.show=false
            }
        }
    })
</script>
</body>
</html>
The effect is as follows:
2.4.2 relative time conversion
In many community websites, the published dynamics will have a relative time after the conversion of relative local time.
Generally, the storage time format on the server is UNIX timestamp. For example, the timestamp at 06:00:00 on January 17, 2018 is 1516140000. After getting the data, the front end converts it into a sustainable time format and displays it. In order to show the real-time performance, in some social products, it will even be converted to different formats in real time, such as a few seconds ago, a few minutes ago and a few hours ago, because it is more user-friendly and user-friendly than directly converting to time, minutes and seconds of month, day, month and day.
Let's implement such a Vue custom instruction v-time, which converts the timestamp passed in by the expression into relative time in real time.
index. The HTML code is as follows:
<!DOCTYPE html>
<html>
<head>
    <title>Time conversion instruction</title>
    <meta charset="utf-8"/>
    <script src="https://cdn.jsdelivr.net/npm/vue/dist/vue.js"></script>
</head>
<body>
<div id="app">
    <div v-time="timeNow"></div>
    <div v-time="timeBefore"></div>
</div>
<script src="./time.js"></script>
<script src="./index.js"></script>
</body>
</html>
index.js code is as follows:
var vm = new Vue({
    el: '#app',
    data: {
        timeNow: (new Date()).getTime(),
        timeBefore: 1580503571085
    }
})
time.js code is as follows:
var Time = {
    //Get current timestamp
    getUnix: function() {
        var date = new Date();
        return date.getTime();
    },

//Get the timestamp of today's 0:00, 0:00, 0 seconds
getTodayUnix: function() {
    var date = new Date();
    date.setHours(0);
    date.setMinutes(0);
    date.setSeconds(0);
    date.setMilliseconds(0);
    return date.getTime();
},

//Get the timestamp of 0:0 second on January 1 this year
getYearUnix: function() {
    var date = new Date();
    date.setMonth(0);
    date.setDate(1);
    date.setHours(0);
    date.setMinutes(0);
    date.setSeconds(0);
    date.setMilliseconds(0);
    return date.getTime();
},
//Acquisition standard date
getLastDate: function(time) {
    var date = new Date(time);
    var month = date.getMonth() + 1 < 10 ? '0' + (date.getMonth() + 1) : date.getMonth() + 1;
    var day = date.getDate() < 10 ? '0' + date.getDate() : date.getDate();
    return date.getFullYear() + '-' + month + '-' + day;
},
//Conversion time
getFormateTime: function(timestamp) {
    var now = this.getUnix();
    var today = this.getTodayUnix();
    var year = this.getYearUnix();
    var timer = (now - timestamp) / 1000;
    var tip = '';

    if (timer <= 0) {
        tip = 'just';
    } else if (Math.floor(timer / 60) <= 0) {
        tip = 'just';
    } else if (timer < 3600) {
        tip = Math.floor(timer / 60) + 'Minutes ago';
    } else if (timer >= 3600 && (timestamp - today >= 0)) {
        tip = Math.floor(timer / 3600) + 'Hours ago';
    } else if (timer / 86400 <= 31) {
        tip = Math.ceil(timer / 86400) + 'Days ago';
    } else {
        tip = this.getLastDate(timestamp);
    }
    return tip;
}
}
Vue.directive('time',{
    bind:function(el,binding){
        el.innerHTML=Time.getFormateTime(binding.value);
        el._timeout_=setInterval(()=>{
            el.innerHTML=Time.getFormateTime(binding.value);
        },60000);
    },
    unbind:function(){
        clearInterval(el._timeout_);
        delete el._timeout_;
    }
})
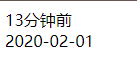
timeNow is the current time and timeBefore is a fixed time 2020-02-01
Time conversion logic:
- 1 minute ago - just now
- 1min~1h -- xx minutes ago
- 1h~1d -- xx hours ago
- 1d~1m - xx days ago
- More than one month - xx, xx
In this way, the logic is clear at a glance. In order to make the judgment simpler, we use timestamp to judge the size. Before writing the v-time instruction, we need to write a series of Time-related functions. We declare an object Time and encapsulate them.
Time. The getformattime () method is the method required in the custom instruction v-time. The parameter is a millisecond timestamp and returns the sorted time format string.
In the bind hook, bind the value of the instruction v-time expression Pass in time. Value as a parameter Get the format time from the getformattime () method, and then use el InnerHTML writes the element of the instruction. Timer el_ timeout _ Trigger every minute, update the time, and clear it in the unbind hook.
Summary: when writing user-defined instructions, it is recommended to bind one-time events and other initial actions to the DOM. It is recommended to complete them in the bind hook and unbind them at the same time.
Time conversion result:
3. Components
3.1 what are components
A component is a reusable Vue instance with a name. In this example, the name of the component is. This component can be used as a custom label in a Vue instance created through new Vue.
    <button-counter></button-counter>
    <button-counter></button-counter>

        Vue.component('button-counter',{
        data:function(){
            return{
                count:0
            }
        },
        template:'<button v-on:click="count++">You clicked me {{count}} times.</button>'
    })
Tags that you haven't seen in your daily work are components. Each tag represents a component, so you can reuse components any number of times.
Web component is actually a part of the page, just like every hardware in the computer. It has independent logic and function or interface. At the same time, it can integrate with each other according to the specified interface rules, so as to become a complete application.
A Web page is composed of parts like navigation, list, pop-up window, drop-down menu, etc. the page is just a container for these components. The components are freely combined to form a fully functional interface. When a component is not needed or wants to replace a component, it can be replaced and deleted at any time without affecting the operation of the whole application.
The core idea of front-end componentization is to divide a huge and complex page into page components with reasonable granularity.
Benefits of using components:
- Improve development efficiency
- Easy to reuse
- Simplify debugging steps
- Improve the maintainability of the whole project
- Facilitate collaborative development
3.2 basic use of components
In order to be used in the template, these components must be registered and recognized by Vue.
There are two component registration types: global registration and local registration.
3.2.1 global registration
Global registration needs to ensure that it is registered before the root instance is initialized, so that the component can be used in any instance.
Using Vue Component (tagName, options) registration.
<div id="app">
    <my-component></my-component>
</div>

<script>
	Vue.component('my-component',{
        template:'<h1>register</h1>'
    });
    var vm=new Vue({
        el:"#app"
    })
</script>
Note:
- The DOM structure of template must be contained by one and only root element, which is directly referenced without being used“ ”Packages cannot be rendered.
- The template declares the mapping relationship between the data and the DOM finally presented to the user.
In addition to the template option, the component can also use other options like Vue instances, such as data, calculated, methods, etc. However, when using data, unlike instances, data must be a function, and then return the data using return.
<div id="app">
    <my-component></my-component>
</div>

<script>
	Vue.component('my-component',{
        template:'<h1>{{message}}</h1>',
        data:function(){
            return{
                message:'register'
            }
        }
    });
    var vm=new Vue({
        el:"#app"
    })
</script>
The data value in a Vue component cannot be an object because the object is a reference type and the component may be referenced by multiple instances at the same time. If the data value is an object, multiple instances will share an object. If one component changes the data attribute value, other instances will also be affected.
Data is a function that returns the copy of the object through return, so that each instance has its own independent object. The attribute value of data can be changed between instances without affecting each other.
Using Vue Extend with Vue Component method:
<div id="app">
    <my-list></my-list>
</div>

<script>
	var list=Vue.extend({
        template:'<h1>this is a list</h1>',
    });
    Vue.component("my-list",list);
    new Vue({
        el:"#app"
    })
</script>
Define the template string into the script tag, using Vue Component defines the component. (script can also be changed to template)
<account></account>
<script id="tmpl" type="text/x-template">
    <div><a href="#">Sign in</a>|<a href="#"> register < / a > < / div >
</script>
Vue.component('account',{
        template:'#tmpl'
    });
3.2.2 partial registration
If you do not need to register components globally or as long as components are used in other components, you can use the components attribute of the option object to realize local registration:
<account></account>
        components:{
            account:{
                template:'<div><h1>This is account assembly</h1><login></login></div>',
                components:{
                    login:{
                        template:'<h3>This is the login component</h3>'
                    }
                }
            }
        }
flag identifier can be used in combination with v-if and v-else to switch components:
<account v-if="flag==true"></account>
<login v-else="flag==false"></login>

        components:{
            account:{
                template:'<div><h1>This is account assembly</h1></div>',
            },
            login:{
                template:'<h3>This is the login component</h3>'
            }
        }
3.2.3 DOM template parsing description
When using DOM as a template (for example, mounting the el option on an existing element), it is limited by HTML, because Vue can get the template content only after the browser parses and standardizes the HTML. Especially like these elements
-
,
-
,, and restrict the elements that can be wrapped by it, and some elements like this can only appear inside some other elements.
-
,, and restrict the elements that can be wrapped by it, and some elements like this can only appear inside some other elements.
Using these restricted elements in custom components can cause some problems:
<table>
    <my-row>...</my-row>
</table>
Custom components are sometimes considered invalid content, so they can cause errors when rendering. This is because the special js attribute is used to mount components. The code is as follows:
<table>
    <tr is="my-row"></tr>
</table>
That is, in standard HTML, some elements can only place specific child elements, while others can only exist in specific parent elements. For example, div cannot be placed in table, and the parent element of tr cannot be Div. Therefore, when using custom tags, the tag names are still the names of those tags, but you can fill in the name of the custom component in the is attribute of the tag, as shown below:
<table border="1" cellpadding="5" cellspacing="0">
    <my-row></my-row>
    <tr is="my-row"></tr>
</table>

        components:{
            myRow:{
                template:'<tr><td>123456</td></tr>',
            }
        }
Examples are as follows:
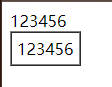
It can be seen from the figure that the directly referenced component label is not used
Note: if a string template is used, it is not limited.
3.3 component options
Vue components can be understood as VueModel classes with predefined behavior. A component can define many options in advance. However, the core are as follows:
- Template: the template declares the mapping relationship between the data and the DOM finally presented to the user.
- Initial data: the initial data state of a component. For reusable components, it is usually a private state.
- Accepted external parameters (props): components transfer and share data through parameters. The default parameter is one-way binding (top-down), but it can also be an explicitly declared two-way binding.
- Methods: data changes are generally performed within the component methods. User input events can be bound to component methods through v-on instructions.
- Life cycle hooks: a component will trigger multiple life cycle hook functions, such as created, attached, destroyed, etc. In these hook functions, we can encapsulate some custom logic. Compared with traditional MVC, it can be understood that the logic of controller is scattered into these hook functions.
3.3.1 component props
The more important function of components is communication between components. props is a very important option in components, which acts as a bridge between parent and child components.
Static props
The scope of the component instance is isolated, which means that the data of the parent component cannot be directly referenced in the template of the child component.
If you want the child component to use the data of the parent component, you need to implement it through the props option of the child component. The subcomponent should explicitly declare the data it expects with the props option:
<my-component message="Data from parent component"></my-component>

    Vue.component('my-component',{
        //Declare props
        props:['message'],
        //Like data, props can be used in templates
        //It can also be used in vm instances like "this.message"
        template:'<span>{{message}}</span>'
    })
Because HTML is not case sensitive, when a string template is not used, the props named CamelCased (hump) needs to be converted to the corresponding kebab case (DASH separated) naming:
<my-component my-message="Data from parent component"></my-component>

    Vue.component('my-component',{
        props:['myMessage'],
        template:'<span>{{myMessage}}</span>'
    })
Dynamic props
In the template, sometimes the transmitted data is not necessarily fixed, but the data of the parent component should be dynamically bound to the props of the child template. Similar to binding to any ordinary HTML feature, v-bind is used for binding. When the data of the parent component changes, the change will also be passed to the child component:
<input type="text" v-model="parentMessage">
<my-component :message="parentMessage"></my-component>

<script>
    Vue.component('my-component',{
        //Declare props
        props:['message'],
        //Like data, props can be used in templates
        //It can also be used in vm instances like "this.message"
        template:'<span>{{message}}</span>'
    })
    var vm=new Vue({
        el:"#app",
        data:{
            parentMessage:''
        }
    })
</script>
Note: if numbers, Boolean values, arrays and objects are directly passed in the parent component, the values passed are strings. If you want to pass an actual value, you need to use v-bind so that it can be evaluated as a JavaScript expression:
<my-component :message="1+1"></my-component><br>
<my-component message="1+1"></my-component>

3.3.2 props verification
The props option values described earlier are arrays. In addition to arrays, they can also be objects. You can specify validation rules for props of components, and Vue will issue a warning if the incoming data does not comply with the rules. When props needs verification, it needs to use object writing.
Data validation is recommended when the component is used by others:
Vue.component('example',{
	props:{
		//Basic type detection. null means that any type can be used
		propA:Number,
		//Multiple types
		propB:[String,Number],
		//Required and string
		propC:{
			type:String,
			required:true
		},
		//There are numbers, the default value is
		propD:{
			type:Number,
			default:100
		},
		//The default value of the array / object should be returned by a factory function
		propE:{
			type:Object,
			default:function(){
				return{message:'hrllo'}
			}
		},
		//Custom validation function
		propF:{
			validator:function(value){
				return value>10
			}
		}
	}
})
Vue throws a warning when props validation fails. Props will be verified before the component instance is created, so instance properties such as data, calculated or methods cannot be used in the default or validator function.
3.3.3 unidirectional data flow
All props form a one-way downlink binding between their parent and child props: the updates of the parent props will flow down to the child components, but not vice versa. The reason for this design is to decouple the parent and child components as much as possible to avoid that the child components inadvertently modify the state of the parent component.
Additionally, every time the parent component changes, all props in the child component will be refreshed to the latest value. This means that props should not be changed inside a subcomponent. If you do, Vue issues a warning in the browser's console.
<div id="example">
<parent></parent>
</div>

<script>
    var childNode = {
            template:
        '<div class="child"><div><span>Subcomponent data</span>' +
                ' <input v-model="childMsg"> </div> <p>{{childMsg}}</p></div>' ,
        props:['childMsg']
    }
    var parentNode = {
            template:
        '<div class="parent"><div><span>Parent component data</span>' +
                ' <input v-model="msg"> </div> <p>{{msg}}</p> <child :child-msg="msg"></child></div>',
        components: {
            'child': childNode
        },
        data(){
        return {
            'msg':'match'
        }
    }
    };
    // Create root instance
    new Vue({
        el: '#example',
        components: {
            'parent': parentNode
        }
    })
</script>
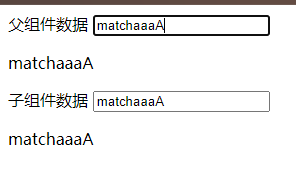
When the parent component data changes, the child component data will change accordingly. When the child component data changes, the parent component data remains unchanged and a warning is issued on the console.
In business, we often need to modify the data in props for the following two reasons:
- After props is passed in as the initial value, the sub component wants to use it as local data.
- props is passed in as the initial value, which is processed into other data and output by the sub component.
Note: objects and arrays in JS are reference types and point to the same memory space. If props is an object or array, changing it inside the child component will affect the state of the parent component.
For these two situations, the correct response is:
-
Define a local variable and initialize it with the value of props:
props:['initialCounter'],
data:function(){
	return{counter:this.initialCounter}
}
However, the defined local variable counter can only accept the initial value of initialCounter. When the value to be passed by the parent component changes, the counter cannot accept the latest value.
<div id="example">
    <parent></parent>
</div>

<script>
    var childNode = {
            template:
        '<div class="child"><div><span>Subcomponent data</span>' +
                ' <input v-model="temp"> </div> <p>{{temp}}</p></div>' ,
        props:['childMsg'],
        data(){
            return{
                temp:this.childMsg
            }
        }
    }
    var parentNode = {
            template:
        '<div class="parent"><div><span>Parent component data</span>' +
                ' <input v-model="msg"> </div> <p>{{msg}}</p> <child :child-msg="msg"></child></div>',
        components: {
            'child': childNode
        },
        data(){
        return {
            'msg':'match'
        }
    }
    };
    // Create root instance
    new Vue({
        el: '#example',
        components: {
            'parent': parentNode
        }
    })
</script>
In the example, the value of the parent component cannot be updated to the child component except the initial value.
-
Define a calculation property, process the value of props and return:
props:['size'],
computed:{
	normalizedSize:function(){
		return this.size.trim().toLowerCase()
	}
}
However, because it is a calculation attribute, only values can be displayed and cannot be set
    var childNode = {
            template:
        '<div class="child"><div><span>Subcomponent data</span>' +
                ' <input v-model="temp"> </div> <p>{{temp}}</p></div>' ,
        props:['childMsg'],
        computed:{
            temp(){
                return this.childMsg
            }
        }
    }
In the example, because the subcomponent uses calculated properties, the data of the subcomponent cannot be modified manually.
-
A more appropriate solution is to use variables to store the initial value of props, and use watch to observe the change of the value of props. When the value of props changes, update the value of the variable:
<body>
    <div id="example">
        <parent></parent>
    </div>

    <script>
        var childNode = {
                template:
            '<div class="child"><div><span>Subcomponent data</span>' +
                    ' <input v-model="temp"> </div> <p>{{temp}}</p></div>' ,
            props:['childMsg'],
            data(){
                return{
                    temp:this.childMsg
                }
            },
            watch:{
                childMsg(){
                    this.temp=this.childMsg
                }
            }
        }
        var parentNode = {
                template:
            '<div class="parent"><div><span>Parent component data</span>' +
                    ' <input v-model="msg"> </div> <p>{{msg}}</p> <child :child-msg="msg"></child></div>',
            components: {
                'child': childNode
            },
            data(){
            return {
                'msg':'match'
            }
        }
        };
        // Create root instance
        new Vue({
            el: '#example',
            components: {
                'parent': parentNode
            }
        })
    </script>
</body>
3.4 component communication
In Vue component communication, the most common communication mode is the communication between parent and child components. The setting methods of parent-child components are different in different cases. To sum up, the communication methods between components are shown in the figure below. The most common is that the parent component is the control component and the child component is the view component. The parent component passes data to the child component for use. When a business logic operation is encountered, the child component triggers the user-defined event of the parent component.
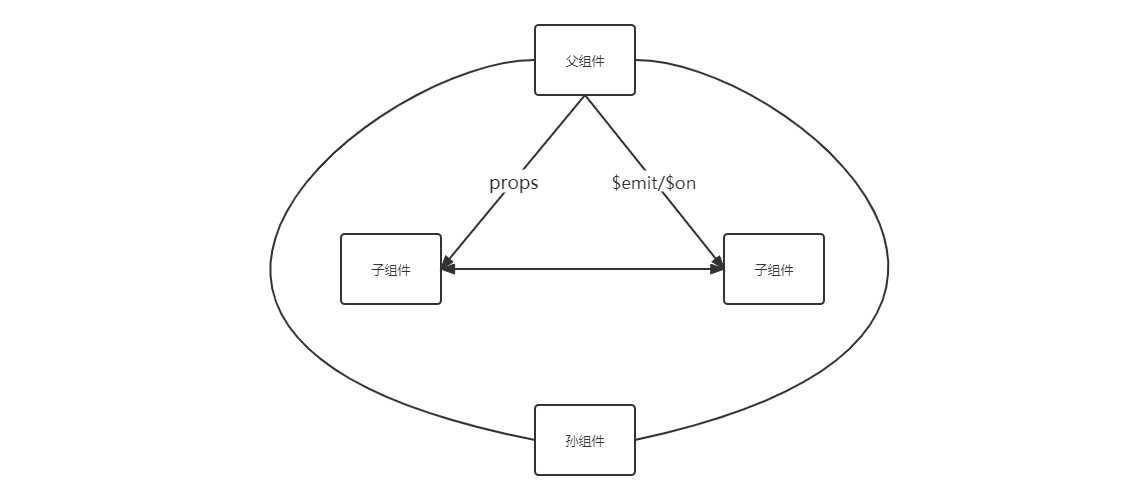
There are three types of component relationships: parent → child, child → parent, and non parent-child.
The communication between the parent component and the child component passes data through props, just like the parameter passing of a method. The parent component calls the child component and passes in data. The child component receives the data passed by the parent component and uses it after verification.
3.4.1 user defined events
Custom events are needed when the child component passes data to the parent component. In addition to listening for DOM events, the v-on instruction can also use custom events between subcomponents.
Use $emit() in the child component to trigger events to pass internal data to the parent component:
<!DOCTYPE html>
<html>
<head>
    <title></title>
    <meta charset="utf-8"/>
    <script src="https://cdn.jsdelivr.net/npm/vue/dist/vue.js"></script>
</head>
<body>
<div id="app">
    <my-component v-on:myclick="onClick"></my-component>
</div>
<script>
    Vue.component('my-component', {
        template:'<div>' +
            '<button type="button" @click="childClick">Click me to trigger a custom event</button></div>' ,
        methods: {
            childClick () {
                this.$emit('myclick', 'This is the data I sent', 'This is the data I sent 2')
            }
        }
    })
    new Vue({
        el: '#app',
        methods: {
            onClick () {
                console.log(arguments)
            }
        }
    })
</script>
</body>
</html>
The code execution steps in the above example are as follows:
-
The subcomponent passes the custom events and the data to be transferred in its own method through the following code:
this.$emit('myclick', 'This is the data I sent', 'This is the data I sent 2')- The first parameter is the custom event name
- The following parameters are the data you want to pass out in turn
-
The parent component uses v-on to bind the processor for the event. The code is as follows:
<my-component v-on:myclick="onClick"></my-component>
In this way, the parameters passed in can be called in the methods method of the Vue instance.
3.4.2 e m i t / emit/ emit/on
This method uses an empty Vue instance as the central event center to trigger and listen to events, and cleverly and lightly realizes the communication between any component, including parent-child, brother and cross level.
The implementation method is as follows:
var Event=new Vue();
	Event.$emit(Event name, data);
	Event.$on(Event name, data=>());
Suppose there are three sibling components, namely a, B and C. how can C obtain the data of component A or B.
<!DOCTYPE html>
<html>
<head>
    <title></title>
    <meta charset="utf-8"/>
    <script src="https://cdn.jsdelivr.net/npm/vue/dist/vue.js"></script>
</head>
<body>
<div id="app">
    <my-a></my-a>
    <my-b></my-b>
    <my-c></my-c>
</div>
<template id="a">
    <div>
        <h3>A Components:{{name}}</h3>
        <button @click="send">Send data to C assembly</button>
    </div>
</template>
<template id="b">
    <div>
        <h3>B Components:{{age}}</h3>
        <button @click="send">Send array to C assembly</button>
    </div>
</template>
<template id="c">
    <div>
        <h3>C Components:{{name}},{{age}}</h3>
    </div>
</template>
<script>
    var Event = new Vue();//Define an empty Vue instance
    var A = {
        template: '#a',
        data() {
        return {
            name: 'beixi'
        }
    },
        methods: {
            send() {
                Event.$emit('data-a', this.name);
            }
        }
    }
    var B = {
        template: '#b',
        data() {
        return {
            age: 18
        }
    },
        methods: {
            send() {
                Event.$emit('data-b', this.age);
            }
        }
    }
    var C = {
        template: '#c',
        data() {
        return {
            name: '',
                age: ""
    }
    },
        mounted() {//Execute after template compilation
        Event.$on('data-a',name => {
            this.name = name;//No new this will be generated inside the arrow function. If not = >, this refers to Event
        })
        Event.$on('data-b',age => {
            this.age = age;
        })
    }
    }
    var vm = new Vue({
        el: '#app',
        components: {
            'my-a': A,
            'my-b': B,
            'my-c': C
        }
    });
</script>
</body>
</html>
The page effect is as follows:

$on listens to the custom events data-a and data-b. because it is sometimes uncertain when the event will be triggered, it usually listens in the mounted and created hooks.
3.5 content distribution
In the actual project development, the content of the parent component is often mixed with the template of the child component. Such a process is called content distribution in Vue and is often called slot. It mainly refers to the current draft specification of web components and uses special elements as slots for the original content.
3.5.1 basic usage
Since slot is a template, any component can be divided into non slot template and slot template from the perspective of template type. The non slot template is an HTML template (that is, some elements of HTML, such as div, span and so on). Its display and how to display are completely controlled by the plug-in itself, but the slot template (that is, slot) is an empty shell. Its display and how to display are completely controlled by the parent component. However, the slot display position is determined by the child component itself. The part of the component template where the slot is written will be displayed in the future.
Generally, the codes for defining sub components are as follows:
<div id="app">
<child>
    <span>123456</span>
</child>
</div>

<script>
    var vm=new Vue({
        el:"#app",
        data:{

        },
        components:{
            child:{
                template:'<div>This is the sub component content</div>'
            }
        }
    })
</script>
The page displays the result: This is the content of the sub component. 123456 content will not be displayed. Although the tag is contained by the child tag of the child component, it does not belong to the child component because it is not in the template attribute of the child component.
Add the slot tag in the template:
template:'<div><slot></slot>This is the sub component content</div>'
Page display result: 123456 this is the sub component content
Distribution resolution content distribution:
-
Suppose there is a component named my component, and its use context code is as follows:
<my-component> <p> hi,slots </p> </my-component> -
Suppose this component template is:
<div> <slot></slot> </div> -
Then the injected HTML component is equivalent to:
<div>
    <p>
        hi,slots
    </p>
</div>
The tag will inject the content of the component use context into the position occupied by this tag. The concept of component distribution is simple and powerful, because it means that an isolated component can inject content in addition to interacting through attributes and events.
- Pass in simple data - property
- Pass in js expression or object - event
- Incoming HTML tags - content distribution
3.5.2 compilation scope
Before further understanding the distribution API, specify the scope in which the content is compiled, assuming that the template is:
<child-component>
	{{message}}
</child-component>
The message here is a slot, which is bound to the data of the parent component., Not the data of sub components.
Component scope simply means that the content of the parent component template is compiled within the parent component scope; The contents of the subcomponent template are compiled within the scope of the subcomponent.
<div id="app">
      <child-component  v-show="someChildProperty"></child-component>
</div>
<script>
    Vue.component('child-component', {
        template: '<div>This is the sub component content</div>',
        data: function () {
            return {
                someChildProperty: true
            }
        }
    })
    new Vue({
        el:'#app'
    })
</script>
someChildProperty here is bound to the data of the parent component, so it is invalid, so the data cannot be obtained. If you want to bind in a sub component, you can use the following code:
<child-component></child-component>
template: '<div v-show="someChildProperty">This is the sub component content</div>'
Therefore, the content distributed by slot is compiled within the parent scope.
3.5.3 default slot
If you want the parent component to insert content into the child component, you must declare the slot tag in the child component. If the child component template does not contain sockets, the content of the parent component will be discarded.
3.5.4 named slot
The slot element can configure the distribution with a special attribute name. Multiple slot tags can have different names.
The usage is as follows:
- The parent component should add the attribute "slot=name" to the distributed tag.
- The sub component adds the attribute "name=name" to the slot tag on the corresponding distribution location.
<div id="app">
    <child>
    <span slot="one">123456</span>
    <span slot="two">abcdef</span>
    </child>
    </div>
<script>
    new Vue({
        el:'#app',
        components:{
            child:{
                template:"<div><slot name='two'></slot>I am a subcomponent<slot name='one'></slot></div>"
            }
        }
    });
</script>
slot distribution is actually that the parent component puts some DOM in the child component, which is responsible for whether and where these DOM are displayed.
3.5.5 scope slot
Slots are divided into single slot, named slot and scope slot.
The content and style of the first two slots are determined by the parent component, that is, what content and how to display are determined by the parent component, while the style of the scope slot is still determined by the parent component, but the content is controlled by the child component. That is, the first two slots cannot bind data, while the scope slot is a slot with bound data.
A more representative application of the scope slot is the list component, which allows the component to customize how to render each item of the list:
<div id="app">
<child>
    <template slot-scope="props"><!--Fixed writing method, and the attribute value can be customized-->
        <li>{{props.item}}</li><!--Interpolation expressions can be used directly-->
    </template>
</child>
</div>

<script>
    Vue.component('child',{
        data(){
            return{
                list:[1,2,3,4]
            }
        },
        template:'<div><ul>'+
            '<slot v-for="item in list" :item=item></slot></ul></div>',
    })
    var vm=new Vue({
        el:"#app",
        data:{

        }
    })
</script>
The meaning of this code is that the child component implements a list loop, but it doesn't care how each item in the list is displayed. The specific display is determined by the outside.
It is a fixed writing method, and the attribute value can be customized. It means that when the sub component uses slot, an item will be passed to the sub component, and the data received by the sub component will be placed on props.
When a sub component loop or a part of the DOM structure should be passed in externally, we use a scope slot. Using the scope slot, the child component can pass data to the scope slot of the parent component. If the parent component wants to receive this data, it must use the template template placeholder in the outer layer and receive the passed data through the attribute name corresponding to the slot scope. As in the above code, pass an item, and the item can be received in the scope slot of the parent component, and then it can be used.
3.6 dynamic components
Let multiple components use the same mount point and switch dynamically, which is dynamic component. Dynamic components can be implemented by using reserved elements and dynamically binding its js features. It is often used in routing control or tab switching.
3.6.1 basic usage
<!DOCTYPE html>
<html>
<head>
    <title></title>
    <meta charset="utf-8"/>
    <script src="https://cdn.jsdelivr.net/npm/vue/dist/vue.js"></script>
</head>
<body>
<div id="app">
    <button @click="change">Switch pages</button>
    <component :is="currentView"></component>
</div>
<script>
    new Vue({
        el: '#app',
        data:{
            index:0,
            arr:[
                {template:'<div>I'm the home page</div>'},
                {template:'<div>I'm the submission page</div>'},
                {template:'<div>I'm the archive page</div>'}
            ],
    },
        computed:{
            currentView(){
                return this.arr[this.index];
            }
        },
        methods:{
            change(){
                this.index = (++this.index)%3;
            }
        }
    })
</script>
</body>
</html>
The is attribute in the tag determines the child component currently used. Is is the abbreviation of v-bind and binds the currentView attribute of data in the parent component. When you click the button, the index value of array arr will be changed, and the contents of sub components will also be modified.
3.6.2 keep-alive
The dynamically switched component (not the currently displayed component) is removed. If the switched component is kept in memory, its state can be retained or re rendering can be avoided. When wrapping dynamic components, inactive component instances are cached rather than destroyed to improve extraction efficiency. Similar to, is an abstract component that does not render a DOM element itself or appear in the parent component chain.
<div id="app">
    <button @click="change">Switch pages</button>
    <keep-alive>
        <component :is="currentView"></component>
    </keep-alive>
</div>
If there are multiple conditional child elements and only one child element is required to be rendered at the same time, you can use conditional statements to judge.
<!DOCTYPE html>
<html>
<head>
    <title></title>
    <meta charset="utf-8"/>
    <script src="https://cdn.jsdelivr.net/npm/vue/dist/vue.js"></script>
</head>
<body>
<div id="app">
    <button @click="change">Switch pages</button>
    <keep-alive>
        <home v-if="index===0"></home>
        <posts v-else-if="index===1"></posts>
        <archive v-else></archive>
    </keep-alive>
</div>
<script>
    new Vue({
        el: '#app',
        components:{
            home:{template:'<div>I'm the home page</div>'},
                posts:{template:'<div>I'm the submission page</div>'},
                    archive:{template:'<div>I'm the archive page</div>'},
                    },
        data:{
            index:0,
        },
        methods:{
            change(){
                //  Properties and methods defined outside data can be obtained and called through $options
                let len = Object.keys(this.$options.components).length;
                this.index = (++this.index)%len;
            }
        }
                })
</script>
</body>
</html>
3.6.3 activated hook function
Vue provides the activated hook function to the component, which is used in the process of dynamic component switching or static component initialization. Activated is an attribute at the same level as template, data and other attributes. Its form is a function. By default, there is only one parameter in the function, and this parameter is a function. When the function is executed, the component will be switched, and the current component can be delayed.
<!DOCTYPE html>
<html>
<head>
    <title></title>
    <meta charset="utf-8"/>
    <script src="https://cdn.jsdelivr.net/npm/vue/dist/vue.js"></script>
</head>
<body>
<div id="app">
    <button @click='toShow'>Click to display sub components</button>
    <!----perhaps<component v-bind:is="which_to_show" keep-alive></component>OK----->
    <keep-alive>
        <component v-bind:is="which_to_show" ></component>
    </keep-alive>
</div>
<script>
    // Create root instance
    var vm = new Vue({
        el: '#app',
        data: {
            which_to_show: "first"
        },
        methods: {
            toShow: function () {   //Toggle component display
                var arr = ["first", "second", "third", ""];
                var index = arr.indexOf(this.which_to_show);
                if (index < 2) {
                    this.which_to_show = arr[index + 1];
                } else {
                    this.which_to_show = arr[0];
                }
                console.log(this.$children);
            }
        },
        components: {
            first: { //First sub component
                template: "<div>This is sub component 1</div>"
            },
            second: { //Second sub component
                template: "<div>This is subassembly 2,Here is the delayed content:{{hello}}</div>",
                data: function () {
                    return {
                        hello: ""
                    }
                },
                activated: function (done) { //When this parameter is executed, the components will be switched
                    console.log('beixi')
                    var self = this;
                    var startTime = new Date().getTime(); // get the current time
                    //Execute in two seconds
                    while (new Date().getTime() < startTime + 2000){
                        self.hello='I am the content after the delay';
                    }
                }
            },
            third: { //Third sub component
                template: "<div>This is subassembly 3</div>"
            }
        }
    });
</script>
</body>
</html>
When switching to the second component, the activated hook function will be executed first, and component 2 will be displayed after 2s, which plays the role of delaying loading.
3.6.4 comprehensive cases
After adding a component, add content by clicking the post comment button and deliver it to the comment list. The logic of implementation is:
- Click the Comment button to trigger the click event and call the method defined by methods in the component.
- Load and save the list data of localStorage into the list in the method defined by methods.
- Add the entered information to the list, and then save the data in localStorage.
- Call the method of the parent component to refresh the list data.
<!DOCTYPE html>
<html lang="en">
<head>
    <meta charset="UTF-8">
    <meta name="viewport" content="width=device-width, initial-scale=1.0">
    <meta http-equiv="X-UA-Compatible" content="ie=edge">
    <title>Document</title>
    <!--introduce vue-->
    <script src="/vue.js"></script>
    <!--introduce bootstrap-->
    <link rel="stylesheet" href="/node_modules/bootstrap/dist/css/bootstrap.min.css">
</head>
<body>
<div id="app">
    <cmt-box @func="loadComments"></cmt-box>
    <ul class="list-group">
        <li class="list-group-item" v-for="item in list" :key="item.id">
            <span class="badge">Commented by: {{ item.user }}</span>
            {{ item.content }}
        </li>
    </ul>
</div>
<template id="tmpl">
    <div>
        <div class="form-group">
            <label>Commented by:</label>
            <input type="text" class="form-control" v-model="user">
        </div>
        <div class="form-group">
            <label>Comments:</label>
            <textarea class="form-control" v-model="content"></textarea>
        </div>
        <div class="form-group">
            <input type="button" value="Comment" class="btn btn-primary" @click="postComment">
        </div>
    </div>
</template>
<script>
    var commentBox = {
        data() {
            return {
                user: '',
                content: ''
        }
        },
        template: '#tmpl',
        methods: {
            postComment() { // Comment method
                var comment = { id: Date.now(), user: this.user, content: this.content }
                // Get all comments from localStorage
                var list = JSON.parse(localStorage.getItem('cmts') || '[]')
                list.unshift(comment)
                // Resave the latest comment data
                localStorage.setItem('cmts', JSON.stringify(list))
                this.user = this.content = ''
                this.$emit('func')
            }
        }
    }
    // Create a Vue instance to get the ViewModel
    var vm = new Vue({
        el: '#app',
        data: {
            list: [
                { id: Date.now(), user: 'beixi', content: 'This is my net name' },
                { id: Date.now(), user: 'jzj', content: 'This is my real name' },
                { id: Date.now(), user: 'Besic talk', content: 'Any questions can be paid attention to the official account.' }
        ]
        },
        beforeCreate(){ /* Note: the loadComments method cannot be called here because both data and methods have not been initialized when the hook function is executed*/
    },
        created(){
        this.loadComments()
    },
        methods: {
            loadComments() { // From the local localStorage, load the comment list
                var list = JSON.parse(localStorage.getItem('cmts') || '[]')
                this.list = list
            }
        },
        components: {
            'cmt-box': commentBox
        }
    });
</script>
</body>
</html>
The display effect is as follows:
