13, Sending requests using Axios
13.1 what is Axios
Axios is an open source asynchronous communication framework that can be used in browser and NodeJS. Its main function is to realize AJAX asynchronous communication. Its functional features are as follows:
- Create XMLHttpRequests from the browser
- From node JS create http request
- Promise API supported
- Intercept requests and responses
- Convert request data and response data
- Cancel request
- Automatically convert JSON data
- The client supports defense against XSRF (Cross Site Request Forgery)
GitHub: https://github.com/axios/axios
13.2 why use Axios
Due to Vue JS is a view layer framework, and the author (you Yuxi) strictly abides by SoC (principle of separation of concerns), so Vue JS does not contain the communication function of AJAX. In order to solve the communication problem, the author separately developed a plug-in named Vue resource. However, after entering version 2.0, the maintenance of the plug-in was stopped and the Axios framework was recommended
13.3 use of Axios
13.3.1 installation vue axios
npm install --save axios vue-axios
13.3.2 in main JS
Using the axios module in a project
import Vue from 'vue'
import axios from 'axios'
import VueAxios from 'vue-axios'

Vue.use(VueAxios, axios)
13.3.3 sending ajax requests
<template>
  <div id="app">
    <div style="width:50%" class="container">
      <div>
        <h3>Regist</h3>
        <h5>Email</h5>
        <input type="text" class="form-control" v-model="mail" /><br />
        {{mail}}
        <h5>Password</h5>
        <input type="password" class="form-control" v-model="password" /><br />
        {{password}}
        <h5>Gender</h5>
        <input type="radio" name="gender" v-model="gender" value="female" />male
        <input type="radio" name="gender" v-model="gender" value="male" />female<br />
        <h5>Hobby</h5>
        <input type="checkbox" name="hobby" v-model="hobby" value="music">music
        <input type="checkbox" name="hobby" v-model="hobby" value="movie">film
        <input type="checkbox" name="hobby" v-model="hobby" value="sport">motion
        <br/>
        <button type="button" class="btn btn-success" @click="registfn">register</button>
      </div>
    </div>
  </div>
</template>

<script>
  import MHeader from './components/Header'
export default {
  name: 'app',
  data(){
    return {
      mail:'',
      password:'',
      gender:'',
      hobby:''
    }

  },
  methods:{
    registfn:function(){

      this.axios({
        method:'get',
        url:'http://localhost:8090/regist?mail='+this.mail+'&password='+this.password,

      }).then(function (response) {
        console.log(response.data)
      });
    }
  }
}
</script>
13.3.4 the server solves cross domain problems
<mvc:cors>
    <mvc:mapping path="/"
        allowed-origins="*"
        allowed-methods="POST, GET, OPTIONS, DELETE, PUT,PATCH"
        allowed-headers="Content-Type, Access-Control-Allow-Headers, Authorization, X-Requested-With"
        allow-credentials="true" />
</mvc:cors>
In spring MVC Add the above paragraph to the XML. Among them, allowed origins refers to the domain name of the allowed access source, "*" means that anyone can access it, or specify the specific domain name
13.3.5 solve the problem that axios cannot transfer parameters in data
Reason: by default, when sending axios, the content type in the request header is: (the backend does not use @ RequestBody)
Content-Type:application/json;charset=UTF-8
The actual server needs:
Content-Type:application/x-www-form-urlencoded
Therefore, use the method in the qs built-in Library of axios for content type conversion.
import Qs from 'qs'

this.axios({
    method:'post',
    url:'http://localhost:8081/regist',
    transformRequest: [function (data) {
        return Qs.stringify(data)
    }],
    data:{
        email:this.email
    }
})
.then(function (response) {
    alert(response.data.message)
});
14, Vue actual combat project: Webpack is routed to the list page after login verification
| Adjust the contents of the project as follows: |
|---|
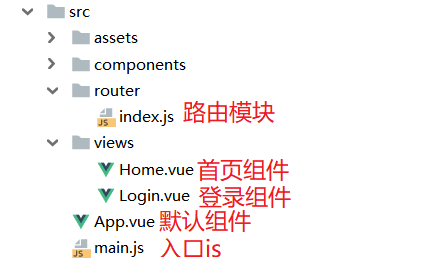 |
14.1 router routing module: index JS (routing configuration table)
import Vue from 'vue'
import Router from 'vue-router'

import Login from '../views/Login'
import Home from '../views/Home'


// Install routing
Vue.use(Router);

// Configure routing
export default new Router({
  routes: [
    {
      // Routing path
      path: '/Login',
      // Route name
      name: 'Login',
      // Jump to component
      component: Login
    },
    {
      path:'/Home',
      name:'Home',
      component:Home
    }
  ]
});
14.2 using element UI component library
14.2.1 installation
Use the command in the project folder to install the element UI modulenpm i element-ui -S
14.2.2 use
Introduce element UI into vue project and use it. In main JS to write the following:import Vue from 'vue';
import ElementUI from 'element-ui'; //join
import 'element-ui/lib/theme-chalk/index.css';//join
import App from './App.vue';
Vue.use(ElementUI);//join
new Vue({
el: '#app',
render: h => h(App)
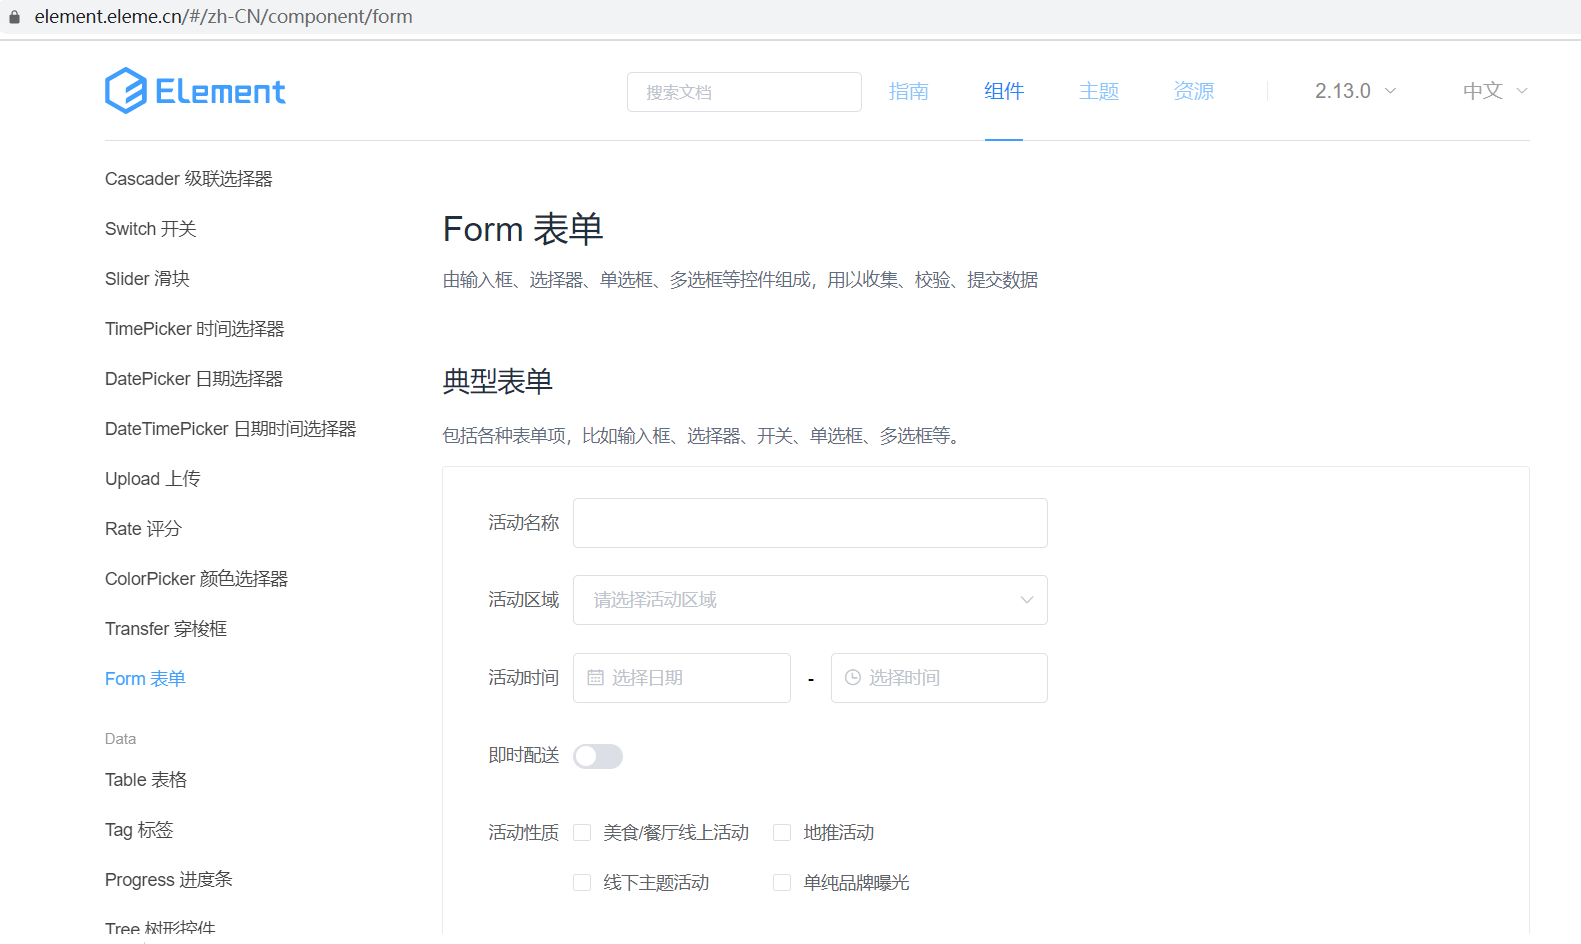
});14.2.3 find components in element UI component library
| In the official component library, find components according to requirements and use them in the project. |
|---|
 |
14.3 write login component: login vue
<template>
    <div class="login-box">
      <el-form ref="form" :model="form" :rules="rules" label-width="80px">
        <h3>Welcome to login</h3>
        <el-form-item label="user name" prop="name">
          <el-input v-model="form.name" placeholder="enter one user name"></el-input>
        </el-form-item>
        <el-form-item label="password" prop="password">
          <el-input type="password" v-model="form.password" placeholder="Please input a password"></el-input>
        </el-form-item>
        <el-form-item>
          <el-button type="primary" @click="onSubmit('form')">Sign in</el-button>
        </el-form-item>
      </el-form>
    </div>
</template>

<script>
export default {
    name: "Login",
    data(){
      return{
        form:{
          name:'',
          password:''
        },
        rules:{
          name:[
            { required: true, message: 'enter one user name', trigger: 'blur' },
            { min: 6, max: 20, message: 'The length is between 6 and 20 characters', trigger: 'blur' }
          ],
          password:[
            { required: true, message: 'Please input a password', trigger: 'blur' },
            { min: 6, max: 20, message: 'The length is between 6 and 20 characters', trigger: 'blur' }
          ]
        }
      }

    },
    methods:{
      onSubmit(formName){
        this.$refs[formName].validate((valid) => {
          var vm = this;
          if (valid) {
            // Send axios request
            this.axios({
              method:'post',
              url:'http://localhost:8090/login',
              data:{
                name:vm.form.name,
                password:vm.form.password
              }
            }).then(function(resp){
              // console.log(resp.data)
              if(resp.data.errno==0){

                //After successful login, the user object should be stored in vuex
                var user  = resp.data.data;
                vm.$store.dispatch('asyncUpdateUser', user);
                vm.$message({
                  message: 'Login succeeded',
                  type: 'success'
                });
                setTimeout(function(){
                  vm.$router.push("/Home")
                },2000)
              }else{
                vm.$message.error('Wrong user name or password');
              }
            })

          } else {
            this.$message.error('User name or password format error');
            return false;
          }
        });
      }
    }
}
</script>

<style scoped>
  .login-box{
    width: 500px;
    height: 300px;
    border: 1px solid #DCDFE6;
    margin: 150px auto;
    padding: 20px 50px 20px 30px;
    border-radius: 20px;
    box-shadow: 0px 0px 20px #DCDFE6;
  }
</style>
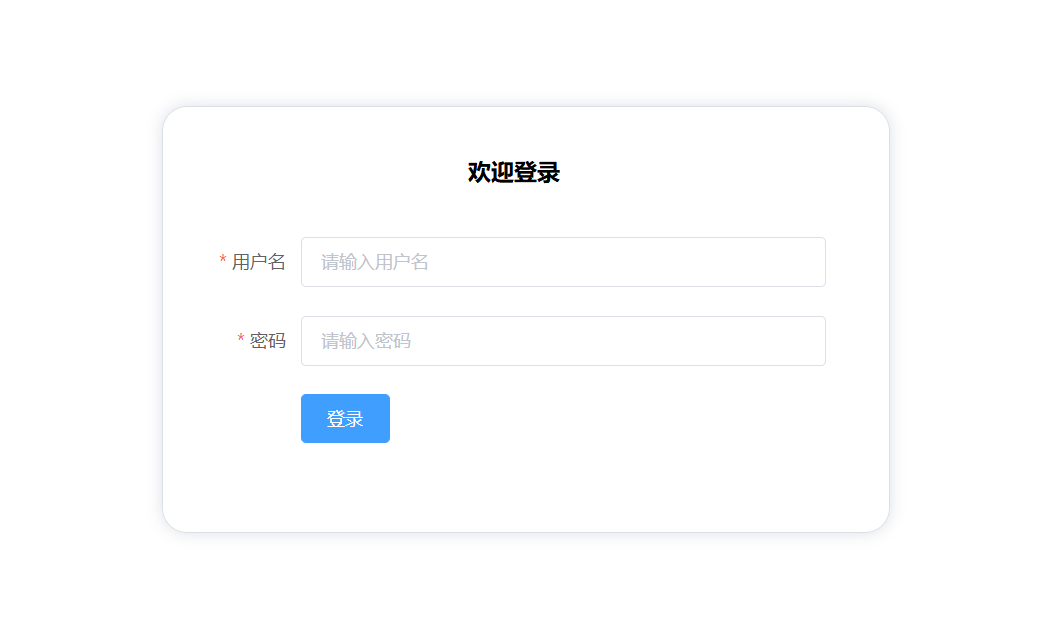
| Display effect of login page: (Element UI) |
|---|
 |
14.4 writing entry JS: main js
import Vue from 'vue'
import App from './App'
import VueRouter from 'vue-router'
// Import the routing configuration table created above
import router from './router'

// Import ElementUI module
import ElementUI from 'element-ui';
import 'element-ui/lib/theme-chalk/index.css';
import axios from 'axios'
import VueAxios from 'vue-axios'

Vue.use(VueRouter);

// Using the ElementUI module
Vue.use(ElementUI);
// Use Axios (a component that implements ajax functionality in vue)
Vue.use(VueAxios, axios)


Vue.config.productionTip = false

/* eslint-disable no-new */
new Vue({
  el: '#app',
  // Configure routing
  router,
  render: h => h(App)
})
15, Application of Vuex
15.1 what is Vuex
Vuex is designed for Vue JS application development state management mode. It uses centralized storage to manage the state of all components of the application, and uses corresponding rules to ensure that the state changes in a predictable way.15.2 installation
Install Vuex by executing the following command at the root of the projectIf it fails, cnpm can be used
Modify main JS file, import Vuex, and the key codes are as follows:npm install vuex --save
import Vuex from 'vuex'
Vue.use(Vuex);
15.3 configuration vuex
15.3.1 creating a Vuex profile
Create a directory named store under the src directory and create a new directory named index The. JS file is used to configure Vuex. The code is as follows:import Vue from 'vue'
import Vuex from 'vuex'
Vue.use(Vuex);
// The global state object is used to save the public data of all components
const state = {
// Define a user object
// In the component, it is through this$ store. state. User to get
user: {
name: ''
}
};
// Monitor the latest state of the state value in real time. Note that getters here can be understood as calculating attributes
const getters = {
// In the component, it is through this$ store. getters. Getuser to get
getUser(state) {
return state.user;
}
};
// Define the method to change the initial value of state. This is the only place where state can be changed. The disadvantage is that it can only be executed synchronously
const mutations = {
// In the component, it is through this$ store. commit('updateUser', user); Method to call mutations
updateUser(state, user) {
state.user = user;
}
};
// Define the method to trigger the function in changes. You can execute the function in changes asynchronously
const actions = {
// In the component, it is through this$ store. dispatch('asyncUpdateUser', user); To call actions
asyncUpdateUser(context, user) {
context.commit('updateUser', user);
}
};
export default new Vuex.Store({
state,
getters,
mutations,
actions
});import Vue from 'vue'
import Vuex from 'vuex'
import store from './store'
Vue.use(Vuex);
new Vue({
el: '#app',
store
});15.3.2 solve the problem that Vuex data disappears after browser refresh
- Problem description
- Solution
- Modify code
  export default {
    name: 'App',
    mounted() {
      window.addEventListener('unload', this.saveState);
    },
    methods: {
      saveState() {
        sessionStorage.setItem('state', JSON.stringify(this.$store.state));
      }
    }
}const state = sessionStorage.getItem('state') ? JSON.parse(sessionStorage.getItem('state')) : {
user: {
name: ''
}
};