Vue template syntax learning
- 1, Vue Instruction Learning
- 2, vue solves the flash problem v-cloak
- 3, Data bound instructions
- 4, Event binding v-on usage
- 5, Attribute binding v-bind instruction
- 6, Branch and loop v-if v-for
- 7, Small case
Record the review and use of Vue, focusing on deepening understanding, not zero basic introduction
1, Vue Instruction Learning
Documents are available at any time: Official document - Instruction Learning
- Instructions in Vue are essentially custom attributes
- Format of instructions in Vue: v-xxx (such as v-if, v-for, etc.)
The use of interpolation expressions and vue's first experience:
<div id="app" v-cloak>
	{{msg}}
div>

<script type="text/javascript">
	// Create a vue instance
	var app = new Vue({
		el:"#app",
		data: {
			msg:"Hello World"
		}
	})

script>
Hello World will be displayed normally on the page
2, vue solves the flash problem v-cloak
When we use the interpolation expression, the string of the expression may appear when the viewer renders for the first time, and then the data content in the data will be replaced. This situation can be solved in the way of official documents.
<html>
	<head>
		<meta charset="utf-8">
		<title>vue.js first day title>
		<script src="vue.js" type="text/javascript" charset="utf-8">script>
		<style type="text/css">
			/* 1. Solve the problem of curly bracket flashing */
			[v-cloak] {
				display: none;
			}
		style>
	head>
	<body>

		<div id="app" v-cloak>
			{{msg}}
		div>

		<script type="text/javascript">
			// Create a vue instance
			var app = new Vue({
				el:"#app",
				data: {
					msg:"Hello World"
				}
			})
		script>
	body>
html>
3, Data bound instructions
3.1 v-text (I'm innerText)
- Fill in plain text content, which is equivalent to innerText in js
- Simpler than interpolation expression
<html>
	<head>
		<meta charset="utf-8">
		<title>vue Template Instruction Learning title>
	head>
	<script src="../vue.js" type="text/javascript">script>
	<body>

		<div id="root">
			{{msg}}
			<div v-text="msg">div>
		div>
		<script type="text/javascript">
			var vm = new Vue({
				el:"#root",
				data:{
					msg:'Hello Vue',
				}
			});
		script>
	body>
html>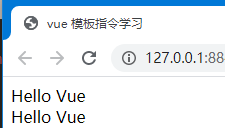
3.2 v-html (can you innerHTML)
- Fill in HTML fragments, which is equivalent to innerHTML in js
- However, there is a security problem. Only the data of this site can be used as the data source, and the third-party data can be used
<html>
	<head>
		<meta charset="utf-8">
		<title>vue Template Instruction Learning title>
	head>
	<script src="../vue.js" type="text/javascript">script>
	<body>

		<div id="root">
			<div v-html="html">div>
		div>
		<script type="text/javascript">
			var vm = new Vue({
				el:"#root",
				data:{
					html:"Hello Vue"
				}
			});
		script>
	body>
html>
You can see that the html part will be escaped
3.3 v-pre skip precompiling
- Fill in original information
- Display original information
- Skip compilation
	<div v-pre>{{msg}}div>

	<script src="../vue.js" type="text/javascript">script>

		<script type="text/javascript">
			var vm = new Vue({
				el:"#root",
				data:{
					msg:'Hello Vue',
					html:"Hello Vue"
				}
			});
		script>
Show original string

3.4 v-once (once compiled, not in transformation)
v-once is compiled only once: after displaying the content, there is no response function (when the information you display will not be modified later, you can use v-once to improve performance)
		<div id="root">
			<div>{{msg}}div>
			<p v-once>{{info}}p>
		div>
		<script type="text/javascript">
			var vm = new Vue({
				el:"#root",
				data:{
					msg:"haha",
					info:"Hello"
				}
			})
		script>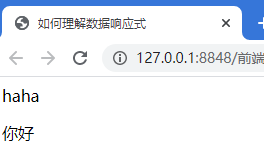
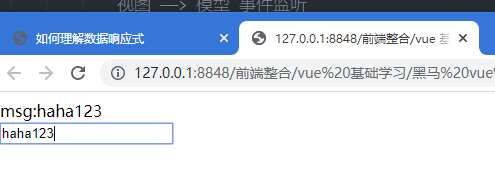
3.5 v-model bidirectional data binding
When using v-model for two-way binding, the data changes are mutual. When using it, you only need to bind a value to it, and the two-way binding of data is often used in forms. Here we will introduce a design idea of vue construction project, namely MVVM.
- M(model)
- V(view)
- VM(View-Model)
Bidirectional data binding is based on the idea of divide and conquer
- View - > model event listening
- Model - > view data binding
		<div id="root">
			<div>msg:{{msg}}div>
			<input type="text" v-model="msg" value="" />
		div>
		<script type="text/javascript">
			var vm = new Vue({
				el:"#root",
				data:{
					msg:"haha"
				}
			})
		script>
The data vary from one another
4, Event binding v-on usage
4.1 simple event handling
Using v-on, we can bind many events, such as click, blur, etc., which are common events when we learn js. We define a simple click event below. Each time we click, the number will be processed by adding one
	<div id="root">
		<div>num: {{num}}div>

		<input type="button" v-on:click="num++" value="Click 1"/>
	div>
	<script src="../vue.js" type="text/javascript">script>
	<body>

		<script type="text/javascript">
			var vm = new Vue({
				el:"#root",
				data:{
					num:0
				}
			});
		script>
4.2 using functions to handle events
Like js, we specify a function to handle a specific event. However, this event should also be specifically defined in methods in vue. The effect is the same as above
<div id="root">
	<div>num: {{num}}div>


	<input type="button" @click="handle()" value="Click 2"/>
	<input type="button" @click="handle" value="Click 3" />

div>
<script type="text/javascript">
	var vm = new Vue({
		el:"#root",
		data:{
			num:0
		},
		// Event call, defining methods to handle click events
		methods: {
			// Method must be defined here
			handle: function() {
				// this here is the instance object in vue
				this.num++;
			}
		}
	});
script>
4.3 event function parameter transfer
Event function parameters
- If the event is directly bound to the function name, the event object ($event) is passed as the first parameter by default
- If the event is bound to a function call, the event object must be passed as the last parameter, and the name of the event object must be $event
<div id="root">
	<div>num: {{num}}div>

	<h3>Event function parameters h3>
	<button @click="say('hi',$event)">SayHibutton>

div>
<script type="text/javascript">
	var vm = new Vue({
		el:"#root",
		data:{
			num:0
		},
		// Event call, defining methods to handle click events
		methods: {
			say: function(p, event) {
				console.log(p); //Print the passed value
				console.log("Label name:"+event.target.tagName);
				console.log("Contents in the label:"+event.target.innerHTML);
			}
		}
	});
script>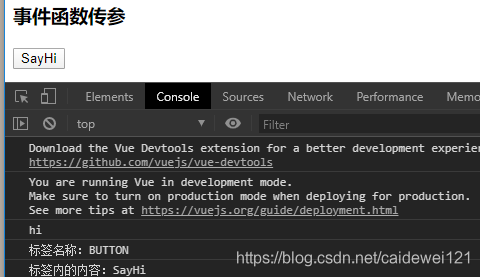
4.4 event modifiers
Just have a brief understanding of event bubbling and preventing bubbling
<h3> Event modifier h3>
<a v-on:click.stop="handle">Jump a>
<a v-on:click.prevent="handle">Jump a>
5, Attribute binding v-bind instruction
5.1 v-bind usage
Function of v-bind Dynamically process the value of the attribute. In the following example, we bind a url value to href so that it can jump to the specified path.
<div id="app">
	<a v-bind:href="url">Jump a>
	<button v-on:click="handle">switch button>


	<a :href="url">Jump 1 a>
div>
<script type="text/javascript">
	var app = new Vue({
		el:"#app",
		data:{
			url:"http://www.baidu.com"
		},methods:{
			handle: function() {
				this.url = "http://www.qq.com"
			}
		}
	})
script>
5.2 is v-bind v-model?
We go deep into the source code of v-model and find that the reason why v-model can realize two-way binding is that its underlying layer uses attribute binding.
v-model Underlying principle: Overwrite the original data with the latest data in the input field
5.3 v-bind binding style
Style binding has two forms
- Use object form
- Use array form
<style>
	.active {
		width: 100px;
		height: 100px;
		border: 1px solid blue;
	}

	.error {
		background-color: red;
	}
style>
<body>
	<div id="app">

		<div v-bind:class="{active: isActive, error: isError}">
			Test style
		div>
		<button v-on:click="handle">switch button>


		<div v-bind:class="[acticeClass, errorClass]">
			Test style II
		div>
		<button v-on:click="handleClass">switch button>
	div>

	<script type="text/javascript">
		var app = new Vue({
			el:"#app",
			data:{
				//Use object bound properties
				isActive:true,
				isError:true,
				//Use array bound properties
				acticeClass:'active',
				errorClass:'error'
			},methods: {
				handle:function() {
					// Control isActive to switch between true and false, and reverse the operation
					this.isActive = !this.isActive;
					this.isError = !this.isError
				},
				handleClass:function() {
					this.acticeClass = !this.acticeClass;
					this.errorClass = !this.errorClass
				}
			}
		})
	script>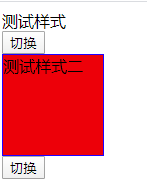
6, Branch and loop v-if v-for
6.1 branch structure
6.1.1 using v-if
- v-if
- v-else
- v-else-if Only one div will be rendered v-if controls whether elements are rendered to the page
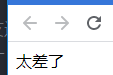
Adding an expression to the judgment structure can complete the data filtering
<div id="app">
	<div v-if="score >= 90">
		excellent
	div>
	<div v-else-if="socre >=80 && score<=89">
		good
	div>
	<div v-else-if="score >=60 && score<=79">
		commonly
	div>
	<div v-else>
		Too bad
	div>
div>
<script>
	var app = new Vue({
		el:"#app",
		data:{
			score:10,
		}
	})
script>
The result must be the worst
6.1.2 using v-show
. v-show Controls whether the element is visible (already rendered on the page) It will be displayed in the dom, and the value of display is set to none
Usage scenario: Frequently showing and hiding an element using v-show (because frequent DOM operation will cause great consumption)
<div id="app">
	<div v-show="flag">test flagdiv>
div>
<script>
	var app = new Vue({
		el:"#app",
		data:{
			flag:false
		}
	})
script>
We can see that dom exists.

6.2 cycle structure v-for
Using v-for can easily traverse elements. Let's take a look at the simple use of v-for. We can traverse the values and the following table at the same time
<div id="app">
	<div>Digital list div>
	<ul>
		<li v-for="(item,index) of row">{{item}} -- {{index}}li>
	ul>


	<ul>
		<li :key="item.id" v-for="item in books">
			<span>{{item.id}}span>
			<span>{{item.title}}span>
		li>
	ul>


	<div v-for="(value ,key, index) in people">
		{{value + '---' + key + '---' + index}}
	div>

div>
<script type="text/javascript">
	var app = new Vue({
		el: "#app",
		data: {
			people:{
				name:'Zhang San',
				age:18,
				gender:'male'
			},
			row: [1, 2, 3, 4, 5, 6, 7, 8, 9],
			books: [{
					"id": 1,
					"title": "The old man and the sea"
				}, {
					"id": 2,
					"title": "Miserable world"
				},
				{
					"id":3,
					"title":"princeling"
				}
			]
		}
	})
script>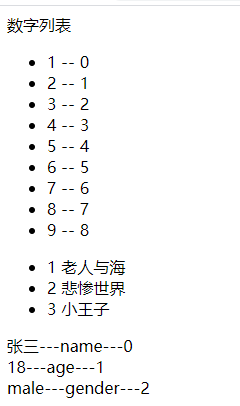
7, Small case
7.1 simple calculator
The implementation logic is as follows:
- Use the v-model instruction to bind the values a and b
- Bind events to the calculation button to realize the calculation logic
- Respond the calculation result to the corresponding position
<div id="app">
	<div>
		<span>numerical value A:span>
		<input type="text" v-model="a" />
	div>

	<div>
		<span>numerical value B:span>
		<input type="text" v-model="b" />
	div>

	<button v-on:click="handleA">calculation button>
	<div>Addition calculation results:<span v-text="resultA">span>div>

	<button v-on:click="handleB">calculation button>
	<div>Subtraction calculation results:<span v-text="resultB">span>div>

	<button v-on:click="handleC">calculation button>
	<div>Multiplication result:<span v-text="resultC">span>div>

	<button v-on:click="handleD">calculation button>
	<div>Division calculation results:<span v-text="resultD">span>div>

div>

<script type="text/javascript">
	// Create a vue instance
	var app = new Vue({
		el: "#app",
		data: {
			a: "",
			b: "",
			resultA: "",
			resultB: "",
			resultC: "",
			resultD: ""
		},
		methods: {
			handleA: function() {
				this.resultA = parseInt(this.a) + parseInt(this.b);
			},
			handleB: function() {
				this.resultB = parseInt(this.a) - parseInt(this.b);
			},
			handleC: function() {
				this.resultC = parseInt(this.a) * parseInt(this.b);
			},
			handleD: function() {
				this.resultD = parseFloat(this.a) / parseFloat(this.b);
			}
		}
	})
script>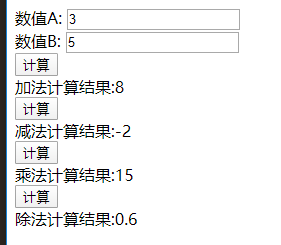
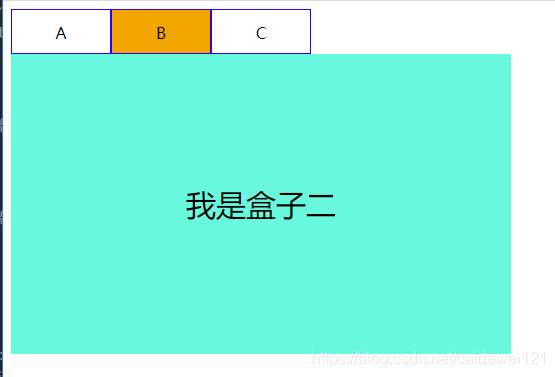
7.2 Tab implementation
The core is to find the corresponding subscript plate and display the specified module
<style type="text/css">
	.tab ul {
		overflow: hidden;
		padding: 0;
		margin: 0;
	}

	.tab ul li {
		box-sizing: border-box;
		padding: 0;
		float: left;
		width: 100px;
		height: 45px;
		line-height: 45px;
		list-style-type: none;
		text-align: center;
		border: 1px solid blue;
		cursor: pointer;
	}

	.tab ul li.active {
		background-color: orange;
	}

	.tab div {
		width: 500px;
		height: 300px;
		display: none;
		text-align: center;
		font-size: 30px;
		line-height: 300px;
	}


	.tab div.active {
		display: block;
		background-color: #00F7DE;
	}
style>
<body>
	<div id="app">
		<div class="tab">
			<ul>
				<li v-on:click="change(index)" :class='currentIndex == index ? "active":"" ' :key="item.id" v-for="(item,index) in list">{{item.title}}li>
			ul>
			<div :class='currentIndex == index ? "active":"" ' :key="item.id" v-for="(item, index) of list">
				<span>{{item.des}}span>
			div>
		div>
	div>
	<script type="text/javascript">
		var app = new Vue({
			el: "#app",
			data: {
				currentIndex:0, // Index of the current tab
				list: [{
					id:1,
					title: "A",
					des: "I'm box one"
				}, {
					id:2,
					title: "B",
					des: "I'm box two"
				}, {
					id:3,
					title: "C",
					des: "I'm box three"
				}]
			},
			methods: {
				// The essence of the tab switching operation here is to operate the class name. The change of the class name is controlled through currentIndex and plain silver
				change:function(index) {
					this.currentIndex = index
				}
			}
		})
	script>