This article is used to record the knowledge points reviewed when implementing the music player.
1.css part
(1) Use of Sprite map
Sprite, also known as Sprite, is shown below. That is, merge a lot of small pictures into a larger picture. When loading the page for the first time, you don't need to load too many small pictures. You only need to load the big picture that combines the small pictures, that is, the wizard picture. This reduces the loading speed of the page to a certain extent and relieves the pressure on the server to a certain extent.

Use: set the sprite image as the background image, set the display area size, and then move the background position to display the required part of the sprite image.
.item i {
    display: inline-block;
    width: 23px;
    height: 17px;
    background: url("../images/table.png") -60px -48px;
    vertical-align: middle;
}
(2) Implement a scrollable list and hide the scroll bar
The song list is too long. You need to scroll through the list, but you want to hide the ugly scroll bar.
<!--html code-->
<div class="left">
    <ul class="list">
        <li class="item" v-for="item in musicList">
            <a href="javaxript:;" @click="songPlay(item.id)"></a>
            <span>{{item.name}}</span>
            <i v-if="item.mvid!=0" @click="playMv(item.mvid)"></i>
        </li>

    </ul>
</div>
/* css code */
::-webkit-scrollbar {
    display: none
}

.left {
    flex: 1;
    overflow-y: scroll;
}
(3) Align small icons and text

In general, for the pattern of small icon + text (horizontal), you can use inline block elements, and then add vertical align: middle to the css of the picture to align it with the text.
(4) Sets the stacking order of elements z-index
It should be noted that z-index can only work on positioning elements (such as position:absolute).
(5) Set 100% full screen background picture
.bcg {
    position: fixed;
    top: 0;
    left: 0;
    width: 100%;
    height: 100%;
    background: url("../images/bg.jpg") no-repeat;
    background-size: 100% 100%;
}
(6) Animation effect
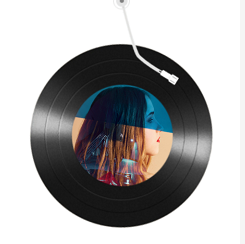
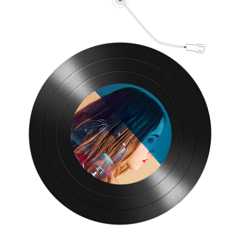
Requirements: during playback, the cd and album cover rotate synchronously, and the playback lever rotates to the bottom. When paused, the cd and album cover stop rotating, and the playback dry rotates back to the top.


cd and album cover rotation:
/* Define rotating animation (cd and album cover) */
@keyframes Rotate {
    from {
        transform: rotateZ(0);
    }
    to {
        transform: rotateZ(360deg);
    }
}


/* Rotating class */
.autoRotate {
    animation-name: Rotate; /*Specifies the name of the keyframe that needs to be bound to the selector.*/
    animation-iteration-count: infinite; /*	Specifies the number of times the animation should be played. Infinite is infinite.*/
    animation-play-state: paused; /*Specifies whether the animation is running or paused, paused is paused*/
    animation-timing-function: linear; /*Specifies the speed curve of the animation.*/
    animation-duration: 5s; /*Specifies the time, in seconds or milliseconds, it takes to complete the animation.*/
}


/* Is it playing */
.playing .disc,
.playing .cover {
    animation-play-state: running; /*Specifies whether the animation is running or paused, and running is running*/
}
The playback lever position is rotated by rotate:
/* Position when the playback lever is paused */
.bar {
    position: absolute;
    left: 200px;
    top: -20px;
    transform: rotate(-25deg);
    transform-origin: 12px 12px;
    z-index: 9;
}

/* Play bar play */
.playing .bar {
    transform: rotate(0);
}
2. Get data using axios
axios is a promise based HTTP library that can be used in browsers and node JS. It can intercept requests and responses and automatically transform json data. The music player only uses get request to get data through axios interface.
// Example: send get request
axios.get('http://localhost:3000/adata?id=123').then(function(ret) {
    // Data is an attribute in the ret object, which is used to obtain the actual data in the background
    console.log(ret.data);
});
3. Use of Vue
(1) The vue instance created contains the following attributes: el is the element node mounted by the instance, data is the data, and methods is the method used. (part of the code is attached below)
var vm = new Vue({
    el: '#player',
    data: {
        query: '',
        musicList: []
    },
    methods: {
        searchMusic: function() {
            var that = this;
            axios.get("https://autumnfish.cn/search?keywords=" + this.query)
                .then(function(response) {
                    // console.log(response);
                    that.musicList = response.data.result.songs;
                }, function(err) {})
        }
});
(2) Loop render list data
The v-for instruction can traverse the list musicList and render the page@ The click instruction is used to bind click events (that is, bind methods in vue instances). It is the abbreviation of v-on:click. The v-if instruction is used to conditionally render a piece of content, which will only be rendered when the expression of the instruction returns a true value.
<ul class="list">
    <li class="item" v-for="item in musicList">
        <a href="javaxript:;" @click="songPlay(item.id)"></a>
        <span>{{item.name}}</span>
        <i v-if="item.mvid!=0" @click="playMv(item.mvid)"></i>
    </li>
</ul>
(3) The v-model instruction implements two-way data binding. When using the v-on instruction, you can add key modifiers, such as the @ keyup.enter instruction to listen for the event of raising the Enter key on the keyboard.
<input type="text" v-model="query" @keyup.enter="searchMusic">
Supplement: the v-model instruction actually uses v-on event binding and v-bind attribute binding to realize the two-way binding of data.
(4) v-bind attribute binding
v-bind can be abbreviated as:.
Where: class="{playing:isPlaying}" determines whether to bind the playing class by judging the true or false value of the isPlaying variable src="imgUrl" bind picture links to data imgUrl.
<div class="middle" :class="{playing:isPlaying}">
    <img :src="imgUrl" alt="" class="cover autoRotate">
    <img src="./images/disc.png" alt="" class="disc autoRotate">
    <img src="./images/player_bar.png" alt="" class="bar">
</div>
(5) The v-show instruction controls the display attribute of css. When v-show="false", it is equivalent to display:none.
<div class="video_box" v-show="isShow">
    <div class="mask" @click="close"></div>
    <video :src="mvUrl" controls="controls" autoplay="autoplay"></video>
</div>
Supplement: both v-if and v-show can control the display and hiding of elements.
The essence of v-show is to control hiding by setting the display in css to none, while v-if dynamically adds or deletes DOM elements to the DOM tree. Therefore, v-if has higher switching consumption and v-show has higher initial rendering consumption. If frequent switching is required, it is better to use v-show. If little change is required, it is better to use v-if.