VUE project creation
Vue project creation method I
Install node js
Download from the official website: https://nodejs.org/en/
View node js version: node -v
View npm version: npm -v
npm switches to Taobao image mode
npm config set registry https://registry.npm.taobao.org
Check whether the image configuration is effective: npm config list
Install Vue cli scaffold
npm install vue-cli -g
Create vue project
vue init webpack Xxx
Project Name								Project name, default, enter

Project description 						Default, enter

Author	chenzs								author

vue build									Default, enter

install vue-router?						Is it installed router,Input: y install

Use ESLint to lint your code?				Rule engine, too strict, input: n

Setup unit tests?							Unit test, input: n

Setup e2e tests with Nightwatch(Y/n)?	Test framework Nightwatch,Input: n

Should we run 'npm install' for

you after the project has been created?	default npm,enter
Enter project directory
cd Xx
Start project & stop project
npm run dev/npm run serve # starts the service and ctrl+c stops it
Vue project creation method 2
1. Find a folder, enter the command line, and enter: vue create Xxx
Select enter
2. Input
cd XXX
npm run serve
Verify: open browser and enter: http://localhost:8080/
3. Install Vue router
npm install vue-router Y
4. Install the element UI
npm i element-ui -S
5. Install axios
npm install axios
6. Install vuex
npm install vuex --save
7. Install Axios utils
npm i axios-utils
8. Install vuex persistedstate
npm i -S vuex-persistedstate
MVVM thought
1.M Model represents data
2.V View represents the view
3. VM (view model) view and data control layer
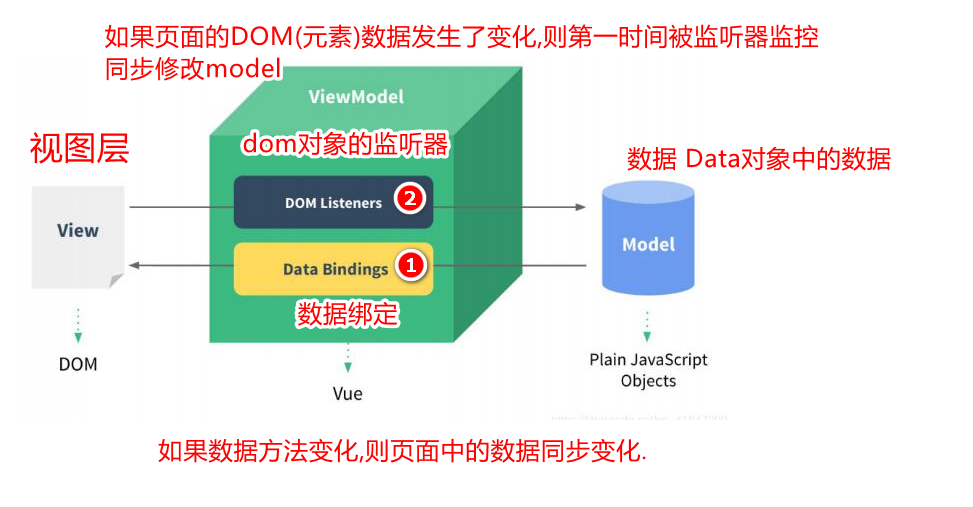
1. When the user data changes, synchronously modify the data of the page
2. When the data of the page changes, it will be monitored by the listener and modify the model data synchronously
VUE basic usage
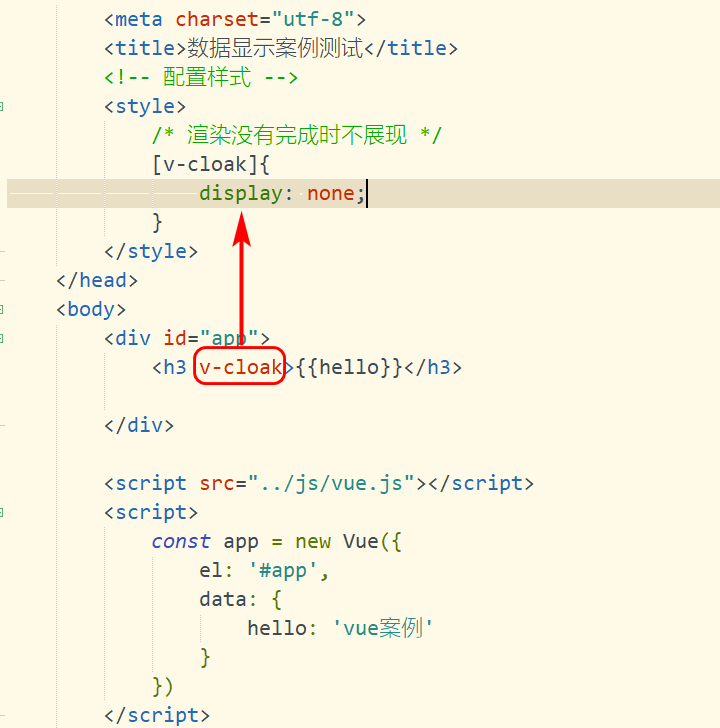
2.1 v-clock attribute
Requirement: since the interpolation expression will show {{xxx}} effect when rendering is not completed, the user experience is not good. Can it be optimized
Optimization: if the rendering is not completed, no information will be presented to the user
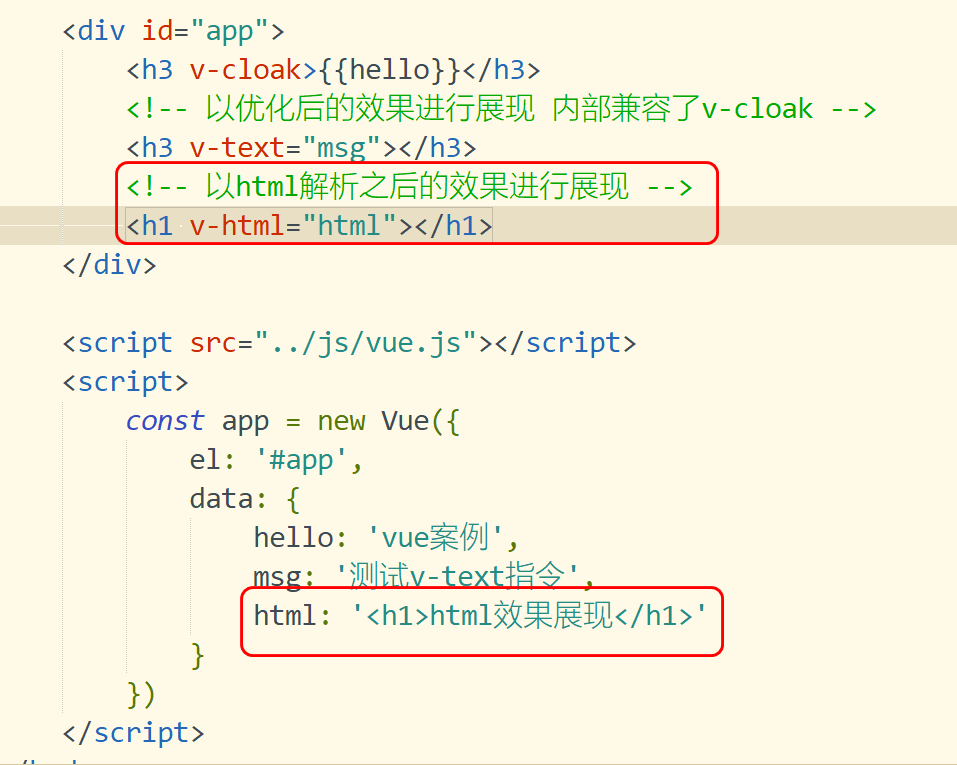
2.2 v-text command

2.3. v-html instruction
Function: use html markup language to show the rendered effect
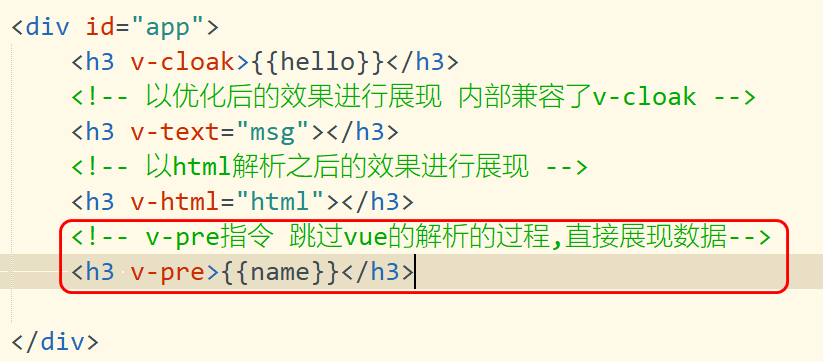
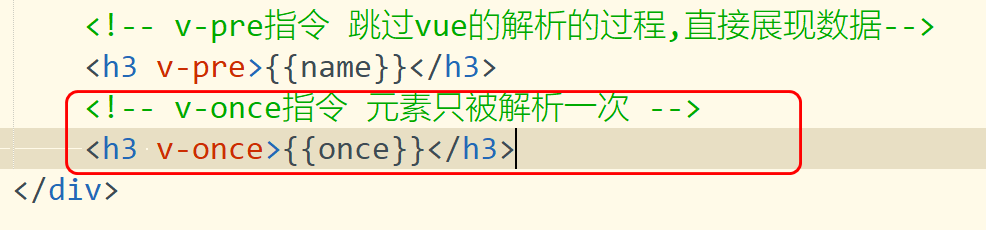
2.4 v-pre instruction
Requirement: sometimes users want to display {name}} data How
2.5 v-once instruction
If the data only needs to be parsed by VUE once and does not need to be parsed again, you can use this instruction
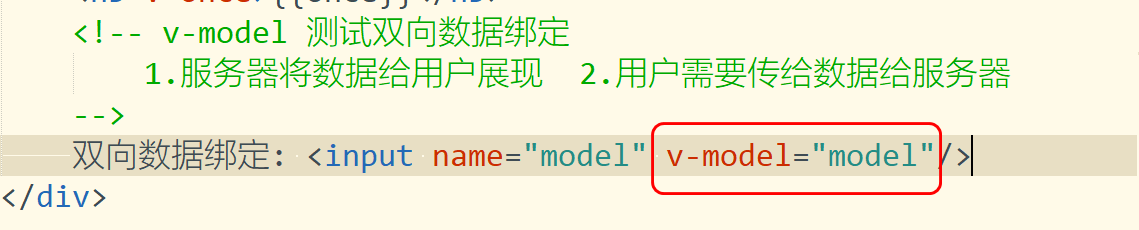
2.6 v-model instruction
Note: if you need to realize bidirectional data binding between page data and attributes, use v-model!!!
Generally, it is most commonly used in the input box to ensure the consistency of data
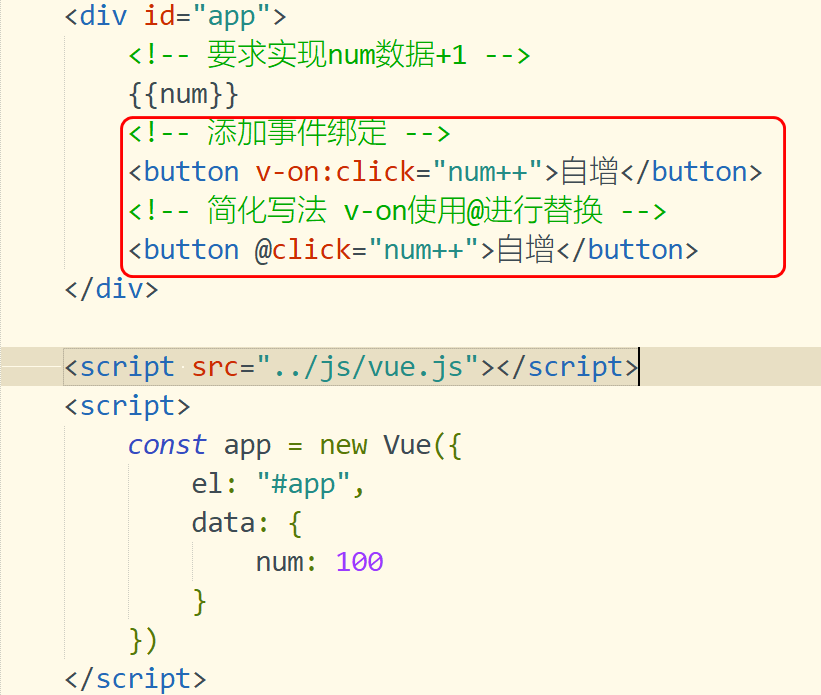
2.7 v-on command
1. Function: if you need to operate on page elements (events)
click command
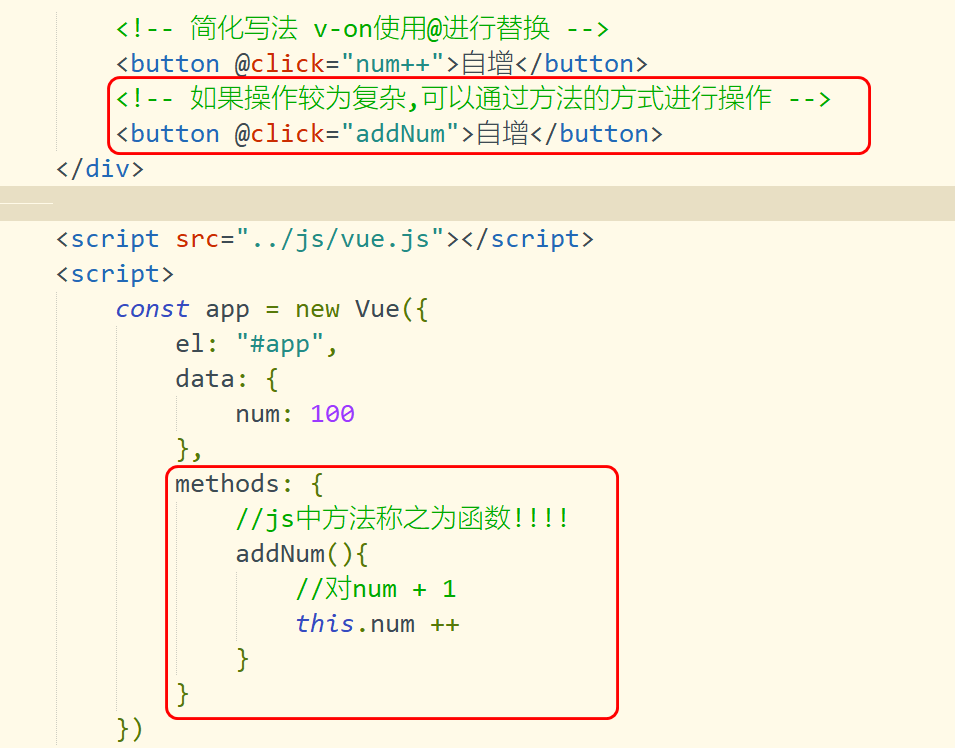
method
Many methods are defined through the methods attribute
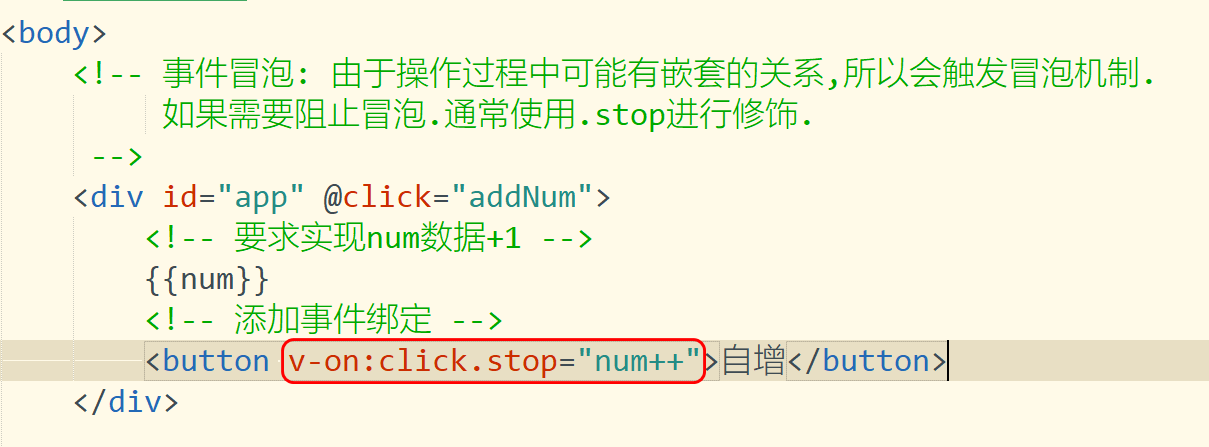
2.8 event modifiers
2.1 stop
2.2 prevent

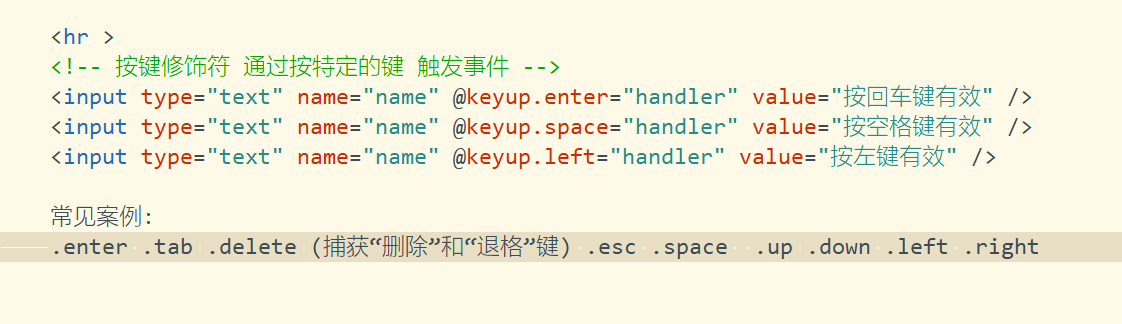
2.3 key modifier
2.9 v-bind attribute binding
1.1 attribute binding
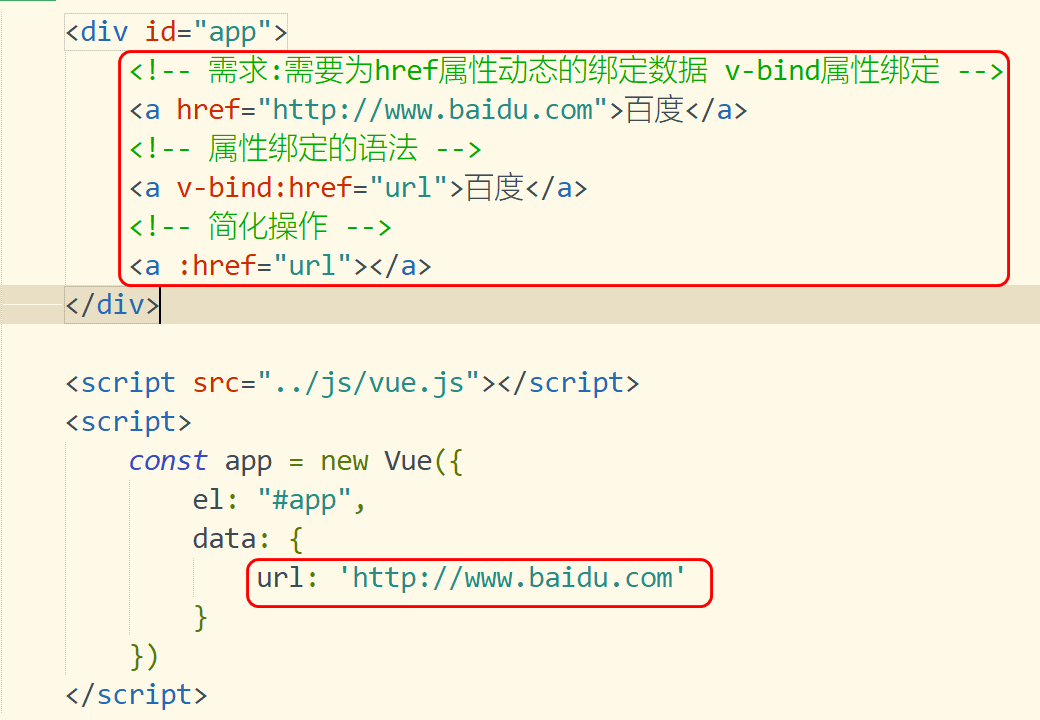
1.2 attribute dynamic binding
<!DOCTYPE html>
<html>
	<head>
		<meta charset="utf-8">
		<title>Property binding</title>

		<!-- definition style label -->
		<style>
			.red{
				background-color: red;
				width: 100px;
				height: 100px;
			}
		</style>
	</head>
	<body>
		<div id="app">
			<!-- demand:Need for href Property to dynamically bind data v-bind Property binding -->
			<a href="http://www.baidu. Com "> Baidu</a>
			<!-- Syntax for property binding -->
			<a v-bind:href="url">Baidu</a>
			<!-- Simplify operation -->
			<a :href="url"></a>

			<hr >
			<!-- class Binding of -->
			<div class="red">
				class Content testing
			</div>
			<hr >
			<!-- demand:Dynamic binding styles are required -->
			<div v-bind:class="{red: isRed}">
				class Content testing
			</div>
			<!-- Simplified writing -->
			<div :class="{red: isRed}">
				class Content testing
			</div>
			<!-- Toggle style -->
			<button @click="isRed = !isRed">switch</button>

			v-on  v-bind
		</div>

		<script src="../js/vue.js"></script>
		<script>
			const app = new Vue({
				el: "#app",
				data: {
					url: 'http://www.baidu.com',
					//If you control the style, set the value of boolean type
					isRed: false
				}
			})
		</script>
	</body>
</html>
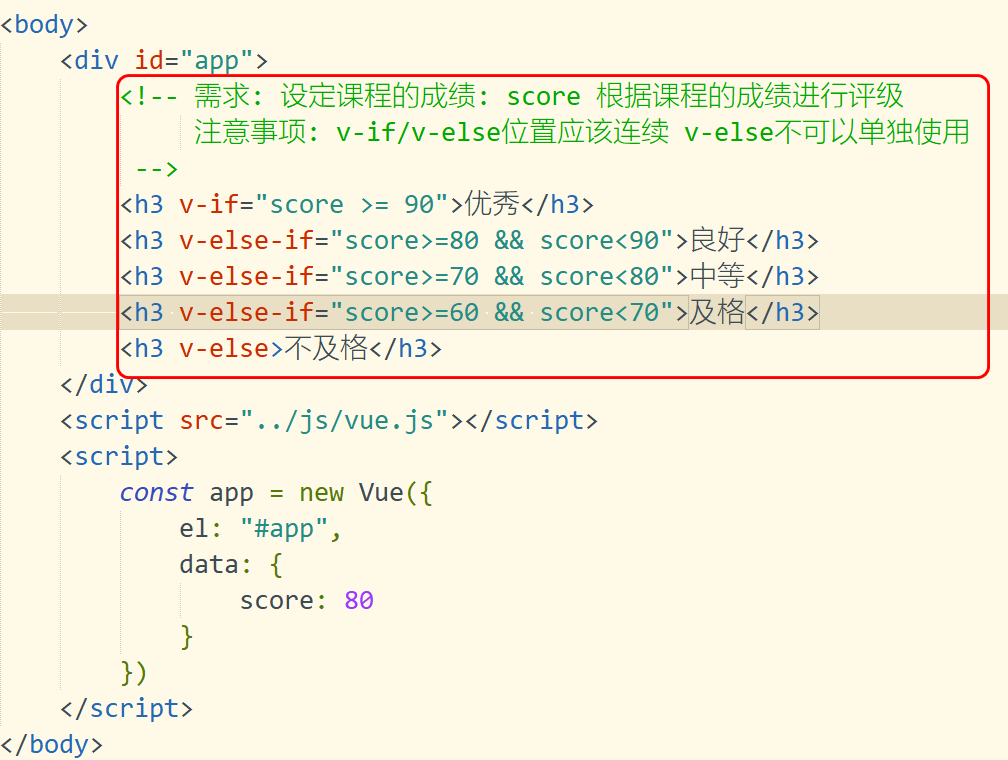
3.0 branch structure syntax
1.4. 1. Introduction to branch structure
If v-if is judged to be true, label data will be displayed
If v-else is judged as false, the data will be displayed
The v-else-if judgment rule is located between if and else
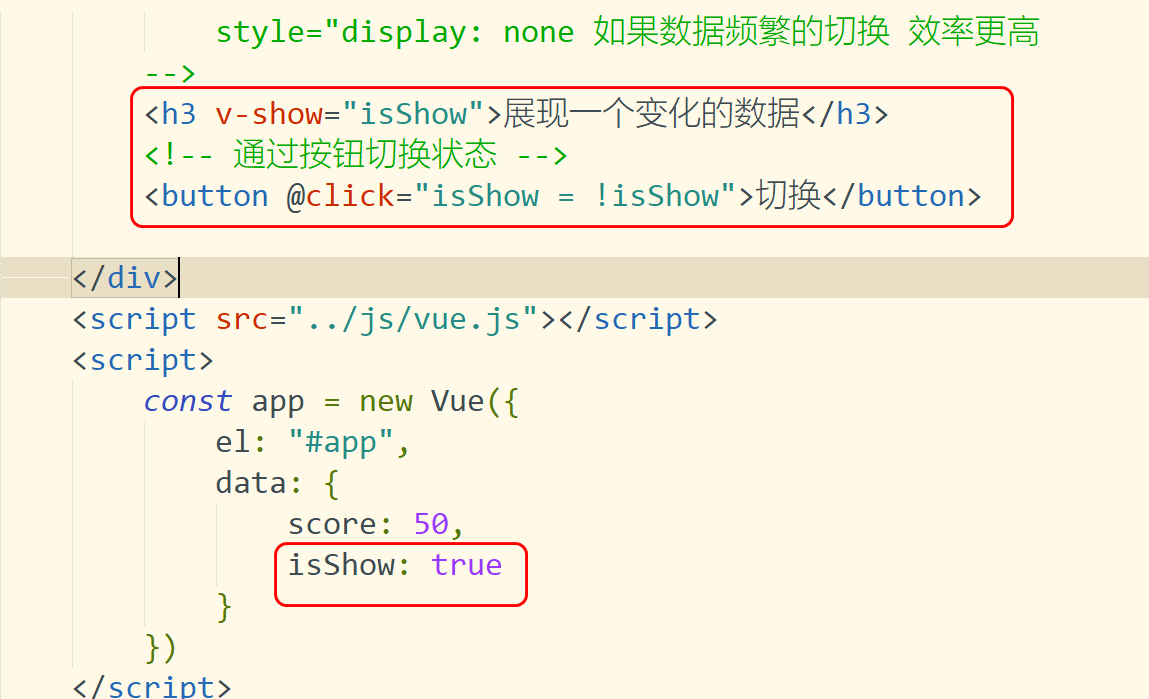
v-show displays data
1.4. 2. Introduction to branch structure (if/else)
3.1 v-sho command
3.2 v-for loop traversal
<!DOCTYPE html>
<html>
	<head>
		<meta charset="utf-8">
		<title>Cyclic structure</title>
	</head>
	<body>
		<div id="app">
			<!-- 1.Circular array considerations:It is best to specify when cycling key Identifies the location of the cyclic data -->
			<h3 v-for="item in hobbys" v-text="item" :key="item"></h3>

			<!-- 2.Loop traversal syntax with subscript 2 parameters 1:Traversal data parameter 2:subscript -->
			<h3 v-for="(item,index) in hobbys" v-text="item" :key="index"></h3>

			<!-- 3.Loop through objects -->
			<div v-for="user in userList" :key="user.id">
				<span v-text="user.id"></span>
				<span v-text="user.name"></span>
			</div>
		</div>

		<script src="../js/vue.js"></script>
		<script>
			const app = new Vue({
				el: "#app",
				data: {
					//Generally, multiple data are saved in the form of array
					hobbys: ['Play games','Knock code','drink water','Water bastard'],
					userList: [{
						id: 100,
						name: 'Sun Shangxiang'
					},{
						id: 200,
						name: 'Wang Zhaojun'
					},{
						id: 300,
						name: 'army officer's hat ornaments'
					}]
				}
			})
		</script>
	</body>
</html>
3.3 Vue form operation
1 common form elements
1.input text box
2.textarea text field
3.select drop-down box
4.radio radio box
5.checkbox multi selection box
2 data binding
<!DOCTYPE html>
<html>
	<head>
		<meta charset="utf-8">
		<title>Form data submission</title>
	</head>
	<body>
		<div id="app">
			<form action="http://www.baidu.com">
				<div>
					<span>user name:</span>
					<span>
						<input name="username" type="text" v-model="username"/>
					</span>
				</div>
				<div>
					<span>Gender:</span>
					<span>
						<!--label Equivalent to merging one div need id-for Associate  -->
						<input name="gender" type="radio" value="male" id="man"
						v-model="gender"/>
						<label for="man">male</label>
						<input name="gender" type="radio" value="female" id="women"
						v-model="gender"/>
						<label for="women">female</label>
					</span>
				</div>

				<div>
					<span>hobby:</span>
					<span>
						<input name="hobbys" type="checkbox" value="Knock code" v-model="hobbys"/>Knock code
						<input name="hobbys" type="checkbox" value="Play games" v-model="hobbys"/>Play games
						<input name="hobbys" type="checkbox" value="drink water" v-model="hobbys"/>drink water
					</span>
				</div>

				<div>
					<span>department:</span>
					<span>
						<!-- Set multiple selections in the drop-down box -->
						<select name="dept" v-model="dept"
							multiple="true">
							<option value="Finance Department">Finance Department</option>
							<option value="R & D department">R & D department</option>
							<option value="Testing department">Testing department</option>
						</select>
					</span>
				</div>
				<div>
					<span>User details</span>
					<span>
						Text field
					</span>
				</div>
				<div>
					<!-- Invalidate default behavior -->
					<button @click.prevent="submit">Submit</button>
				</div>
			</form>
		</div>
		<script src="../js/vue.js"></script>
		<script>
			const app = new Vue({
				el: "#app",
				data: {
					username: '',
					gender: 'female',
					//If the data item has more than one item, it is received using an array
					hobbys: ['Knock code','drink water'],
					//Define the drop-down box. If single data uses' ', multiple data use arrays
					//dept: 'R & D department'
					dept: ['Finance Department','R & D department']
				},
				methods: {
					submit(){
						console.log("username data:"+this.username)
						console.log("username data:"+this.gender)
					}
				}
			})
		</script>
	</body>
</html>
3.4 form modifiers
1.number: transfer the content entered by the user to the value type
2.trim: remove the redundant spaces on the left and right sides
3.lazy: simplify the number of times the input box calls js. It is called when the focus is lost
<!DOCTYPE html>
<html>
	<head>
		<meta charset="utf-8">
		<title>Form modifier</title>
	</head>
	<body>
		<div id="app">
			<!-- number Convert characters to numeric values -->
			Number 1: <input type="text" v-model.number="num1"/><br>
			Number 2: <input type="text" v-model.number="num2"/><br>
			<button @click="addNum">Addition operation</button> <br>
			total: {{count}}
			<hr >
			<!-- Remove extra spaces -->
			data: <input type="text" v-model.trim="msg"/> <br>
			Character length {{msg.length}}
			<hr />
			<!-- lazy Event triggered when data loses focus -->
			Verify user name: <input type="text" v-model.lazy="username"><br>
			{{username}}
		</div>
		<script src="../js/vue.js"></script>
		<script>
			const app = new Vue({
				el: "#app",
				data: {
					num1: '',
					num2: '',
					count: '',
					msg: '',
					username: ''
				},
				methods: {
					addNum(){
						this.count = this.num1 + this.num2
					}
				}
			})
		</script>
	</body>
</html>
3.5 calculation attributes
1.7. 1. Requirements description
Sometimes a lot of data calculation needs to be done in vue's JS However, if all data calculations are written into HTML tags, the structure of the code is chaotic
Optimization: VUE provides the function of calculating attributes
1.7. 2. Calculation attribute cases
<!DOCTYPE html>
<html>
	<head>
		<meta charset="utf-8">
		<title>Calculation properties</title>
	</head>
	<body>
		<div id="app">
			<!-- demand: You need to reverse a string
				User input abc
				Required output   cba
				thinking: The string is split into an array, the array is inverted, and the array is spliced into a string
				Method description:
				reverse(): Invert the array
				join("Connector") Concatenate arrays into strings
			 -->
			 User input: <input type="text" v-model="msg" /> <br>
			 General call:{{msg.split('').reverse().join('')}}<br>

			 <!-- Add the name of the calculated attribute-->
			 Calculation property call: {{reverseMethod}}

		</div>
		<script src="../js/vue.js"></script>
		<script>
			const app = new Vue({
				el: "#app",
				data: {
					msg: ''
				},
				//Defines the key of the calculation attribute
				computed: {
					//The name of the specified calculated property requires a return value
					reverseMethod(){

						return this.msg.split('').reverse().join('')
					}
				}
			})
		</script>
	</body>
</html>
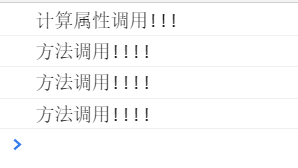
1.7. 3. Differences between calculation attributes and methods
Test site: 1 Method is executed every time it is called
2. There is a caching mechanism when calculating attribute calls
3. If the data needs to be referenced by a large number, it is better and more efficient to use calculation attributes
3.6 listener
1.1 requirements description
When the attribute data changes, the data is monitored by the listener So as to realize the operation of data
When to use:
Generally used for business processing (asynchronous operation Ajax)
1.2 configuring listeners
<!DOCTYPE html>
<html>
	<head>
		<meta charset="utf-8">
		<title>Verify that the user name is available</title>
	</head>
	<body>
		<div id="app">
			<!--
				demand:
					Require user input username User name for,Then verify with the server
					Prompt the user if it already exists. If it does not exist, the user is prompted for availability.
			 -->
			 user name: <input type="text" v-model.lazy="username"/>{{msg}}

		</div>
		<script src="../js/vue.js"></script>
		<script>
			const app = new Vue({
				el: "#app",
				data: {
					username: '',
					//Verification results
					msg: ''
				},
				methods: {
					checkName(val){
						//===The new version of data verification in a strict sense advocates that the verification value also includes the verification type
						if(val === 'admin'){
							this.msg = "Data already exists"
						}
						else if(val === 'tom'){
							this.msg = "Data already exists"
						}
						else{
							this.msg = "Data can be used"
						}
					}
				},
				watch: {
					//Listeners that define properties
					username(val){
						this.checkName(val)
					}
				}
			})
		</script>
	</body>
</html>
3.7 filter
2.1 description of filter
Filters are generally used to format data Price / time, etc
2.2 requirements description
After the user enters the data, it is required to use the filter to reverse the data
2.3 filter introduction case
<!DOCTYPE html>
<html>
	<head>
		<meta charset="utf-8">
		<title>Use of filters</title>
	</head>
	<body>
		<div id="app">
			 <!-- use | Line call filter-->
			 User input: <input type="text" v-model="username" /><br>
			 {{username | rename}}<br>
			 <!-- Filter cascade-->
			 {{username | rename | addChar}}
		</div>
		<script src="../js/vue.js"></script>
		<script>

			//1. Define filters separately
			// Parameter 1: filter name parameter 2: method executed by filter
			// Note: the filter needs to return a value
			Vue.filter('rename',function(val){

				return val.split('').reverse().join('')
			})

			//2. Add hahaha character
			//The function keyword can be omitted from the arrow function. If there is only one parameter, the () keyword can be omitted
			//Association using = >
			Vue.filter('addChar',val => {

				return val + 'Ha ha ha'
			})


			const app = new Vue({
				el: "#app",
				data: {
					username: '',

				},
				methods: {

				}
			})
		</script>
	</body>
</html>
3.8 VUE life cycle
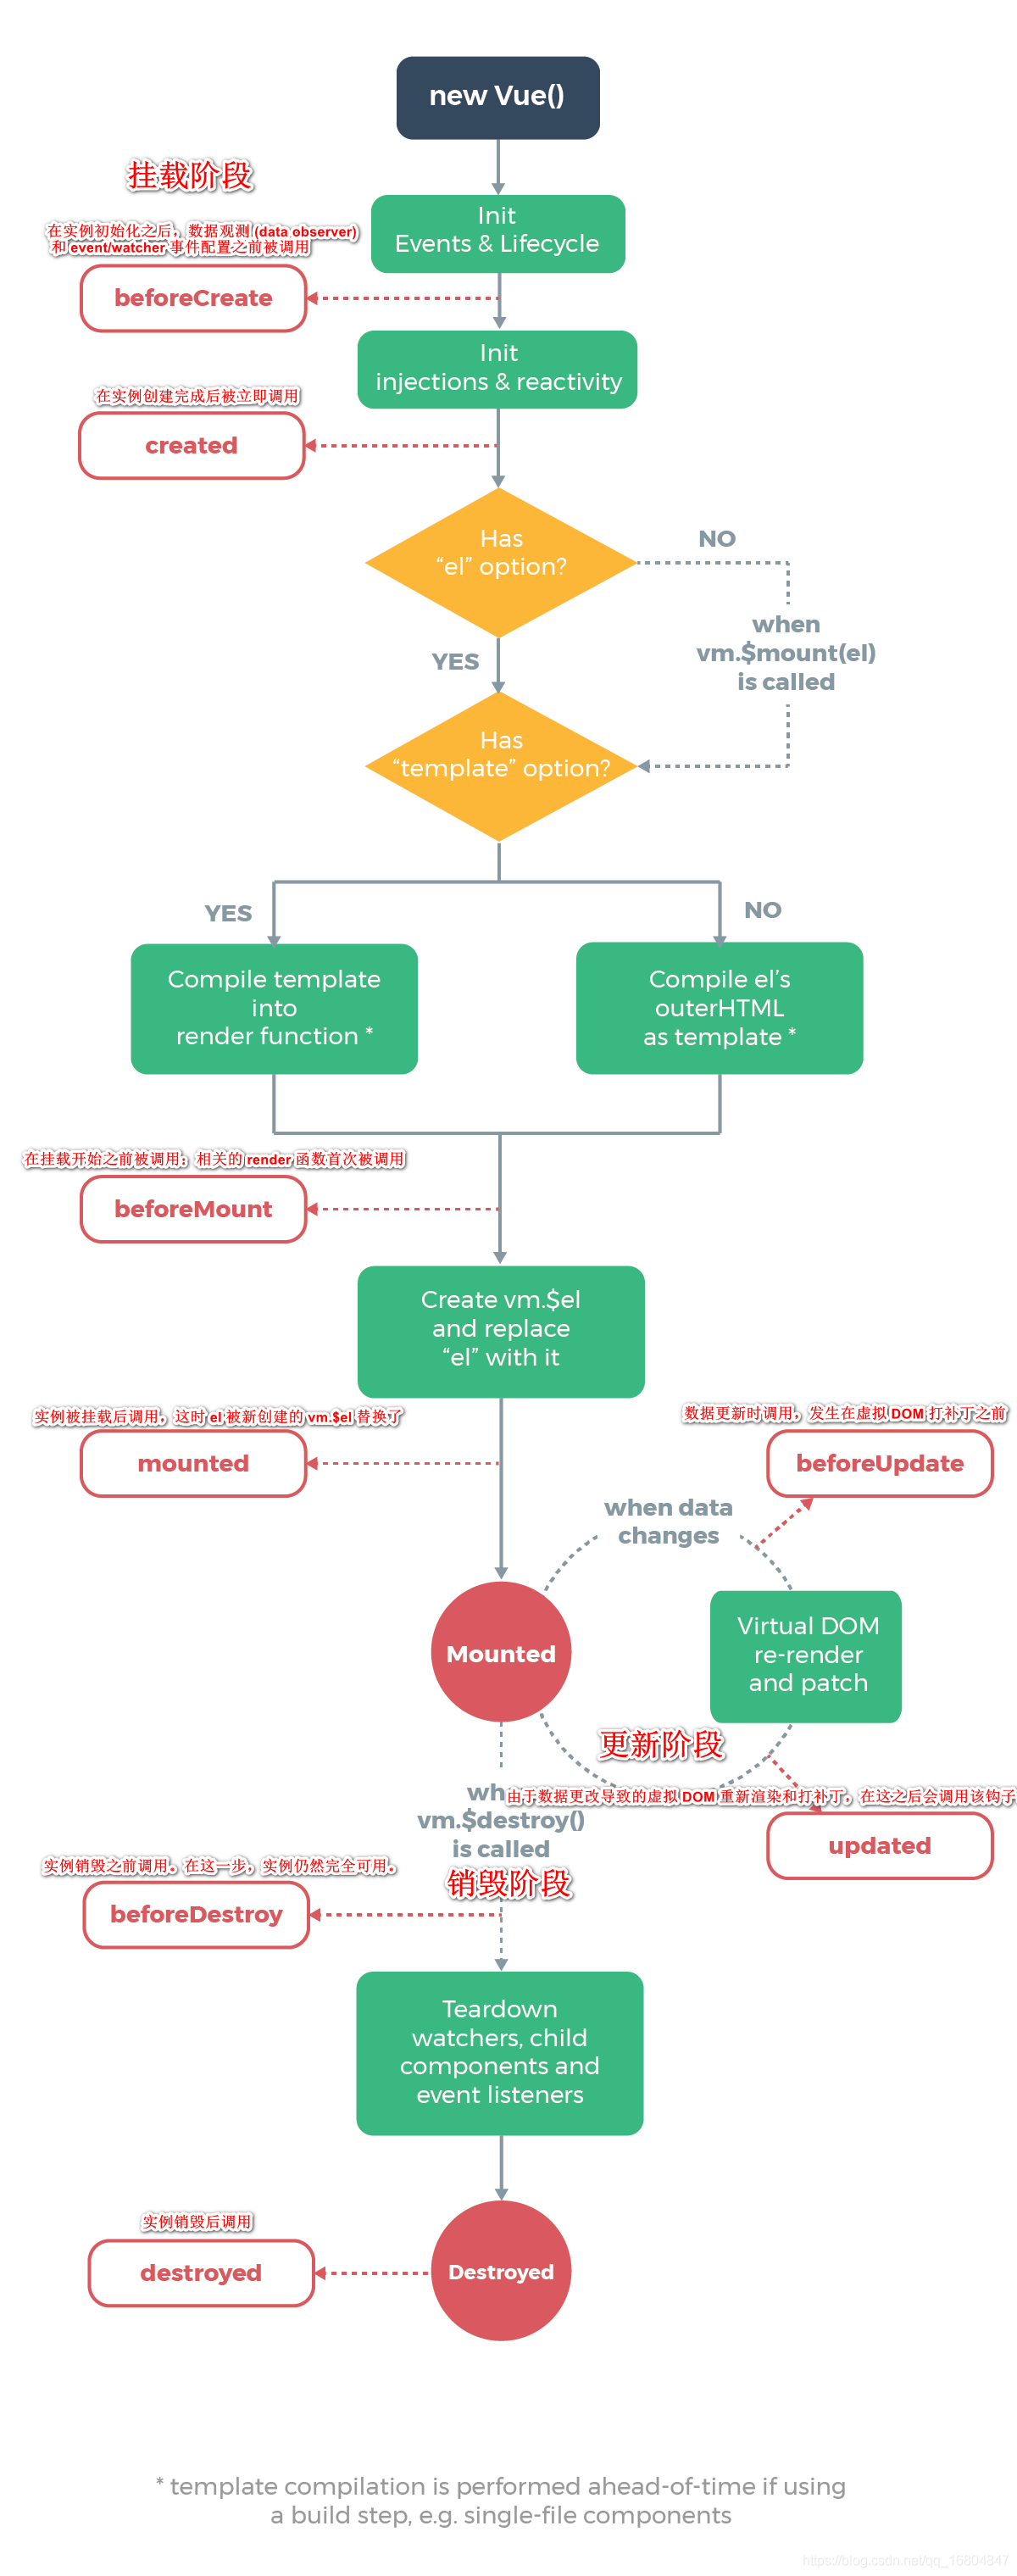
3.1 description of Vue life cycle function
All life cycle hooks automatically bind this context to the instance, so you can access data and operate on properties and methods. This means that you cannot use the arrow function to define a lifecycle method (for example, created: () = > this fetchTodos()). This is because the arrow function is bound to the parent context, so this is different from the Vue instance you expect, this Fetchtodos behavior is undefined.
3.2 flow chart of Vue object periodic function
3.3 VUE object lifecycle Demo
life cycle <!--
1.VUE Object's lifecycle function,Can be called separately
2.The function name of the lifecycle is fixed,It cannot be modified at will.
-->
user name: <input type="text" v-model="name"/>
<button @click="destroyed">Destroy</button>
</div>
<script src="../js/vue.js"></script>
<script>
const app = new Vue({
el: "#app",
data: {
name: ''
},
methods: {
destroyed(){
//Manually destroy vue objects. The object API in vue is called with $
this.$destroy()
}
},
//After instance initialization, data observer and event/watcher events are called before configuration.
beforeCreate(){
console.log("After initialization, call-beforeCreate")
},
//Called immediately after the instance is created. In this step, the instance has completed the following configuration
created(){
console.log("Strength object completion,And after the configuration is completed, it is called. created")
},
//Called before the mount starts: the related render function is called for the first time.
beforeMount(){
console.log("The data is called before it is mounted. beforeMount")
},
//After the instance is mounted, the calling page is called after the real load is completed.
mounted(){
console.log("Page loading complete mounted")
},
//Called during data update, which occurs before the virtual DOM is patched
beforeUpdate(){
console.log("Called when data is updated beforeUpdate")
},
//Invoked after data changes
updated(){
console.log("Call after data modification updated")
},
//Before the instance is destroyed, it is called. At this step, the instance is still fully available.
beforeDestroy(){
console.log("VUE Call before object destruction beforeDestroy")
},
//After the instance is destroyed, it is called. After the hook is called, all instructions corresponding to Vue instances are unbound, all event listeners are removed, and all sub instances are destroyed.
destroyed(){
console.log("Call after instance destruction destroyed")
}
})
</script>
</body>
3.9 array operation in Vue
Array usage case description
1).push() appends data to the end of the array
2).pop() deletes the last element of the array
3).shift() deletes the first element of the array
4.unshift() appends data at the beginning of the data
5.splice() replaces data at the specified location
6.sort() sorts the data according to the code, from small to large
7.reverse() array inversion
Array basic case
<!DOCTYPE html>
<html>
	<head>
		<meta charset="utf-8">
		<title>Array case</title>
	</head>
	<body>
		<div id="app">
			<span v-for="item in array" v-text="item"></span><br>

			data: <input type="text" v-model="data"/>
			<button @click="push">Add</button>
			<button @click="pop">Remove last</button>
			<button @click="shift">Delete first element</button>
			<button @click="unshift">Append element at the beginning</button>
			<button @click="splice">Replace element</button>
			<button @click="sort">sort</button>
			<button @click="reverse">reversal</button>
		</div>
		<script src="../js/vue.js"></script>
		<script>
			const app = new Vue({
				el: "#app",
				data: {
					array: [5,7,4,1],
					data: ''
				},
				methods: {
					push(){
						this.array.push(this.data)
					},
					pop(){
						//Remove last data
						this.array.pop()
					},
					shift(){
						this.array.shift()
					},
					unshift(){
						this.array.unshift(this.data)
					},
					splice(){
						//About parameter description parameter 1: operation data start position index
						//			  Parameter 2: number of operation data
						//			  Parameter 3: value to replace
						//Delete element deletes the last 2 bits of the first element
						//this.array.splice(1,2,'')
						//Replace element replace the first 2 elements (replace the elements as a whole)
						//There can be more than one element after replacement
						this.array.splice(0,2,this.data)
					},
					sort(){
						this.array.sort()
					},
					reverse(){
						this.array.reverse()
					},

				}

			})
		</script>
	</body>
</html>
4.0 componentization in Vue
Component introduction
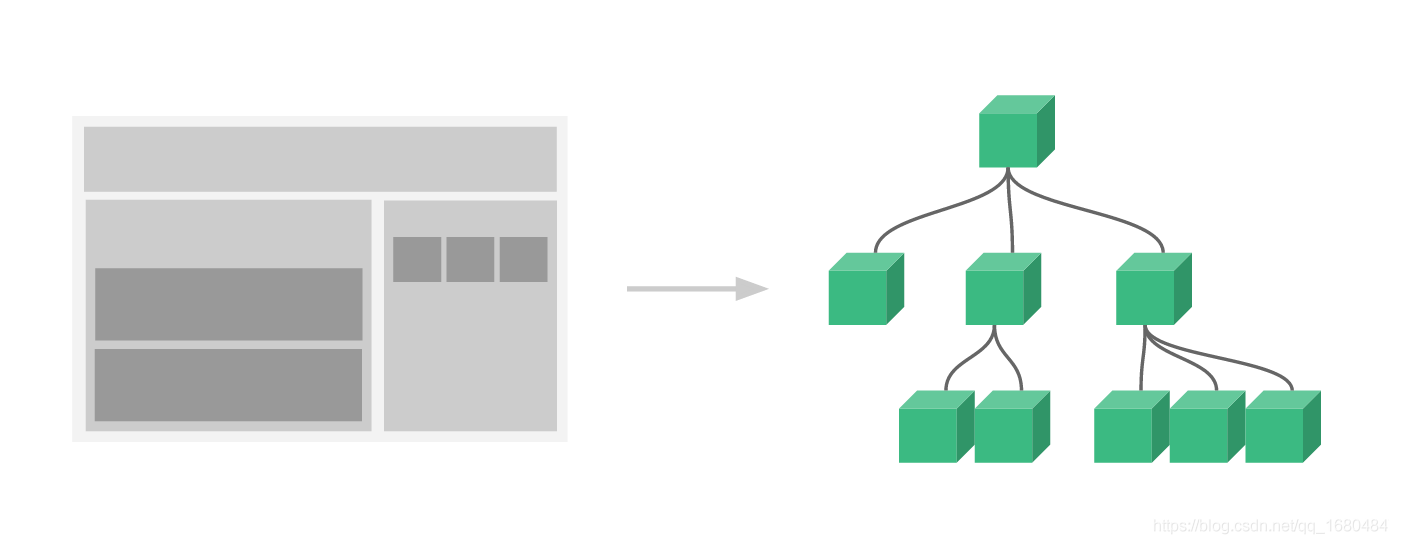
Component system is another important concept of Vue because it is an abstraction that allows us to build large applications using small, independent and usually reusable components. Think about it, almost any type of application interface can be abstracted as a component tree
Using components, you can encapsulate some duplicate content Each component is maintained separately It embodies the idea of divide and conquer
4.1 global components
<!DOCTYPE html>
<html>
<head>
<meta charset="utf-8">
<title>assembly</title>
</head>
<body>
<div id="app">
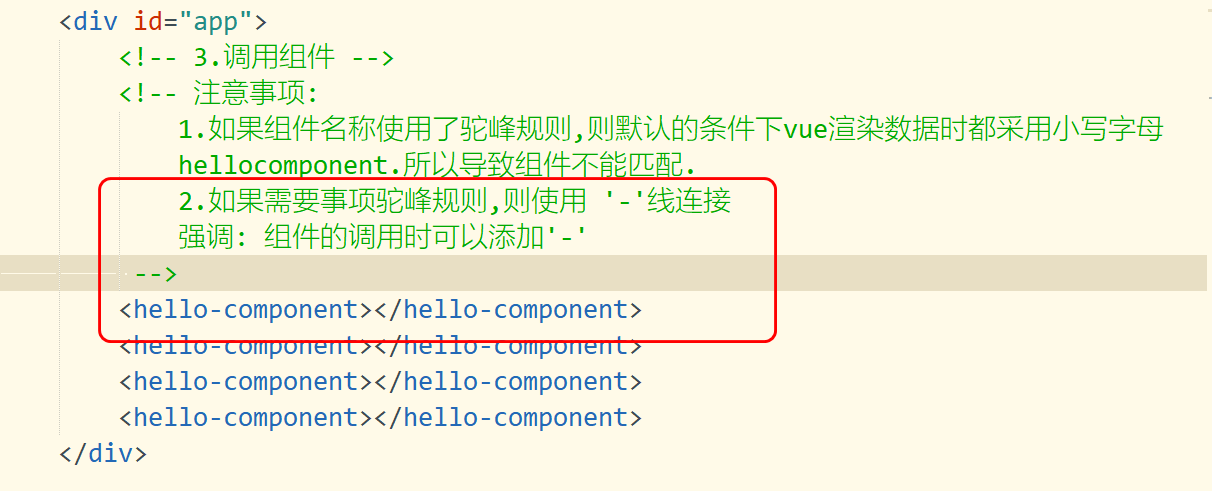
<!-- 3.Call component -->
<hello></hello>
</div>
<script src="../js/vue.js"></script>
<script>
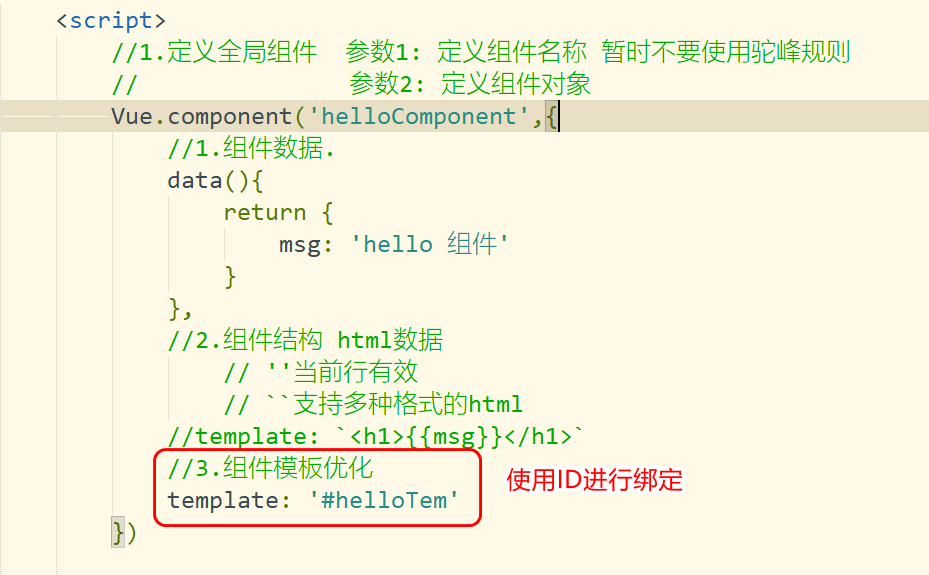
//1. Define global component parameter 1: define component name. Do not use hump rule for the time being
// Parameter 2: define component object
Vue.component('hello',{
//1. Component data
data(){
return {
msg: 'hello assembly'
}
},
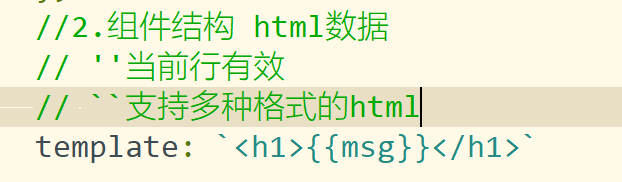
//2. Component structure html data
template: '<h1>{{msg}}</h1>'
})
/* Note: the use of components must have the rendering of Vue objects */
const app = new Vue({
el: "#app"
})
</script>
</body>
</html>
4.2 naming rules for hump of components
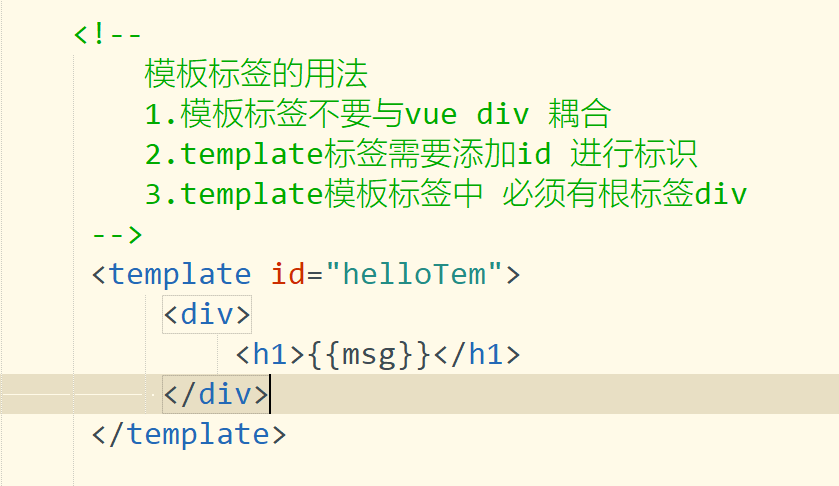
4.3 use of component template labels
1). ` Function of No
2). Writing method of component template
4.4 definition of local components
<!DOCTYPE html>
<html>
	<head>
		<meta charset="utf-8">
		<title>assembly</title>
	</head>
	<body>
		<div id="app">
			<hello1></hello1>
			<hello1></hello1>
		</div>

		<template id="hello1Tem">
			<div>
				<h3>{{msg}}</h3>
			</div>
		</template>

		<script src="../js/vue.js"></script>
		<script>

			//1. Define component objects
			const hello1 = {
				data(){
					return {
						msg: 'hello1 Local component'
					}
				},
				template: '#hello1Tem'
			}

			/* Writing of local components */
			const app1 = new Vue({
				el: "#app",
				//Component name / component object in vue object
				components: {
					//hello1  : hello1
					//js can be simplified if the key and value values are the same
					hello1
				}
			})

		</script>
	</body>
</html>
4.5 Axios
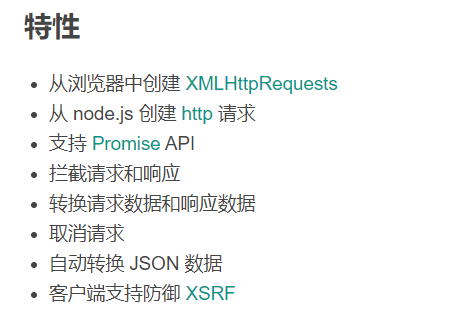
Introduction to Axios
Axios is an HTTP Library Based on promise (internally encapsulated with ajax), which can be used in browsers and node JS.
Function: simplify asynchronous calls internally
[the external chain image transfer fails. The source station may have an anti-theft chain mechanism. It is recommended to save the image and upload it directly (IMG niseyfh-1640436594032) (C: \ users \ administrator \ appdata \ roaming \ typora \ user images \ image-20210519185400242. PNG)]
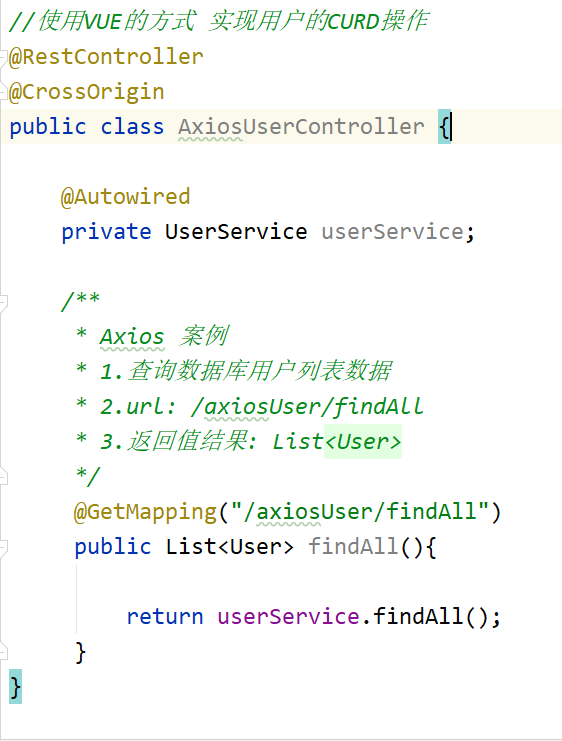
4.6 addition, deletion and modification of Axios introduction
Display user list
1.1 editing AxiosUserController
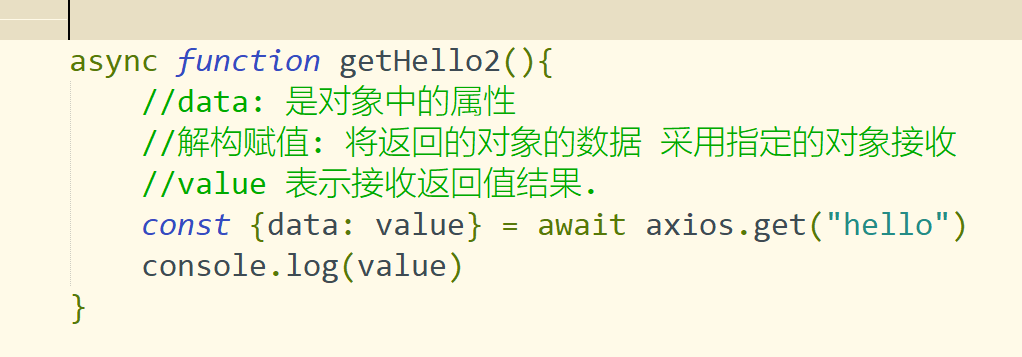
1.2 obtaining user list data
1. Use the mounted method to initialize the data
2. Acquire data by axios
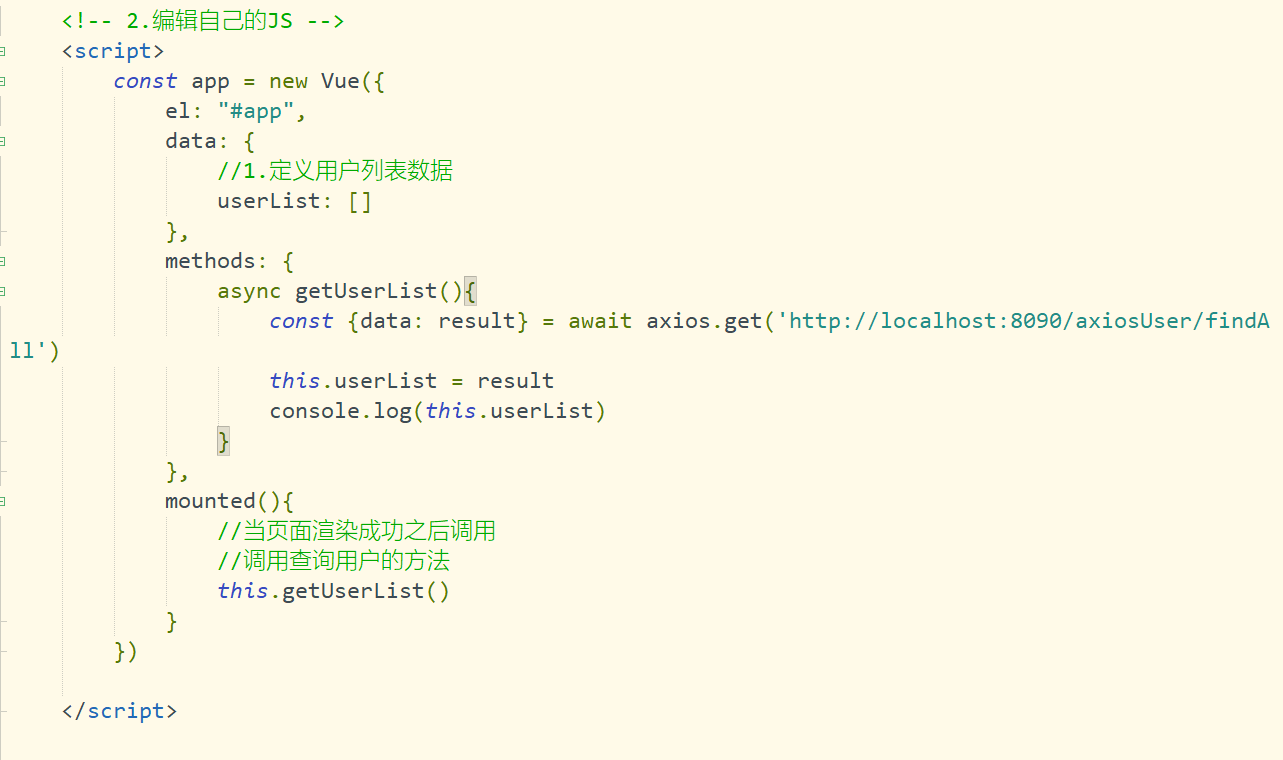
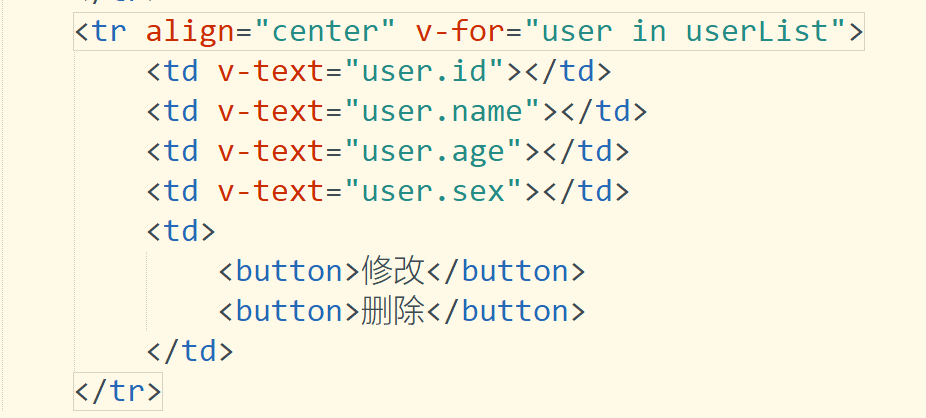
1.3 loop traversal data
1.4 modify user implemented data echo
<!DOCTYPE html>
<head>
    <meta charset="UTF-8">
    <title>User list data</title>
</head>
<body>
	<div id="app">
		User number: <input type="text" disabled v-model="user.id"  />
		User name: <input type="text" v-model="user.name"/><br>
		User age: <input type="text" v-model="user.age"/>
		User gender: <input type="text" v-model="user.sex"/>
		<button>to update</button>
		<hr />
		<!-- Table presented by user -->
		<table id="userTable" border="1px" align="center" width="800px">
			<tr align="center">
				<td colspan="5"><h3>User list</h3></td>
			</tr>
			<tr align="center">
				<td>ID</td>
				<td>name</td>
				<td>Age</td>
				<td>Gender</td>
				<td>operation</td>
			</tr>
			<tr align="center" v-for="user in userList">
				<td v-text="user.id"></td>
				<td v-text="user.name"></td>
				<td v-text="user.age"></td>
				<td v-text="user.sex"></td>
				<td>
					<button @click="updateBtn(user)">modify</button>
					<button>delete</button>
				</td>
			</tr>
		</table>
	</div>
	<!-- 1.Import page JS -->
	<script src="../js/vue.js"></script>
	<script src="../js/axios.js"></script>

	<!-- 2.Edit your own JS -->
	<script>
		const app = new Vue({
			el: "#app",
			data: {
				//1. Define user list data
				userList: [],
				//2. Define user attributes
				user: {
					id: '',
					name: '',
					age: '',
					sex: ''
				}
			},
			methods: {
				async getUserList(){
					const {data: result} = await axios.get('http://localhost:8090/axiosUser/findAll')
					this.userList = result
					//console.log(this.userList)
				},
				//Update button action
				updateBtn(user){
					//Assign the user object passed by the user to the attribute user in data
					this.user = user
				}
			},
			mounted(){
				//When the page is rendered successfully, it is called.
				//Call the method to query the user
				this.getUserList()
			}
		})

	</script>

</body>
</html>
Implement user modification
1.1 edit page JS
<!DOCTYPE html>
<head>
<meta charset="UTF-8">
<title>User list data</title>
</head>
<body>
<div id="app">
User number: <input type="text" disabled v-model="user.id" />
User name: <input type="text" v-model="user.name"/><br>
User age: <input type="text" v-model="user.age"/>
User gender: <input type="text" v-model="user.sex"/>
<button @click="updateUser">to update</button>
<hr />
<!-- Table presented by user -->
<table id="userTable" border="1px" align="center" width="800px">
<tr align="center">
<td colspan="5"><h3>User list</h3></td>
</tr>
<tr align="center">
<td>ID</td>
<td>name</td>
<td>Age</td>
<td>Gender</td>
<td>operation</td>
</tr>
<tr align="center" v-for="user in userList">
<td v-text="user.id"></td>
<td v-text="user.name"></td>
<td v-text="user.age"></td>
<td v-text="user.sex"></td>
<td>
<button @click="updateBtn(user)">modify</button>
<button>delete</button>
</td>
</tr>
</table>
</div>
<!-- 1.Import page JS -->
<script src="../js/vue.js"></script>
<script src="../js/axios.js"></script>
<!-- 2.Edit your own JS -->
<script>
const app = new Vue({
el: "#app",
data: {
//1. Define user list data
userList: [],
//2. Define user attributes
user: {
id: '',
name: '',
age: '',
sex: ''
}
},
methods: {
async getUserList(){
const {data: result} = await axios.get('http://localhost:8090/axiosUser/findAll')
this.userList = result
//console.log(this.userList)
},
//Update button action
updateBtn(user){
//Assign the user object passed by the user to the attribute user in data
this.user = user
},
//Update user information
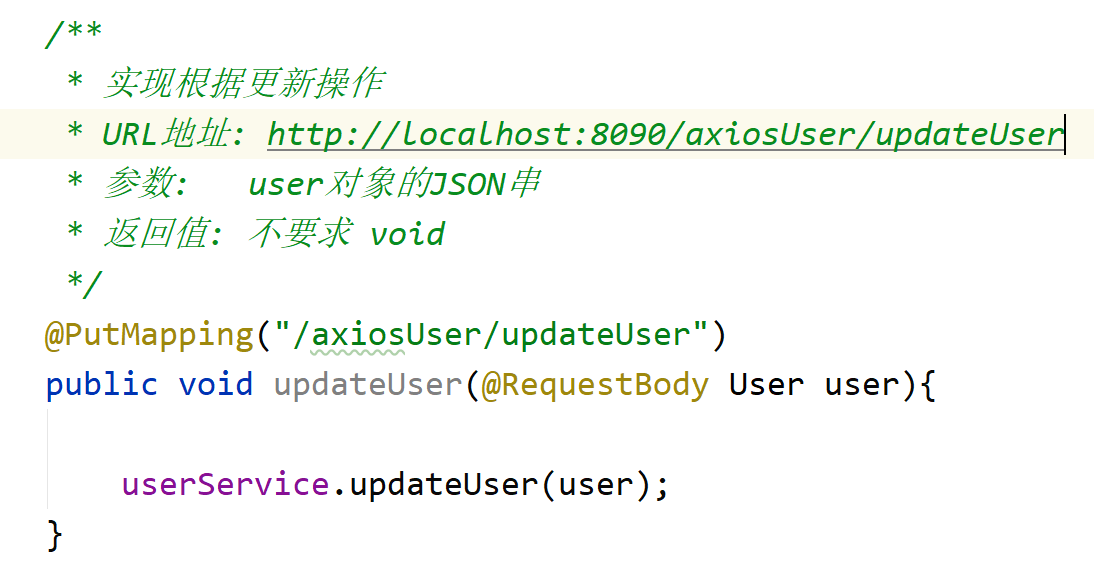
async updateUser(){
//Request type put / post get / delete
//http://localhost:8090/axiosUser/updateUser
//The update operation may not return a value
await axios.put('http://localhost:8090/axiosUser/updateUser',this.user)
}
},
mounted(){
//When the page is rendered successfully, it is called.
//Call the method to query the user
this.getUserList()
}
})
</script>
</body>
</html>
1.2 editing AxiosUserController
Receive user parameters according to the ajax of user update operation
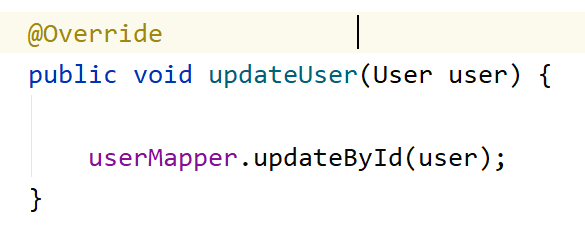
1.3 editing AxiosUserService
Realize data warehousing according to user ID
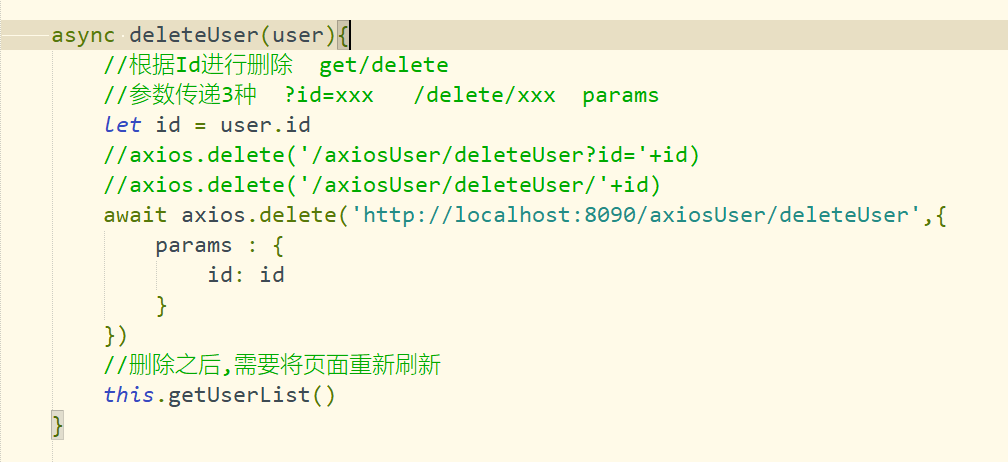
User data deletion
1.1 edit page JS
1). Add event for delete button
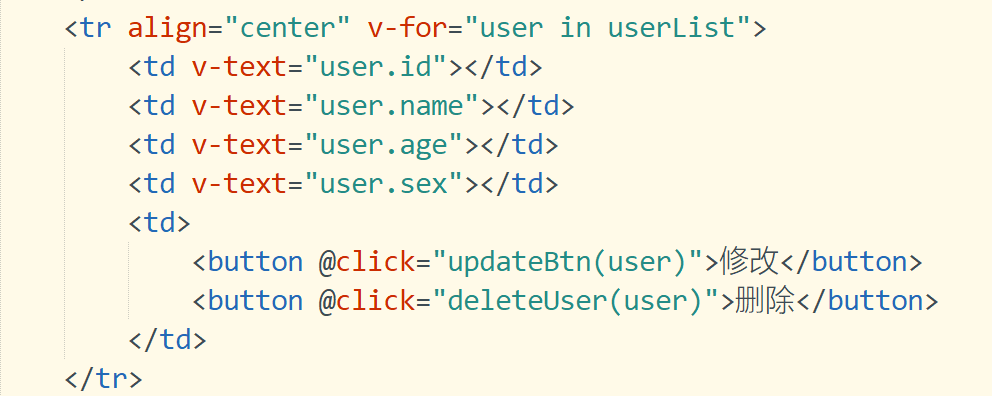
2). Edit click function
1.2 editing AxiosUserController
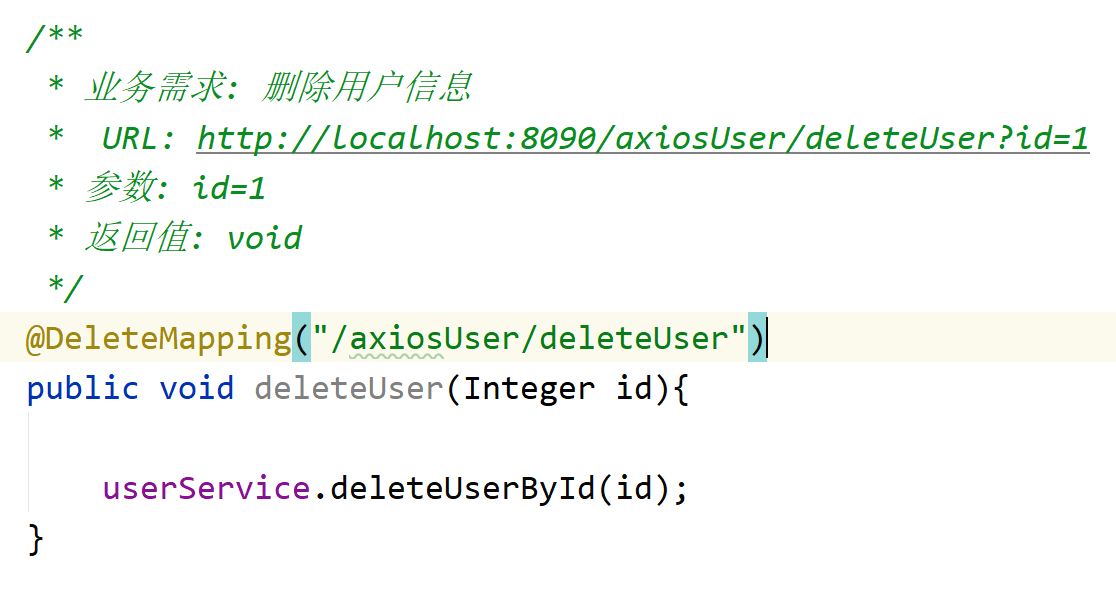
4.7 cross domain
2.1 homology strategy
The Same origin policy is a convention. It is the core and basic security function of the browser. If the Same origin policy is missing, the normal functions of the browser may be affected. It can be said that the Web is built on the Same origin policy, and the browser is only an implementation of the Same origin policy.
For security reasons, the browser requires that all requests must meet the same origin policy!!!
Element: request protocol: / / Domain Name: port must be the same!!!
2.2 cross domain issues
ajax requests violate the same origin policy, and ajax requests are called cross domain access
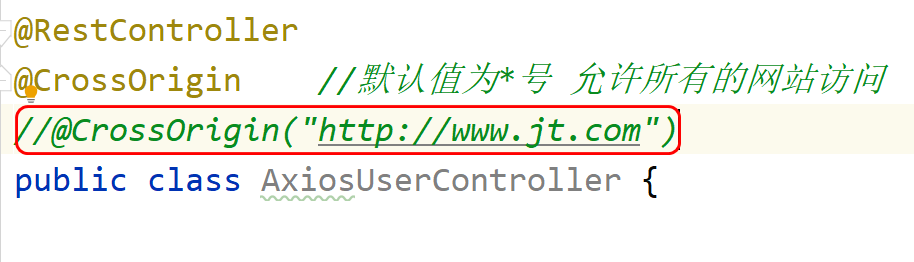
CORS
CORS is a W3C standard, whose full name is "cross origin resource sharing". It allows browsers to send XMLHttpRequest requests to cross source servers, thus overcoming the limitation that AJAX can only be used in the same source.
The essence of CORS is to add a response header that allows access to the server. CORS is a technology of the server
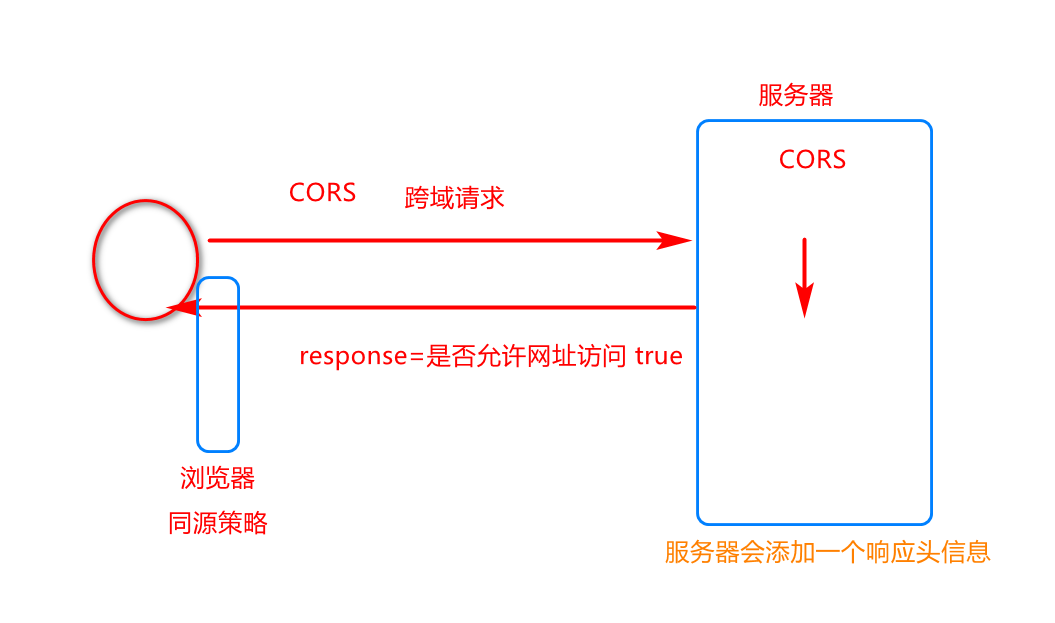
2.3 response header information
*The number represents a wildcard Allow all requests for access
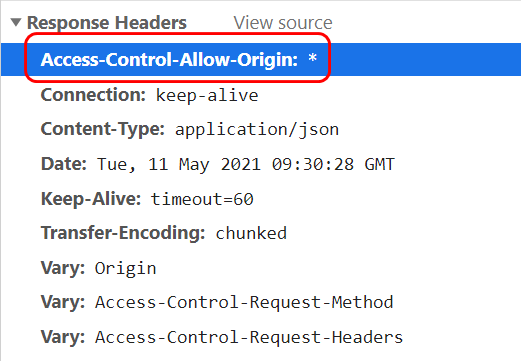
*The number can be changed to a specific web address Only the website is allowed to access
VUE routing mechanism
1.1 introduction to Vue router
Vue Router is Vue JS (opens new window) is the official routing manager. It and Vue JS core deep integration makes it easy to build single page applications. The functions include:
Nested routing / view tables
Modular, component-based routing configuration
Routing parameters, queries, wildcards
Based on Vue View transition effect of JS transition system
Fine grained navigation control
Links with automatically activated CSS class es
HTML5 history mode or hash mode, automatically degraded in IE9
Custom scroll bar behavior
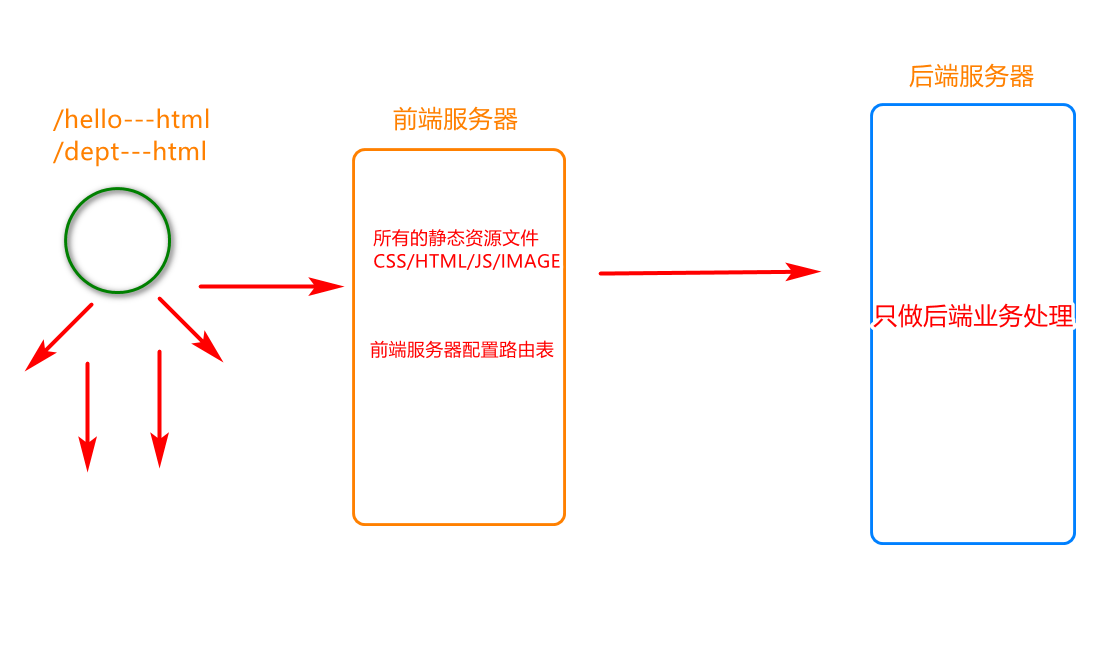
1.2 front end routing
1.2. 1. Introduction to back-end routing
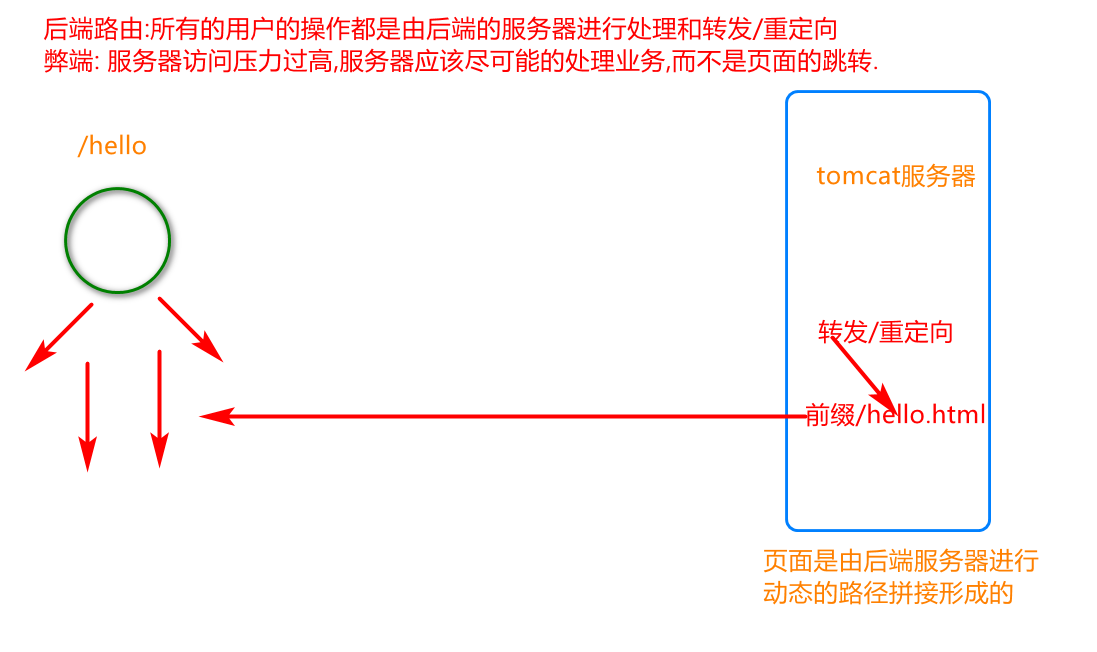
4.8 front end routing
Note: the front-end routing is internally configured with a routing table. After the user initiates a request, it directly jumps to the html page (component) according to the content of the routing table
4.9 introduction to routing
1.1 steps for using router
- Introduce the js class library of routing
- Add routing link
- Add padding bit of route
- Define routing components
- Configure routing rules and create routing instances
- Mount vue for routing
1.2 introduction to router
<!DOCTYPE html>
<html>
	<head>
		<meta charset="utf-8">
		<title>Routing rules</title>
	</head>
	<body>
		<div id="app">
			<!-- 2.Add routing link
				router-link: vue The label is resolved to a label
				to: vue Will resolve to href attribute
			 -->
			<router-link to="/user">user</router-link>
			<router-link to="/dept">department</router-link>

			<!-- 3.Define a route placeholder when the user clicks a route,Show page in this location
				Understood as new div.
			  -->
			<router-view></router-view>

		</div>

		<!-- 1.introduce js -->
		<script src="../js/vue.js"></script>
		<script src="../js/vue-router.js"></script>
		<script>

			/* 4.Define component variables */
			const user = {
				template: '<h1>I am user assembly</>'
			}

			const dept = {
				template: '<h1>I'm a department component</>'
			}

			/* 5.Configure routing rules  */
			const router = new VueRouter({
				//Define rules
				routes: [
					{ path:'/user', component:user},
					{ path:'/dept', component:dept}
				]
			})


			//6. Mount the routing component into Vue
			const app = new Vue({
				el: "#app",
				router
			})
		</script>
	</body>
</html>
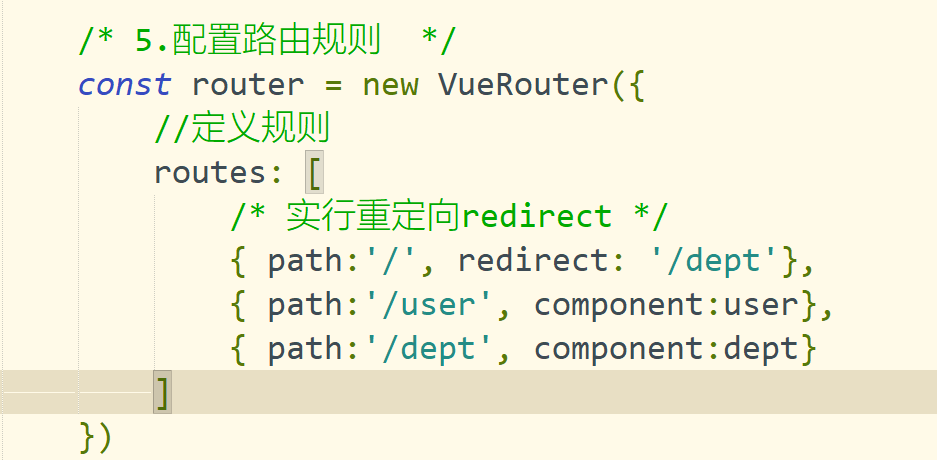
1.3 Router redirection
Note: the routing component provides the redirection function, which allows users to jump to the specified component by default
Requirement: jump to / user component by default
1.4 Router nesting
1.4. 1. Requirements description
Links: shopping malls, zoos
Nesting: shopping mall, shoe, mobile phone Zoo: chicken and duck
1.4. 2 nested implementation
<!DOCTYPE html>
<html>
	<head>
		<meta charset="utf-8">
		<title>Routing rules</title>
	</head>
	<body>
		<div id="app">
			<router-link to="/shopping">market</router-link>
			<router-link to="/zoo">zoo</router-link>

			<router-view></router-view>
		</div>

		<!-- Define mall components -->
		<template id="shoppingTem">
			<div>
				<h1>I'm a mall component</h1>

				<router-link to="/shopping/shoe">Shoe shop</router-link>
				<router-link to="/shopping/phone">Mobile phone store</router-link>
				<router-view></router-view>
			</div>
		</template>


		<!-- 1.introduce js Note the order of introduction -->
		<script src="../js/vue.js"></script>
		<script src="../js/vue-router.js"></script>

		<script>
			const shopping = {
				template : "#shoppingTem"
			}

			const zoo = {
				template : "<h1>I'm the zoo component</h1>"
			}

			const shoe = {
				template : "<h1>I'm a shoe store</h1>"
			}

			const phone = {
				template : "<h1>I'm a mobile phone store</h1>"
			}

			//If nesting is required, use the keyword children
			const router = new VueRouter({
				routes: [
					{path:'/shopping', component: shopping,
					children: [
						{path:'/shopping/shoe',component: shoe},
						{path:'/shopping/phone',component: phone}
					]},

					{path:'/zoo', component: zoo}
				]
			})

			const app = new Vue({
				el: "#app",
				router
			})

		</script>
	</body>
</html>
5.0 VUE front end case
1.1. Add Vue. Exe under the root directory config. JS file
module.exports = {
    lintOnSave:false, //Close the code formatting verification tool
    devServer:{
        port: 81//Modify boot port
    }
}
1.2 write main js
import Vue from 'vue'
import App from './App.vue'
import router from './router/router.js'

import ElementUI from 'element-ui';
import 'element-ui/lib/theme-chalk/index.css';

import axios from '@/utils/axiosutils.js'
import store from '@/vuex'

Vue.use(ElementUI);
/* Import axios package */
import axios from 'axios'
/* Set the request root directory of axios */
axios.defaults.baseURL = 'http://localhost:8091/'
/* After adding a global object to the vue object, send an ajax request using the $http object */
Vue.prototype.$http = axios

Vue.config.productionTip = false

new Vue({
	router,
  render: h => h(App),
}).$mount('#app')
1.3 write app vue
<template>
  <div id="app">
  <!-- Add route placeholder-->
   <router-view></router-view>
  </div>
</template>

<script>
export default {
  name: 'App'
}
</script>
<style>
*{
	padding: 0;
	margin: 0;
}
</style>
1.4 create router folder under src and write index js
import Vue from 'vue'
import Router from 'vue-router'

import index from '../components/index.vue'
import user from '../components/user.vue'
Vue.use(Router)

export default new Router({
	mode: 'history',
	routes: [
    {path: '/', redirect: '/index'},
    {path: '/index', component: index,redirect:'/user',children:[
    {path: '/user', component: user},
  ]}
]
1.5 write menu in the components directory vue
<template>
 <div>
    <el-menu router >
        <el-submenu index="1">
            <template slot="title">
                <span>Administration</span>
            </template>
            <el-menu-item-group>
                <el-menu-item index="/user"> <i class="el-icon-location"></i>user management </el-menu-item>
                <!-- <el-menu-item index="/menu"> <i class="el-icon-location"></i>Menu management</el-menu-item> -->
            </el-menu-item-group>
        </el-submenu>
    </el-menu>
 </div>
</template>

<script>
    export default {
        name: 'Menu'
    }
</script>

<style>
</style>
1.6 write index. In the components directory vue
<template>
  <el-container class="wrap">

	 <el-header class="header">
		<el-row>
			<el-col :span="20">information system</el-col>
			<el-col :span="4">
				<el-dropdown>
					<span class="el-dropdown-link">
						keafmd<i class="el-icon-arrow-down el-icon--right"></i>
					</span>
				<el-dropdown-menu slot="dropdown">
				<el-dropdown-item command="Personal">Personal settings</el-dropdown-item>
				<el-dropdown-item command="Logout">sign out</el-dropdown-item>
				</el-dropdown-menu>
				</el-dropdown>
				</el-col>
			</el-row>
		</el-header>

		<el-container>
			<el-aside width="200px" class="aside">
				<Menu></Menu>
			</el-aside>

			<el-main>
				<!-- <User></User> -->
				<router-view></router-view>
			</el-main>
		</el-container>
	</el-container>
</template>

<script>
	import Menu from '@/components/menu'
	export default {
		name: 'Index',
		components: {
			Menu
		},
		data() {
			return {}
		},
		methods: {

		},
		created() {}
	}
</script>

<style scoped>
	.wrap {
		height: 100vh;
	}

	.header {
		border-bottom: 1px solid aqua;
	}

	.aside {
		border-right: 1px solid aqua;
	}
</style>
1.7 write user. In the components directory vue
<template>
  <div>
  <el-table :data="tableData.filter(data => !search ||     data.name.toLowerCase().includes(search.toLowerCase()))" style="width: 100%">
	<el-table-column label="userName" prop="userName"></el-table-column>
	<el-table-column label="Password" prop="password"></el-table-column>
	<el-table-column align="right">
		<template slot="header" slot-scope="scope">
		<el-input v-model="search" size="mini" placeholder="Enter keyword search" />
		</template>
		<template slot-scope="scope">
		<el-button size="mini" @click="handleEdit(scope.$index,  scope.row)">Edit</el-button>
		<el-button size="mini" type="danger" @click="handleDelete(scope.$index, scope.row)">Delete
		</el-button>
		</template>
	 </el-table-column>
	</el-table>
	</div>
</template>

<script>
	export default {
		name: 'User',
		components: {

		},
		data() {
			return {
				tableData: [],
				search: ''
			}
		},
		methods: {
			getData() {
				axios.get('/user/findAll')
					.then((res) => {
						this.tableData = res.data
					})
					.catch(function(error) {
						console.log(error);
					});

			},
			handleEdit(index, row) {
				console.log(index, row);
			},
			handleDelete(index, row) {
				console.log(index, row);
			}
		},
		created() {
			this.getData();
		}
	}
</script>

<style>
</style>
ta() {
return {}
},
methods: {
	},
	created() {}
}
1.7 stay components Write under directory user.vue