Continued from the previous article 30. Realizing the function of deleting users
In the last stage, we completed all the functions of the user management module. In this chapter, we begin to develop the permission management module.
1, Innovative new git branch
Because we want to develop new modules, according to the principle of module collaborative development, we need to create a special branch for development permission management. After the permission management development is completed, we need to merge the branches into the main branch.
First, open vscode and enter "git branch" on the console to view our branch (it can be seen that it is on the main branch of the master). Then we use "git checkout -b rights" to create a branch named "right". We can see that we have automatically switched to the new Branch: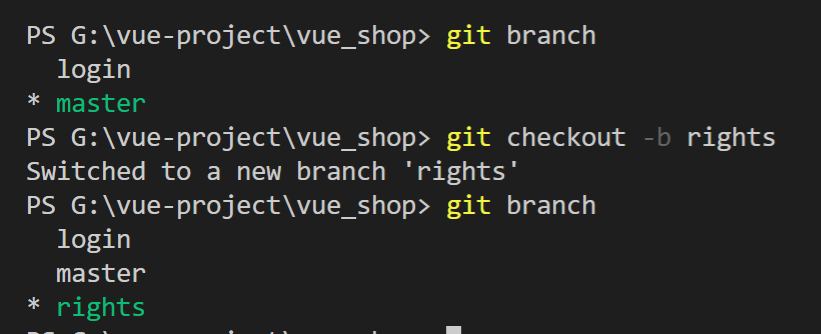
Then we push the local branch to the cloud:
Then we go to gitee cloud and see a new branch: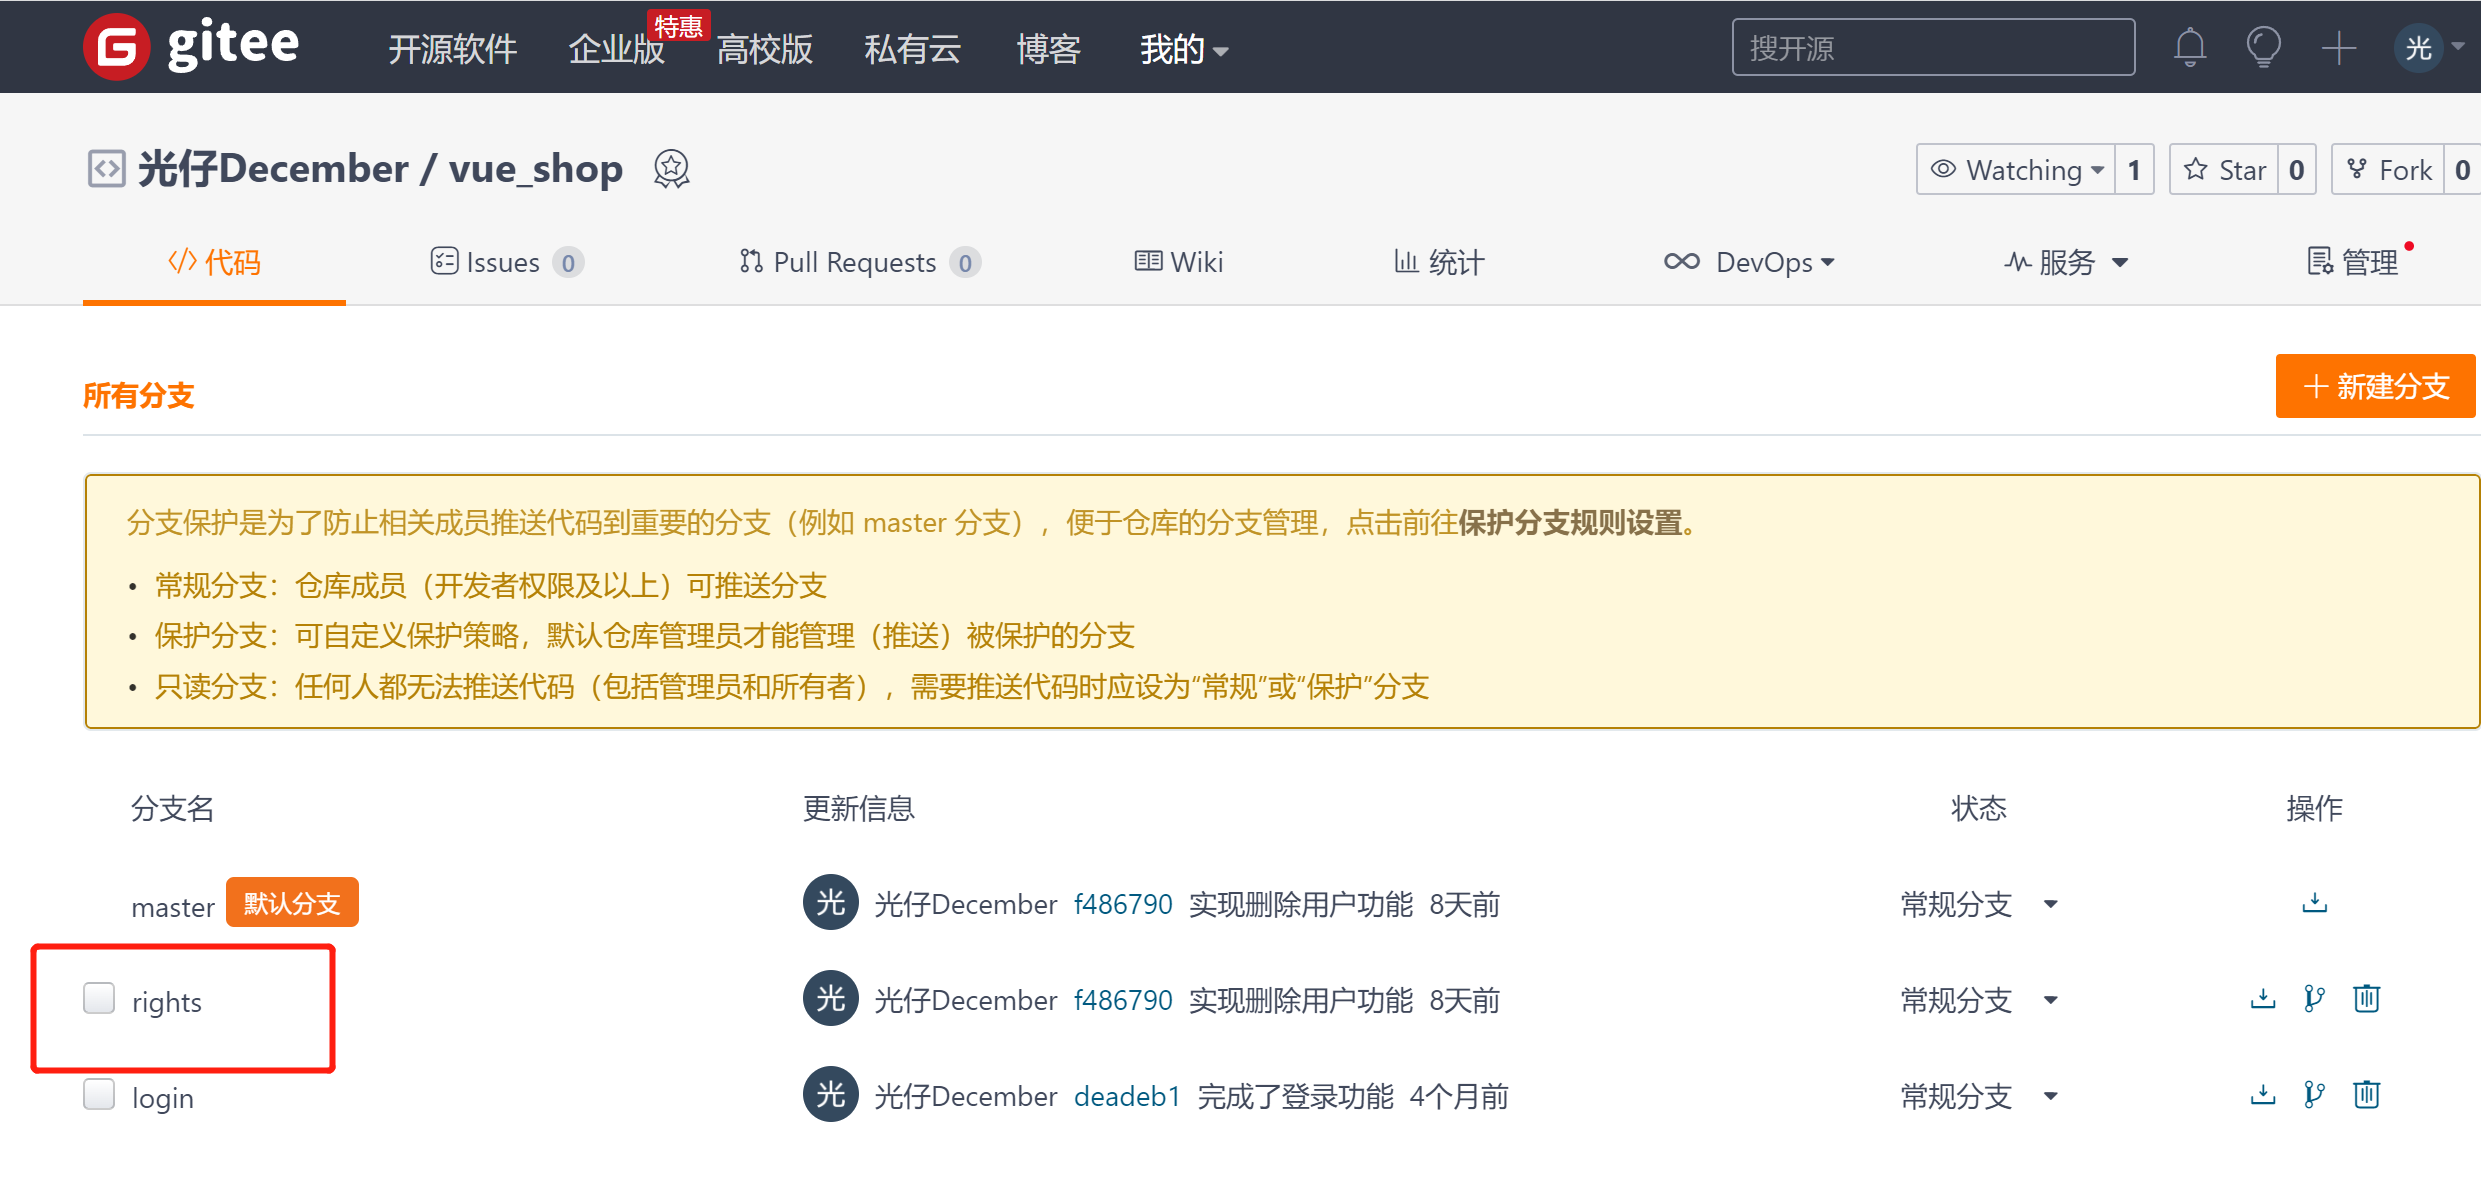
2, Create components and define routing rules
We create a folder named "power" under components, and then we create all module codes related to permission management in this folder. Then create a Rights.vue file under power: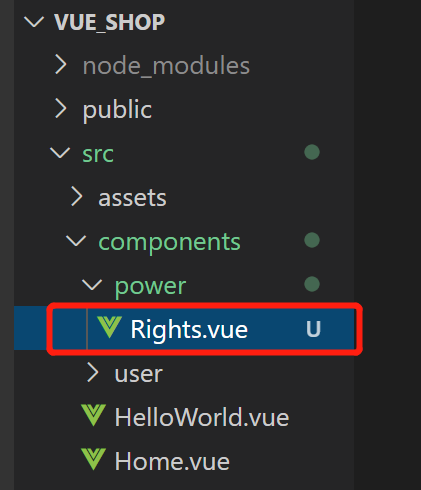
Then write the basic code structure in the Rights.vue file:
<template>
    <div>
        <h3>Permission list component page</h3>
    </div>
</template>

<script>
export default {

}
</script>

<style scoped>

</style>
Then we introduce the Rights component under "router/index.js" and define routing rules in routing rules:
import Vue from 'vue'
import VueRouter from 'vue-router'
import Login from '../components/Login.vue' //Reference Login component
import Home from '../components/Home.vue'
import Welcome from '../components/Welcome.vue'
import Users from '../components/user/Users.vue'
import Rights from '../components/power/Rights.vue'

Vue.use(VueRouter)

const routes = []

const router = new VueRouter({
  routes: [
    { path: '/', redirect: '/login' },
    { path: '/login', component: Login }, //Define the routing address to access the page
    {
      path: '/home',
      component: Home,
      redirect: '/welcome',
      children: [
        {path:'/welcome',component:Welcome},
        {path:'/users',component:Users},
        {path:'/rights',component:Rights}
      ]
    }
  ]
})
//Mount route navigation guard
//to is the path we jump, from is the path from, and next is the release function
router.beforeEach((to,from,next)=>{
  //If the user visits the login page, it will be released directly
  if(to.path ==="/login") return next();
  //Get the saved token value from sessionStorage
  const tokenStr = window.sessionStorage.getItem("token");
  //No token, forced jump to login page
  if(!tokenStr) return next("/login");
  next();//Direct release with token
})

export default router
Then we refresh the page and click the permission management menu to be routed to the component just created: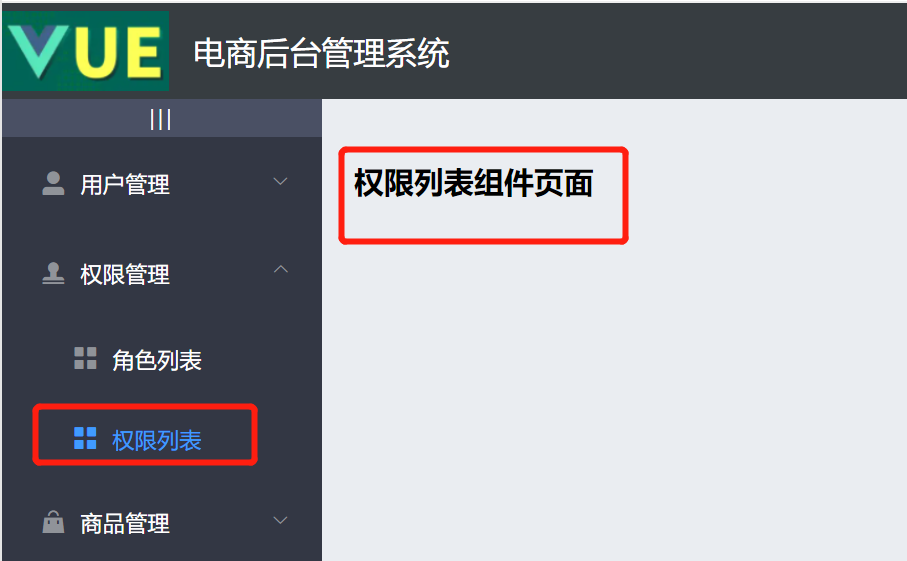
3, Draw basic layout of permission list
The final effect drawing is roughly as follows: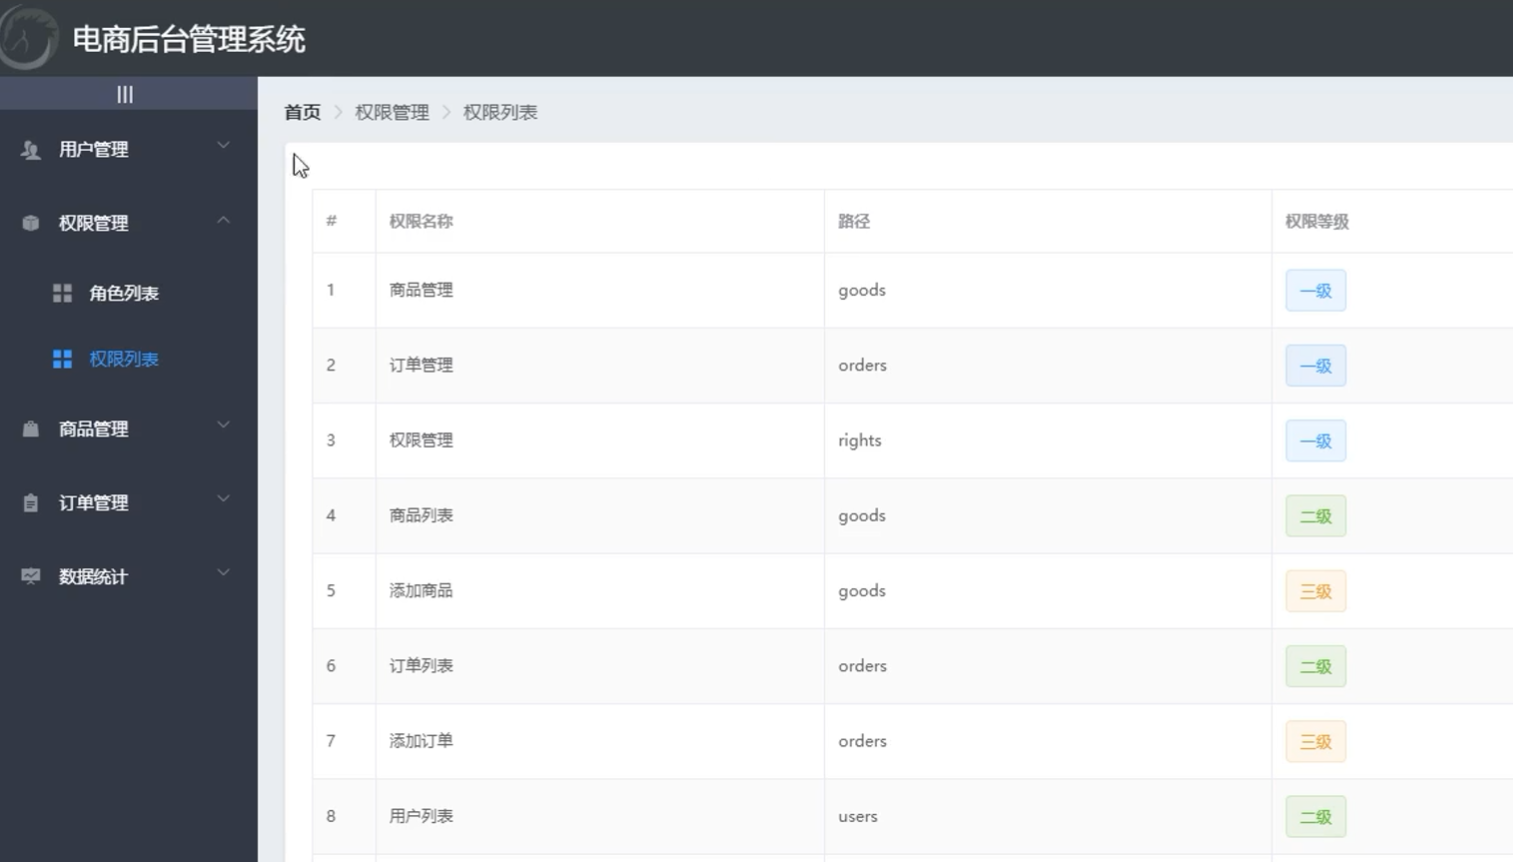
In the card view, a table is placed to display all permission lists.
Let's make the breadcrumb navigation and card view in the upper left corner first.
First, we will directly copy and modify the breadcrumb navigation in user management, and then create a card view area through "El card":
<template>
    <div>
        <!-- Breadcrumb navigation -->
        <el-breadcrumb separator-class="el-icon-arrow-right">
        <el-breadcrumb-item :to="{ path: '/home' }">home page</el-breadcrumb-item>
        <el-breadcrumb-item>Authority management</el-breadcrumb-item>
        <el-breadcrumb-item>Permission list</el-breadcrumb-item>
        </el-breadcrumb>

        <!-- Card view -->
        <el-card> 123</el-card>
    </div>
</template>

<script>
export default { }
</script>

<style scoped>

</style>
effect:
4, Get permission list data
The following is the API document for obtaining permission data: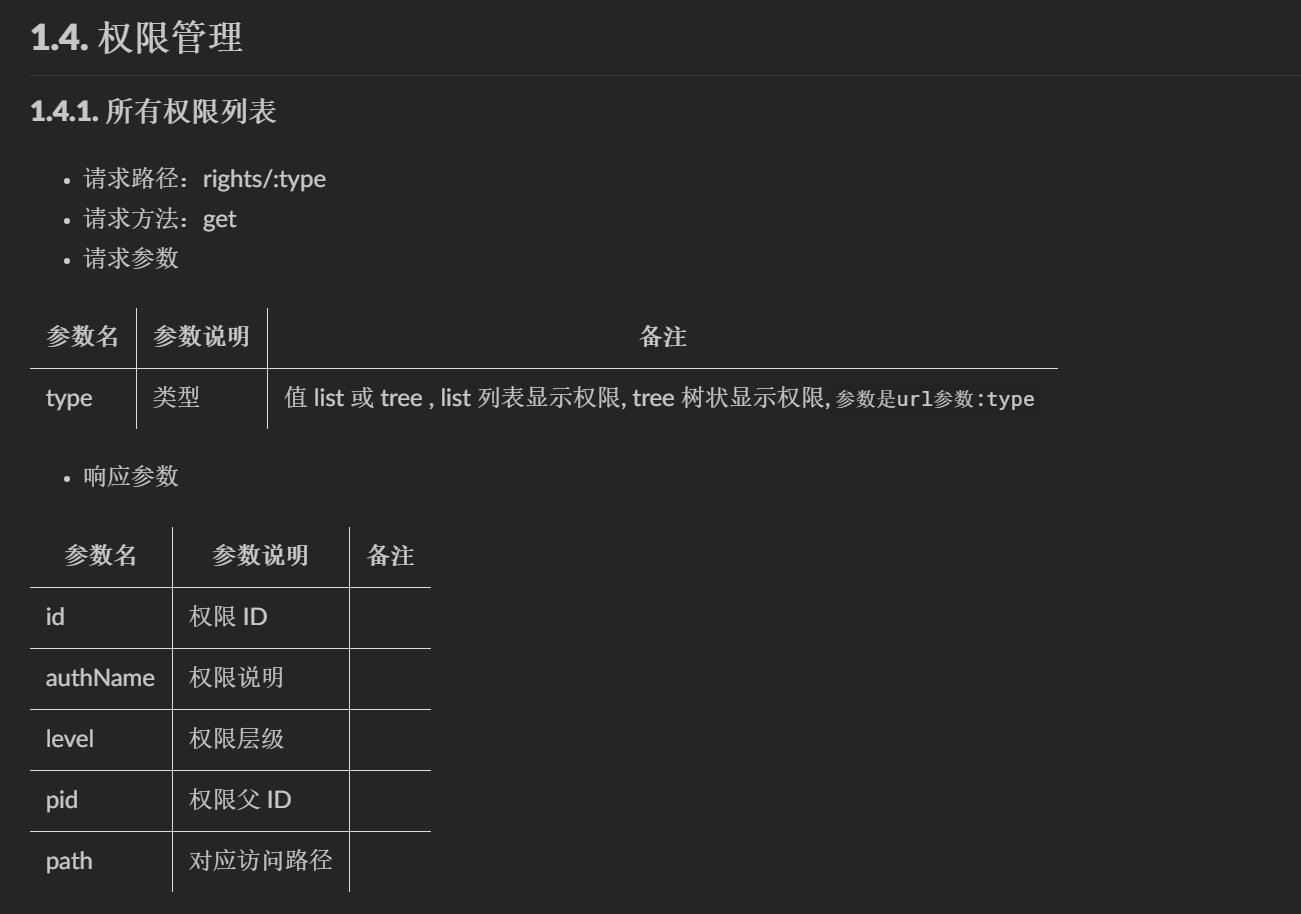
● response data type=list
 {
    "data": [
        {
            "id": 101,
            "authName": "Commodity management",
            "level": "0",
            "pid": 0,
            "path": null
        },
        {
            "id": 102,
            "authName": "Order management",
            "level": "0",
            "pid": 0,
            "path": null
        }
    ],
    "meta": {
        "msg": "Successfully obtained permission list",
        "status": 200
    }
}
● response data type=tree
  {
    data: [
      {
        id: 101,
        authName: 'Commodity management',
        path: null,
        pid: 0,
        children: [
          {
            id: 104,
            authName: 'Product list',
            path: null,
            pid: 101,
            children: [
              {
                id: 105,
                authName: 'Add item',
                path: null,
                pid: '104,101'
              }
            ]
          }
        ]
      }
    ],
    meta: {
      msg: 'Successfully obtained permission list',
      status: 200
    }
  }
We can see that there are two kinds of structures that can be obtained, one is list and the other is tree. At present, we only need to get the top-level list.
So we're at rights In the method area of Vue, create a new list object named "rightsList" to carry the permission management information array. Then, execute the method of obtaining user list data in the life cycle function "created()" (that is, when the page is loaded):
<script>
export default {
    date(){
        return {
            //Permission list
            rightsList: []
        }
    },
    created(){
        //Get all permission information
        this.getRightsList();
    },
    methods:{
        //Get permission list
        getRightsList(){

        }
    }
}
</script>
Here we define a method called "getRightsList", in which we write the code to obtain the user list:
//Get permission list
async getRightsList(){
    const {data:res} = await this.$http.get('rights/list');
    if(res.meta.status!==200){
        return this.$message,error("Failed to get permission list!");
    }
    this.rightsList = res.data;
}
Then we need to render the obtained data to the table. We write the table in the card view area above:
<template>
    <div>
        <!-- Breadcrumb navigation -->
        <el-breadcrumb separator-class="el-icon-arrow-right">
        <el-breadcrumb-item :to="{ path: '/home' }">home page</el-breadcrumb-item>
        <el-breadcrumb-item>Authority management</el-breadcrumb-item>
        <el-breadcrumb-item>Permission list</el-breadcrumb-item>
        </el-breadcrumb>

        <!-- Card view -->
        <el-card>
            <el-table>
                <el-table-column type="index"></el-table-column>
                <el-table-column label="Permission name" prop="authName"></el-table-column>
                <el-table-column label="route" prop="path"></el-table-column>
                <el-table-column label="privilege level" prop="level"></el-table-column>
            </el-table>
        </el-card>
    </div>
</template>
Refresh the page and we can see that the data has been displayed: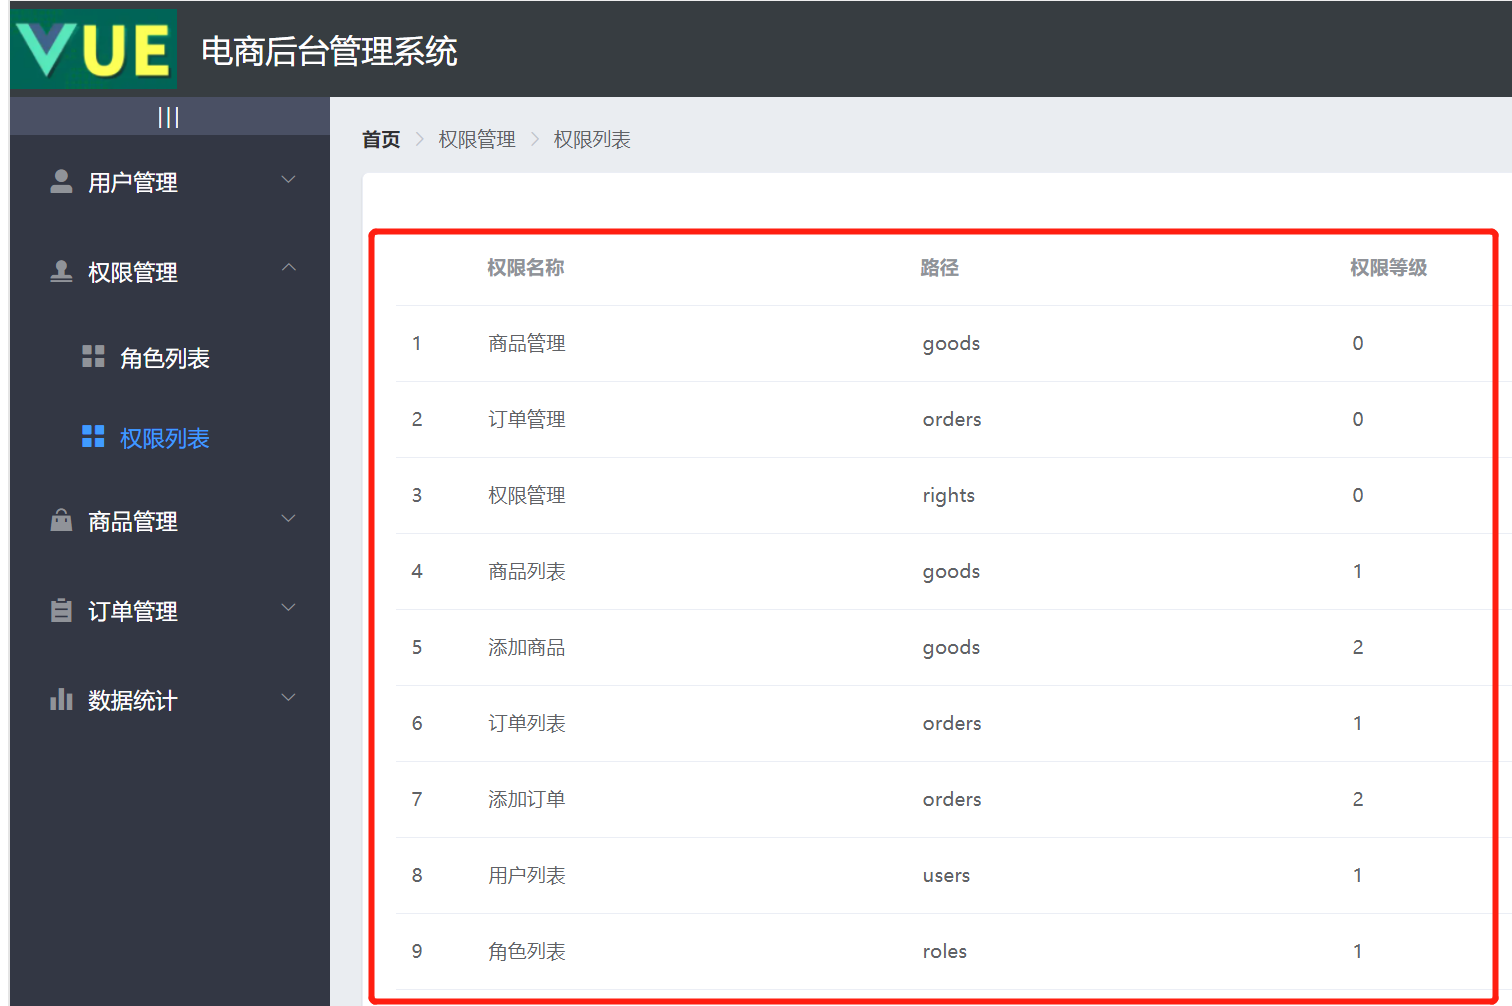
Then let's beautify the table. First, add borders for all tables, and then set zebra color change, that is, add a border and stripe attribute to El table:
<el-table :data="rightsList" border stripe>
effect: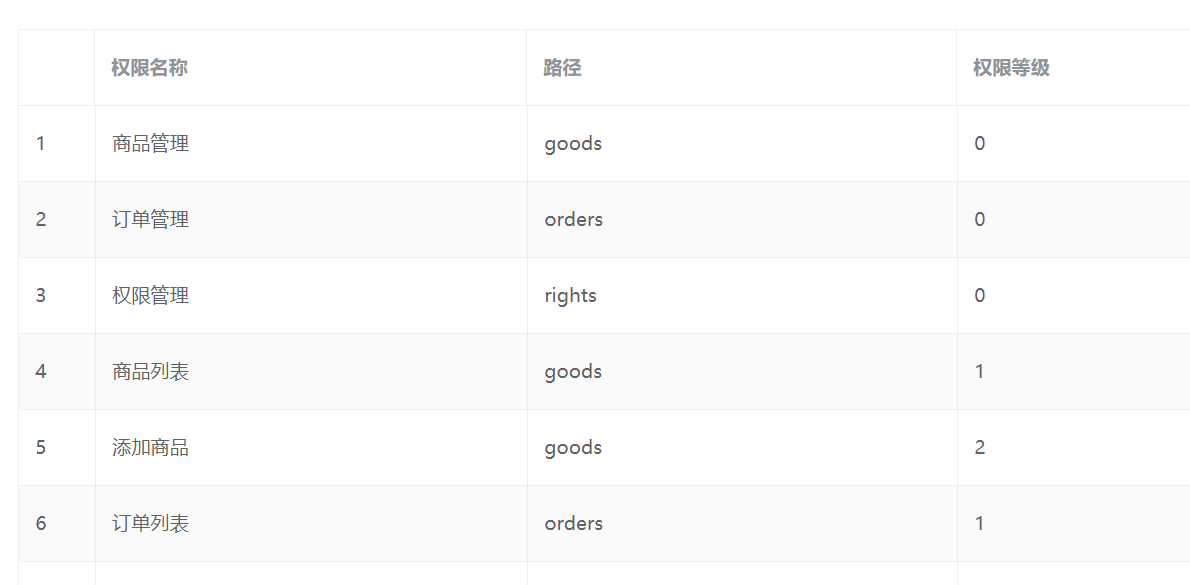
Then let's beautify the permission level column (at present, they are all three numbers of 0 / 1 / 2). We modify the level to a colored area block, as follows: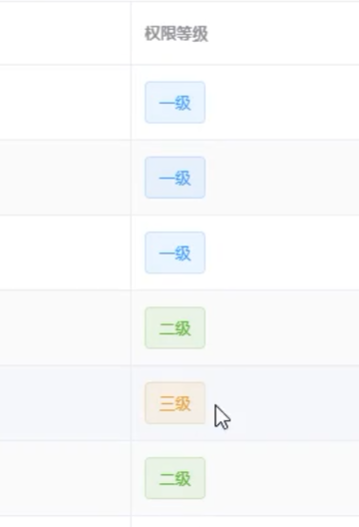
At this time, we need to use the Tag tag of element UI: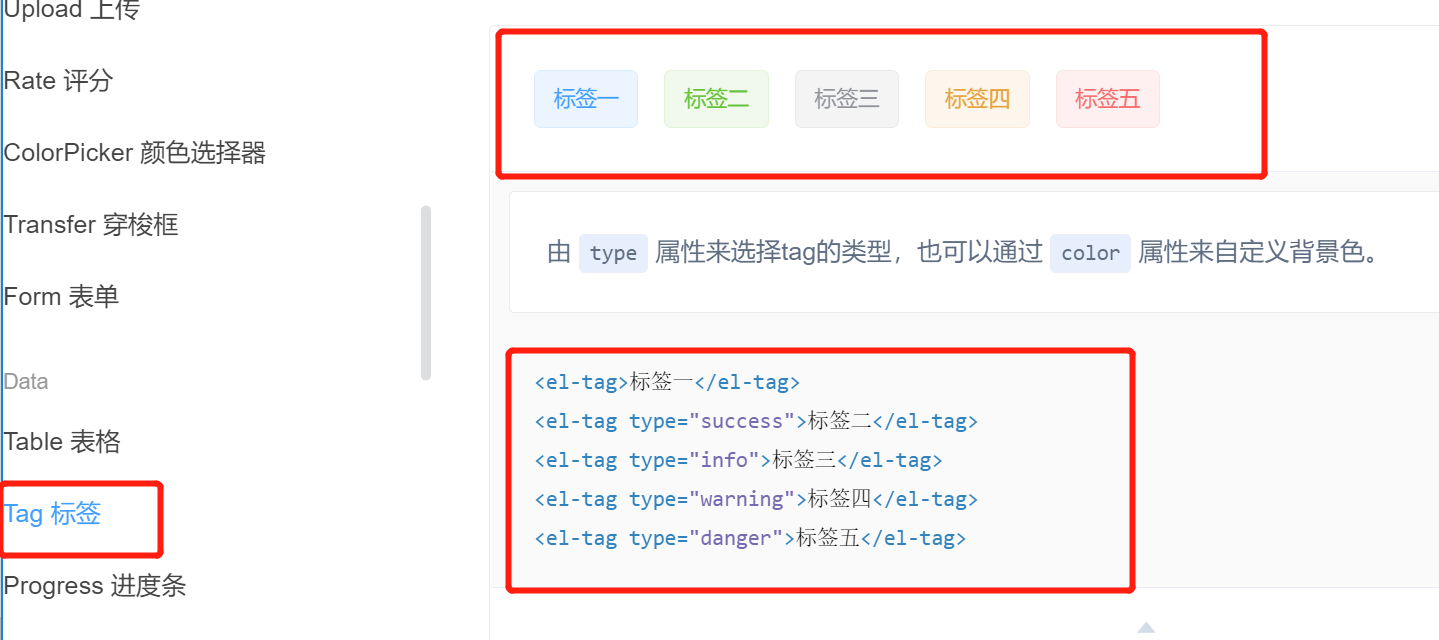
We are at element JS to register a Tag component:
import Vue from 'vue'
import { Button, Form, FormItem, Input, Message, Container,
    Header, Aside, Main, Menu, Submenu, MenuItem, MenuItemGroup,
    Breadcrumb,BreadcrumbItem,Card,Row,Col,Table,TableColumn,Switch,
    Tooltip,Pagination,Dialog,MessageBox,Tag } from 'element-ui'

Vue.use(Button);Vue.use(Form);Vue.use(FormItem);Vue.use(Input);
Vue.use(Container);Vue.use(Header);Vue.use(Aside);Vue.use(Main);
Vue.use(Menu);Vue.use(Submenu);Vue.use(MenuItem);Vue.use(MenuItemGroup);
Vue.use(Breadcrumb);Vue.use(BreadcrumbItem);Vue.use(Card);Vue.use(Row);
Vue.use(Col);Vue.use(Table);Vue.use(TableColumn);Vue.use(Switch);Vue.use(Tooltip);
Vue.use(Pagination);Vue.use(Dialog);Vue.use(Tag);
Vue.prototype.$message = Message
Vue.prototype.$confirm = MessageBox.confirm
Then, in the permission level list in table, use the scope slot to define different data and display different effects:
<!-- Card view -->
<el-card>
    <el-table :data="rightsList" border stripe>
        <el-table-column type="index"></el-table-column>
        <el-table-column label="Permission name" prop="authName"></el-table-column>
        <el-table-column label="route" prop="path"></el-table-column>
        <el-table-column label="privilege level" prop="level">
            <template slot-scope="scope">
                <el-tag v-if="scope.row.level === '0'">class a</el-tag>
                <el-tag v-else-if="scope.row.level === '1'" type="success">second level</el-tag>
                <el-tag v-else type="warning">Tertiary</el-tag>
            </template>
        </el-table-column>
    </el-table>
</el-card>
effect: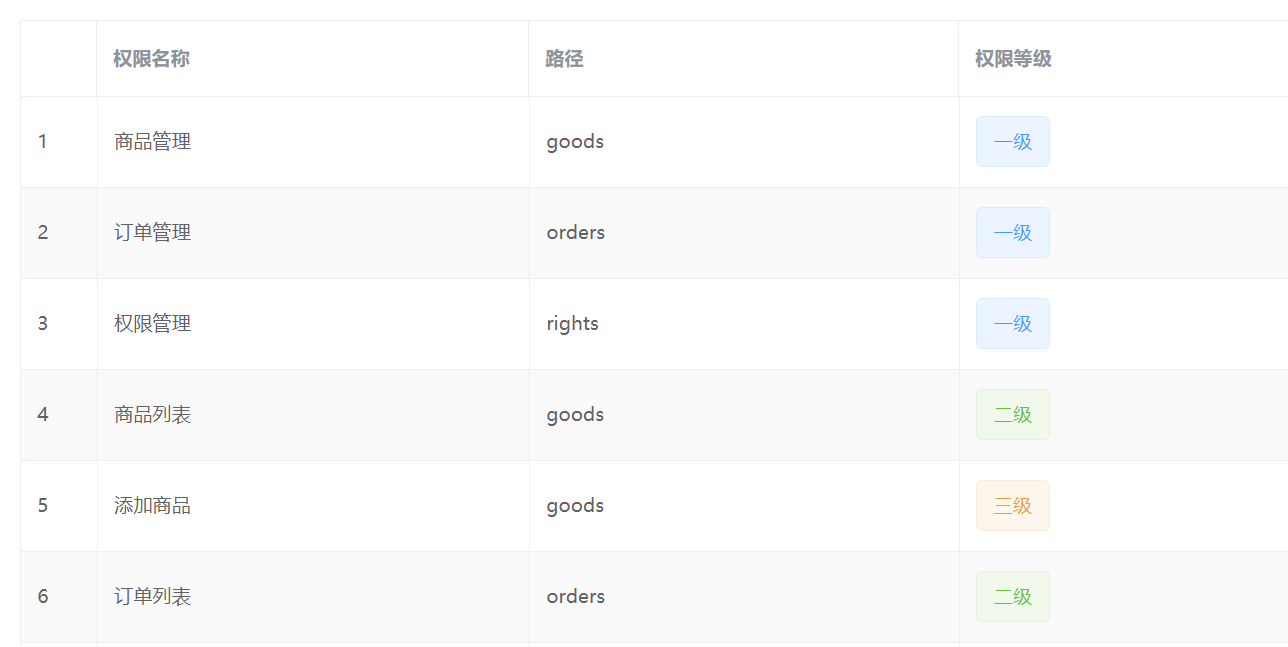
So far, our permission list function has been written.
Next, let's introduce the relationship among users, roles and permissions.
Reference: dark horse programmer (www.itheima.com) Vue project practical teaching video
Please indicate the source for Reprint: https://blog.csdn.net/u013517797/article/details/122521428