catalogue
I Preparation for creating vue project
1. Execute the create project command
8. Select the preset ESLine rule
11. Select installation method
12. Project creation and dependent automatic installation
II cesium installation configuration
3. Create cesium test component
III Supplement the error handling of npm run dev
I Preparation for creating vue project
Note: the version using Vue cli scaffold is 2.9.6
git Download and install for source code management
node.js Try to use a lower version (the node.js version used here is v12.14) and try not to be too high;
You can download and install the above by yourself. I won't repeat it; Next, let's start creating the project
1. Execute the create project command
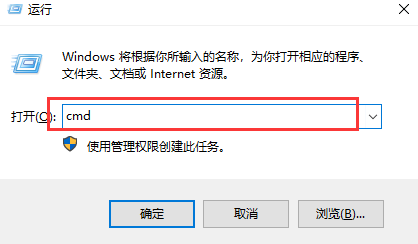
If node. Is installed JS press and hold win+r to enter run. Enter cmd to open the command run page for the administrator, as shown in the figure below

Check node JS and vue versions, as shown below

Install global Vue cli
npm install vue-cli -g
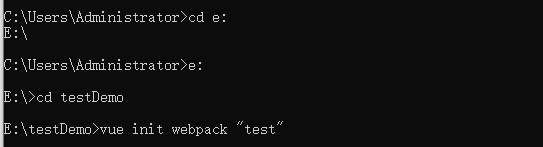
Enter the directory of the project to be created through the cd command and execute the instruction. The created project will be stored in the directory and execute the command of creating the project. The project name can be quoted "test", as shown in the figure below
vue init webpack test
2. Project name
If the default test is the project name, press enter to continue. Otherwise, enter the project name to be created. Chinese and uppercase are not supported;
? Project name (test)

3. Project description
You can give a brief description of this item. By default, press enter to the next step
? Project description (A Vue.js project)

4. Author description
The default is the author information configured in vue. Enter the next step directly by default
? Author (.......@126.com>)

5. Compilation method
The compilation method of vue can be selected by the user with the up and down keys and determined by pressing enter. By default, enter directly
? Vue build (User arrow keys)
> Runtime + Compiler: recommended for most users
Runtime-only: about 6KB lighter min+gzip, but templates (or any Vue-specific HTML) are ONLY allowed in .vue files -render functions are required elsewhere
 Translate the above:
Vue compilation method? (the user can use up and down keys to select and enter to confirm)
>Runtime + compiler: recommended for most users
Runtime only: about 6KB lighter than min+gzip, but templates (or any vue specific HTML) are only allowed in Used in vue files - rendering functions are required elsewhere
6. Is vue routing installed
Default installation route, enter # Y # and press enter to continue
? Install vue-router? (Y/n)
7. Whether to use ESLine
Use ESLine to restrict code writing style. ESLine is a tool to check syntax specification. Enter Y and continue
? Use ESLint to lint your code?(Y/n)
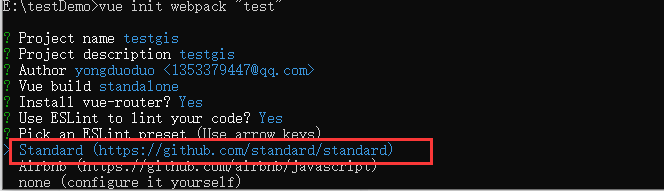
8. Select the preset ESLine rule
Select the default standard specification and press enter to continue
? Pick an ESLint preset (User arrow keys)
> Standard (https://github.com/standard/standard)
Airbnb (https://github.com/airbnb/javascript)
none (configure it yourself)
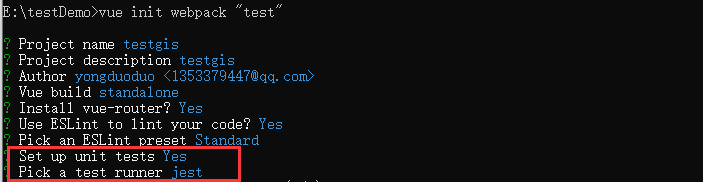
9. Set up unit test
The test unit is not created by default. Enter n and press enter to continue;
To create a test unit, enter Y and press enter to continue. In the next step, press "jest" to continue
? Set up unit tests (Y/n)
10. Setting e2e
Use the Nightwatch framework to set the e2e test. Enter n by default and press enter to continue
? Setup e2e tests with Nightwatch?(Y/n)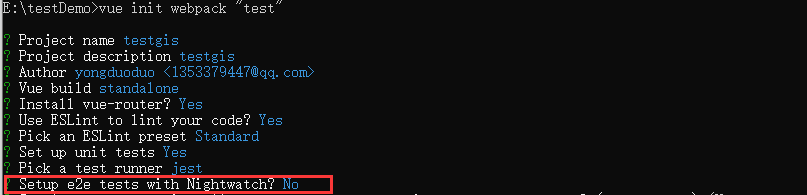
11. Select installation method
When creating a project, there are many dependent packages that need to be downloaded. You can use NPM tool or yarn tool class to download them automatically. By default, you can enter directly and install them using NPM
? Should we run `npm install` for you after the project has been created? (recommended) (Use arrow keys)
> Yes, use NPM
Yes, use Yarn
No, I will handle that myself
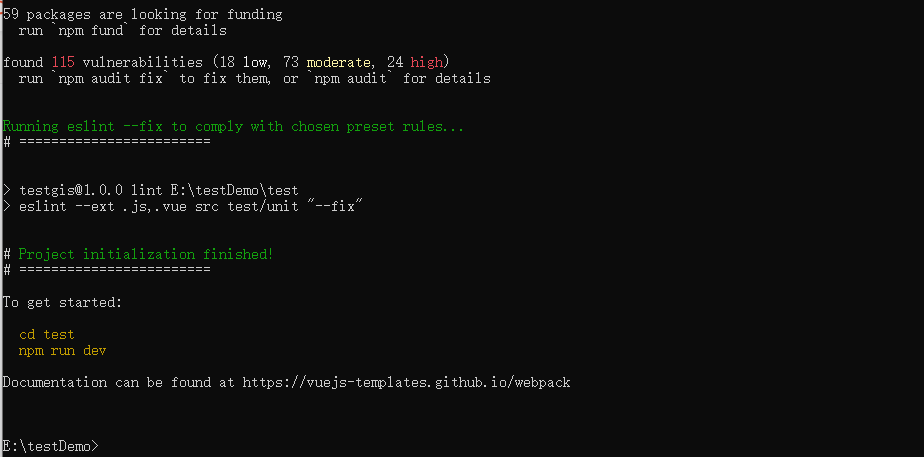
12. Project creation and dependent automatic installation
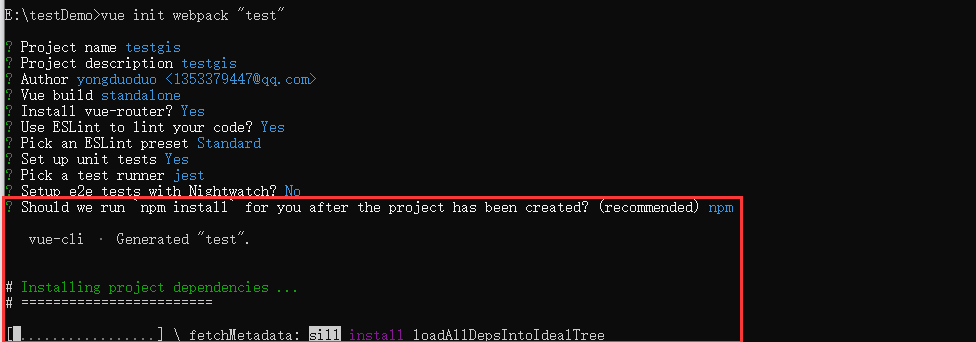 Waiting for installation
13. Operation project
Enter the following command lines in sequence
cd test
npm run dev
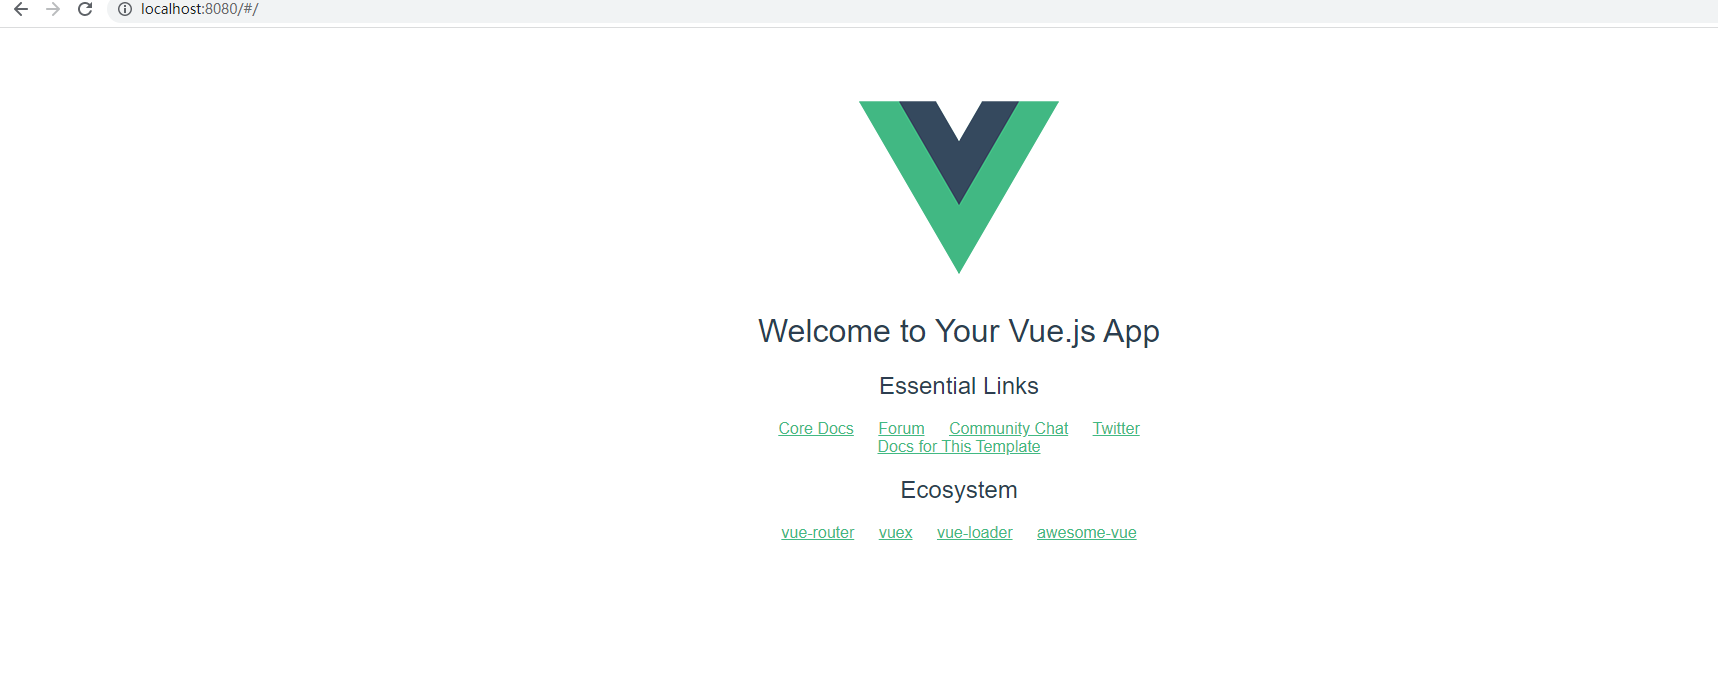
Wait for the following prompt to indicate that the project is running successfully
DONE Compiled successfully in 2768ms 11:33:49
I Your application is running here: http://localhost:8080
Project access address, access the following address in the browser
http://localhost:8080
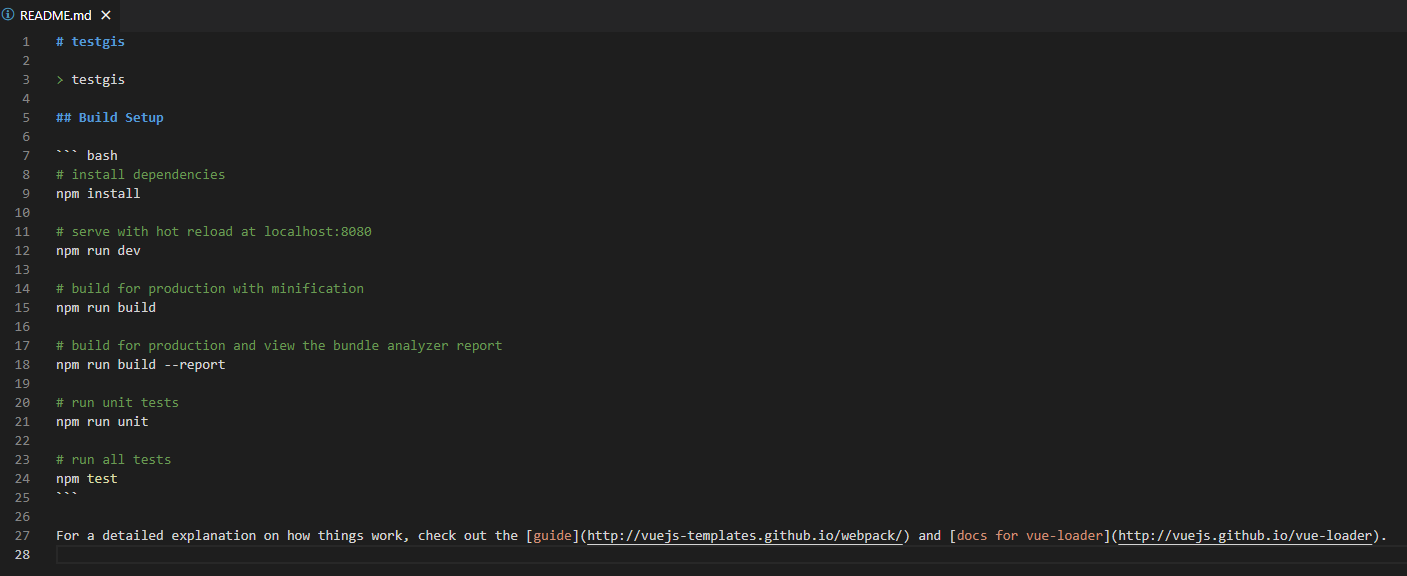
Note: view the startup command of the project in the root directory of the project View in MD file
14. Stop the project
Press ctrl + c in the command window, and the following prompt will appear. Enter Y and press enter to continue to stop the project

II cesium installation configuration
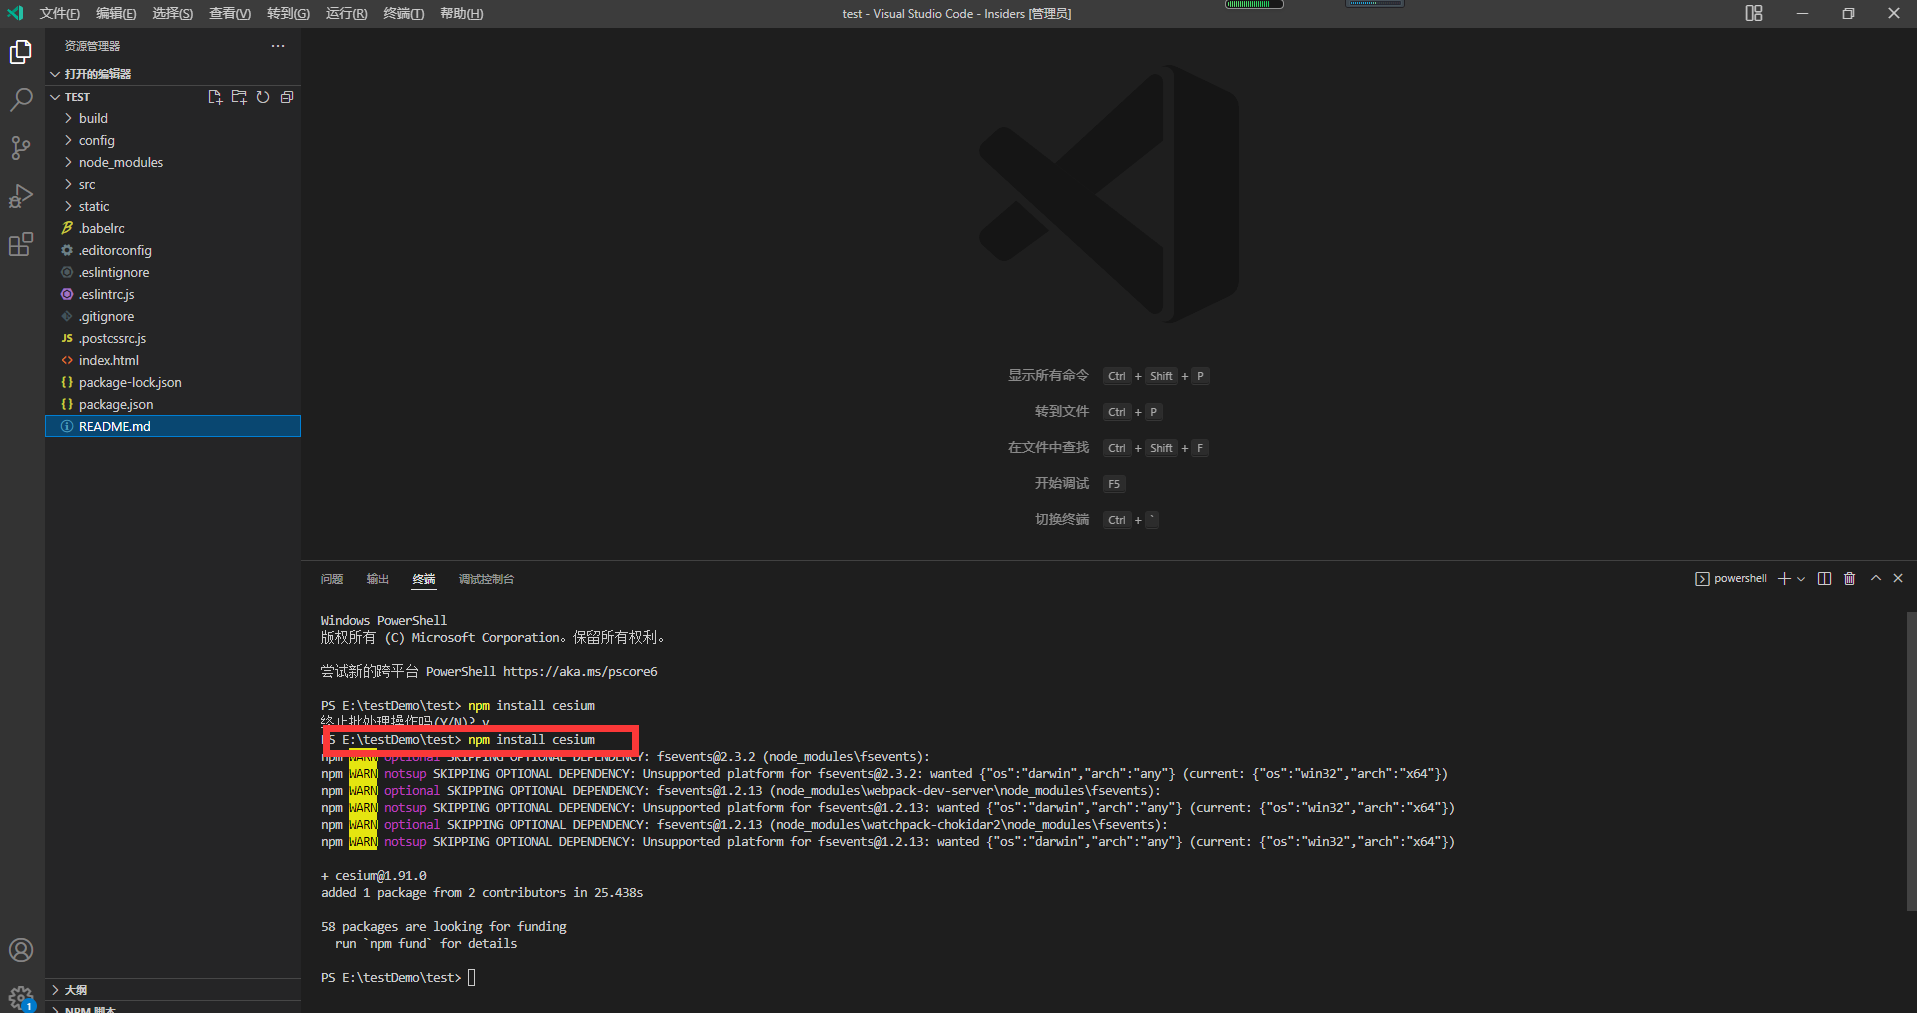
1. Install Cesium environment
Open the text project in the command window or VS Code development tool and execute the npm install cesium installation command, as shown in the following figure
Install the cesium environment in the command window

VS Code development tool installation cesium environment
The following errors may be reported when installing cesium. If not, they will be ignored
rollbackFailedOptional: verb npm-session ab1b9becfc5b03e4
terms of settlement:
1. Execute the following command to modify the resource image link of npm
npm config set registry http://registry.npm.taobao.org
2. Check whether the modification is successful
npm config get registry
The following results show that the modification is successful

2.Webpack configuration
Before configuration, those who have used Cesium know that it is a very complex library, which is difficult to package directly. We can't use it in main JS is directly imported into Cesium like Vue. The specific configuration is as follows
build/webpack.base.conf.js
1. Define Cesium source code path
'use strict'
const path = require('path')
const utils = require('./utils')
const config = require('../config')
const vueLoaderConfig = require('./vue-loader.conf')

// cesium configuration
const cesiumSource = '../node_modules/cesium/Source'
2. Add sourcePrefix: '' to output to let webpack correctly handle multiline strings
3. Configure amd} parameters
4. Add unknowncontextcritical after rules in module: false
module.exports = {
  context: path.resolve(__dirname, '../'),
  entry: {
    app: './src/main.js'
  },
  output: {
    path: config.build.assetsRoot,
    filename: '[name].js',
    publicPath: process.env.NODE_ENV === 'production'
      ? config.build.assetsPublicPath
      : config.dev.assetsPublicPath,
    sourcePrefix: ' ' // cesium configuration
  },
  // cesium configuration -- start
  amd:{
      toUrlUndefined: true
  },
  // cesium configuration -- end
  resolve: {
    extensions: ['.js', '.vue', '.json'],
    alias: {
      'vue$': 'vue/dist/vue.esm.js',
      '@': resolve('src'),
		  'cesium': path.resolve(__dirname, cesiumSource) // cesium configuration
    }
  },
  module: {
    rules: [
      // ...(config.dev.useEslint ? [createLintingRule()] : []),
      {
        test: /\.vue$/,
        loader: 'vue-loader',
        options: vueLoaderConfig
      },
      {
        test: /\.js$/,
        loader: 'babel-loader',
        include: [resolve('src'), resolve('test'), resolve('node_modules/webpack-dev-server/client')]
      },
      {
        test: /\.(png|jpe?g|gif|svg)(\?.*)?$/,
        loader: 'url-loader',
        exclude: [resolve('src/assets/icons')], // svg configuration
        options: {
          limit: 10000,
          name: utils.assetsPath('img/[name].[hash:7].[ext]')
        }
      },
      {
        test: /\.(mp4|webm|ogg|mp3|wav|flac|aac)(\?.*)?$/,
        loader: 'url-loader',
        options: {
          limit: 10000,
          name: utils.assetsPath('media/[name].[hash:7].[ext]')
        }
      },
      {
        test: /\.(woff2?|eot|ttf|otf)(\?.*)?$/,
        loader: 'url-loader',
        options: {
          limit: 10000,
          name: utils.assetsPath('fonts/[name].[hash:7].[ext]')
        }
      }
    ],
    unknownContextCritical: false // cesium configuration
  }
}
build/webpack.dev.conf.js
1. Define the Cesium source code path and Cesium Workers path (Note: the node_modules here is different from the configuration in webpack.base.conf.js, and there is no.. /)
// cesium configuration
const cesiumSource = 'node_modules/cesium/Source'
const cesiumWorkers = '../Build/Cesium/Workers'
2. Siceum definition_ BASE_ URL variable
3. Add the following plug-ins to plugins to copy static resources
  plugins: [
    new webpack.DefinePlugin({
      'process.env': require('../config/dev.env'),
      'CESIUM_BASE_URL': JSON.stringify('') // cesium configuration
    }),
    new HtmlWebpackPlugin({
      ......
    }),
    new CopyWebpackPlugin([ { from: path.join(cesiumSource, cesiumWorkers), to: 'Workers' } ]), // cesium configuration
    new CopyWebpackPlugin([ { from: path.join(cesiumSource, 'Assets'), to: 'Assets' } ]), // cesium configuration
    new CopyWebpackPlugin([ { from: path.join(cesiumSource, 'Widgets'), to: 'Widgets' } ]), // cesium configuration
    new CopyWebpackPlugin([ { from: path.join(cesiumSource, 'ThirdParty/Workers'), to: 'ThirdParty/Workers' } ]), // cesium configuration

    // copy custom static assets
    new CopyWebpackPlugin([
      ......
    ])
  ]
build/webpack.prod.conf.js
1. Define path
// cesium configuration
const cesiumSource = 'node_modules/cesium/Source';
const cesiumWorkers = '../Build/Cesium/Workers';
2. Define 'cesium'_ BASE_ URL 'variable
3. Add the following plug-ins to plugins to copy static resources
plugins: [
    // http://vuejs.github.io/vue-loader/en/workflow/production.html
    new webpack.DefinePlugin({
      'process.env': env,
      'CESIUM_BASE_URL': JSON.stringify('static') // cesium configuration
    }),
    new UglifyJsPlugin({
      ......
    }),
    new ExtractTextPlugin({
      ......
    }),
    new OptimizeCSSPlugin({
      ......
    }),
    new HtmlWebpackPlugin({
      ......
    }),

    new CopyWebpackPlugin([ { from: path.join(cesiumSource, cesiumWorkers), to: 'static/Workers' } ]), // cesium configuration
    new CopyWebpackPlugin([ { from: path.join(cesiumSource, 'Assets'), to: 'static/Assets' } ]), // cesium configuration
    new CopyWebpackPlugin([ { from: path.join(cesiumSource, 'Widgets'), to: 'static/Widgets' } ]), // cesium configuration
    new CopyWebpackPlugin([ { from: path.join(cesiumSource, 'ThirdParty/Workers'), to: 'ThirdParty/Workers' } ]), // cesium configuration
    new CopyWebpackPlugin([ { from: 'ThirdParty', to: 'ThirdParty' } ]), // cesium configuration

    ......
  ]
4. ThirdParty folder creation
Create a new folder ThirdParty in the project root directory and put it into draco_decoder.wasm file is needed when loading gltf model files.
5,main.js configure global style
// cesium configuration
import widgets from "../node_modules/cesium/Source/Widgets/widgets.css"
Vue.prototype.widgets = widgets
3. Create cesium test component
<template>
  <div>
    <div id="map3DView">
  </div>
  </div>
</template>

<script>
const Cesium = require('cesium/Cesium')
let viewer = undefined

export default {
  name: 'map3DView',
  data () {
    return {
    }
  },
  mounted(){
    Cesium.Ion.defaultAccessToken = 'eyJhbGciOiJIUzI1NiIsInR5cCI6IkpXVCJ9.eyJqdGkiOiI0NzhhMDI0NC05NDUwLTRjZWYtOWI5Mi1mYzNjNWQ5OGQ1ZWQiLCJpZCI6NDU0MTEsImlhdCI6MTYyNjA4MTg2MX0.dn2cDGd6p2ar3atcOEwX9LVjmgqcBj1RCqVaWkwFEcU';
    viewer = new Cesium.Viewer("map3DView", {
      requestRenderMode: true, // Turn on the requested rendering mode
      maximumRenderTimeChange: Infinity, // Process simulation time change
      animation: false, // Do you want to create an animated widget, the instrument in the lower left corner
      baseLayerPicker: false, // Show layer selector
      fullscreenButton: false, // Whether to display full screen button
      geocoder: false, // Whether to display geocoder widget, query button in the upper right corner
      homeButton: false, // Show Home button
      infoBox: false, // Show message box
      shouldAnimate: true,  // Allow animation
      sceneModePicker: false, // Show 3D/2D selector
      selectionIndicator: false, // Whether to display the green mouse box of the pick indicator component
      timeline: true, // Show timeline
      navigationHelpButton: false, // Whether to display the help button in the upper right corner
      vrButton: false, // Whether to display dual screen
      scene3DOnly: true, // If set to true, all geometry is drawn in 3D mode to save GPU resources
      fullscreenElement: document.body, // HTML elements rendered at full screen
      allowDataSourcesToSuspendAnimation: false,
      navigationInstructionsInitiallyVisible: false,
      terrainProvider:
        Cesium.createWorldTerrain(),
      orderIndependentTranslucency: false,
      contextOptions: {
        webgl: {
          alpha: true,
          depth: true,
          stencil: true,
          antialias: true, //!mobilecheck(),
          premultipliedAlpha: true,
          //Via canvas To realize the screenshot of todataurl(), you need to set this item to true
          preserveDrawingBuffer: true,
          failIfMajorPerformanceCaveat: true
        }
      },
      requestWaterMask: true // Water Effects
    })
    viewer.shadows = true //Turns shadows on or off

    // Turn off anti aliasing
    viewer.scene.fxaa = true
    viewer.scene.postProcessStages.fxaa.enabled = true;

    //Enable frame rate detection
    viewer.scene.debugShowFramesPerSecond = true;

    // Turn on global illumination
    viewer.scene.globe.enableLighting = true

    //Change configuration, optimize performance
    viewer.scene.logarithmicDepthBuffer = true;
    // Cancel double click event - track the location
    viewer.cesiumWidget.screenSpaceEventHandler.removeInputAction(Cesium.ScreenSpaceEventType.LEFT_DOUBLE_CLICK);

    viewer.camera.flyTo({
      destination: Cesium.Cartesian3.fromDegrees(103.04756,37.48098,21119200),
      orientation: {
        heading: 6.07,
        pitch: -1.53,
      },
      duration: 5
    })
  }
}
</script>

<style lang="scss" scoped>
#map3DView{
  width: 100%;
  height: 100%;
  overflow: hidden;

  /* cesium De copyright */
    /deep/ .cesium-widget-credits {
      display: none !important;
      visibility: hidden !important;
    }

    /deep/ .cesium-widget-credits {
      display: none !important;
      visibility: hidden !important;
    }

    /* Hide timeline */
    /deep/ .cesium-viewer-timelineContainer{
      display: none;
    }

    /* Frame rate position control */
    /deep/ .cesium-performanceDisplay-defaultContainer{
      top: auto;
      bottom: 36px;
    }

    /* Hide frame rate name */
    /deep/ .cesium-performanceDisplay-throttled{
      display: none;
    }
  }
</style>
The operation results are as follows

So far, the creation of cesium project and installation configuration in vue have been completed perfectly;
III Supplement the error handling of npm run dev
When executing npm run dev, the following information appears and needs to be processed
You may use special comments to disable some warnings.
Use // eslint-disable-next-line to ignore the next line.
Use /* eslint-disable */ to ignore all warnings in a file.
The solution is as follows
Method 1: in webpack base. In the conf.js file, find the # rules node under the # module node and comment out this line
// ...(config.dev.useEslint ? [createLintingRule()] : []),
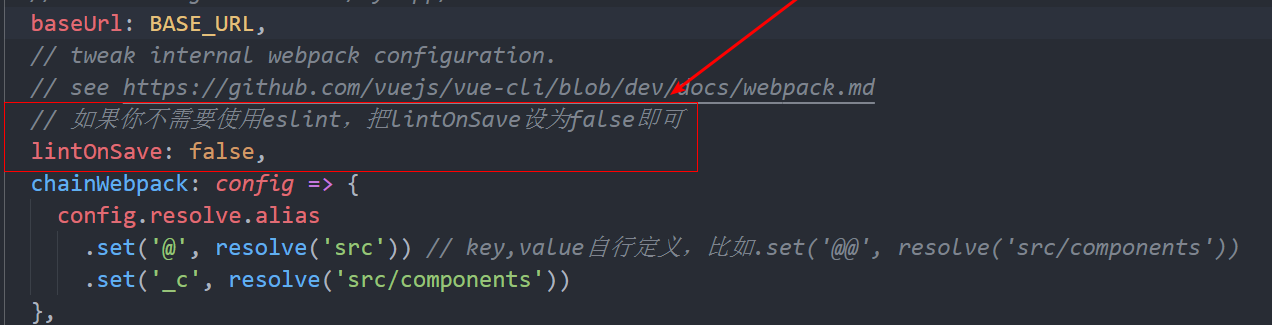
Second, if the newer version of vbp.ue is not used base. Conf.js configuration, but vue cli service configuration. Find} vue config. JS file, set lintOnSave to false
IV Framework source code
Download: Vue2+Cesium framework source code