preface
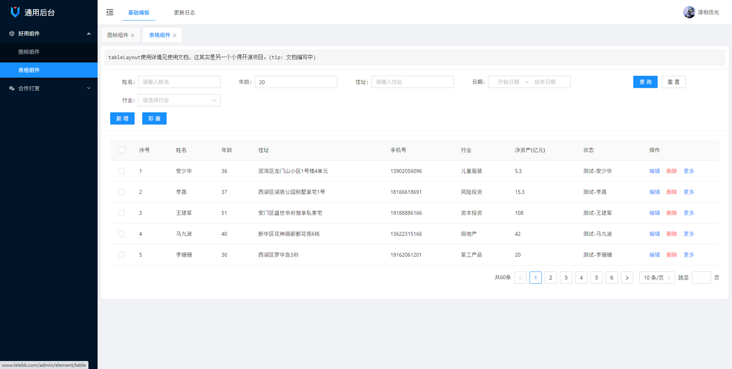
Vue3 antd admin is a background front-end solution, which is implemented based on vue3 and antd UI. It uses the latest front-end technology stack and integrates basic functions such as dynamic routing, authentication login and menu management. On this basis, it optimizes the style and solves the ignored problems such as no scrolling and no BFC isolation of other frame menus. Compared with the same type of framework, its logic is clearer and simpler, there is no redundant code, and it is faster to start. I believe that no matter what your needs are, this project can help you. good luck!
At present, the project is only the basic part completed, and there are still many places to be improved, such as H5 adaptation, page animation, instruction permissions, more easy-to-use components, etc. because I can't update quickly iteratively due to my usual work, I hope more developers will join in
This framework has been open source to github Portal
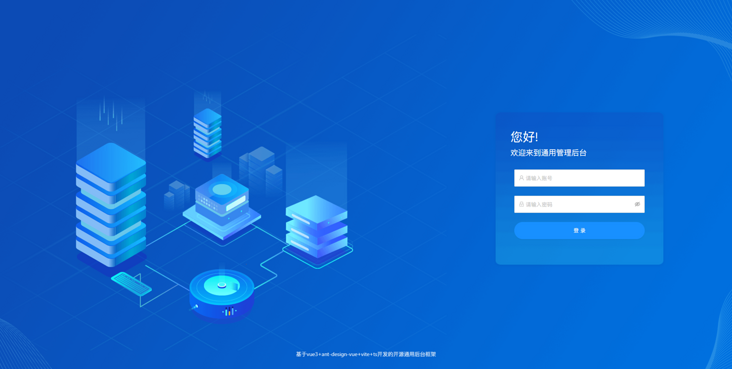
preview


The framework Basic Edition adheres to the concept of out of the box, without redundant component pages, clear code and no redundancy
Installation and use
1. Download front end project
# Clone project
git clone git@github.com:llyyayx/vue3-antd-admin.git

# Enter project directory
cd vue3-antd-admin

# Installation dependency
npm install

# Local development launch project
npm run dev
2. Interface configuration
After the first step, your front-end page can be accessed and opened normally, but the project depends on the api or the author's online address. You need to provide the following necessary interfaces and settings to proxy to your api address.
We do it ourselves
If you can't get the support from the background personnel for the time being, you can use the interface provided by the framework, which will be more convenient. You can download the interface provided by the vue3 vite admin example admin-nodeServe , which is the api actually used in the online example. You only need to enter the directory npm install npm run strat after downloading. The default port number is http://127.0.0.1:8010 , if you have a node foundation, you can modify the code to achieve the data and functions you need.
All interfaces must be configured in @ / API / login In ts, you can modify the url of the interface, but try not to modify the interface ts type specification!
a. Login interface
method: post
url: /login
interface specification
// Data format submitted to the background
export type LoginFrom = {
  username: string | undefined;
  password: string | undefined;
};
// Data format required to be returned in the background
export type LoginSuccess = {
  code: number;
  message: string;
  data?: T;
  token: string;
};
b. Get user information interface
method: get
url: /info
interface specification
// Data format submitted to the background
 None, header in token Authentication
// Data format required to be returned in the background
export type UserInfo = {
  code: number,
  message: string,
  data?: T,
  info: {
    // token
    token: string,
    // user name
    name: string,
    // head portrait
    avatar: string,
    // jurisdiction
    roles: string[],
  }
}
c. Menu interface
method: get
url: /menu
interface specification
// Data format submitted to the background
 None, header in token Authentication
// Data format required to be returned in the background
export type RouterData = {
  code: number,
  message: string,
  data: [
    {
       // Menu id
      id: number,
      // Routing address
      path: string,
      // Menu name
      name: string,
      // The relative location of the template file relative to the views folder
      component: string,
      // Route name (must be unique)
      key: string,
      // Redirect address
      redirect?: string,
      // Menu icon
      icon?: string,
      // Menu subset, page level, no configuration required
      children?: RouterObj[],
      // Parent id
      pid?: number,
      // Whether to hide the page / menu. The default is false and not hidden
      hidden?: boolean,
      // Whether to cache the page. The default is false
      keepAlive?: boolean
    }
  ]
}
c. Exit login interface
method: post
url: /logout
interface specification
export interface ResponseData<T = any> {
  code: number,
  message: string,
  data?: T
}
At this point, you can enjoy the use! Adding and deleting pages only needs to add and delete database data in the background, and the front end only needs to focus on page interaction.
If you want to understand the internal operation logic of the framework, please continue with the framework documentation Portal
How to contribute
Welcome to join us! Mention an Issue Or submit a Pull Request.
Pull Request:
- Fork code!
- Create your own branch: git checkout -b feat/xxxx
- Submit your modification: git commit -am 'feat(function): add xxxxx'
- Push your branch: git push origin feat/xxxx
- Submit pull request
Thank you for your reading and support!