preface
I believe that as a front-end developer, no matter using vue, react or Australian, you will not be unfamiliar with component and component-based development, and even have a lot of Taoism. But when it comes to native component development, many friends may scratch their heads. Is there any other operation? It's like people who often use Google to develop heard that IE suddenly supports ECMA specification, but web composites is not a new technology. Next, let's learn about this' new 'technology with me.
Introduction to Web Components
Web Components are a set of different technologies that allow you to create reusable custom elements whose functions are encapsulated outside your code and use them in your web applications. For specific introduction, please refer to the document. Web Components | MDN (mozilla.org),
Here we are talking about the three APIs of web components and the pits we stepped on.
Custom elements
Let's try to define the element ourselves for the first time.
<!DOCTYPE html>
<html lang="en">

<head>
  <meta charset="UTF-8">
  <meta http-equiv="X-UA-Compatible" content="IE=edge">
  <meta name="viewport" content="width=device-width, initial-scale=1.0">
  <title>Document</title>
</head>

<body>
  <hello-custom></hello-custom>
  <hello-custom></hello-custom>
  <hello-custom></hello-custom>
</body>
<script>
  class HelloCustom extends HTMLElement {
    constructor() {
      super();
      let hello = document.createElement('div');
      hello.innerHTML = "Test the custom element"
      this.append(hello)
    }
  }
  window.customElements.define('hello-custom', HelloCustom);
</script>

</html>
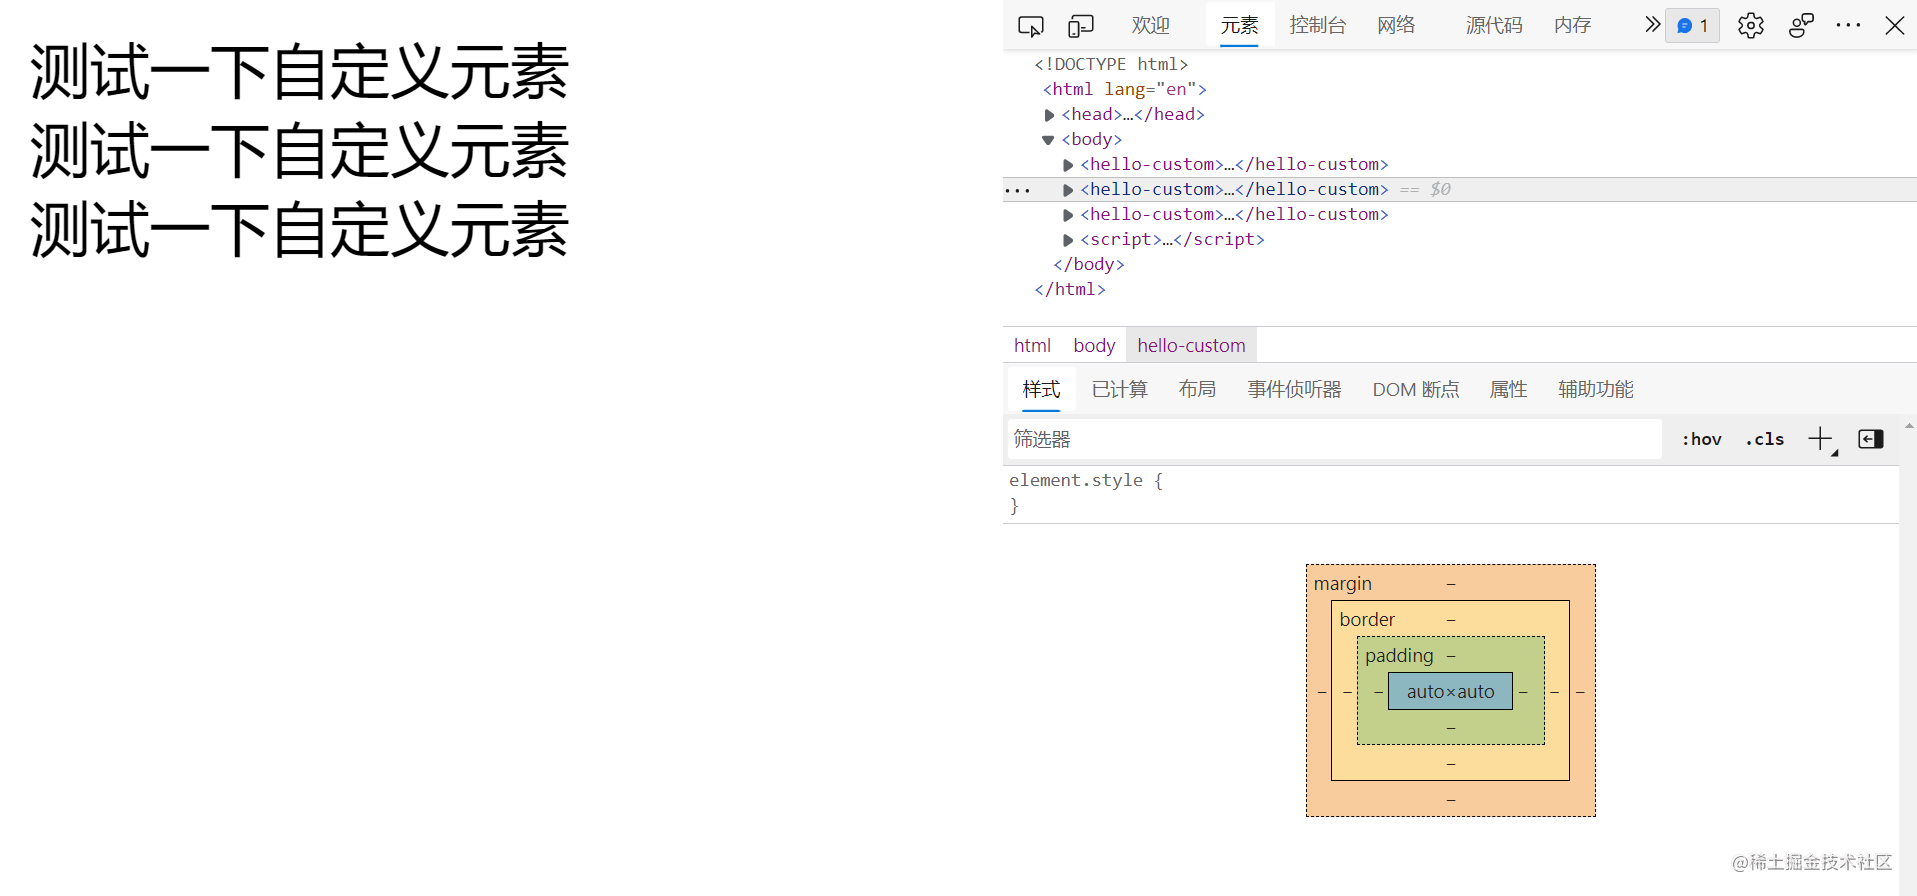
We can find that we mainly use a class to inherit the type of the original html tag. Then create the required element in the constructor. Finally, remember to use the this.append method to add the element to the current custom label. A custom label class is implemented, and then our component is registered by calling the define method in the global object customElements. Note: the custom label must have a hyphen in the middle. The browser defaults to a single word as a native label, and the one with a hyphen is a custom label
as you can see, it is really troublesome to generate dom with js, so we can use the second API: HTML templates
HTML templates
<body>
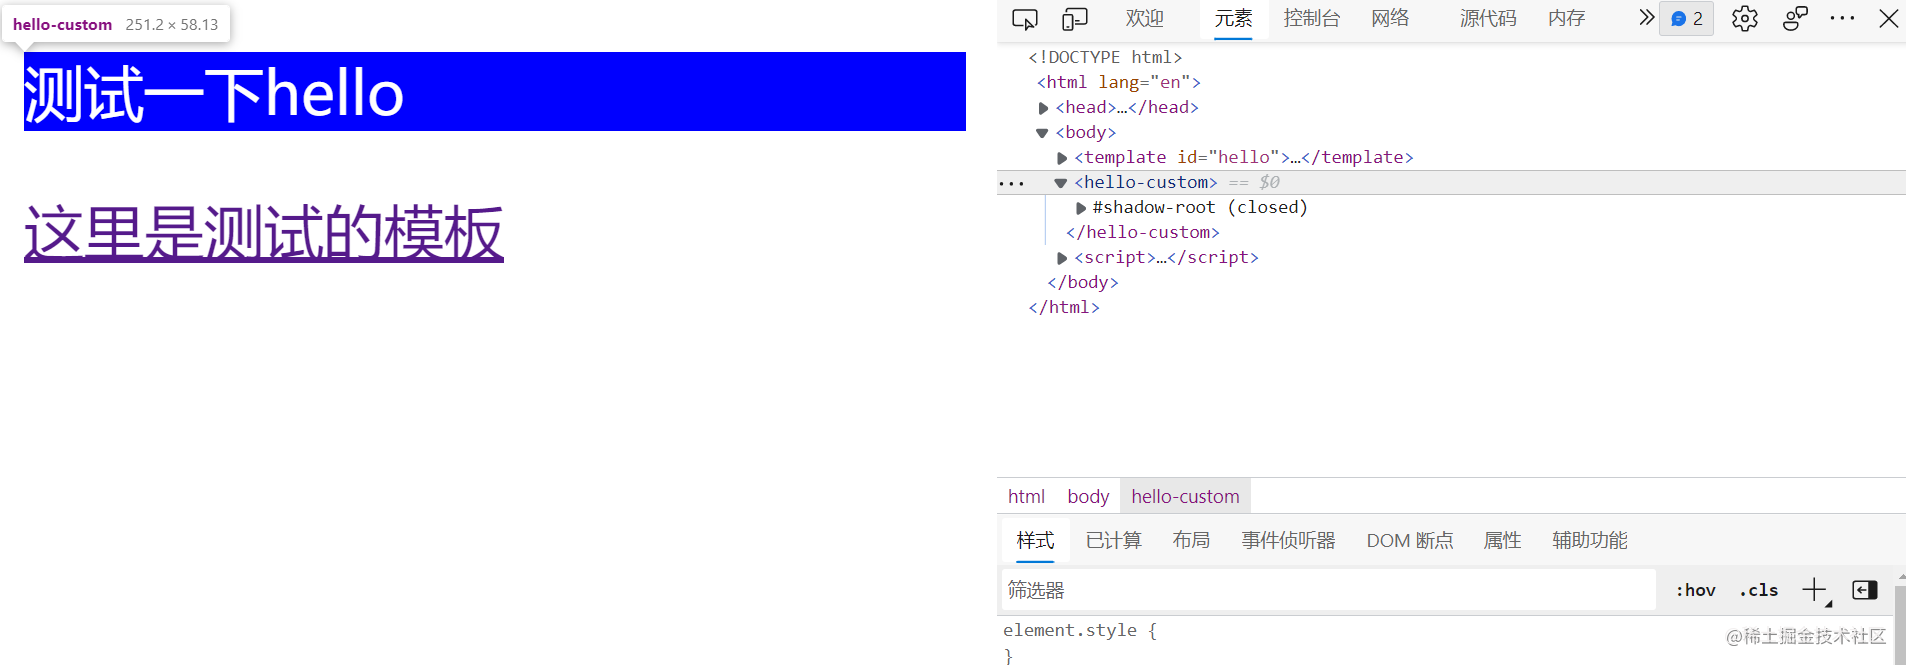
<template id="hello">
<p>Test it hello</p>
<a href="">Here is the test template</a>
</template>
</body>

You can see as like as two peas, the template tag is just a template, which is used to supply components, and it will not be rendered itself. If you see what this is thinking, is it exactly the same as Vue? In fact, the design of Vue is affected by the original components, but Vue design is more in-depth and more functional. Now vue3 supports the use of native components. You can take a look if you are interested. Vue and Web Components | Vue.js (vuejs.org)
To get back to business, how we use the template is actually very simple. Because the template may be reused, we can't directly use the template source. We need to copy it
var content = hello.content.cloneNode(true);.
  class HelloCustom extends HTMLElement {
    constructor() {
      super();
      let hello = document.getElementById("hello")
      var content = hello.content.cloneNode(true);
      this.append(content)
    }
  }

Seeing that there are smart readers here, we have to ask, how do you write the style? Can you also write it in js? In fact, you can write a style tag in the template tag. For example:
  <template id="hello">
    <style>
      p {
        background-color: blue;
        color: white;
      }
    </style>
      <p>Test it hello</p>
      <a href="">Here is the test template</a>
  </template>

So far, it seems that the native components have been built and the style components have been written, but I found another problem in the development process, that is, the elements rendered by template are real, and its style can be changed by external css. For example, I wrote:
  <style>
    #htllo_test {
      background-color: red;
    }
  </style>
  <template id="hello">
    <style>
      p {
        background-color: blue;
        color: white;
      }
    </style>
      <p id="htllo_test">Test it hello</p>
      <a href="">Here is the test template</a>
  </template>

The external css style acts on the component, and the weight is higher. It covers the internal style of the component, and the original blue background becomes red. Students who have used vue know that there is a scope attribute on the style tag of vue, which can prevent external styles from acting on internal components. How do we implement our native components? Here we use the last of the three APIs, Shadow DOM (Shadow DOM)
Shadow DOM
The so-called shadow dom, known by name, can shield external influence. It's very simple. We'll stop making those fancy statements and start straight.
  class HelloCustom extends HTMLElement {
      constructor() {
        super();
        this.shadow = this.attachShadow({mode:'closed'}) // open and closed control whether they can be accessed by external js respectively
        let hello = document.getElementById("hello")
        var content = hello.content.cloneNode(true);
        this.shadow.append(content)
      }
}
It can be found that it is very simple to use. You only need to add one piece of code
this.shadow = this.attachShadow({mode:'open'})
Then add our content to this.shadow when selecting Add.

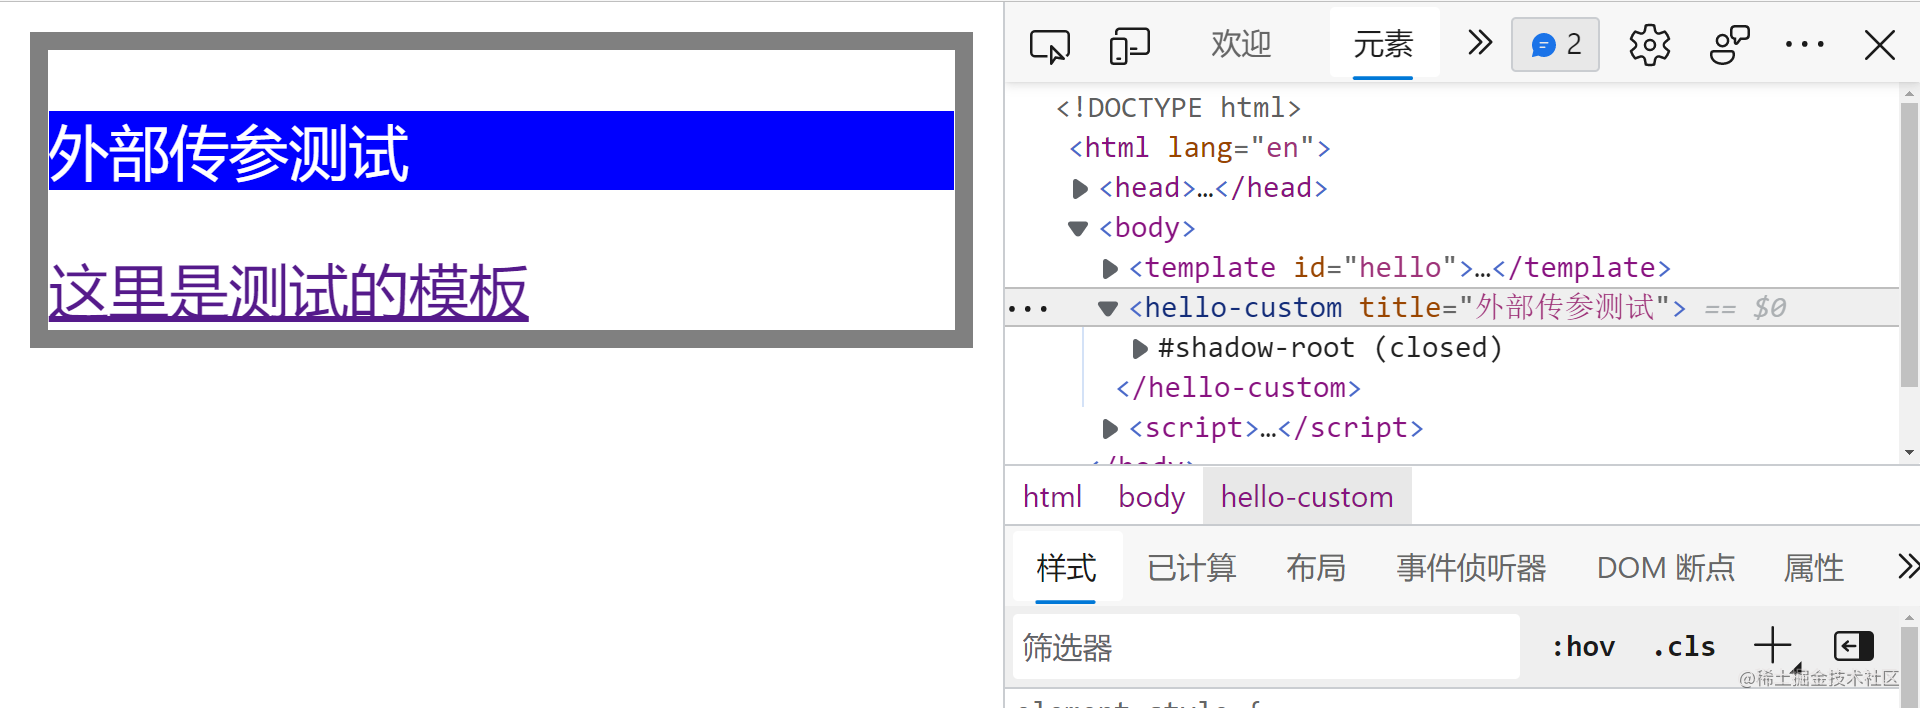
Looking at the effect again, we can find that the external style can no longer affect the interior, and the internal details and are hidden, so we can't view the internal structure. This is because we select the mode:closed when using shadow dom. If we select open, we can view it. Its essence is whether to allow external js to directly modify the DOM inside the operation component.
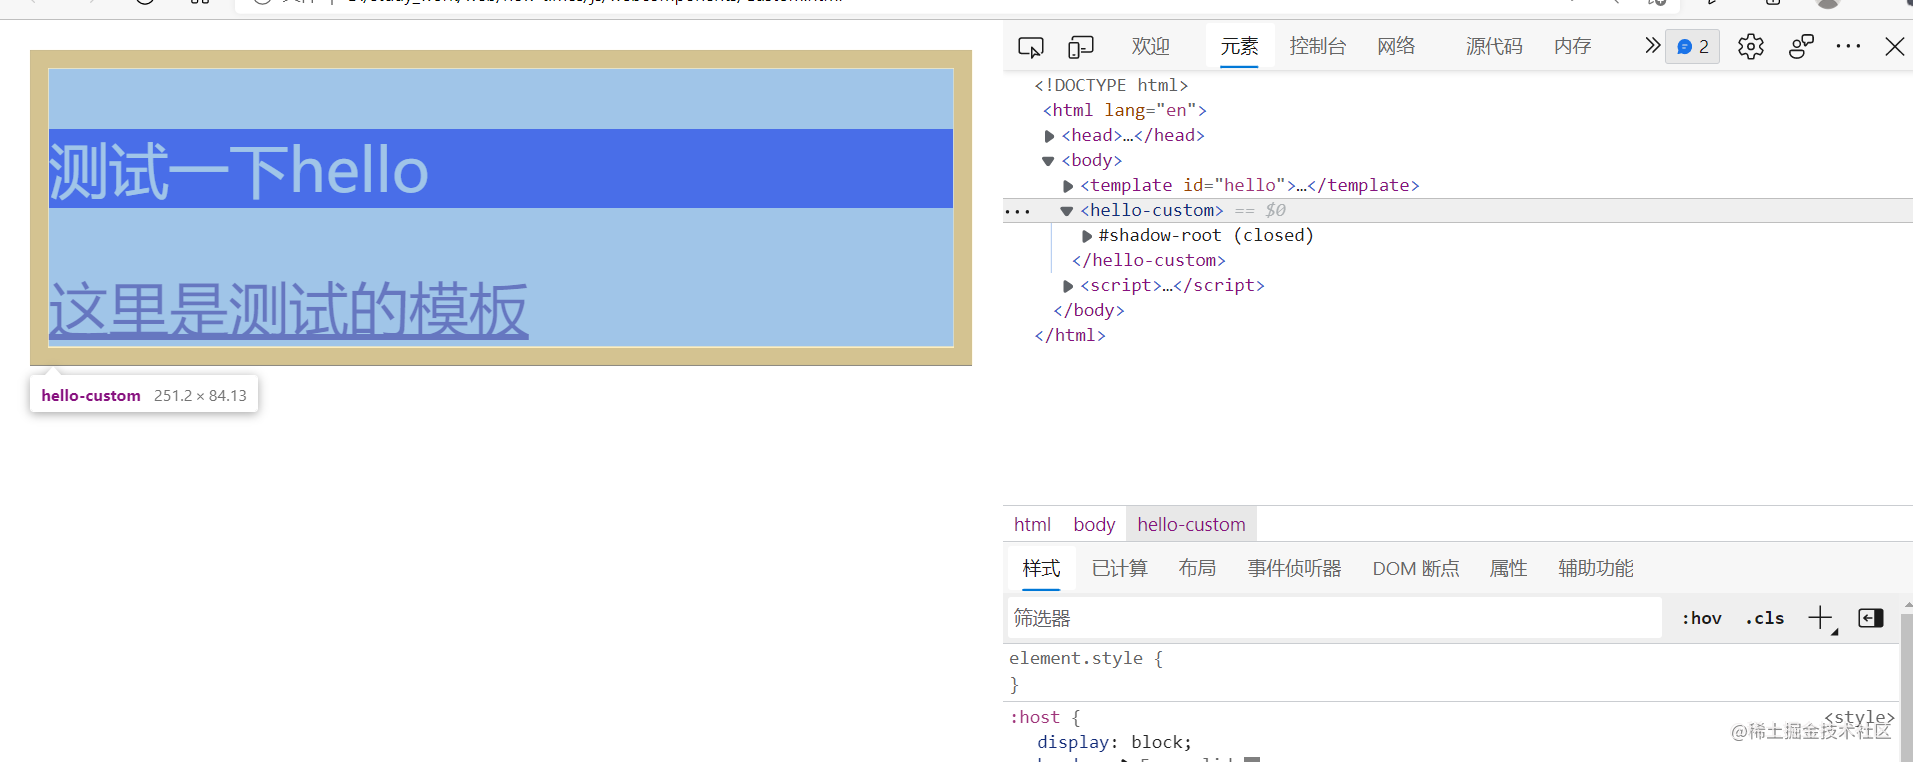
After using Shadow DOM, you can use the special selector host selector of Shadow DOM in the template, which selects the entire template itself. It is worth noting that it must display the specified display attribute, otherwise it will not be visible.
For example, when a user-defined element is clicked on the mouse, it cannot be box selected or selected on the left. After setting display:
  <template id="hello">
    <style>
      :host {
        display: block;
        border: 5px solid gray;
      }
      p {
        background-color: blue;
        color: white;
      }
    </style>
      <p id="htllo_test">Test it hello</p>
      <a href="">Here is the test template</a>
  </template>
Custom component lifecycle
like the components of major frameworks, element components also have their own life cycle, which is particularly important. As for what the life cycle is, I don't think I need to go over it again, just go to the code.
  class HelloCustom extends HTMLElement {
    // Lifecycle - created
    constructor() {
      super();
      console.log('created-Executed');

      this.shadow = this.attachShadow({ mode: 'closed' }) // open and closed control whether they can be accessed by external js respectively
      let hello = document.getElementById("hello")
      var content = hello.content.cloneNode(true);
      this.shadow.append(content)
    }
    // Lifecycle - mounted
    connectedCallback() {
      console.log('mounted-Executed');
    }

    // Lifecycle - update
    attributeChangedCallback() {
      console.log('update-Executed');
    }

    // Lifecycle - Destruction
    disconnectedCallback() {
      console.log('Removed')
    }
  }
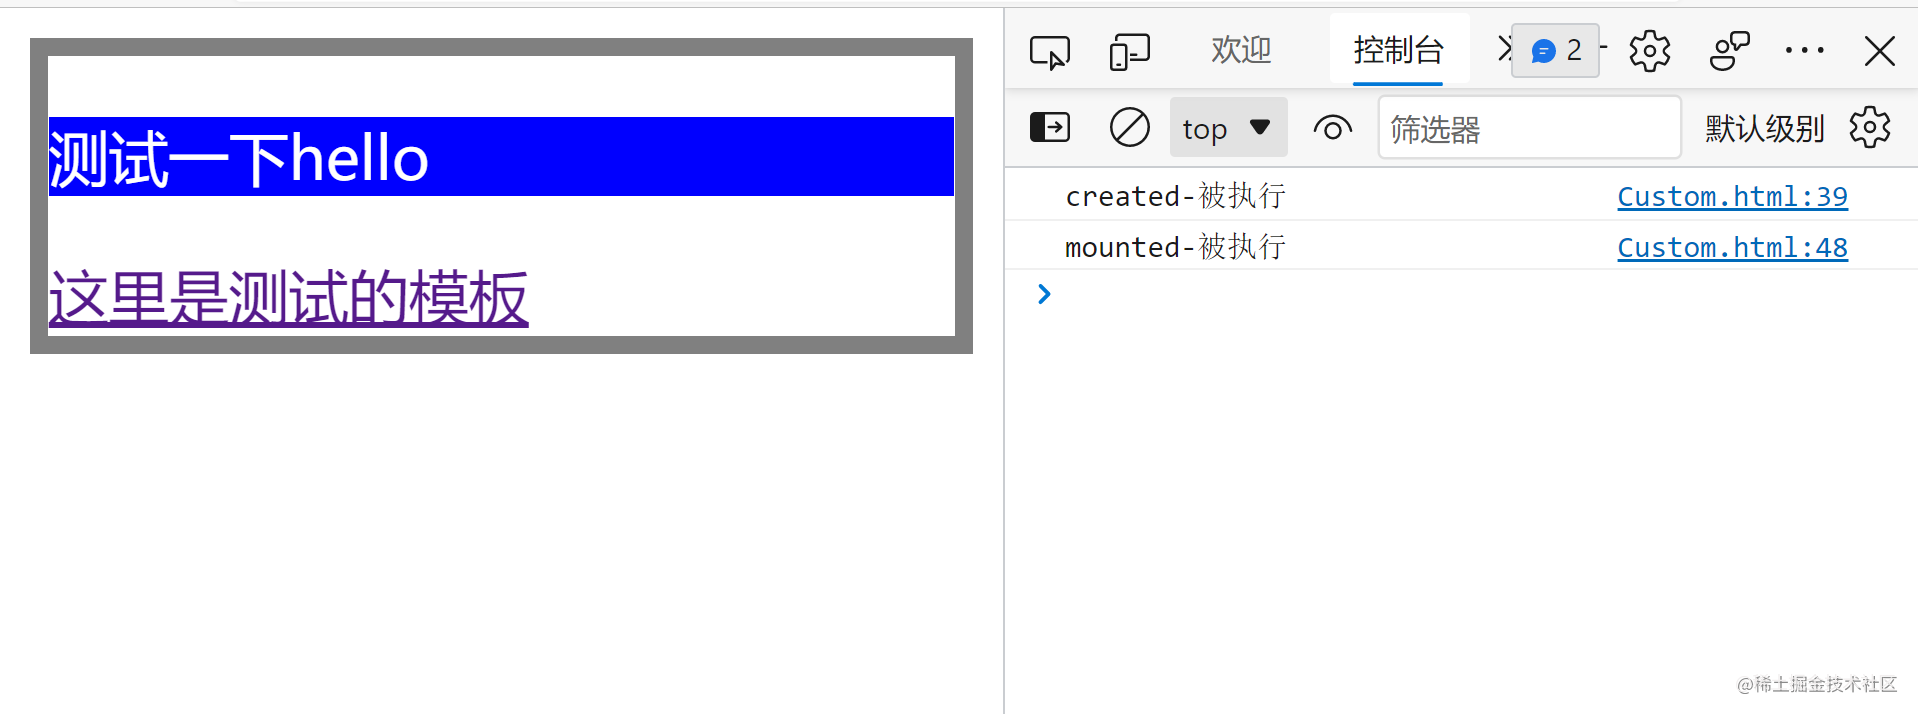
here I correspond these life cycles to vue life cycles to facilitate your understanding and memory.
- Constructor is a constructor, equivalent to the created life cycle
- connectedCallback is equivalent to the mounted lifecycle
- attributeChangedCallback is equivalent to the update life cycle, where update here means that the parameters mounted on the component are changed
- Disconnected callback is equivalent to the destruction lifecycle
Using slot
you are not mistaken. Slots can be used in native components. The use method is basically the same as vue. Maybe the latter uses the former for reference. The method of use is as follows:
  <template id="hello">
    <style>
      :host {
        display: block;
        border: 5px solid gray;
      }
      p {
        background-color: blue;
        color: white;
      }
    </style>
    <p id="htllo_test"></p>
    <slot>slot default</slot>
    <slot name="slot1">slot1</slot>
    <a href="">Here is the test template</a>
    <slot name="slot2">slot2</slot>
  </template>

  <hello-custom title="External parameter transmission test" id="hello_custom">
    <div>I am the default slot</div>
    <div slot="slot1">name slot1</div>
  </hello-custom>
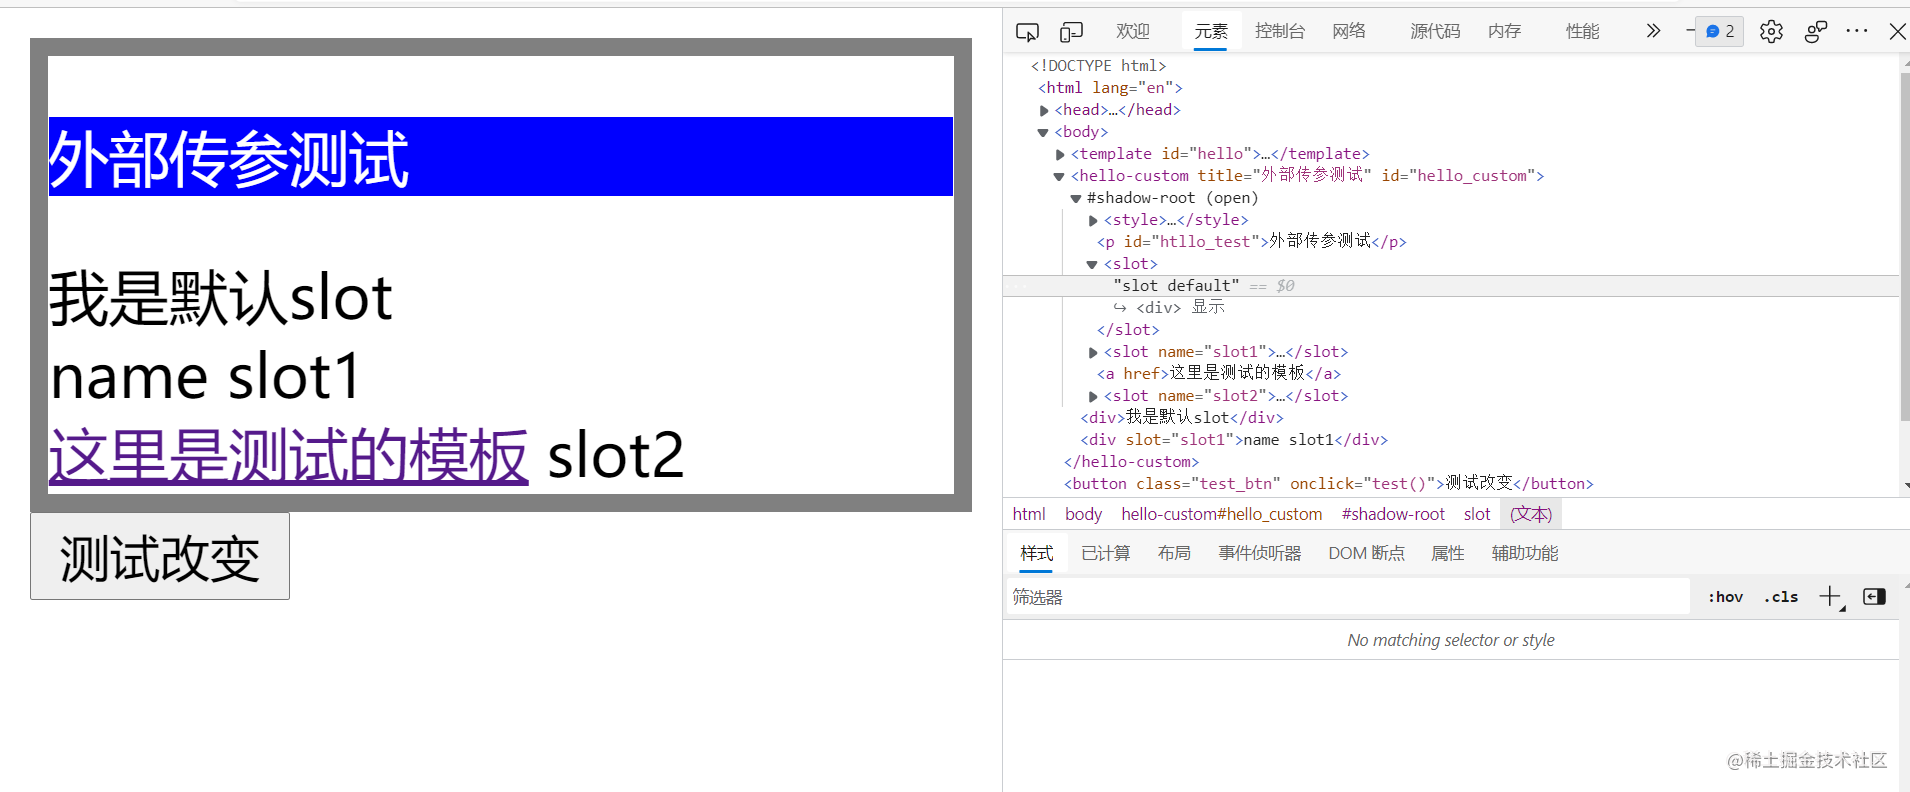
you can see that the slot without the name attribute automatically becomes the default slot, and the elements without the slot attribute in the component will be placed in it by default, and then the slot and the name attribute will be placed one by one. If not, the default content will be displayed. It is very simple and basically consistent with vue.
Application experience summary and pit stepping
It can be externally transferred and modified
components must be able to communicate internally and externally. External parameter transmission is inevitable, and the use method is very simple. You only need to mount the parameters on the native component and get them internally. For example:
<hello-custom title="External parameter transmission test"></hello-custom>
  class HelloCustom extends HTMLElement {
    // Lifecycle - created
    constructor() {
      super();

      this.shadow = this.attachShadow({ mode: 'closed' }) // open and closed control whether they can be accessed by external js respectively
      let hello = document.getElementById("hello")
      var content = hello.content.cloneNode(true);
      content.querySelector("#htllo_test").innerHTML = this.getAttribute("title")
      this.shadow.append(content)
    }
  }
Using this.getAttribute, you can get the parameters mounted externally, and then operate as you want
Like other tags, native components can be selected and operated. You can mount id and class to be operated by css. We won't repeat the operation of css here. You can try it yourself. (the shadow dom mentioned above can shield external modifications, which means that modifications to the internal dom can be shielded. The overall components can be changed, such as size, background, and the use of combined vue components).
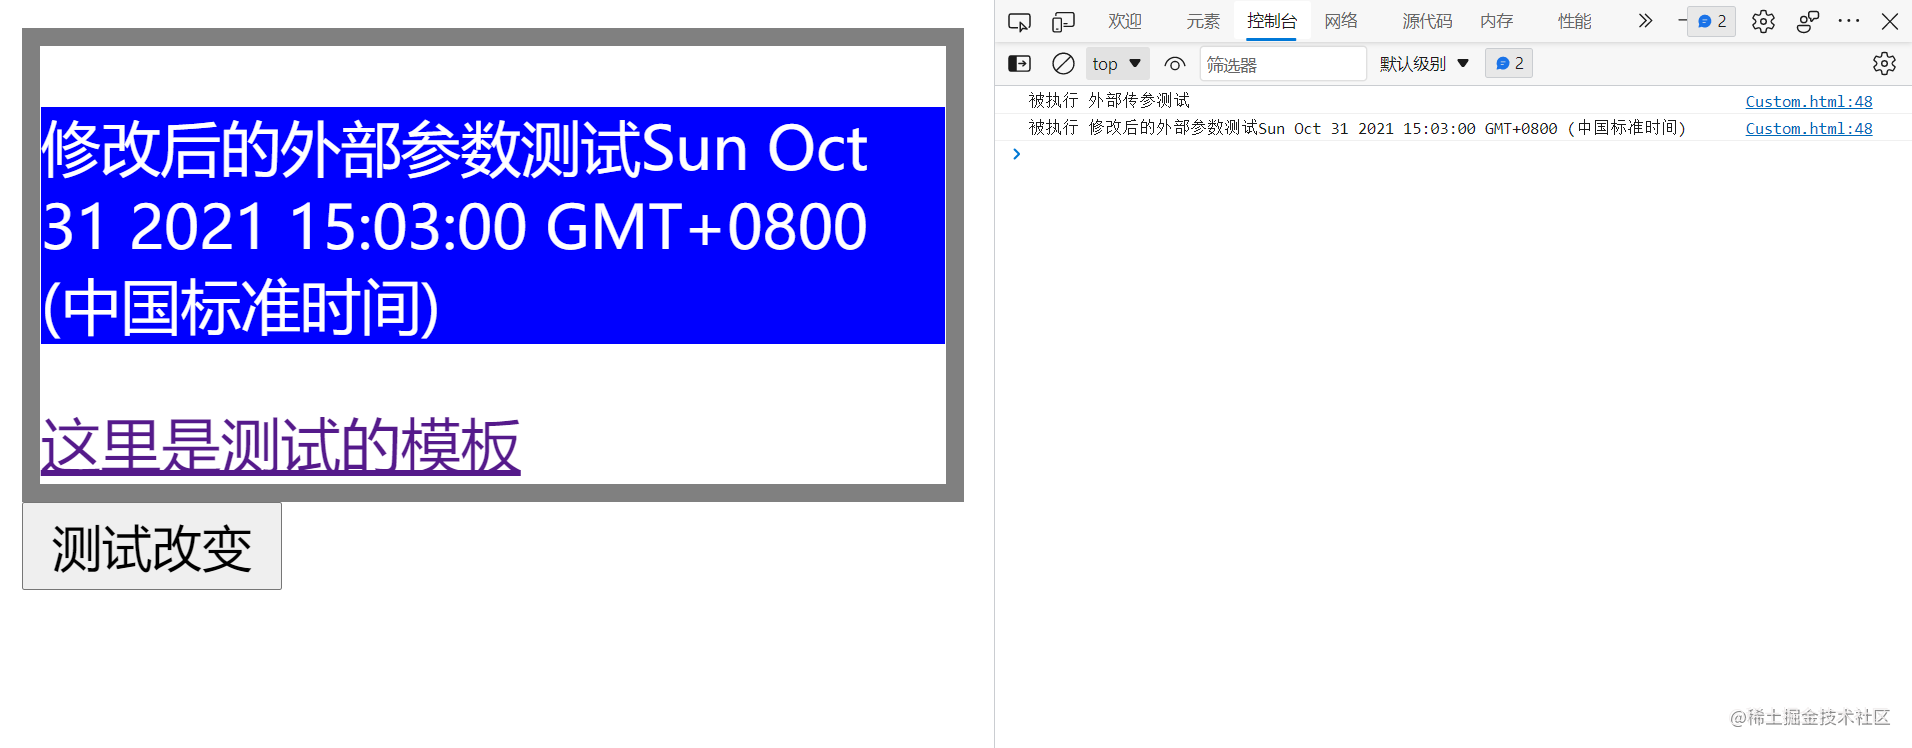
js operation element data needs to use the life cycle attributeChangedCallback, which will be executed when the external parameters are changed. The operation is as follows:
  <hello-custom title="External parameter transmission test" id="hello_custom"></hello-custom>
  <button class="test_btn" onclick="test()">Test change</button>
  class HelloCustom extends HTMLElement {
    // Lifecycle - created
    constructor() {
      super();
      this.shadow = this.attachShadow({ mode: 'closed' }) // open and closed control whether they can be accessed by external js respectively
      let hello = document.getElementById("hello")
      this.content = hello.content.cloneNode(true);
      this.shadow.append(this.content)
    }
    attributeChangedCallback(name, oldValue, newValue) {
      this.shadow.querySelector("#htllo_test").innerHTML = newValue
      console.log("Executed", newValue);
    }
    static get observedAttributes() {return ['title', 'l']; }
  }
  window.customElements.define('hello-custom', HelloCustom);

  function test() {
    let myHello = document.getElementById('hello_custom')
    myHello.setAttribute("title", "Modified external parameter test" + new Date())
    // console.log(myHello);
  }
It should be noted that if you need to trigger the attributeChangedCallback() callback function after the element attribute changes, you must listen to this attribute. This can be achieved by defining the observedAttributes() get function. The observedAttributes() function contains a return statement and returns an array containing the attribute names to listen to. Static get observedAttributes() {return ['title ','l'];} you can see that the callback has been successful.
External modification of internal child elements
if the mode is set to open, you can directly modify the component sub elements after external acquisition. Generally, we don't recommend this. The better way is to use the above method to listen inside the component and modify the component properties externally. Here is a knowledge point to explain and understand.
  function test() {
    let myHello = document.getElementById('hello_custom')
    myHello.setAttribute("title", "Modified external parameter test" + new Date())
    // console.log(myHello);
    console.log(myHello.shadowRoot);
  }
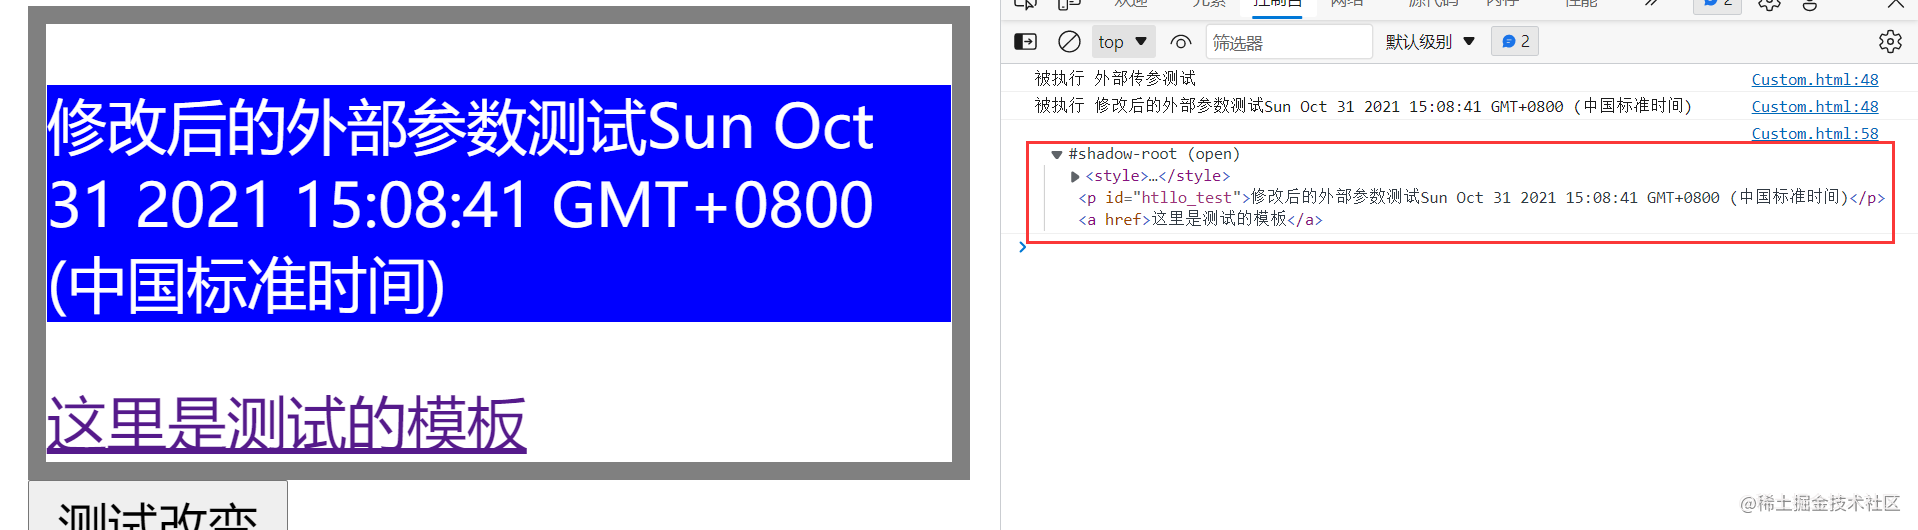
During internal acquisition, it should be noted that document cannot obtain the elements in the template. After the constructor life cycle, this.shoadow should be used to obtain the dom
Follow up thinking and discussion of defects of native components
Defects in native components:
- The compatibility of native components is general. At least IE does not support it and cannot be compensated by babel. Please be careful if you need to be compatible with IE.
- Native components are also js rendering in essence, which is not much different from vue. Therefore, if pages are used heavily, SEO optimization will be more troublesome. In short, it's better to use vue.
- The module cannot export the template tag. The template can only be written in html
- Shadow DOM isolates external js and css, which makes global css Tools unavailable. If shadow DOM is not used, components may be contaminated by external styles.
- Native development is troublesome, and it is basically combined with webpack
Follow up thinking
The above problems are the problems encountered in practical use
the third point can be solved by using ejs template in webpack, because ejs template exports a function that can return the current template string. Just use js to export the template like exporting JS
fourth point. The isolation of Shadow DOM from global CSS Tools cannot be solved temporarily. My choice is to compromise and not use Shadow DOM. If readers have a better method, please communicate in the comment area.
I think the most troublesome thing is that this thing itself cannot implement two-way binding like vue. Without MVVM data view binding, it may need to be implemented by the boss. That's the problem. Now that we're at this stage, why don't I use vue....
Degree of support
Note: Firefox, Chrome and Opera support custom elements by default. Safari currently only supports autonomous custom elements, and Edge is also actively implementing them.