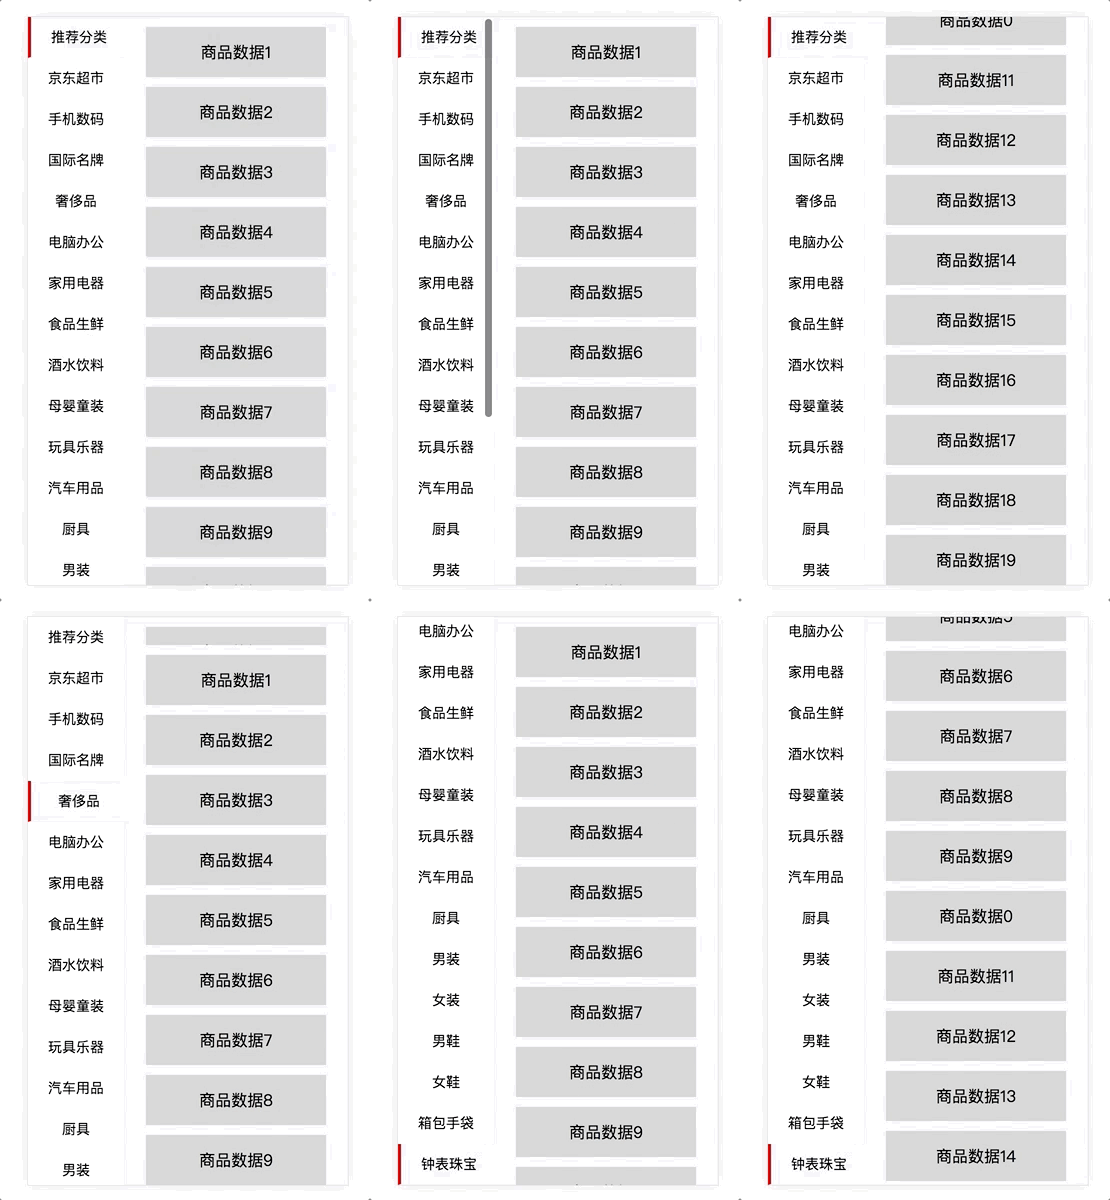
After two months of separation, I had a short break. Recently, I just joined a new company and started to do some business projects. It was also interesting. Before that, jquery was used less and its foundation was weak. In the new project, I was in the process of gradual tutoring. These two days, just to achieve the relevant elevator effect, I wrote a small demo, simple version for you to start friends to see.
Here, as usual, put a github link first. Elevator And the preview, there is an intuitive feeling can be interested in looking down, but this partial basis, if you just start to see.

Next, I will formally start to talk about my ideas. If you have good ideas, you can communicate with me and learn from each other.
Step 1: Setting up meta, writing html shelves, and introducing jquery
The first is to write a page. The page is divided into two parts: left and right. The data above are acquired from the background or local data in practical application. I am writing dead data for the time being. leftSide is on the left, right Side is on the right, and each category on the left has an area representing the classification on the right, and there will be corresponding content inside. This piece of content is called rightContent. Because the content is added dynamically, there is very little code in the html section.
<head>
    <meta name="viewport" content="width=device-width,initial-scale=1.0,minimum-scale=1.0,user-scalable=no">
    <script language="javascript" src="jquery.js"></script>
</head>


<body>
    <div class="content">
        <div class="leftSide" id="leftSide">

        </div>
        <div class="rightSide">

        </div>
    </div>
</body>
Step 2: Add a css style to the shelf
   *{
        padding:0;
        margin: 0;
        background-color: #f5f5f9;
        overflow:hidden
    }
    .content{
        width: 100%;
        height: 100%;
        overflow: hidden;
        position: fixed;
    }
    .leftSide{
        float: left;
        width: 30%;
        height: 100%;
        background-color: transparent;
        overflow: auto;
    }
    .rightSide{
        float: left;
        width: 70%;
        height: 100%;
        background-color: #f5f5f9;
        overflow: hidden;
    }
To keep the whole page from scrolling with the mouse, set overflow:hidden in * and the whole area as well. The left area needs to be set to auto so that it can slide up and down to see the classification.
Step 3: Add menus dynamically around and set styles
There are many small pieces to add to the left, and you need to set the selected style, so add the style first
    .leftSide span{
        display: block;
        width: 100%;
        height: 40px;
        background-color: white;
        border-bottom: 1px solid transparent;
    }
    .leftSide span p{
        display: block;
        margin: 0 auto;
        width: 80%;
        height: 100%;
        background-color: transparent;
        text-align: center;
        line-height: 40px;
        font-size: 14px;
        color:black;
        border-bottom: 1px solid lightgrey;
    }
    .leftSide .active{
        border-left: 3px solid red;
        background-color: #f5f5f9;
    }
    .rightSide .rightContent{
        width: 100%;
        height: 100%;
        background-color: #f5f5f9;
        overflow: auto;
    }
    .line{
        width: 80%;
        height: 50px;
        background-color: lightgrey;
        margin: 0 auto;
        margin-top: 10px;
        text-align: center;
        line-height: 50px;
    }
Dynamic addition of elements and false data left and right
//Classification array
var list = ['Recommended classification','Jingdong Supermarket','Mobile Digital','International Famous Brand','Luxury goods','Computer Office','Household Electric Appliances','Fresh food','drinks','Maternal and infant clothing','Toy instruments','Automobile','Kitchen utensils','Men's wear','Women's wear','Men's Shoes','Women's Shoes','Luggage and handbag','Watch jewelry'];

//Set the left slide
var html = '';
for(var i = 0;i < list.length;i++){
    if(i == 0){
        html = '<span class="active" onclick="setActive('+i+')">'+'<p>'+list[i]+'</p>'+'</span>';
    }else{
        html = '<span onclick="setActive('+i+')">'+'<p>'+list[i]+'</p>'+'</span>';
    }
    rightContent = '<div class="rightContent"></div>';
    $("#leftSide").append(html);
    $(".rightSide").append(rightContent);

}
  //Dynamic addition of false data div
var fadeDataDiv = '';
for(var i = 0; i < list.length;i++){
    fadeDataDiv = '<div class="line">'+'Commodity data'+i+'</div>';
    $(".rightContent").append(fadeDataDiv);
}
Step 4: Get an array of distances from the top
Get the div distance on the right side of each category from the top, and set it accordingly in the click event.
//An array of distances from the top
var topData = [];
for(var j=0;j<$('.rightContent').length;j++){
    topData.push($('.rightContent').eq(j).offset().top);
}
Step 5: Complete Click Events
In the click event, first remove the clicked style, then add the style to the clicked element, and set the distance between the right menu and the top.
//Set the right display area
function setActive(i){
    $(".leftSide span").removeClass('active');
    $(".leftSide span").eq(i).addClass('active');
    $('.rightSide').animate({scrollTop:topData[i]+'px'});
}
This basically completes the function, and on this basis can continue to write complex, but also can write different. If you see any questions above, you can leave a message for discussion.