1, Using ESLint in webpack
How does ESLint land?
- Integration with CI/CD system
- Integration with webpack
Integration of webpack and ESLint
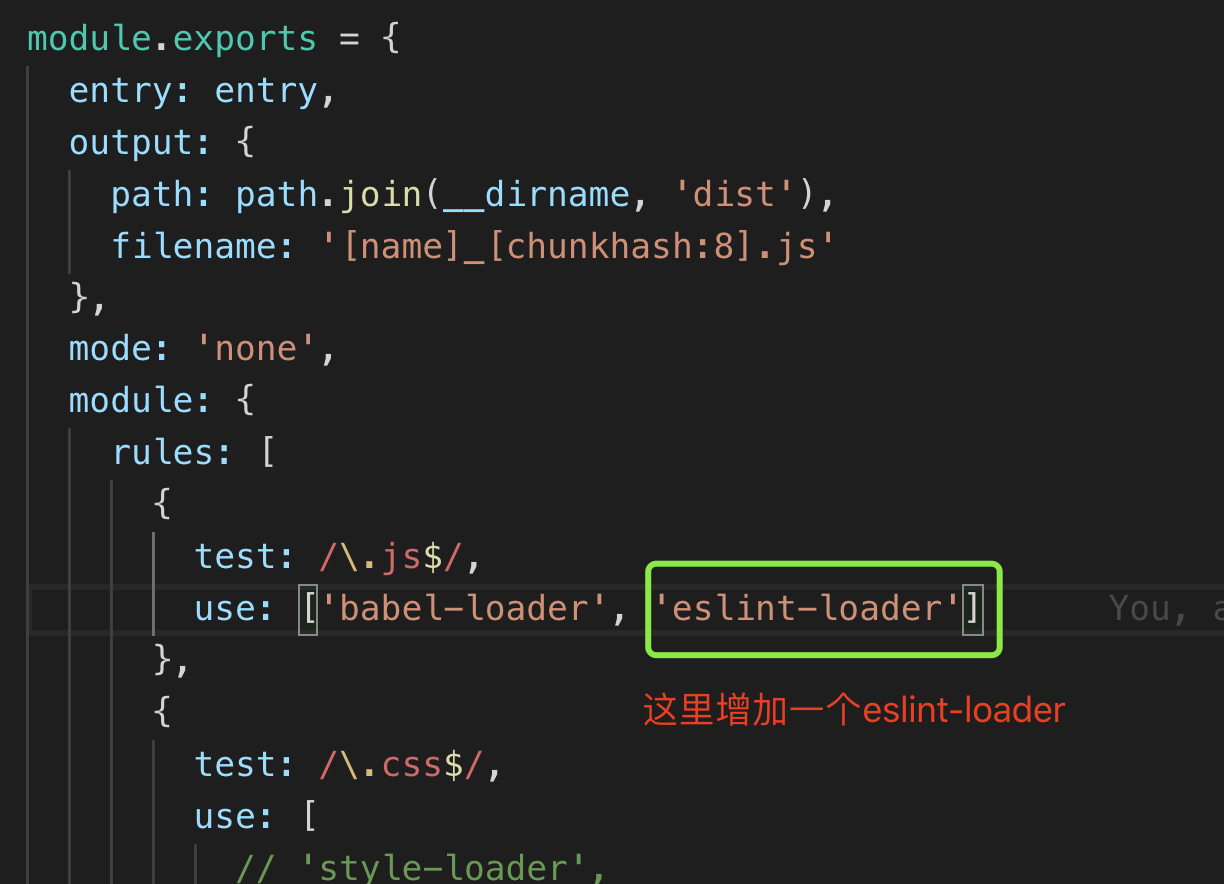
Use eslint loader to check the JS specification at build time.
Next, let's use eslint config airbnb, which has many dependencies
The first step is to install the dependency
npm install eslint eslint-plugin-import eslint-plugin-react eslint-plugin-jsx-a11y -D
npm install eslint-loader -D
The second step is in webpack Add the loader to prod.js
Step 3: add a configuration file eslintrc.js
Note: the configuration file can be eslintrc.json, can be eslintrc.js, it can be eslintrc
Here we use eslintrc.js, since it is a js file, we need to use module Exports.
- The parser configuration item is the parser we want to use. We use Babel eslint, so we need to install Babel eslint
- The extensions configuration item is used for inheritance. If you want to inherit more than one, you need to use an array. We inherit airbnb, so follow eslint config airbnb
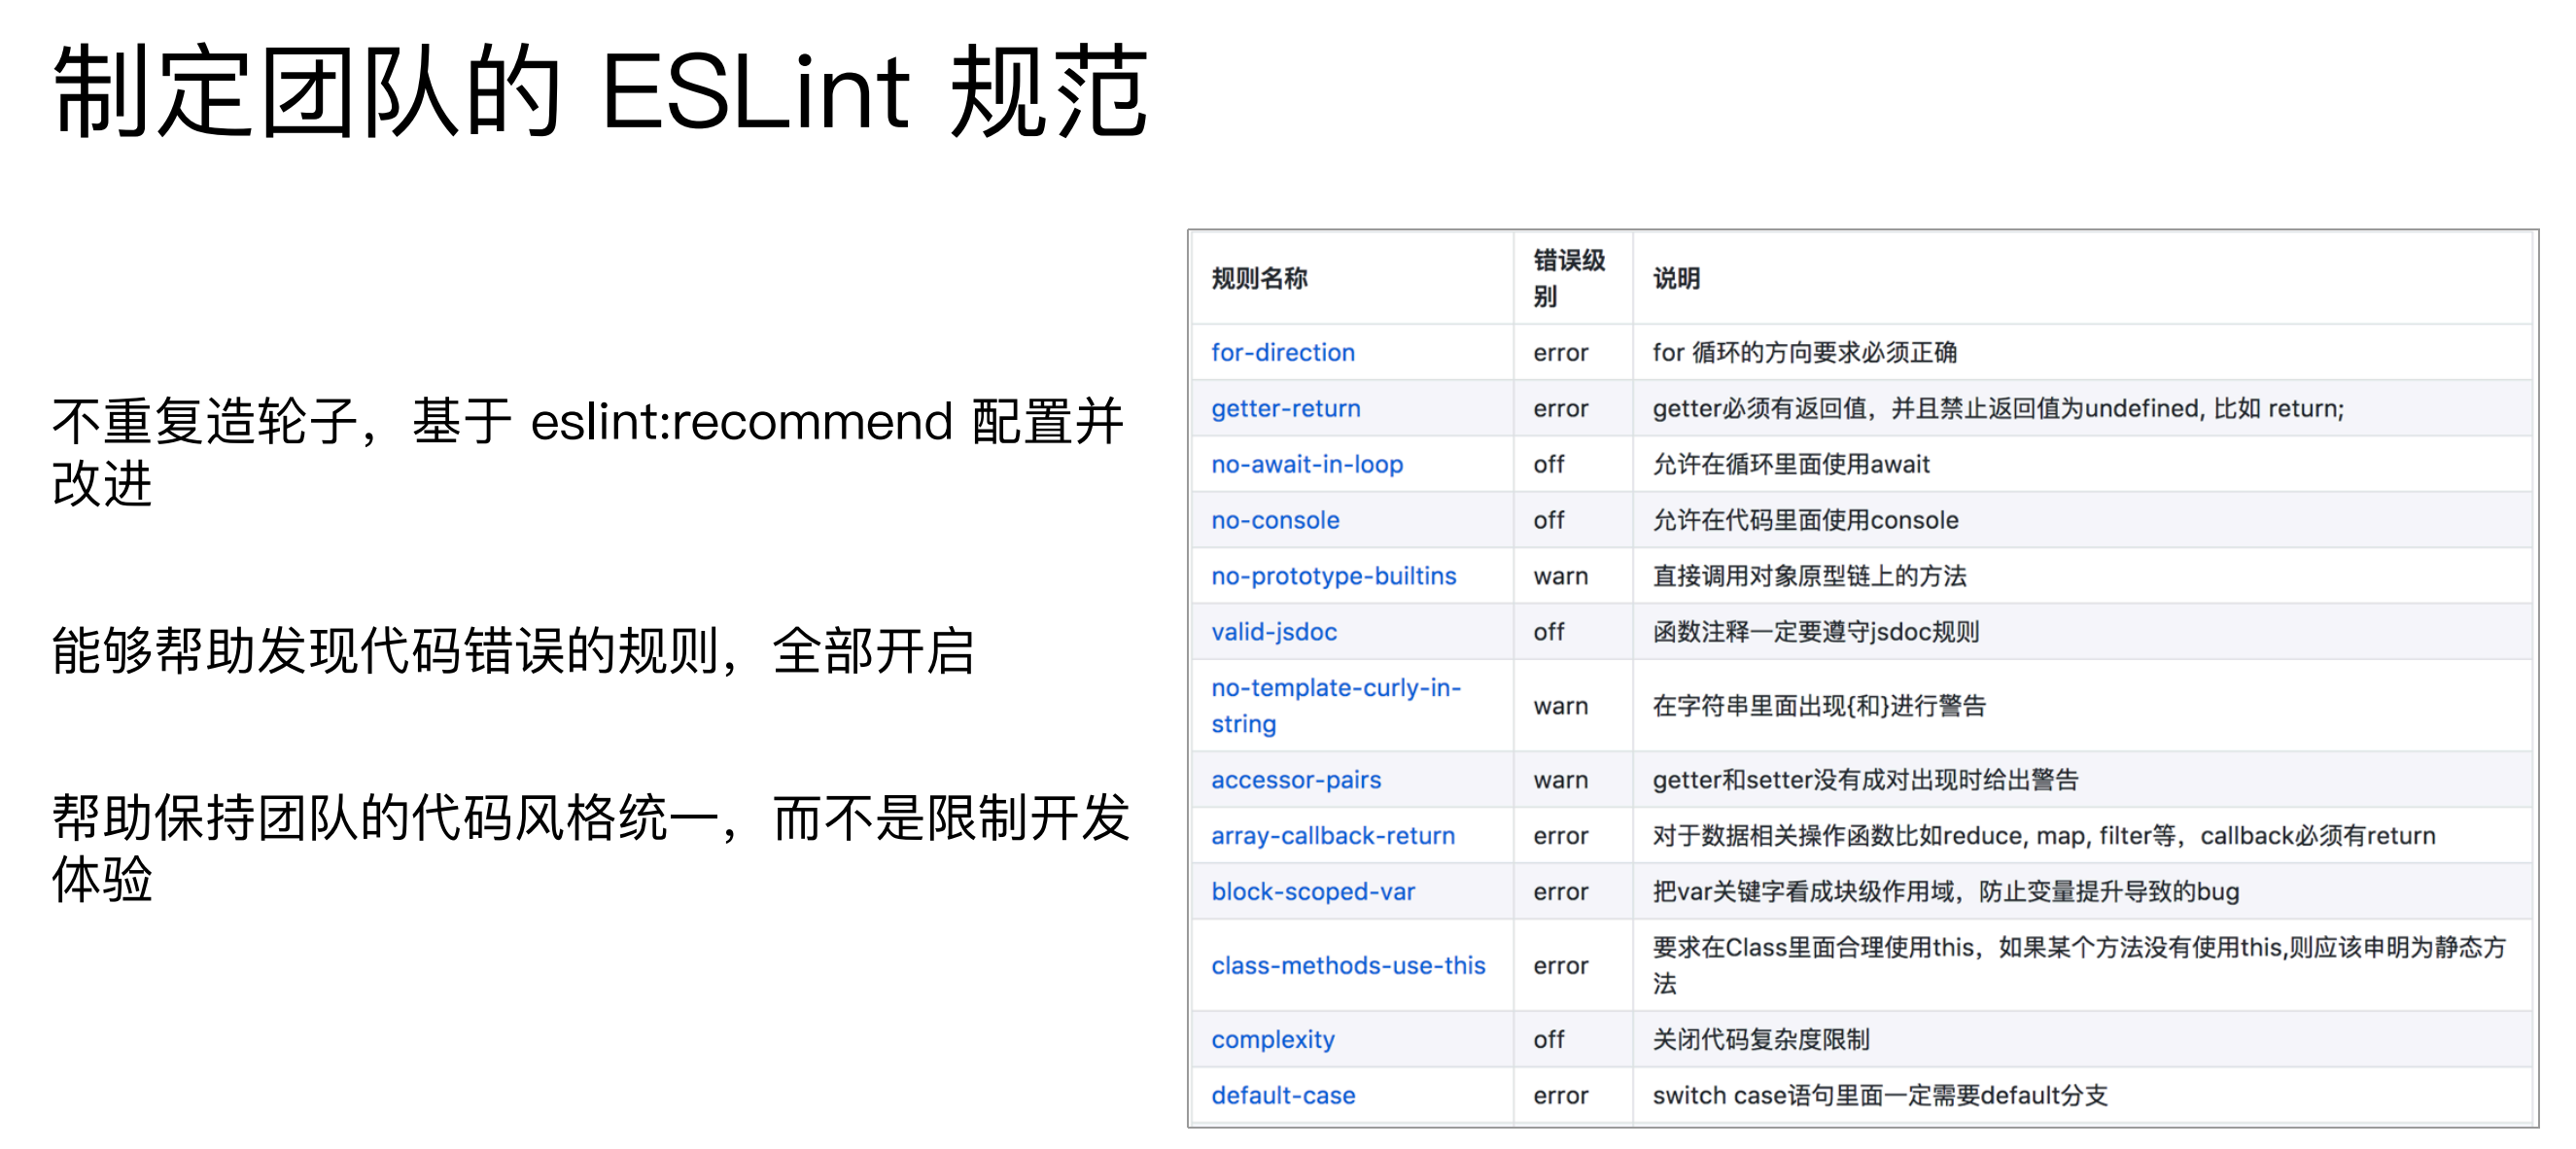
- The rules configuration is used to modify and customize the eslint rules. For example, if you are dissatisfied with the official rules, you can change them here, but not here.
- env configuration specifies the enabled environment. For example, if node is set to true, you will not report an error if you use some global variables of node
npm install babel-eslint eslint-config-airbnb -D
module.exports = {
  "parser": "babel-eslint",
  "extends": "airbnb",
  "env": {
    "browser": true,
    "node": true
  },
  "rules": {
    "semi": "error"
  }
}
Let's execute npm run build
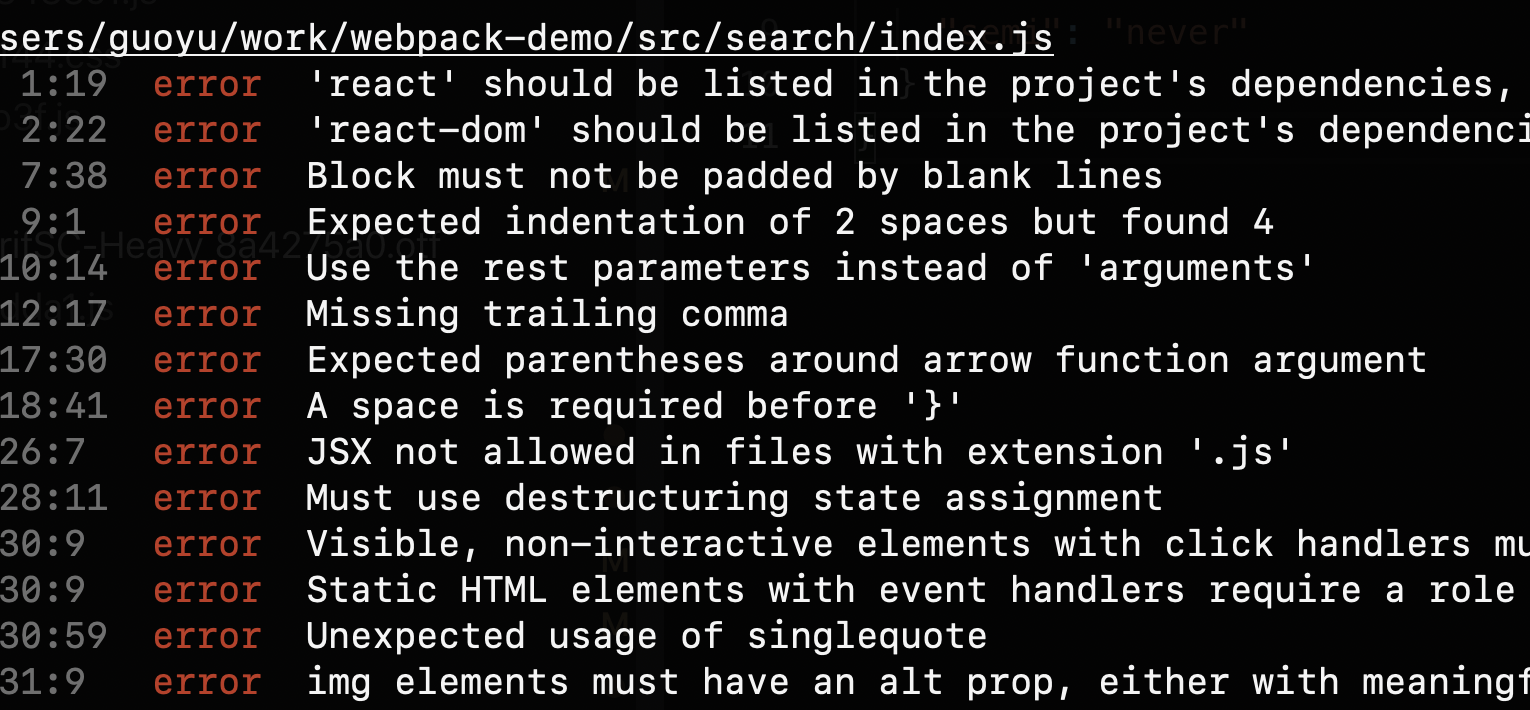
It will detect each file, and then list the places where each file does not comply with the eslint specification, such as:
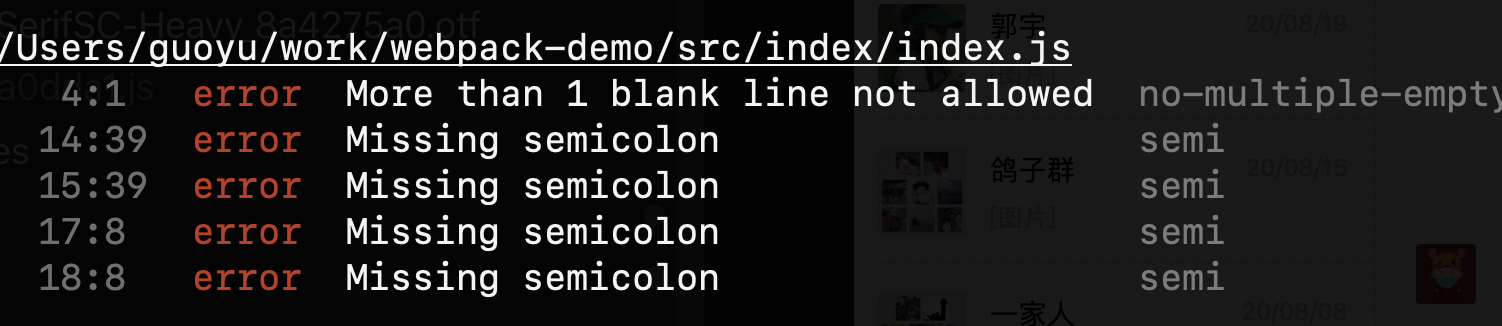
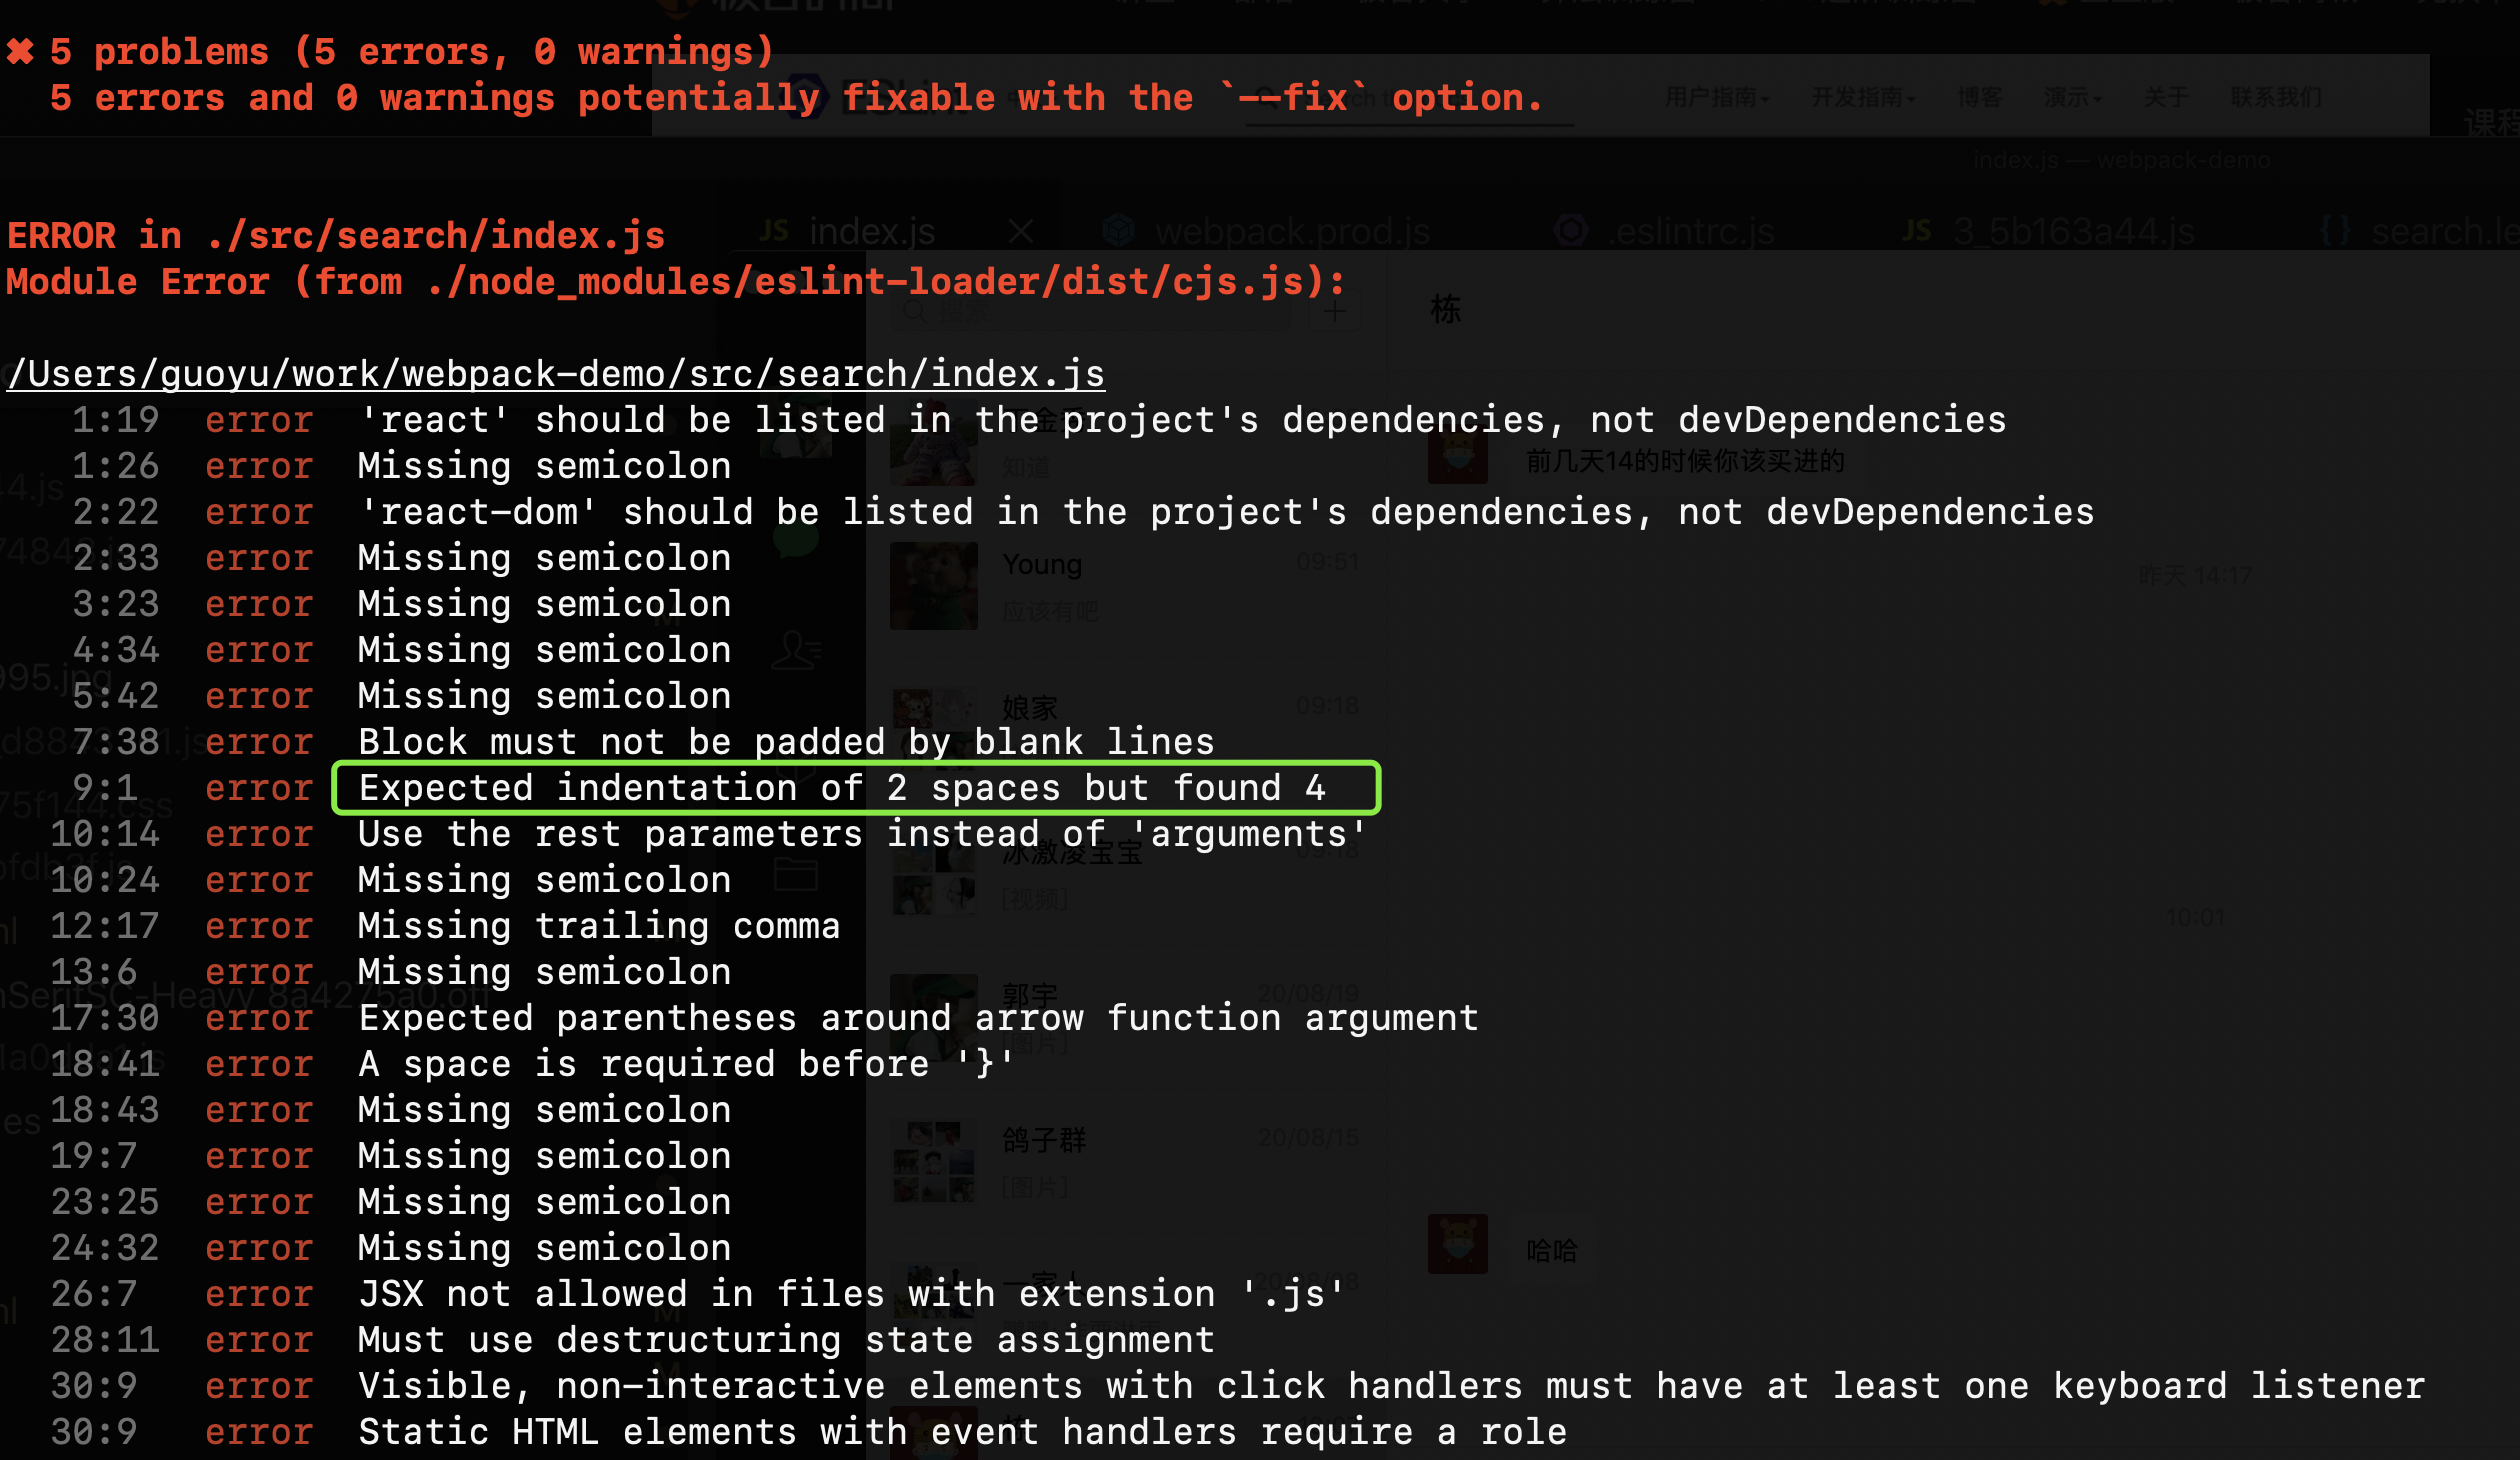
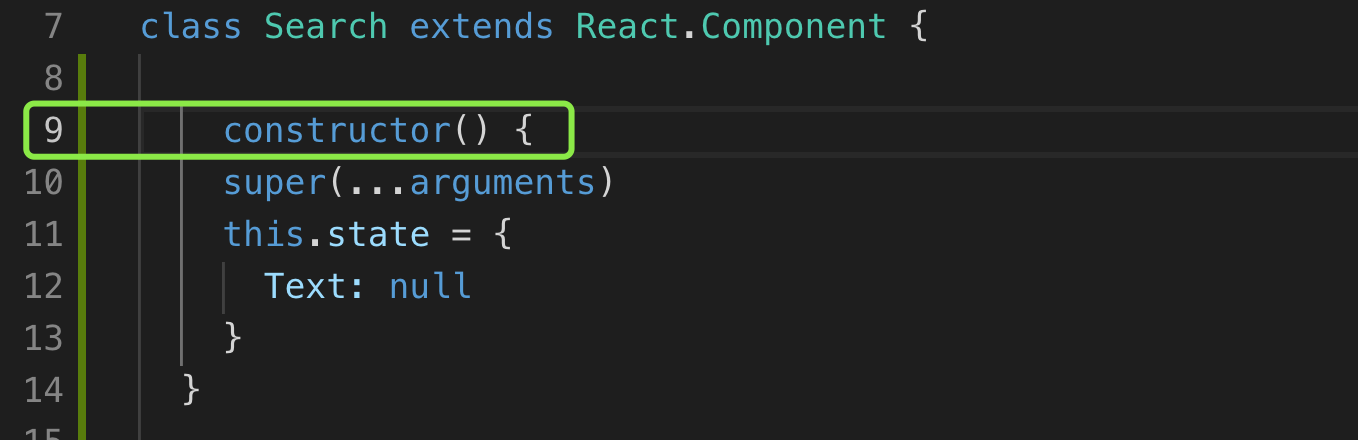
For example, we see a hint above that we need two spaces, but we find four. That's because I did it on purpose, line 9.
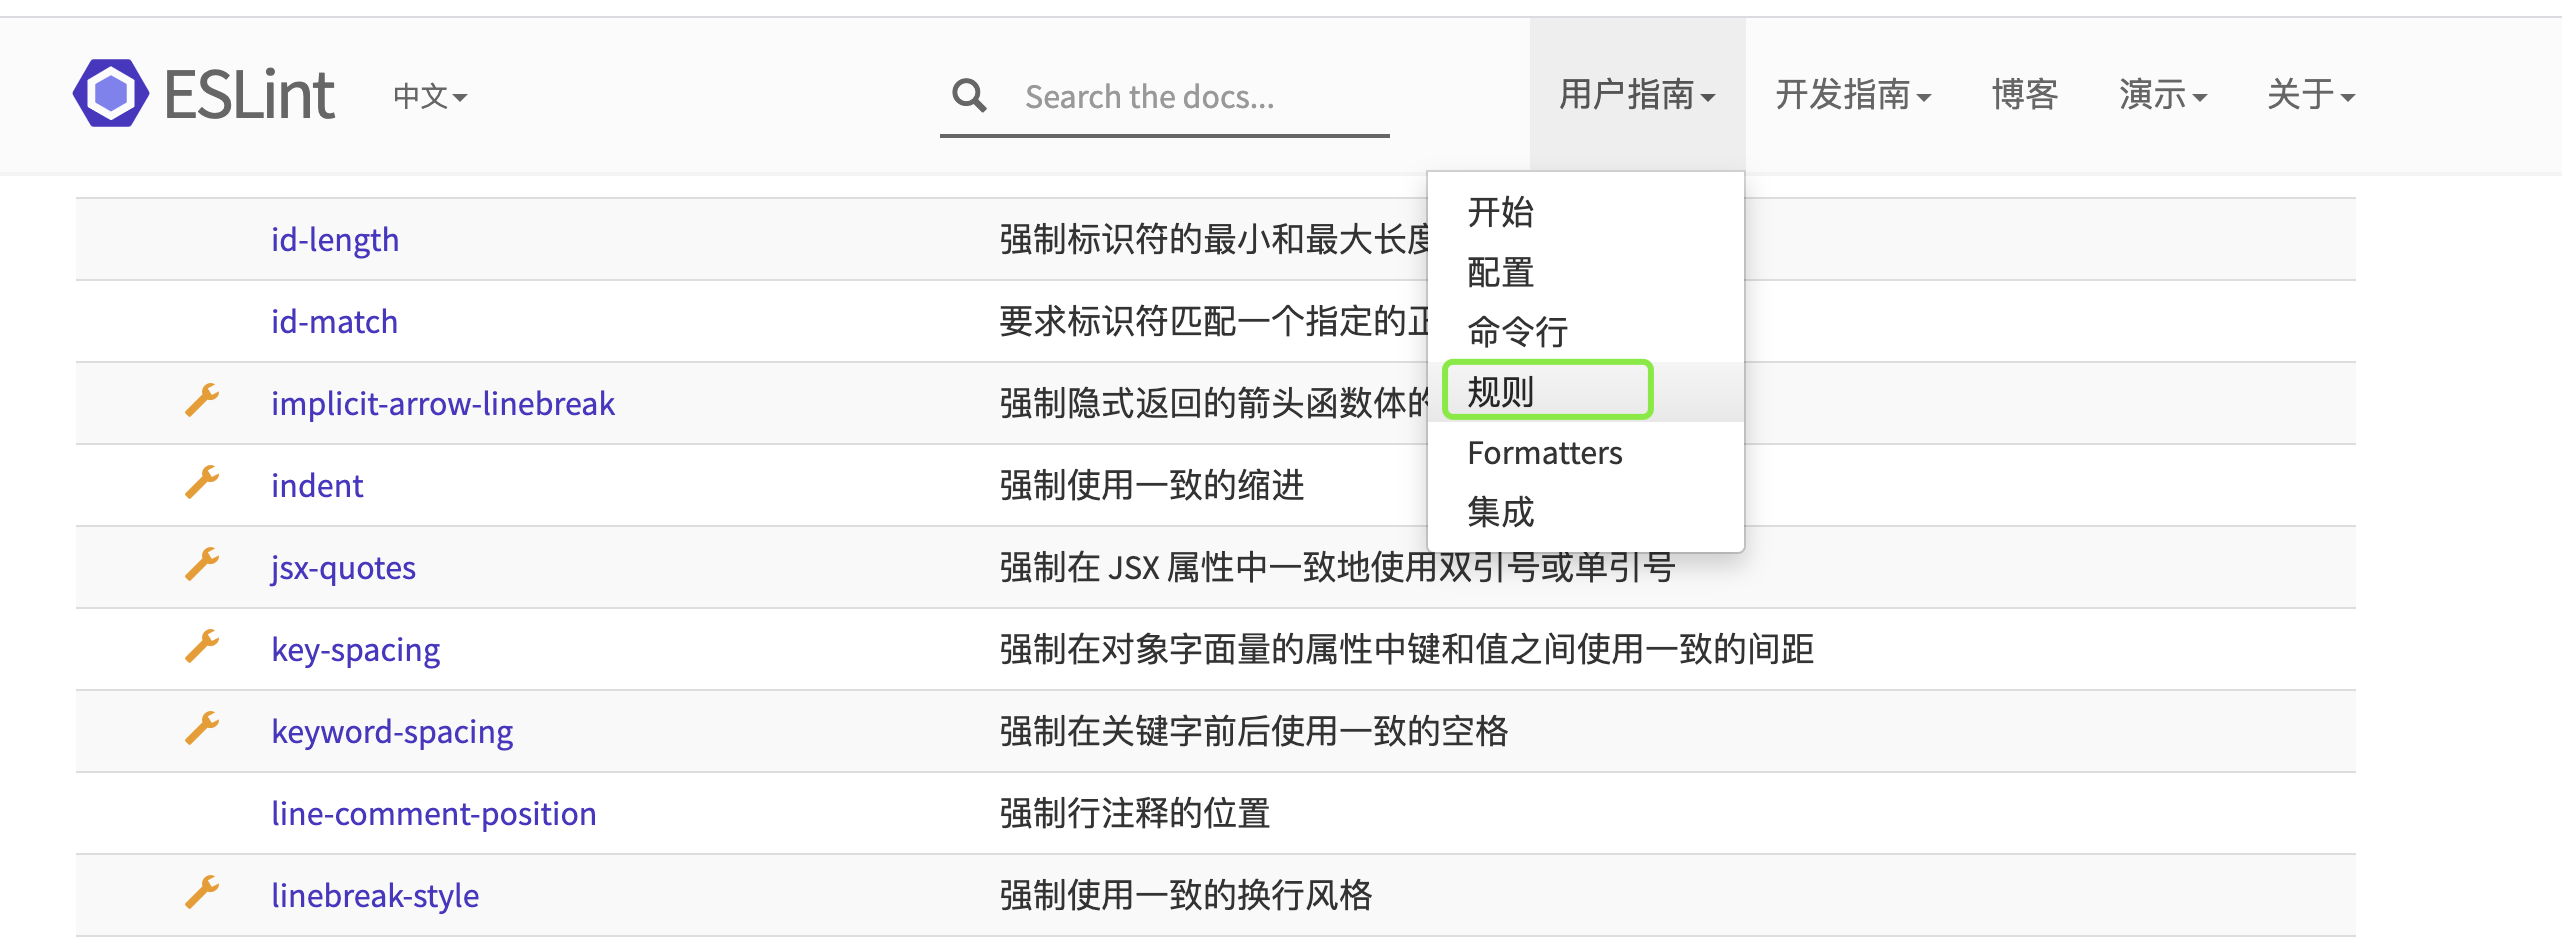
What if our team just wants to use four spaces? How to modify rules? Modify as shown in the figure below. On the eslint official website, the user guide, rules, select indent and indent.
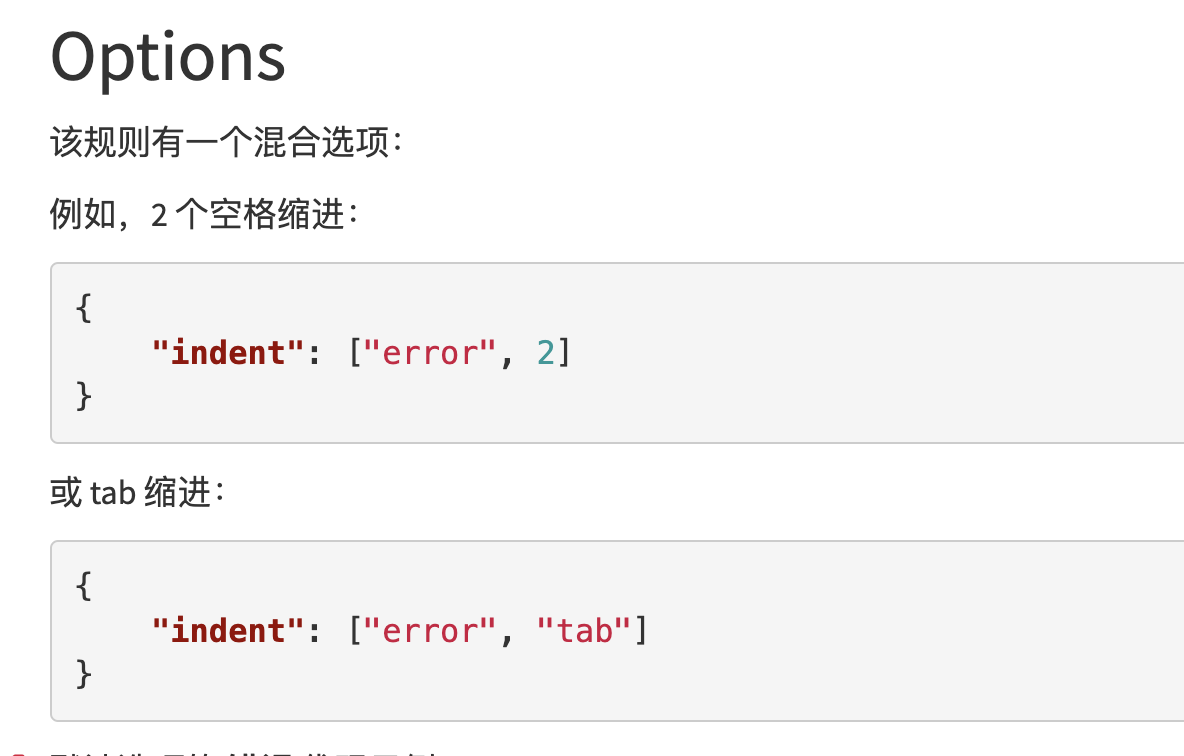
We just need to revise it eslintrc.js.
module.exports = {
  "parser": "babel-eslint",
  "extends": "airbnb",
  "env": {
    "browser": true,
    "node": true
  },
  "rules": {
    "indent": ["error", 4] // Pay attention here
  }
}
As another example, we don't want semicolons after every statement in the code. This configuration:
  "rules": {
    "semi": "never"
  }
2, webpack packaging libraries and components
How to package a component or basic library with webpack? In fact, rollup is the best packaging. It is pure and simpler, but webpack is also very powerful. Today we are talking about webpack.
2.1 problem throwing
Implement the packaging of a large integer addition library
(1) Compressed and uncompressed versions need to be packaged
(2) Support AMD/CJS/ESM module introduction,
import * as largeNumber from 'large-number'
largeNumber.add('999', '1')
CJS support:
const largeNumber = require('large-number')
largeNumber.add('999', '1')
Support AMD:
require(['large-number'], function(large-number) {
    largeNumber.add('999', '1')
})
support
<script src="https://unpkg.com/large-number"></script>
<script>
    largeNumber.add('999', '1')
</script>
// How to expose the library?
module.export = {
  mode: "production",
  entry: {
    "large-number": "./src/index.js",
    "large-number.min": "./src/index.js"
  },
  output: {
    filename: "[name].js",
    library: "largeNumber",
    libraryExport: "default",
    libraryTarget: "umd"
  }
}
2.2 examples
Write a library, package it with webpack, publish it to npm, and then use it for the project
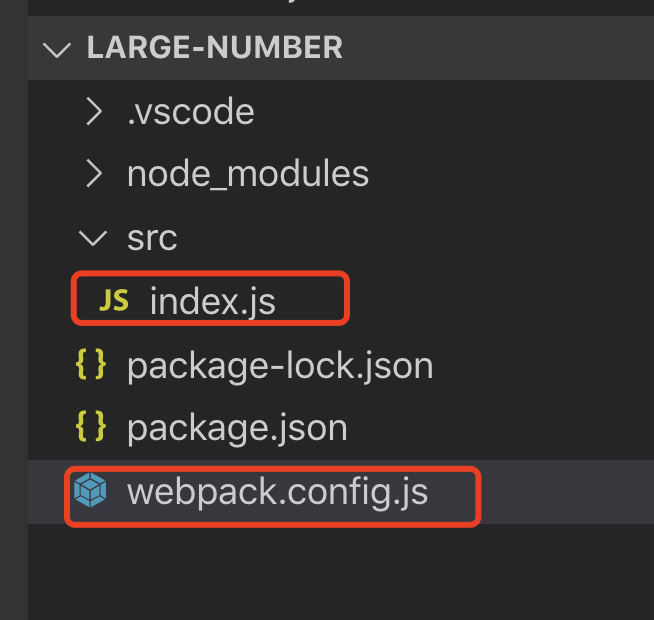
The first step is to create the directory large number
mkdir large-number

cd large-number

npm init -y

npm i webpack webpack-cli -D
Step 2: create large number / SRC / index js
export default function add(a, b) {
  let i = a.length - 1
  let j = b.length - 1

  let carry = 0
  let ret = ''

  while (i >= 0 || j >= 0) {
    let x = 0
    let y = 0
    let sum
    if (i >= 0) {
      x = a[i] - '0'
      i --
    }
    if (j >= 0) {
      y = b[j] - '0'
      j --
    }

    sum = x + y + carry

    if (sum >= 10) {
      carry = 1
      sum -= 10
    } else {
      carry = 0
    }
    ret = sum + ret
  }
  if (carry) {
    ret = carry + ret
  }
  return ret
}
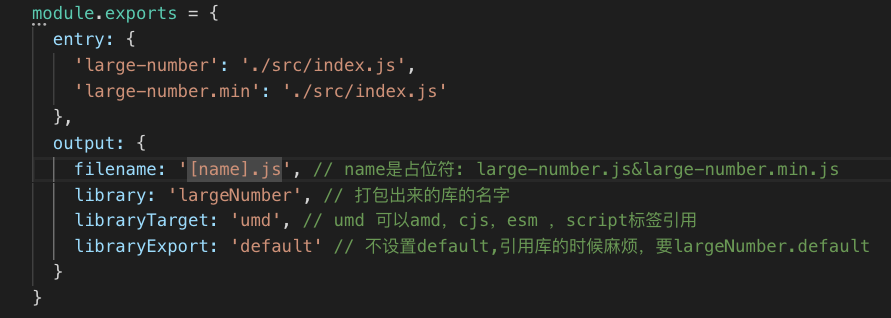
Step 3: create large number / webpack config. js
Step 4: package Add in JSON
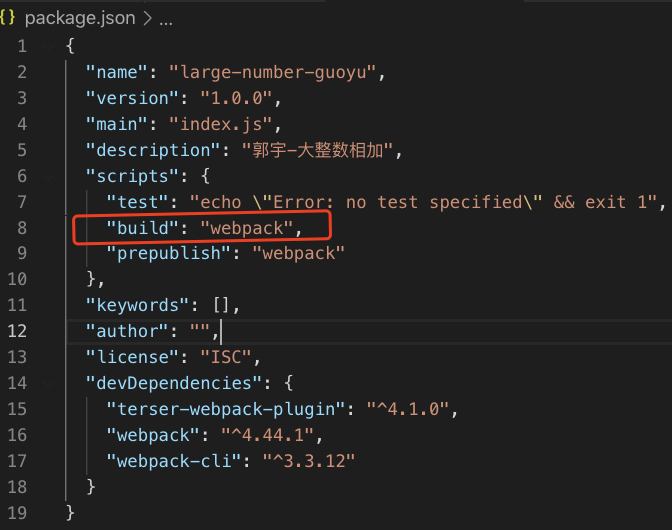
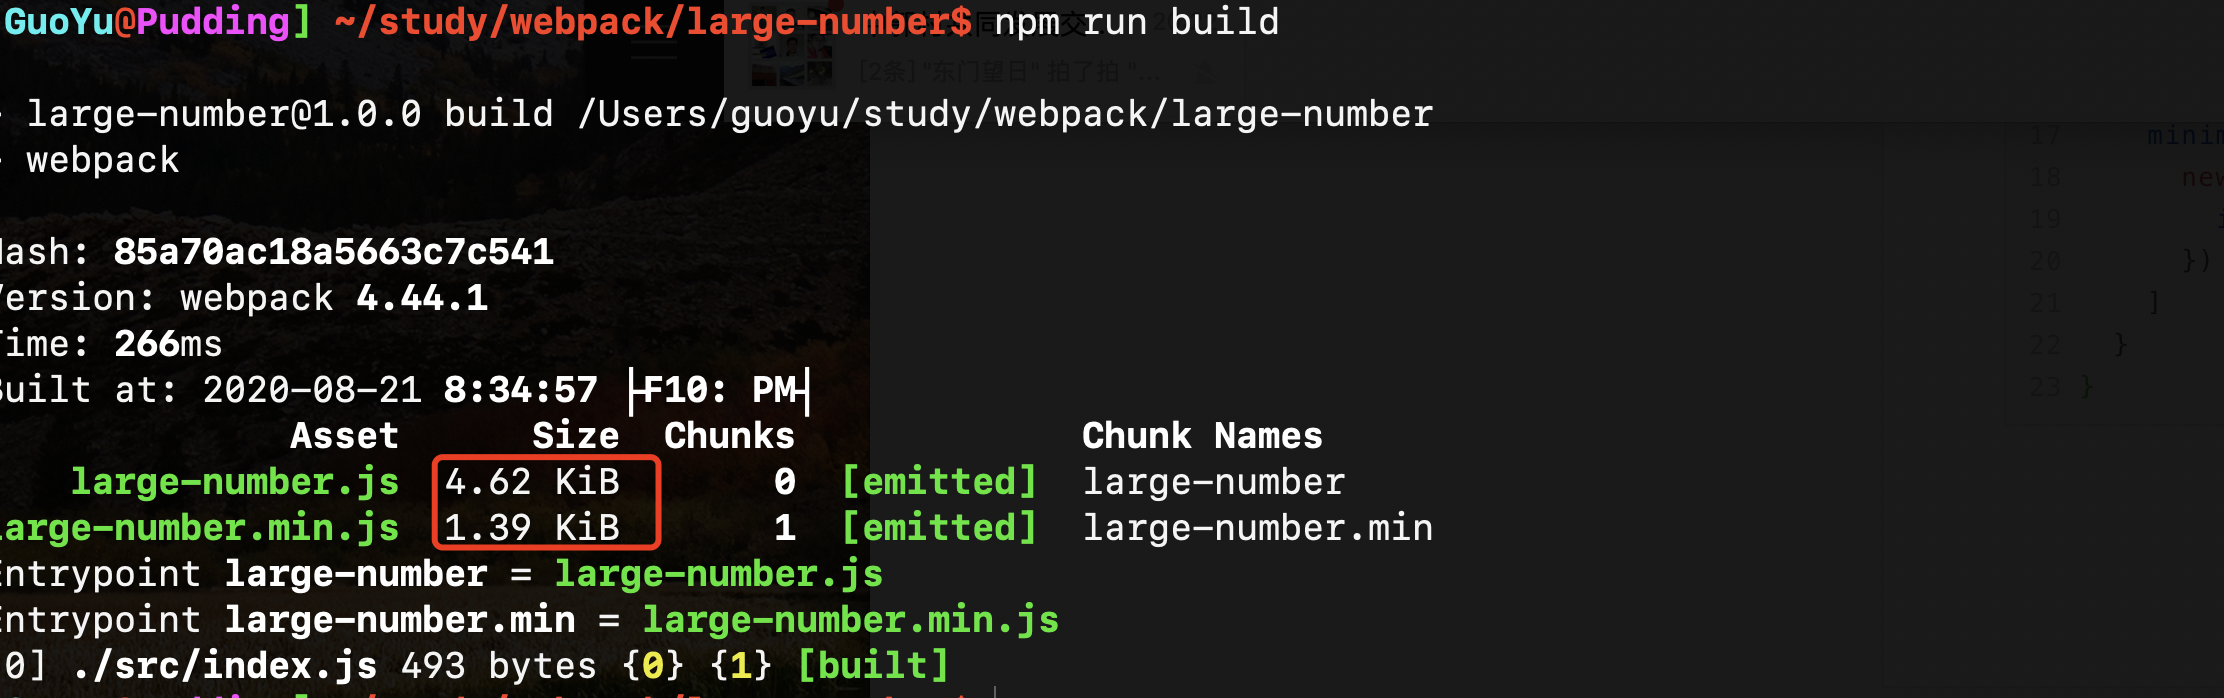
Packaging: npm run build

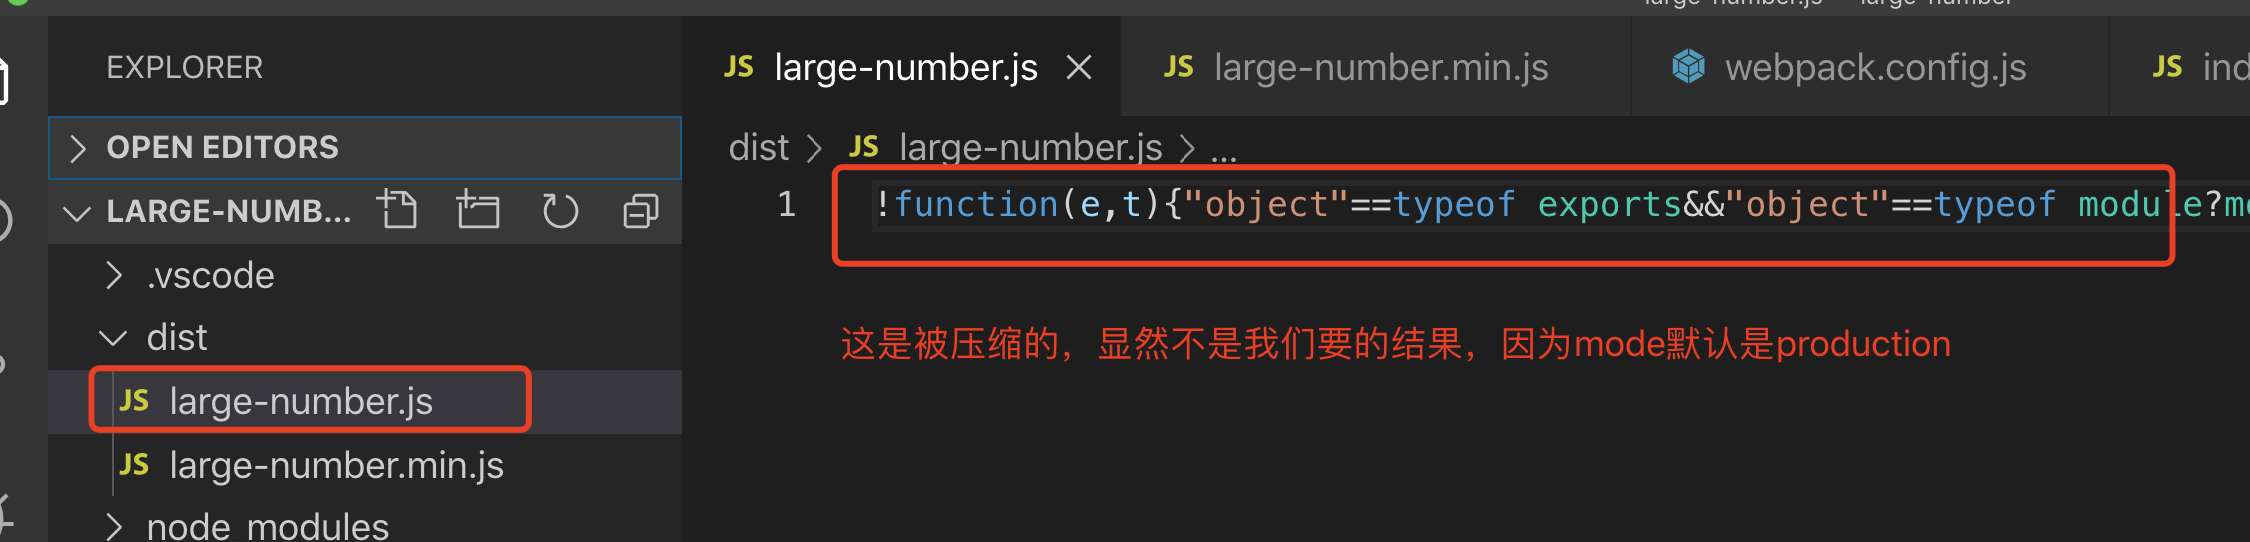
Step 5: fix: install the terser webpack plugin
Obviously, the mode cannot be production, because the packaging will be compressed. Therefore, we need to set the mode to none, and then decide which to compress and which not to compress through other configurations.
Here we use a plug-in: terser webpack plugin, which compresses large number through configuration Min.js without compressing large number JS, note that the terser webpack plugin is also webpack 4 X comes with a built-in plug-in. Its kernel is uglifyjs webpack plugin
npm install terser-webpack-plugin -D
webpack.config.js
const TerserWebpackPlugin = require('terser-webpack-plugin')
module.exports = {
  mode: 'none',
  entry: {
    'large-number': './src/index.js',
    'large-number.min': './src/index.js'
  },
  output: {
    filename: '[name].js', // name is a placeholder: large number js&large-number. min.js
    library: 'largeNumber', // The name of the packaged library
    libraryTarget: 'umd', // umd can be referenced by amd, cjs, esm and script tags
    libraryExport: 'default' // If default is not set, it is troublesome to reference the library. Largenumber is required default
  },
  // optimization
  optimization: {
    minimize: true,
    minimizer: [
      new TerserWebpackPlugin({
        include: /\.min\.js$/  // Compress only for min.js
      })
    ]
  }
}
npm: package. main attribute in JSON
In short, this attribute defines the file address when we refer to a dependency.
It is rarely used in normal development. It is only useful when we reference or develop a dependent package. If we do not use the main attribute, we may need to write the reference as follows: require("some module / dist/app.js"), if we specify dist/app.js in the main attribute JS, we can directly reference dependencies: require("some module")
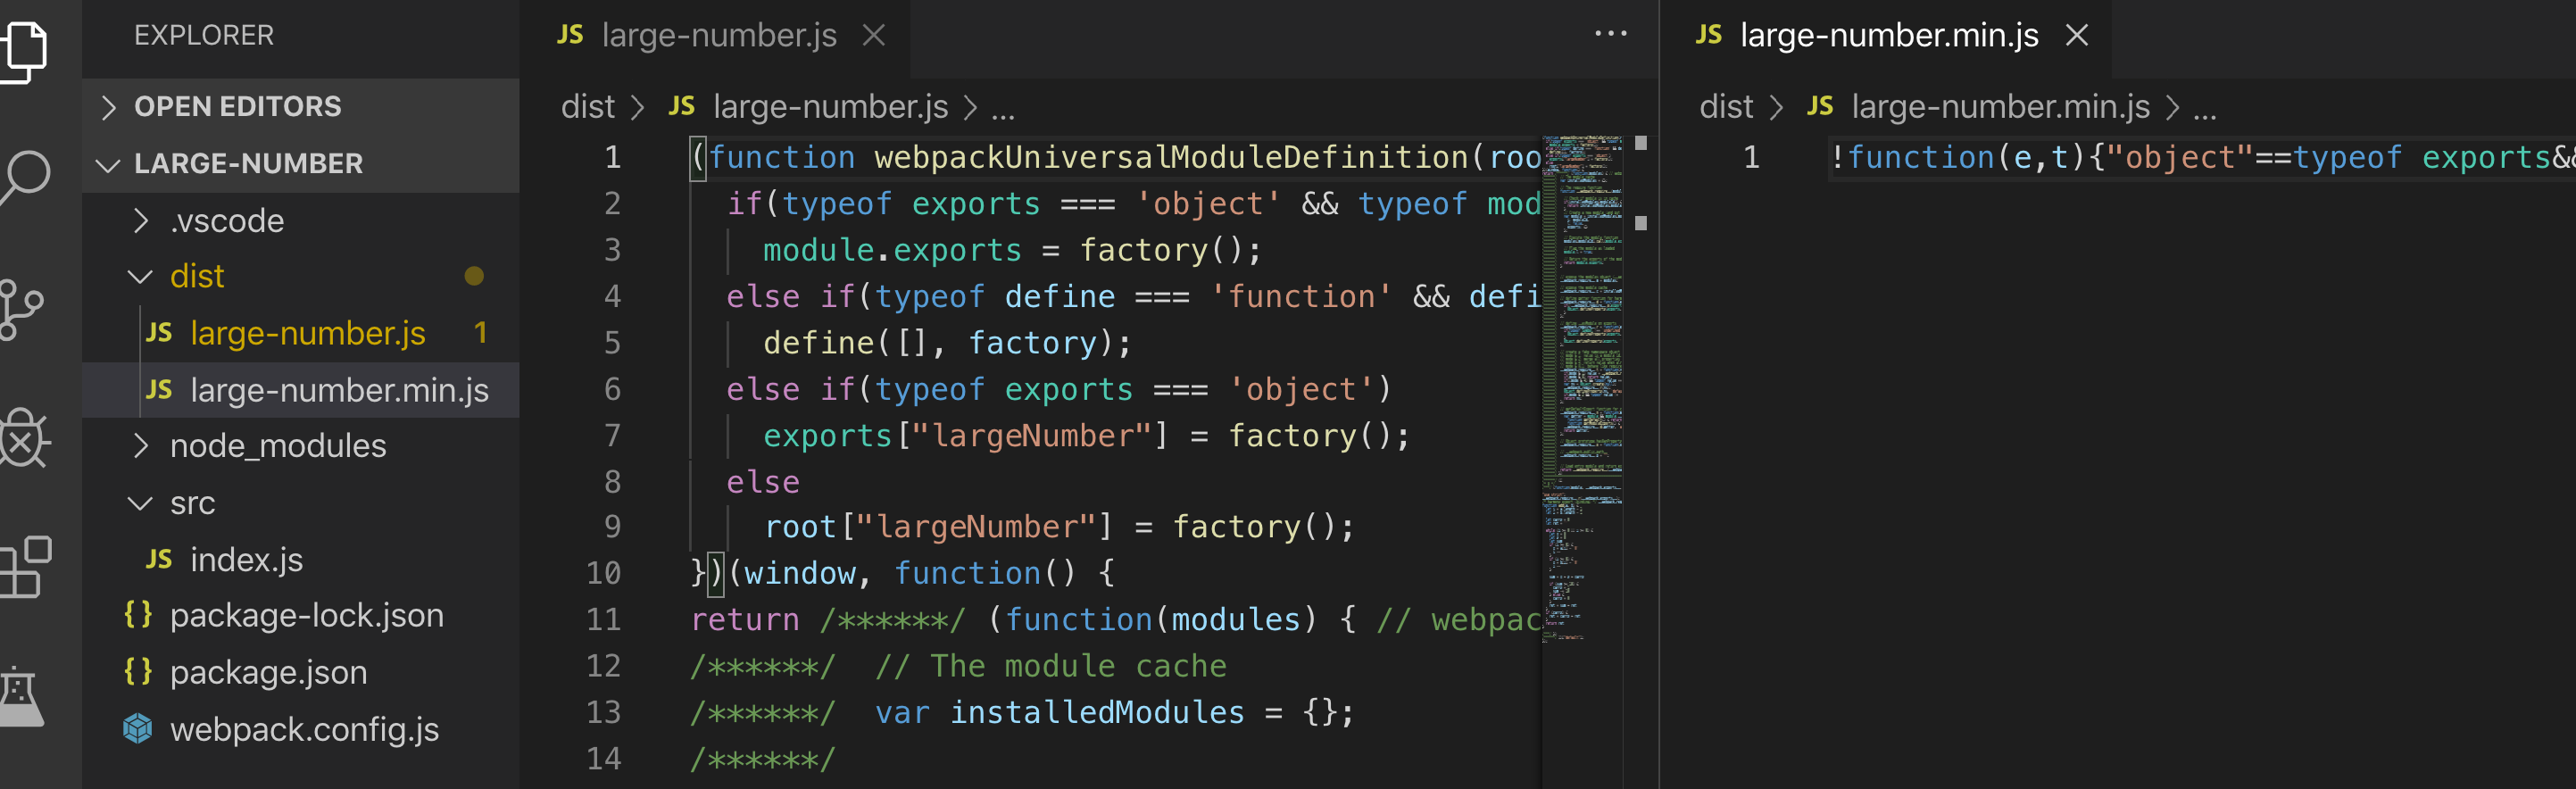
Step 6: create a large number / index js
if (process.env.NODE_ENV === 'production') {
  module.exports = require('./dist/large-number.min.js')
} else {
  module.exports = require('./dist/large-number.js')
}
At the same time, in package JSON is set as follows:
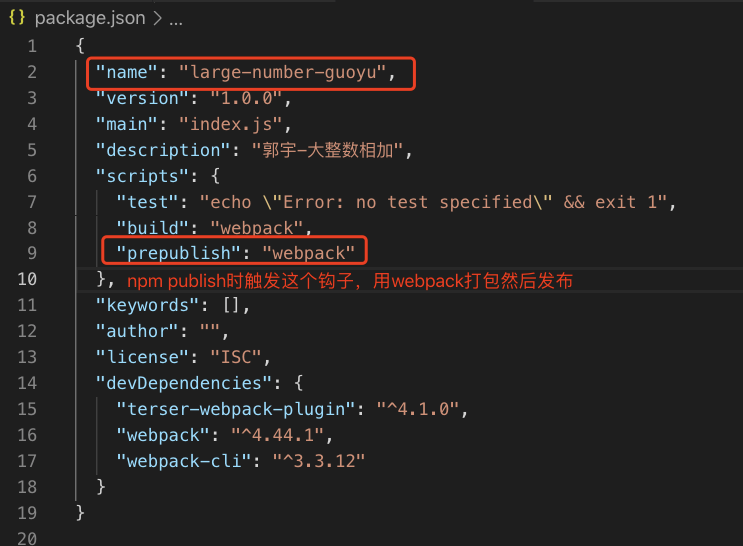
Step 7: log in to npm login

Step 8: release
When npm publish is executed, the hook prepublish is triggered
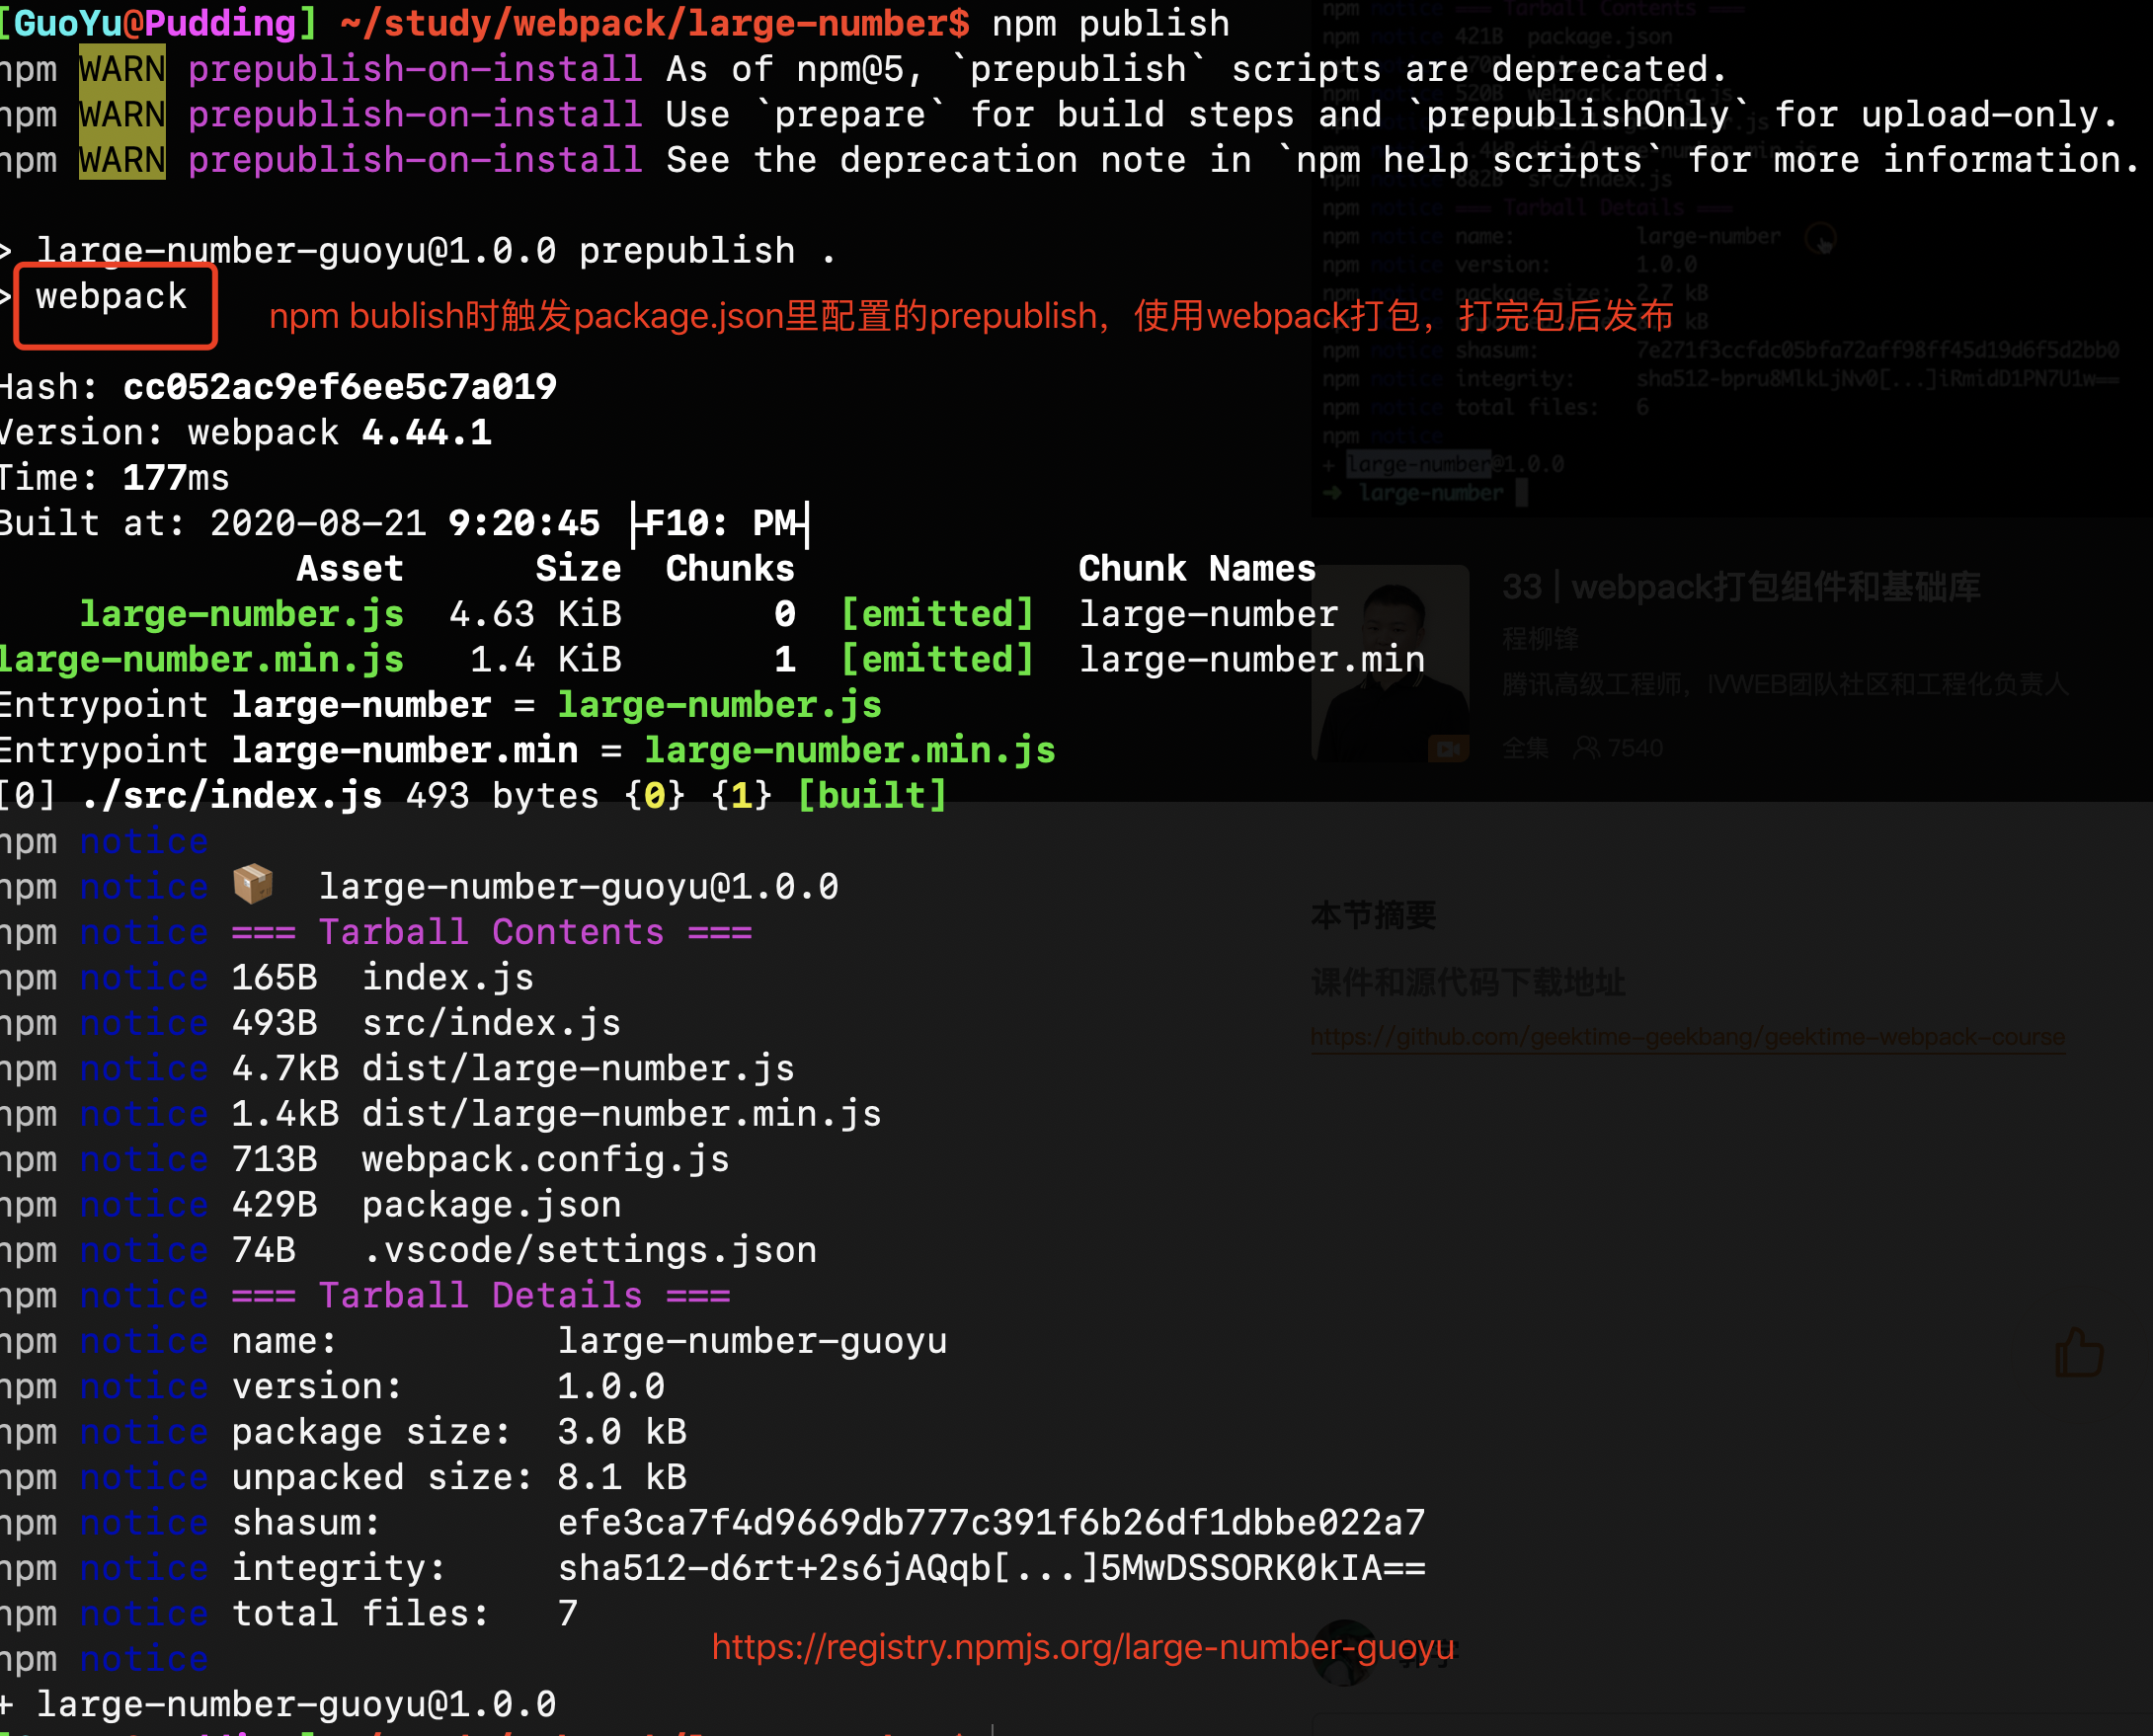
Remember, if the library you write is upgraded, it must be in package Change the version number in the version configuration of JSON, and then npm publish again
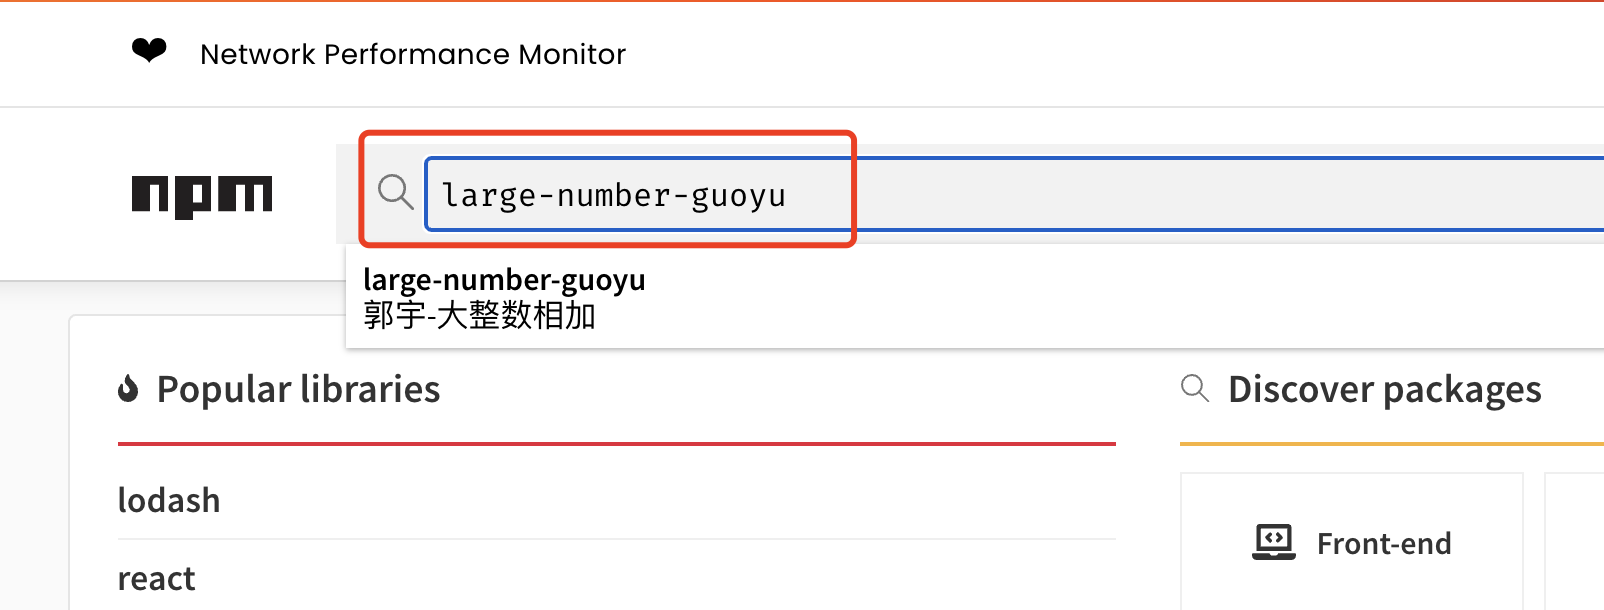
Step 9: switch to the business project to use the library
npm install large-number-guoyu -S
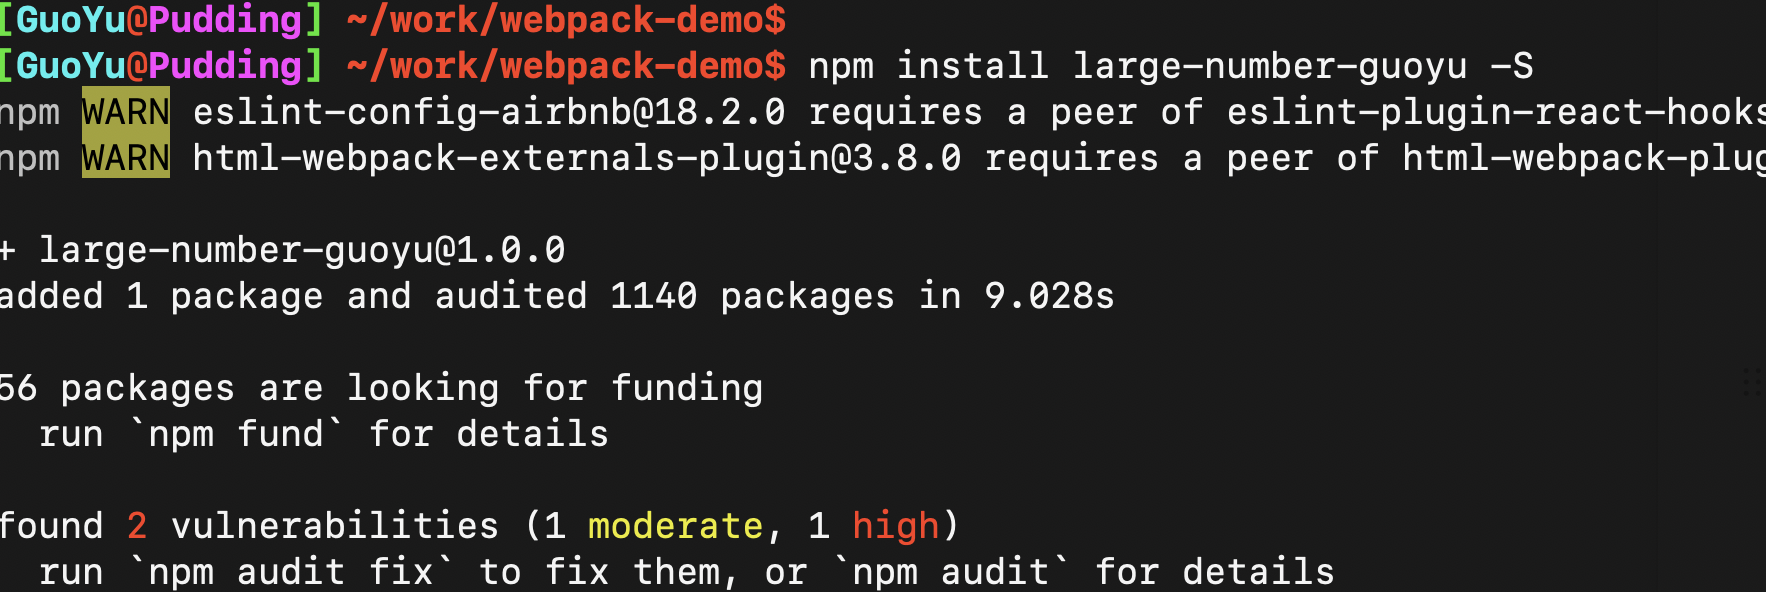
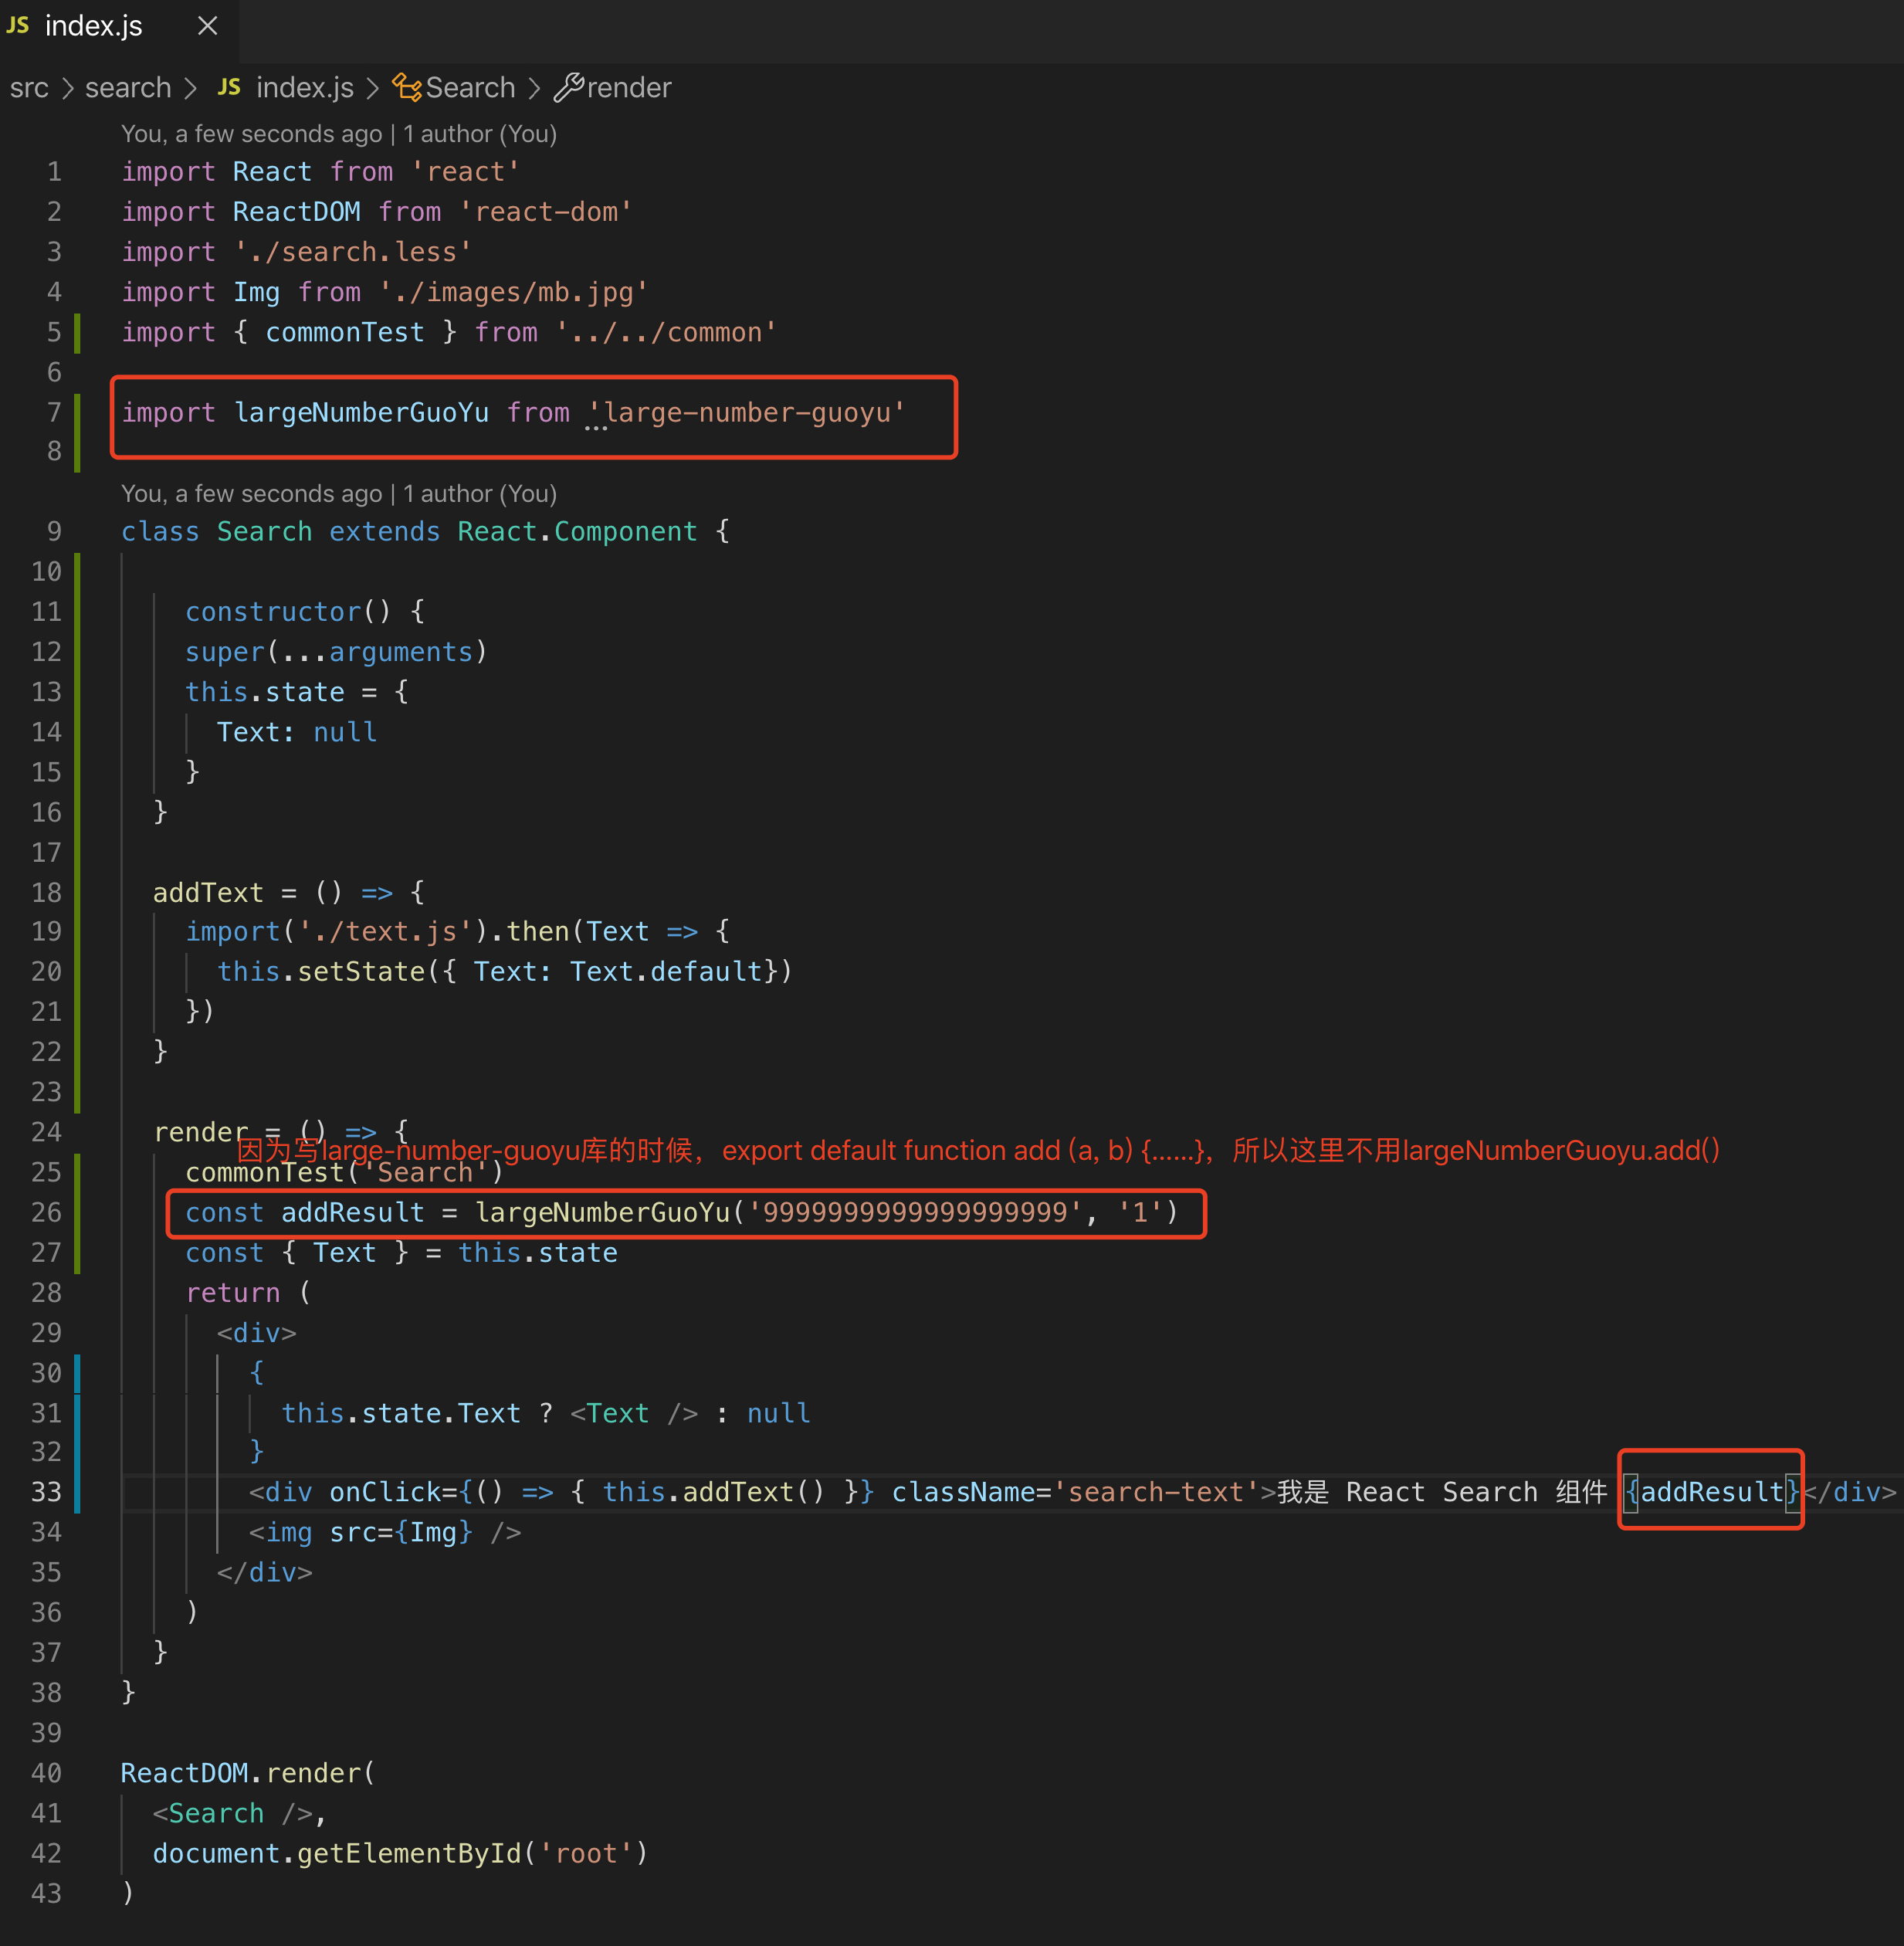
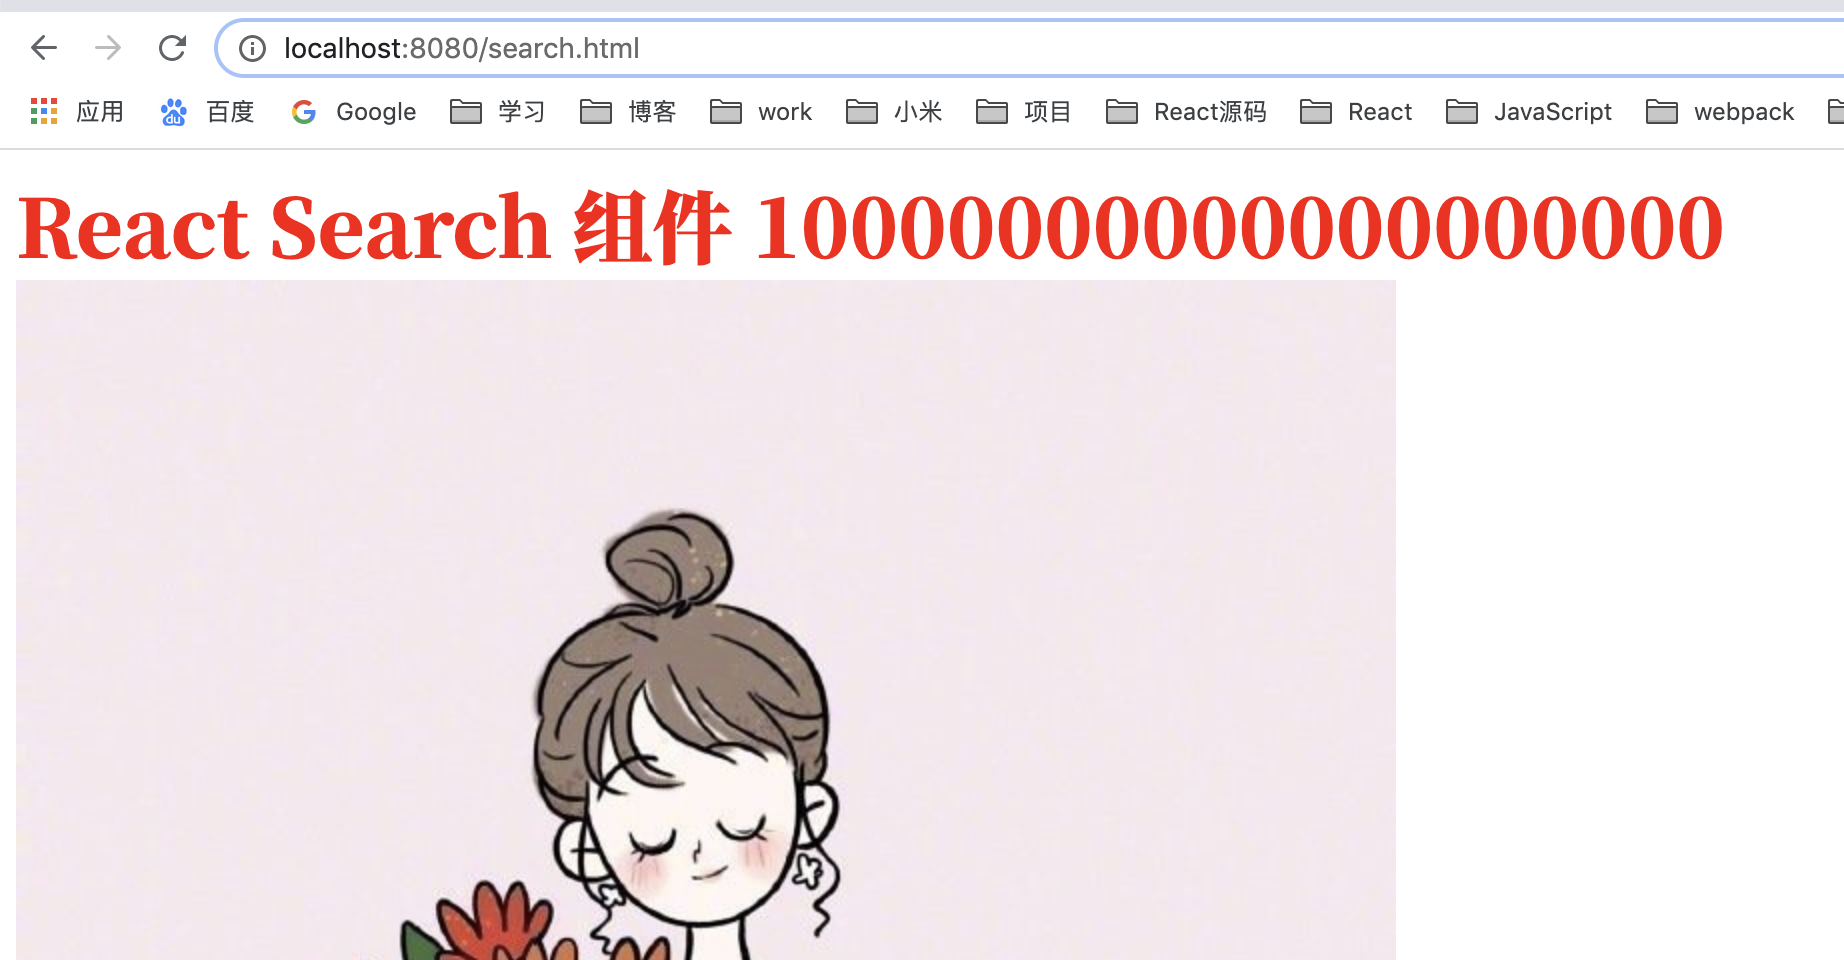
Reference in project
3, DLLPlugin and DLLReferencePlugin of webpack
3.1 what is a DLL
DLL(Dynamic Link Library) file is a dynamic link library file. In Windows, many applications are not a complete executable file. They are divided into some relatively independent dynamic link libraries, namely DLL files, and placed in the system. When we execute a program, the corresponding DLL file will be called.
For example: screws are used in many products, but factories do not need to produce screws every time when producing different products, because screws can be produced separately and used for a variety of products. Here, the function of the screw can be understood as dll.
3.2 why use DLL
Generally speaking, our code can be at least simply divided into business code and third-party library. If you don't deal with it, you need to rebuild all the code every time, which takes a lot of time. Then, in most cases, the code of many third-party libraries will not change (unless it is a version upgrade). At this time, dll can be used: package the reusable third-party modules into the dynamic link library. Without upgrading these libraries, the dynamic library does not need to be repackaged, and only the business code is repackaged each time.
Or the above example: take each build as the process of producing products. We extract the process of producing screws first, and then we don't have to produce screws repeatedly regardless of adjusting the function or design of the product (corresponding to the change of business code) (the third-party module doesn't need to be packaged repeatedly); Unless the product needs to use new types of screws (the third-party module needs to be upgraded), it is necessary to re produce new screws, and then focus on adjusting the product itself.
3.3 use steps
3.3.1 create a webpack dll. js
Create a webpack under the root directory dll. JS file
const path = require('path')
const webpack = require('webpack')
module.exports = {
entry: {
// Third party Library
library: [
'react',
'react-dom'
]
},
output: {
// The file name of the output dynamic link library, [name] represents the name of the current dynamic link library,
filename: '[name]_[hash:8].dll.js',
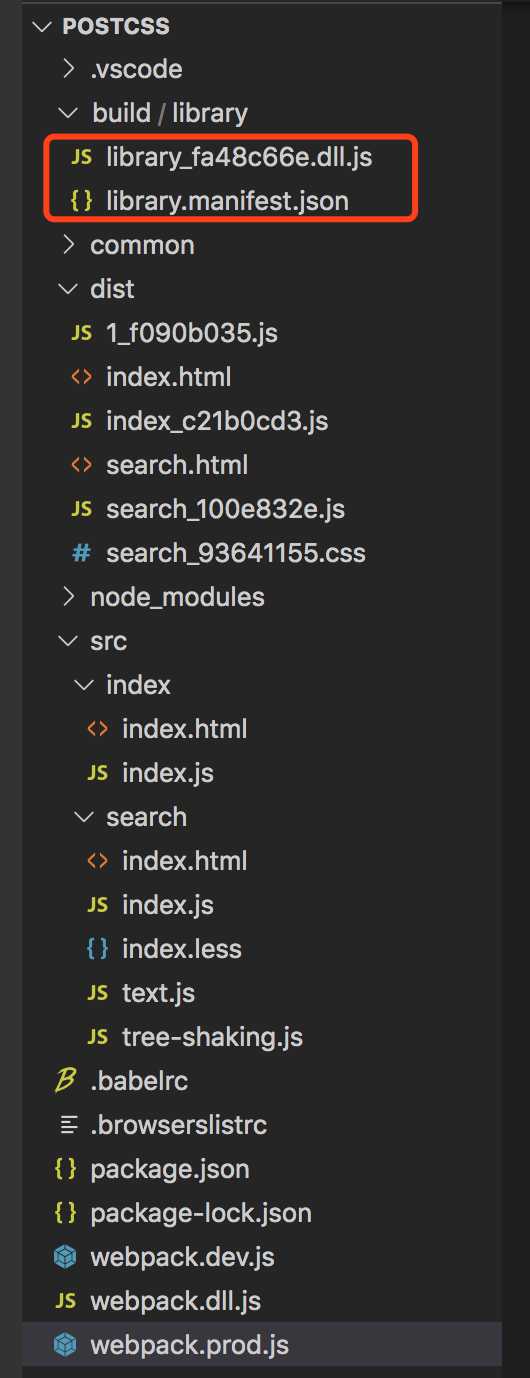
path: path.join(__dirname, 'build/library'),
// The library must be consistent with the name in dllplugin, which will be explained later
library: '[name]_dll_[hash:8]'
},
plugins: [
new webpack.DllPlugin({
// Global variable name of dynamic link library, and output Consistent in Library
// The value of this field is the output manifest The value of the name field in the JSON file
name: '[name]_dll_[hash:8]',
// Describe the manifest. Of the dynamic link library JSON file name when outputting
path: path.join(__dirname, 'build/library/[name].manifest.json')
})
]
}
3.3.2 use (Reference) the typed DLL file in the project
On webpack The dll file typed above is referenced in prod.js
const webpack = require('webpack')

new webpack.DllReferencePlugin({
  manifest: require('./build/library/library.manifest.json')
})
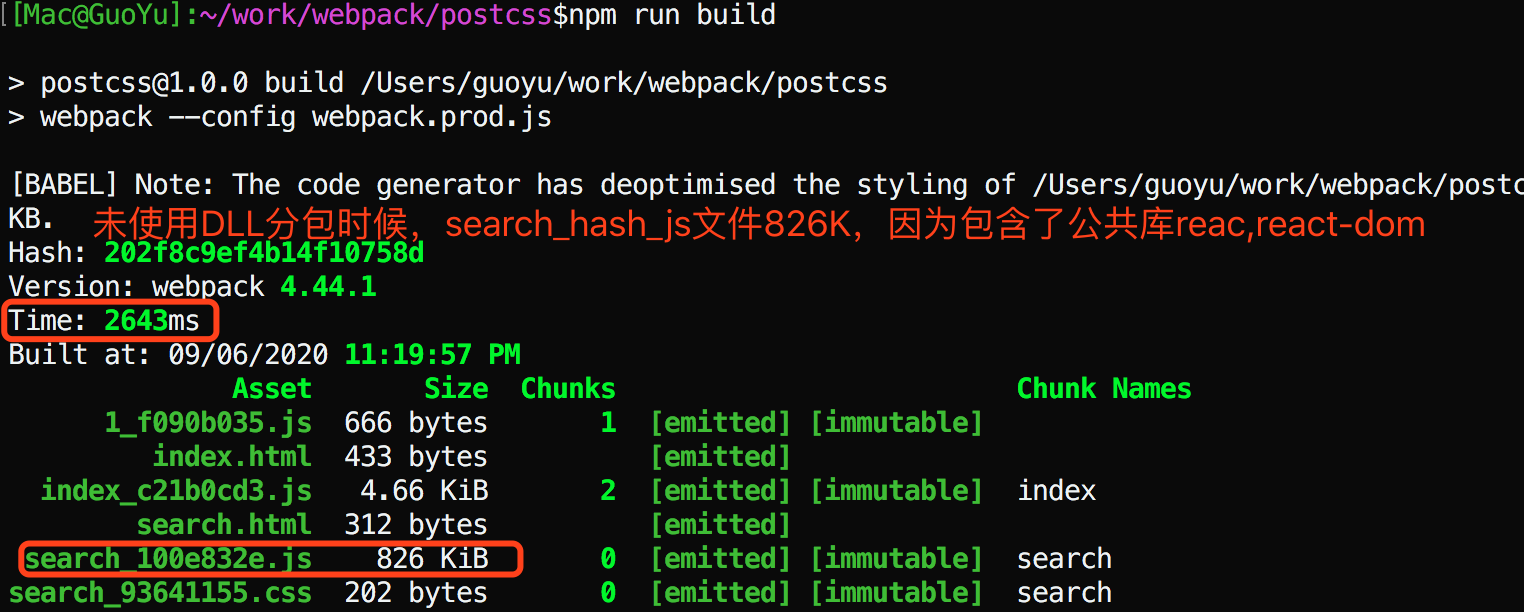
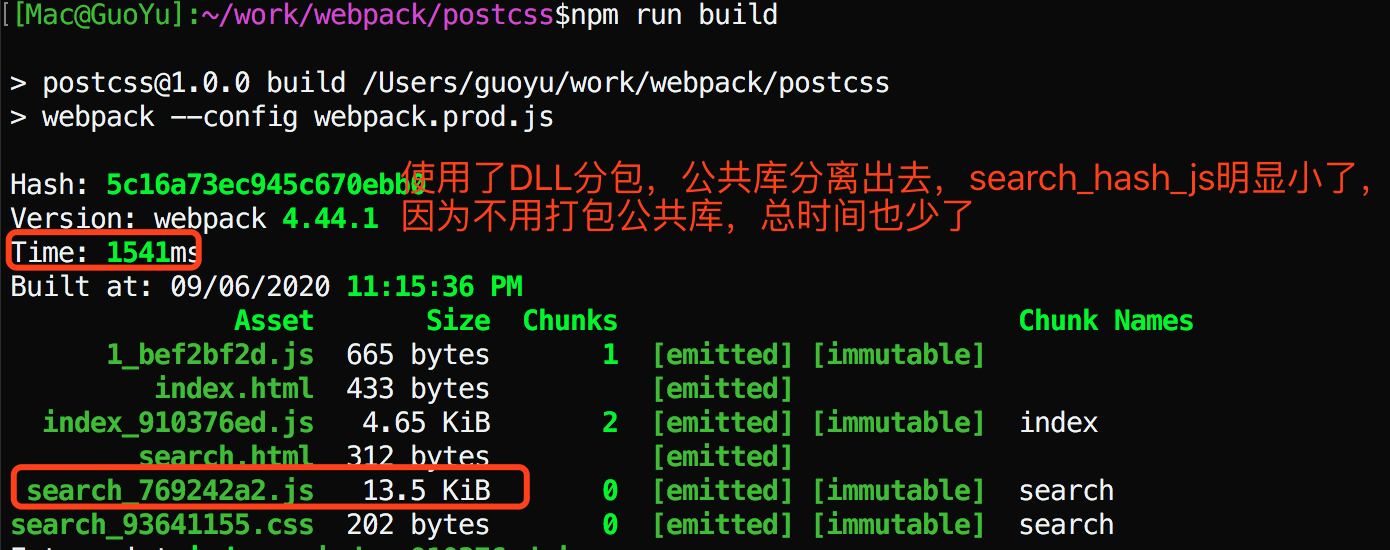
It can be seen that whether to separate the basic package has a great impact on the construction efficiency
3.3.3 add asset html webpack plugin DLL JS file into html file
npm i add-asset-html-webpack-plugin --save
const AddAssetHtmlWebpackPlugin = require('add-asset-html-webpack-plugin')
new AddAssetHtmlWebpackPlugin({
  filepath: path.join(__dirname, './build/library/library_fa48c66e.dll.js')
})
const AddAssetHtmlWebpackPlugin = require('add-asset-html-webpack-plugin')

const files = fs.readdirSync(path.resolve(__dirname, './build/library'));
files.forEach(file => {
  if(/.*\.dll.js/.test(file)) {
    //Mount the packaged dll file into html
    plugins.push(new AddAssetHtmlWebpackPlugin({
        filepath: path.resolve(__dirname, './build/library', file)
    }))
  }
  if(/.*\.manifest.json/.test(file)) {
    //Analyze whether the third-party module is already in the dll file. If it is, no node is needed_ Modules are packaged in analysis
    plugins.push(new webpack.DllReferencePlugin({
      manifest: path.resolve(__dirname, './build/library', file)
    }))
  }
})
4, Multiprocess / multithread packaging
4.1 basic principle and background
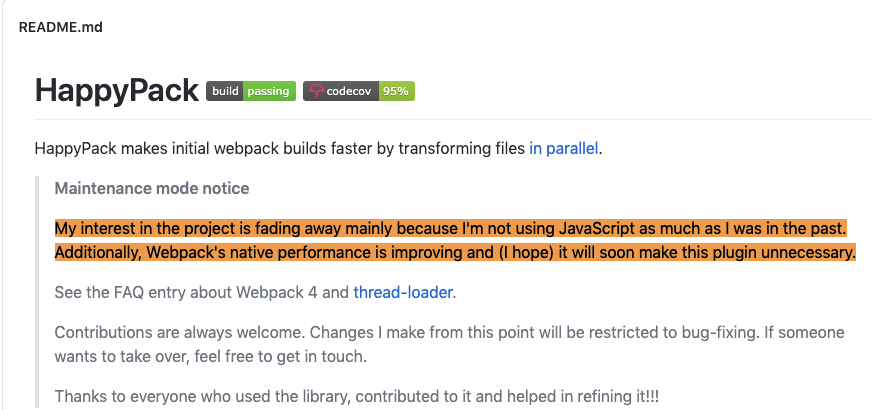
In the era of webpack3, the most active multi-threaded packaging scheme is HappyPack. Later, due to the author's reason, it was no longer maintained, and webpack4 In the X era, the official brought its own thread loader, which can be solved.
HappyPack will create a thread pool, and each module and its dependencies will get worker threads. Threads will process their own modules. After processing, they will return to the main thread through their own communication mechanism to complete the whole construction process.
In fact, the principle of thread loader is similar to that of HappyPack. The packaging task is divided into multiple (node) processes, and the modules are distributed to these threads in turn to complete the packaging task together.
4.2 how to use tread loader
Step 1: install thread loader
npm install thread-loader -D
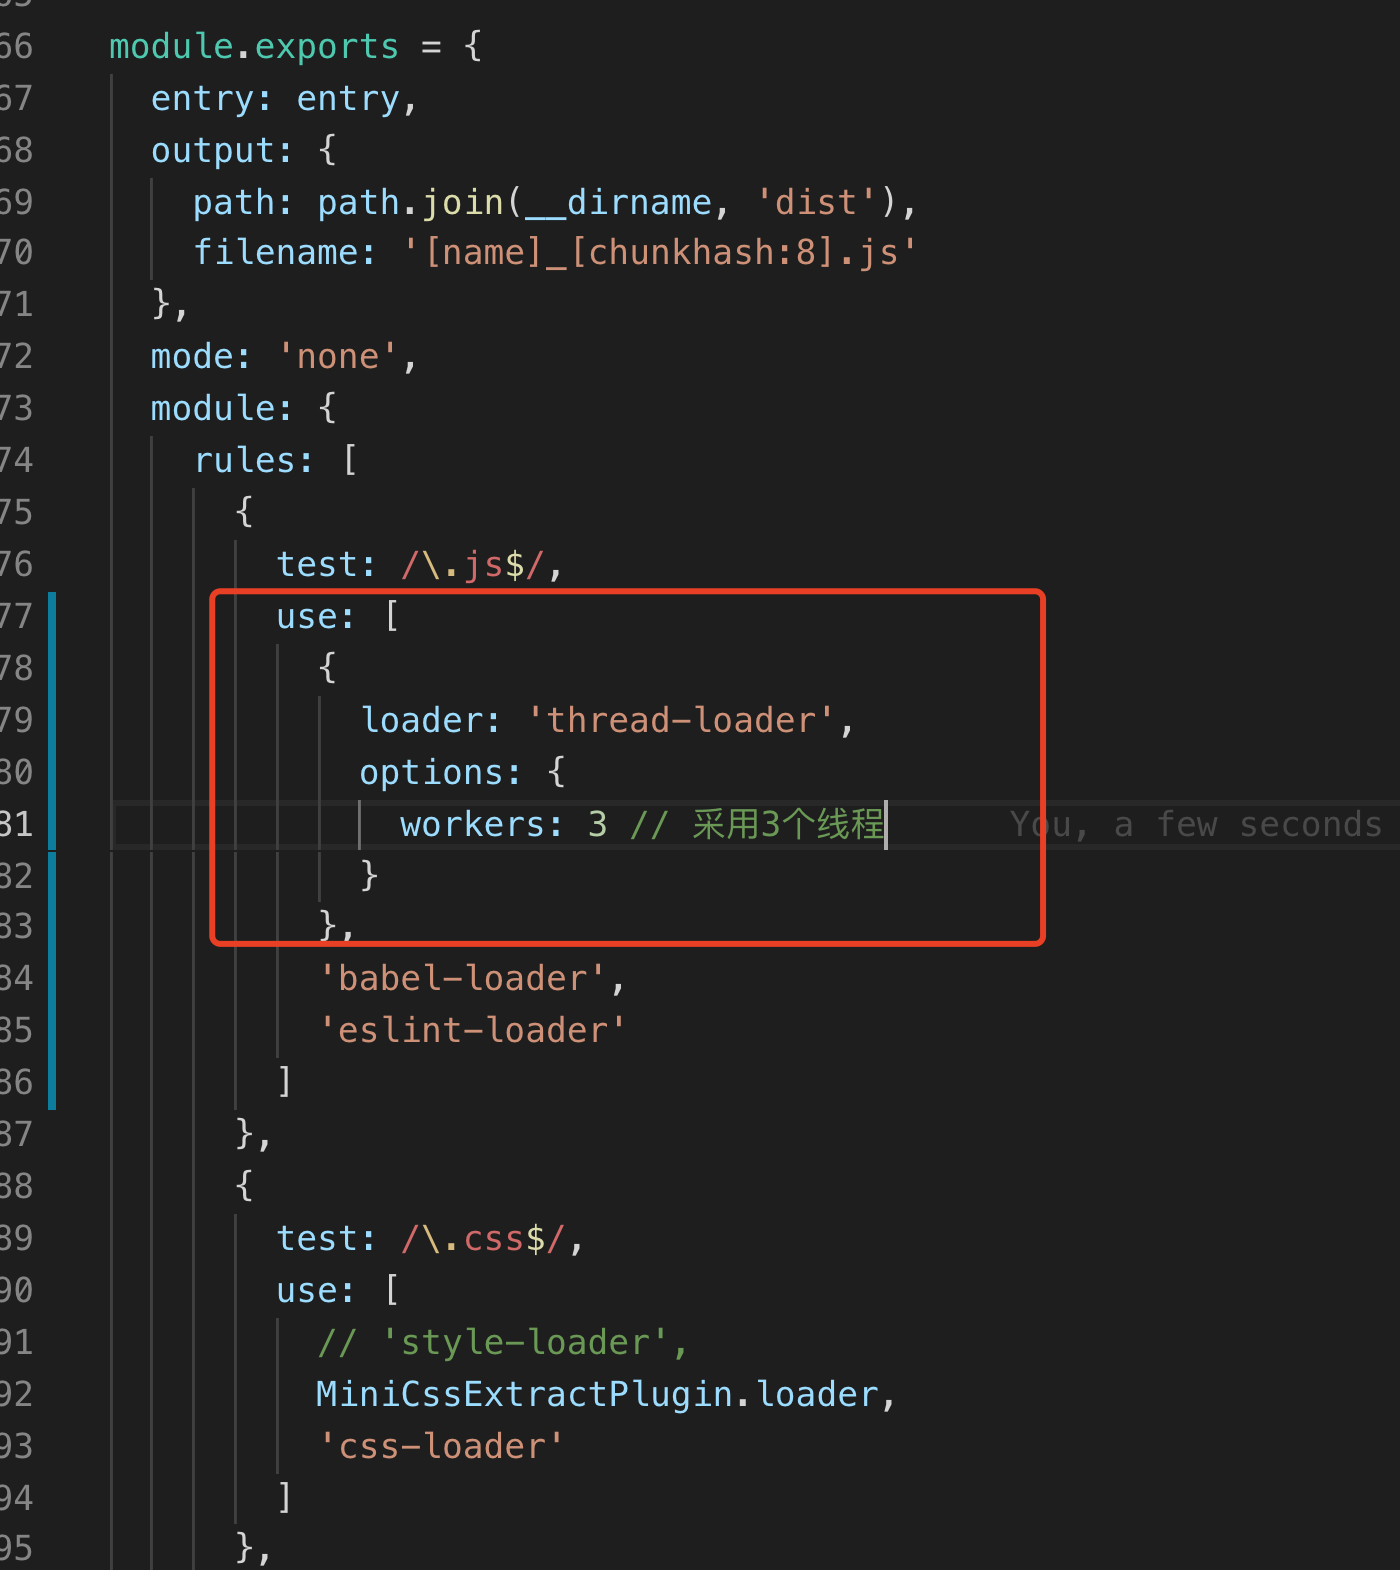
Step 2: configure the webpack under rules
{
  test: /\.js$/,
  use: [
    {
      loader: 'thread-loader',
      options: {
        workers: 3 // 3 threads
      }
    },
    'babel-loader',
    'eslint-loader'
  ]
}
4.3 multi process parallel compression
There are many compression methods. Here is a recommended method: turn on the parallel parameter in terser webpack plugin. (Note: parallel means parallel and simultaneous)
Installation:
npm install terser-webpack-plugin --save-dev
use:
The following parallel setting is 4. If it is not set, the default is 2 times the number of CPU s minus 1
const TerserPlugin = require('terser-webpack-plugin')

module.exports = {
  optimization: {
    minimizer: [new TerserPlugin({
        parallel: 4
    })],
  },
}
parallel
Type: Boolean|Number Default: true
Use multi-process parallel running to improve the build speed. Default number of concurrent runs: os.cpus().length - 1.
Through the comparison of an example, when the above parallel: false, the packaging time is 111 seconds. If parallel: true is set, the packing time is 79 seconds, and the effect is obvious
5, Using cache to improve the speed of secondary construction
5.1 caching using Babel loader plug-in
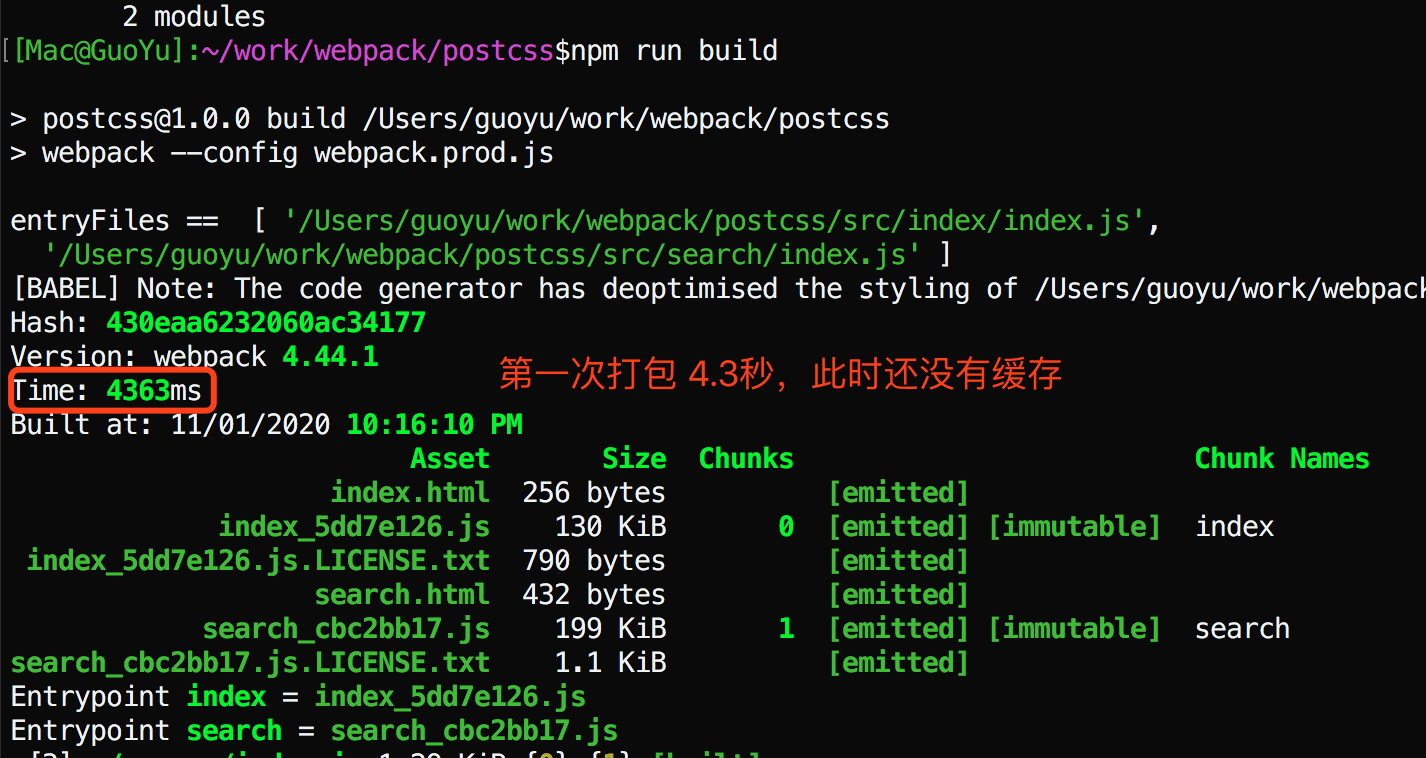
Before using cache
How to use?
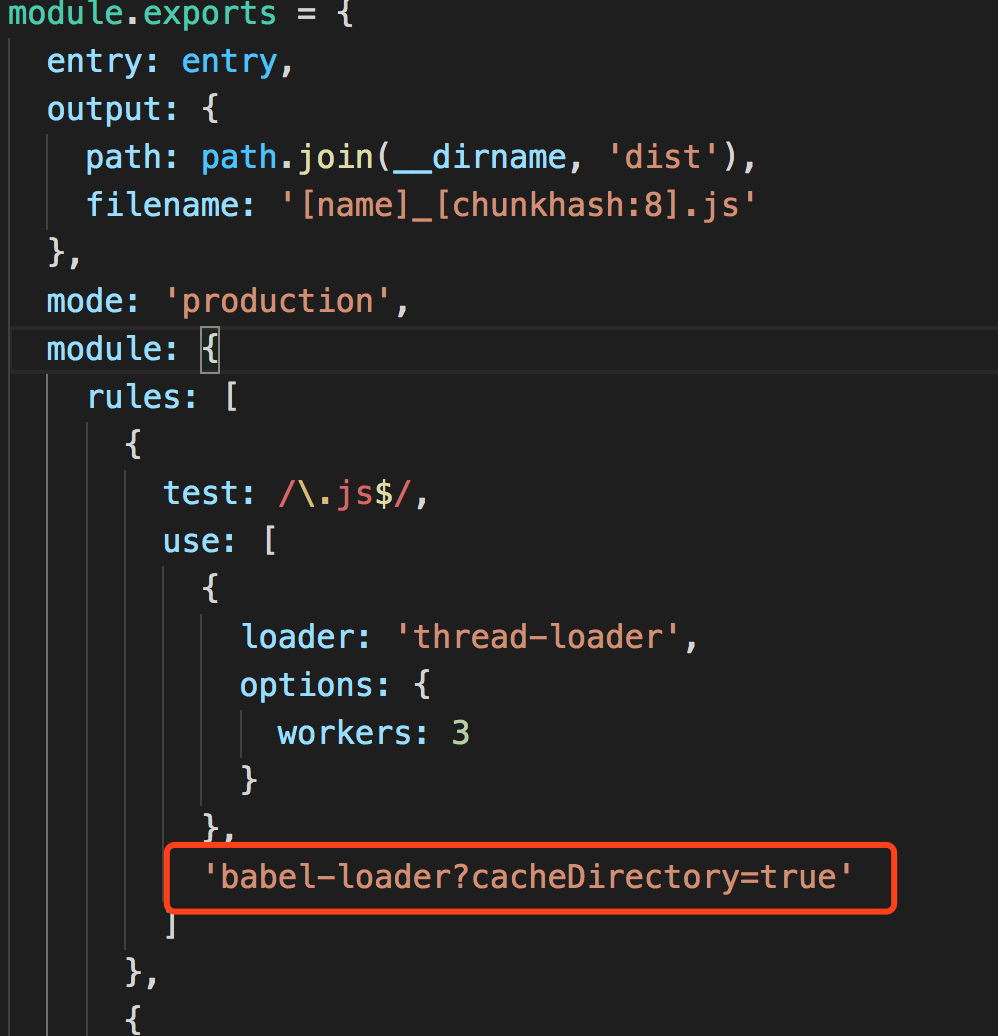
use: [
  {
    loader: 'thread-loader',
    options: {
      workers: 3
    }
  },
  'babel-loader?cacheDirectory=true'
]
Then: npm run build
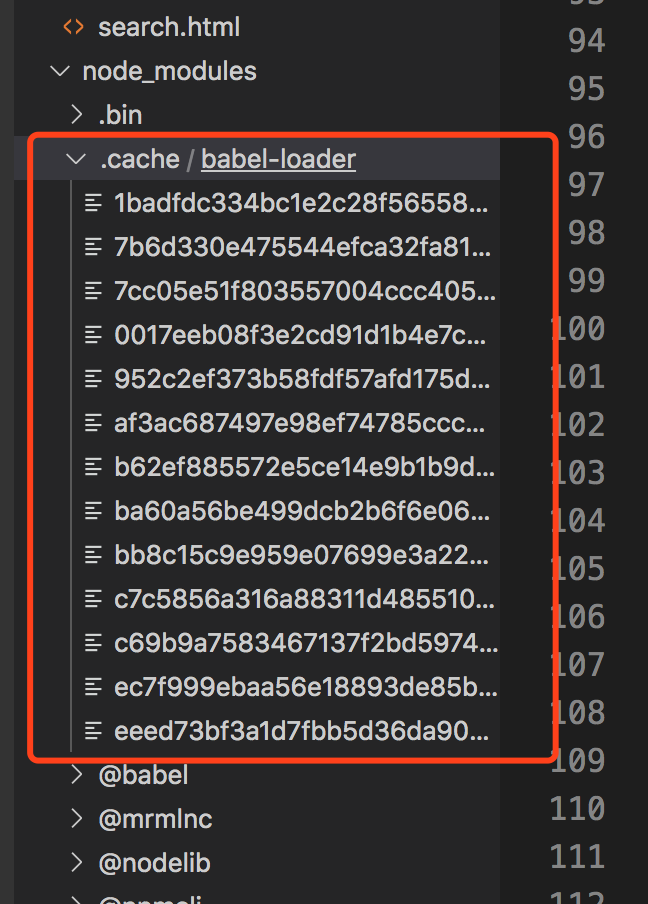
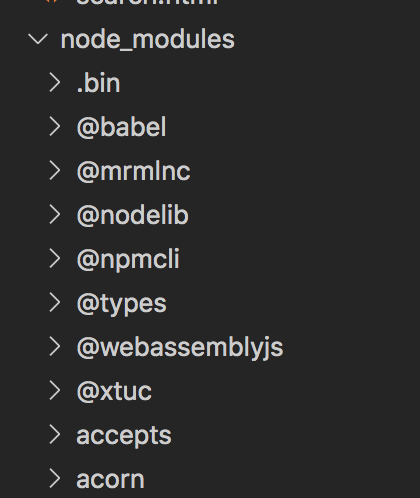
As you can see, node_ There is one more module Folder of cache / Babel loader
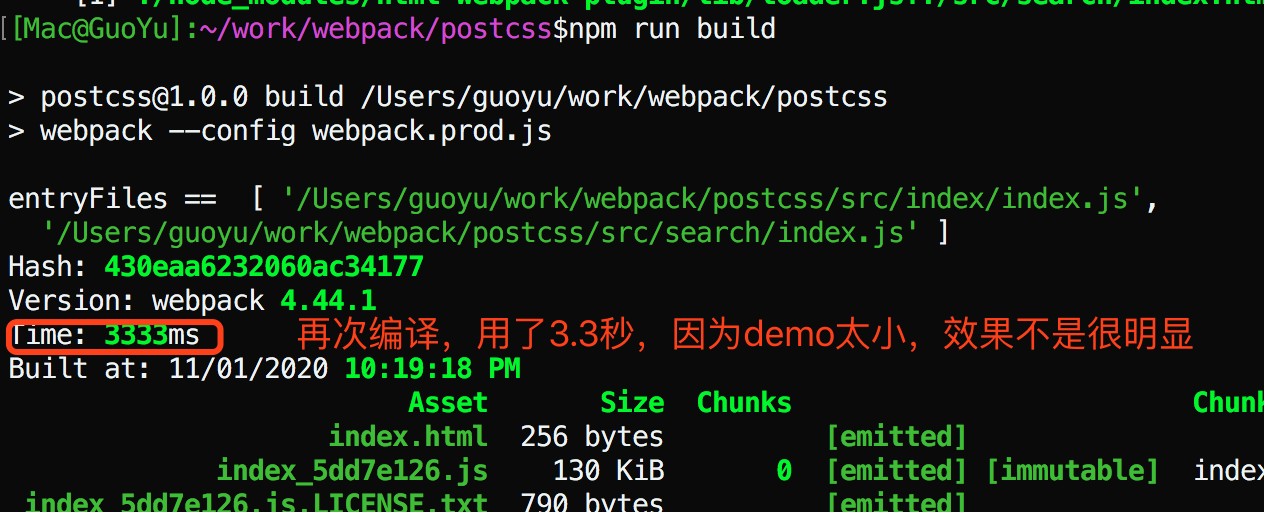
Execute npm run build again
5.2 caching using terser webpack plugin
npm install terser-webpack-plugin

const TerserPlugin = require('terser-webpack-plugin')

optimization: {
  minimizer: [
    new TerserPlugin({
      parallel: 4,
      cache: true
    })
  ]
}
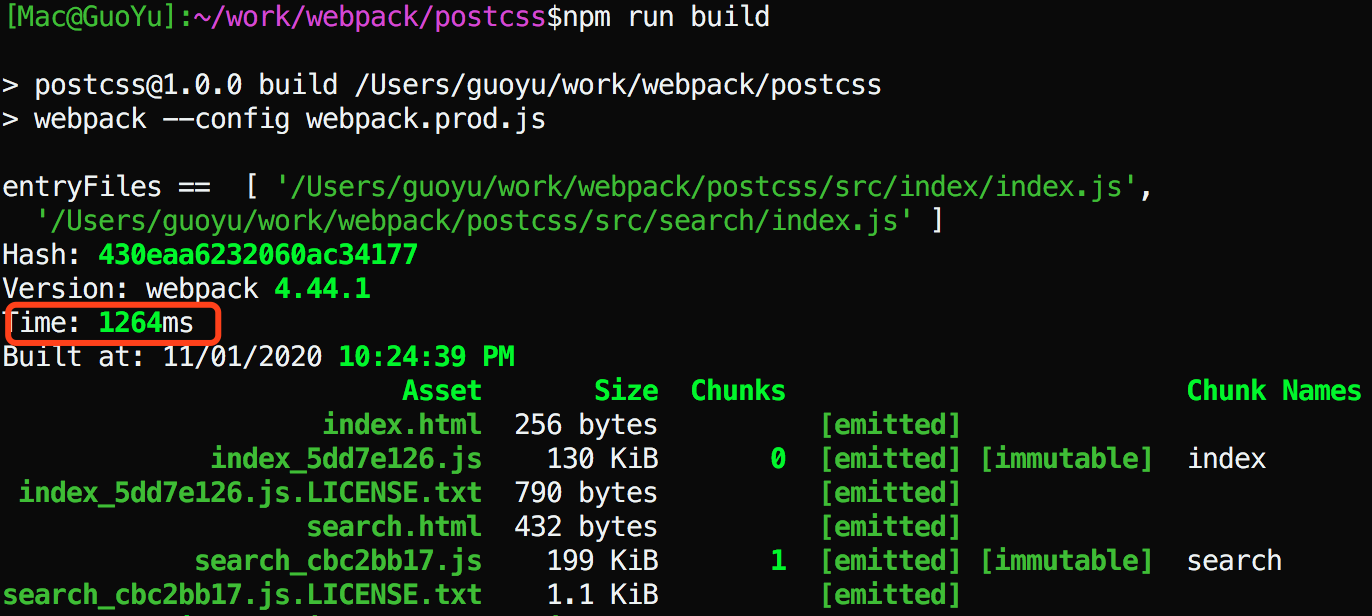
Execute npm run build

The first execution is about 3.3 seconds, and the second execution is 1.2 seconds
5.3 using hard source webpack plugin
npm install hard-source-webpack-plugin -S

const HardSourceWebpackPlugin = require('hard-source-webpack-plugin')

plugins: [new HardSourceWebpackPlugin()]
Execute npm run build
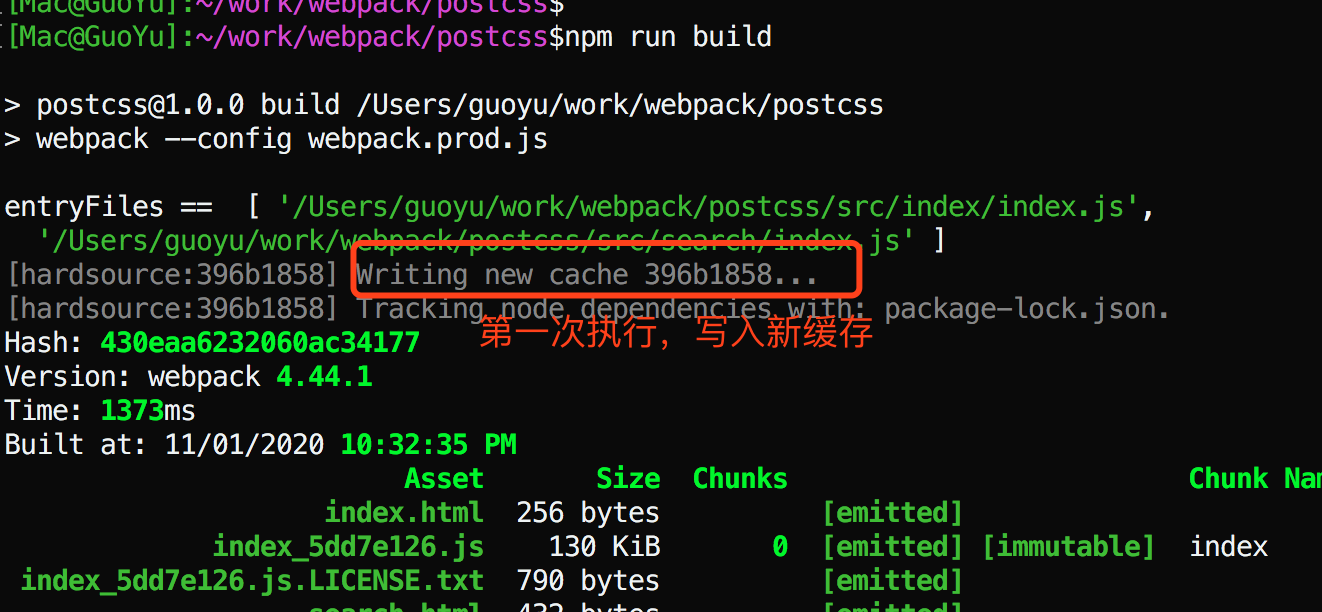
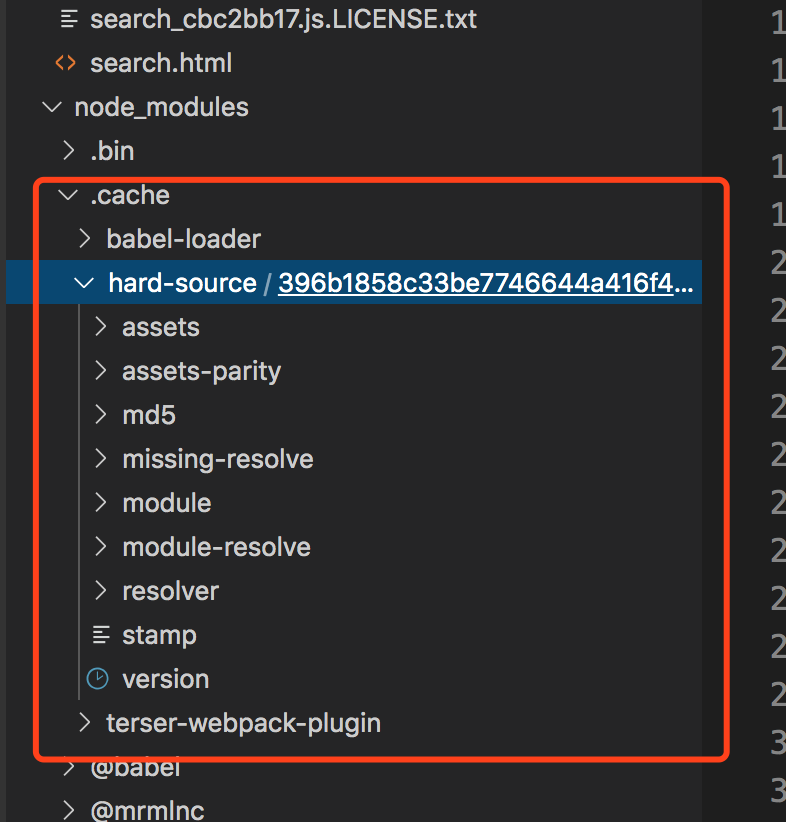
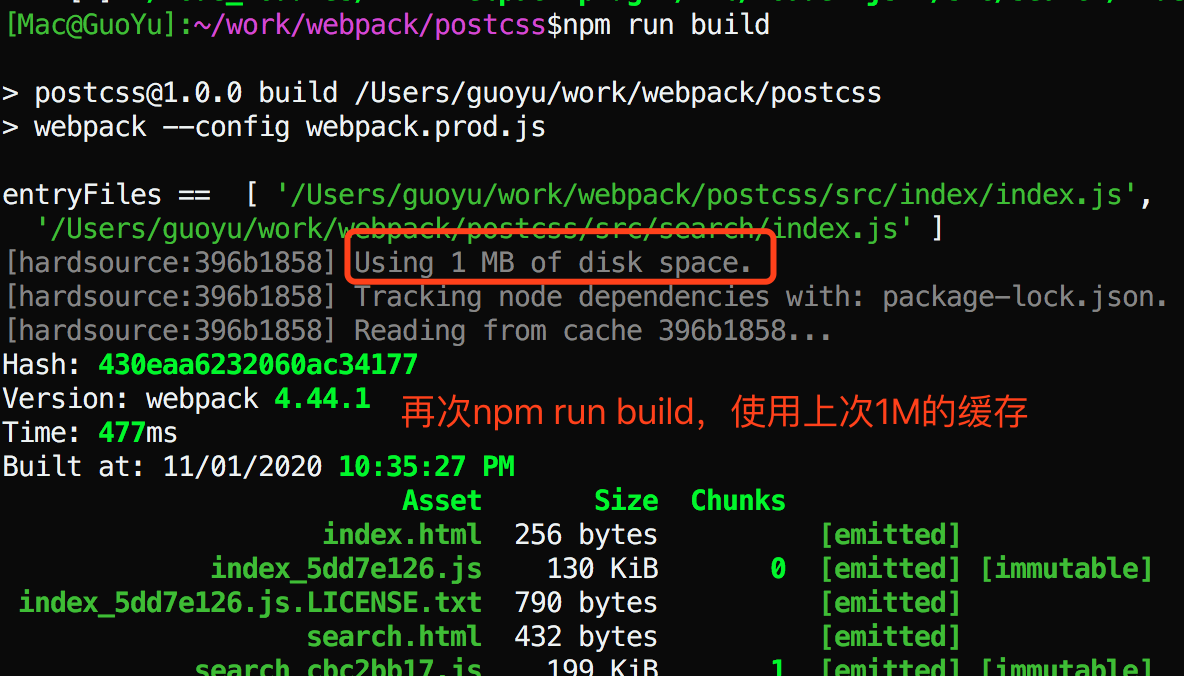
The final time is reduced to 0.47 seconds