Previously:
Wechat applet learning journey - production of the first page
Wechat applet learning journey - making your own applet based on zero - making the second page
Wechat applet learning journey – improving pages page – learning Font Icon, data binding, condition / list rendering, event / catch/bind and routing
Wechat applet learning journey - making your own applet based on zero - completing the article details page - custom properties / page communication / caching mechanism / asynchronous API/async/await
Wechat applet learning journey - making your own applet based on zero - Implementation of music playback function on article details page - bug modification and optimization of background audio / global App / page
Introduction to wechat applet - day 6 - use of custom components and request s - making movie pages
Introduction to wechat applet (VII) – end of introduction
Realize more functions of movie page buttons
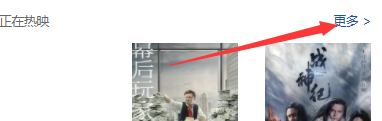
Click the more button to enter the more page of the movie.
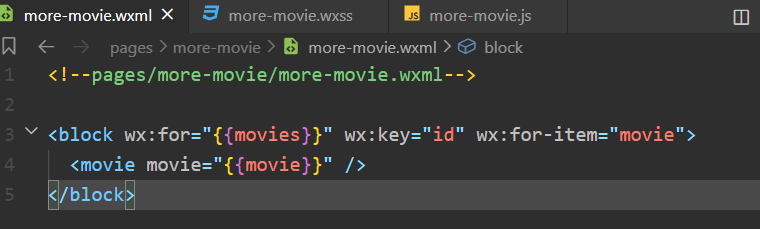
So let's first get the requested data to build more movie pages.
get data
/**
   * Initial data of the page
   */
  data: {
    // Movie Collection
    movies:[]
  },

  /**
   * Life cycle function -- listening for page loading
   */
  onLoad: function (options) {
    // Request the server data to get the movie being played
    wx.request({
      // Request address
      url: app.gBaseUrl + 'in_theaters',
      method: "GET",
      // The parameter is a query string in the get request
      data: {
        // Start index of movie
        start: 0,
        // Total number of films
        count: 12
      },
      success: (res) => { // Use the arrow function to solve the problem of this pointing
        // Movie data
        console.log(res.data.subjects);
        this.setData({
          movies: res.data.subjects
        })
      }
    });
  },
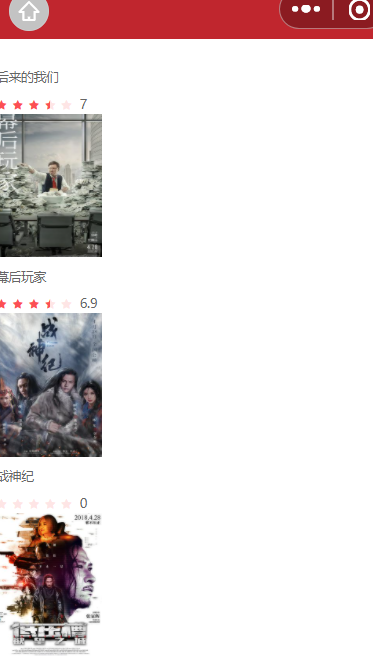
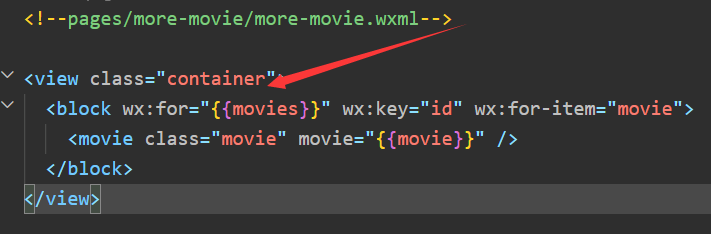
More movie page layout
/* pages/more-movie/more-movie.wxss */
/* container */
.container {
  display: flex;
  flex-direction: row;
  /* If it cannot be arranged, it will wrap automatically */
  flex-wrap: wrap;
  padding: 30rpx 28rpx;
  justify-content: space-between;
}

.movie {
  margin-bottom: 26rpx;
}
Here, we can find that the external style class is not used to set the style of the component, but the style class is directly added to the component, and the set style also takes effect. The reason for the effectiveness here should be that this component is wrapped by the view label, so the set style will take effect. If it is not wrapped by other labels, but a separate label, the set style will not take effect unless an external style class is used.
Something like this won't work.
<movie class="movie" movie="{{movie}}" />
movies page more button binding events
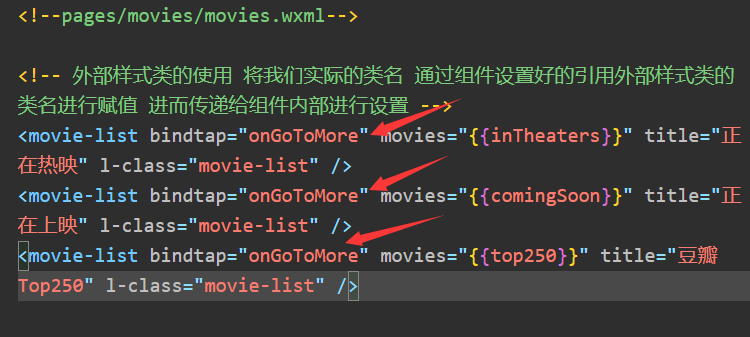
Bind the current list type on each movie list. Bind with custom attributes.
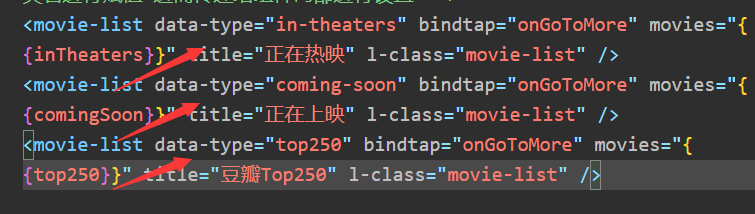
More button events
Get the custom attributes on the current element through the event event attribute. When the page Jump is performed, pass the movie type together. The method is to send a request to more movie pages.
/**
   * Page Jump
   * @param {*} event
   */
  onGoToMore(event) {
    // type
    const type = event.currentTarget.dataset.type;
    // Jump to more pages and open as sub pages
    wx.navigateTo({
      url: "/pages/more-movie/more-movie?type="+type
    })
  }
More page onLoad changes
The specific movie list that needs to be requested is received through the type attribute.
/**
   * Life cycle function -- listening for page loading
   */
  onLoad: function (options) {
    // Get movie list type
    const type = options.type;
    // Request the server data to get the movie being played
    wx.request({
      // Request address
      url: app.gBaseUrl + type,
      method: "GET",
      // The parameter is a query string in the get request
      data: {
        // Start index of movie
        start: 0,
        // Total number of films
        count: 12
      },
      success: (res) => { // Use the arrow function to solve the problem of this pointing
        // Movie data
        console.log(res.data.subjects);
        this.setData({
          movies: res.data.subjects
        })
      }
    });
  },
Realize the search function of movies page
Develop directly using Lin UI applet component library. Convenient and fast, there is no need to write.
Register components
{
  "usingComponents": {
    "movie-list":"/components/movie-list/index",
    "l-search-bar":"/miniprogram_npm/lin-ui/search-bar/index"
  }
}
use
<!-- Search bar -->
<!-- bg-color Property to change the background color -->
<!-- We use this component to provide a good external style class to change the style and modify the height -->
<!-- These things are explained on the official website -->
<!-- use show-cancel Property to cancel the Cancel button on the right and its events -->
<l-search-bar l-class="ex-search-bar" placeholder="Please enter the movie you want to see" />
/* External style class */
.ex-search-bar {
  /* There may be a style conflict, so we need to raise the priority */
  height: 90rpx !important;
}


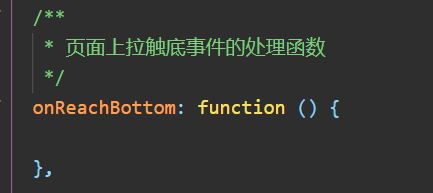
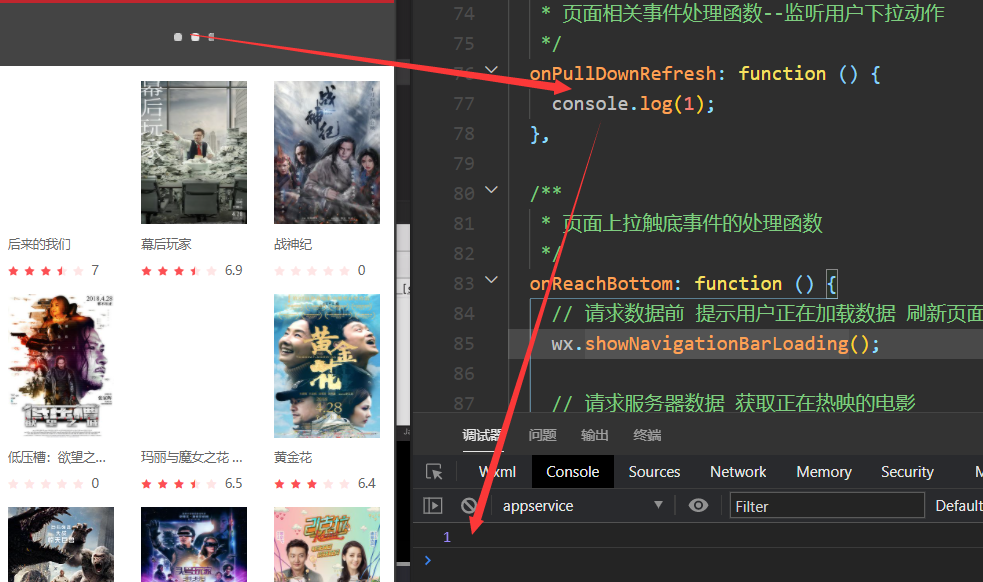
Slide up to load more movie data
The default number of data we request each time is 12, so the user may slide to the bottom in a moment. In fact, in the life cycle of the applet, there is a callback function to slide to the bottom of the page.
As you can see, as long as you slide to the bottom, the code we write in this function will be printed. This indicates that the function is indeed executed.
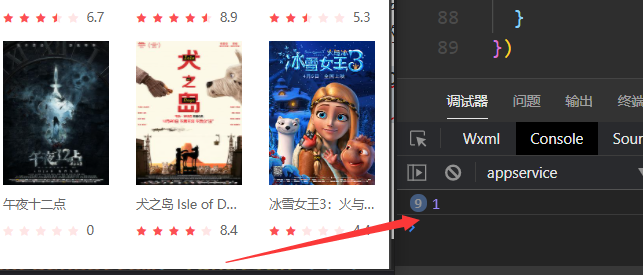
So we can write the code to continue to request the movie list in this function.
Load more movie data
Save the type value we got in the onLoad method, that is, the type of the movie list.
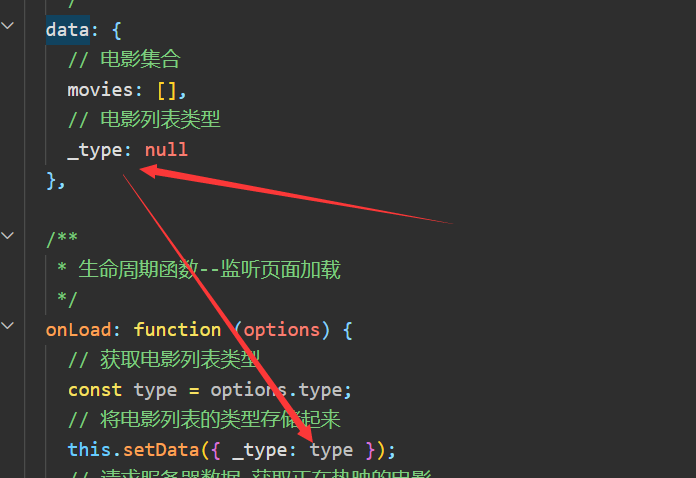
Initiate request to get data
The code logic is written in the life cycle function of the bottom event on the page.
/**
   * Handler for bottom pull event on page
   */
  onReachBottom: function () {
    // Request the server data to get the movie being played
    wx.request({
      // Request address
      url: app.gBaseUrl + this.data._type,
      method: "GET",
      // The parameter is a query string in the get request
      data: {
        // Start index of movie
        start: this.data.movies.length,
        // Total number of films
        count: 12
      },
      success: (res) => { // Use the arrow function to solve the problem of this pointing
        // Movie data
        this.setData({
          // Additional data
          movies: [...this.data.movies, ...res.data.subjects]
        });
      }
    });
  }
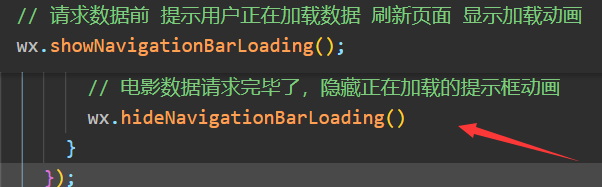
Prompt user data request
When we initiate a request to obtain new movie data, it is likely that users may initiate requests many times, but the network situation is not good. At this time, the page refresh is relatively slow. At this time, we need to remind users that the page data is being refreshed. This light prompt can be completed with the built-in components of the applet.
Our purpose is to prompt the user that the page is loading before the page is refreshed during the data request. Once the data request is successful and the page starts to refresh, we should not continue to prompt the user that the data is loading.
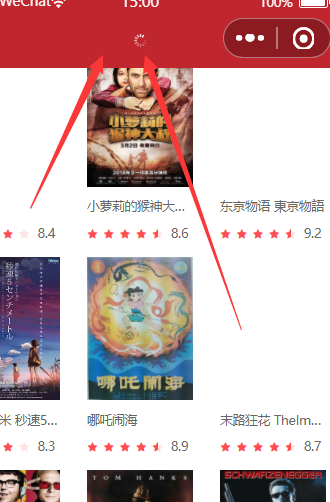
Just add a prompt box to show and hide the loaded animation.
/**
   * Handler for bottom pull event on page
   */
  onReachBottom: function () {
    // Before requesting data, prompt the user that the data is being loaded, refresh the page, and display the loading animation
    wx.showNavigationBarLoading();

    // Request the server data to get the movie being played
    wx.request({
      // Request address
      url: app.gBaseUrl + this.data._type,
      method: "GET",
      // The parameter is a query string in the get request
      data: {
        // Start index of movie
        start: this.data.movies.length,
        // Total number of films
        count: 12
      },
      success: (res) => { // Use the arrow function to solve the problem of this pointing
        // Movie data
        this.setData({
          // Additional data
          movies: [...this.data.movies, ...res.data.subjects]
        });

        // The movie data request is completed. Hide the loading prompt box animation
        wx.hideNavigationBarLoading()
      }
    });
  },
Drop down refresh data
Open the drop-down refresh of the page
{
  "usingComponents": {
    "movie":"/components/movie/index"
  },
    // Enable pull-down refresh
  "enablePullDownRefresh": true
}
If in app If this is configured in JSON, all pages can be refreshed.

Listen for user drop-down actions
By default, the applet provides us with a good function to monitor the drop-down action of the applet page.
Implement drop-down refresh
This is relatively simple. You can do it directly with a piece of code. After getting the data, call wx.. Stoppulldownrefresh() method to stop the drop-down action.
/**
   * Page related event handler -- listen to user drop-down actions
   */
  onPullDownRefresh: function () {
    // After the user drops down, we refresh the data
    wx.request({
      url: app.gBaseUrl + this.data._type,
      data: {
        start: 0,
        count: 12
      },
      success: (res) => {
        this.setData({
          movies: res.data.subjects
        })
        // Turn off our drop-down refresh animation
        wx.stopPullDownRefresh();
      }
    })
  }
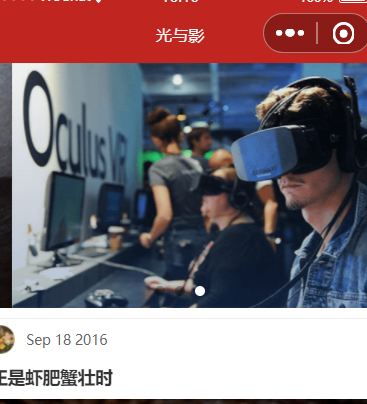
Enhance the effect of reading pages
Configuration title and dynamic configuration title
Configuration title
**Use the navigationBarTitleText property in the applet's global window object, * * to set the title of the navigation bar.
"navigationBarTitleText": "Light and shadow"
However, the title of this configuration is dead, and can not be changed dynamically. For components, this configuration is undoubtedly useless. We should make this Title Dynamic.
Dynamic configuration title
Obviously, the dynamic configuration title is not available. For this common function, the applet basically helps us provide it.
Wx. Using applet The setnavigationbartitle method can dynamically set the title we want to set.
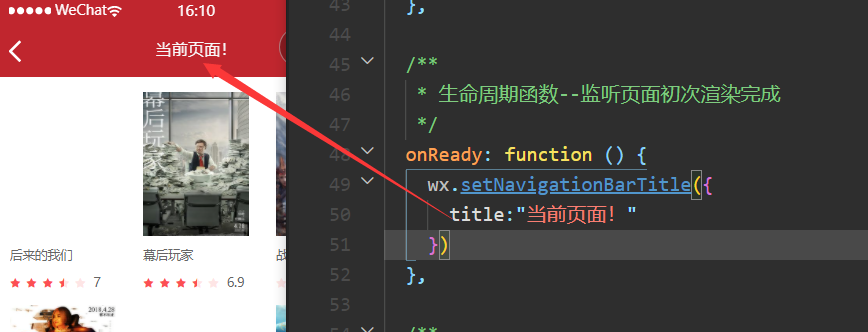
We write this part of the code for dynamically setting the title in the onReady life cycle. The title needs to be set only when the page is loaded for the first time.
/**
   * Life cycle function -- monitor the completion of the first rendering of the page
   */
  onReady: function () {
    let title = "film";
    // Render different titles according to the type
    switch (this.data._type) {
      case "in_theaters":
        title = "It's showing";
        break;
      case "coming_soon":
        title = "Coming soon";
        break;
      case "top250":
        title = "Top250";
        break;
    }
    wx.setNavigationBarTitle({
      title
    })
  }
Movie details page
Component independence
Improve the post component
At first, we wrote the callback function of clicking on the article and clicking on the article details page directly on the component, which must be unreasonable. Because it is impossible for everyone to use the component, the operation after clicking is the same. Therefore, the execution of callback function should be passed to the outside world. Improve the reusability of components and separate components from the specific execution of events. This is component independence.
Launch event
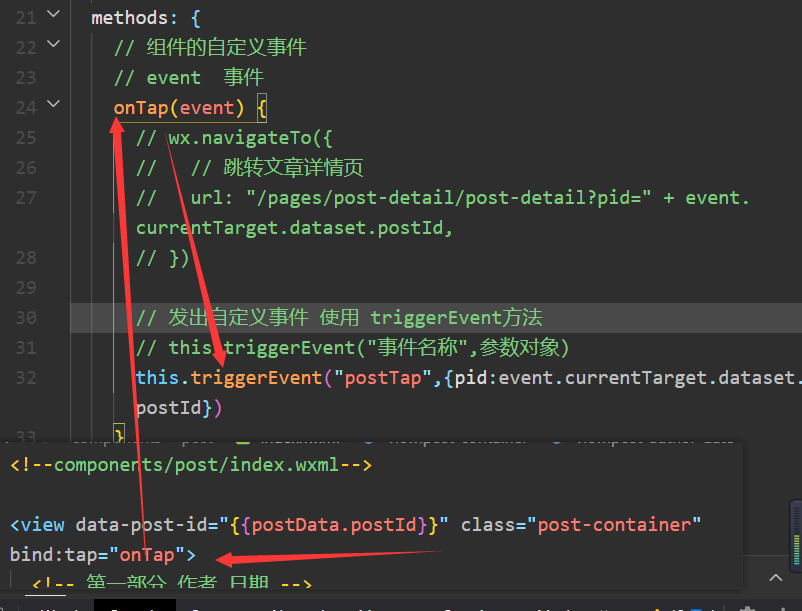
Of course, the parameters carried do not have to be obtained through the properties of the target object of the current event. After all, we already have all the information in this article on the component.

Receive event
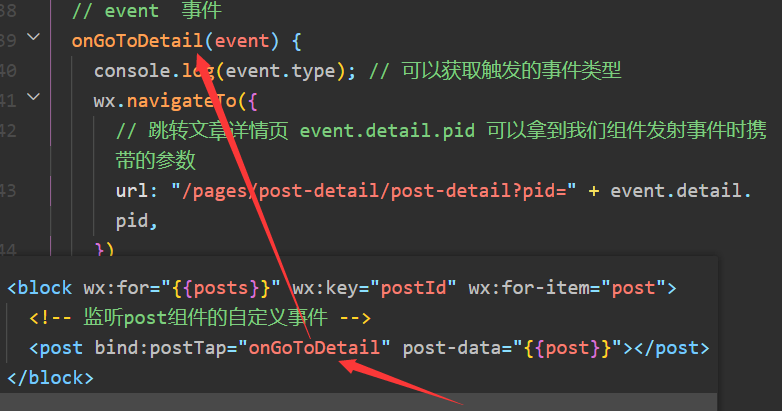
This function is implemented normally, but it improves the reusability of components.
Article page problem correction
Although we do the above, we improve the reusability of components. But now it brings a new problem, that is, we can't complete the jump by clicking on the picture.
Mode 1
The simplest way, of course, is to write a method directly and finish it according to the previous logic. Easy to understand.
Mode II
We can still implement it in one method. Click the above rotation diagram to realize normal jump.
// Event event
  onGoToDetail(event) {
    // console.log(event.type); //  You can get the type of event triggered
    let pid = event.currentTarget.dataset.postId;
    if (!pid) {
      // Not obtained. It means that you click the article to jump
      pid = event.detail.pid;
    }
    wx.navigateTo({
      // Jump to the article details page event detail. PID can get the parameters carried by our component when launching events
      url: "/pages/post-detail/post-detail?pid=" + pid,
    })
  }
Production of film details page
Bind events to custom component movie
For the convenience of development, I'm talking about business code encapsulating a part on components. In fact, a good component should not be like this. This is because we write our own business components purely for our own convenience, so we can do this.
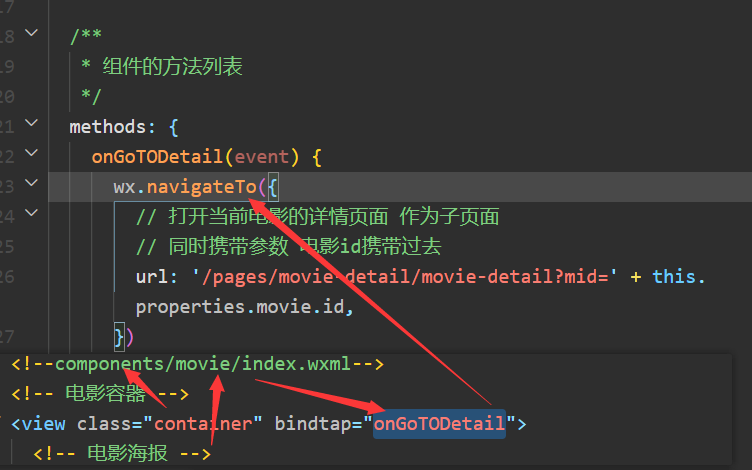
After clicking each movie, you can go to the movie details page. And carries the id number of the current movie.
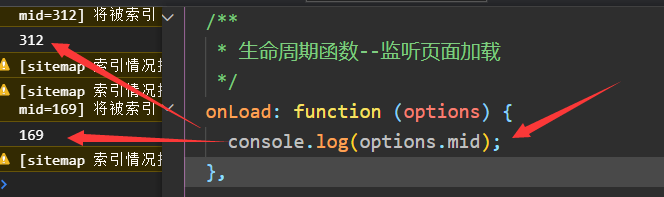
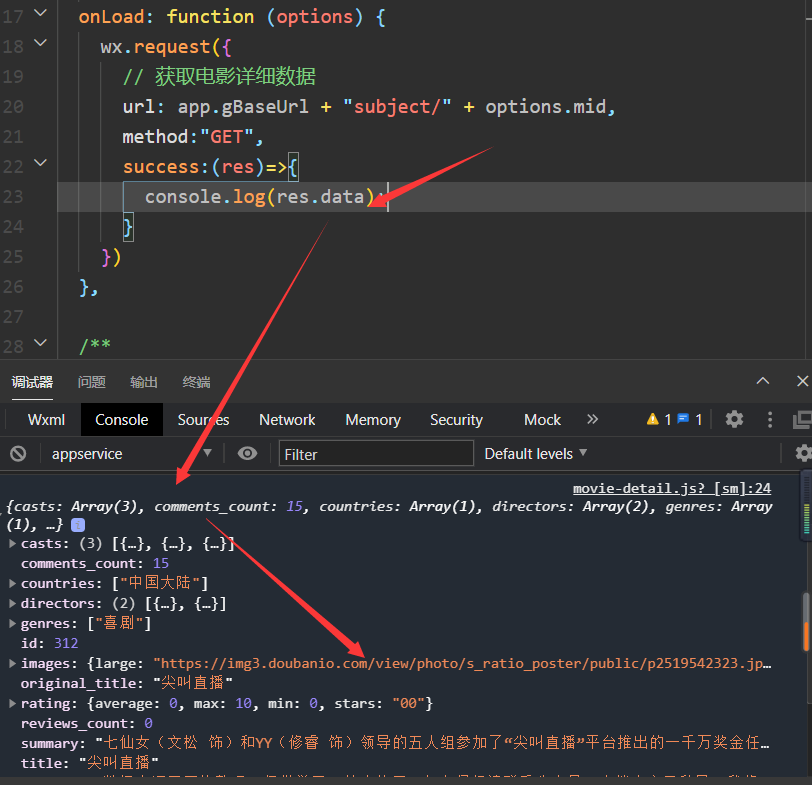
Request movie data according to id
According to the mid, a request is sent to the server to obtain the detailed data of the current movie.
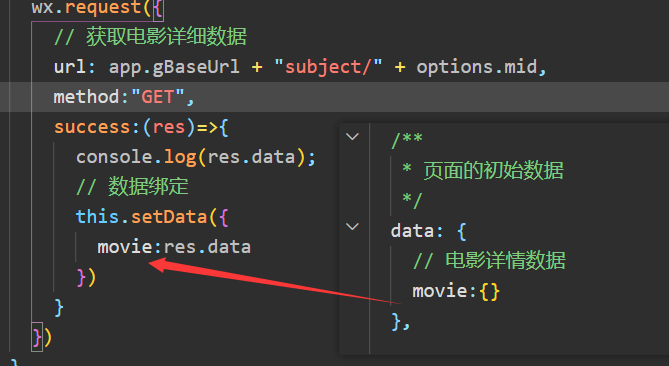
Binding data
Production of detail page
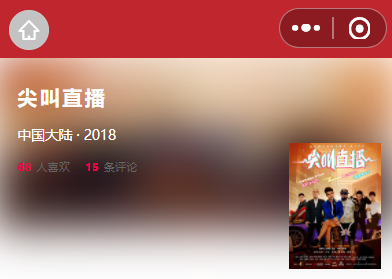
Detail page header area
Previously, we have obtained the movie detail data of each movie detail page. Next, start the production of the head of the film details.
skeleton
<!--pages/movie-detail/movie-detail.wxml-->
<view class="container">
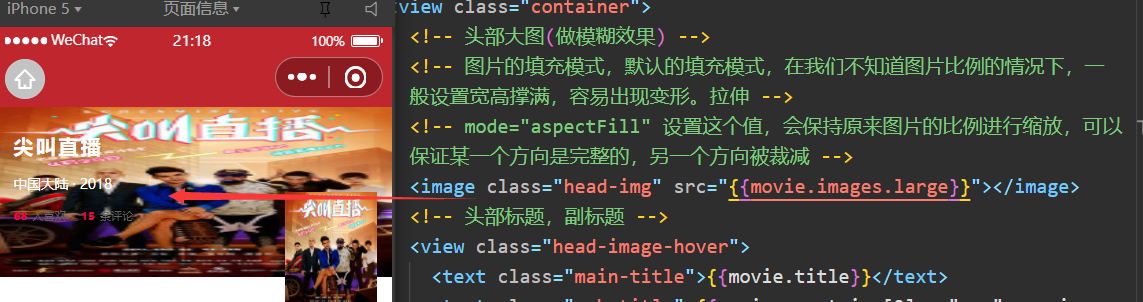
<!-- Large picture of head(Do blur effect) -->
<image class="head-img" src="{{movie.images.large}}"></image>
<!-- Subtitle -->
<view class="head-image-hover">
<text class="main-title">{{movie.title}}</text>
<text class="sub-title">{{movie.countries[0] + " · " +movie.year}}</text>
<!-- How many people want to see it and how many like it -->
<view class="like">
<text class="highlight-font">{{movie.wish_count}}</text>
<text class="plain-font">People like</text>
<text class="highlight-font">{{movie.comments_count}}</text>
<text class="plain-font">Comments</text>
</view>
<!-- Movie Poster -->
<image class="movie-image" src="{{movie.images.large}}"></image>
</view>
</view>
style
/* pages/movie-detail/movie-detail.wxss */

/* container */
.container {
  display: flex;
  flex-direction: column;
}

/* Make a fuzzy rendering of the head poster */
.head-img {
  width: 100%;
  height: 320rpx;
  /* Blur effect */
  filter: blur(18px);
}
/* title */
.head-image-hover{
  display: flex;
  flex-direction: column;
  width: 100%;
  height: 320rpx;
  position: absolute;
}
.main-title{
  font-size:38rpx;
  color:#fff;
  font-weight: bold;
  letter-spacing: 2px;
  margin-top: 50rpx;
  margin-left: 40rpx;
}
.sub-title{
  font-size: 28rpx;
  color:#fff;
  margin-top: 30rpx;
  margin-left: 40rpx;
}
.like{
  display: flex;
  flex-direction: row;
  margin-top: 30rpx;
  margin-left: 40rpx;
}
/* Digital highlight */
.highlight-font{
  color:#f21146;
  font-size: 22rpx;
  font-weight: 600;
  margin-right: 10rpx;
}
.plain-font{
  color:#666;
  font-size: 22rpx;
  margin-right: 30rpx;
}


/* Movie Poster */
.movie-image {
  position: absolute;
  top: 160rpx;
  right: 30rpx;
  height: 238rpx;
  width: 175rpx;
}
effect
Yes, I want it.
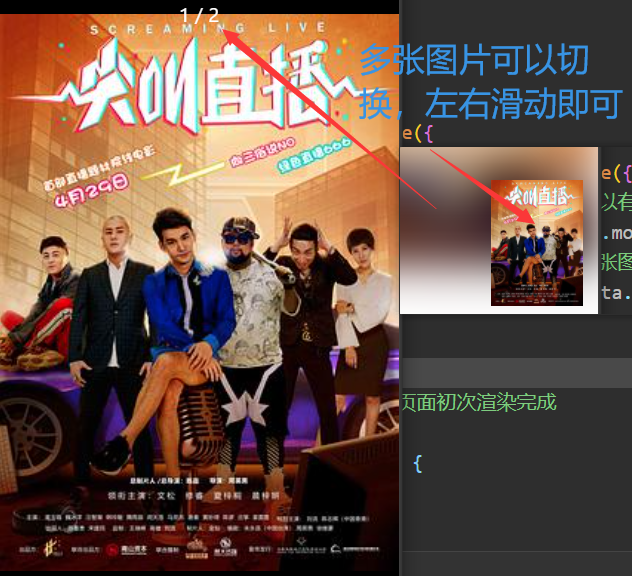
Head Movie Poster (Preview)
The poster enlargement method of making small programs is what we call preview. The native applet provides us with this method.

/**
   * Picture preview
   * @param {*} event
   */
  onViewPost(event) {
    wx: wx.previewImage({
      // The preview image can have multiple values, which are src values, that is, the link address
      urls: [this.data.movie.images.large],
      // First picture currently previewed
      current: this.data.movie.images.large
    })
  }
Most functions are basically built-in. If you want to make any effect, it is suggested that the first thing is to check the documents.
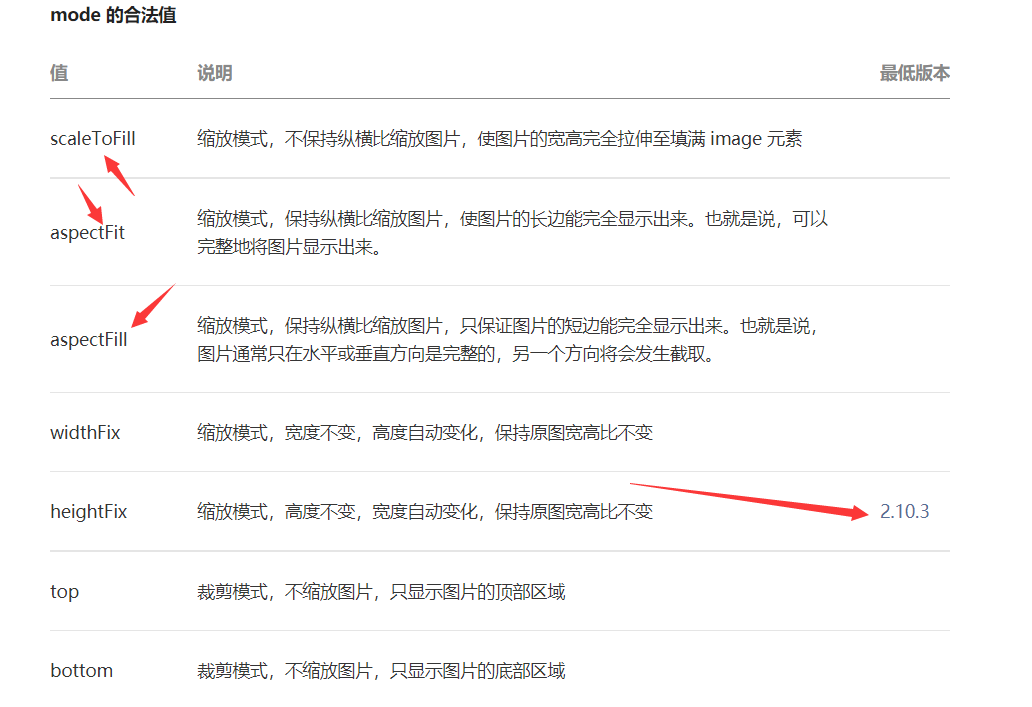
Mode mode of picture
The mode mode of the picture is understood by everyone
Mode not set by default:
When the mode is set to aspectFill:
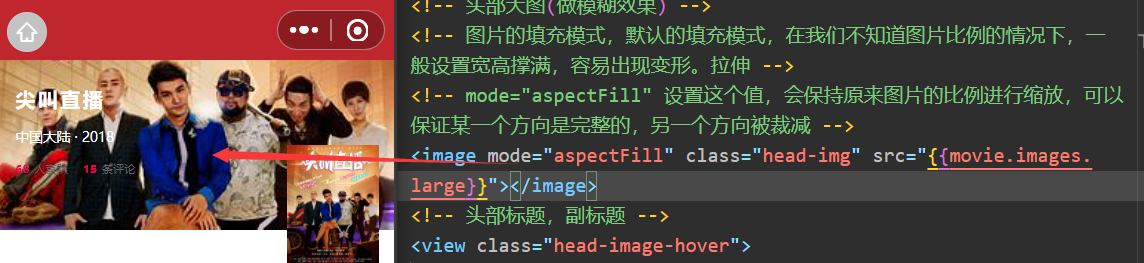
Obviously, it can be seen that the picture is not stretched.
Of course, there are many values of mode mode. You can go to the official website to have a look
Film details page recommendation introduction section
Data preprocessing
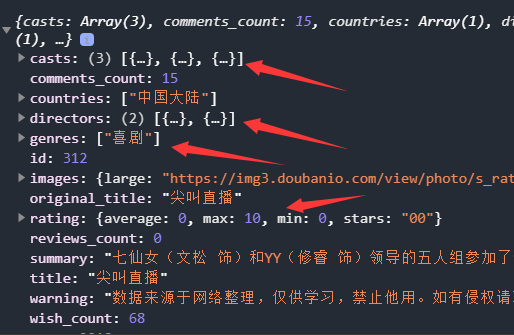
We can see that many of the data we get are arrays, which is not convenient for the data display of the page, so we need to preprocess the data.
Encapsulate a tool function
This function is used to process the array of directors and actors, and splice the name attribute of elements.
/**
 * Convert the name attribute in the array element to string splicing
 * @param {*} casts The array can splice the name s of actors and directors
 */
export function convertToCastString(casts) {
  const names = [];
  casts.forEach(item => {
    names.push(item.name);
  })
  return names.join(" / ");
}
Data processing
Preprocess the data to facilitate better display of the page
// pages/movie-detail/movie-detail.js
// Import util tool
import { convertToCastString } from "../../utils/util.js"
const app = getApp()
Page({

  /**
   * Initial data of the page
   */
  data: {
    // Movie detail data
    movie: {}
  },

  /**
   * Life cycle function -- listening for page loading
   */
  onLoad: function (options) {
    wx.request({
      // Get movie details
      url: app.gBaseUrl + "subject/" + options.mid,
      method: "GET",
      success: (res) => {
        console.log(res.data);
        // Movie data preprocessing
        this.processMovieData(res.data);
        // After the data binding method processes the data, the internal binding
      }
    })
  },
  /**
   * Picture preview
   * @param {*} event
   */
  onViewPost(event) {
    wx: wx.previewImage({
      // The preview image can have multiple values, which are src values, that is, the link address
      urls: [this.data.movie.image],
      // First picture currently previewed
      current: this.data.movie.image
    })
  },
  /**
   * Preprocess the requested movie data
   * @param {*} movie Movie data
   */
  processMovieData(movie) {
    // Processed data
    const movieData = {};
    // Handle arrays of directors and actors
    movieData.directorsStr = convertToCastString(movie.directors);
    movieData.castsStr = convertToCastString(movie.casts);
    // Take care of the picture
    movieData.image = movie.images.large;
    // Title Processing
    movieData.title = movie.title;
    // Subtitle
    movieData.sub_title = movie.countries[0] + " · " + movie.year;
    movieData.wishCount = movie.wish_count;
    movieData.commentsCount = movie.comments_count;
    movieData.originalTitle = movie.original_title;
    // score
    movieData.score = movie.rating.stars / 10;
    movieData.average = movie.rating.average;
    movieData.genresStr = movie.genres.join(" / ");
    // Data binding
    this.setData({
      movie: movieData
    })
  }
})
Page data display
Only the introduction of the film is intercepted here. That's the part we're currently writing.
 <!-- Film introduction -->
  <view class="summary">
    <!-- Start title -->
    <view class="orgin-title">
      <text>{{movie.originalTitle}}</text>
    </view>
    <view class="flex-row">
      <text class="mark">score</text>
      <!-- lin-ui Scoring component for -->
      <view class="score-container">
        <l-rate size="22" disabled="{{true}}" score="{{movie.score}}"></l-rate>
        <text class="average">{{movie.average}}</text>
      </view>
    </view>
    <view class="flex-row">
      <text class="mark">director</text>
      <!-- There may be multiple directors and data processing is required -->
      <text>{{movie.directorsStr}}</text>
    </view>
    <view class="flex-row">
      <text class="mark">Filmmaker</text>
      <!-- The filmmaker also needs data processing, which is also an array -->
      <text>{{movie.castsStr}}</text>
    </view>
    <view class="flex-row">
      <text class="mark">type</text>
      <!-- The general type is also an array, which requires original processing -->
      <text>{{movie.genresStr}}</text>
    </view>
  </view>
<!-- Split line -->
<view class="hr"></view>
Style writing of film introduction
/* Film introduction */
.summary {
  margin-left: 40rpx;
  margin-top: 40rpx;
  color: #777;
}

.orginal-title {
  color: #1f3463;
  font-size: 24rpx;
  font-weight: bold;
  margin-bottom: 40rpx;
}

.flex-row {
  display: flex;
  flex-direction: row;
  align-items: baseline;
  margin-bottom: 10rpx;
}
.score-container {
  display: flex;
  flex-direction: row;
  align-items: baseline;
}
.average{
  margin-left: 20rpx;
}


.mark {
  margin-right: 30rpx;
  /* nowrap  */
  white-space: nowrap;
  color: #999;
}
/* level */
.hr{
  width: 100%;
  height: 1px;
  margin-top: 50rpx;
  background-color: #d9d9d9;
}
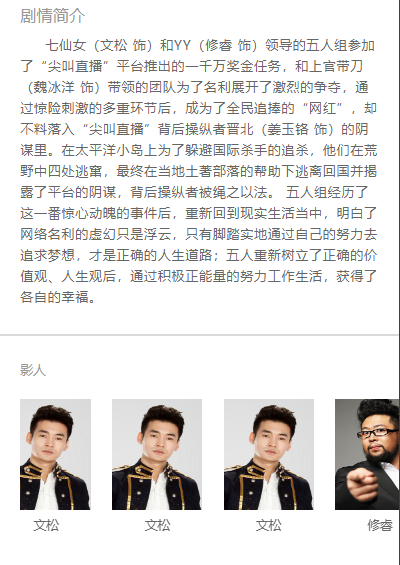
effect

Introduction to the film plot
There's nothing to say. It's simple
structure
  <!-- Plot introduction -->
  <view class="synopsis">
    <text class="synopsis-font">Plot introduction</text>
    <text class="summary-content">{{movie.summary}}</text>
  </view>
  <view class="hr"></view>
style
/* Plot introduction style */
.synopsis{
  margin-left: 40rpx;
  display: flex;
  flex-direction: column;
  margin-top: 50rpx;
}
.synopsis-font{
  font-size: 32rpx;
  color:#999;
}

.summary-content{
  margin-top: 20rpx;
  margin-right: 40rpx;
  line-height: 40rpx;
  letter-spacing: 1px;
  text-indent: 2em;
}
Filmmaker part production
This part is actually a little difficult. Watch and learn
Added data preprocessing part
/**
 * Convert the name attribute in the array element to string splicing
 * @param {*} casts The array can splice the name s of actors and directors
 */
export function convertToCastString(casts) {
  const names = [];
  casts.forEach(item => {
    names.push(item.name);
  })
  return names.join(" / ");
}
/**
 * Integrate the photographer's information, pictures and names
 * @param {*} casts
 */
export function convertToCastInfos(casts) {
  const castsArray = [];
  casts.forEach(item => {
    castsArray.push({
      img: item.avatars?.large,
      name: item.name
    })
  })
  return castsArray;
}
/**
   * Preprocess the requested movie data
   * @param {*} movie Movie data
   */
  processMovieData(movie) {
    // Processed data
    const movieData = {};
    // Handle arrays of directors and actors
    movieData.directorsStr = convertToCastString(movie.directors);
    movieData.castsStr = convertToCastString(movie.casts);
    // Take care of the picture
    movieData.image = movie.images.large;
    // Title Processing
    movieData.title = movie.title;
    // Subtitle
    movieData.sub_title = movie.countries[0] + " · " + movie.year;
    movieData.wishCount = movie.wish_count;
    movieData.commentsCount = movie.comments_count;
    movieData.originalTitle = movie.original_title;
    // score
    movieData.score = movie.rating.stars / 10;
    movieData.average = movie.rating.average;
    movieData.genresStr = movie.genres.join(" / ");
    movieData.summary = movie.summary;
    // Processing filmmaker data
    movieData.castsInfo = convertToCastInfos(movie.casts);
    // Data binding
    this.setData({
      movie: movieData
    })
  }
structure
<!-- Introduction to filmmakers -->
  <view class="casts">
    <!-- title -->
    <text class="cast-font">Filmmaker</text>
    <view class="casts-container">
      <!-- The list circulates and displays the cinematographer data -->
      <block wx:for="{{movie.castsInfo}}" wx:key="index">
        <view class="cast-container">
          <image class="cast-img" src="{{item.img}}"></image>
          <text>{{item.name}}</text>
        </view>
        <!-- Simulate the data of multiple photographers, let a photographer appear three times, and make the sliding effect of the picture -->
        <view class="cast-container">
          <image class="cast-img" src="{{item.img}}"></image>
          <text>{{item.name}}</text>
        </view>
        <view class="cast-container">
          <image class="cast-img" src="{{item.img}}"></image>
          <text>{{item.name}}</text>
        </view>
      </block>
    </view>
  </view>
style
/* Profile layout */
.casts{
  display: flex;
  flex-direction: column;
  margin-top: 50rpx;
  margin-left: 40rpx;

}
.casts-container{
  display: flex;
  flex-direction: row;
}
.cast-container{
  display: flex;
  flex-direction: column;
  align-items: center;
  margin-right: 40rpx;
  margin-bottom: 60rpx;
}
.cast-img{
  width: 170rpx;
  height: 210rpx;
  margin-bottom: 12rpx;
}
.cast-font{
  color:#999;
  margin-bottom: 40rpx;
}
Sliding effect
Sliding component of applet
The built-in components provided by the applet include the scroll view component, which can be used to replace the view component.
Provide this label, which can slide horizontally to make a scrollable view area.
You have all the scroll views you want
effect
Movie details page full code
structure
<!--pages/movie-detail/movie-detail.wxml-->
<view class="container">
<!-- Large picture of head(Do blur effect) -->
<!-- The filling mode of the picture is the default filling mode. When we don't know the proportion of the picture, the width and height are generally set to be full, which is prone to deformation. stretching -->
<!-- mode="aspectFill" Setting this value will keep the scale of the original picture for scaling, which can ensure that one direction is complete and the other direction is cut -->
<image mode="aspectFill" class="head-img" src="{{movie.image}}"></image>
<!-- Subtitle -->
<view class="head-image-hover">
<text class="main-title">{{movie.title}}</text>
<text class="sub-title">{{movie.sub_title}}</text>
<!-- How many people want to see it and how many like it -->
<view class="like">
<text class="highlight-font">{{movie.wishCount}}</text>
<text class="plain-font">People like</text>
<text class="highlight-font">{{movie.commentsCount}}</text>
<text class="plain-font">Comments</text>
</view>
<!-- Movie Poster -->
<!-- Click on the picture to enlarge -->
<image bind:tap="onViewPost" class="movie-image" src="{{movie.image}}"></image>
</view>
<!-- Film introduction -->
<view class="summary">
<!-- Start title -->
<view class="orgin-title">
<text>{{movie.originalTitle}}</text>
</view>
<view class="flex-row">
<text class="mark">score</text>
<!-- lin-ui Scoring component for -->
<view class="score-container">
<l-rate size="22" disabled="{{true}}" score="{{movie.score}}"></l-rate>
<text class="average">{{movie.average}}</text>
</view>
</view>
<view class="flex-row">
<text class="mark">director</text>
<!-- There may be multiple directors and data processing is required -->
<text>{{movie.directorsStr}}</text>
</view>
<view class="flex-row">
<text class="mark">Filmmaker</text>
<!-- The filmmaker also needs data processing, which is also an array -->
<text>{{movie.castsStr}}</text>
</view>
<view class="flex-row">
<text class="mark">type</text>
<!-- The general type is also an array, which requires original processing -->
<text>{{movie.genresStr}}</text>
</view>
</view>
<!-- Split line -->
<view class="hr"></view>
<!-- Plot introduction -->
<view class="synopsis">
<text class="synopsis-font">Plot introduction</text>
<text class="summary-content">{{movie.summary}}</text>
</view>
<view class="hr"></view>
<!-- Introduction to filmmakers -->
<view class="casts">
<!-- title -->
<text class="cast-font">Filmmaker</text>
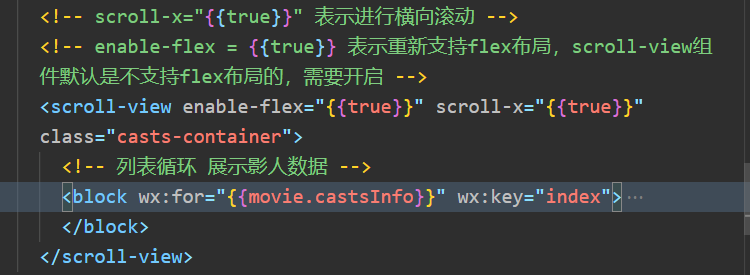
<!-- scroll-x="{{true}}" Indicates horizontal scrolling -->
<!-- enable-flex = {{true}} Indicates re support flex Layout, scroll-view Component is not supported by default flex The layout needs to be opened -->
<scroll-view enable-flex="{{true}}" scroll-x="{{true}}" class="casts-container">
<!-- The list circulates and displays the cinematographer data -->
<block wx:for="{{movie.castsInfo}}" wx:key="index">
<view class="cast-container">
<image class="cast-img" src="{{item.img}}"></image>
<text>{{item.name}}</text>
</view>
<!-- Simulate the data of multiple photographers, let a photographer appear three times, and make the sliding effect of the picture -->
<view class="cast-container">
<image class="cast-img" src="{{item.img}}"></image>
<text>{{item.name}}</text>
</view>
<view class="cast-container">
<image class="cast-img" src="{{item.img}}"></image>
<text>{{item.name}}</text>
</view>
</block>
</scroll-view>
</view>
</view>
style
/* pages/movie-detail/movie-detail.wxss */

/* container */
.container {
  display: flex;
  flex-direction: column;
}

/* Make a fuzzy rendering of the head poster */
.head-img {
  width: 100%;
  height: 320rpx;
  /* Blur effect */
  filter: blur(18px);
}

/* title */
.head-image-hover {
  display: flex;
  flex-direction: column;
  width: 100%;
  height: 320rpx;
  position: absolute;
}

.main-title {
  font-size: 38rpx;
  color: #fff;
  font-weight: bold;
  letter-spacing: 2px;
  margin-top: 50rpx;
  margin-left: 40rpx;
}

.sub-title {
  font-size: 28rpx;
  color: #fff;
  margin-top: 30rpx;
  margin-left: 40rpx;
}

.like {
  display: flex;
  flex-direction: row;
  margin-top: 30rpx;
  margin-left: 40rpx;
}

/* Digital highlight */
.highlight-font {
  color: #f21146;
  font-size: 22rpx;
  font-weight: 600;
  margin-right: 10rpx;
}

.plain-font {
  color: #666;
  font-size: 22rpx;
  margin-right: 30rpx;
}


/* Movie Poster */
.movie-image {
  position: absolute;
  top: 160rpx;
  right: 30rpx;
  height: 238rpx;
  width: 175rpx;
}

/* Film introduction */
.summary {
  margin-left: 40rpx;
  margin-top: 40rpx;
  color: #777;
}

.orginal-title {
  color: #1f3463;
  font-size: 24rpx;
  font-weight: bold;
  margin-bottom: 40rpx;
}

.flex-row {
  display: flex;
  flex-direction: row;
  align-items: baseline;
  margin-bottom: 10rpx;
}
.score-container {
  display: flex;
  flex-direction: row;
  align-items: baseline;
}
.average{
  margin-left: 20rpx;
}


.mark {
  margin-right: 30rpx;
  /* nowrap  */
  white-space: nowrap;
  color: #999;
}
/* level */
.hr{
  width: 100%;
  height: 1px;
  margin-top: 50rpx;
  background-color: #d9d9d9;
}

/* Plot introduction style */
.synopsis{
  margin-left: 40rpx;
  display: flex;
  flex-direction: column;
  margin-top: 50rpx;
}
.synopsis-font{
  font-size: 32rpx;
  color:#999;
}

.summary-content{
  margin-top: 20rpx;
  margin-right: 40rpx;
  line-height: 40rpx;
  letter-spacing: 1px;
  text-indent: 2em;
}

/* Profile layout */
.casts{
  display: flex;
  flex-direction: column;
  margin-top: 50rpx;
  margin-left: 40rpx;

}
.casts-container{
  display: flex;
  flex-direction: row;
  /* margin-bottom: 50rpx; */
  height: 300rpx;
}
.cast-container{
  display: flex;
  flex-direction: column;
  align-items: center;
  margin-right: 40rpx;
  margin-bottom: 40rpx;
}
.cast-img{
  width: 170rpx;
  height: 210rpx;
  margin-bottom: 12rpx;
}
.cast-font{
  color:#999;
  margin-bottom: 40rpx;
}
behavior
// pages/movie-detail/movie-detail.js
// Import util tool
import { convertToCastString,convertToCastInfos } from "../../utils/util.js"
const app = getApp()
Page({

  /**
   * Initial data of the page
   */
  data: {
    // Movie detail data
    movie: {}
  },

  /**
   * Life cycle function -- listening for page loading
   */
  onLoad: function (options) {
    wx.request({
      // Get movie details
      url: app.gBaseUrl + "subject/" + options.mid,
      method: "GET",
      success: (res) => {
        console.log(res.data);
        // Movie data preprocessing
        this.processMovieData(res.data);
        // After the data binding method processes the data, the internal binding
        // this.setData({
        //   movie: res.data
        // })
      }
    })
  },
  /**
   * Picture preview
   * @param {*} event
   */
  onViewPost(event) {
    wx: wx.previewImage({
      // The preview image can have multiple values, which are src values, that is, the link address
      urls: [this.data.movie.image],
      // First picture currently previewed
      current: this.data.movie.image
    })
  },
  /**
   * Preprocess the requested movie data
   * @param {*} movie Movie data
   */
  processMovieData(movie) {
    // Processed data
    const movieData = {};
    // Handle arrays of directors and actors
    movieData.directorsStr = convertToCastString(movie.directors);
    movieData.castsStr = convertToCastString(movie.casts);
    // Take care of the picture
    movieData.image = movie.images.large;
    // Title Processing
    movieData.title = movie.title;
    // Subtitle
    movieData.sub_title = movie.countries[0] + " · " + movie.year;
    movieData.wishCount = movie.wish_count;
    movieData.commentsCount = movie.comments_count;
    movieData.originalTitle = movie.original_title;
    // score
    movieData.score = movie.rating.stars / 10;
    movieData.average = movie.rating.average;
    movieData.genresStr = movie.genres.join(" / ");
    movieData.summary = movie.summary;
    // Processing filmmaker data
    movieData.castsInfo = convertToCastInfos(movie.casts);
    // Data binding
    this.setData({
      movie: movieData
    })
  },
  /**
   * Life cycle function -- monitor the completion of the first rendering of the page
   */
  onReady: function () {

  },

  /**
   * Life cycle function -- monitor page display
   */
  onShow: function () {

  },

  /**
   * Life cycle function -- listening for page hiding
   */
  onHide: function () {

  },

  /**
   * Life cycle function -- listen for page unloading
   */
  onUnload: function () {

  },

  /**
   * Page related event handler -- listen to user drop-down actions
   */
  onPullDownRefresh: function () {

  },

  /**
   * Handler for bottom pull event on page
   */
  onReachBottom: function () {

  },

  /**
   * Users click the upper right corner to share
   */
  onShareAppMessage: function () {

  }
})
End of beginner level chapter
Small programs are relatively simple compared with vue or react. Easy to get started.
Complete project code
The complete project code can be put on the csdn blog or downloaded from my github.