Reference
Configure Cuda and Pytorch under Windows 11/10 WSL2 Ubuntu 20.04
Official Installation of wsl2
Official wsl2 connection gpu
This article is basically a synthesis of some of the above articles, which I did not intend to post, but I even paid a system price for it since I really referenced too many experience stickers to completely solve my problem for the first time. Ultimately, it is now successful. I will try my best to describe the problems I have encountered and give my own solutions. Most people actually follow the above instructions without any problems, but if they fail to do so, you can refer to this article.
Install wsl2 ubuntu20.04
Installing wsl2 is easy. Microsoft officially gives you only one command, which will install wsl2 and ubuntu20 by default. 04 Subsystem to your computer.
Open cmd input
wsl --install
You can specify which version you want to install to pass
wsl --install -d<Distribution Name>
Where Distribution Name is the name of the distribution
You can view the installable versions in the online store
wsl --list --online
 or
wsl -l -o
Once the installation is complete (a reboot may be required, but not absolutely) you can view the installation version number below
wsl -l -v
If you can't, I recommend the old way to view other blogs, which is available in the references. I won't go into any further details here.
Install wsl cuda driver
Go to the cuda website to download the wsl driver. Download according to your own version of the graphics card. By the way, my graphics card model is GTX1050. You can refer to it.
Below is the corresponding link.
CUDA ON WSL
https://developer.nvidia.com/cuda/wsl/download
The downloaded installation package is GUI installed, so you do not need to customize the installation. In general, the default installation is sufficient. Here we emphasize that wsl is installed on the C drive by default. If you want to use the wsl linux subsystem and connect to the GPU, you should have enough space. Once the installation is complete, we can view it by typing "nvidia-smi" in the cmd command line window. I'm not very good at making beautiful windows. I'll use the results in the references to show you an approximate successful interface.
PS C:\Users\TF> nvidia-smi       #Note that this is the WIN10/11 command, if you have no results in the WSL terminal, don't panic

Thu Dec 23 18:14:18 2021
+-----------------------------------------------------------------------------+
| NVIDIA-SMI 510.06       Driver Version: 510.06       CUDA Version: 11.6     |
|-------------------------------+----------------------+----------------------+
| GPU  Name            TCC/WDDM | Bus-Id        Disp.A | Volatile Uncorr. ECC |
| Fan  Temp  Perf  Pwr:Usage/Cap|         Memory-Usage | GPU-Util  Compute M. |
|                               |                      |               MIG M. |
|===============================+======================+======================|
|   0  NVIDIA GeForce ... WDDM  | 00000000:01:00.0 Off |                  N/A |
| N/A   43C    P0    14W /  N/A |    134MiB /  4096MiB |      0%      Default |
|                               |                      |                  N/A |
+-------------------------------+----------------------+----------------------+

+-----------------------------------------------------------------------------+
| Processes:                                                                  |
|  GPU   GI   CI        PID   Type   Process name                  GPU Memory |
|        ID   ID                                                   Usage      |
|=============================================================================|
|  No running processes found                                                 |
+-----------------------------------------------------------------------------+
The first pit I encountered here is also the most critical pit for me to write this post. A lot of experience stickers may be lucky and fail to meet the issues below me, but I need to emphasize that even if you can only tell a little bit about someone who is in a similar situation to me. Solve problems that are causing them headaches.
Next, open your wsl interface, enter wsl in the console or open your recently installed Ubuntu subsystem. Enter the same code
nvidia-smi
If you've succeeded in creating the same interface as the windows console, I congratulate you, and you can go on and look down. You don't need to read this title anymore. But if it's win10, you have a high probability of having problems displaying the above interface successfully. No matter what kind of problem you have, no matter what
$ nvidia-smi       #wsl2 could not output nvidia driver information
Failed to initialize NVML: GPU access blocked by the operating system
Failed to properly shut down NVML: GPU access blocked by the operating system
NO moudle named nvidia, please install....
Remember not to install Ubuntu drivers, especially the following error recommending installing somebody. wsl2 was born to use linux as a subsystem of windows. It is absolutely wrong to install an nvidia driver for ubuntu.
There are two ways to solve the above problem, one is to upgrade win11 directly, and then update the downloaded wsl2 can basically solve the problem. It must be said that win11 is much stronger than win10 in this respect, although the cpu usage is much larger.
Update wsl2
wsl --update
If you and I are both win10 and have the second scenario, Please install, then we'll start working.
First update your wsl2 to make sure you have the latest kernel, not an exact version, which is version 5.10.43.3 and later on your current official website. Next, try nvidia-smi again in the ubuntu subsystem to see if there is an interface. If wsl2 has been updated and still does not solve the problem, then your windows system is older, please update your windows system and accept updates from other MIcrosoft products when Settings->windows Update->Advanced Options check Update windows.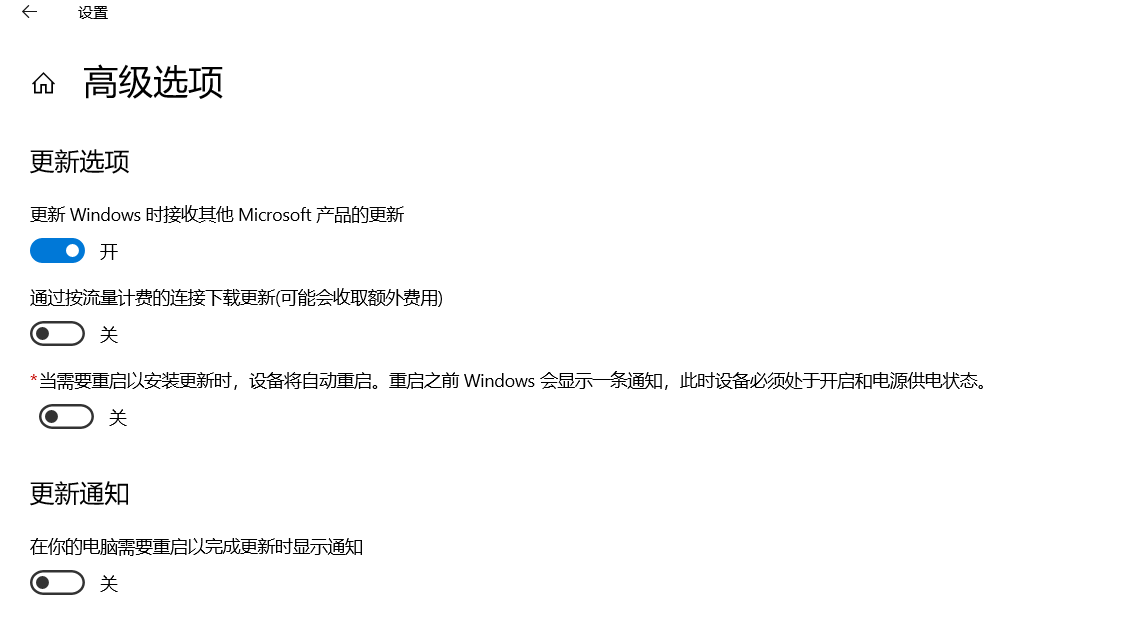
Or you can go to the windows website and download the update package directly to update your windows directly to the latest version. I have not tried this method and can refer to other tips.
Actually, this would have been possible if we had to join the preview plan, but it seems that Windows has been updated to feed graphics card data back into wsl, at least by updating itself, so we just need to keep updating through windows.
Here's an important point. Our Windows updates aren't all in one cluster. That is, you need to keep checking for updates and restart your computer until your ubuntu subsystem can display an interface (problem solving) or your windows are up to date (which means there may be something missing from the above conditions or other unknown problems of your own).
linux System Show Success Interface
$ nvidia-smi       #This means that the graphics card can actually be checked by the Linux subsystem
Thu Dec 23 18:27:28 2021
+-----------------------------------------------------------------------------+
| NVIDIA-SMI 510.00       Driver Version: 510.06       CUDA Version: 11.6     |
|-------------------------------+----------------------+----------------------+
| GPU  Name        Persistence-M| Bus-Id        Disp.A | Volatile Uncorr. ECC |
| Fan  Temp  Perf  Pwr:Usage/Cap|         Memory-Usage | GPU-Util  Compute M. |
|                               |                      |               MIG M. |
|===============================+======================+======================|
|   0  NVIDIA GeForce ...  On   | 00000000:01:00.0 Off |                  N/A |
| N/A   44C    P0    14W /  N/A |    134MiB /  4096MiB |     N/A      Default |
|                               |                      |                  N/A |
+-------------------------------+----------------------+----------------------+

+-----------------------------------------------------------------------------+
| Processes:                                                                  |
|  GPU   GI   CI        PID   Type   Process name                  GPU Memory |
|        ID   ID                                                   Usage      |
|=============================================================================|
|  No running processes found                                                 |
+-----------------------------------------------------------------------------+
At this point, the most difficult problems of wsl2 have been basically solved, the rest of which can be referred to other experience stickers or this post.
Install CUDA Tollkit
CUDA Historical Version (as required)
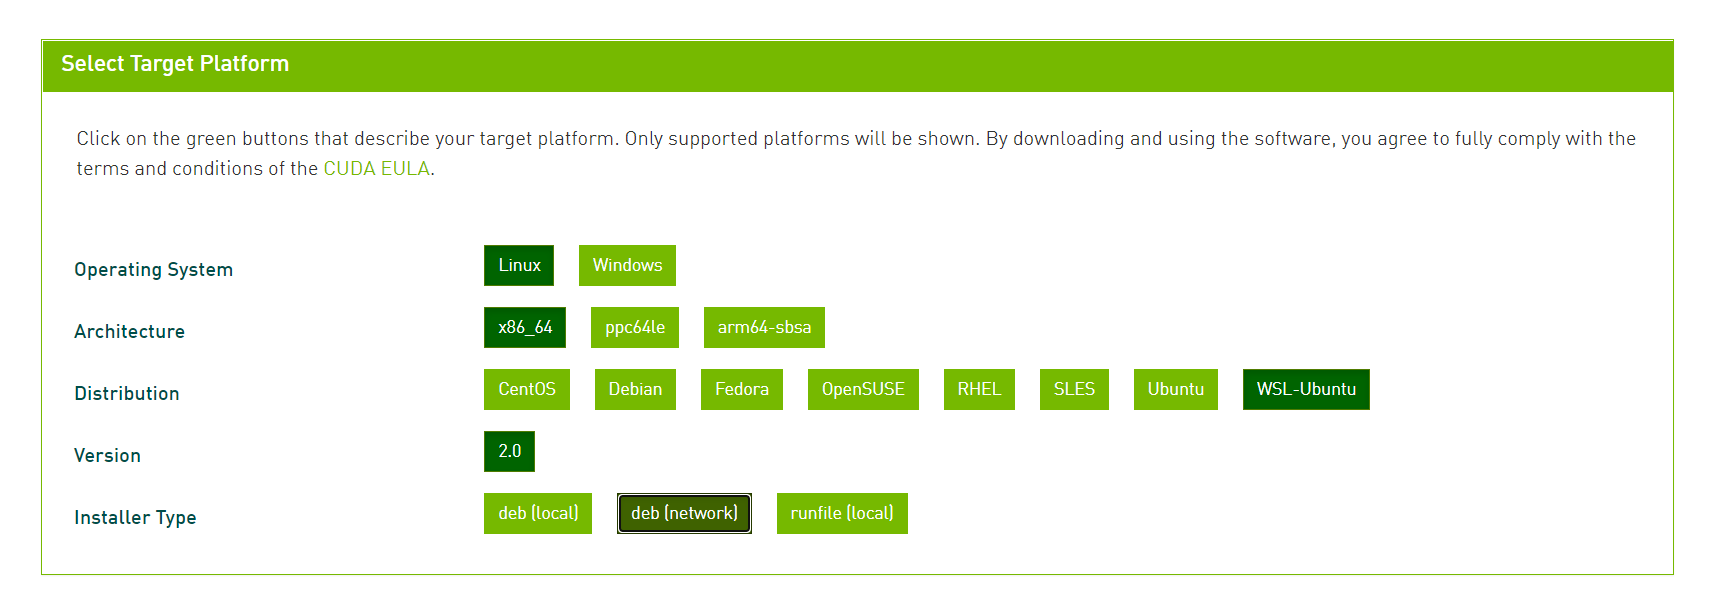
There are codes to enter below the official website. I am using the network version. Just enter the code step by step. There should be no big problem. Not here.
After installing cuda, configure the environment variables inside wsl2.
sudo vim ~/.bashrc #Open environment file
# Copy the three lines to the bottom, and the variable name can be changed appropriately depending on the cuda downloaded
export CUDA_HOME=/usr/local/cuda
export PATH=$PATH:$CUDA_HOME/bin
export LD_LIBRARY_PATH=/usr/local/cuda-11.0/lib64${LD_LIBRARY_PATH:+:${LD_LIBRARY_PATH}}
# Update Profile
source ~/,bashrc
# Update dependencies that may be required (may not be required)
sudo apt-get install freeglut3-dev build-essential libx11-dev libxmu-dev libxi-dev libgl1-mesa-glx libglu1-mesa libglu1-mesa-dev
# Check for successful installation
nvcc -V
Success interface
···
$ nvcc -V
nvcc: NVIDIA ® Cuda compiler driver
Copyright © 2005-2021 NVIDIA Corporation
Built on Fri_Dec_17_18:16:03_PST_2021
Cuda compilation tools, release 11.6, V11.6.55
Build cuda_11.6.r11.6/compiler.30794723_0
···
If this interface and the nvidia-smi interface of the previous linux appear at this point, the problem will be minimal, leaving pytorch as the problem.
Configure cudnn
cuda alone is not enough to enable us to use the computer's GPU, and it needs tools to work with it. To make it easier for our code to be used by graphics cards and return results, which is what cudnn does.
cudnn installation
You need to sign in to an account. If you don't have one, sign up.
Please install the appropriate version of cudnn for your cuda.
I installed a cuda of 11.6, and currently only 11.5 cudnn, which I tested is completely feasible.
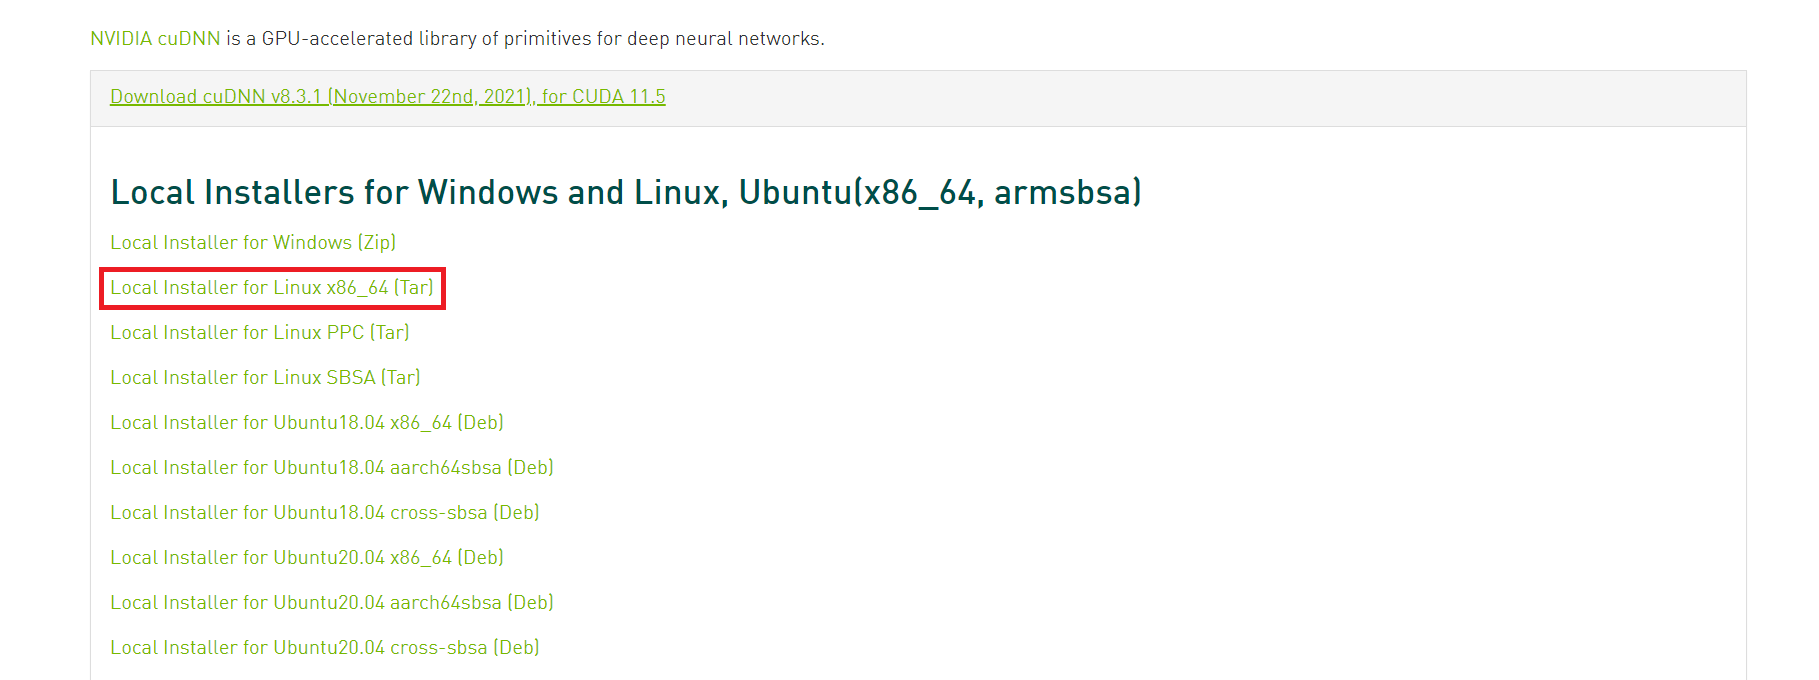
You can choose your favorite path to download. You don't have to force the C drive, wsl2 can access all the paths.
Use the Ubuntu command cd to enter the folder of the file. Execute the following instructions
#Here are the installation commands
tar -zxvf cudnn-Complete version number by yourself.tgz
sudo cp -P cuda/lib64/libcudnn* /usr/local/cuda-11.6(Check the specific version modification path yourself)/lib64/
sudo cp cuda/include/cudnn.h /usr/local/cuda-11.6(Check the specific version modification path yourself)/include/

#To change read permissions:
sudo chmod a+r /usr/local/cuda-11.6(Check the specific version modification path yourself)/include/cudnn.h
sudo chmod a+r /usr/local/cuda-11.6(Check the specific version modification path yourself)/lib64/libcudnn*
If you are using cuda11. Under version 6, you can check to see if CUDA is working. There are references in the posts, but cuda11.6 The checked folder content has been removed, so it cannot be checked, so it is not necessary to download it back for checking.
With the above commands executed and the previous steps completed successfully, there is no problem by default.
Connect pytorch GPU
Next comes the second difficulty, pytorch is connected to gpu, so we've done so much to train our model with gpu. First, we need to install anaconda. If you don't have it on your computer, you can find the Anaconda installation experience under this tutorial.
Get into pytorch website
My interface choices are as follows:
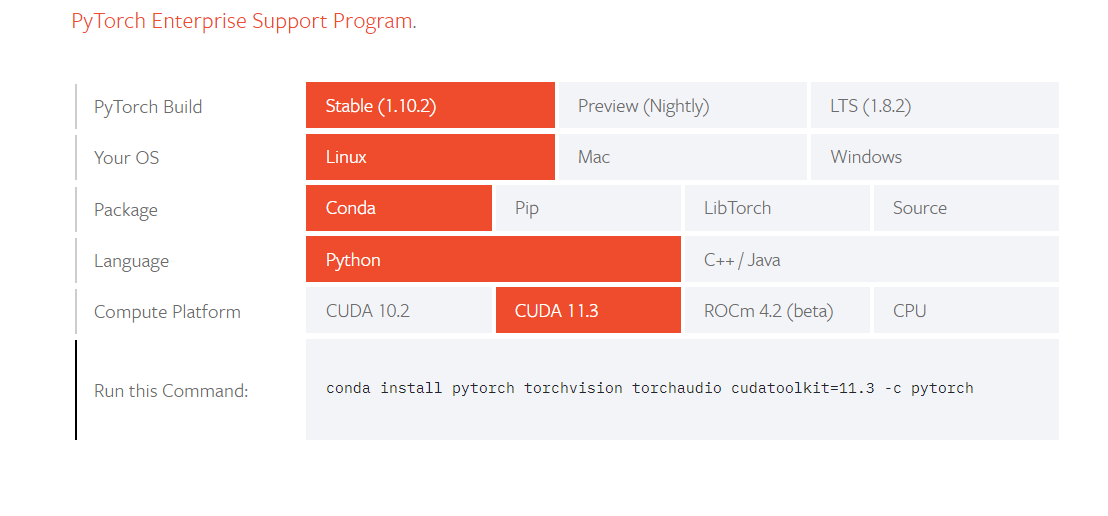
We have CUDA11 installed. 3 pytorch, this download is very slow, but it is recommended to download from the official website. The domestic mirror source has a higher probability of the cpu version, and then it will have to be uninstalled at no cost. However, the download of the official website is very slow. We recommend using magic connection. Here you can see that you are all superb. Of course, you can do it without magic, but it will be very slow.
When downloading, conda is advised to create a new environment to suit her project. After all, base is just one and if it breaks down, it is a hassle.
Enter conda environment of pytorch you downloaded
Input:
python
import torch
torch.__version__#Check Version
torch.cuda.is_available()#A critical step is to go back and configure True successfully. No, if you have no previous problems, try downloading pytorch with pip or changing the pytorch version.
The picture is shown below:
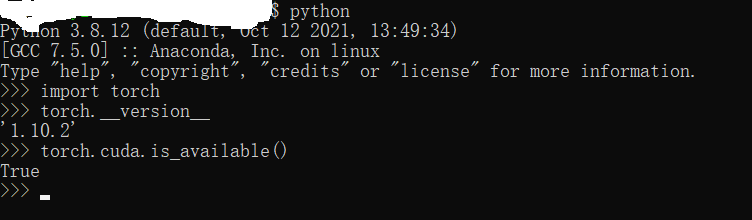
At this point, wsl2 has successfully configured cuda and pytorch. Now you can use it.
ANACONDA Installation
anaconda Official Download Connection
Page down to find the linux version of anaconda download.
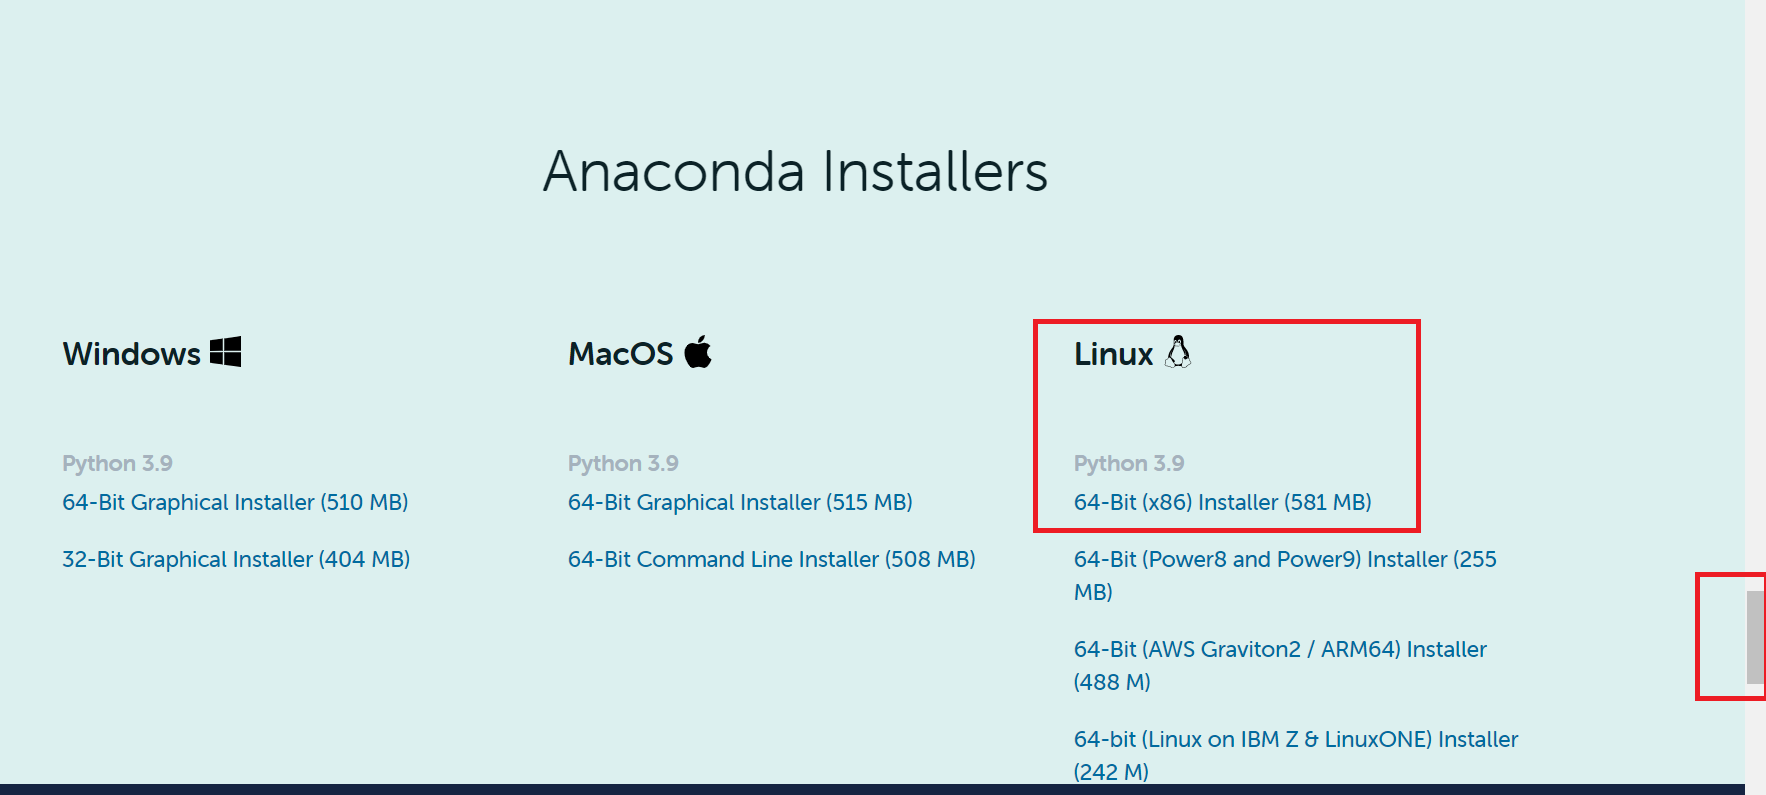
Like cudnn, you can download it to your favorite location. Next, use the ubuntu subsystem cd to enter the location where the file is stored.
Input:
bash Anaconda3xxx.sh # xxx downloads the version for itself
Then the rest of the installation interface, such as no special requirements, is installed directly by default.
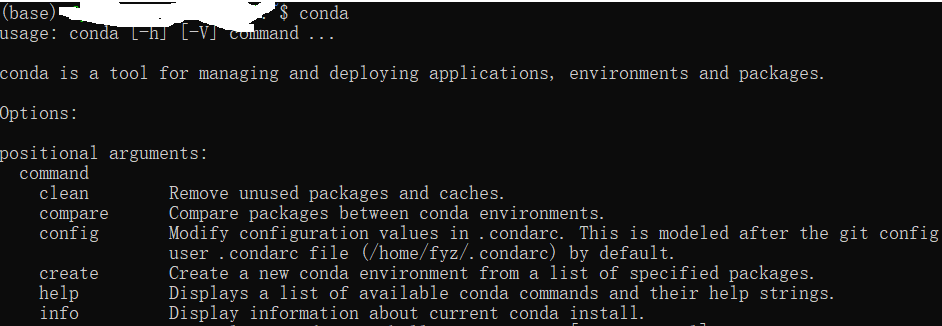
It is emphasized here that installation can be done directly and will be installed into the subsystem by default, without having to move it to the subsystem for installation.
After the installation is complete, type conda. The following interface appears to indicate that the installation was successful.
anaconda can create a new environment. The default environment is base.
You can create a new environment with the following code
conda create -n yourEnvName python=x.x
You can view an existing environment with the following code
conda info -e
Activate an existing environment
conda activate youEnvName
Later remarks
This installation is easy to say and easy to understand, but I did work for two days. It is not really simple. When I press win11, there will be many fewer problems. The main problem is in win10. There are certain requirements for the version. Please be aware that this article will be a commemoration.