Today's topic: XXL job distributed scheduled tasks
reference resources: https://blog.csdn.net/huangjinjin520/article/details/106880276/
XXL-JOB is a lightweight distributed task scheduling framework. Its core design goal is rapid development, simple learning, lightweight and easy to expand. General microservices use this framework for scheduled tasks.
It happened that this thing was used in the company's new project, and then I was given the technical choice of the distributed scheduled task, including integrating this technology into the project. Today, let's record how to integrate it.
1 download XXL job
First, we need to download the project
git clone https://github.com/xuxueli/xxl-job.git
After downloading these modules, you can directly start the admin module to enter the background
xxl-job-admin: Dispatching center

xxl-job-core: Public dependence

xxl-job-executor: Actuator Sample Example (select the appropriate version of actuator, which can be used directly, or refer to it and transform the existing project into an actuator)
xxl-job-executor-sample-spring: Spring Version, via Spring Container management actuator, which is more general, is recommended;
xxl-job-executor-sample-springboot: Springboot Version, via Springboot Management actuator;
xxl-job-executor-sample-jfinal: JFinal Version, via JFinal Management actuator;
xxl-job-executor-sample-nutz: Nutz Version, via Nutz Management actuator;

I'll just choose the spring boot actuator
2 import script
Type the script in the doc directory into the database

3. Modify database account and password

Insert picture description here
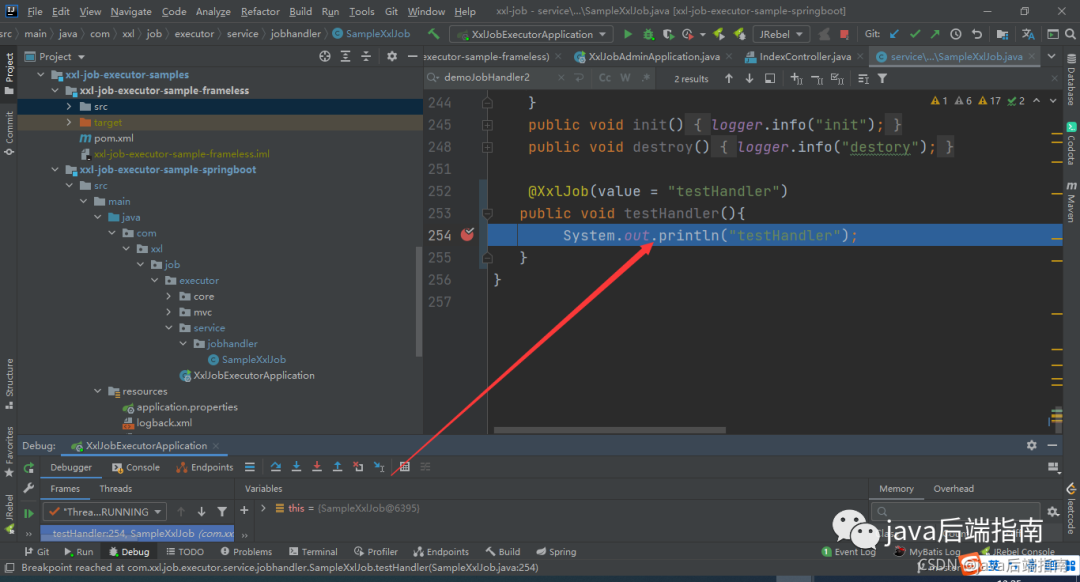
4. Add Scheduled Task business class

Insert picture description here
5. The actuator name shall correspond to

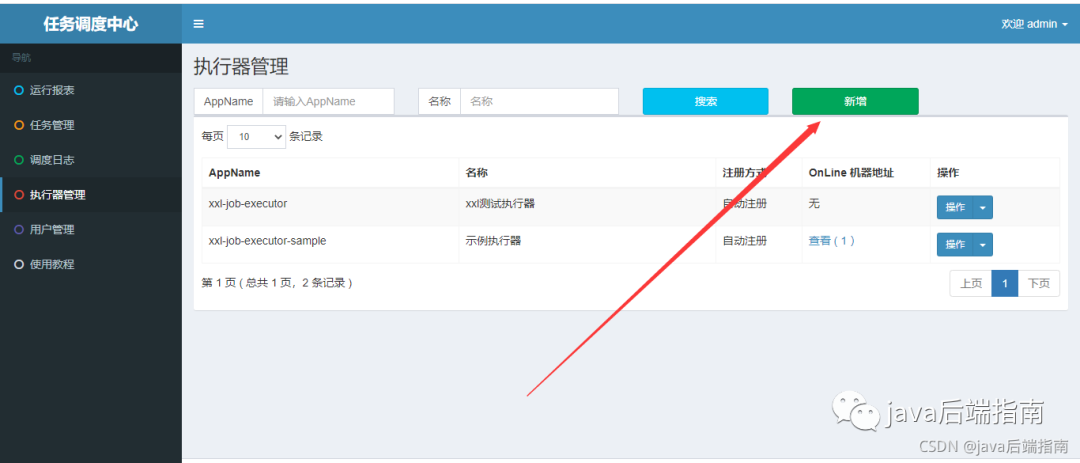
Add corresponding actuator management in actuator management
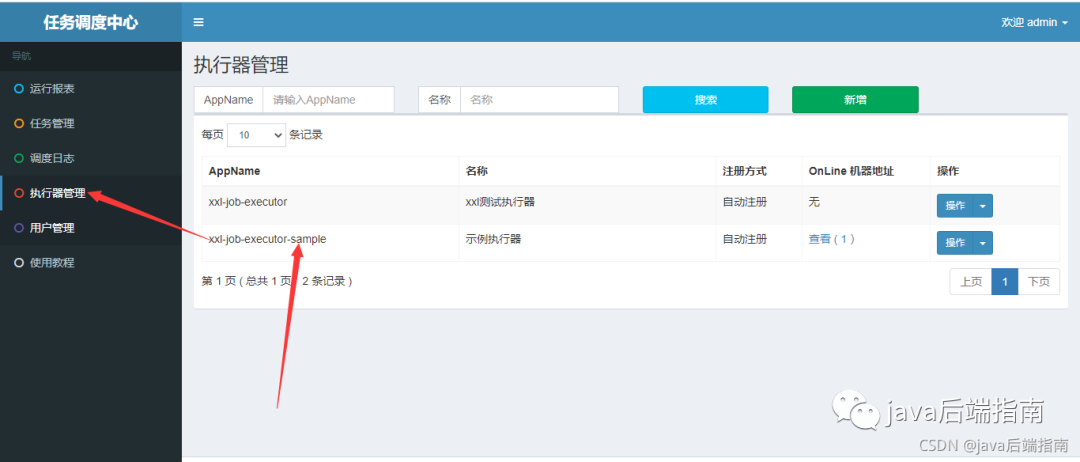
The machine address can be registered automatically without writing.

If there is no actuator, add an actuator
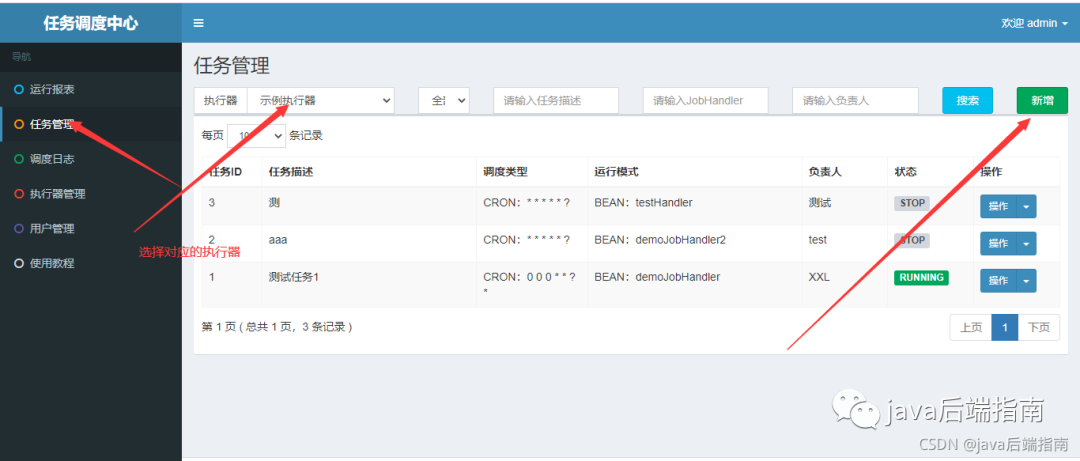
6 add scheduled tasks
Add scheduled task

Execute it and find that it can succeed.
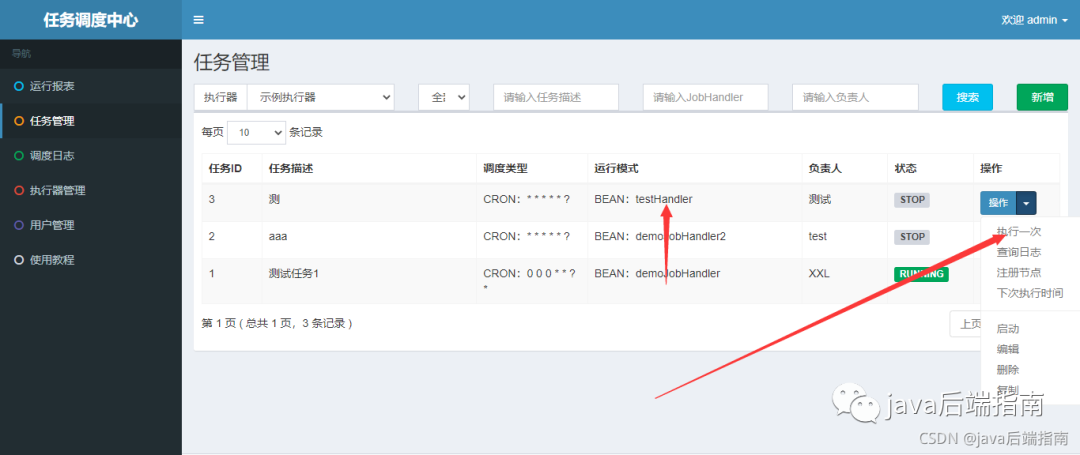
OK, this completes the simple startup.
7 integration in the project
The official XXL job executor sample jboot is actually a module in our microservice, so we can introduce dependencies in our own projects:
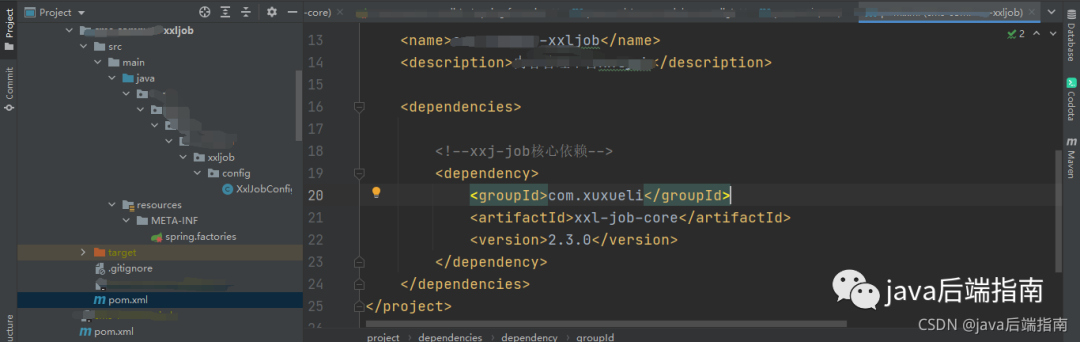
  <!--xxj-job Core dependency-->
        <dependency>
            <groupId>com.xuxueli</groupId>
            <artifactId>xxl-job-core</artifactId>
            <version>2.3.0</version>
        </dependency>
In fact, I can create a public module of XXL job and create a configuration class:
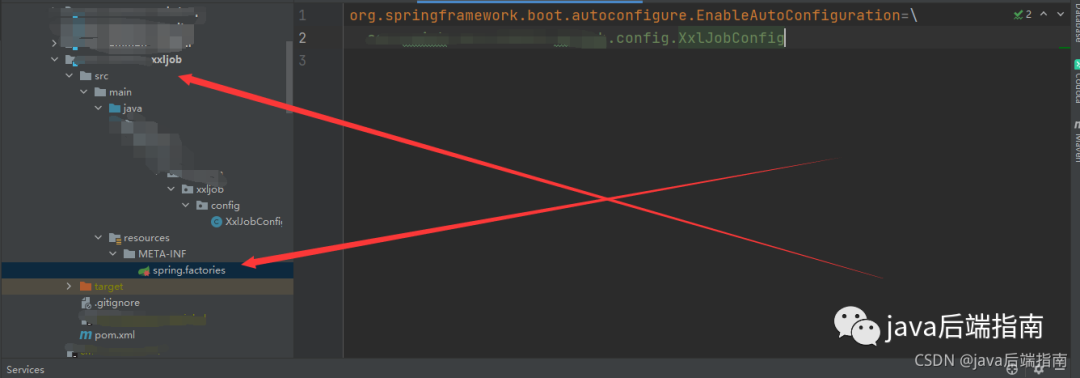
public class XxlJobConfig {
    private Logger logger = LoggerFactory.getLogger(XxlJobConfig.class);

    @Value("${xxl.job.addresses}")
    private String adminAddresses;

    @Value("${xxl.job.accessToken}")
    private String accessToken;

    @Value("${xxl.job.appname}")
    private String appname;

    @Value("${xxl.job.address}")
    private String address;

    @Value("${xxl.job.ip}")
    private String ip;

    @Value("${xxl.job.port}")
    private int port;

    @Value("${xxl.job.logpath}")
    private String logPath;

    @Value("${xxl.job.logretentiondays}")
    private int logRetentionDays;


    @Bean
    public XxlJobSpringExecutor xxlJobExecutor() {
        logger.info(">>>>>>>>>>> xxl-job config init.");
        XxlJobSpringExecutor xxlJobSpringExecutor = new XxlJobSpringExecutor();
        xxlJobSpringExecutor.setAdminAddresses(adminAddresses);
        xxlJobSpringExecutor.setAppname(appname);
        xxlJobSpringExecutor.setAddress(address);
        xxlJobSpringExecutor.setIp(ip);
        //Offset 1000 ports to the right based on the project ports, which can be compatible with the projects of all modules
        xxlJobSpringExecutor.setPort(port+1000);
        xxlJobSpringExecutor.setAccessToken(accessToken);
        xxlJobSpringExecutor.setLogPath(logPath);
        xxlJobSpringExecutor.setLogRetentionDays(logRetentionDays);

        return xxlJobSpringExecutor;
    }

    /**
     * For multiple network cards and internal deployment of containers, the registered IP can be flexibly customized with the help of the "InetUtils" component provided by "spring cloud commons";
     *
     *      1,Import dependency:
     *          <dependency>
     *             <groupId>org.springframework.cloud</groupId>
     *             <artifactId>spring-cloud-commons</artifactId>
     *             <version>${version}</version>
     *         </dependency>
     *
     *      2,Configuration file, or container startup variable
     *          spring.cloud.inetutils.preferred-networks: 'xxx.xxx.xxx.'
     *
     *      3,Get IP
     *          String ip_ = inetUtils.findFirstNonLoopbackHostInfo().getIpAddress();
     */


}
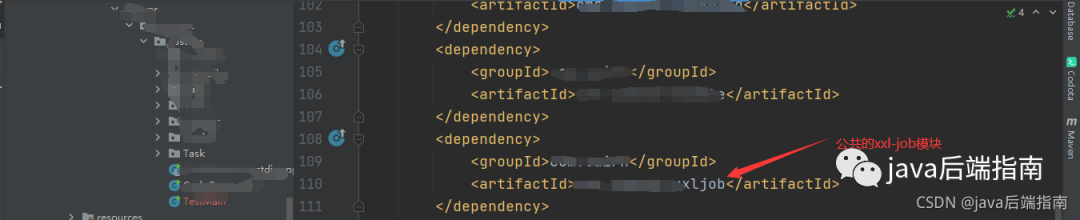
Introduce dependencies in this module:
 <!--xxj-job Core dependency-->
        <dependency>
            <groupId>com.xuxueli</groupId>
            <artifactId>xxl-job-core</artifactId>
            <version>2.3.0</version>
        </dependency>
Then we can introduce the XXL job module into our own module
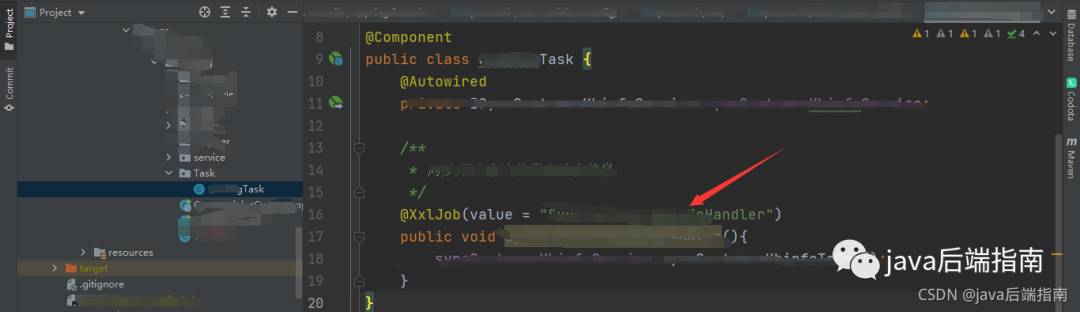
Just create a task class, introduce @ XXL job, configure a Handler, and add it in the background.
nacos configuration:
# xxl-job
logging:
  config: classpath:logback.xml
xxl:
  job:
      accessToken: ""
      addresses: http://127.0.0.1:9207/xxl-job-admin
      address: ""
      appname: ${spring.application.name}
      ip: ""
      logpath: /data/applogs/xxl-job/jobhandler
      logretentiondays: 30
      port: ${server.port}
That is, on the official website document of XXL job, we only need the admin module.