1. Overview
Using YOLOv5 training dataset, there are three steps: data preparation and processing before training, training your own dataset, detection, and some optimization problems after training.
2. Preparations before training
First from the official website of YOLOv5: https://github.com/ultralytics/yolov5 Download the corresponding project to your own platform, and I'm using Google cloab here.
1. Processing data
Use software like labelImage to process your pictures, tag your pictures, and be careful to save xml files and pictures separately
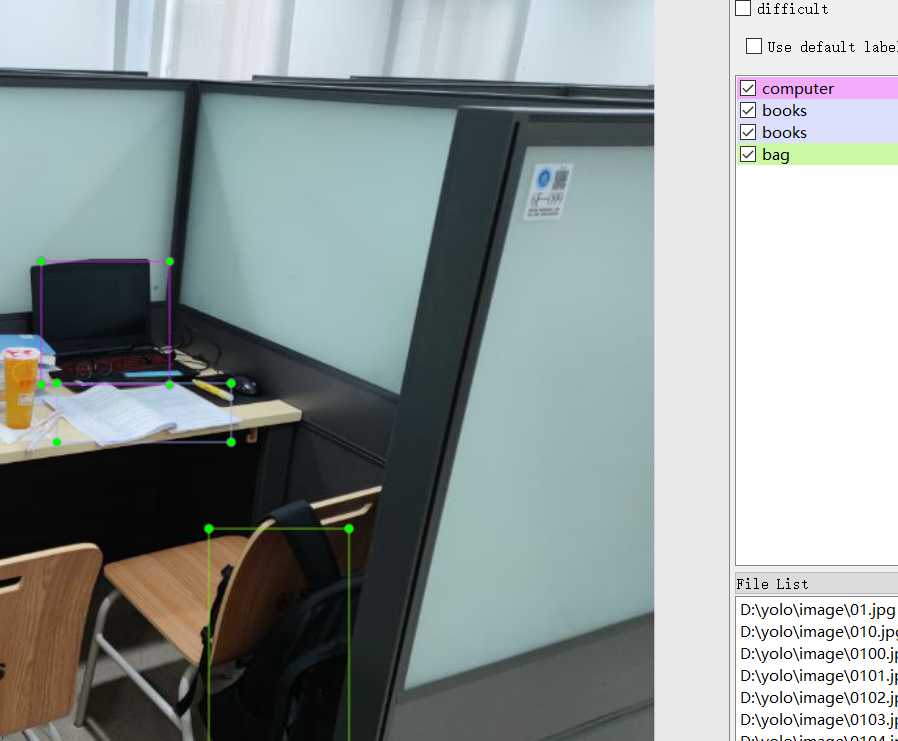
If you need to rename your pictures in batches, name them before labeling them
#File Renamer Turbo
import os
import sys
def re_name():
    path=input("Please enter a path(for example D:\\\\picture): ")
    name=input("Please enter the opening name:")
    startNumber=input("Please enter the start number:")
    fileType=input("Please enter a suffix name (such as .jpg,.txt Etc.):")
    print("Generating to"+name+startNumber+fileType+"File name for iteration")
    count=0
    filelist=os.listdir(path)
    for files in filelist:
        Olddir=os.path.join(path,files)
        if os.path.isdir(Olddir):
            continue
        Newdir=os.path.join(path,name+str(count+int(startNumber))+fileType)
        os.rename(Olddir,Newdir)
        count+=1
    print("Altogether modified"+str(count)+"Files")

re_name()
2. Environment Configuration
(1) Direct download through PIP install-r requirements.txt, which should be noted in the downloaded YOLOv5 project file.
(2) Download via manual pip
pip install numpy
pip install matplotlib
pip install pandas
pip install scipy
pip install seaborn
pip install opencv-python
pip install tqdm
pip install pillow
pip install tensorboard
pip install pyyaml
pip install pandas
pip install scikit-image
pip install Cython
pip install thop
pip install pycocotools
3. Create corresponding folders
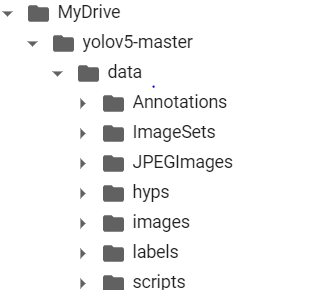
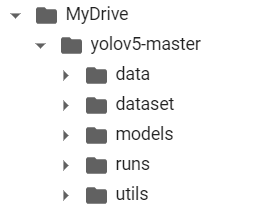
The file is best used in the corresponding project, where the runtime calls the corresponding module in the project.
Annotations: Store label files as xml
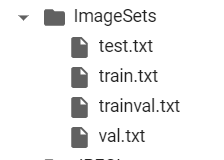
ImageSets: Stores a data set split file for classification and detection, including train.txt (including the name of the picture used for training), val.txt (with the name of the picture used for validation), train val.txt (a combination of train and value), and test.txt (with the name of the picture used for testing). This part of the later code is automatically vivid and does not need to be created
JPEGImages: Store corresponding img pictures
labels: a txt file that stores label label information and corresponds to a picture
4. Processing data
The labeled pictures and xml files are passed into JPEGImages and Annotations respectively, and then we create a makeTxt.py file to allocate the data for training and validation.
import os
import random


trainval_percent = 0.9
train_percent = 0.9  #The ratio of data used for training, which cannot be set to 1, will result in
xmlfilepath = 'data/Annotations'
txtsavepath = 'data/ImageSets'
total_xml = os.listdir(xmlfilepath)

num = len(total_xml)
list = range(num)
tv = int(num * trainval_percent)
tr = int(tv * train_percent)
trainval = random.sample(list, tv)
train = random.sample(trainval, tr)

ftrainval = open('data/ImageSets/trainval.txt', 'w')
ftest = open('data/ImageSets/test.txt', 'w')
ftrain = open('data/ImageSets/train.txt', 'w')
fval = open('data/ImageSets/val.txt', 'w')

for i in list:
    name = total_xml[i][:-4] + '\n'
    if i in trainval:
        ftrainval.write(name)
        if i in train:
            ftrain.write(name)
        else:
            fval.write(name)
    else:
        ftest.write(name)

ftrainval.close()
ftrain.close()
fval.close()
ftest.close()
After running, the following files will be generated in ImageSets
Then create voc_label.py, where you want to change the label in classes=[] to its specific name. After running, a txt file with the corresponding label will be generated in the labels file.
# xml parse package
import xml.etree.ElementTree as ET
import pickle
import os
# The os.listdir() method returns a list of files or folder names contained in the specified folder
from os import listdir, getcwd
from os.path import join


sets = ['train', 'test', 'val']
classes = ['computer', 'person','phone','tablet phone','cup','bag','bag2','books']


# Perform normalization
def convert(size, box): # size: (original w, original h), box:(xmin, xmax, ymin, ymax)
    dw = 1./size[0]     # 1/w
    dh = 1./size[1]     # 1/h
    x = (box[0] + box[1])/2.0   # The x-coordinate of the center point of an object in the graph
    y = (box[2] + box[3])/2.0   # The y-coordinate of the center point of an object in the graph
    w = box[1] - box[0]         # Actual Pixel Width of Object
    h = box[3] - box[2]         # The actual pixel height of the object
    x = x*dw    # Coordinate ratio of object center point x (equivalent to x/original w)
    w = w*dw    # Width ratio of object width (equivalent to w/original w)
    y = y*dh    # The coordinate ratio of the center point y of the object (equivalent to y/original h)
    h = h*dh    # Width ratio of object width (equivalent to h/original h)
    return (x, y, w, h)    # Returns the x-coordinate ratio, y-coordinate ratio, width ratio, height ratio, value range [0-1] relative to the center point of the object in the original image


# year ='2012', id (file name) of corresponding picture
def convert_annotation(image_id):
    '''
    That will correspond to the file name xml File Conversion label Files, xml The file contains the corresponding bunding Box and picture length size,
    By parsing it, normalizing it and reading it label File, that is to say
    One picture file corresponds to one xml Files, which can then be parsed and normalized to save the corresponding information to the only one label File Go
    labal Format in file: calss x y w h  At the same time, a picture has more than one category, so the correspondingbundingThere are also several pieces of information
    '''
    # The corresponding folder is found by year, and the corresponding image_id xml file, which corresponds to the bund file, is opened
    in_file = open('data/Annotations/%s.xml' % (image_id), encoding='utf-8')
    # Ready to write label s in the corresponding image_id, respectively
    # <object-class> <x> <y> <width> <height>
    out_file = open('data/labels/%s.txt' % (image_id), 'w', encoding='utf-8')
    # Parsing xml files
    tree = ET.parse(in_file)
    # Get the corresponding key-value pair
    root = tree.getroot()
    # Get the size of the picture
    size = root.find('size')
    # If the tag inside the xml is empty, increase the criteria
    if size != None:
        # Get Width
        w = int(size.find('width').text)
        # Get High
        h = int(size.find('height').text)
        # Traverse target obj
        for obj in root.iter('object'):
            # Get Hard??
            difficult = obj.find('difficult').text
            # Get Category=string Type
            cls = obj.find('name').text
            # Skip if the category does not correspond to our predefined class file, or hard==1
            if cls not in classes or int(difficult) == 1:
                continue
            # Find id by category name
            cls_id = classes.index(cls)
            # bndbox object found
            xmlbox = obj.find('bndbox')
            # Get the corresponding bndbox array = ['xmin','xmax','ymin','ymax']
            b = (float(xmlbox.find('xmin').text), float(xmlbox.find('xmax').text), float(xmlbox.find('ymin').text),
                 float(xmlbox.find('ymax').text))
            print(image_id, cls, b)
            # Bring in for normalization
            # w = wide, h = high, b= bndbox array = ['xmin','xmax','ymin','ymax']
            bb = convert((w, h), b)
            # bb corresponds to normalized (x,y,w,h)
            # Generate calss x y w h in label file
            out_file.write(str(cls_id) + " " + " ".join([str(a) for a in bb]) + '\n')


# Return to the current working directory
wd = getcwd()
print(wd)


for image_set in sets:
    '''
    Traverse all file datasets
    Two things have been done:
    1.Traverse all picture files and write all their full paths in the corresponding txt Go to the file for easy positioning
    2.All picture files are parsed and transformed at the same time, and their corresponding bundingbox And all information about the category is parsed and written to label File Go
         Finally, by reading the file directly, you can find the corresponding label information
    '''
    # Find the labels folder first and create it if it doesn't exist
    if not os.path.exists('data/labels/'):
        os.makedirs('data/labels/')
    # Read the contents of files like train, test..In ImageSets/Main
    # Contains the corresponding file name
    image_ids = open('data/ImageSets/%s.txt' % (image_set)).read().strip().split()
    # Open the corresponding 2012_train.txt file to prepare it for writing
    list_file = open('data/%s.txt' % (image_set), 'w')
    # Write in and wrap the corresponding file_id and full path
    for image_id in image_ids:
        list_file.write('data/images/%s.jpg\n' % (image_id))
        # Call year =year image_id =corresponding file name_id
        convert_annotation(image_id)
    # Close File
    list_file.close()
5. Modification of some file parameters
(1) Modify the dataset file coco.yaml under the data file or rebuild a file by copying the code, modify the data path (train, val, test) to the corresponding txt file under the previous ImageSet, change the NC (number of labels in the data), and change the labels in the names to their own
# YOLOv5 🚀 by Ultralytics, GPL-3.0 license
# COCO 2017 dataset http://cocodataset.org
# Example usage: python train.py --data coco.yaml
# parent
# ├── yolov5
# └── datasets
#     └── coco  ← downloads here


# Train/val/test sets as 1) dir: path/to/imgs, 2) file: path/to/imgs.txt, or 3) list: [path/to/imgs1, path/to/imgs2, ..]
path: ../datasets/coco          # dataset root dir
train:   #Change to your own txt file  # train images (relative to 'path') 118287 images
val:                            # train images (relative to 'path') 5000 images
test:                           # 20288 of 40670 images, submit to

# Classes
nc: 80  # number of classes
names: ['person', 'bicycle', 'car', 'motorcycle', 'airplane', 'bus', 'train', 'truck', 'boat', 'traffic light',
        'fire hydrant', 'stop sign', 'parking meter', 'bench', 'bird', 'cat', 'dog', 'horse', 'sheep', 'cow',
        'elephant', 'bear', 'zebra', 'giraffe', 'backpack', 'umbrella', 'handbag', 'tie', 'suitcase', 'frisbee',
        'skis', 'snowboard', 'sports ball', 'kite', 'baseball bat', 'baseball glove', 'skateboard', 'surfboard',
        'tennis racket', 'bottle', 'wine glass', 'cup', 'fork', 'knife', 'spoon', 'bowl', 'banana', 'apple',
        'sandwich', 'orange', 'broccoli', 'carrot', 'hot dog', 'pizza', 'donut', 'cake', 'chair', 'couch',
        'potted plant', 'bed', 'dining table', 'toilet', 'tv', 'laptop', 'mouse', 'remote', 'keyboard', 'cell phone',
        'microwave', 'oven', 'toaster', 'sink', 'refrigerator', 'book', 'clock', 'vase', 'scissors', 'teddy bear',
        'hair drier', 'toothbrush']  # class names
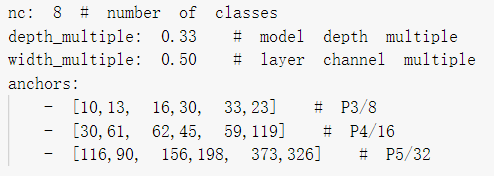
(2) Using the modification of the model and yolov5s.pt, modify the corresponding yolov5-master/models/yolov5m.yaml and change the nc to its corresponding number of labels. This also involves the setting of anchors box.
(3) Modification of train.py
The main parameters are--weight, --cfg, --data, --hyp, --epochs, --batch-size, --imagsz, --cache is prone to error, and it is best to modify it as well.
#Path to write your own data in default
#--weight downloads the corresponding yolov5s.pt, yolov5m.pt and waits until you have a project in which to fill in the path
parser.add_argument('--weights', type=str, default='', help='initial weights path')
#--cfg for your--weight, in models for the first 5. (2) files
parser.add_argument('--cfg', type=str, default='', help='model.yaml path')
 #Files corresponding to the previous 5. (1)
parser.add_argument('--data', type=str, default='', help='dataset.yaml path')
parser.add_argument('--hyp', type=str, default='data/hyps/hyp.scratch.yaml', help='hyperparameters path')
#Number of iterations
parser.add_argument('--epochs', type=int, default=300)
parser.add_argument('--batch-size', type=int, default=16, help='total batch size for all GPUs')
#Picture size
parser.add_argument('--imgsz', '--img', '--img-size', type=int, default=640, help='train, val image size (pixels)')
parser.add_argument('--cache', action='store_true', help='cache images for faster training')
3. Data Training
After completing the above steps, you can run the train.py file to start training on your own data, and when the interface below appears, it shows that the training has started normally.

4. Detection
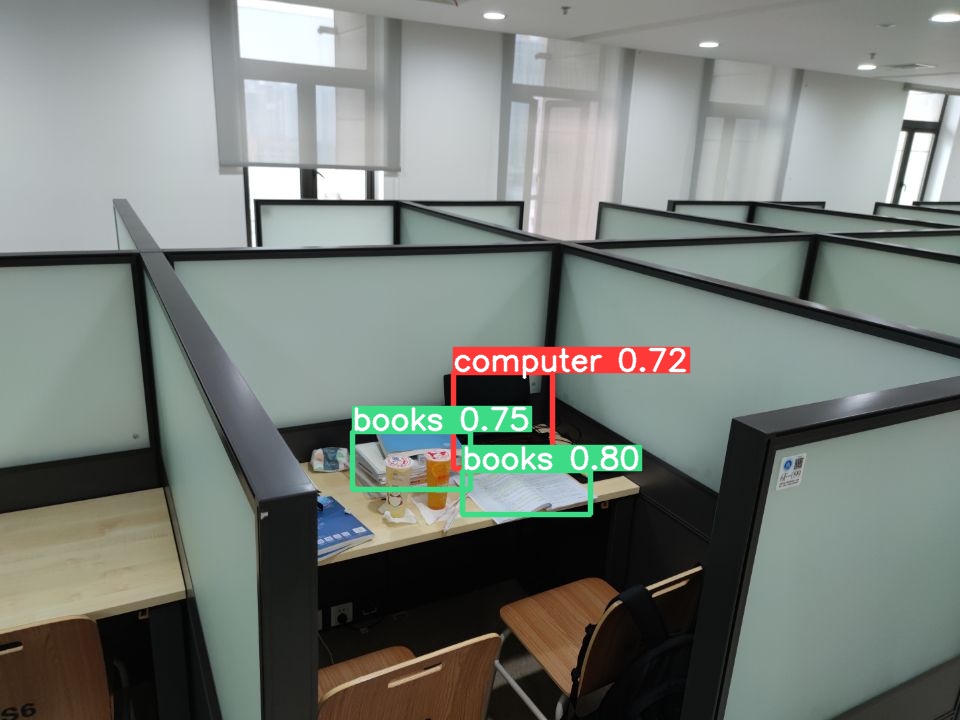
The main changes to the detect.py file are the selection of weights trained by weight, --the path of the source detection picture, and then running the PY file to get the corresponding results in the corresponding folder.
#Select Weight
parser.add_argument('--weights', nargs='+', type=str, default='Choose your own trained weight', help='model.pt path(s)')
#Select Detection Picture Path
parser.add_argument('--source', type=str, default='Choose the path where the picture needs to be detected', help='file/dir/URL/glob, 0 for webcam')
#Run the path to save the results
parser.add_argument('--project', default='runs/detect', help='save results to project/name')
Attach a map of my own
5. Optimize (improve recognition rate)
1. Number of datasets: Increasing the number of datasets can significantly improve the accuracy of identification
2. Identify the eigenvalues of objects: The identified objects are a class of objects corresponding to a label, which have consistent eigenvalues and can be subdivided as much as possible to improve the recognition accuracy.
3. Modify the anchor box. The anchor value in the project may not be suitable for us. We can calculate our own anchor box by k-means (currently under study)
4. To change the model, I tried yolov5s.pt and yolov5m.pt, m is slightly better than s