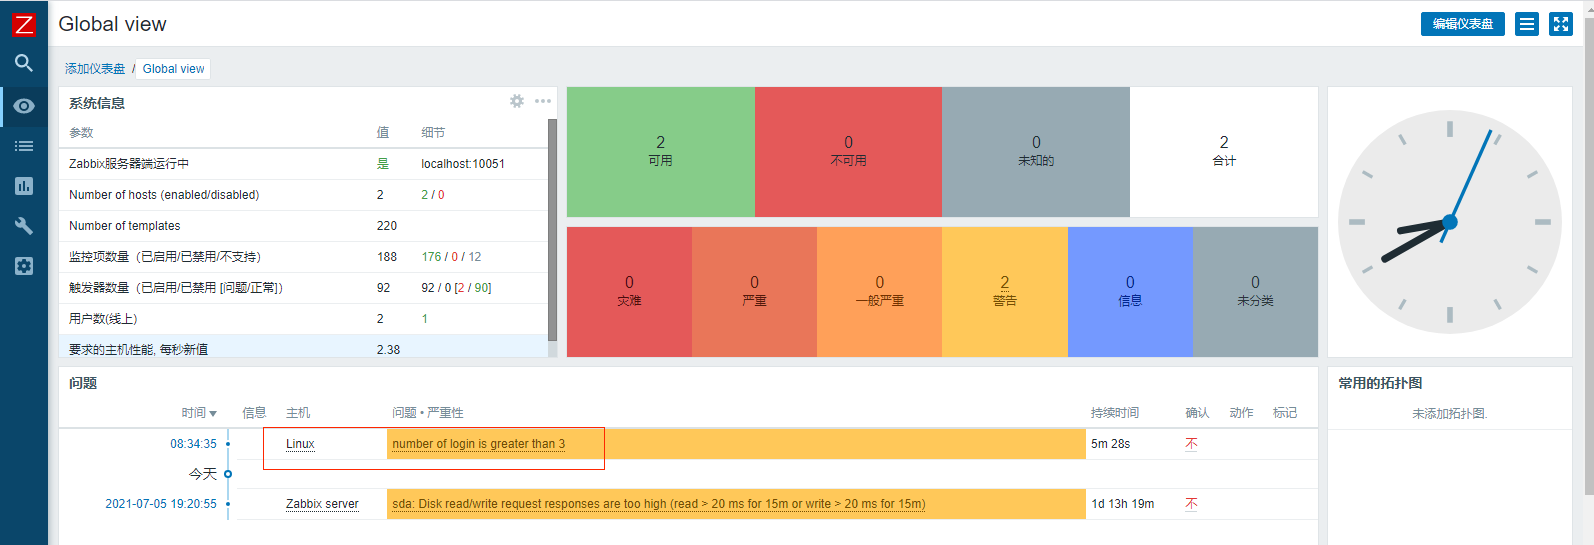
1, What is Zabbix?
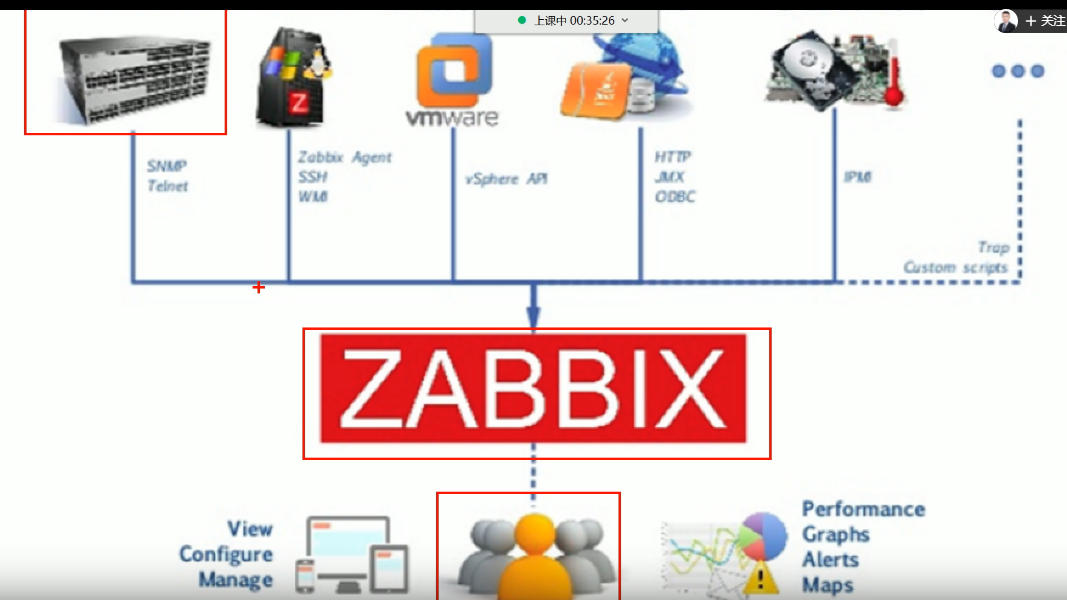
Zabbix is an enterprise class solution that supports real-time monitoring of thousands of servers, virtual machines and network devices and collects millions of monitoring indicators.
Zabbix is completely open source and free.
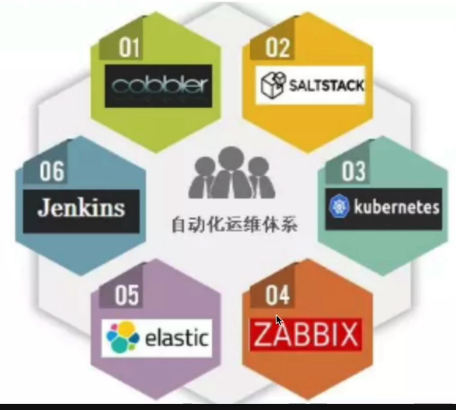
Operation and maintenance system
2, Zabbix5 0 installation
https://www.zabbix.com/documentation/5.0/zh/manual
1. Install Zabbix service
https://www.zabbix.com/cn/download?zabbix=5.0&os_distribution=centos&os_version=7&db=mysql&ws=apache
1.Prepare the machine and initialize the environment
# ifconfig
# ifconfig ens192|awk 'NR==2 {print $2}'

2.Turn off the firewall SELinux
Redhat Used SELinux To enhance security, the closing method is:
 Permanently valid
 modify /etc/selinux/config In file SELINUX="" by disabled ,Then restart.
 Immediate effect
# setenforce 0
 View status
# getenforce

3.obtain zabbix Download source for
# rpm -Uvh https://repo.zabbix.com/zabbix/5.0/rhel/7/x86_64/zabbix-release-5.0-1.el7.noarch.rpm
# yum clean all

4.replace zabbix.repo Source: Ali
send -i 's#http://repo.zabbix.com/#http://mirrors.aliyun.com/zabbix#' /etc/yum.repos.d/zabbix.repo

5.Empty cache, Download zabbix The server
# yum clean all
# yum makecache
# yum install zabbix-server-mysql zabbix-agent

6.The installation tool can use multiple versions of software on the machine without affecting the dependent environment of the whole system
# yum install centos-release-scl

7.Edit profile /etc/yum.repos.d/zabbix.repo
[zabbix-frontend]
...
enabled=1 # Turn on the parameters here
...
8.install zabbix Front end environment and installed to sci Environment. /opt/rh

# yum install zabbix-web-mysql-scl zabbix-apache-conf-scl (apache)
# yum install zabbix-web-mysql-scl zabbix-nginx-conf-scl

9.install zabbix Required database, mariadb
# yum install mariadb-server -y
 Configure database settings for startup and self startup
 # systemctl enable --now mariadb
 # systemctl status mariadb.service
 # netstat -ntlp
 # mysql_secure_installation
 # mysql -uroot -p
 password
 mysql> create database zabbix character set utf8 collate utf8_bin;
 mysql> create user zabbix@localhost identified by 'password';
 mysql> grant all privileges on zabbix.* to zabbix@localhost;
 mysql> quit;
 Import initial schema and data
# zcat /usr/share/doc/zabbix-server-mysql*/create.sql.gz | mysql -uzabbix -p zabbix
 by Zabbix server Configuration database editing configuration files
/etc/zabbix/zabbix_server.conf
 DBPassword=password
# grep '^DB'  /etc/zabbix/zabbix_server.conf

10.modify zabbix of php configuration file
 Edit profile /etc/opt/rh/rh-nginx116/nginx/conf.d/zabbix.conf
# listen 80;
# server_name example.com;
Edit profile /etc/opt/rh/rh-php72/php-fpm.d/zabbix.conf
php_value[date.timezone] = Asia/shanghai
listen.acl_users = apache,nginx((optional)

11.start-up Zabbix server and agent Processes and set them to start automatically:
 (apache)
# systemctl restart zabbix-server zabbix-agent httpd rh-php72-php-fpm
# systemctl enable zabbix-server zabbix-agent httpd rh-php72-php-fpm
 (nginx)
# systemctl restart zabbix-server zabbix-agent rh-nginx116-nginx rh-php72-php-fpm
# systemctl enable zabbix-server zabbix-agent rh-nginx116-nginx rh-php72-php-fpm

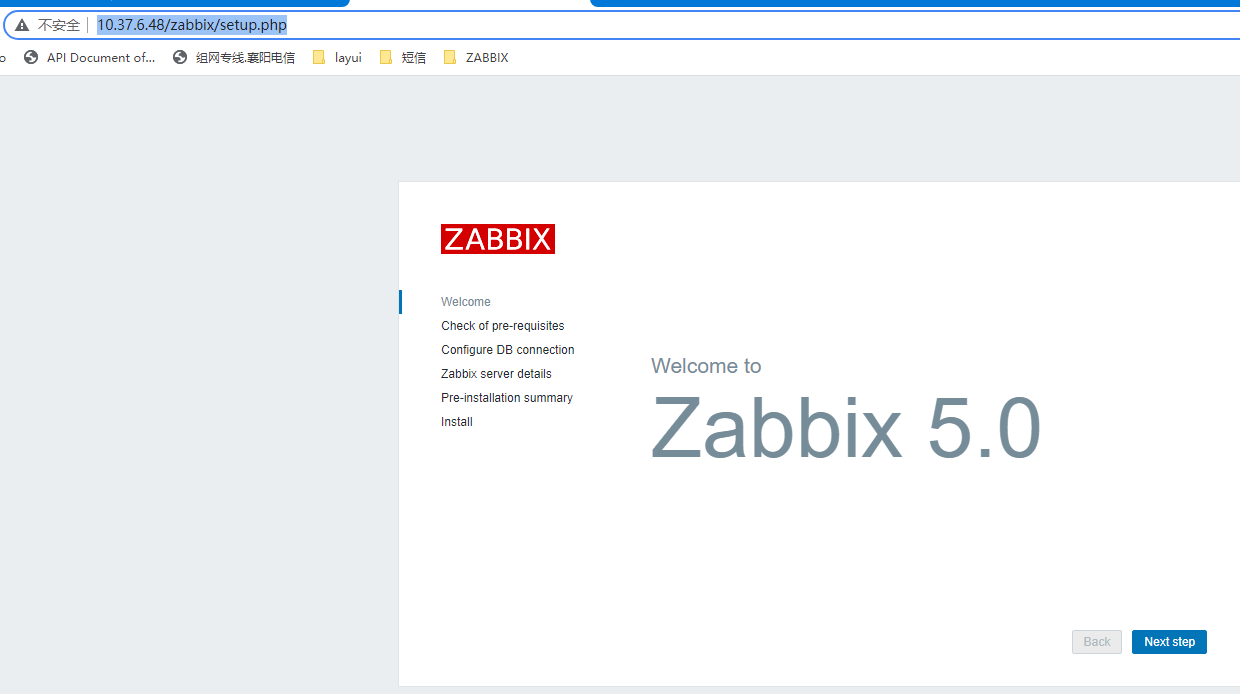
11.to configure Zabbix front end
 Connect to the newly installed Zabbix front end: http://server_ip_or_name/zabbix (apache)
 http://10.37.6.48/zabbix/
 Default account and password after successful installation
 Admin/zabbix
2. Deploy Zabbix client
Zabbix agent 2 is a new generation of ZABBIX agent, which may replace the original ZABBIX agent in the future
Reducing the number of TCP connections has greater check concurrency and is easy to expand through plug-ins
A plug-in can be a simple check implemented by just a few lines of simple code
The complex inspection of independent data collection returned by long-running scripts and data cycles can replace the original Zabbix agent (compatible with the original Zabbix agent)
All functions of agent)
Agent 2 is developed in Go language (reusing part of the C code of the original Zabbix Agent).
Zabbix agent2 needs to be compiled in the Go environment of version 1.13 +
linux time setting
Automatic calibration
# yum install ntpdate -y
# ntpdate -u  ntp.aliyun.com
ntpdate -u cn.pool.ntp.org

time zone
mv xxxx{,.bak}Equivalent to mv xxxx xxxx.bak
# mv /etc/localtime{,.bak}
# ln -s /usr/share/zoneinfo/Asia/Shanghai /etc/localtime

Synchronize system time to hardware clock
# hwclock --systohc
# hwclock -w
Configure the download source agent2 of zabbix in advance
# rpm -Uvh https://repo.zabbix.com/zabbix/5.0/rhel/7/x86_64/zabbix-release-5.0-1.el7.noarch.rpm
# yum clean all
# yum install zabbix-agent2

View configuration
# vim /etc/zabbix/zabbix_agent2.conf
# grep -Ev '^#|^$' /etc/zabbix/zabbix_agent2.conf
# cat /var/run/zabbix/zabbix_agent2.pid
 Start command
# ls -l /usr/sbin/zabbix_agent2
# systemctl enable --now zabbix-agent2
# netstat -ntlp
 modify agent2 Configuration file, view configuration information, modify Server ,Hostname
Server=10.37.6.48
ServerActive=10.37.6.48
Hostname=Zabbix10.37.6.53
 restart zabbix2
# systemctl restart zabbix-agent2
Verify the connectivity of zabbix-agent2
1.Actively obtain data through commands on the server
# yum install zabbix-get -y
2.Command to check whether the server is connected to the client
# zabbix_get -s '10.37.6.53' -p 10050 -k 'system.hostname'
Solve the garbled code problem in ZABBIX server view
# yum install wqy-microhei-fonts -y
# \cp /usr/share/fonts/wqy-microhei/wqy-microhei.ttc  /usr/share/fonts/dejavu/DejaVuSans.ttf
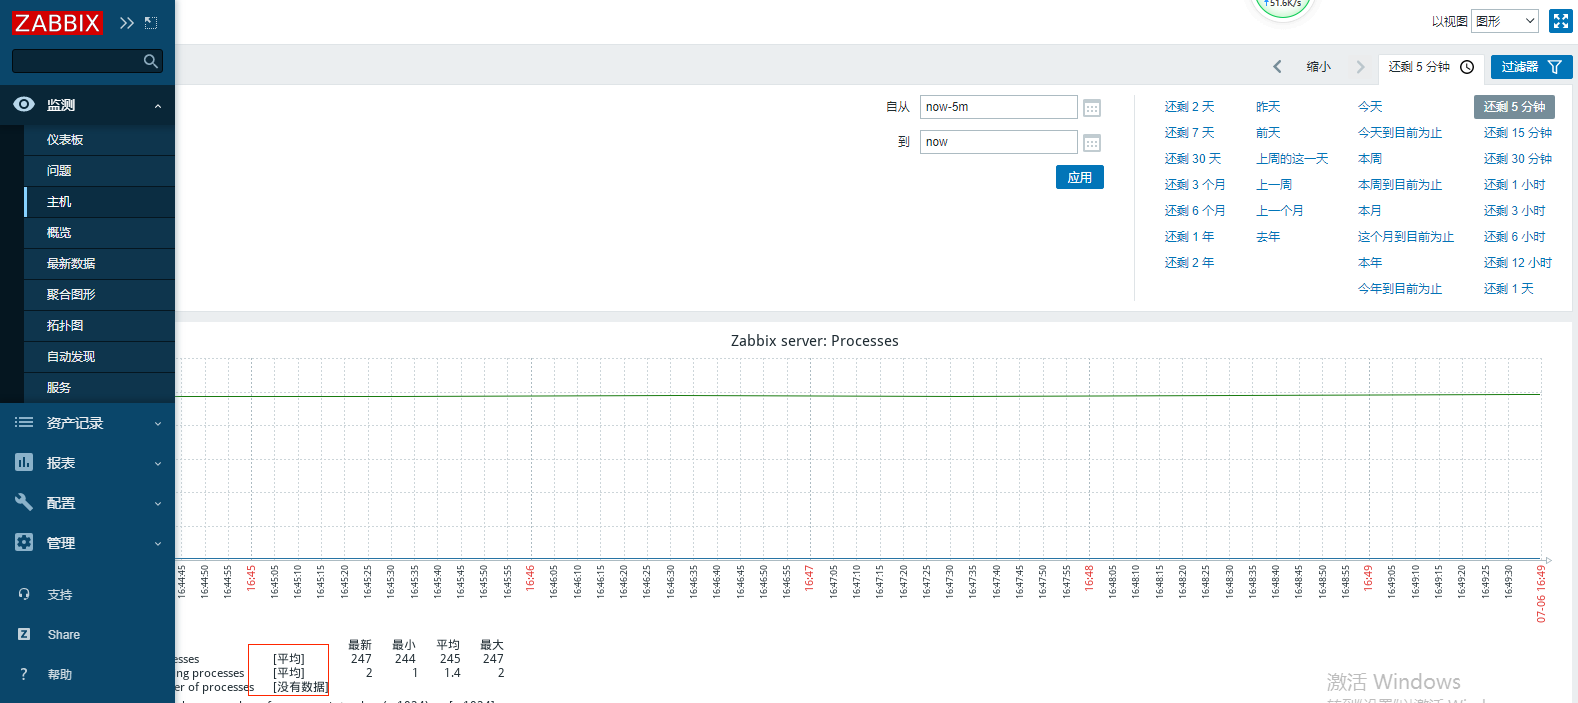
3, zabbix simple configuration
3.1 add client zaabix agent host
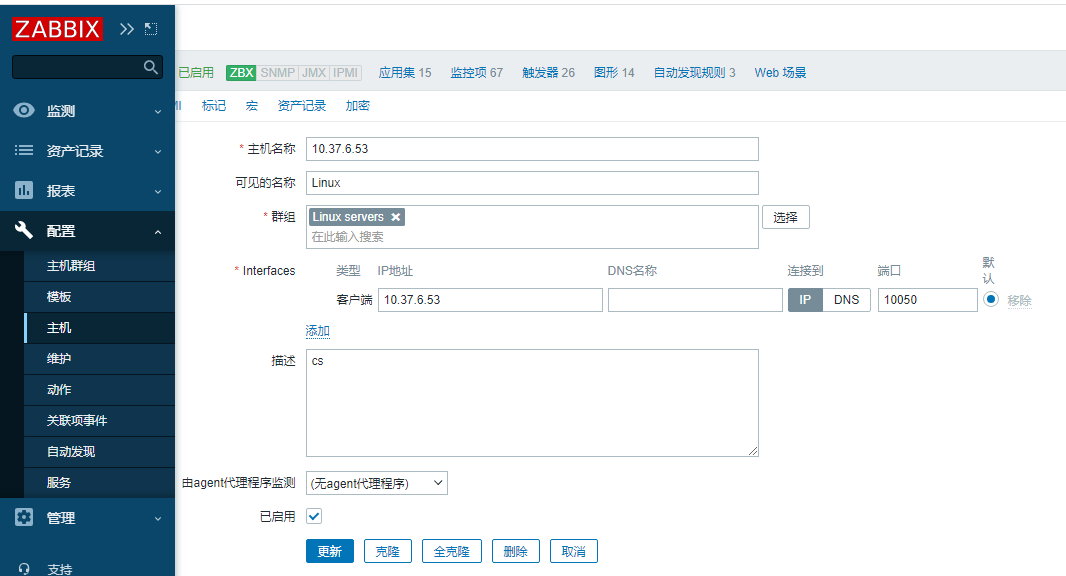

Wait a little, the small icon will turn green, zabbix is the correct monitoring
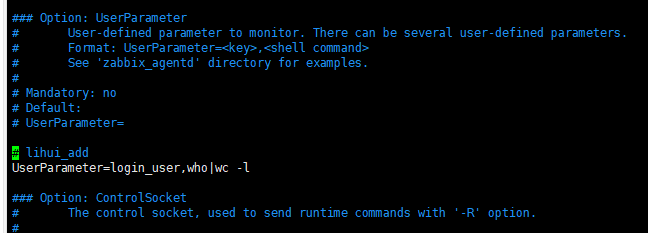
3.2 adding custom key s
Limit the number of logins to no more than three and alarm more than three
1. Specify the linux commands to be executed
who
who |wc -l # displays the number of logins
2. Manually create the configuration file of zabbix to customize the key
zabbix_agent2.conf # main configuration file
zabbix_agent2.d # extended directory
Find the syntax for the key in the main configuration file.
#vim /etc/zabbix/zabbix_agentd.conf
#Restart service
# systemctl restart zabbix-agent2
Server test

3.2 user defined monitor item template
Create template
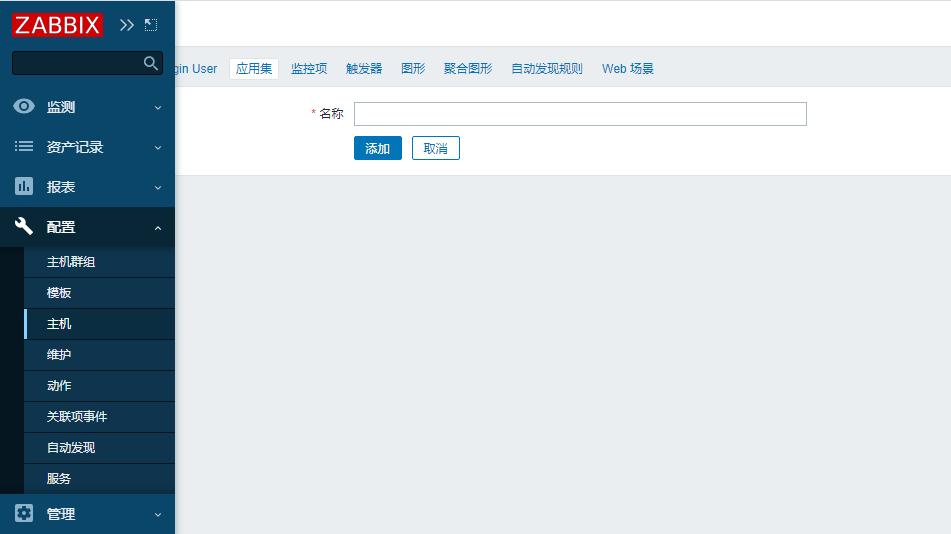
Create an application set (like a folder with a bunch of monitoring items)
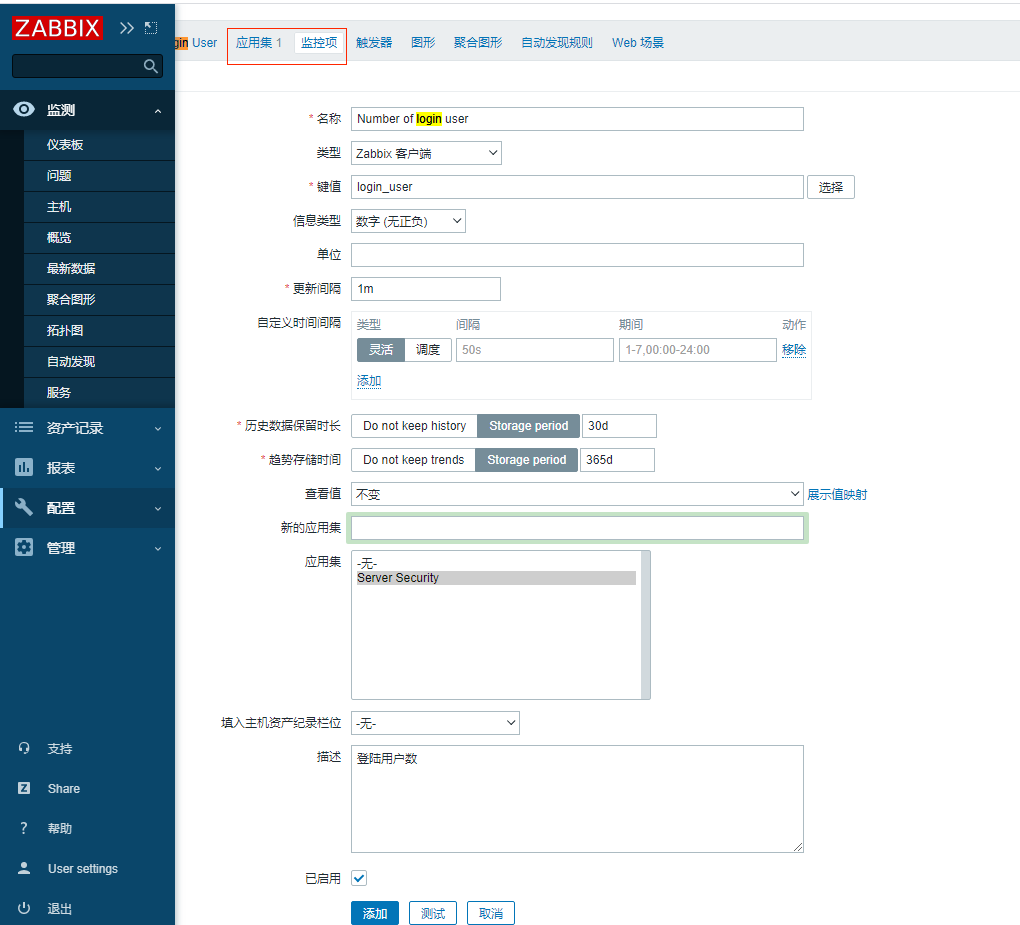
Create monitoring items, customize items, and specify what you want to monitor
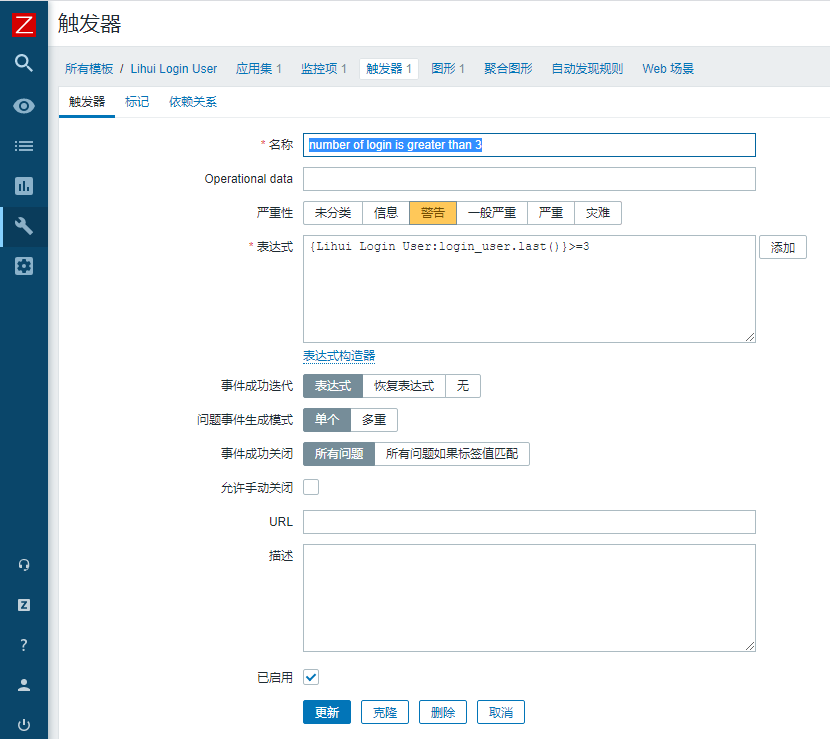
Create a trigger. When the monitoring item obtains the value, compare it with the trigger, judge and decide whether to alarm
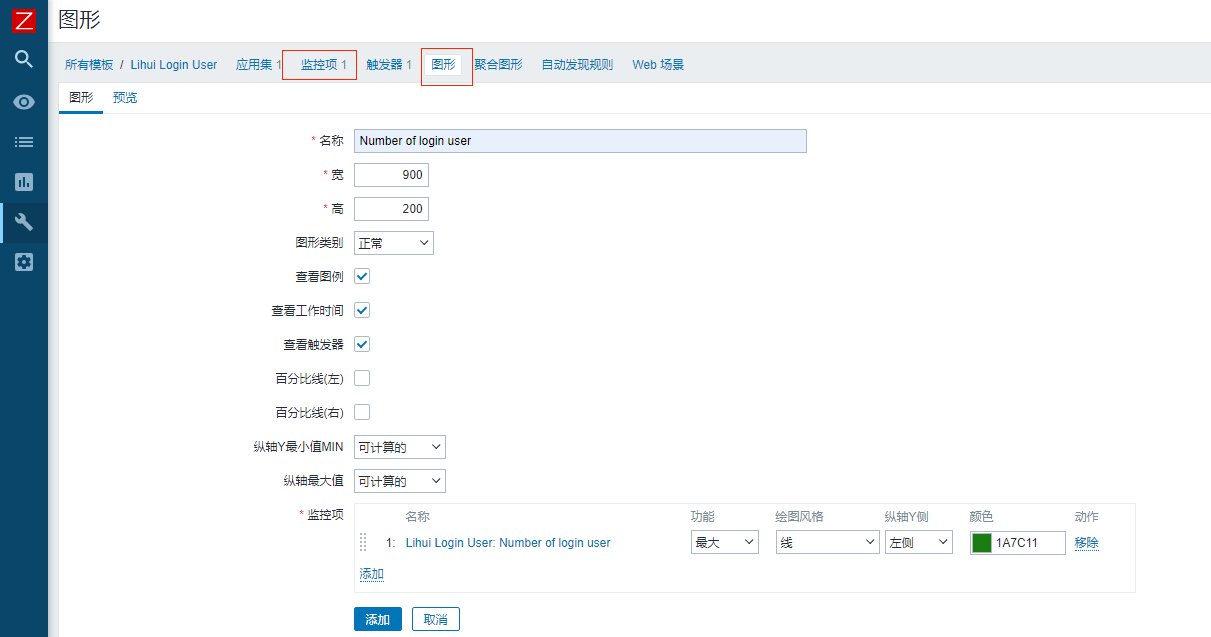
Create a drawing to connect and associate a specific host with the template.
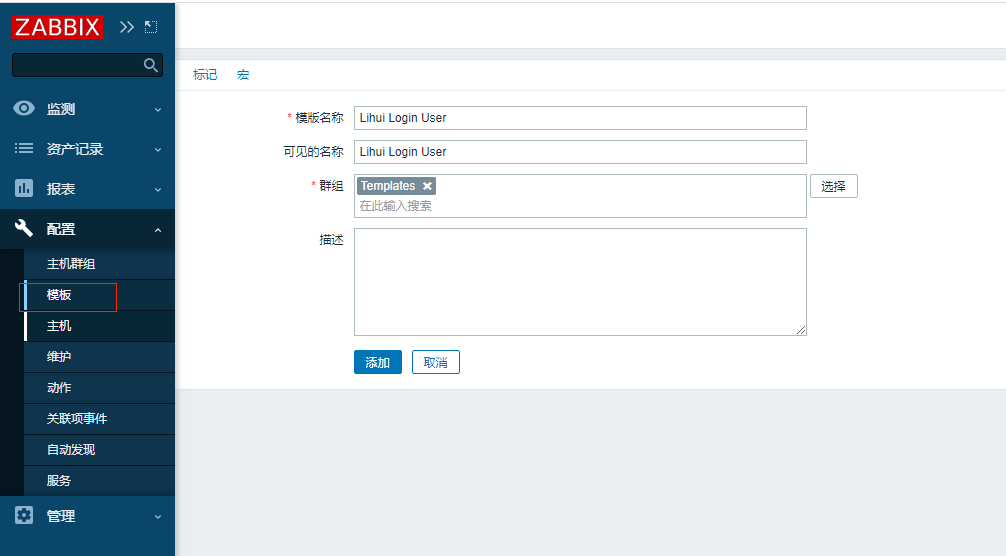
Create application set in the upper right corner
Create monitoring items, customize items, and specify what you want to monitor
Create a trigger. When the monitoring item obtains the value, compare it with the trigger, judge and decide whether to alarm
Create drawing
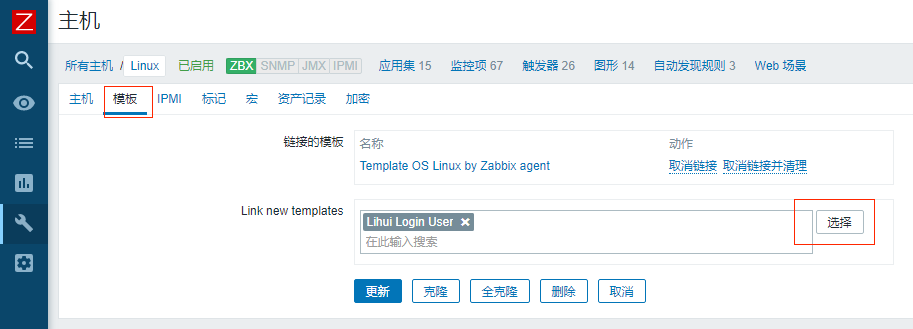
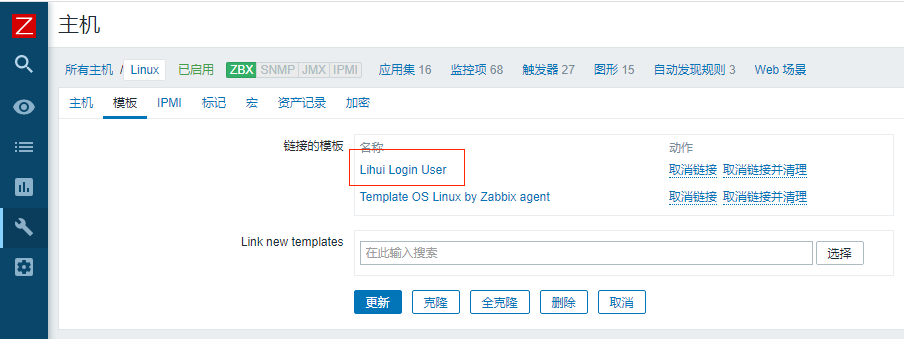
Change the specific host to template link association.
verification


