Summary
This article uses create-react-app as scaffolding, and combines react + redux + react-router to build a simple single-page application demo. The article will step by step explain how to build such a one-page application. The corresponding demo address will be given at the end of the article.
This paper mainly explains the practical process of SPA construction. After having a preliminary understanding of react, redux and react-router, we use these technologies to build a simple one-page application. This application includes side navigation bar and main content area. Below is a brief list of the frameworks and tools that will be used.
- create-react-app: Scaffolding
- react: Responsible for page component building
- react-router: responsible for the control of the routing part of a single page application
- redux: responsible for managing the data flow of the entire application
- react-redux: Combining react with Redux
- redux-thunk: A middleware of redux. The action creator can be returned to a function (not just an object), and the dispatch method can receive a function as a parameter. This modification enables action to support asynchronous (or delayed) operations.
- redux-actions: A FSA toolkit for redux that can simplify and standardize action and reducer parts accordingly
Well, let's not say much. Let's build your one-page application together.
Use create-react-app scaffolding
create-react-app It's the official scaffolding from Facebook. With it, you can quickly build react projects by skipping the cumbersome configuration of webpack and the introduction of npm in one line of instructions.
First install create-react-app
npm i -g create-react-app
Once installed, you can quickly create a web pack-based react application using the create-react-app instruction
cd $your_dir
create-react-app react-redux-demo
At this point you can enter the react-redux-demo directory and run npm start to start the application.
Open to visit localhost:3000 and see the corresponding page below, indicating that the project infrastructure has been created.
Create React components
Modify directory structure
Here's a look at the corresponding directory structure in our react-redux-demo project
|--public
    |--index.html
    |-- ......
|--src
    |--App.js
    |--index.js
    |-- ......
|--node_modules
The content stored in public will not be compiled by webpack, so you can put some static pages or pictures; the content stored in SRC will be packaged and compiled by webpack, and our main work directory is under src.
Students who know react will surely know that in react we can achieve a new world by building various react component s. In our project, components will be divided into general component and page component parts based on this. Common components are components in our general sense. Some large projects maintain their own component libraries, in which components are shared by the whole project. Page components are actually the pages presented in our project. So, our catalog will be like this
|--public
      |--index.html
      |-- ......
|--src
    |--page
         |--welcome.js
         |--goods.js
    |--component
         |--nav
             |--index.js
             |--index.css
    |--App.js
    |--index.js
    |-- ......
|--node_modules
In the src directory, two new directories, page and component, are created to store page components and general components, respectively. Page components include welcome.js and good.js, and general components include a navigation bar nav.
Two Component Forms
Write pages or components, similar to static page development. The recommended components are written in two ways:
1) Pure function form: This kind of component is stateless component. Because of the use of functions to define, this object cannot be accessed, and there is no life cycle method, only props can be accessed. This kind of component is mainly some pure display class of small components, by combining these small components to form more complex components. For example:
const Title = props => (
    <h1>
        {props.title} - {props.subtitle}
    </h1>
)
2) Components in the form of es6: These components are usually complex or stateful. Use the class syntax of ES6 to create. It should be noted that using this in a page/component pays attention to its pointing and requires binding when necessary. Binding methods can use either the bind function or the arrow function. The method of creation is as follows:
class Title extends Component {
    constructor(props) {
        super(props);
        this.state = {
            shown: true
        };
    }

    render() {
        let style = {
            display: this.state.shown ? 'block' : none
        };
        return (
            <h1 style={style}>
                {props.title} - {props.subtitle}
            </h1>
        );
    }
}
The following is a comparison between the two components:
| Presentational Components | Container Components
---|---|---
Purpose | How things look (markup, styles) | How things work (data fetching, state updates)
Aware of Redux | No | Yes
To read data | Read data from props | Subscribe to Redux state
To change data | Invoke callbacks from props | Dispatch Redux actions
Are written | By hand | Usually generated by React Redux
In view of the above analysis, we can write nav as a stateless component, while part of the page uses stateful components.
Navbar component nav
// component/nav/index.css
.nav {
    margin: 30px;
    padding: 0;
}
.nav li {
    border-left: 5px solid sandybrown;
    margin: 15px 0;
    padding: 6px 0;
    color: #333;
    list-style: none;
    background: #bbb;
}

// component/nav/index.js
import React from 'react';
import './index.css';

const Nav = props => (
    <ul className="nav">
        {
            props.list.map((ele, idx) => (
                <li key={idx}>{ele.text}</li>
            ))
        }
    </ul>
);

export default Nav;
Modified App.js and App.css
// App.css
.App {
    text-align: center;
}
.App::after {
    clear: both;
}
.nav_bar {
    float: left;
    width: 300px;
}
.conent {
    margin-left: 300px;
    padding: 30px;
}

// App.js
import React, { Component } from 'react';
import Nav from './component/nav';
import Welcome from './page/welcome';
import Goods from './page/goods';
import './App.css';

const LIST = [{
    text: 'welcome',
    url: '/welcome'
}, {
    text: 'goods',
    url: '/goods'
}];

const GOODS = [{
    name: 'iPhone 7',
    price: '6,888',
    amount: 37
}, {
    name: 'iPad',
    price: '3,488',
    amount: 82
}, {
    name: 'MacBook Pro',
    price: '11,888',
    amount: 15
}];

class App extends Component {
    render() {
        return (
            <div className="App">
                <div className="nav_bar">
                    <Nav list={LIST} />
                </div>
                <div className="conent">
                    <Welcome />
                    <Goods list={GOODS} />
                </div>
            </div>
        );
    }
}

export default App;
welcome page
// page/welcome.js
import React from 'react';

const Welcome = props => (
    <h1>Welcome!</h1>
);

export default Welcome;
goods page
// page/goods.js
import React, { Component } from 'react';

class Goods extends Component {
    render() {
        return (
            <ul className="goods">
                {
                    this.props.list.map((ele, idx) => (
                        <li key={idx} style={{marginBottom: 20, listStyle: 'none'}}>
                            <span>{ele.name}</span> |
                            <span>¥ {ele.price}</span> |
                            <span>Surplus {ele.amount} piece</span>
                        </li>
                    ))
                }
            </ul>
        );
    }
}

export default Goods;
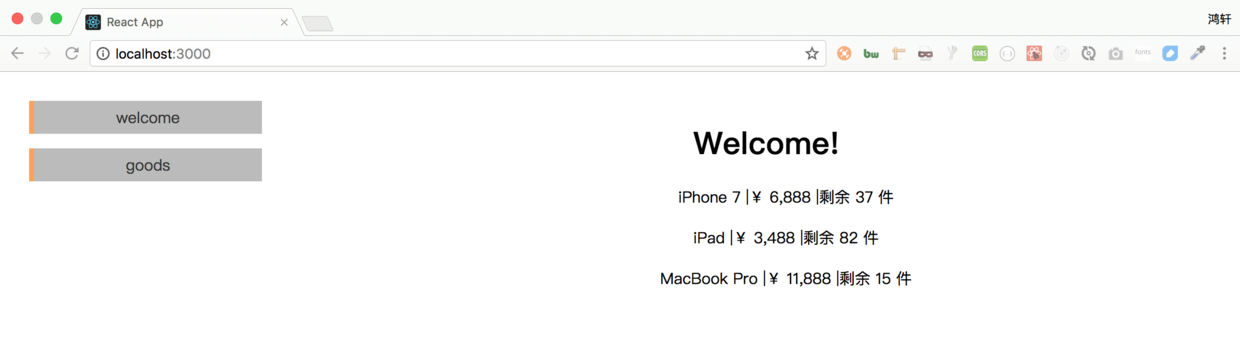
Now our page is like this
Using redux to manage data streams
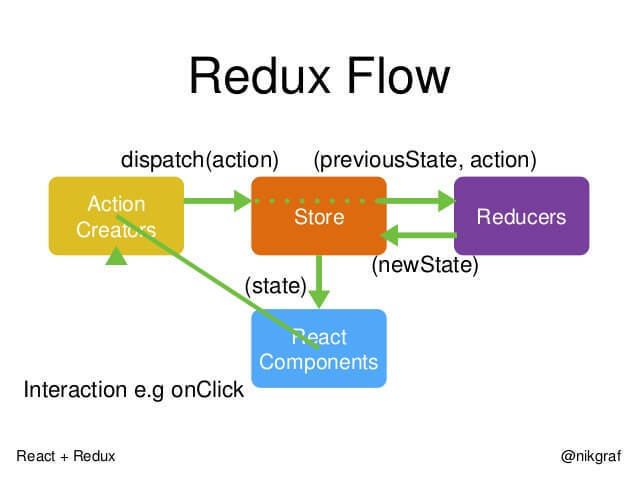
redux is an implementation of flux architecture. The figure shows how a click event interacts in the react+redux framework.
However, Redux is not entirely dependent on the react framework. In fact, Redux can be combined with any UI layer framework. Therefore, in order to better integrate Redux with react and have a better global management of store s in redux-flow, we also need to use react-redux.
npm i --save redux
npm i --save react-redux
At the same time, in order to better create action and reducer, we will also introduce redux-actions in the project: a FSA toolbox for redux, which can simplify and standardize action and reducer parts accordingly. Of course, this is optional.
npm i --save redux-actions
Next we will take the goods page as an example to realize the following scenario: after rendering the goods page component, send a request to get the list of goods. The mock data is used to get the data.
To achieve these functions, we need to further adjust the directory structure.
|--public
      |--index.html
      |-- ......
|--src
    |--page
         |--welcome.js
         |--goods.js
    |--component
         |--nav
             |--index.js
             |--index.css
    |--action
         |--goods.js
    |--reducer
         |--goods.js
         |--index.js
    |--App.js
    |--index.js
    |-- ......
|--node_modules
First, create action
First, we need to create the corresponding action.
Action is an object type, and Flux has relevant standardization recommendations for the structure of action FSA
An action must contain the type attribute, and it has three optional attributes: error, payload, and meta.
- The type attribute is equivalent to an action identifier, by which different actions can be distinguished, and its type can only be string constants or symbols.
- The payload attribute is optional and can be of any type. Payload can be used to load data; when error is true, payload is usually used to load error messages.
- The error attribute is optional and is usually true when an error occurs; if it is any other value, it is not understood as an error.
- meta attributes can be of any type and generally include data that is not suitable for placing in payload.
We can create an action to get goods information:
// action/goods.js
const getGoods = goods => {
    return {
        type: 'GET_GOODS',
        payload: goods
    };
}
In this way, we can get the GET_GOODS action.
In the project, redux-actions are used to create and manage actions:
createAction(type, payloadCreator = Identity, ?metaCreator)
createAction is equivalent to a wrapper for the action creator, which returns an FSA that can be used to create specific actions.
Payload creator is a function that processes and returns the required payload; if it is vacant, the default method is used. If an Error object is passed in, the error attribute of action is automatically set to true:
example = createAction('EXAMLE', data => data);
// The same effect as the following
example = createAction('EXAMLE');
Therefore, the above approach can be rewritten as follows:
// action/goods.js
import {createAction} from 'redux-actions';
export const getGoods = createAction('GET_GOODS');
* In addition, you can use createActions to create multiple action creators at the same time.
Secondly, the way to create state -- reducer
For different action s, different reducer s correspond to state processing, and they correspond to each other through the value of type.
Reducer is a method of handling state, which receives two parameters, the current state and the corresponding action. According to state and action, reducer processes and returns a new state (also a new object, without modifying the original state). It can be achieved by a simple switch operation:
// reducer/goods.js
const goods = (state, action) => {
    switch (action.type) {
        case 'GET_GOODS':
            return {
                ...state,
                data: action.payload
            };
        // Other action processing...
    }
}
For createAction, redux-actions also have the corresponding reducer mode:
handleAction(type, reducer | reducerMap = Identity, defaultState)
type can be a string or an action creator returned by createAction:
handleAction('GET_GOODS', {
    next(state, action) {...},
    throw(state, action) {...}
}, defaultState);

//Or it could be
handleAction(getGoods, {
    next(state, action) {...},
    throw(state, action) {...}
}, defaultState);
In addition, sometimes a series of action s for some operations can be semantically and logically related, and we want to put them together for easy maintenance. Multiple related reducer s can be written together through handleActions for later maintenance:
handleActions(reducerMap, defaultState)
So we use redux-actions to rewrite the reducer we wrote earlier
// reducer/goods.js
import {handleActions} from 'redux-actions';

export const goods = handleActions({
    GET_GOODS: (state, action) => ({
        ...state,
        data: action.payload
    })
}, {
    data: []
});
Then, merge reducer
Because a store is managed uniformly in redux, it is necessary to merge the States processed by the unused reducer.
redux provides us with the combineReducers method. When business logic is too much, we can combine multiple reducers to produce a unified reducer. Although we have only one reducer now, in order to be expansive and demonstrative, a reducer/index.js file is created here to merge the reducer and generate a rootReducer.
// reducer/index.js
import {combineReducers} from 'redux';
import {goods} from './goods';

export const rootReducer = combineReducers({
    goods
});
After that, the page components are combined with the data flow
The action and reducer in Redux have been created in the above section. However, the data flow and our components are still separated. We need to make the change of the global state, store, drive the change of the page components to complete the last part of redux-flow. This requires mapping parts of the state in the store to the props of the component.
To solve this problem, we need to use the react-redux tool we mentioned earlier.
First, we need to create a global store based on rootReducer. Create a new store.js file in the src directory and call the createStore method of redux:
// store.js
import {createStore} from 'redux';
import {rootReducer} from './reducer';
export const store = createStore(rootReducer);
Then, we need to make the store accessible to all components. The simplest way is to use react-redux
Provider is provided to package the whole application. In this way, all the sub-pages and sub-components can access the store. Therefore, index.js needs to be rewritten:
// index.js
import React from 'react';
import ReactDOM from 'react-dom';
import './index.css';
import App from './App';
import {Provider} from 'react-redux';
import {store} from './store';

ReactDOM.render(
    <Provider store={store}>
        <App />
    </Provider>,
document.getElementById('root'));
Finally, it is the connection between components and states. Connect the parts of the store that need to be mapped to our components. This can be achieved by using its connect method:
connect(mapStateToProps)(component);
There is a global store in redux, which stores the state of the whole application and manages it uniformly. Connect connects data in this state to the page component. Among them, mapStateToProps is a way of mapping the state of the store to the properties of the component, and component is a page component that needs to be connected. Through the connect method, once the store changes, the components will be updated accordingly.
We need to modify the original page/goods.js
import React, { Component } from 'react';
import {connect} from 'react-redux';

class Goods extends Component {
    render() {
        return (
            <ul className="goods">
                {
                    this.props.list.map((ele, idx) => (
                        <li key={idx} style={{marginBottom: 20, listStyle: 'none'}}>
                            <span>{ele.name}</span> |
                            <span>¥ {ele.price}</span> |
                            <span>Surplus {ele.amount} piece</span>
                        </li>
                    ))
                }
            </ul>
        );
    }
}

const mapStateToProps = (state, ownProps) => ({
    goods: state.goods.data
});
// -export default Goods;
export default connect(mapStateToProps)(Goods);
In addition, the trigger of corresponding action can be mapped for the corresponding method in the component:
const mapDispatchToProps = dispatch => ({
    onShownClick: () => dispatch($yourAction)
});
Finally, the entire flow is triggered after the component rendering is completed
If there is an interaction requiring state updates, state updates can be achieved by triggering actions in the corresponding parts of the component - > component updates. Trigger mode:
dispatch($your_action)
After connect ing, the component will have a dispatch attribute in its props, which is a dispatch method:
let dispatch = this.props.dispatch;
Therefore, the final page/goods.js component is as follows:
import React, { Component } from 'react';
import {connect} from 'react-redux';
import * as actions from '../action/goods';

const GOODS = [{
    name: 'iPhone 7',
    price: '6,888',
    amount: 37
}, {
    name: 'iPad',
    price: '3,488',
    amount: 82
}, {
    name: 'MacBook Pro',
    price: '11,888',
    amount: 15
}];

class Goods extends Component {
    componentDidMount() {
        let dispatch = this.props.dispatch;
        dispatch(actions.getGoods(GOODS));
    }
    render() {
        return (
            <ul className="goods">
                {
                    this.props.goods.map((ele, idx) => (
                        <li key={idx} style={{marginBottom: 20, listStyle: 'none'}}>
                            <span>{ele.name}</span> |
                            <span>¥ {ele.price}</span> |
                            <span>Surplus {ele.amount} piece</span>
                        </li>
                    ))
                }
            </ul>
        );
    }
}

const mapStateToProps = (state, ownProps) => ({
    goods: state.goods.data
});

export default connect(mapStateToProps)(Goods);
Notice that the data in the component is no longer written in App. js, but acquired and rendered through a complete redux-flow process. Note that App.js is modified at the same time
import React, { Component } from 'react';
import Nav from './component/nav';
import Welcome from './page/welcome';
import Goods from './page/goods';
import './App.css';

const LIST = [{
    text: 'welcome',
    url: '/'
}, {
    text: 'goods',
    url: '/goods'
}];

class App extends Component {
    render() {
        return (
            <div className="App">
                <div className="nav_bar">
                    <Nav list={LIST} />
                </div>
                <div className="conent">
                    <Welcome />
                    <Goods />
                </div>
            </div>
        );
    }
}

export default App;
Visiting a page now, although the effect is the same as before, its internal structure and principle are quite different.
The last part: adding routing system
Routing system is an important part of single page application. Because of different common page skip refreshes, a single page application will have its own routing system to maintain.
Of course we can write a routing system by hand, but in order to quickly and effectively create and manage our applications, we can choose a useful routing system. This paper chooses react-router 4. It should be noted that in v4 version, react-router splits the routing system of WEB into react-router-dom, so npmreact-router-dom is needed.
npm i --save react-router-dom
In this example, we wrap the entire App application with the BrowserRouter component in react-router, in which the Route component is used to load different page components when matching different routes. (HashRouter, as the name implies, is used as a path.) Reaction-router recommends BrowserRouter, which requires history-related API support.
First, you need to add the Browser Router component to App.js and place the Route component in the Browser Router. The Route component receives two attributes: path and component, which are matching paths and loading rendering components, respectively.
// App.js
import React from 'react';
import ReactDOM from 'react-dom';
import './index.css';
import App from './App';
import {Provider} from 'react-redux';
import {store} from './store';
import {BrowserRouter, Route} from 'react-router-dom';

ReactDOM.render(
    <Provider store={store}>
        <BrowserRouter>
            <Route path='/' component={App}/>
        </BrowserRouter>
    </Provider>,
document.getElementById('root'));
At this point, we start the server and have been. Because the route matches path='/', the App component is loaded.
Remember the Nav navigation bar component we created in the first part? Now, we want to achieve the navigation function: click on the corresponding navigation bar link, the right side shows different areas of content. This requires revamping the content section of index.js: we add two Route components to it and load different page components (welcome and goods) in different paths.
// index.js
import React, { Component } from 'react';
import Nav from './component/nav';
import Welcome from './page/welcome';
import Goods from './page/goods';
import './App.css';
import {Route} from 'react-router-dom';

const LIST = [{
    text: 'welcome',
    url: '/welcome'
}, {
    text: 'goods',
    url: '/goods'
}];

class App extends Component {
    render() {
        return (
            <div className="App">
                <div className="nav_bar">
                    <Nav list={LIST} />
                </div>
                <div className="conent">
                    <Route path='/welcome' component={Welcome} />
                    <Route path='/goods' component={Goods} />
                </div>
            </div>
        );
    }
}

export default App;
Now, try typing http://localhost:3000, http://localhost:3000/well com and http://localhost:3000/goods in the address bar to see the effect.
Of course, it's impossible to "jump" pages in a real project by manually modifying the address bar. So you need to use the Link component. The "to" attribute is used to indicate the address of the "jump". This Link component will be added to the Nav component
// component/nav/index.js
import React from 'react';
import './index.css';
import {Link} from 'react-router-dom';

const Nav = props => (
    <ul className="nav">
        {
            props.list.map((ele, idx) => (
                <Link to={ele.url} key={idx}>
                    <li>{ele.text}</li>
                </Link>
            ))
        }
    </ul>
);

export default Nav;
The final page effect is as follows:
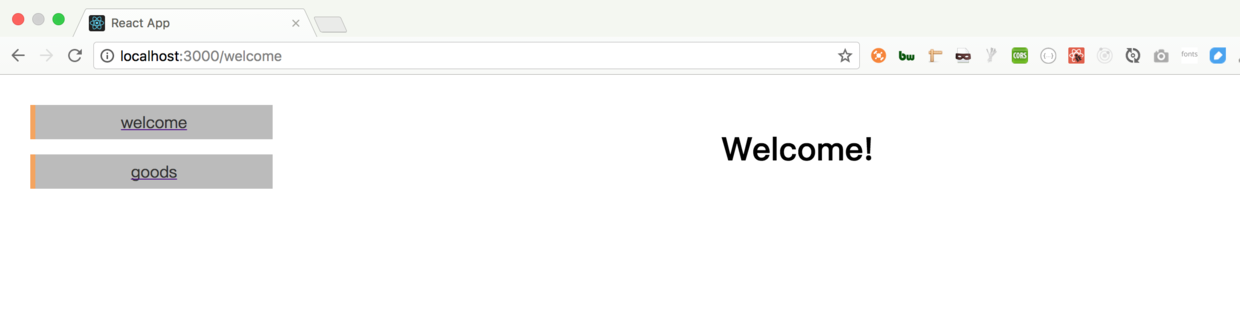
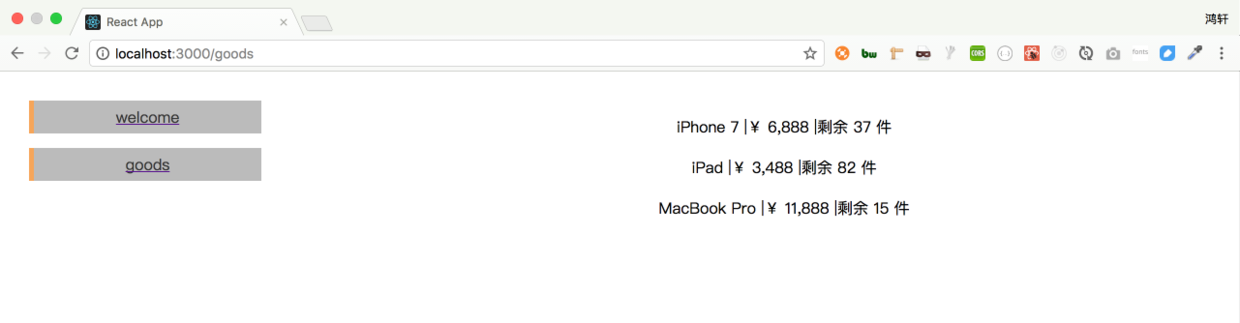
Now in this demo, we click on the navigation on the left, the content on the right changes, and the browser will not refresh. Based on React+Redux+React-router, we implemented a most basic version of SPA (single page application).
Click here to download the demo.
Additional parts, asynchronous requests
If you remember in the redux data stream section, how to pass data to the goods page: dispatch (actions. getGoods (GOODS), we directly pass the action constructor getGoods into the GOODS list as loaded data. However, in practical application scenarios, we often send ajax requests in action to get data from the back end; in the process of waiting for data acquisition, there may also be a loading effect; finally, we receive a response response response, and then render the response page.
Based on the above scenarios, reorganize the ideas in our action:
- When the component rendering is complete, an action, dispatch(actions.getGoods()) is triggered. This action does not take a list of parameters, but requests the result from the back end.
- In the getGoods() method, there are three main things to do: first, trigger an action of requestGoods to indicate that the data is being requested; secondly, call a method called fetchData(), which is the method of requesting data from the back end; finally, after getting the data, trigger an action of receiveGoods to identify the request completed and rendered. Data.
- Other parts are similar.
Here's a problem. Based on the discussion above, we need actions.getGoods() to return a function to implement the three functions we mentioned in Step 2; however, the dispatch() method in the current project can only accept an object type as a parameter. So we need to modify the dispatch() method.
The means of transformation is to use redux-thunk middleware. The action creator can return a function (not just an object) and the dispatch method can receive a function as a parameter. This modification enables action to support asynchronous (or delayed) operations.
So how to reform it? First, add redux-thunk middleware to Redux
npm i --save redux-thunk
Then modify store.js
// store.js
import {createStore, applyMiddleware, compose} from 'redux';
import {rootReducer} from './reducer';
import thunk from 'redux-thunk';

const middleware = [thunk];
export const store = createStore(rootReducer, compose(
    applyMiddleware(...middleware)
));
Then, based on the previous ideas, collate the code in action. Here, we use setTimeout to simulate requesting data from the back end:
// action/goods.js
import {createAction} from 'redux-actions';

const GOODS = [{
    name: 'iPhone 7',
    price: '6,888',
    amount: 37
}, {
    name: 'iPad',
    price: '3,488',
    amount: 82
}, {
    name: 'MacBook Pro',
    price: '11,888',
    amount: 15
}];

const requestGoods = createAction('REQUEST_GOODS');
const receiveGoods = createAction('RECEIVE_GOODS');

const fetchData = () => {
    return new Promise((resolve, reject) => {
        setTimeout(() => {
            resolve(GOODS);
        }, 1500);
    });
};

export const getGoods = () => async dispatch => {
    dispatch(requestGoods());
    let goods = await fetchData();
    dispatch(receiveGoods(goods));
};
Modify the code in reducer accordingly
// reducer/goods.js
import {handleActions} from 'redux-actions';

export const goods = handleActions({
    REQUEST_GOODS: (state, action) => ({
        ...state,
        isFetching: true
    }),
    RECEIVE_GOODS: (state, action) => ({
        ...state,
        isFetching: false,
        data: action.payload
    })
}, {
    isFetching: false,
    data: []
});
As you can see, we added an isFetching state to indicate whether the data has been loaded.
Finally, you need to update the UI component layer
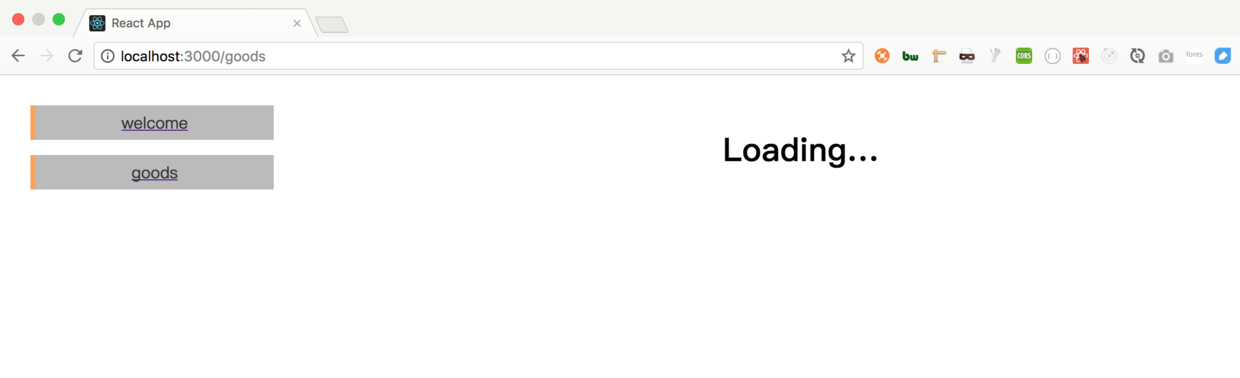
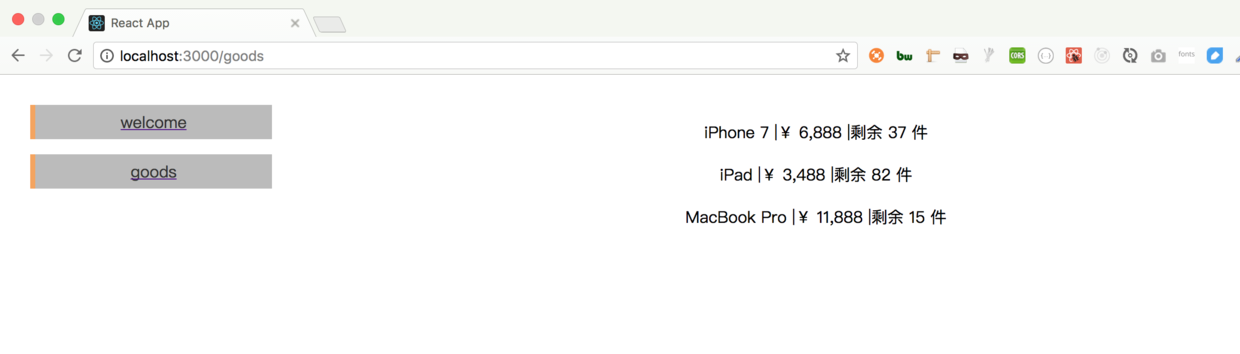
// page/goods.js
import React, { Component } from 'react';
import {connect} from 'react-redux';
import * as actions from '../action/goods';

class Goods extends Component {
    componentDidMount() {
        let dispatch = this.props.dispatch;
        dispatch(actions.getGoods());
    }
    render() {
        return this.props.isFetching ? (<h1>Loading...</h1>) : (
            <ul className="goods">
                {
                    this.props.goods.map((ele, idx) => (
                        <li key={idx} style={{marginBottom: 20, listStyle: 'none'}}>
                            <span>{ele.name}</span> |
                            <span>¥ {ele.price}</span> |
                            <span>Surplus {ele.amount} piece</span>
                        </li>
                    ))
                }
            </ul>
        );
    }
}

const mapStateToProps = (state, ownProps) => ({
    isFetching: state.goods.isFetching,
    goods: state.goods.data
});

export default connect(mapStateToProps)(Goods);
Ultimately, accessing the http://localhost:3000/goods page will have a loading effect of about 1.5s, and then render the list after the "back-end" data returns.
Finally, if you haven't gone away yet
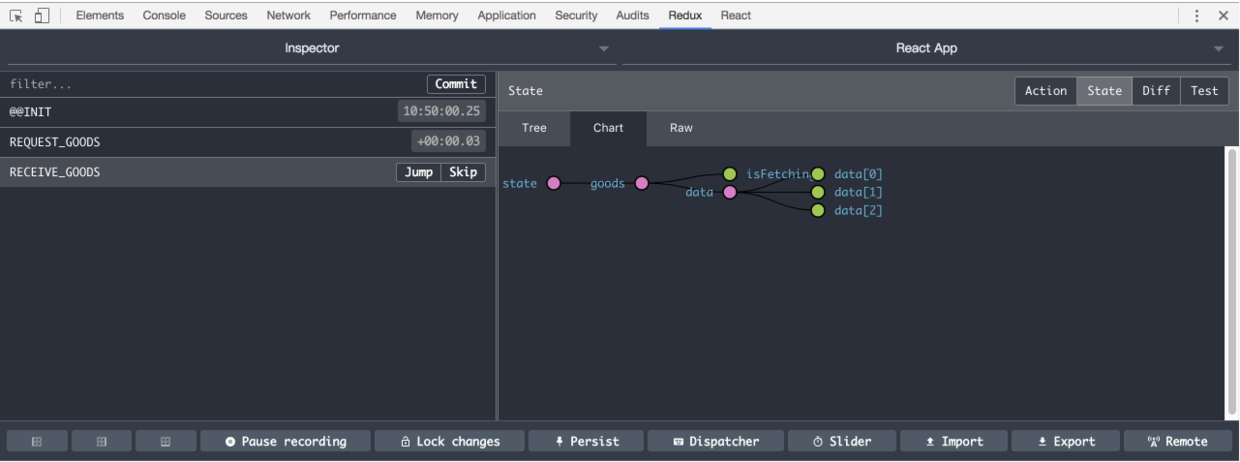
Introduce a redux debugging artifact—— redux-devTools It can be found in the chrome plug-in

Used in developer tools, redux can be debugged easily
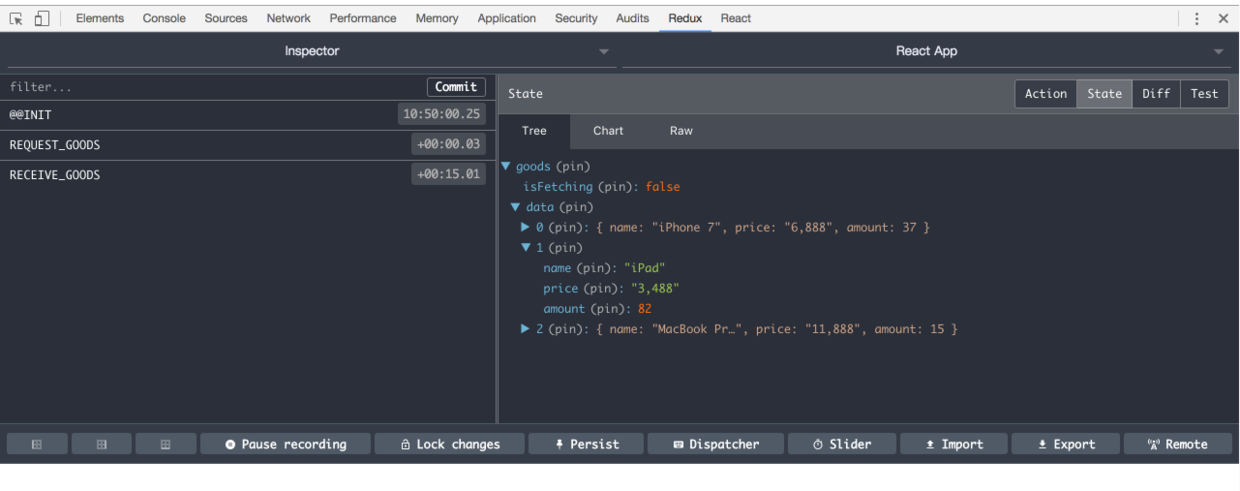
Of course, you need a simple configuration in your code. Make some minor changes to store.js
import {createStore, applyMiddleware, compose} from 'redux';
import {rootReducer} from './reducer';
import thunk from 'redux-thunk';

const middleware = [thunk];
// export const store = createStore(rootReducer, compose(
//     applyMiddleware(...middleware)
// ));
const composeEnhancers = window.__REDUX_DEVTOOLS_EXTENSION_COMPOSE__ || compose;
export const store = createStore(rootReducer, composeEnhancers(
    applyMiddleware(...middleware)
));
Above.
Now, you can happily develop SPA! demo in this article can be obtained by clicking here..