1. Title: Interface design.
(1) Develop a single page APP.
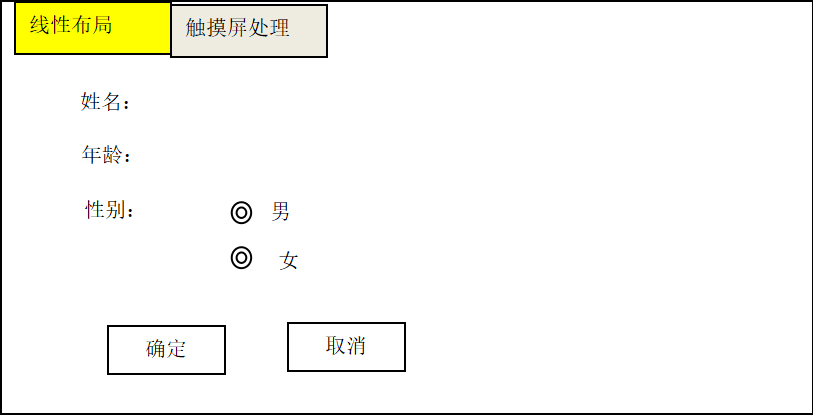
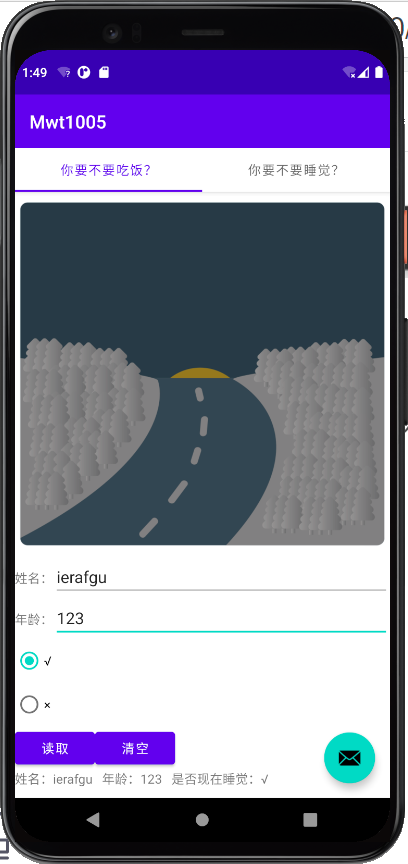
(2) Linear Layout TAB page: Display personal related information, using TextView, EditText, Button, CheckBox and other controls. (Page content can also be designed by itself)
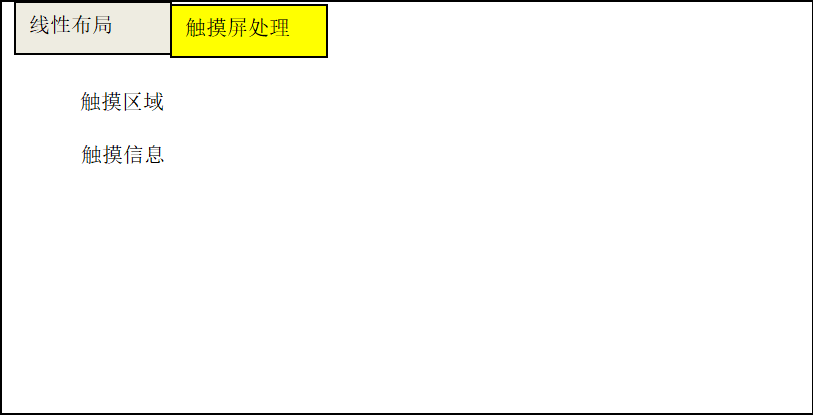
(3) "Touch Screen Processing" TAB Page: Implement touch screen function in specified areas.
(4) Other TAB pages: Page functions can be designed by yourself.
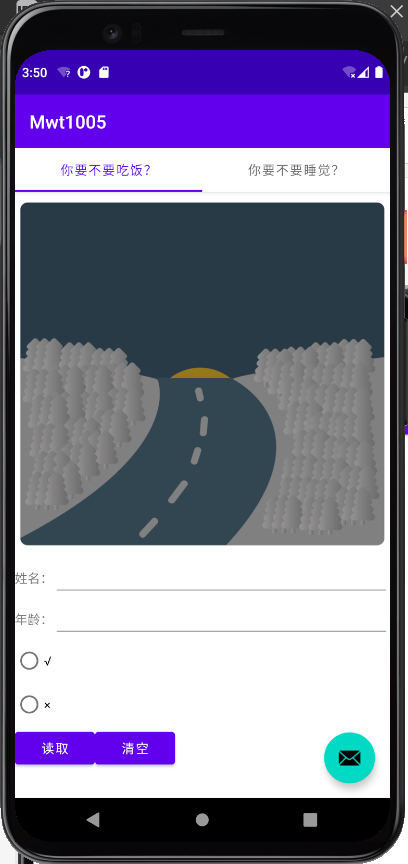
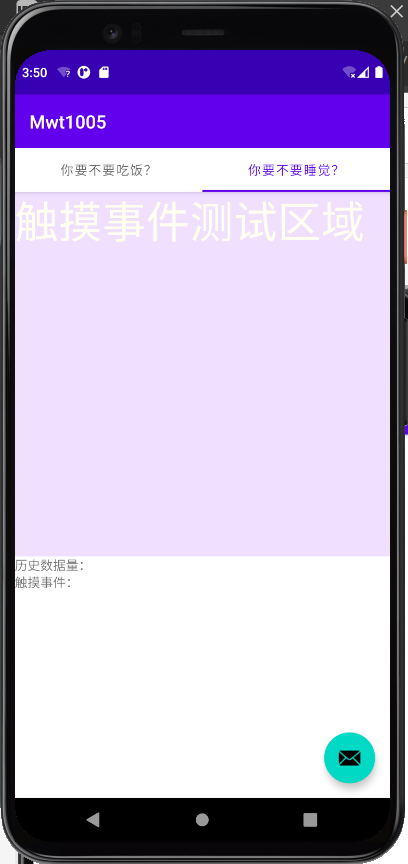
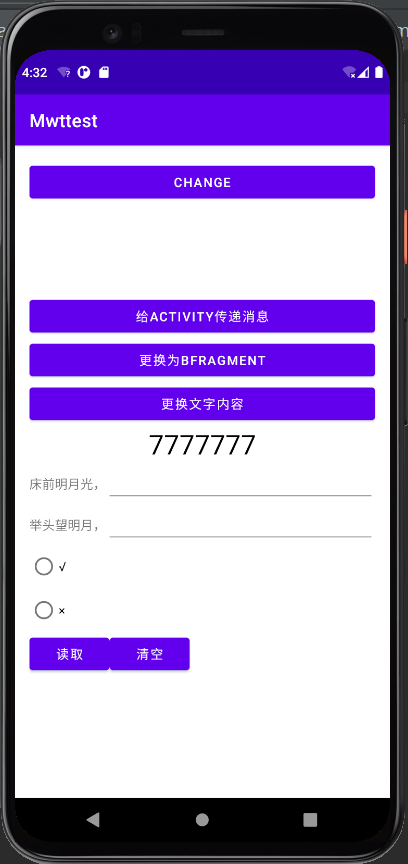
2. Interface Display
3. Creation Process-Principal Code
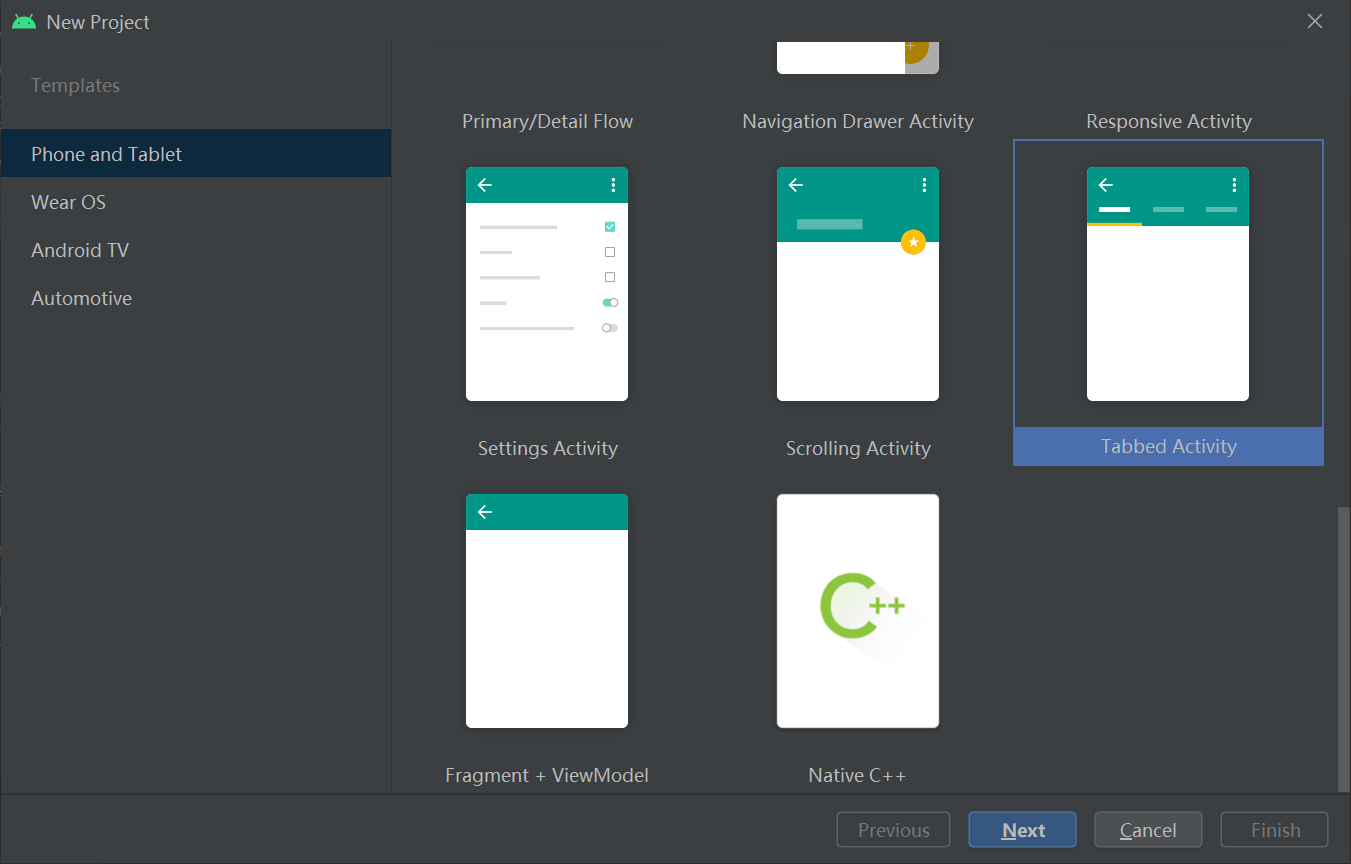
1. Project Creation
file->new->new project->Tabbed Activity
2. If you look at the contents of the project inside, you will find several things that need our attention.
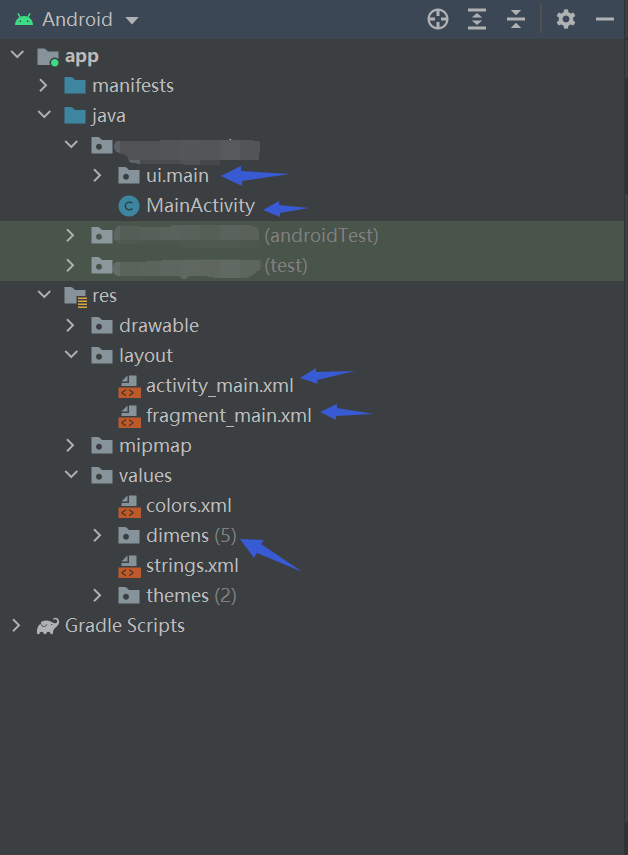
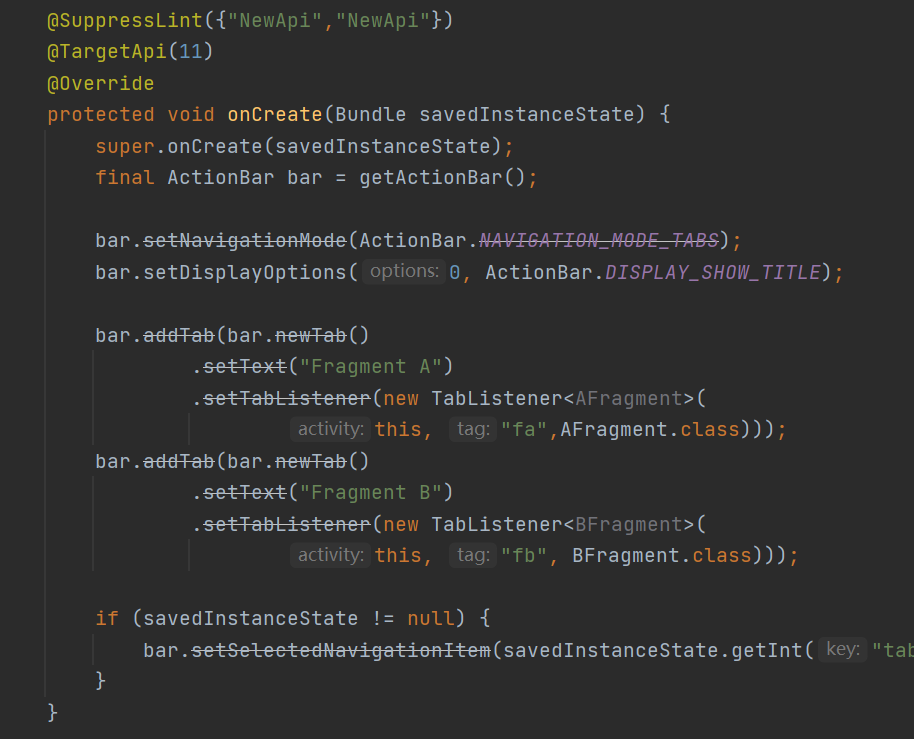
We know that Tab pages can be divided into several, but teachers or some very old blogs tell us that if we need n Tab pages, we need to create new Java and xml files for n fragmentactivity in one project.
However, in this project we only see one fragment.xml file, while running the simulator we see two Tab s.


3. Now go back to see the code and we find a Java file named SectionsPagerAdapter under the ui.main folder.
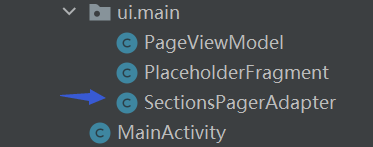
This file is important because it contains the title of the Tab, the contents of the Tab, and other code, which exactly indicates that the protagonist of this production of the Tab is SectionsPagerAdapter.java.
But before you start working on it, create two new layout files in the layout file. Here, the first file with a red box is my first Tab and the second is my second Tab.
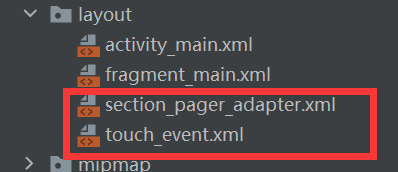
Graphicism, recorded a video during the class, knocked down the code displayed by the teacher on PPT directly, so the first xml file used the code displayed by the teacher in the class.
The second xml file uses the code from the book.
Because it's not the focus of this time, it's not here anymore. It's mainly used for layout nesting and RadioButton is used for keys.
4. Start looking at the code in the protagonist's file.

The benefit of encapsulating a project directly with it is that there are notes in some places and it saves a lot of effort.
From the notes in the figure above, we can see that this object (class) named FragmentPagerAdapter can return a fragment corresponding to a section/column/page.
There are two Tab s here, defined by arrays (maybe?), and I changed the name.
Changing the name can be changed in the array of pictures above, or in res->values->string.xml if an error occurs, the corresponding Tab name can be modified because the Tab's title name here is derived from the string.xml file and the code parameters are: new int[]{R.layout.Tab1,R.layout.Tab2}.

This getItem is for location (if I'm not mistaken), and it can present different content depending on the location of the Tab.
So you'll need to modify the return here later.
There are two more pieces of code that we don't focus on, so we can leave them alone for a while (if you don't need a bicycle).
5. Here, we use getItem to get the pages we want to display. Delete the returned pages and use switch to return to the pages we need. The pages are in Tab1 and Tab2.
    @Override
        //Presents different content according to tab location
        // getItem is called to instantiate the fragment for the given page.
        // Return a PlaceholderFragment (defined as a static inner class below).
        public Fragment getItem(int position) {
            switch (position){
                case 0:
                    return new Tab1();
                case 1:
                    return new Tab2();
            }
            return null;
        }
Then create a static class page whose parent class is Fragment.
public static class Tab1 extends Fragment
{
	//content
}
Now you can put what we want into this class, and the code written here is used directly on the page.
I have directly misappropriated my teacher's code here.
public static class Tab1 extends Fragment {
public View onCreateView(LayoutInflater inflater,ViewGroup container,Bundle savedInstanceState) {
super.onCreate(savedInstanceState);
View v = inflater.inflate(R.layout.section_pager_adapter, container, false);
final RadioButton rb1 = (RadioButton) v.findViewById(R.id.RadioButton1);
final RadioButton rb2 = (RadioButton) v.findViewById(R.id.RadioButton2);
final EditText ed1 = (EditText) v.findViewById(R.id.entry1);
final EditText ed2 = (EditText) v.findViewById(R.id.entry2);
final TextView text1 = (TextView) v.findViewById(R.id.label4);
Button but1 = (Button) v.findViewById(R.id.get);
Button but2 = (Button) v.findViewById(R.id.cancel);
final String str3="";
but1.setOnClickListener(new View.OnClickListener() {
@Override
public void onClick(View v) {
String str1 = ed1.getText().toString();
String str2 = ed2.getText().toString();
String str3 = null;
if(rb1.isChecked())
str3=rb1.getText().toString();
if(rb2.isChecked())
str3=rb2.getText().toString();
text1.setText("Full name:"+str1+" Age:"+str2+" Do you sleep now?"+str3);
}
});
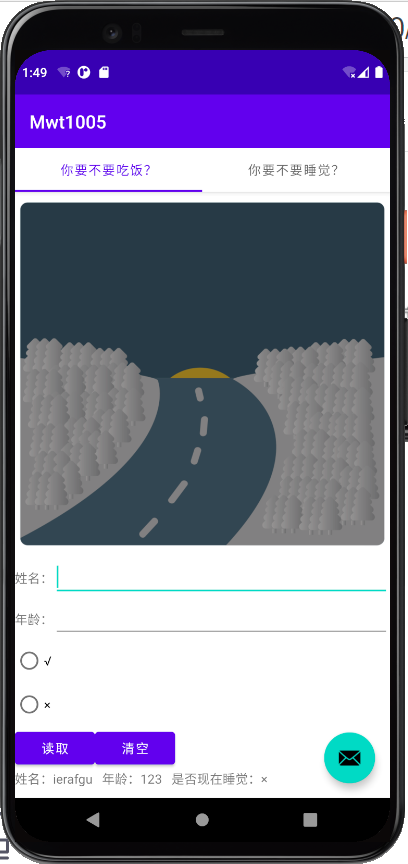
but2.setOnClickListener(new View.OnClickListener() {
@Override
public void onClick(View v) {
ed1.setText("");
ed2.setText("");
rb1.setChecked(false);
rb2.setChecked(false);
}
});
return v;
}
}
The two button s instantiated here are for "get" and "clear" purposes, and the code content is similar to my last blog on the computer, so I won't go into any further details here.
The point is this line of code.
View v = inflater.inflate(R.layout.section_pager_adapter, container, false);
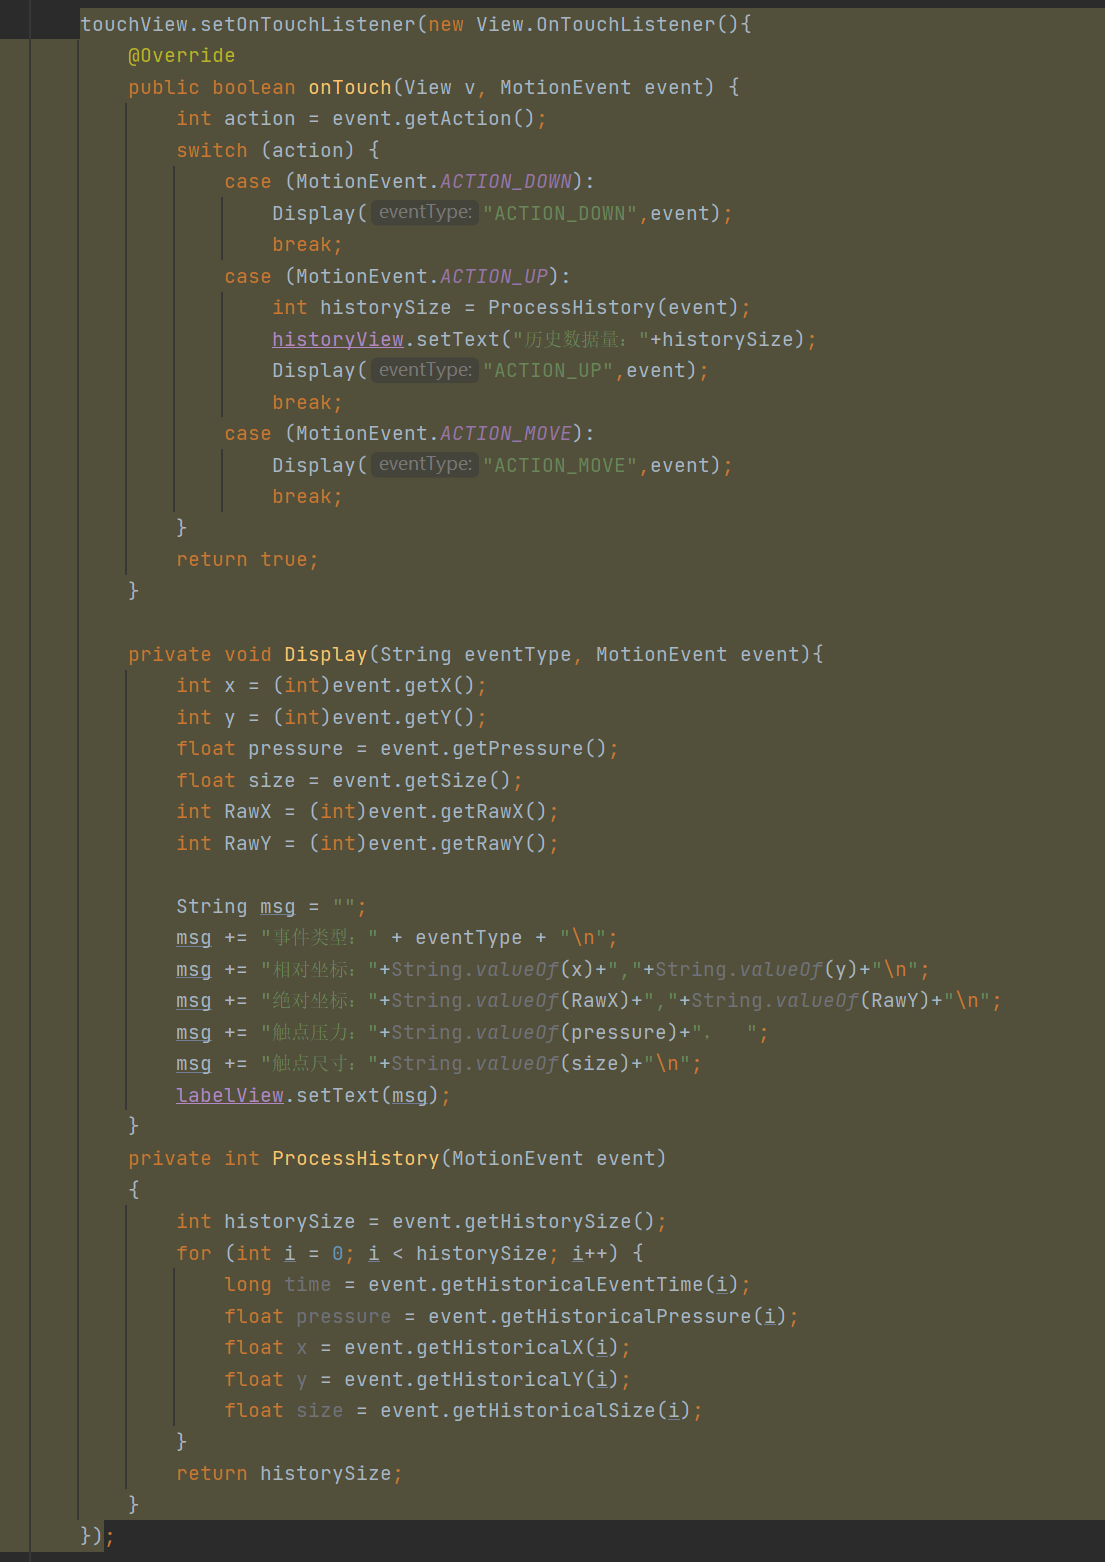
Then create a Tab2 as Tab1 does. The Tab2 page content here is a touch event on the book.
You need to use MotionEvent's package, rewrite it like Tab1 plus LayoutInflater and ViewGroup containers, and rewrite it... The code is easy, take two more minutes to see what's basically there.
public static class Tab2 extends Fragment{
		@SuppressLint("ClickableViewAccessibility")
        @Override
        public View onCreateView(LayoutInflater inflater,ViewGroup container,Bundle savedInstanceState)
        {
            super.onCreate(savedInstanceState);
            TextView labelView = null;
            View v = inflater.inflate(R.layout.touch_event, container, false);
            labelView = (TextView) v.findViewById(R.id.event_label);
            TextView touchView = (TextView)v.findViewById(R.id.touch_area);
            final TextView historyView = (TextView)v.findViewById(R.id.history_label);


            TextView finalLabelView = labelView;
            touchView.setOnTouchListener(new View.OnTouchListener()
            {
                @Override
                public boolean onTouch(View v, MotionEvent event) {
                    int action = event.getAction();
                    switch (action) {
                        case (MotionEvent.ACTION_DOWN):
                            Display("ACTION_DOWN",event);
                            break;
                        case (MotionEvent.ACTION_UP):
                            int historySize = ProcessHistory(event);
                            historyView.setText("Historical data volume:"+historySize);
                            Display("ACTION_UP",event);
                            break;
                        case (MotionEvent.ACTION_MOVE):
                            Display("ACTION_MOVE",event);
                            break;
                    }
                    return true;
                }
            private void Display(String eventType, MotionEvent event){
            int x = (int)event.getX();
            int y = (int)event.getY();
            float pressure = event.getPressure();
            float size = event.getSize();
            int RawX = (int)event.getRawX();
            int RawY = (int)event.getRawY();

            String msg = "";
            msg += "Event type:" + eventType + "\n";
            msg += "Relative coordinates:"+String.valueOf(x)+","+String.valueOf(y)+"\n";
            msg += "Absolute coordinates:"+String.valueOf(RawX)+","+String.valueOf(RawY)+"\n";
            msg += "Contact pressure:"+String.valueOf(pressure)+",  ";
            msg += "Contact size:"+String.valueOf(size)+"\n";
            finalLabelView.setText(msg);
        }
            private int ProcessHistory(MotionEvent event)
            {
                int historySize = event.getHistorySize();
                for (int i = 0; i < historySize; i++) {
                    long time = event.getHistoricalEventTime(i);
                    float pressure = event.getHistoricalPressure(i);
                    float x = event.getHistoricalX(i);
                    float y = event.getHistoricalY(i);
                    float size = event.getHistoricalSize(i);
                }
                return historySize;
            }
            });
            return v;
        }
    }
In fact, at the beginning, my code will show a highlighted piece of yellow, like below.
Very confused, there is only one answer to find on the Internet, "Code is not written properly as a result", but how to change it? There is no solution at all, although it can run, but it looks uncomfortable...
Later, when I was confused about another problem, I accidentally hit somewhere on the page and it automatically added a line of code to me. My code finally returned to normal.
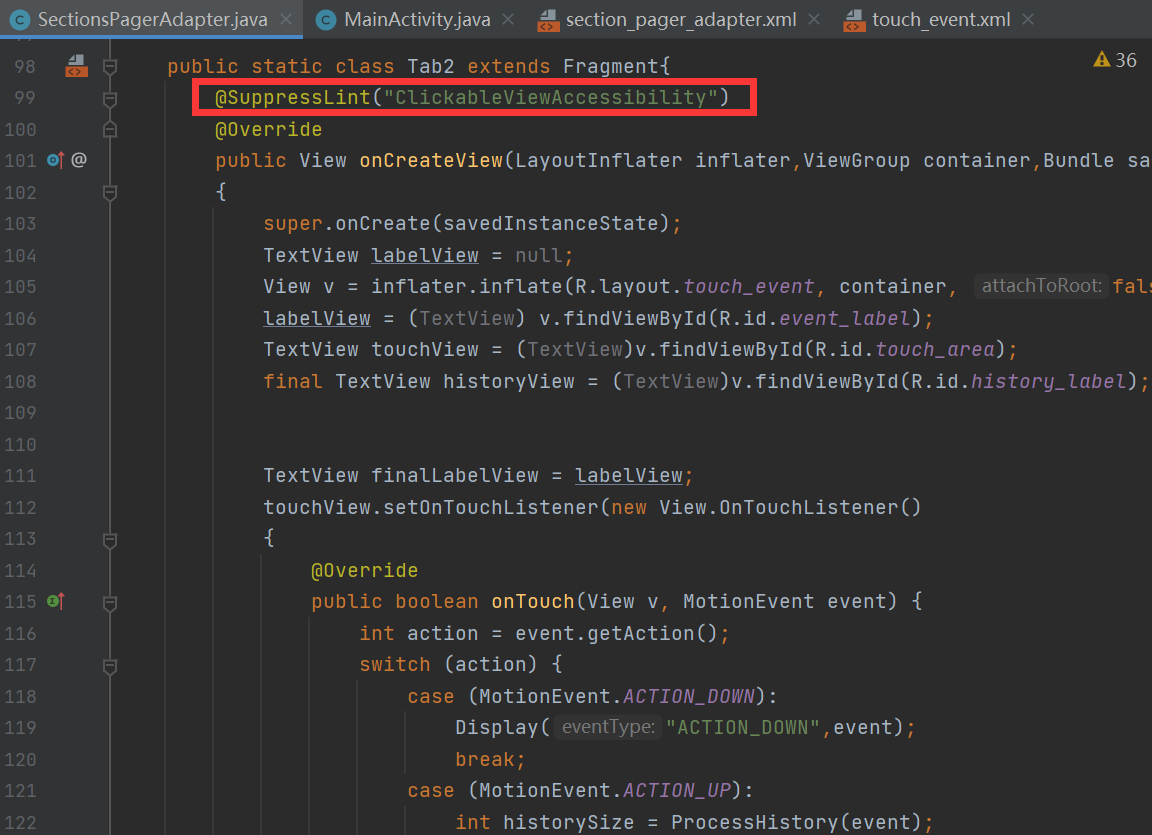
Add this line of code:
@SuppressLint("ClickableViewAccessibility")
Later, I went online to find out what the problem was and attached a link to it at the end of the article.
4. Observe the code in MainActivity.java
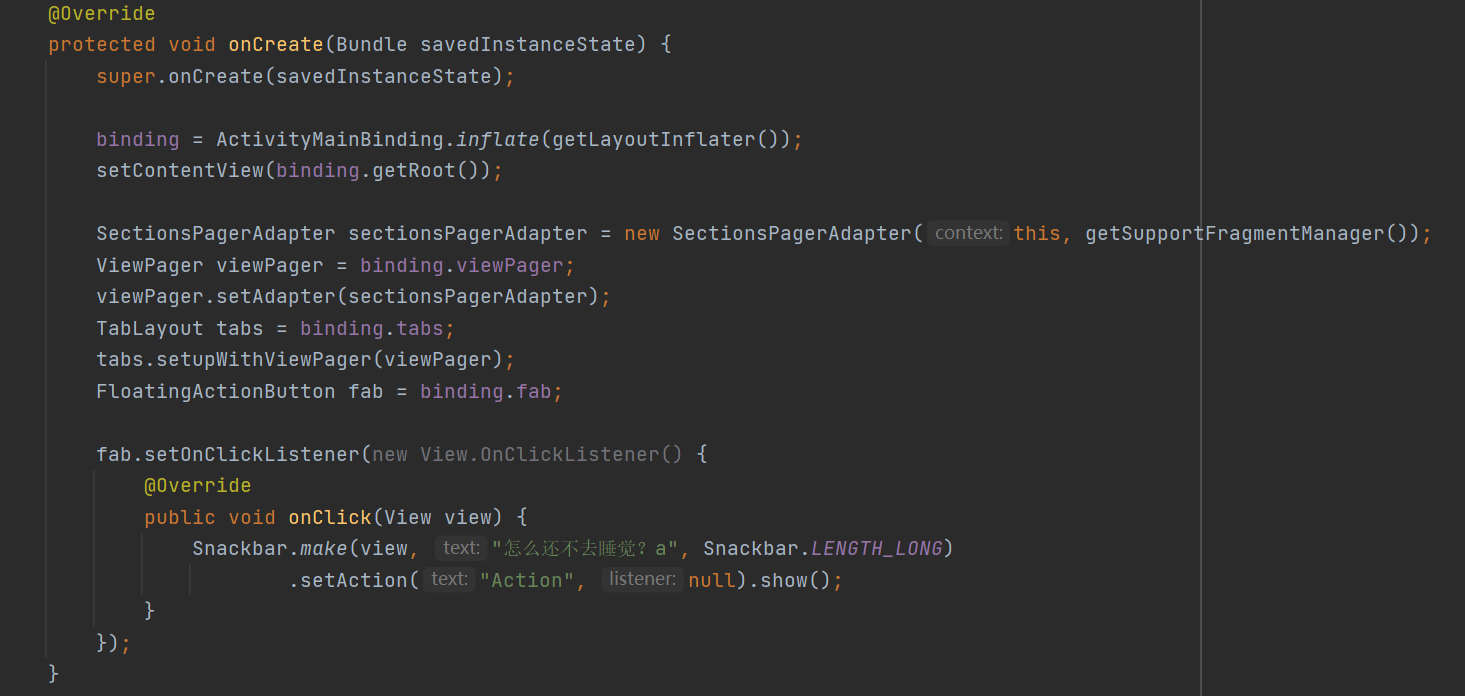
When I started running the simulator, I found a floating window in the lower right corner of the page. When I clicked on it, the pop-up text would appear.
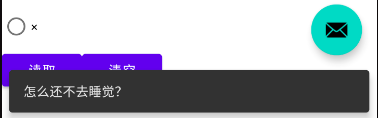
Its listener is in the MainActivity.java file, and because it only knows, it doesn't go too far, so it just changes its text content.
But the content of this file is important because it controls the pages of our entire project.
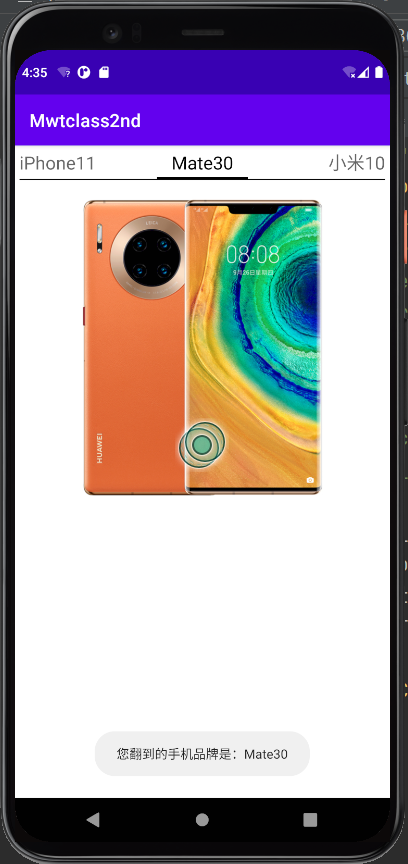
5. Demonstration
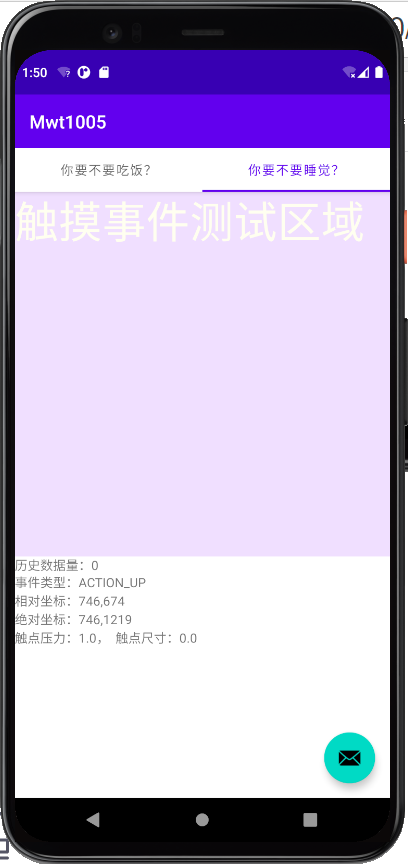
Note: Because it is the code running on the simulator and using the mouse to click on the "screen", the contact pressure and size here are constant to 1.0 and 0.0, respectively.
6. Summary
It's hard to get on the computer this time, because at first, you wanted to copy the code from the book in a step-by-step way, and then you'd be fine, but I didn't expect that some of the functions in the book would no longer work in Android Studio, and the runtime project just flipped away. So I started looking for ways on the Internet to see if I could run the project in another way, but I didn't expect that,We are on the bumpy road to Android development.
As a result, I jumped to another page on the official website, which called me to use navigation... I didn't despair, so I went online to find routines, the accompanying codes from books I borrowed in the library before...
I ran some cool routines, but I still don't know about Fragment s.

On October 5th, three days ago, I was bored and found a style called Tabbed Activity at the bottom of the project style when I started a new project.
To my surprise, I set up a new project.
No progress, because you can't read the code, how can you create two pages without fragmenta and fragmentb? Why is there nothing in this MainActivity?
Then it's a long way to find what the code means.
Finally, I found a very critical blog in my favorites. Yes, this blog provides the key to my next code.
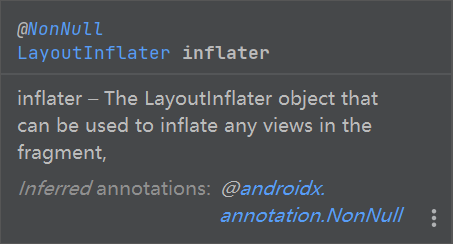
I finally know what Fragments are! After the Android upgrade, Fragments were changed into a class, but since it was not an Activity class, we couldn't use findViewbyId directly to find the controls in our layout file. Instead, we needed to construct a LayoutInflater method to build a view. This teacher told us about it in class, but I didMy heart is already on holiday.
import androidx.fragment.app.Fragment;
import androidx.fragment.app.FragmentManager;
import androidx.fragment.app.FragmentPagerAdapter;
When inheriting the Fragment parent, import the above class first.
Then you start biting and writing code.
It took me 6 days to finish this blog on computer 2, and I spent 2 days on this blog. The hardships are self-evident.
7. Reference
The links below are websites or blogs that I have referenced in this upload.
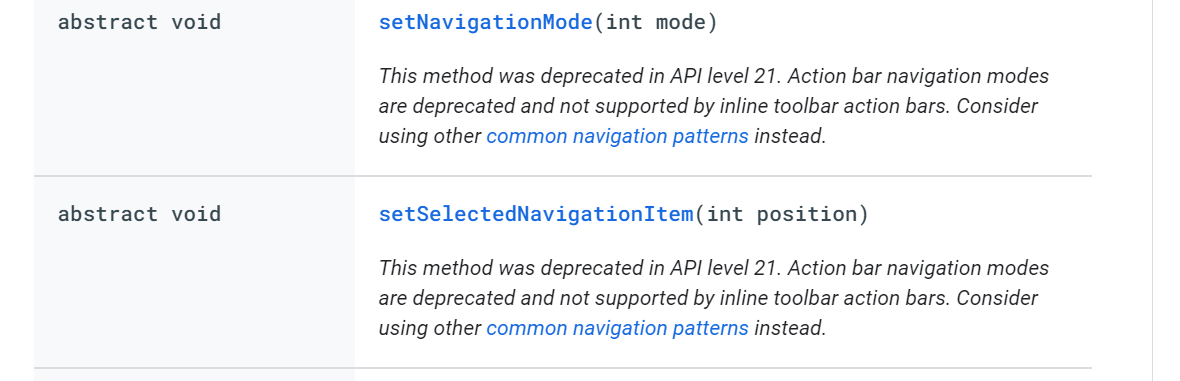
ActionBar
Use of Android Architecture Component-Navigation (1)
Use of Tabbed Activity (Fragment)
Create a sliding view with tags using ViewPager2
Android Studio Development Learning (13) - Fragment
android studio sometimes writes code and suddenly a piece of code has a dark yellow background
In Android development, I need to convert AppCompatActivity into fragment s, how can I change it?
Issue id: ClickableViewAccessibility