Some time ago, many disasters occurred in China. Zhengzhou high tech Zone, where we were at that time, experienced the situation of water and power failure. It's frightening to think of it!
Therefore, it was decided to build a complete real-time weather early warning project, mainly using node JS and the third-party free interface for aggregating data. The api management interface uses the apipost we developed. There is no special advanced technology stack. It is mainly to attract jade by throwing bricks. I hope it will be helpful to you!
1, Free weather forecast interface
There are many API interfaces for free weather on the Internet. I use the interface for aggregating data here, which is relatively stable for large factories.
Application address: https://www.juhe.cn/docs/api/...
After the application is successful, a request key will be generated in the personal center, which will be used when sending the interface.
2, Use weather forecast interface and generate program code
According to the instructions for the use of aggregated data, we can use the interface debugging tool to debug the interface. Here we use the API post test.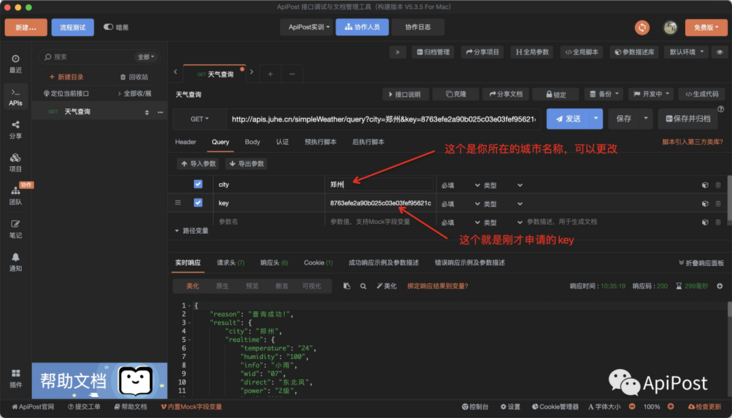
You can see that the json format after the request is successful is as follows:
{
    "reason": "query was successful!",
    "result": {
        "city": "Zhengzhou",
        "realtime": {
            "temperature": "24",
            "humidity": "100",
            "info": "light rain",
            "wid": "07",
            "direct": "northeasterly wind",
            "power": "2 level",
            "aqi": "32"
        },
        "future": [
            {
                "date": "2021-07-23",
                "temperature": "23/28℃",
                "weather": "Light rain turns overcast",
                "wid": {
                    "day": "07",
                    "night": "02"
                },
                "direct": "East wind to north wind"
            },
            {
                "date": "2021-07-24",
                "temperature": "24/31℃",
                "weather": "Light rain to cloudy",
                "wid": {
                    "day": "07",
                    "night": "01"
                },
                "direct": "Northeast wind to east wind"
            },
            {
                "date": "2021-07-25",
                "temperature": "23/31℃",
                "weather": "cloudy",
                "wid": {
                    "day": "01",
                    "night": "01"
                },
                "direct": "East wind to southeast wind"
            },
            {
                "date": "2021-07-26",
                "temperature": "24/31℃",
                "weather": "light rain",
                "wid": {
                    "day": "07",
                    "night": "07"
                },
                "direct": "northeasterly wind"
            },
            {
                "date": "2021-07-27",
                "temperature": "23/31℃",
                "weather": "Light rain turns sunny",
                "wid": {
                    "day": "07",
                    "night": "00"
                },
                "direct": "Northeast to South"
            }
        ]
    },
    "error_code": 0
}
At this point, we have obtained the weather data for the next 7 days.
Step 3: use nodemailer to send mail in NodeJS
nodeJS nodemailer is used to send mail, which is easy to use. It can be installed and used by the following command:
npm install nodemailer
The following is a function I wrote to send e-mail, in which the e-mail account and authorization code can be obtained from the corresponding e-mail service provider.
/**
 * nodeJS Send mail
 *
 * */
function sendEmail(text){
    let nodemailer = require('nodemailer');

    let transporter = nodemailer.createTransport({
        service:"126",  //  mailbox
        secure:true,    //  Secure sending mode
        auth:{
            user:"be***er@126.com", //  Sender mailbox
            pass:"MLQ***PYU"//  The authorization code is obtained from the mail service provider, and the acquisition address of mailbox 126 is: https://help.mail.163.com/faq.do?m=list&categoryID=197
        }
    })

    let mailOptions = {
        from:"be***er@126.com", // The sender's mailbox is consistent with the sender's mailbox above
        to:"3257132998@qq.com", // Recipient mailbox, that is, the mailbox that receives the weather forecast in real time
        subject:"Real time weather monitoring system", // Message subject (title)
        text:text // Email solicitation
    }

    transporter.sendMail(mailOptions,(err,data) => {
        if(err){
            console.log(err);
            res.json({status:400,msg:"send fail....."})
        }else{
            console.log(data);
            res.json({status:200,msg:"Mail sent successfully....."})
        }
    })
}

// Test email
sendEmail('it's raining')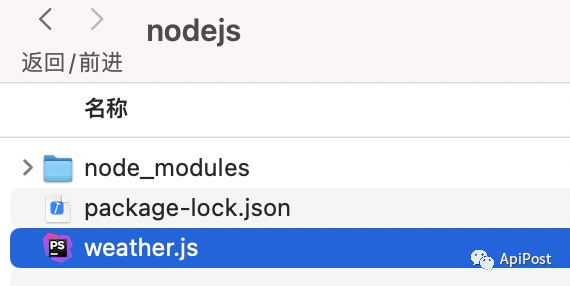
Create a new weather JS, the content is the above code, through
node weather.js
You can test mail sending.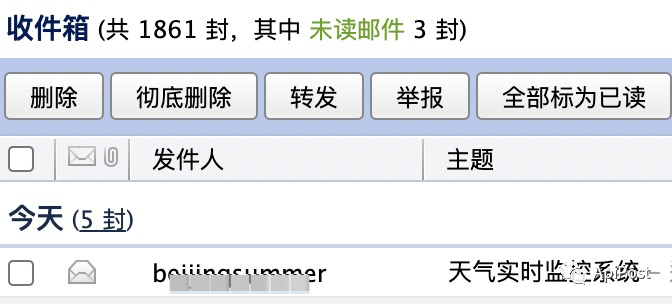
Send successfully, mail received successfully.
Step 4: get the weather regularly in nodeJS and send it to the specified mailbox
Click the generate nodejs (Request) code in the upper right corner of API post to generate the program code for requesting aggregation weather interface in nodejs. We can realize the above requirements in combination with setInterval.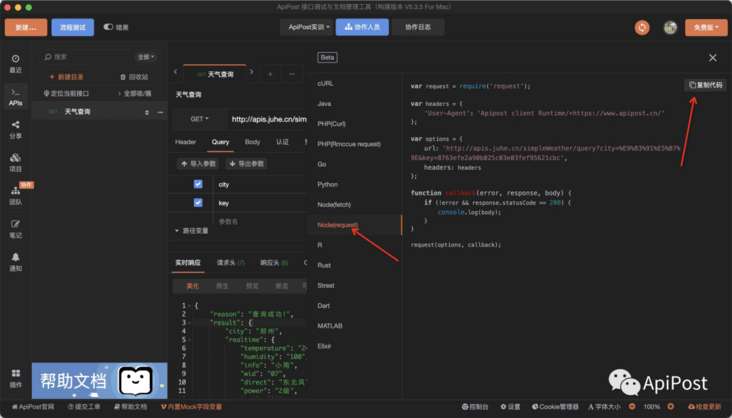
All codes are as follows:
/**
 * nodeJS Send mail
 *
 * */
function sendEmail(text){
    let nodemailer = require('nodemailer');

    let transporter = nodemailer.createTransport({
        service:"126",  //  mailbox
        secure:true,    //  Secure sending mode
        auth:{
            user:"be***er@126.com", //  Sender mailbox
            pass:"MLQ***PYU"//  The authorization code is obtained from the mail service provider, and the acquisition address of mailbox 126 is: https://help.mail.163.com/faq.do?m=list&categoryID=197
        }
    })

    let mailOptions = {
        from:"be***er@126.com", // The sender's mailbox is consistent with the sender's mailbox above
        to:"3257132998@qq.com", // Recipient mailbox, that is, the mailbox that receives the weather forecast in real time
        subject:"Real time weather monitoring system", // Message subject (title)
        text:text // Email solicitation
    }
    transporter.sendMail(mailOptions,(err,data) => {
        if(err){
            console.log(err);
            res.json({status:400,msg:"send fail....."})
        }else{
            console.log(data);
            res.json({status:200,msg:"Mail sent successfully....."})
        }
    })
}

setInterval(function(){
    var request = require('request');

    var headers = {
        'User-Agent': 'Apipost client Runtime/+https://www.apipost.cn/'
    };

    var options = {
        url: 'http://apis.juhe.cn/simpleWeather/query?city=%E9%83%91%E5%B7%9E&key=8763efe2a90b025c03e03fef95621cbc',
        headers: headers
    };

    function callback(error, response, body) {
        let json = JSON.parse(body);
        console.log(json.result)
        if (!error && response.statusCode == 200) {
            sendEmail('Future weather in Zhengzhou' + json.result.future[0].weather)
        }
    }

    request(options, callback);

}, 300000);
So far, all the systems have been built. We just need to find a small server to execute
node weather.js
You can send the weather information to the specified mailbox every 5 minutes. Of course, you can also send it as needed.
matters needing attention:
Because the Chinese code may have problems in the request, it is best to encode the city name (right click).
Welcome to like, comment and exchange, and learn about the latest news of ApiPost~