Preface
In this age of spirits, fat fish skilled in Vue have been beaten up too many times, and interviews have been questioned: "You can't really?" I couldn't stop saying anything.
There are many Vue and React projects in the new company. After doing a few things, I find there are still many similarities between them. The key point is to understand the idea first, then master the corresponding writing, and get started much faster.
This article tries to implement some of the common features of Vue in React once, and if you happen to be Vue to React or React to Vue, you're looking forward to helping.
If you're a student familiar with React and Vue, kneel down and spray (for survival by hand)
Each feature has a corresponding Vue and React version implementation, as well as a corresponding screenshot or recording
1. v-if
Let's start with the most common display hiding, where an element's display hiding is handled in a Vue using v-if or v-show instructions, except that v-if is a "real" conditional rendering where event listeners and subcomponents within the conditional block are properly destroyed and rebuilt during switching. V-show is simple, just control on the css style.
Vue
<template>
  <div class="v-if">
    <button @click="onToggleShow">switch</button>
    <div v-if="isShow">The fat fish at the front shows up</div>
  </div>
</template>

<script>
export default {
  name: 'vif',
  data () {
    return {
      isShow: true
    }
  },
  methods: {
    onToggleShow () {
      this.isShow = !this.isShow
    }
  }
}
</script>
React
import React, { useState } from "react"

export default function Vif (){
  const [ isShow, setIsShow ] = useState(true)
  const onToggleShow = () => {
    setIsShow(!isShow)
  }

  return (
    <div className="v-if">
      <button onClick={ onToggleShow }>switch</button>
      {/* Trinomial operators can also be used */}
      {/* { isShow ? <div>Front fat fish show up </div>: null} */}
      {
        isShow && <div>The fat fish at the front shows up</div>
      }
    </div>
  )
}
preview
2. v-show
Same as above, this time we use v-show to show hiding while observing the style changes of the DOM
Note: What to show here is not set to a block because some elements are not block-level elements themselves, and forcing it to a block may result in incorrect styles.
Vue
<template>
  <div class="v-show">
    <button @click="onToggleShow">switch</button>
    <div v-show="isShow">The fat fish at the front shows up</div>
  </div>
</template>

<script>
export default {
  name: 'vshow',
  data () {
    return {
      isShow: true
    }
  },
  methods: {
    onToggleShow () {
      this.isShow = !this.isShow
    }
  }
}
</script>
React
import React, { useState } from "react"

export default function VShow (){
  const [ isShow, setIsShow ] = useState(true)
  const onToggleShow = () => {
    setIsShow(!isShow)
  }

  return (
    <div className="v-show">
      <button onClick={ onToggleShow }>switch</button>
      {
        <div style={{ display: isShow ? '' : 'none' }}>The fat fish at the front shows up</div>
      }
    </div>
  )
}
preview

3. v-for
In general, rendering a list uses the v-for directive in Vue, which requires special syntax in the form of item in items, where items are the source data array and item is the alias of the array element being iterated. Of course, each element needs to have a unique key set
Vue
<template>
  <div class="v-for">
    <div
      class="v-for-item"
      v-for="item in list"
      :key="item.id"
    >
      {{ item.name }}
    </div>
  </div>
</template>

<script>
export default {
  name: 'vfor',
  data () {
    return {
      list: [
        {
          id: 1,
          name: 'Front end',
        },
        {
          id: 2,
          name: 'back-end',
        },
        {
          id: 3,
          name: 'android',
        },
        {
          id: 4,
          name: 'ios',
        },
      ]
    }
  }
}
</script>
React
Without the v-for directive in React, we can use map traversal to achieve similar functionality
import React, { useState } from "react"

export default function VFor (){
  const [ list, setList ] = useState([
    {
      id: 1,
      name: 'Front end',
    },
    {
      id: 2,
      name: 'back-end',
    },
    {
      id: 3,
      name: 'android',
    },
    {
      id: 4,
      name: 'ios',
    },
  ])

  return (
    <div className="v-for">
      {
        list.map((item) => {
          return <div className="v-for-item" key={ item.id }>{ item.name }</div>
        })
      }
    </div>
  )
}
preview
4. computed
When a variable needs to be evaluated by other variables, it is very convenient to use computed attributes, and Vue's computed attributes are cached based on their responsive dependencies. The dependent values do not change and will not be recalculated to achieve the effect of caching.
Let's look at a simple addition example: num3 is the sum of num1 and num2, and the button adds 10 for num1 at each click, and num3 adds 10 for each click
Vue
computed source code point here
<template>
  <div class="computed">
    <button @click="onAdd">+10</button>
    <div>Calculation results:{{ num3 }}</div>
  </div>
</template>

<script>
export default {
  name: 'computed',
  data () {
    return {
      num1: 10,
      num2: 10,
    }
  },
  computed: {
    num3 () {
      return this.num1 + this.num2
    }
  },
  methods: {
    onAdd () {
      this.num1 += 10
    }
  }
}
</script>
React
React does not compute attributes, but we can do it with the hook useMemo, which is different from Vue computed in that we have to maintain dependencies manually
computed source code point here
import React, { useMemo, useState } from "react"

export default function Computed (){
  const [ num1, setNum1 ] = useState(10)
  const [ num2, setNum2 ] = useState(10)

  const num3 = useMemo((a, b) => {
    return num1 + num2
  }, [ num1, num2 ])

  const onAdd = () => {
    setNum1(num1 + 10)
  }

  return (
    <div className="computed">
      <button onClick={ onAdd }>+10</button>
      <div>Calculation results:{ num3 }</div>
    </div>
  )
}
preview
5. watch
Sometimes when we need to listen for data changes and perform asynchronous or costly operations, we can use watch es in Vue
Let's simulate a scenario where we can do this by watch ing: select a boy or girl, select it, send the request, and display the result of the request. (setTimeout simulates the asynchronous request process here)
Vue
<template>
  <div class="watch">
    <div class="selects">
      <button
        v-for="(item, i) in selects"
        :key="i"
        @click="onSelect(item)"
      >
        {{ item }}
      </button>
    </div>
    <div class="result">
      {{ result }}
    </div>
  </div>
</template>

<script>
export default {
  name: 'watch',
  data () {
    return {
      fetching: false,
      selects: [
        'boy',
        'girl'
      ],
      selectValue: ''
    }
  },
  computed: {
    result () {
      return this.fetching ? 'In Request' : `Request Result: Selected ${this.selectValue || '~'}`
    }
  },
  watch: {
    selectValue () {
      this.fetch()
    }
  },
  methods: {
    onSelect (value) {
      this.selectValue = value
    },
    fetch () {
      if (!this.fetching) {
        this.fetching = true

        setTimeout(() => {
          this.fetching = false
        }, 1000)
      }
    }
  }
}
</script>
React
useEffect is used in React to implement actions that listen for changes in some data and perform responses
import React, { useState, useMemo, useEffect } from "react"
import './watch.css'

export default function Watch() {
  const [fetching, setFetching] = useState(false)
  const [selects, setSelects] = useState([
    'boy',
    'girl'
  ])
  const [selectValue, setSelectValue] = useState('')

  const result = useMemo(() => {
    return fetching ? 'In Request' : `Request Result: Selected ${selectValue || '~'}`
  }, [ fetching ])

  const onSelect = (value) => {
    setSelectValue(value)
  }
  const fetch = () => {
    if (!fetching) {
      setFetching(true)

      setTimeout(() => {
        setFetching(false)
      }, 1000)
    }
  }

  useEffect(() => {
    fetch()
  }, [ selectValue ])

  return (
    <div className="watch">
      <div className="selects">
        {
          selects.map((item, i) => {
            return <button key={ i } onClick={ () => onSelect(item) }>{ item }</button>
          })
        }
      </div>
      <div className="result">
        { result }
      </div>
    </div>
  )
}
preview
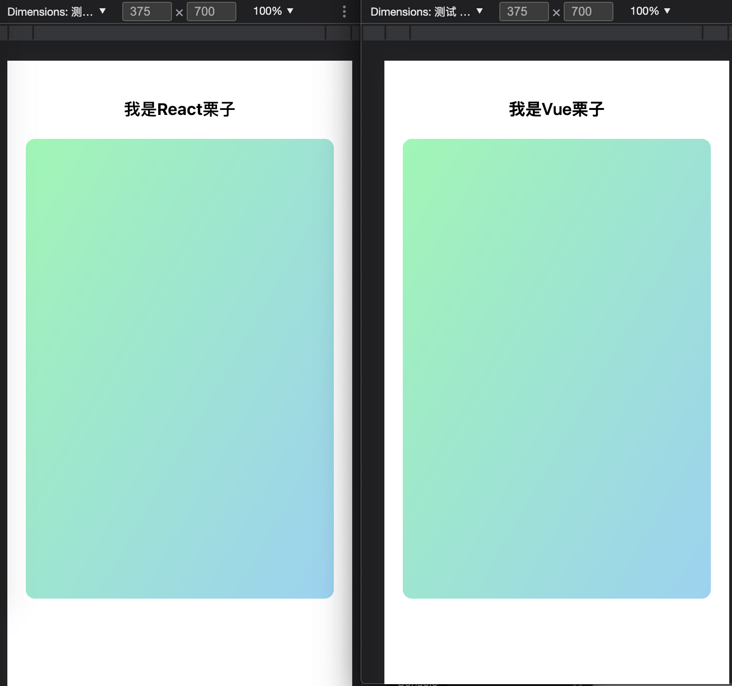
6. style
Sometimes it is inevitable to dynamically add style to an element, and both Vue and React provide us with easy ways to use them.
They are similar in usage:
Same:
CSS property names can be named with camelCase or kebab-case, remember to enclose in quotation marks
Difference:
- Vue can bind multiple style objects through array syntax, and React is primarily a single object (which Vue can also do)
- React automatically adds a "px" (which is not handled automatically by the Vue) suffix to an attribute whose inline style is numeric, and other units need to be specified manually
- React styles do not automatically complete prefixes. If you need to support older browsers, you need to manually supplement the corresponding style properties. In Vue, when v-bind:style uses CSproperty that requires adding a browser engine prefix, such as transform, Vue.js automatically detects and adds the appropriate prefix.
Vue
<template>
  <div class="style" :style="[ style, style2 ]"></div>
</template>

<script>
export default {
  name: 'style',
  data () {
    return {
      style: {
        width: '100%',
        height: '500px',
      },
      style2: {
        backgroundImage: 'linear-gradient(120deg, #84fab0 0%, #8fd3f4 100%)',
        borderRadius: '10px',
      }
    }
  }
}
</script>
React
import React from "react"

export default function Style (){
  const style = {
    width: '100%',
    height: '500px',
  }
  const style2 = {
    backgroundImage: 'linear-gradient(120deg, #84fab0 0%, #8fd3f4 100%)',
    borderRadius: '10px',
  }

  return (
    <div className="style" style={ { ...style, ...style2 } } ></div>
  )
}
preview
7. class
How do you dynamically add class es to elements? I prefer to use the syntax of arrays (and, of course, object writing) in Vue, and some third-party packages in React, such as classnames It makes adding class es easier.
Let's see how the button selection works without any libraries
Vue
<template>
  <button :class="buttonClasses" @click="onClickActive">{{ buttonText }}</button>
</template>

<script>
export default {
  name: 'class',
  data () {
    return {
      isActive: false,
    }
  },
  computed: {
    buttonText () {
      return this.isActive ? 'Selected' : 'Unchecked'
    },
    buttonClasses () {
      // Maintaining class dynamic lists as arrays
      return [ 'button', this.isActive ? 'active' : '' ]
    }
  },
  methods: {
    onClickActive () {
      this.isActive = !this.isActive
    }
  }
}
</script>

<style scoped>
.button{
  display: block;
  width: 100px;
  height: 30px;
  line-height: 30px;
  border-radius: 6px;
  margin: 0 auto;
  padding: 0;
  border: none;
  text-align: center;
  background-color: #efefef;
}

.active{
  background-image: linear-gradient(120deg, #84fab0 0%, #8fd3f4 100%);
  color: #fff
}

</style>
React
import React, { useMemo, useState } from "react"

import './class.css' // The style here is the same as above


export default function Class (){
  const [ isActive, setIsActive ] = useState(false)
  const buttonText = useMemo(() => {
    return isActive ? 'Selected' : 'Unchecked'
  }, [ isActive ])
  const buttonClass = useMemo(() => {
    // Unlike Vue, we need to join manually to become'button active'
    return [ 'button', isActive ? 'active' : '' ].join(' ')
  }, [ isActive ])

  const onClickActive = () => {
    setIsActive(!isActive)
  }

  return (
    <div className={ buttonClass } onClick={onClickActive}>{ buttonText }</div>
  )
}
preview
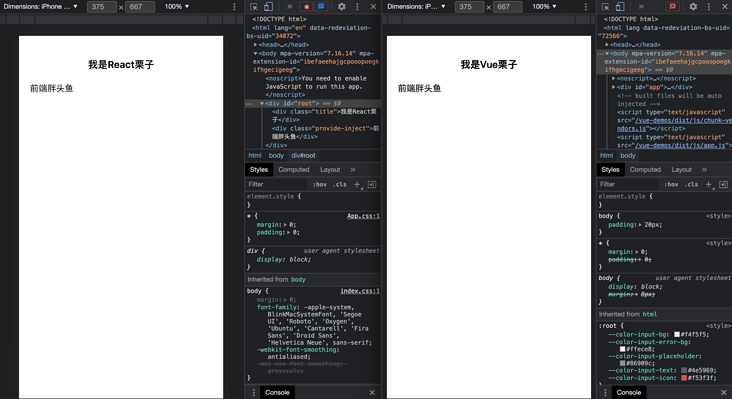
8.provide/inject
Both Vue and React have their own good solutions for managing the global state, such as Vuex in Vue, redux and Mox in React. Of course, introducing these into small projects is a bit oversized. Are there any other solutions?
Can be used in Vue provide/inject
In React, you can use Context
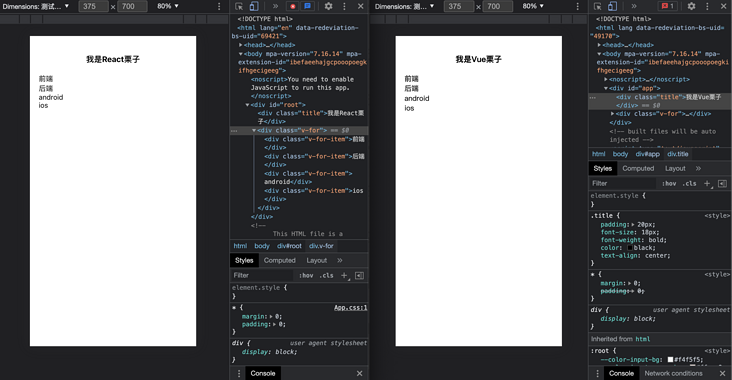
Assuming there is a user information userInfo variable globally, which needs to be easily accessed in each component, how can it be implemented in Vue and React?
Vue
Borrowing provide/inject from a Vue passes the top-level state to any child node, assuming we app again. A userInfo data is declared in Vue
provide Source Code Point Here
app.vue
<template>
  <div id="app">
    <div class="title">I am Vue Chestnuts</div>
    <router-view/>
  </div>
</template>
<script>

export default {
  name: 'app',
  // Declare data
  provide () {
    return {
      userInfo: {
        name: 'Fatty-Headed Front Fish'
      }
    }
  }
}
</script>
provide.vue
<template>
  <div class="provide-inject">{{ userInfo.name }}</div>
</template>

<script>
export default {
  name: 'provideInject',
  // Use data
  inject: [ 'userInfo' ]
}
</script>
React
To achieve similar functionality in React, you can use Context To share the global state with any child node
provide Source Code Point Here
context/index.js
import { createContext } from "react";

export const UserInfoContext = createContext({
  userInfo: {
    name: ''
  }
})
app.js
import { UserInfoContext } from './context/index'

function App() {
  return (
    <BrowserRouter>
      // Notice here
      <UserInfoContext.Provider
        value={{ userInfo: { name: 'Fatty-Headed Front Fish' } }}
      >
        <div className="title">I am React Chestnuts</div>
        <Routes>
          <Route path="/v-if" element={<Vif />} />
          <Route path="/v-show" element={<VShow />} />
          <Route path="/v-for" element={<VFor />} />
          <Route path="/computed" element={<Computed />} />
          <Route path="/watch" element={<Watch />} />
          <Route path="/style" element={<Style />} />
          <Route path="/class" element={<Class />} />
          <Route path="/slot" element={<Slot />} />
          <Route path="/nameSlot" element={<NameSlot />} />
          <Route path="/scopeSlot" element={<ScopeSlot />} />
          <Route path="/provide" element={<Provide />} />
        </Routes>
      </UserInfoContext.Provider>
    </BrowserRouter>
  );
}
provide.js
import React, { useContext } from "react"
import { UserInfoContext } from '../context/index'


export default function Provide() {
  // Using a defined UserInfoContext with the userContext
  const { userInfo } = useContext(UserInfoContext)

  return (
    <div class="provide-inject">{ userInfo.name }</div>
  )
}
preview
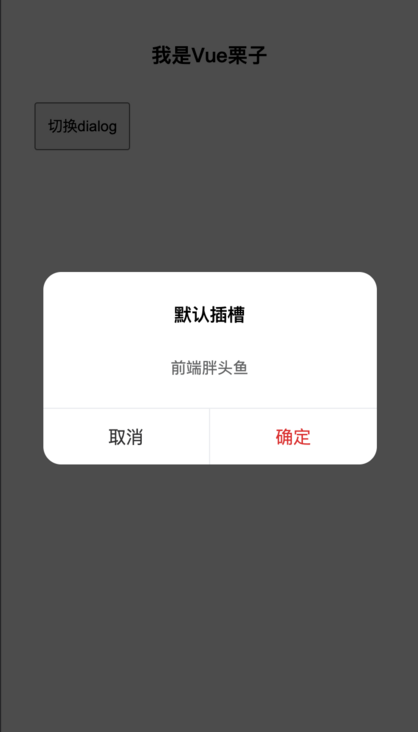
9. slot (default slot)
Slot is a very useful function in Vue. I understand it as a pit, waiting for you to fill it from outside. This pit can be divided into default pit, named Pit and scope pit. Let's take a real-world example to see how the same function can be achieved in React.
Suppose we want to implement a simple dialog component, the basic function is that the title can pass a string, and the content can be completely customized. What should we do?
Vue
dialog component
<template>
  <div class="dialog" v-show="visible">
    <div class="dialog-mask" @click="onHide"></div>
    <div class="dialog-body">
      <div class="dialog-title" v-if="title">{{ title }}</div>
      <div class="dialog-main">
        // Note that there is a default slot location
        <slot></slot>
      </div>
      <div class="dialog-footer">
        <div class="button-cancel" @click="onHide">cancel</div>
        <div class="button-confirm" @click="onHide">Determine</div>
      </div>
    </div>
  </div>
</template>

<script>
export default {
  name: "dialog",
  props: {
    title: {
      type: String,
      default: "",
    },
    visible: {
      type: Boolean,
      default: false,
    },
  },
  methods: {
    onHide () {
      this.$emit('update:visible', false)
    }
  }
};
</script>
Default slot component
dialog
<template>
  <div class="slot">
    <button @click="onToggleVisible">switch dialog</button>
    <Dialog
      :visible.sync="visible"
      title="Default slot"
    >
      // This will be replaced with <slot></slot>
      <div class="slot-body">Fatty-Headed Front Fish</div>
    </Dialog>
  </div>
</template>

<script>
import Dialog from './components/dialog.vue'

export default {
  name: 'slot',
  components: {
    Dialog,
  },
  data () {
    return {
      visible: false
    }
  },
  methods: {
    onToggleVisible () {
      this.visible = !this.visible
    }
  }
}
React
What should I do to implement these same functions in React? React has no slots! Don't worry, although there is no concept of a slot in React, you can use props instead. Children gets the child elements inside the component, which enables the default slot to function
dialog
import React, { useState, useEffect } from "react"

import './dialog.css'

export default function Dialog(props) {
  // Forgive me for implementing it in a foolish way like visible-1, not here
  const { children, title = '', visible = -1 } = props
  const [visibleInner, setVisibleInner] = useState(false)

  const onHide = () => {
    setVisibleInner(false)
  }

  useEffect(() => {
    setVisibleInner(visible > 0)
  }, [ visible ])

  return (
    <div className="dialog" style={ { display: visibleInner ? 'block' : 'none' }}>
      <div className="dialog-mask" onClick={ onHide }></div>
      <div className="dialog-body">
        { title ? <div className="dialog-title">{ title }</div> : null }
        <div className="dialog-main">
          {/* Notice here that the default slot function is implemented through children */}
          {children}
        </div>
        <div className="dialog-footer">
          <div className="button-cancel" onClick={ onHide }>cancel</div>
          <div className="button-confirm" onClick={ onHide }>Determine</div>
        </div >
      </div >
    </div >
  )
}
Default slot component
import React, { useState, useEffect } from "react"
import Dialog from './components/dialog'

export default function Slot() {
  const [visible, setVisible] = useState(-1)

  const onToggleVisible = () => {
    setVisible(Math.random())
  }

  return (
    <div className="slot">
      <button onClick={ onToggleVisible }>switch dialog</button>
      <Dialog
        visible={visible}
        title="Default slot"
      >
        {/* Notice here that it is read and replaced by children of the Dialog component */}
        <div className="slot-body">Fatty-Headed Front Fish</div>
      </Dialog>
    </div>
  )
}
preview
10. name slot (named slot)
When there is more dynamic content inside the component that needs external filling, one default slot is not enough, we need to give the slot Name So that the outside can work step by step to the designated location.
Let's enrich the Dialog component, assuming that title can also support dynamic content delivery?
Vue
The declaration of the slot in Vue is made in the form of <slot name="main"> </slot>, and then used in the form of v-slot:main, one radish and one pit will be filled up
NamesSlot source code point here
Dialog transformation
<template>
  <div class="dialog" v-show="visible">
    <div class="dialog-mask" @click="onHide"></div>
    <div class="dialog-body">
      <div class="dialog-title" v-if="title">{{ title }}</div>
      <!-- Notice here, no transmission title Attributes, when content is inherited through slots -->
      <slot name="title" v-else></slot>
      <div class="dialog-main">
        <!-- statement main Part -->
        <slot name="main"></slot>
      </div>
      <div class="dialog-footer">
        <div class="button-cancel" @click="onHide">cancel</div>
        <div class="button-confirm" @click="onHide">Determine</div>
      </div>
    </div>
  </div>
</template>
// ... Elsewhere as in previous interview
nameSlot
React
Pass props before. The children attribute reads the contents of the component label as if it were the same function as the Vue default slot, but how does a named slot work? One of the fun things about React is that I think attributes can be passed, strings, numbers, functions, even DOM s. So it's easy to implement named slots, just as the attributes are transferred.
NamesSlot source code point here
Dialog transformation
import React, { useState, useEffect } from "react"

import './dialog.css'

export default function Dialog(props) {
  // Forgive me for implementing it in a foolish way like visible-1, not here
  const { title, main, visible = -1 } = props
  const [visibleInner, setVisibleInner] = useState(false)

  const onHide = () => {
    setVisibleInner(false)
  }

  useEffect(() => {
    setVisibleInner(visible > 0)
  }, [ visible ])

  return (
    <div className="dialog" style={ { display: visibleInner ? 'block' : 'none' }}>
      <div className="dialog-mask" onClick={ onHide }></div>
      <div className="dialog-body">
        {/* { title ? <div className="dialog-title">{ title }</div> : null } */}
        {/* Note here that rendering title s directly is OK */}
        { title }
        <div className="dialog-main">
          {/* Notice here that the default slot function is implemented through children */}
          {/* {children} */}
          {/* This is not a child here, it's main */}
          { main }
        </div>
        <div className="dialog-footer">
          <div className="button-cancel" onClick={ onHide }>cancel</div>
          <div className="button-confirm" onClick={ onHide }>Determine</div>
        </div >
      </div >
    </div >
  )
}
nameSlot
import React, { useState } from "react"
import Dialog from './components/dialog'

import './slot.css'

export default function NameSlot() {
  const [visible, setVisible] = useState(-1)

  const onToggleVisible = () => {
    setVisible(Math.random())
  }

  return (
    <div className="slot">
      <button onClick={ onToggleVisible }>switch dialog</button>
      <Dialog
        visible={visible}
        // Notice here that the DOM passed directly
        title={ <div className="dialog-title">Default slot</div> }
        // Notice here that the DOM passed directly
        main={ <div className="slot-body">Fatty-Headed Front Fish</div> }
      >
      </Dialog>
    </div>
  )
}
preview
You can see named slots, but React is simpler to use attributes directly
11. scope slot
With the default slot, named slot, of course, scoped slot is the last thing! Sometimes it is useful to make the contents of the slot accessible to the data only available in the sub-components, which is what scoped slots mean.
Assume that there is a userInfo: {name:'front fat fish'} data object inside the Dialog component that you want to be accessible using the external slot of the Dialog component. What should you do?
Vue
scopeSlot source code point here
Dialog
<template>
  <div class="dialog" v-show="visible">
    <div class="dialog-mask" @click="onHide"></div>
    <div class="dialog-body">
      <div class="dialog-title" v-if="title">{{ title }}</div>
      <!-- Notice here that by binding userInfo Externally available -->
      <slot name="title" :userInfo="userInfo" v-else></slot>
      <div class="dialog-main">
        <!-- Notice here that by binding userInfo Externally available -->
        <slot name="main" :userInfo="userInfo"></slot>
      </div>
      <div class="dialog-footer">
        <div class="button-cancel" @click="onHide">cancel</div>
        <div class="button-confirm" @click="onHide">Determine</div>
      </div>
    </div>
  </div>
</template>

<script>
export default {
  name: "dialog",
  // ...
  data () {
    return {
      userInfo: {
        name: 'Fatty-Headed Front Fish'
      }
    }
  },
  // ...
};
</script>
scopeSlot
<template>
  <div class="slot">
    <button @click="onToggleVisible">switch dialog</button>
    <Dialog
      :visible.sync="visible"
    >
      <template v-slot:title>
        <div class="dialog-title">Scope slot</div>
      </template>
      <!-- Notice here -->
      <template v-slot:main="{ userInfo }">
        <!-- Notice here userInfo yes Dialog Data inside component -->
        <div class="slot-body">Hello{{ userInfo.name }}</div>
      </template>
    </Dialog>
  </div>
</template>
React
Again, everything in React is transferable, similar to DOM in a named slot, but we can also transfer functions that pass userInfo data inside a Dialog component to external use through function arguments.
scopeSlot source code point here
Dialog transformation
import React, { useState, useEffect } from "react"

import './dialog.css'

export default function Dialog(props) {
  // Forgive me for implementing it in a foolish way like visible-1, not here
  const { title, main, visible = -1 } = props
  const [visibleInner, setVisibleInner] = useState(false)
  const [ userInfo ] = useState({
    name: 'Fatty-Headed Front Fish'
  })

  const onHide = () => {
    setVisibleInner(false)
  }

  useEffect(() => {
    setVisibleInner(visible > 0)
  }, [ visible ])

  return (
    <div className="dialog" style={ { display: visibleInner ? 'block' : 'none' }}>
      <div className="dialog-mask" onClick={ onHide }></div>
      <div className="dialog-body">
        {/* Scope slot, when a function is used and data is passed in */}
        { title(userInfo) }
        <div className="dialog-main">
          {/* Scope slot, when a function is used and data is passed in */}
          { main(userInfo) }
        </div>
        <div className="dialog-footer">
          <div className="button-cancel" onClick={ onHide }>cancel</div>
          <div className="button-confirm" onClick={ onHide }>Determine</div>
        </div >
      </div >
    </div >
  )
}
scopeSlot
import React, { useState } from "react"
import Dialog from './components/dialog'

import './slot.css'

export default function ScopeSlot() {
  const [visible, setVisible] = useState(-1)

  const onToggleVisible = () => {
    setVisible(Math.random())
  }

  return (
    <div className="slot">
      <button onClick={ onToggleVisible }>switch dialog</button>
      <Dialog
        visible={visible}
        // Slot by function
        title={ () => <div className="dialog-title">Scope slot</div> }
        // Receive userInfo data
        main={ (userInfo) => <div className="slot-body">Hello{ userInfo.name }</div> }
      >
      </Dialog>
    </div>
  )
}
preview