reference resources: Use Opencv and Python to build your own object detection software.
According to the content in the reference video, you can build it by yourself. However, because the video is in English and the subtitles turned out by the machine are not accurate, the steps and code notes are made into notes, and the complete project is attached at the end of the text.
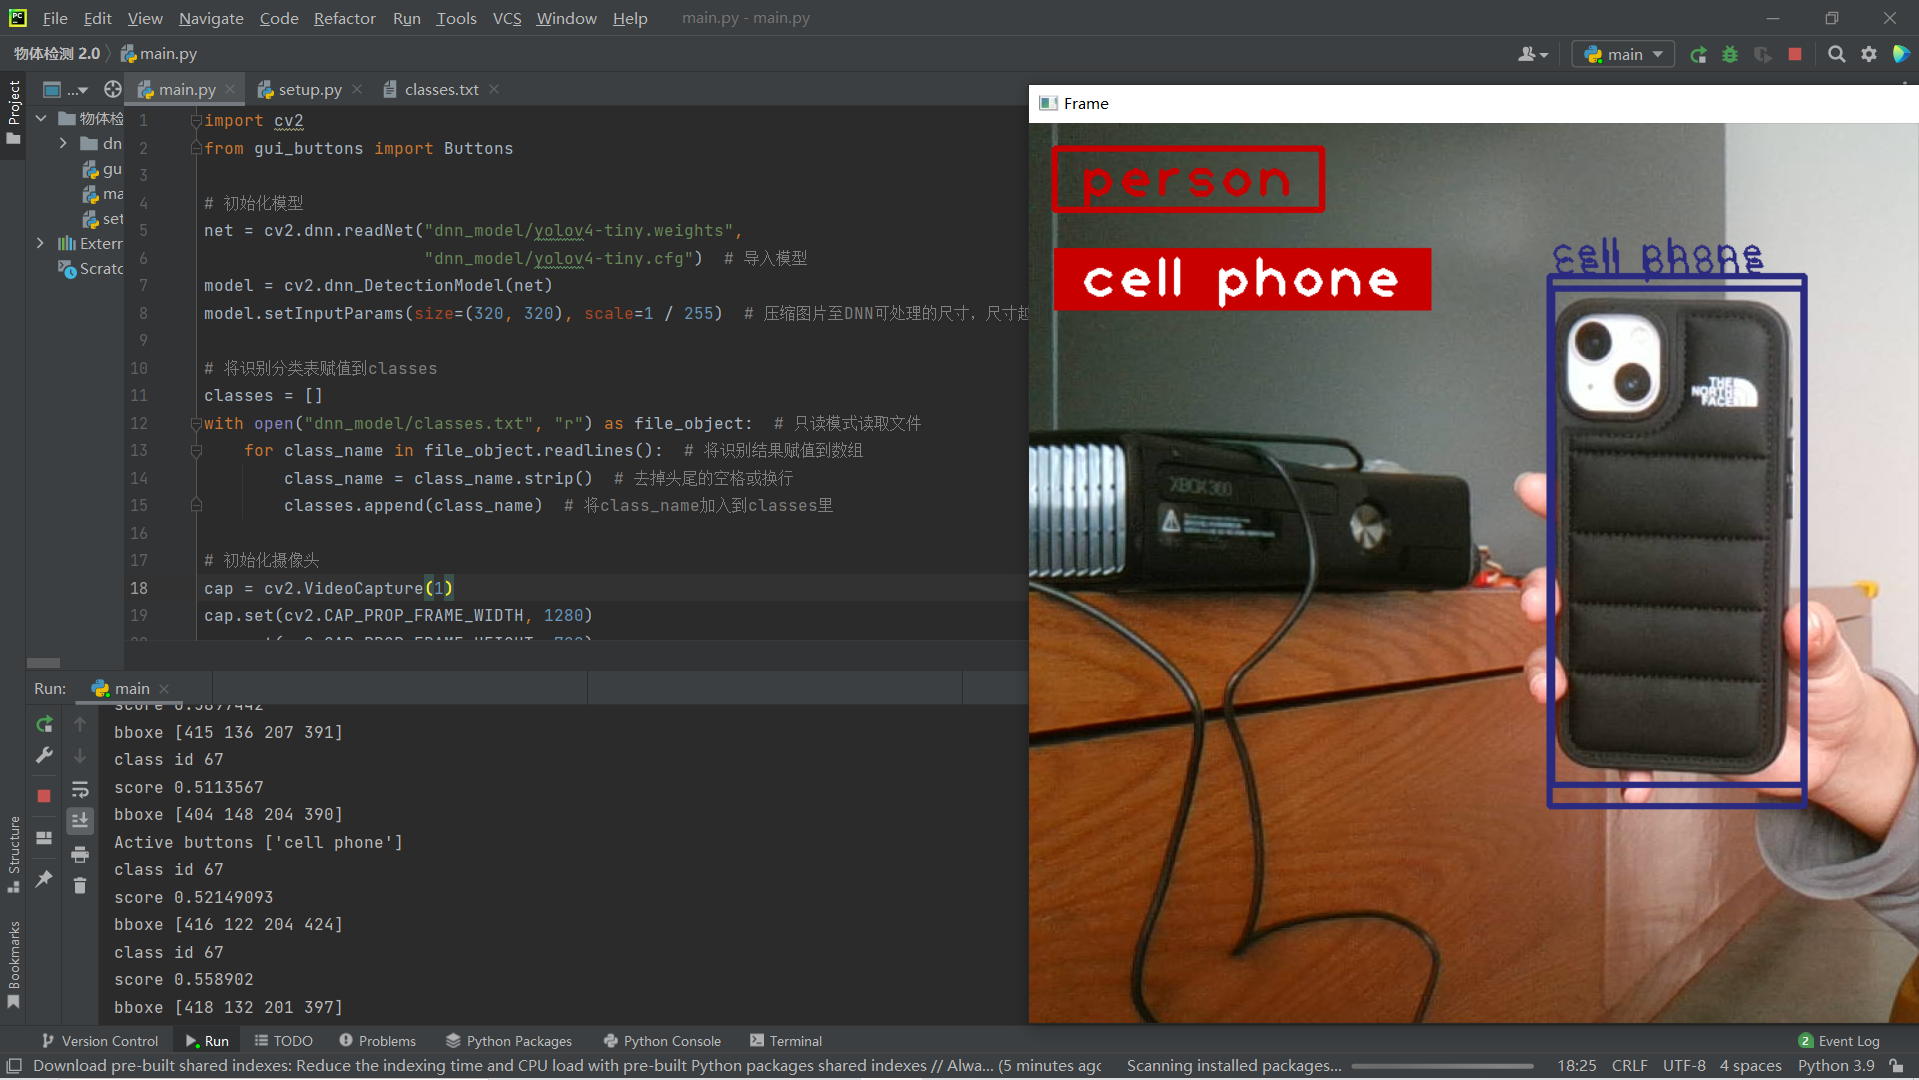
Initialization model
The imported model library is well trained and can detect 80 kinds of objects.
# Initialization model
net = cv2.dnn.readNet("dnn_model/yolov4-tiny.weights",
                      "dnn_model/yolov4-tiny.cfg")    # Import model
model = cv2.dnn_DetectionModel(net)
model.setInputParams(size=(320, 320), scale=1 / 255)  # Compress the picture to the size that can be processed by DNN. The larger the size, the better the detection effect, but the processing speed will slow down
Object detection
# Object detection
(class_ids, scores, bboxes) = model.detect(frame)
print("class ids", class_ids)  # Classification results
print("scores", scores)        # Accuracy
print("bboxes", bboxes)        # Location information of identification frame
The identification box and results are displayed in the screen window
- Import identification classification table
# Assign the identification classification table to classes
classes = []
with open("dnn_model/classes.txt", "r") as file_object:   # Read only mode to read files
    for class_name in file_object.readlines():     # Assign the recognition result to the array
        class_name = class_name.strip()    # Remove leading and trailing spaces or line breaks
        classes.append(class_name)         # Will class_name added to classes
- The window displays the identification box and text results
# Display the identification box and identification results on the screen
for class_id, score, bbox in zip(class_ids, scores, bboxes):        # The multi frame data is packaged and reconstituted into a single frame
    (x, y, w, h) = bbox   # x. Y represents the position coordinate of the upper left corner of the identification frame, w width, h height
    class_name = classes[class_id]

    # Draw a rectangle on the screen to frame the object, and display the recognition result with text
    cv2.rectangle(frame, (x, y), (x + w, y + h), (128, 42, 42), 3)  # Picture, upper left corner coordinate, lower right corner coordinate, RGB color, thickness
    cv2.putText(frame, class_name, (x, y - 10), cv2.FONT_HERSHEY_PLAIN, 2, (128, 42, 42), 2)  # Screen, text content, position, font, font size, RGB color, thickness
Change camera resolution
So far, object detection has been preliminarily completed. To adjust the relationship between processing speed and recognition accuracy, you can change the camera resolution or the size of the model. For example, add some setting statements to the initialization camera code.
# Initialize camera
cap = cv2.VideoCapture(0)
cap.set(cv2.CAP_PROP_FRAME_WIDTH, 1280)
cap.set(cv2.CAP_PROP_FRAME_HEIGHT, 720)
Design interactive interface
The little brother in the video also taught how to increase interactivity. The final effect is to control whether to display the object detection result by clicking the button on the screen, that is, whether to frame the object.
You can write your own code, or directly call the functions written by others. Here only shows how to design by yourself.
Create a new window and add a mouse response function
# Define the mouse response callback function
def click_button(event, x, y, flags, params):
    if event == cv2.EVENT_LBUTTONDOWN:
        print(x, y)

# Create new window
cv2.namedWindow("Frame")
cv2.setMouseCallback("Frame", click_button)
Create a button icon on the screen
Here, using fillPoly instead of rectangle can speed up data processing. Note that the sentence import numpy as np should be added before use
# Create button on screen
# cv2.rectangle(frame, (20, 20), (210, 70), (0, 0, 200), -1)      # A border thickness of - 1 indicates that the box is filled with color
polygon = np.array([[(20, 20), (210, 20), (210, 70), (20, 70)]])  # Create buttons by drawing polygons
cv2.fillPoly(frame, polygon, (0, 0, 200))
cv2.putText(frame, "Person", (30,60), cv2.FONT_HERSHEY_PLAIN, 3, (255, 255, 255), 3)
Modify mouse response function
- Usage of pointPolygonTest function: used to detect whether a point is in a polygon
- A parameter contour represents a polygon
- The second parameter pt represents the test point
- Three parameter measureDist boolean variable
When measureDist is set to true, the actual distance value is returned.
If the return value is positive, it indicates that the point is inside the polygon; The return value is negative, which means it is outside the polygon, and the return value is 0, which means it is on the polygon.
When measureDist is set to false, three fixed values - 1, 0 and 1 are returned.
If the return value is + 1, it means that the point is inside the polygon; The return value is - 1, which means it is outside the polygon; The return value is 0, indicating that it is on the polygon.
button_person = False   # Used to mark the button status

# Define the mouse response callback function
def click_button(event, x, y, flags, params):
    global button_person
    if event == cv2.EVENT_LBUTTONDOWN:
        print(x, y)
        polygon = np.array([[(20, 20), (210, 20), (210, 70), (20, 70)]])  # Create buttons by drawing polygons

        is_inside = cv2.pointPolygonTest(polygon, (x, y), False)
        if is_inside > 0:
            print("The button is clicked")

            # Change button status flag bit
            if button_person:
                button_person = False
            else:
                button_person = True

            print("Button status is", button_person)
Add condition judgment
Add a condition judgment statement to determine whether to display the identification box and results according to the status flag bit of the button
if class_name == "person" and button_person is True:
    # Draw a rectangle on the screen to frame the object, and display the recognition result with text
    cv2.rectangle(frame, (x, y), (x + w, y + h), (128, 42, 42), 3)  # Picture, upper left corner coordinate, lower right corner coordinate, RGB color, thickness
    cv2.putText(frame, class_name, (x, y - 10), cv2.FONT_HERSHEY_PLAIN, 2, (128, 42, 42), 2)  # Screen, text content, position, font, font size, RGB color, thickness
Complete project
The link to the complete project is here link (there is no integral requirement)