Introduction to face recognition
This project is used for entry-level learning of face recognition and is for reference only
brief introduction
Face recognition is a biometric recognition technology based on human face feature information. It is a series of related technologies that use the camera or camera to collect the image or video stream containing face, and automatically detect and track the face in the image, so as to carry out face recognition on the detected face, which is usually also called portrait recognition and face recognition.
Nowadays, the application of face recognition can be seen everywhere: payment, punch in, unlock and so on... Its algorithm has also become a hot research content. If the algorithm is poor or the database is poor, it is likely to lead to face recognition and even recognize the name of "another you in the world" (indicating the gate of a communication university in Beijing).
Then let's explore face recognition.
Face recognition system mainly has four steps
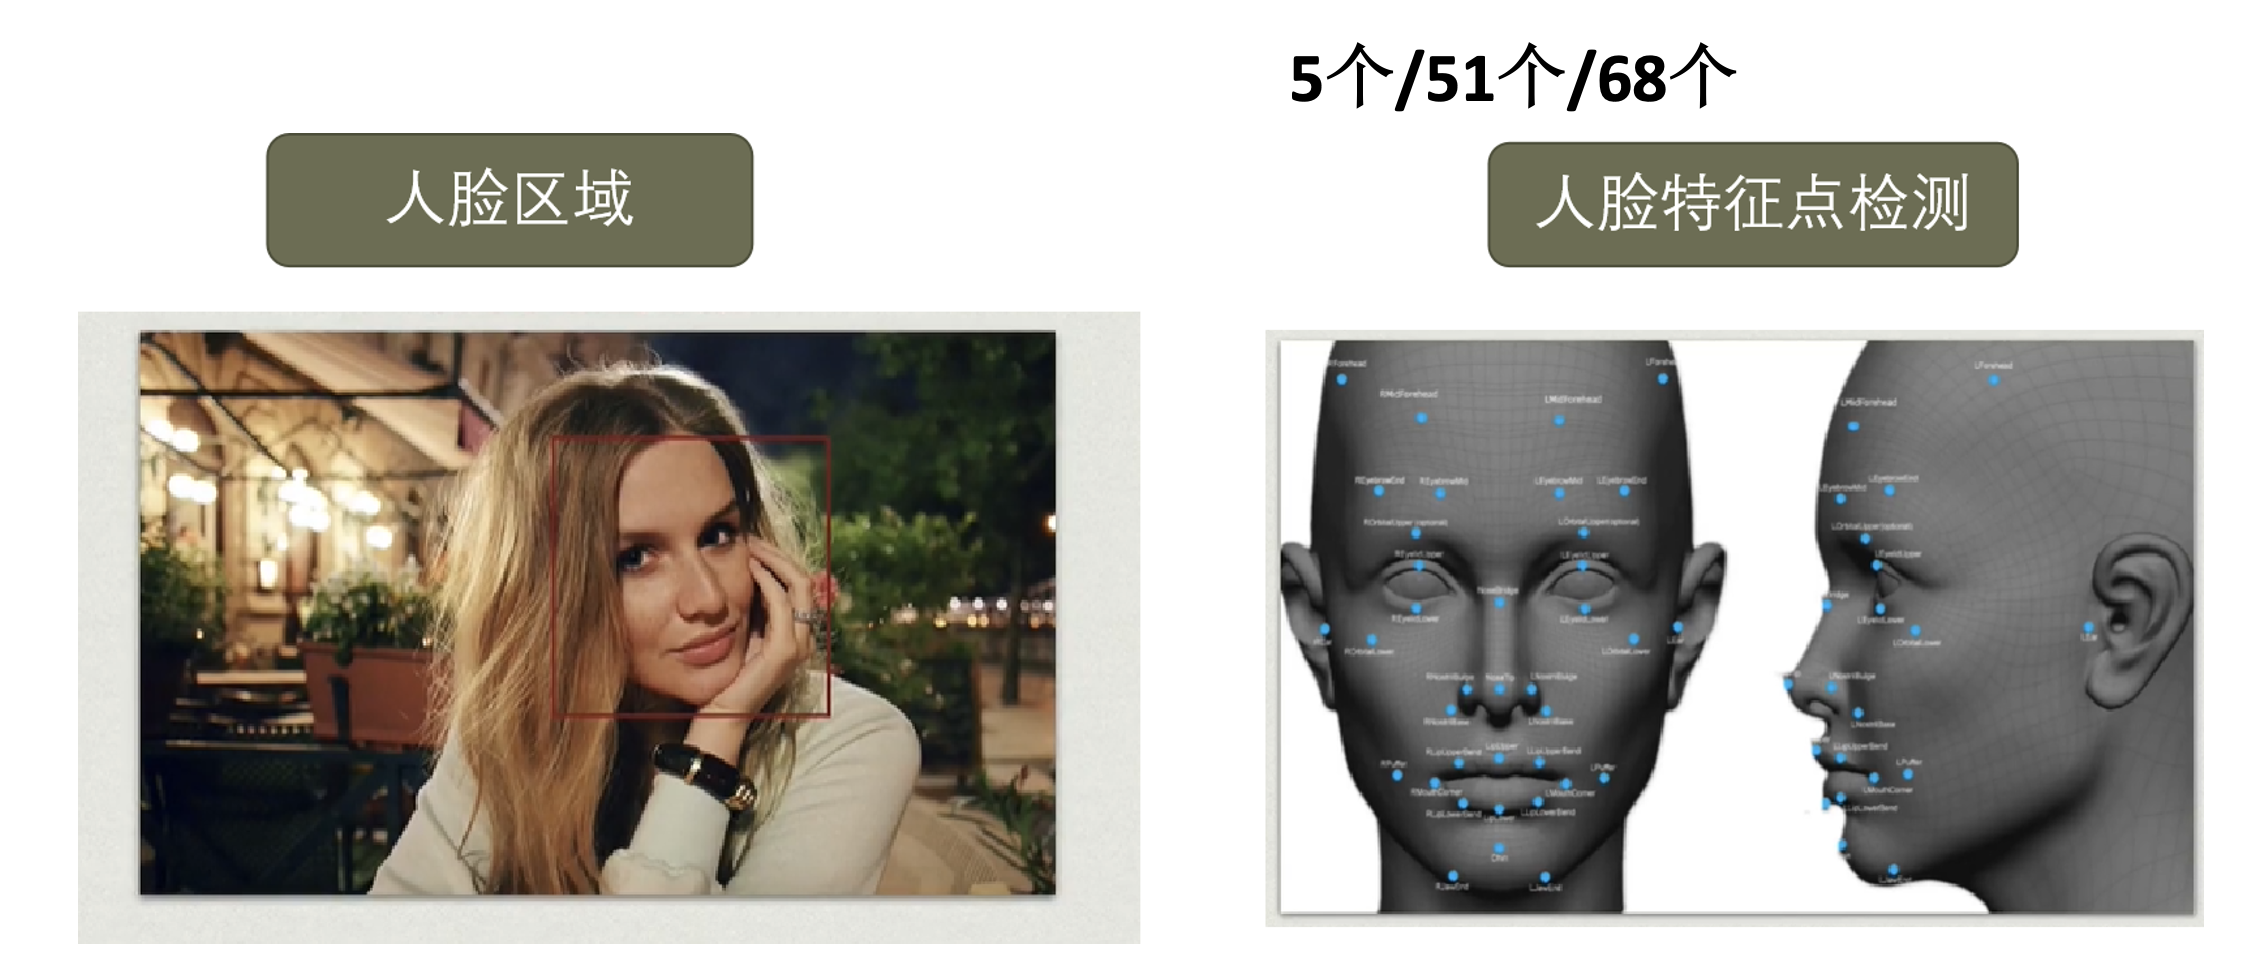
Face detection
opencv only
- Install opencv Python
pip install opencv-python
In the arcade system, you need to_ frontalface_ default. The path of XML is found and written into the code.
General path: "/ Library/Frameworks/Python.framework/Versions/3.7/lib/python3.7/site-packages/cv2/data/haarcascade_frontalface_default.xml"
- code-demo
import cv2

def detect(filename):
    face_cascade = cv2.CascadeClassifier('/Library/Frameworks/Python.framework/Versions/3.7/lib/python3.7/site-packages/cv2/data/haarcascade_frontalface_default.xml')
    #Load haar data
    img=cv2.imread(filename)
    #Load the picture and read it directly in BGR format
    gray=cv2.cvtColor(img,cv2.COLOR_BGR2GRAY)
    #cv2.cvtColor(p1,p2) is the color space conversion function, p1 is the picture to be converted, and p2 is the format to be converted.
    #cv2.COLOR_BGR2GRAY converts BGR format into grayscale image
    faces = face_cascade.detectMultiScale(gray, 1.3, 5)
    # Recognize the faces in the image and return the rectangular box vector group of all faces
    # scaleFactor=1.3 in order to detect targets of different sizes, the length and width of the image are gradually reduced according to a certain proportion through the scalefactor parameter,
    # Then it is detected that the larger the parameter is set, the faster the calculation speed is, but the face of a certain size may be missed.
    # minNeighbors=5 is the minimum number of adjacent rectangles constituting the detection target, which is set to 5 here

    for(x,y,w,h) in faces:
        img=cv2.rectangle(img,(x,y),(x+w,y+h),(255,0,0),2)

    #Draw a rectangular box in the image
    cv2.imshow('Person Detected!',img)
    cv2.waitKey(0)
    cv2.destroyAllWindows()
    #Display results

if __name__ == '__main__':
    detect('image/101.png')
- Recognition results
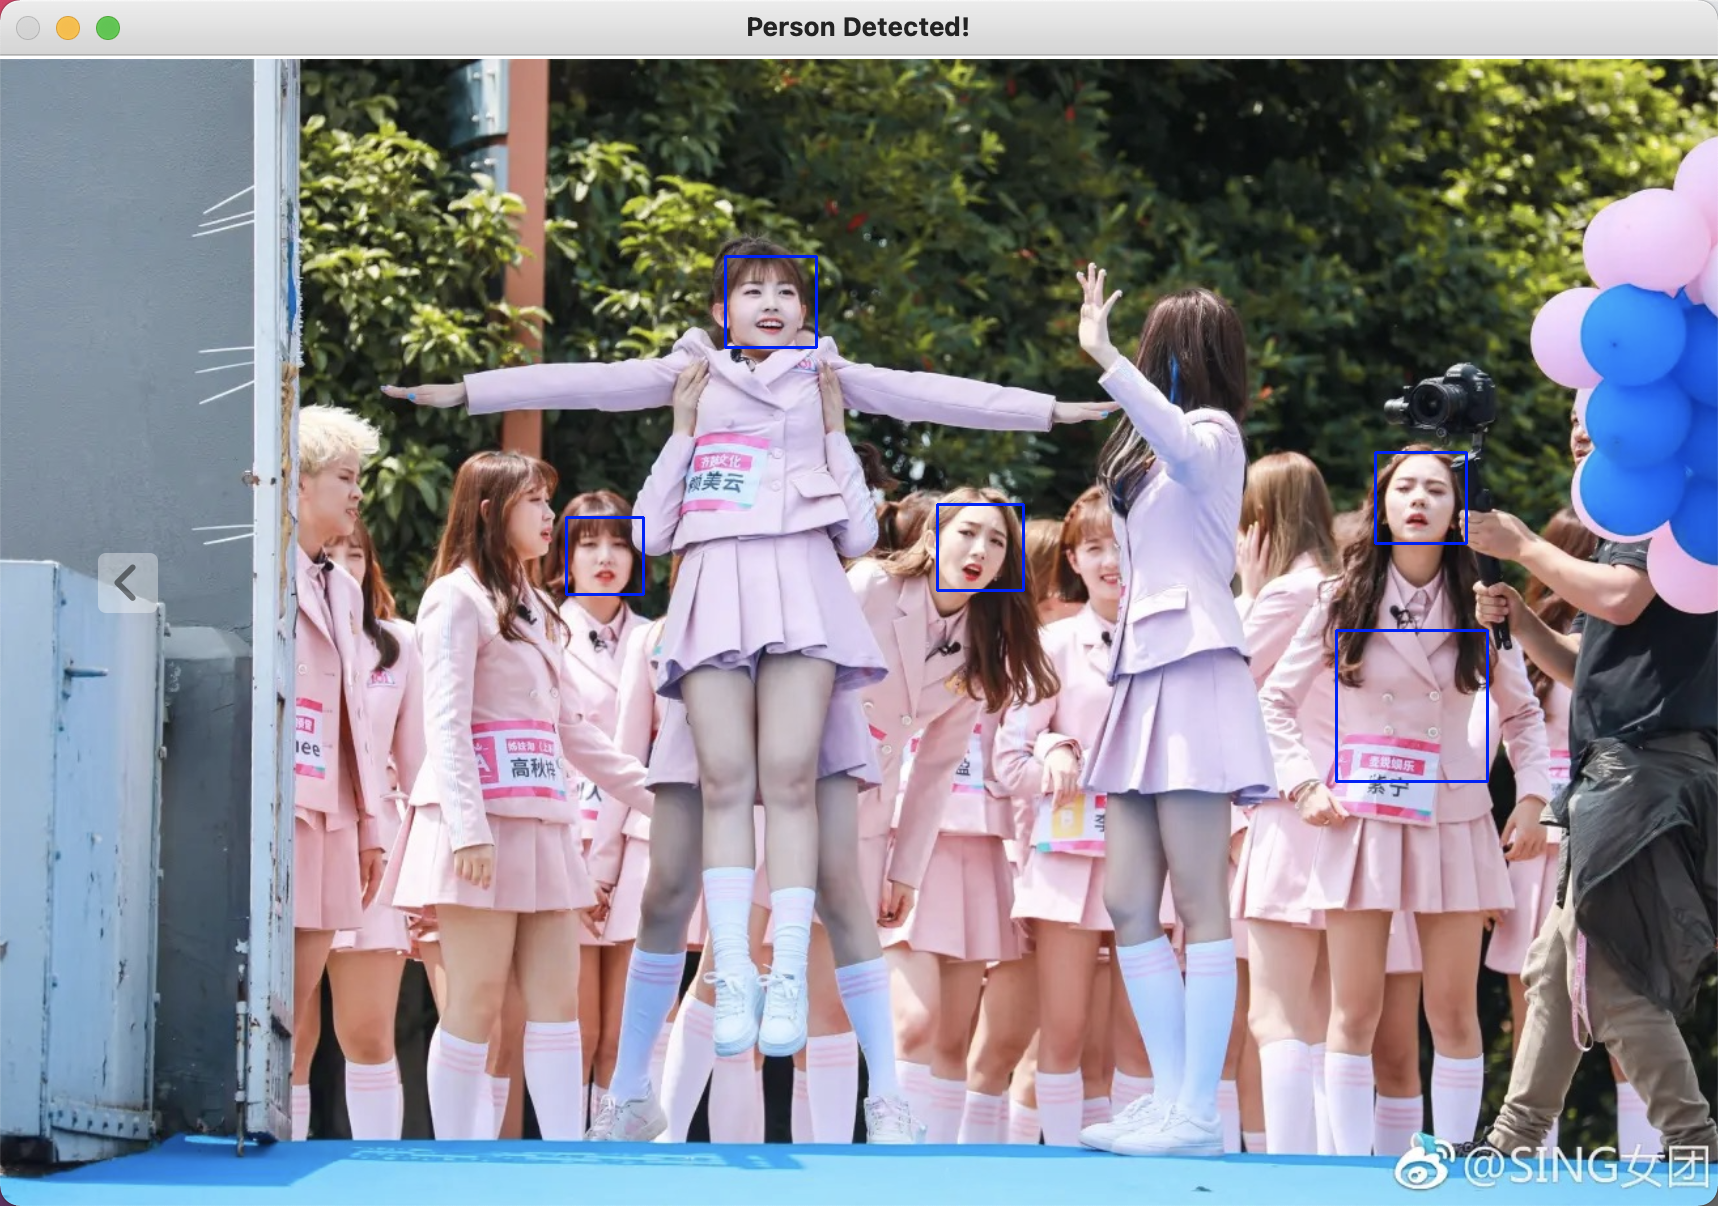
It can be seen that although some faces can be correctly recognized, some faces (such as side faces) can not be recognized, and even some wrong recognition. This requires us to use more advanced algorithms to recognize faces
face_recognition
GitHub project: face_recognition
-The project currently has more than 30000 star s and is one of the most mainstream face recognition toolkits on GitHub.
- Face_recognition mainly refers to the OpenFace project and Google's facenet.
-The world's most concise face recognition library can extract, recognize and operate faces using Python and command-line tools.
-The face recognition of this project is based on the deep learning model in the industry-leading C + + open source library dlib. It is tested with the Labeled Faces in the Wild face data set, and the accuracy is as high as 99.38%. However, the recognition accuracy of children and Asian faces needs to be improved.
- Installing dlib and face_recognition
When installing dlib, errors may occur because the dependency package is not installed. Therefore, before installing dlib, we first install openblas and cmake with brew
brew install openblas

brew install cmake

pip install dlib

pip install face_recognition
- code-demo
import face_recognition
import cv2

def detect(filename):
    image=face_recognition.load_image_file(filename)
    #Load picture to image
    face_locations_noCNN=face_recognition.face_locations(image)
    #Returns an array of bounding boxes of human faces in a image
    #A list of tuples of found face locations in css (top, right, bottom, left) order
    #Because the order of return values is like this, the assignment in the following for loop should be carried out in this order

    print("face_location_noCNN:")
    print(face_locations_noCNN)
    face_num2=len(face_locations_noCNN)
    print("I found {} face(s) in this photograph.".format(face_num2))
    # So far, you can observe the coordinates and the number of faces in the two cases. Generally speaking, the coordinates will be different, but the number of faces detected should be the same
    # That is to say_ num1 = face_num2;  face_locations_useCNN and face_ locations_ It's different from CNN

    org=cv2.imread(filename)
    img=cv2.imread(filename)
    #cv2.imshow(filename,img) #Show original picture

    for i in range(0,face_num2):
        top=face_locations_noCNN[i][0]
        right=face_locations_noCNN[i][1]
        bottom=face_locations_noCNN[i][2]
        left=face_locations_noCNN[i][3]

        start=(left,top)
        end=(right,bottom)

        color=(0,255,255)
        thickness=2
        cv2.rectangle(org,start,end,color,thickness)
        #cv2.rectangle(img, pt1, pt2, color[, thickness[, lineType[, shift]]]) → None
        #img: picture pT1 & pT2: upper left corner and lower right corner of rectangle color: color of rectangle border (RGB) thickness: the parameter indicates the thickness of rectangle border

    cv2.imshow("no cnn",org)
    cv2.waitKey(0)
    cv2.destroyAllWindows()

    # # use CNN
# face_locations_useCNN = face_recognition.face_locations(image,model='cnn')
# model – Which face detection model to use. "hog" is less accurate but faster on CPUs.
# "cnn" is a more accurate deep-learning model which is GPU/CUDA accelerated (if available). The default is "hog".

# print("face_location_useCNN:")
# print(face_locations_useCNN)
# face_num1=len(face_locations_useCNN)
# print(face_num1)       # The number of faces


# for i in range(0,face_num1):
#     top = face_locations_useCNN[i][0]
#     right = face_locations_useCNN[i][1]
#     bottom = face_locations_useCNN[i][2]
#     left = face_locations_useCNN[i][3]
#
#     start = (left, top)
#     end = (right, bottom)
#
#     color = (0,255,255)
#     thickness = 2
#     cv2.rectangle(img, start, end, color, thickness)    # opencv draw rectangle inside the function

# # Show the result
# cv2.imshow("useCNN",img)

if __name__ =='__main__':
    detect('image/101.png')
- Recognition results

It can be seen that compared with the results of the first recognition, the accuracy of this time is improved, but in this recognition, the side face is still unrecognizable, so we need to find the face feature points.
Facial feature points
Dlib has special functions and models, which can locate 68 feature points of human face.
After finding the feature points, you can align the feature points (move the eyes, mouth and other parts to the same position) through the geometric transformation of the image (affine, rotation and scaling).
- Download package
Package to download: shape_predictor_68_face_landmarks.dat
And add it to the path "/ library / frameworks / python. Framework / versions / 3.7 / lib / Python 3.7 / site packages" (mac user) - code-demo
#coding=utf-8

import cv2
import dlib

def detect(filename):
    img=cv2.imread(filename)
    gray=cv2.cvtColor(img,cv2.COLOR_BGR2GRAY)

    #Face classifier
    detector=dlib.get_frontal_face_detector()
    #Get face detector
    predictor=dlib.shape_predictor(r"/Library/Frameworks/Python.framework/Versions/3.7/lib/python3.7/site-packages/shape_predictor_68_face_landmarks.dat")
    #dets saves the rectangular box of the face in the image, which can have multiple faces
    dets=detector(gray,1)

    for face in dets:
        shape=predictor(img,face)# Find 68 calibration points of human face
        # Traverse all points, print out their coordinates and circle them
        for pt in shape.parts():
            pt_pos=(pt.x,pt.y)
            cv2.circle(img,pt_pos,2,(0,255,0),1)
        cv2.imshow("image",img)

    cv2.waitKey(0)
    cv2.destroyAllWindows()

if __name__=='__main__':
    detect('image/101.png')
- Recognition results
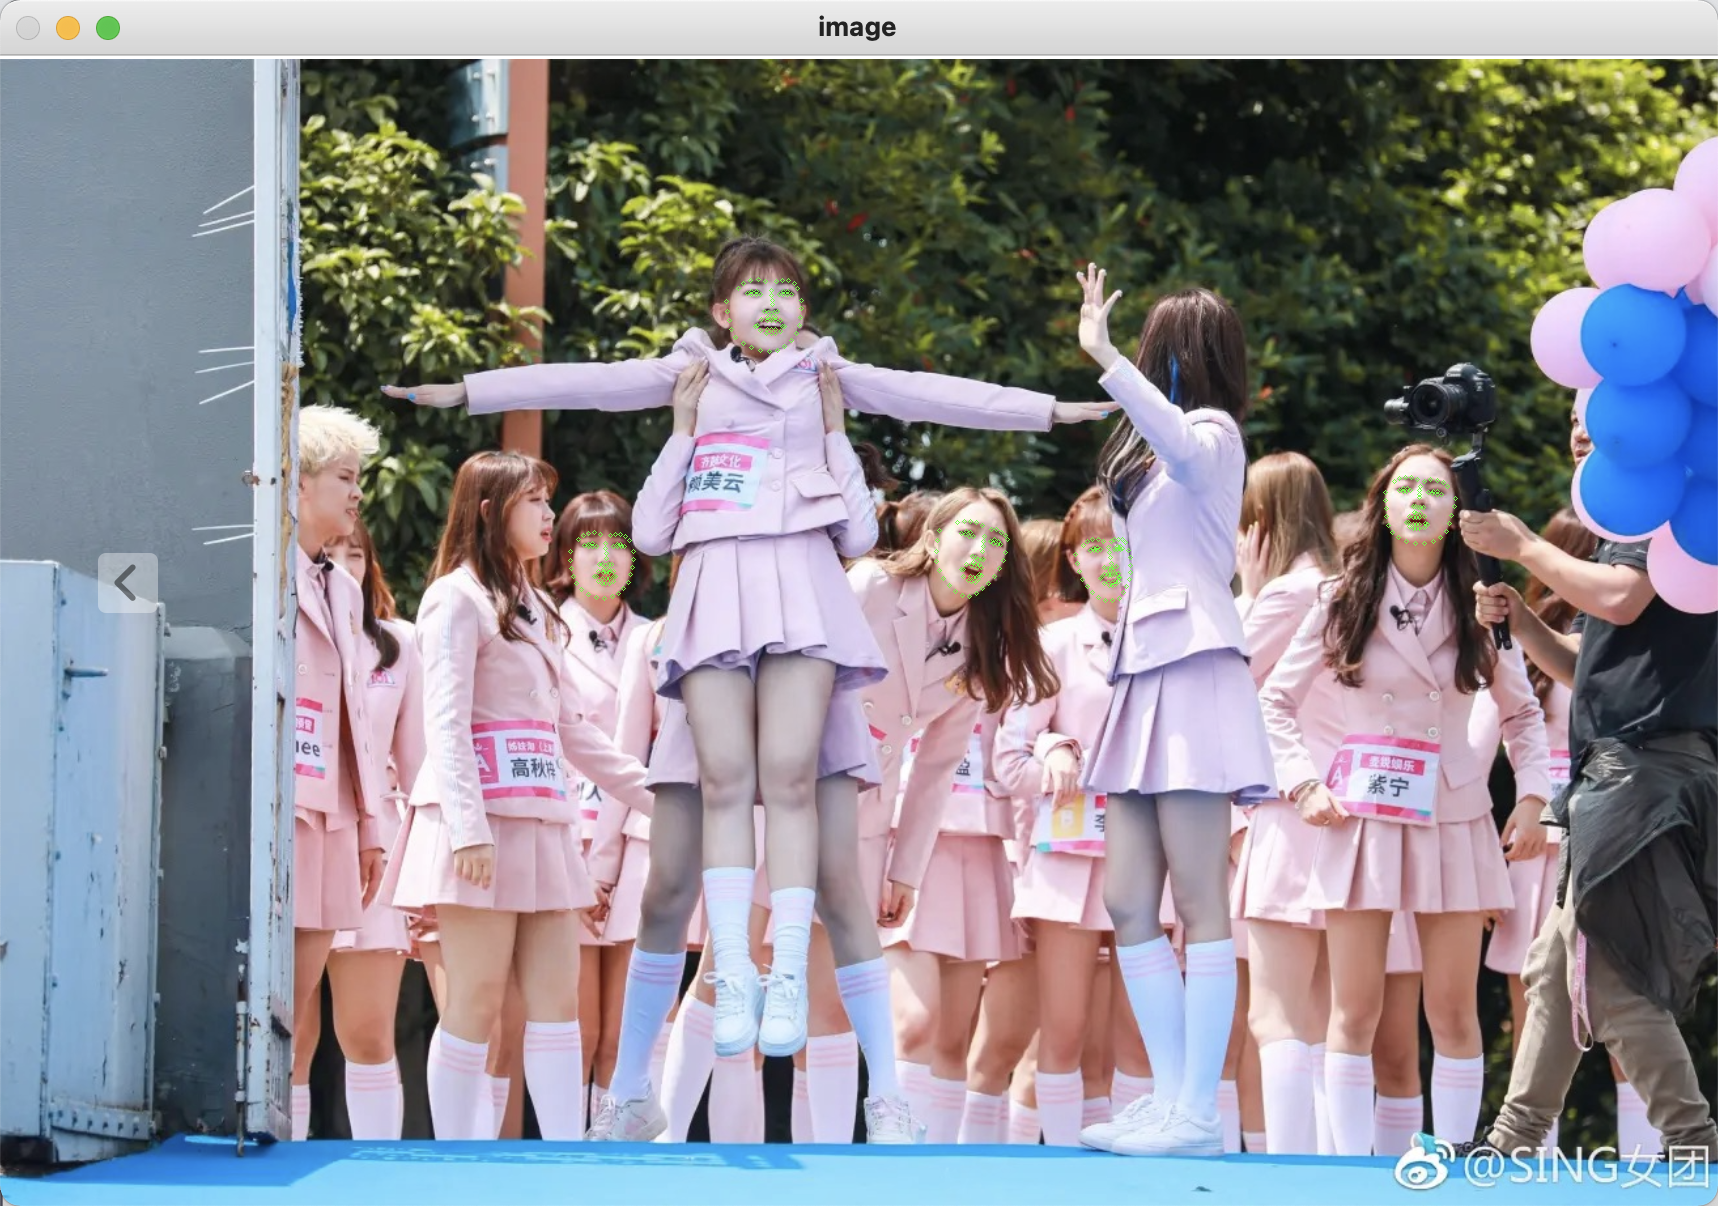
Although we still failed to recognize the side face this time, which shows that our algorithm still needs to be improved, but we have successfully extracted several feature points of the face, which also provides data for our later operations such as face alignment.
Let's enjoy the results of other feature points:
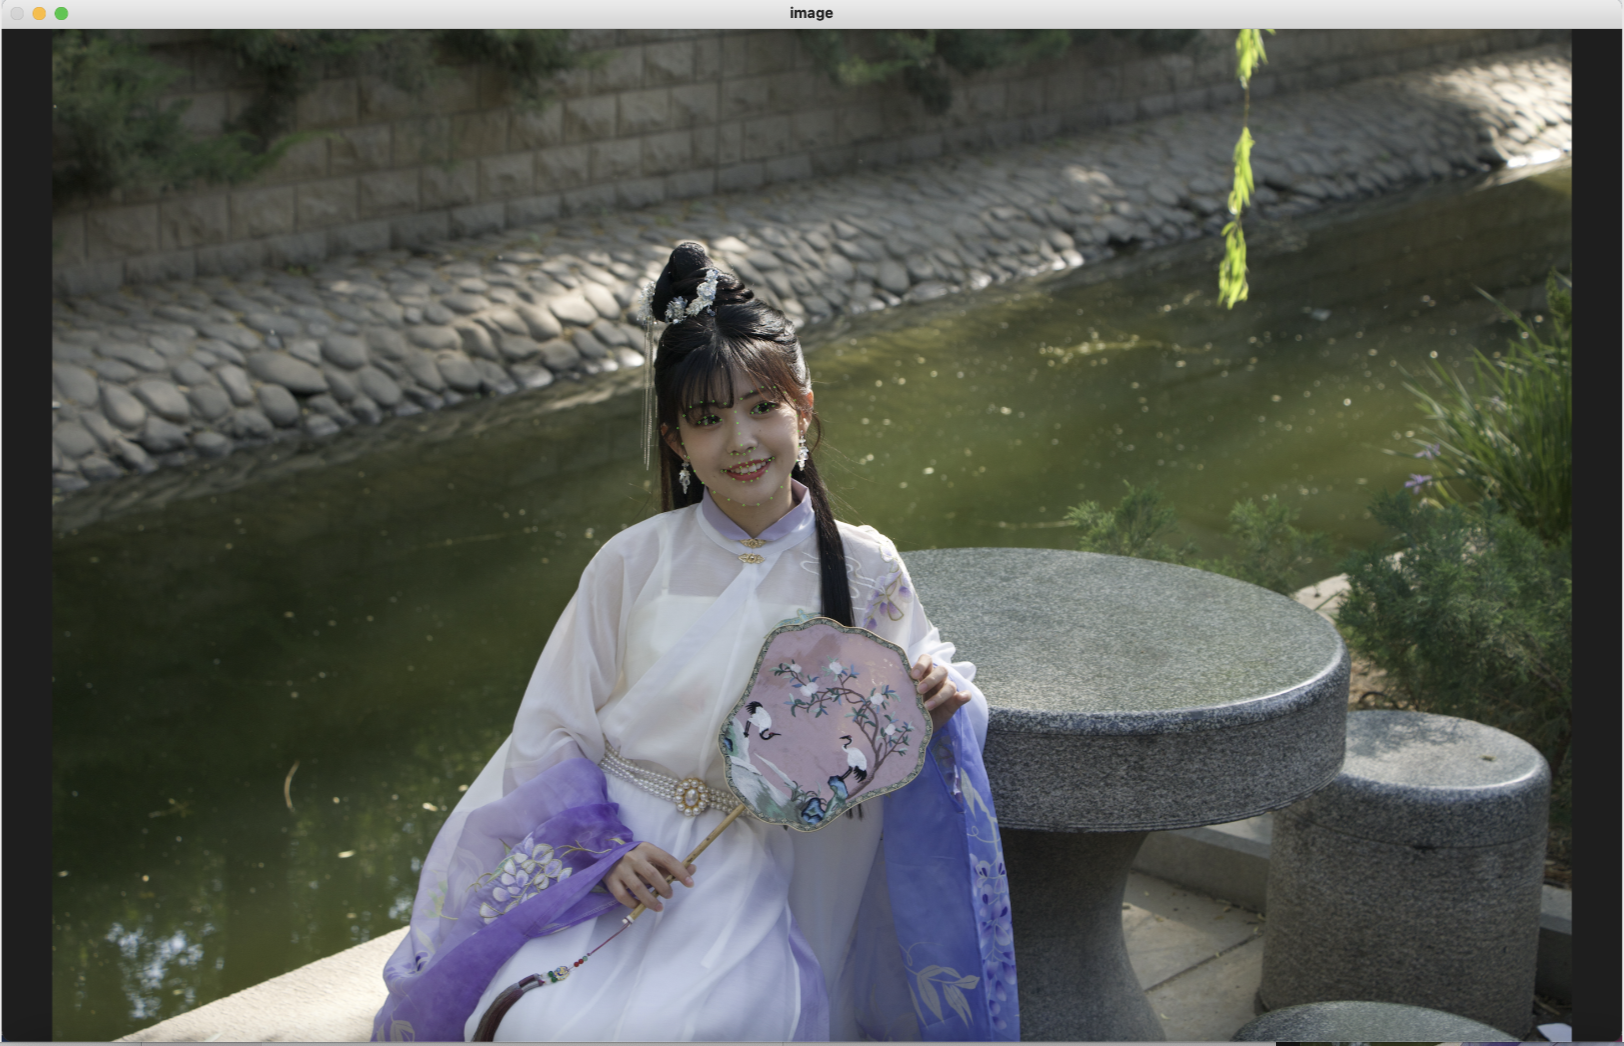
To be updated
face alignment
Extract the feature vector of human face
Face matching
reference material
cv2. Meaning of rectangle parameter
The meaning of the parameters of the detectmultiscale function
Detailed description of face recognition project completed by DLib