Slider assembly
It's a slider component that can slide. You know what I mean!
This is the original look:
Slider(value: 0, onChanged: (value) {}),
 This is the styled Slider:
class _SliderDemoState extends State<SliderDemo> {
// Set the callback value to zero, and each drag will change this value
  double _value = 0;

  @override
  Widget build(BuildContext context) {
    return Scaffold(
        appBar: AppBar(
          title: Text("Slider"),
        ),
        body: Container(
          child: Column(
            children: [
              // Cannot slide
              Slider(value: 0, onChanged: (value) {}),
              Slider(
                // When dragging, determine the position of the current dot
                value: _value,

                // Label, which needs to be used with divisions
                label: "${_value}",

                // Set the scale and divide it into four parts
                divisions: 4,

                // Set minimum value
                min: 0,

                // Set maximum value
                max: 100,

                // Sets the color that has been slid
                activeColor: Colors.teal,

                // Set the color that has not been slid to
                inactiveColor: Colors.redAccent,

                // Sets the color of the dot
                thumbColor: Colors.blueGrey,

                // Callback method to return the position of the current dot
                onChanged: (value) {
                  setState(() {
                    _value = value;
                  });
                },
              ),
            ],
          ),
        ));
  }
}
 His source code is as follows:
const Slider({
    Key? key,
    required this.value,
    required this.onChanged,
    this.onChangeStart,
    this.onChangeEnd,
    this.min = 0.0,
    this.max = 1.0,
    this.divisions,
    this.label,
    this.activeColor,
    this.inactiveColor,
    this.thumbColor,
    this.mouseCursor,
    this.semanticFormatterCallback,
    this.focusNode,
    this.autofocus = false,
  }) : _sliderType = _SliderType.material,
       assert(value != null),
       assert(min != null),
       assert(max != null),
       assert(min <= max),
       assert(value >= min && value <= max),
       assert(divisions == null || divisions > 0),
       super(key: key);
Switch switch assembly
Components that can be turned on and off.
Original appearance:
Switch(value: false, onChanged: (v){}),
 After changing his value with callback, the switching effect can be realized:
Text("The current switch is: ${_value == false ? "Off state" : "On state"}"),
Switch(
    // Sets whether the current switch is on / off
    value: _value,
    // Callback whether the current switch is clicked
    onChanged: (v) {
      setState(() {
        _value = v;
      });
    }),
 His source code is as follows:
const Switch.adaptive({
    Key? key,
    required this.value,
    required this.onChanged,
    this.activeColor,
    this.activeTrackColor,
    this.inactiveThumbColor,
    this.inactiveTrackColor,
    this.activeThumbImage,
    this.onActiveThumbImageError,
    this.inactiveThumbImage,
    this.onInactiveThumbImageError,
    this.materialTapTargetSize,
    this.thumbColor,
    this.trackColor,
    this.dragStartBehavior = DragStartBehavior.start,
    this.mouseCursor,
    this.focusColor,
    this.hoverColor,
    this.overlayColor,
    this.splashRadius,
    this.focusNode,
    this.autofocus = false,
  })  : assert(autofocus != null),
        assert(activeThumbImage != null || onActiveThumbImageError == null),
        assert(inactiveThumbImage != null || onInactiveThumbImageError == null),
        _switchType = _SwitchType.adaptive,
        super(key: key);
Another apple style switch
CupertinoSwitch(
    value: _value,
    onChanged: (v) {
      setState(() {
        _value = v;
      });
    })
The style is as follows:

SwitchListTile switch bar
You can set the switch bar of title and other information,
This can be set to more than one.
SwitchListTile(
     value: _value,
     title: Text("This is the title"),
     subtitle: Text("This is the subtitle"),
     onChanged: (v) {
       setState(() {
         _value = v;
       });
     }),
The style is as follows:
 Sets the title of the style
SwitchListTile(
    // Main title
    title: Text("This is the title"),
    // subtitle
    subtitle: Text("This is the subtitle"),
    // Status of the switch
    value: _value,
    // Title Color
    tileColor: Color(0xffededed),
    // Callback method
    onChanged: (v) {
      setState(() {
        _value = v;
      });
    })
The style is as follows:

The source code is as follows:
  const SwitchListTile({
    Key? key,
    required this.value,
    required this.onChanged,
    this.tileColor,
    this.activeColor,
    this.activeTrackColor,
    this.inactiveThumbColor,
    this.inactiveTrackColor,
    this.activeThumbImage,
    this.inactiveThumbImage,
    this.title,
    this.subtitle,
    this.isThreeLine = false,
    this.dense,
    this.contentPadding,
    this.secondary,
    this.selected = false,
    this.autofocus = false,
    this.controlAffinity = ListTileControlAffinity.platform,
    this.shape,
    this.selectedTileColor,
  }) : _switchListTileType = _SwitchListTileType.material,
       assert(value != null),
       assert(isThreeLine != null),
       assert(!isThreeLine || subtitle != null),
       assert(selected != null),
       assert(autofocus != null),
       super(key: key);
progress bar
It can be used to display the loading status of the network and the progress of file download. It is mainly used to display the progress.
Linear progress bar
The default style is as follows:
LinearProgressIndicator(),
The style is as follows:

You can set its style, but once its value is set, it cannot move. You can change the value with the help of a Timer to achieve the effect of moving.
LinearProgressIndicator(
    value: 0.8,
    color: Colors.blueGrey,
    backgroundColor: Colors.redAccent,
  )
The style is as follows:

The source code is as follows:
  const LinearProgressIndicator({
    Key? key,
    double? value,
    Color? backgroundColor,
    Color? color,
    Animation<Color?>? valueColor,
    this.minHeight,
    String? semanticsLabel,
    String? semanticsValue,
  }) : assert(minHeight == null || minHeight > 0),
       super(
         key: key,
         value: value,
         backgroundColor: backgroundColor,
         color: color,
         valueColor: valueColor,
         semanticsLabel: semanticsLabel,
         semanticsValue: semanticsValue,
       );
Circular progress indicator
Use the same as the linear progress indicator above.
The default style is as follows:
// Default circular progress indicator
CircularProgressIndicator(),

// Adaptive circular progress indicator
CircularProgressIndicator.adaptive(value: 0.5,)
The style is as follows:
 Refresh progress indicator
Use the same as the linear progress indicator above.
The default style is as follows:
RefreshProgressIndicator(),
 An apple progress indicator:
CupertinoActivityIndicator()

Image picture component
Components that can place pictures
Before that, if you are using static pictures, you need to use pubspec Yaml file, and you need to create a folder for pictures under the root directory of the project.
Like this:
 In pubspec Configure in yaml file:
// This is to add the picture directly under the whole folder
assets:
 - images/

// Add a single picture
assets:
 - images/1.png
 - images/2.png
Note: after adding, you need to click Pub get in the upper right corner of Android studio to add dependencies: Picture component
Use local picture resources, that is, use the asset method:
Image.asset("images/1.png")
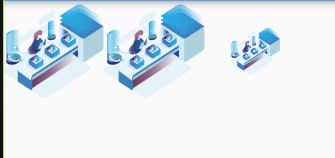
 You can set his style:
Wrap(
        children: [
          Container(
            alignment: Alignment.center,
            width: 100,
            height: 100,
            child: Image.asset("images/1.png"),
          ),
          Container(
            alignment: Alignment.center,
            width: 100,
            height: 100,
            child: Image.asset(
              "images/1.png",
              fit: BoxFit.cover,
            ),
          ),
          Container(
            alignment: Alignment.center,
            width: 100,
            height: 100,
            child: Image.asset(
              "images/1.png",
              // Set filling method
              fit: BoxFit.fitWidth,
              // Set width and height
              width: 50,
              height: 50,
              // fill style
              repeat: ImageRepeat.repeat,
            ),
          ),
        ],
      )
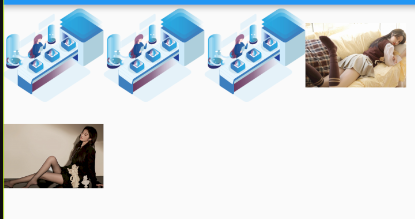
Use web pictures
The premise of using network pictures is to have a network, otherwise everything is nonsense,
The usage is the same as that of the static picture above.
Container(
  alignment: Alignment.center,
  width: 100,
  height: 100,
  child: Image.network(
    "https://pic.netbian.com/uploads/allimg/220131/012219-16435633391d32.jpg",
    // Set filling method
    fit: BoxFit.fitWidth,
    // Set width and height

    // fill style
    repeat: ImageRepeat.repeat,
  ),
),
Container(
	alignment: Alignment.center,
	width: 100,
	height: 100,
	child: Image.network(
	  "https://pic.netbian.com/uploads/allimg/220205/002942-1643992182534d.jpg",
	  // Fill mode setting
	  fit: BoxFit.fitWidth,
	  // Set width and height

	  // fill style
	  repeat: ImageRepeat.repeat,
	),
)
The style is as follows:
There are other ways to load pictures. I'll just cite these two loading methods!
The source code is as follows:
  const Image({
    Key? key,
    required this.image,
    this.frameBuilder,
    this.loadingBuilder,
    this.errorBuilder,
    this.semanticLabel,
    this.excludeFromSemantics = false,
    this.width,
    this.height,
    this.color,
    this.opacity,
    this.colorBlendMode,
    this.fit,
    this.alignment = Alignment.center,
    this.repeat = ImageRepeat.noRepeat,
    this.centerSlice,
    this.matchTextDirection = false,
    this.gaplessPlayback = false,
    this.isAntiAlias = false,
    this.filterQuality = FilterQuality.low,
  }) : assert(image != null),
       assert(alignment != null),
       assert(repeat != null),
       assert(filterQuality != null),
       assert(matchTextDirection != null),
       assert(isAntiAlias != null),
       super(key: key);
There's time to update... Bye, workers.
I still recommend you to see Lao Meng's Flutter:
http://laomengit.com/guide/introduction/mobile_system.html
The interpretation of more than 300 components is completely enough! I'm not advertising!!!!!