stay Access Guide: An article about Huawei Account Services We have described the advantages of Huawei Account Services, such as one-click authorization to log in to Huawei for sharing the whole scene, sharing all user resources of Huawei Account, account security, reliability, easy and fast access, and why it can help developers to increase the number of customers. Finally, the article provides the download QR code of Demo App for you to download and experience the login authorization process of Huawei Account. Demo is very simple, it integrates 3 SDK interfaces (totally 4) for Huawei Account Services. This article will help you get familiar with Huawei Account Services by instructing you to develop this Demo quickly.
If you haven't downloaded Demo yet, use your browser to scan for the following QR download experience:

(Note: Demo collects operational information for user count)
Demo Development Preparation
1. Install Android Studio version 3.5 and above;
2. Install JDK 1.8 or above;
3. Use SDK Platform 19 or above;
4. Use Gradle 4.6 or above;
5. Register as a developer in the Huawei Developers Alliance. If you have already registered, please skip this step;
6. Download demo source code on github locally;
Demo source address: https://github.com/HMS-Core/huawei-account-demo/tree/quickstart
Run Environment Configuration (about 2 minutes)
1. Open demo project using Android Studio;
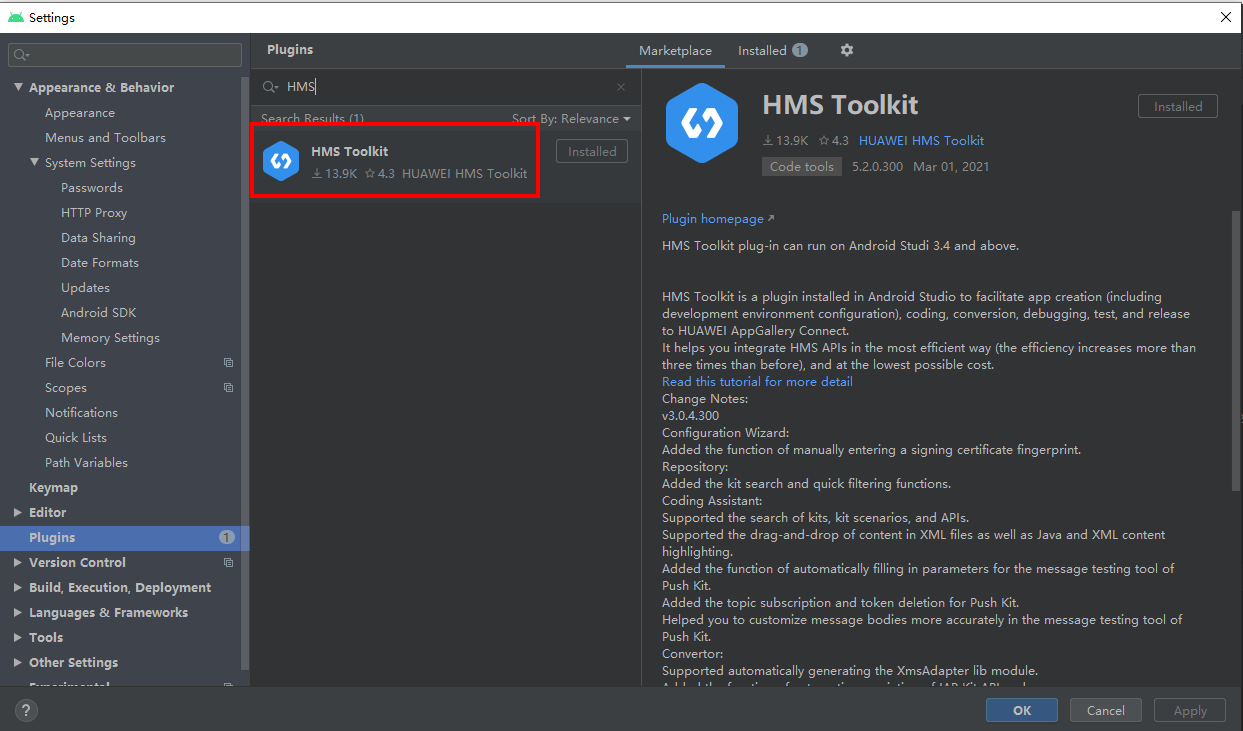
2. Download in the Android Plugin Market HMS Toolkit Plug-ins and install, version 5.2.0.300 or above;
How to install the plug-in can also be referred to: How to install the HMS Toolkit
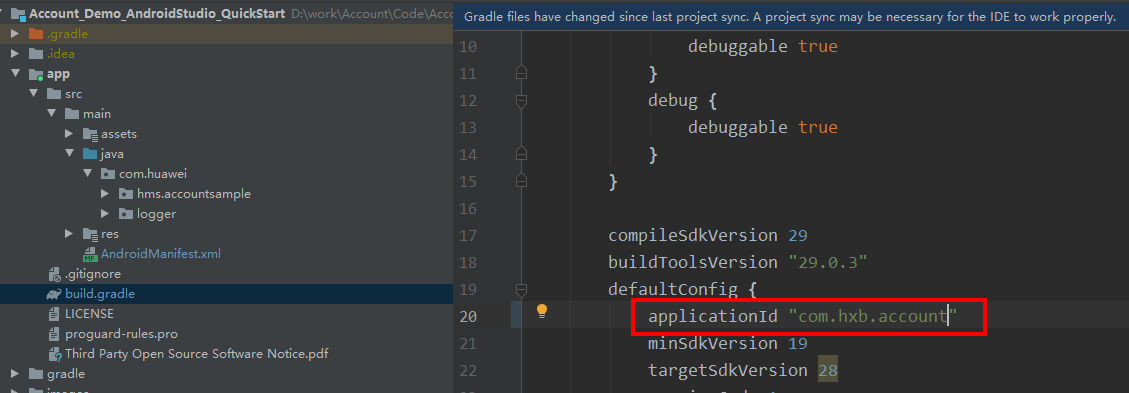
3. Create your own package name in the project, such as com.hxb.account, put demo package com.huawei.hms.accountsample old code moved to new package; Modify the Package Name and Application ID involved in the project to create a new package name for yourself. (You can't directly use the package name in Demo, which has already been registered in the Huawei app market by other users.)
Create a new package name of your own (be careful to move the corresponding activities and other classes under the new package you define) to facilitate the search for related files during compilation:
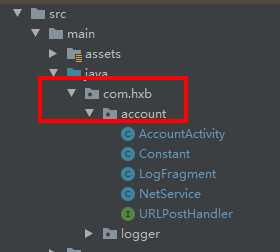
Modify AndroidManifest. The package in the XML file is com.hxb.account

Modify build. The applicationId in gradle is com.hxb.account.
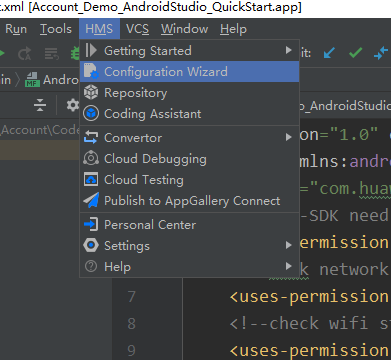
4. Open the Configuration Wizard under the HMS menu to check the environment configuration. If you do not sign in to the Huawei Developer Account, the Toolkit will guide you to sign in first, then click Configuration Wizard after you sign in.
Pop up the following page, which is red × Part of the explanation is that the Toolkit has detected that the Huawei Developer Consortium does not have an application with a corresponding package name under its corresponding development account number.
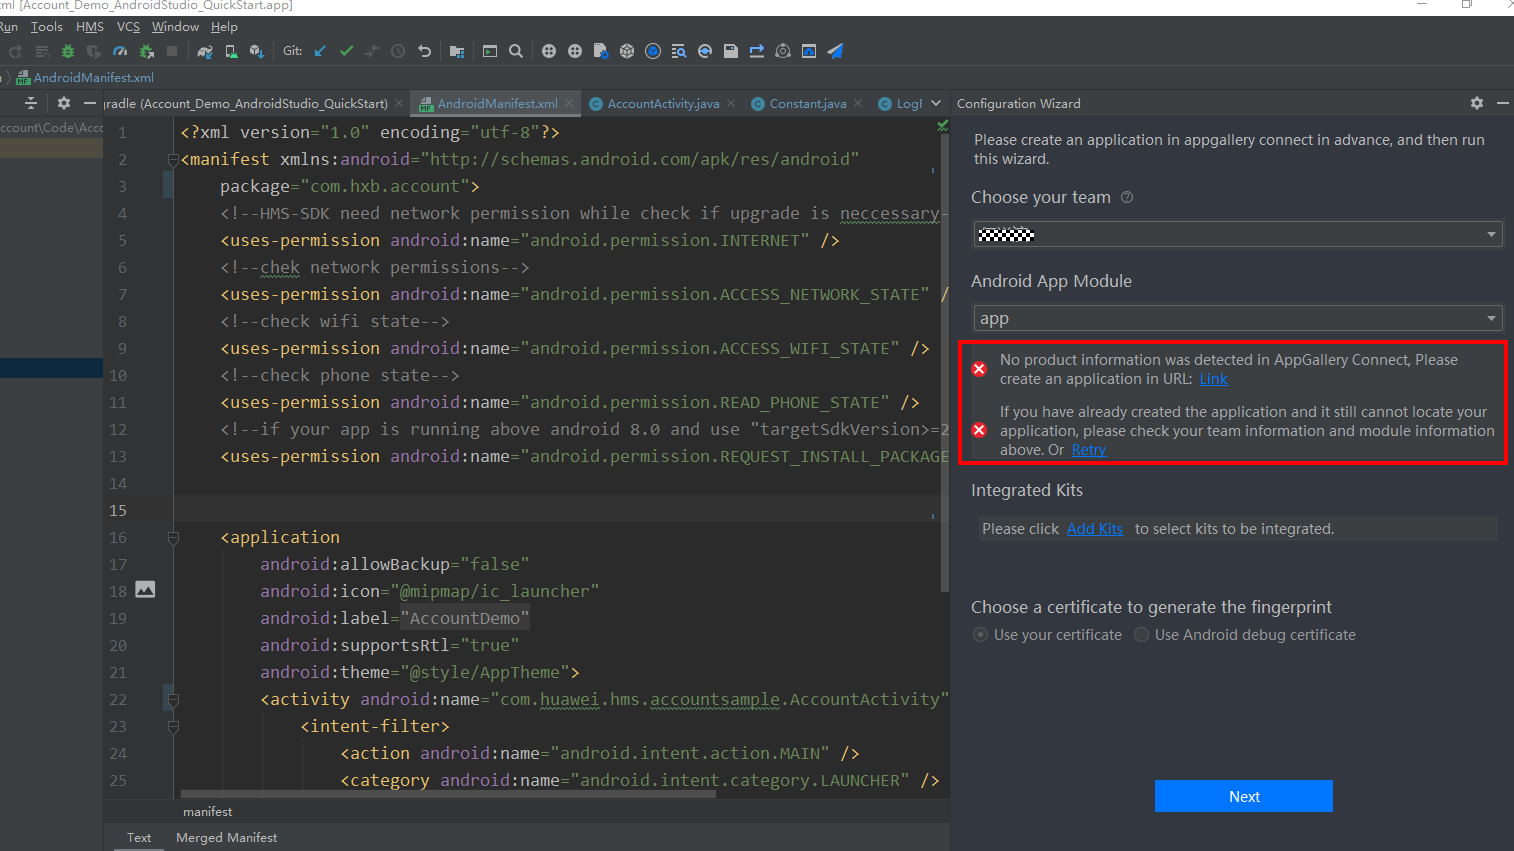
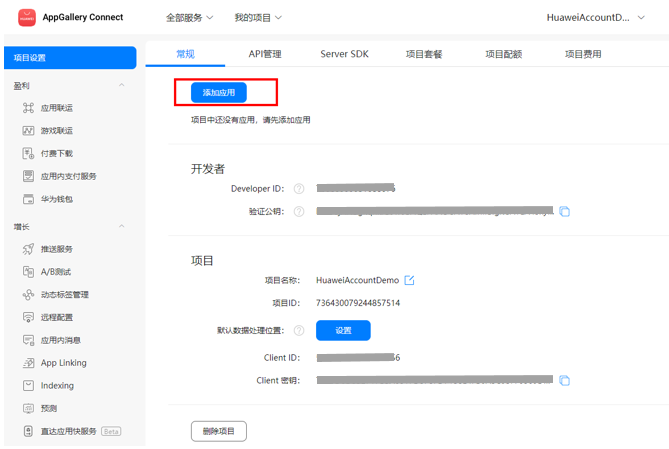
Click Link to jump directly to the Developer Consortium and create related apps. This part needs to be done manually as follows:
A. Click App Publish
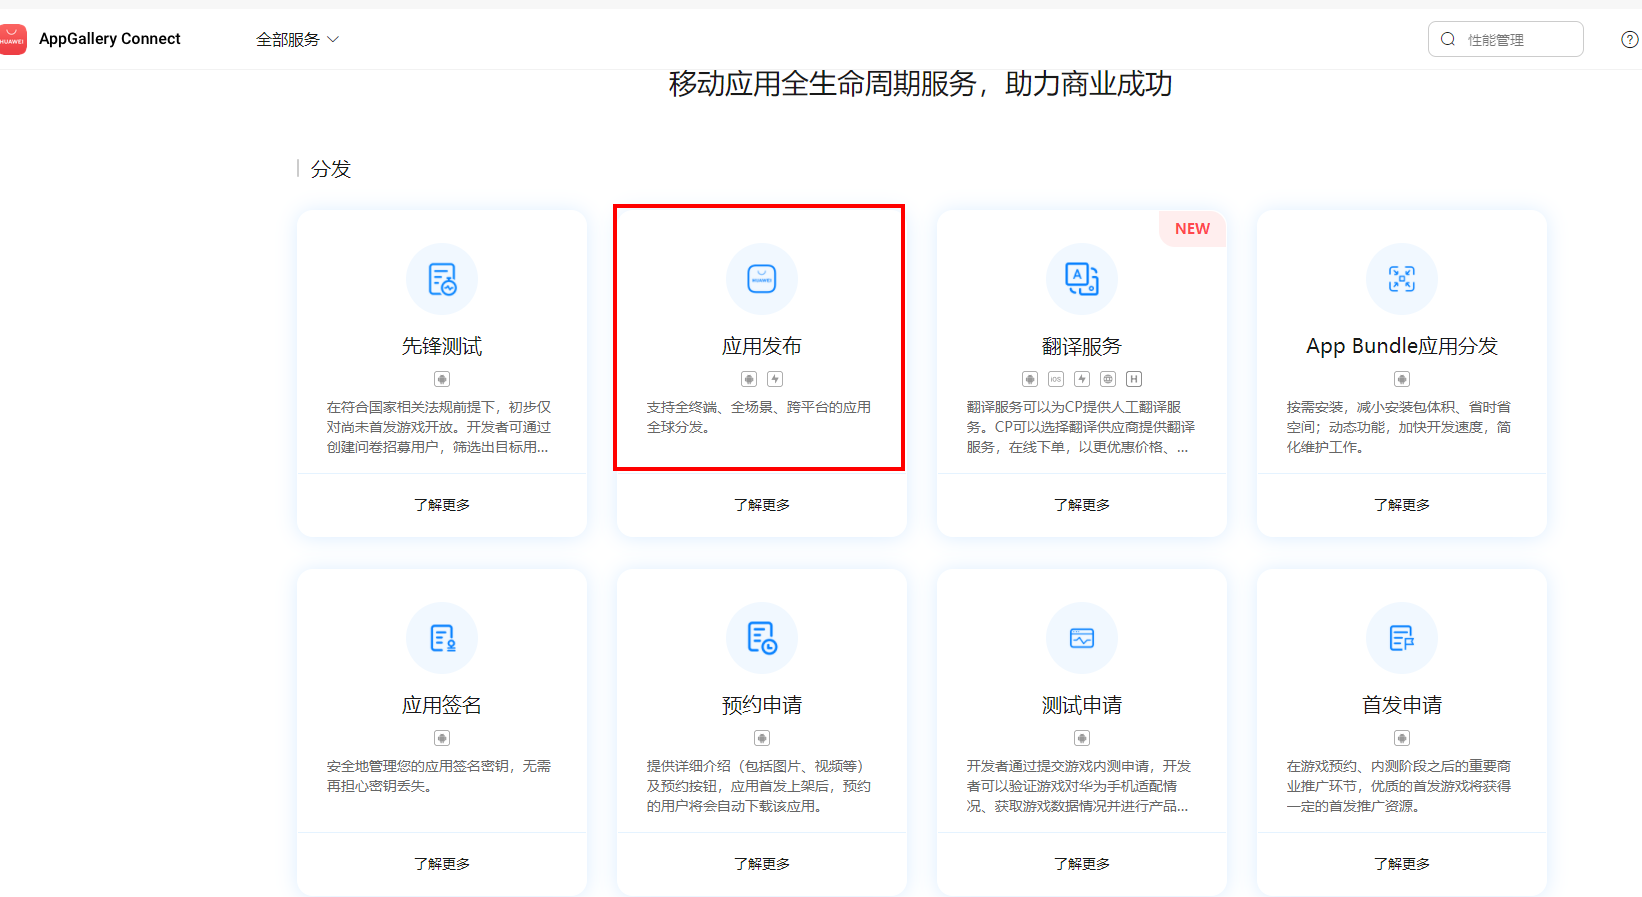
B. Click to add items
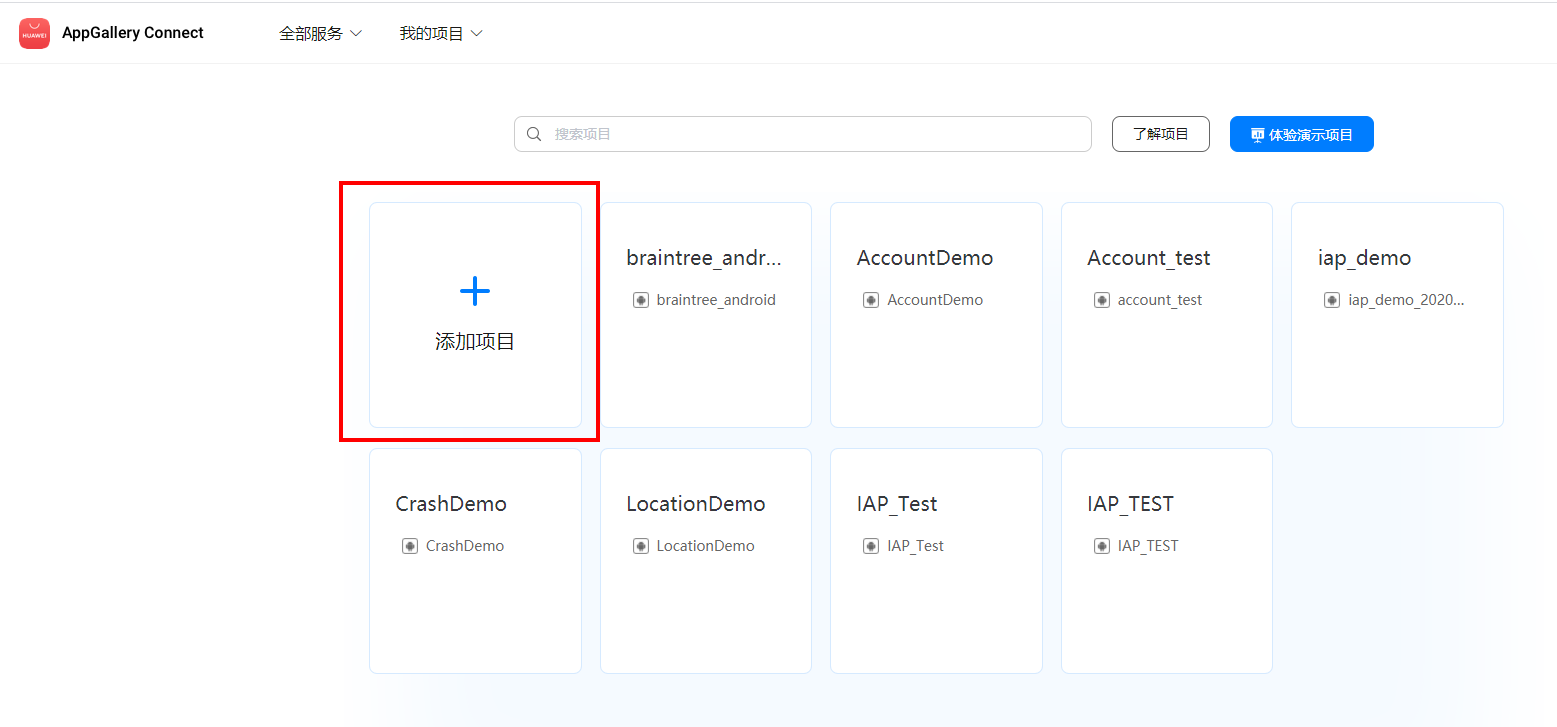
C. Create Project
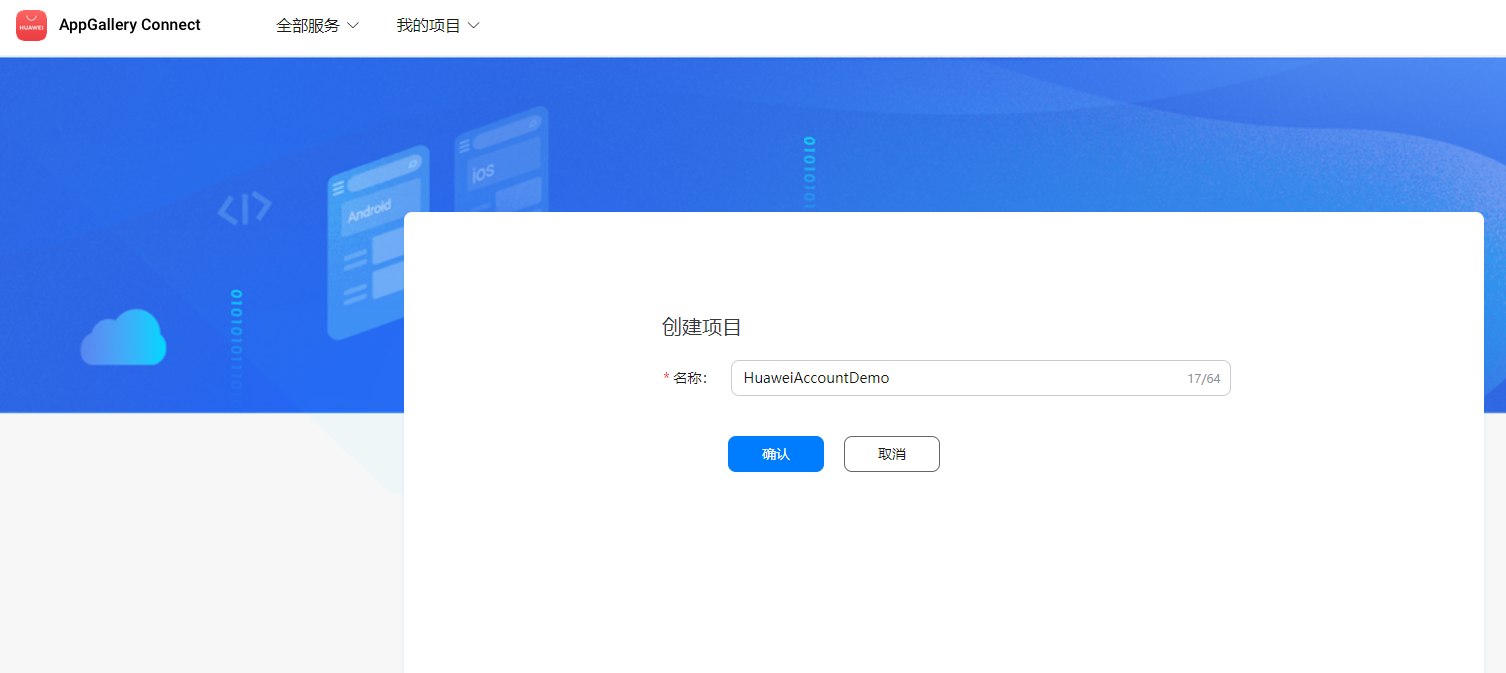
D. Click to add an application
E, Add Items
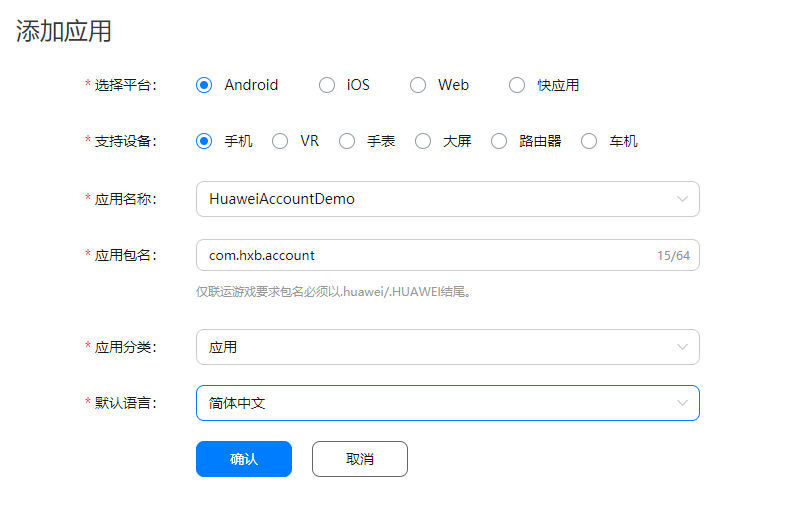
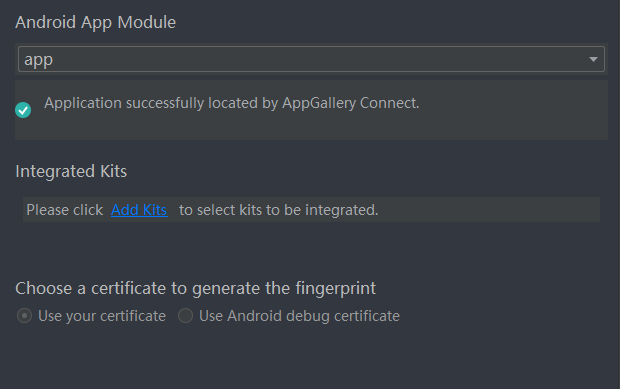
After the application is created, click Retry in the Configuration Wizard panel to re-check the configuration and check for success:
7. Add Account kit
Click Add Kits in the Configuration Wizard panel and select Account kit to add
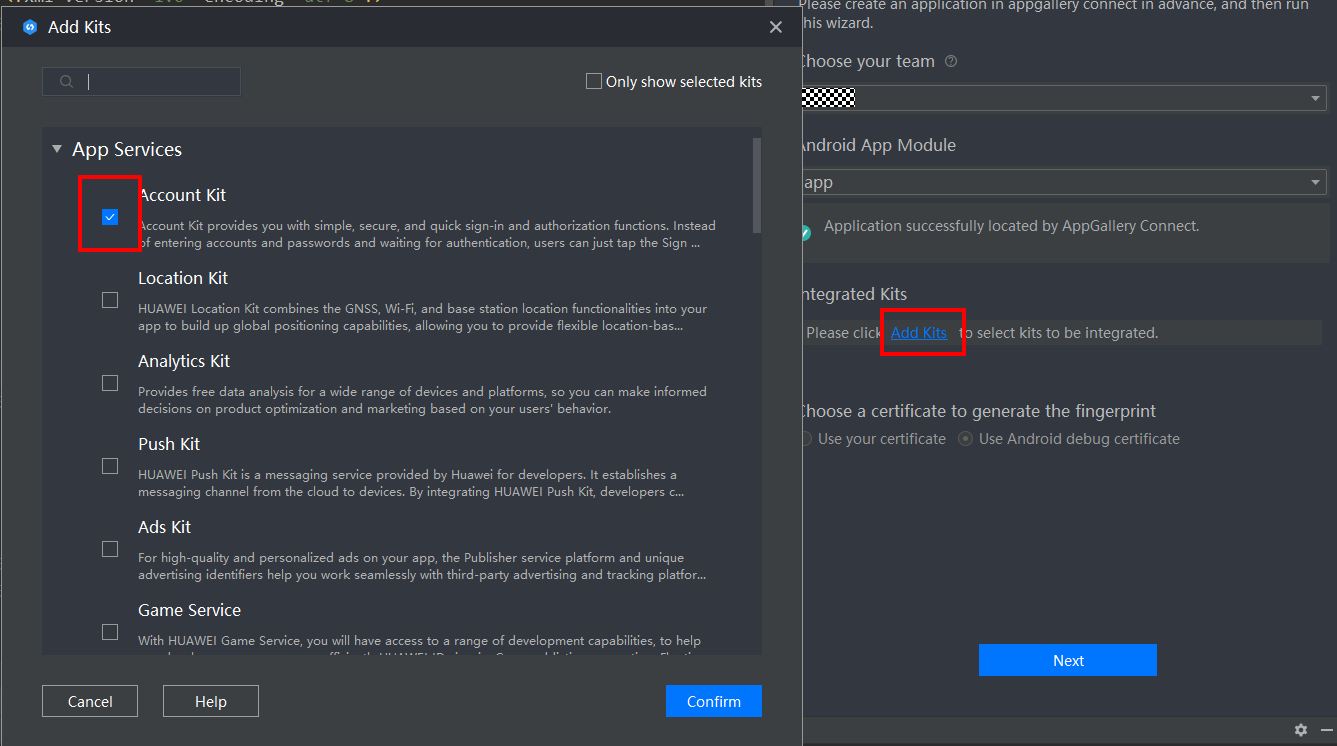
Add results:
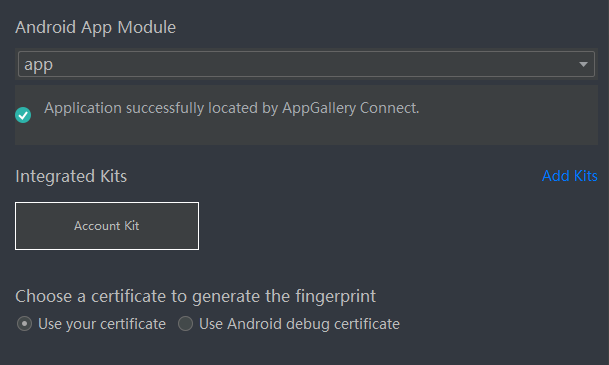
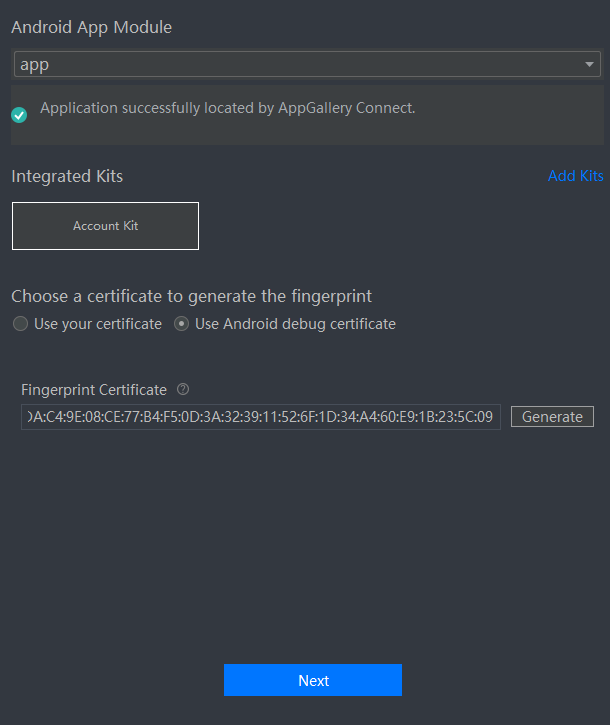
8. Select a certificate, currently select the Android debug certificate option, click Generate to generate a fingerprint certificate, as shown below
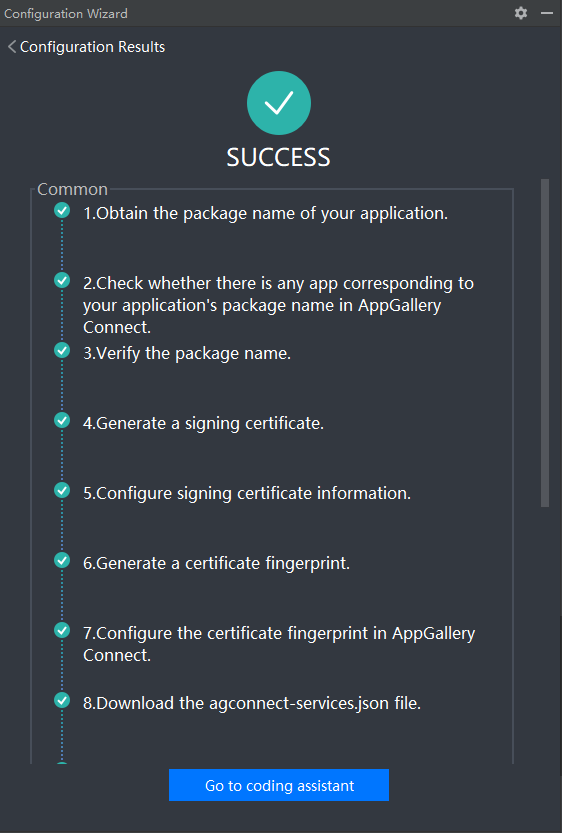
9. Click Next to automatically configure other configurations, including opening the Account Kit service switch on the Huawei Developer Consortium, configuring the fingerprint certificate of the application, and downloading agconnect-services.json file to project directory, confusing configuration, in build. The gradle file inserts the dependencies, apk signatures, etc. needed to access the Account SDK. Success will be displayed after success. If problems are detected halfway, they can be handled according to the guidelines.
Packaging test using Toolkit remote real-time machine
When the environment is configured, Call Toolkit's Cloud Debugging for packaging testing
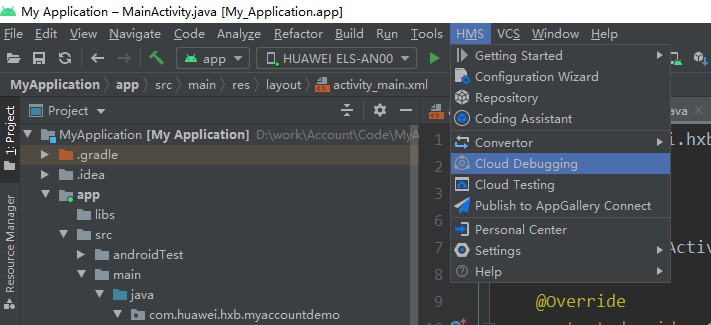
Select the model you want to use:
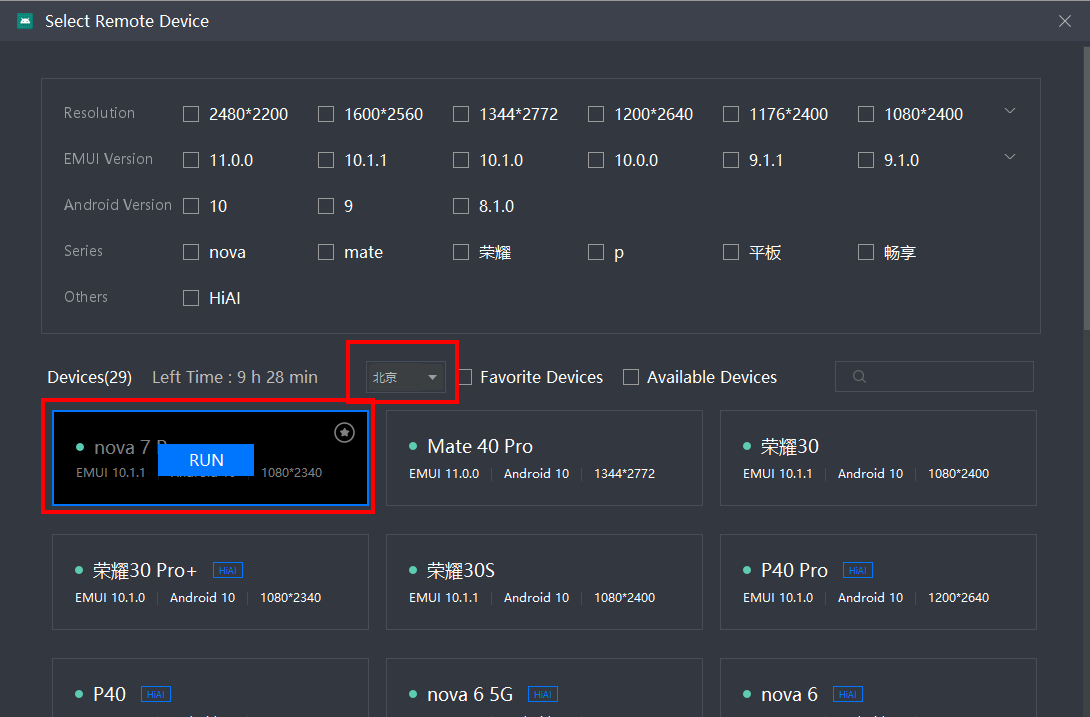
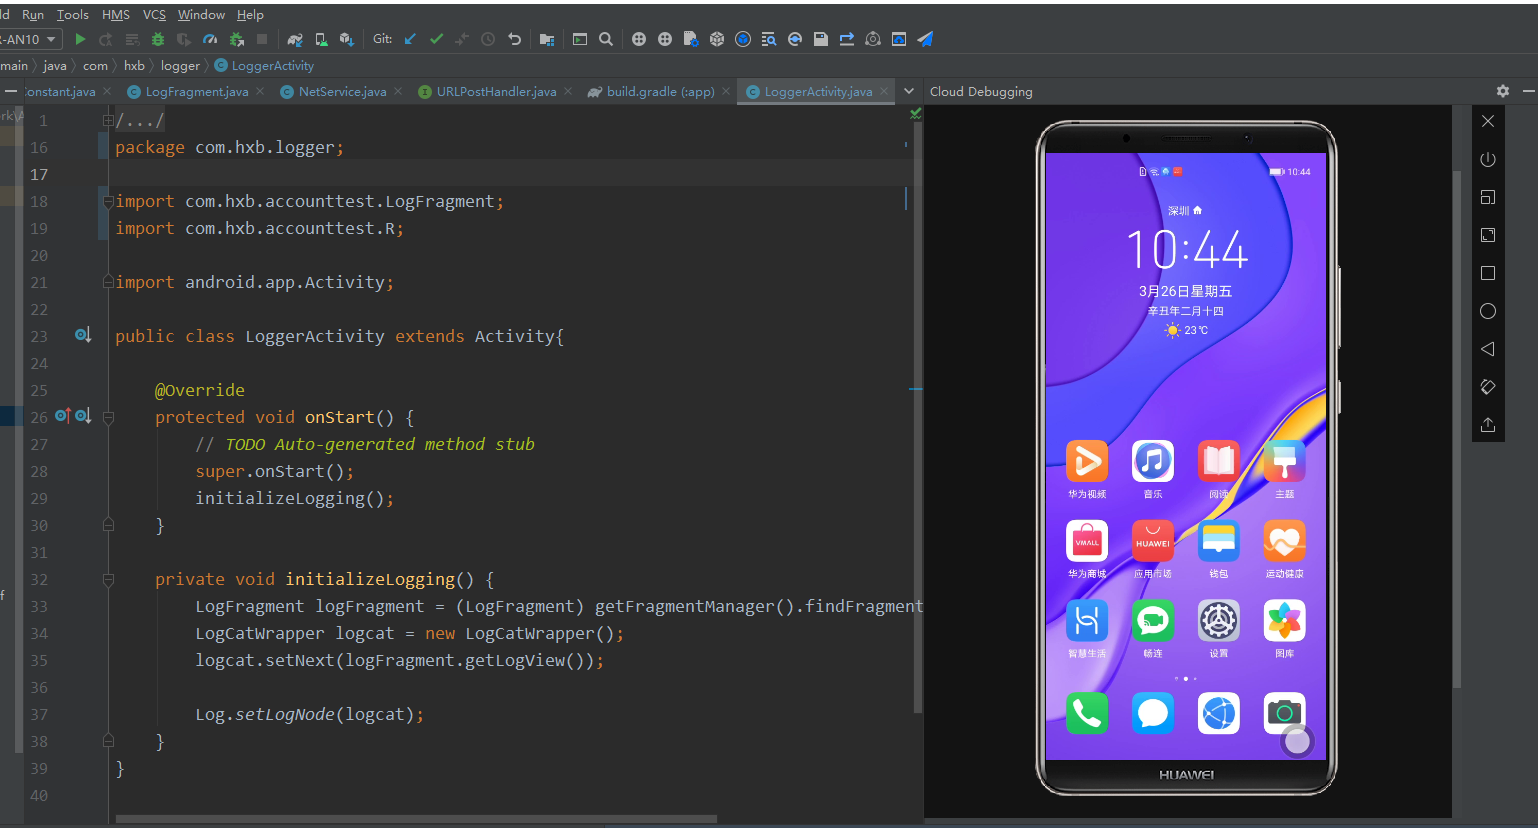
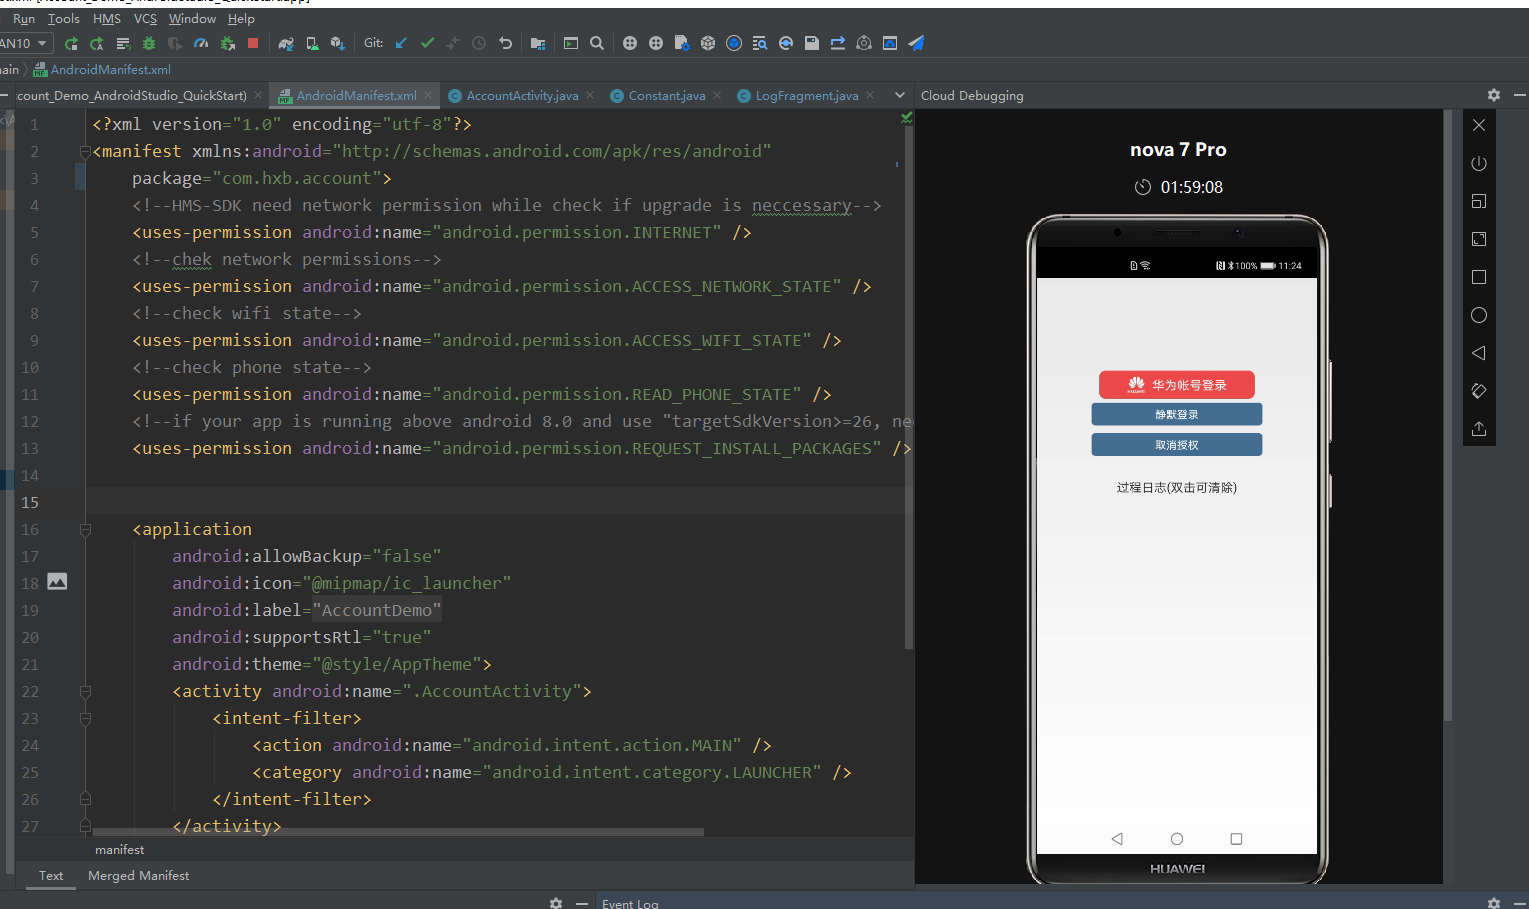
Select the device and click Run to test the App:
Demo Core Code Details
1. Interface Design
The interactive interface of account number mainly involves login, silent login, exit account number and deauthorization. Demo shows the use of three interfaces: login, silent login and deauthorization.
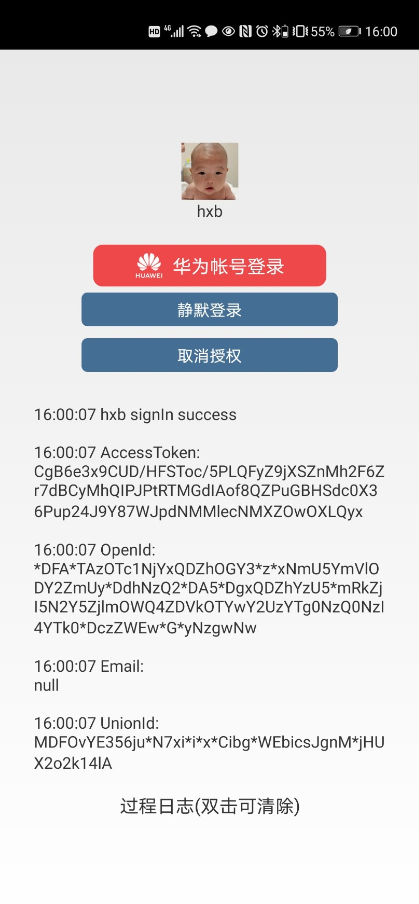
The "Huawei Account Login" icon uses standard encapsulated controls. Please follow the instructions when using it. Huawei Account Logon Icon Usage Specification Use the Huawei icon:
<com.huawei.hms.support.hwid.ui.HuaweiIdAuthButton
    android:layout_width="wrap_content"
    android:layout_height="wrap_content" />
1. Core code of account authorization function
(1) Account Logon
Scenario description: Account login is based on OAuth 2.0 protocol standard and OpenID Connect protocol. It supports two login modes: Authorization Code and ID Token. Authorization Code mode only applies to applications with its own server. ID Token mode applies to both single-machine applications and applications with its own server. You can choose one of these modes to implement according to the actual situation.
private void signIn() {
    mAuthParam = new AccountAuthParamsHelper(AccountAuthParams.DEFAULT_AUTH_REQUEST_PARAM)
          .setIdToken()
          .setAccessToken()
          .createParams();
    mAuthManager = AccountAuthManager.getService(AccountActivity.this, mAuthParam);
    startActivityForResult(mAuthManager.getSignInIntent(), Constant.REQUEST_SIGN_IN_LOGIN);
 }
The setIdToken() in the code indicates authorization using ID-Token and setAuthorizationCode(), the difference between which will be described in more detail in a subsequent article, getSignInIntent() is the account login authorization interface.
Login results are processed after login authorization completes:
@Override
 protected void onActivityResult(int requestCode, int resultCode, Intent data) {
    super.onActivityResult(requestCode, resultCode, data);
    if (requestCode == Constant.REQUEST_SIGN_IN_LOGIN) {
       //login success
       //get user message by parseAuthResultFromIntent
       Task<AuthAccount> authAccountTask = AccountAuthManager.parseAuthResultFromIntent(data);
       if (authAccountTask.isSuccessful()) {
          AuthAccount authAccount = authAccountTask.getResult();
          Log.i(TAG, authAccount.getDisplayName() + " signIn success ");
          Log.i(TAG, "AccessToken:\n" + authAccount.getAccessToken());
          Log.i(TAG, "OpenId:\n" + authAccount.getOpenId());
          Log.i(TAG, "Email:\n" + authAccount.getEmail());
          Log.i(TAG, "UnionId:\n" + authAccount.getUnionId());
//download avatar use AsyncTask
NetService = new NetService(new URLPostHandler() {
@Override
public void PostHandler(Bitmap bitmap) {
imageView.setImageBitmap(bitmap);
textView.setText(authAccount.getDisplayName());
}
});
netService.execute(authAccount.getAvatarUriString());
} else {
Log.i(TAG, "signIn failed: " + ((ApiException) authAccountTask.getException()).getStatusCode());
}
}
}(2) Log on silently
Scenario description: After a user first logs in to the application using an account number, no duplicate authorization is required when they log in again
private void silentSignIn() {
    Task<AuthAccount> task = mAuthManager.silentSignIn();
    task.addOnSuccessListener(new OnSuccessListener<AuthAccount>() {
       @Override
       public void onSuccess(AuthAccount authAccount) {
          Log.i(TAG, "silentSignIn success");
       }
    });
    task.addOnFailureListener(new OnFailureListener() {
       @Override
       public void onFailure(Exception e) {
          //if Failed use getSignInIntent
          if (e instanceof ApiException) {
             ApiException apiException = (ApiException) e;
             signIn();
          }
       }
    });
 }
silentSignIn() is called in the code for silent account login.
(3) Revoke authorization
Scenario description: To enhance the privacy security of an application, an application can provide an entry for users to revoke their authorization of the application.
private void cancelAuthorization() {
    Task<Void> task = mAuthManager.cancelAuthorization();
    task.addOnSuccessListener(new OnSuccessListener<Void>() {
       @Override
       public void onSuccess(Void aVoid) {
imageView.setImageDrawable(null);
textView.setText("");
Log.i(TAG, "cancelAuthorization success");
}
});
task.addOnFailureListener(new OnFailureListener() {
@Override
public void onFailure(Exception e) {
Log.i(TAG, "cancelAuthorization failure: " + e.getClass().getSimpleName());
}
});
}cancelAuthorization() is called in the code to cancel the application authorization.
Links related to Huawei Account Services:
>>Huawei Account Service Detailed Guidance Document
>>Video Explanation (Refer to HMS 4.0 video explanation)
Original Link: https://developer.huawei.com/consumer/cn/forum/topic/0201524776948490132?fid=18
Original author: pepper