Answer card recognition project based on Opencv image recognition
In the course of watching Mr. Tang Yudi's image processing, there is a small item of answer card recognition. Here, I will make a simple summary combined with my own understanding.
1. Project analysis
First, when getting the project, analyze what the purpose of the project is, what kind of goal to achieve, what matters needing attention, and conceive the general process of the experiment.
 Figure 1 Answer sheet test image
For example, in the item identified by the answer sheet, for the test picture, as shown in Figure 1, the first functions that should be realized are:
- Be able to capture each filling option in the answer sheet.
- Compare the obtained filling options with the correct options to calculate the correct answer rate.
2. Project experiment
In the morphological operation of the test image, it is first converted to gray image, and then denoised by Gaussian filter.
gray = cv2.cvtColor(image, cv2.COLOR_BGR2GRAY)
blurred = cv2.GaussianBlur(gray, (5, 5), 0)
cv_show('blurred',blurred)
After obtaining the Gaussian filtering results, edge detection and contour detection are carried out to extract the boundaries of all contents of the answer sheet.
edged = cv2.Canny(blurred, 75, 200)
cv_show('edged',edged)

# Contour detection
cnts, hierarchy = cv2.findContours(edged.copy(), cv2.RETR_EXTERNAL,
	cv2.CHAIN_APPROX_SIMPLE)
cv2.drawContours(contours_img,cnts,-1,(0,0,255),3)
cv_show('contours_img',contours_img)
docCnt = None
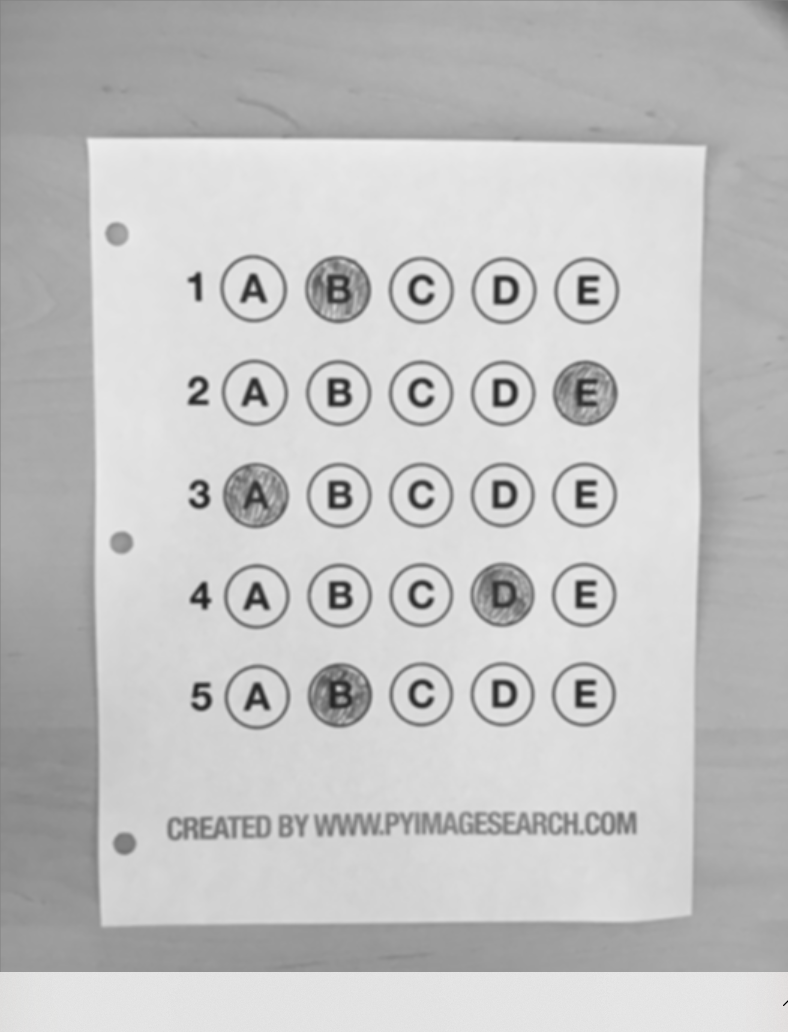 Figure 2 Gaussian filter graph Figure 2 Gaussian filter graph
|
 Figure 3 Edge detection diagram Figure 3 Edge detection diagram
|
# Contour detection
cnts, hierarchy = cv2.findContours(edged.copy(), cv2.RETR_EXTERNAL,
	cv2.CHAIN_APPROX_SIMPLE)
cv2.drawContours(contours_img,cnts,-1,(0,0,255),3)
cv_show('contours_img',contours_img)
def four_point_transform(image, pts):
	# Get input coordinate points
	rect = order_points(pts)
	(tl, tr, br, bl) = rect

	# Calculate the entered w and h values
	widthA = np.sqrt(((br[0] - bl[0]) ** 2) + ((br[1] - bl[1]) ** 2))
	widthB = np.sqrt(((tr[0] - tl[0]) ** 2) + ((tr[1] - tl[1]) ** 2))
	maxWidth = max(int(widthA), int(widthB))

	heightA = np.sqrt(((tr[0] - br[0]) ** 2) + ((tr[1] - br[1]) ** 2))
	heightB = np.sqrt(((tl[0] - bl[0]) ** 2) + ((tl[1] - bl[1]) ** 2))
	maxHeight = max(int(heightA), int(heightB))

	# Corresponding coordinate position after transformation
	dst = np.array([
		[0, 0],
		[maxWidth - 1, 0],
		[maxWidth - 1, maxHeight - 1],
		[0, maxHeight - 1]], dtype = "float32")

	# Calculate transformation matrix
	M = cv2.getPerspectiveTransform(rect, dst)
	warped = cv2.warpPerspective(image, M, (maxWidth, maxHeight))

	# Returns the transformed result
	return warped
# Perform perspective transformation

warped = four_point_transform(gray, docCnt.reshape(4, 2))
cv_show('warped',warped)
After the perspective transformation, the binary conversion is required. In order to find the ROI circle contour, the quadratic contour detection is used to perform the traversal cycle and if judgment to find all the circle contours that meet the screening conditions. The reason why Hough transform is not used here is that in the process of filling in the answer sheet, it is inevitable that the filling will exceed the circle area, and the straight-line detection method using Hough transform will affect the accuracy of the experimental results.
# Find the outline of each circle
cnts, hierarchy = cv2.findContours(thresh.copy(), cv2.RETR_EXTERNAL,
	cv2.CHAIN_APPROX_SIMPLE)
cv2.drawContours(thresh_Contours,cnts,-1,(0,0,255),3)
cv_show('thresh_Contours',thresh_Contours)
questionCnts = []
# ergodic
for c in cnts:
	# Calculate scale and size
	(x, y, w, h) = cv2.boundingRect(c)
	ar = w / float(h)

	# Specify the standard according to the actual situation
	if w >= 20 and h >= 20 and ar >= 0.9 and ar <= 1.1:
		questionCnts.append(c)

# Sort from top to bottom
questionCnts = sort_contours(questionCnts,
	method="top-to-bottom")[0]
correct = 0
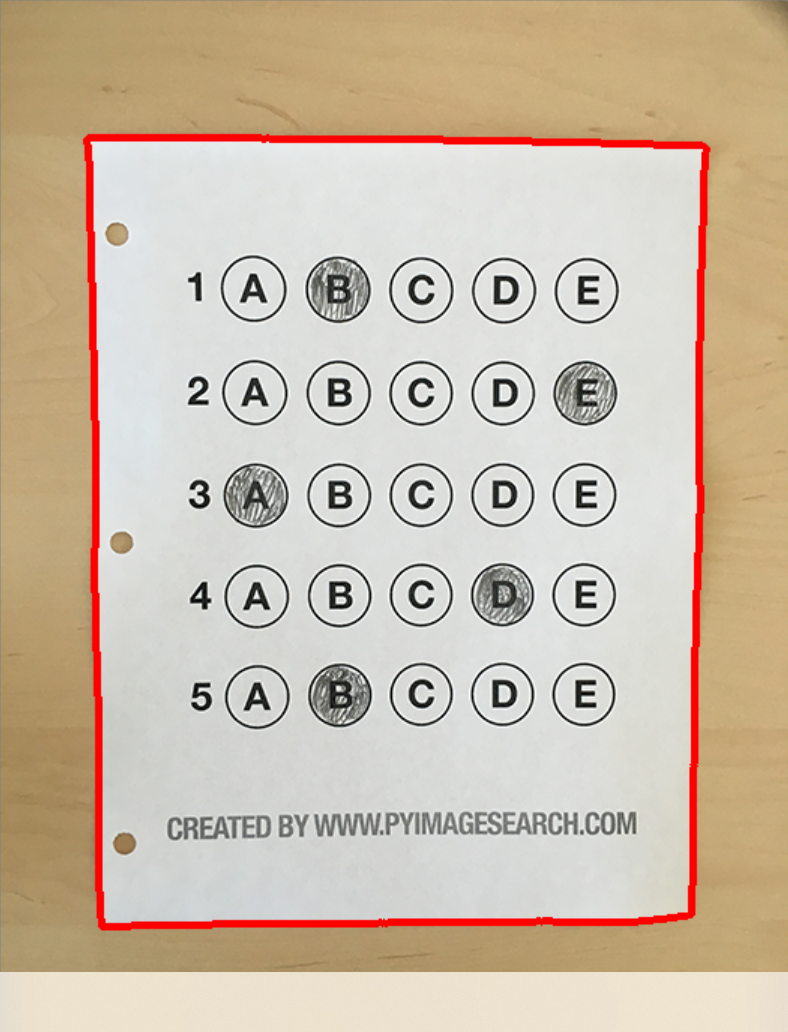 Figure 4 Contour detection diagram Figure 4 Contour detection diagram
|
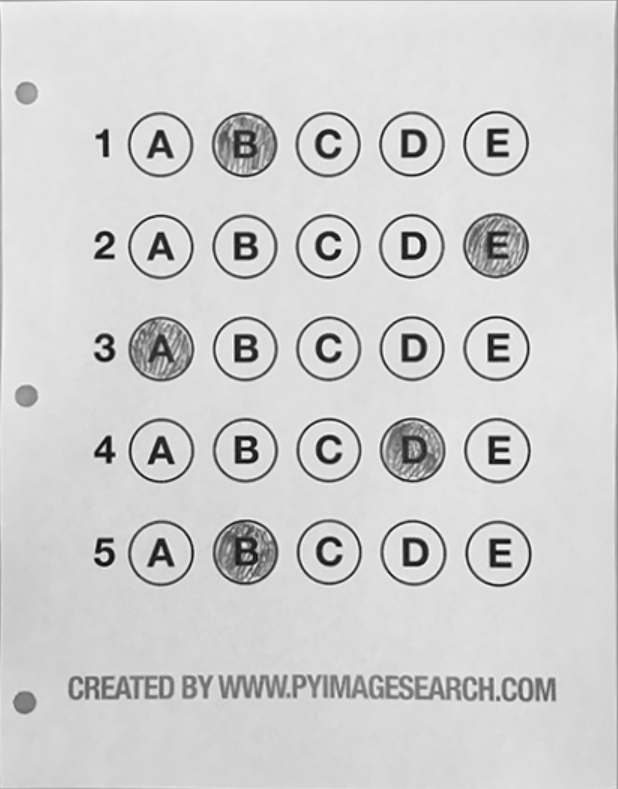 Figure 5 Perspective transformation Figure 5 Perspective transformation
|
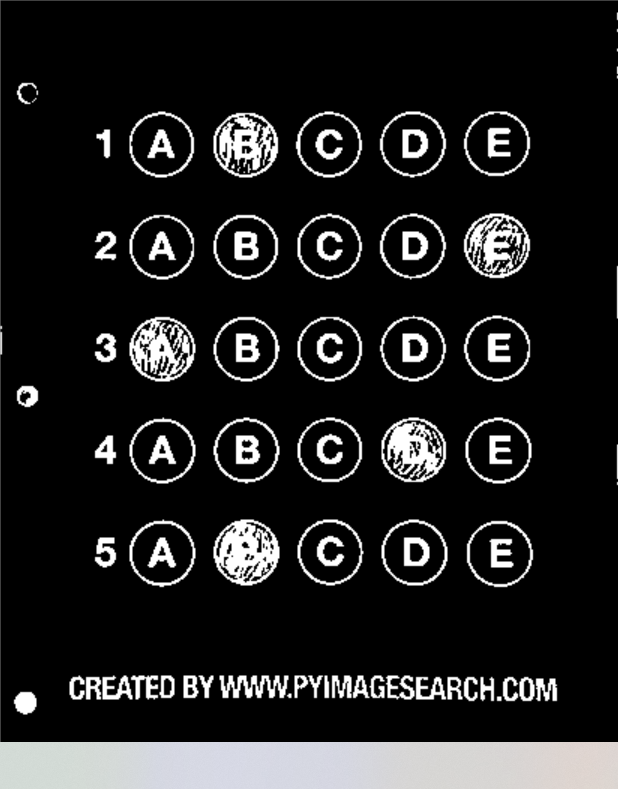 Figure 6 Binary conversion diagram Figure 6 Binary conversion diagram
|
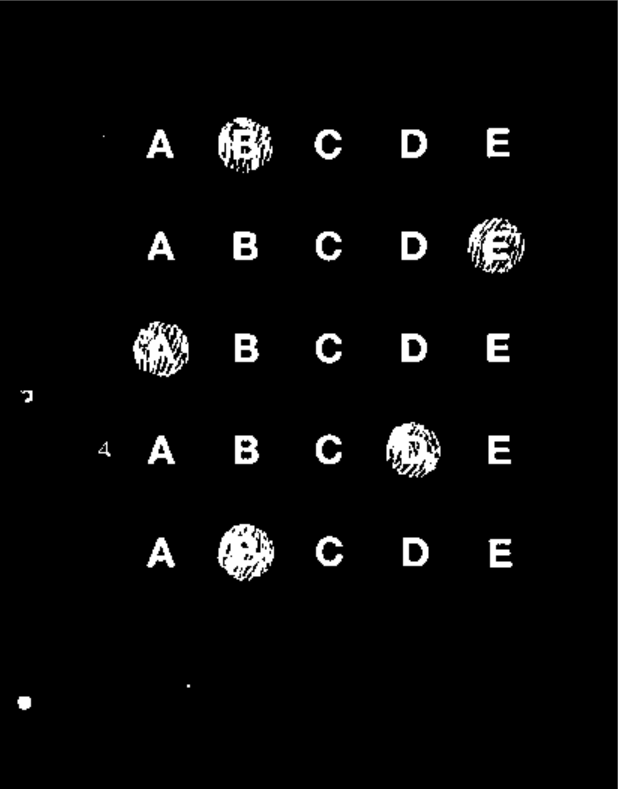 Figure 7 Contour screening map Figure 7 Contour screening map
|
After each circle contour is obtained, it needs to be sorted from left to right and from top to bottom. Taking Figure 7 as an example, the answer sheet is distributed into five rows and five columns. In each column, the abscissa x value of option A in each row is similar, while the ordinate y of A, B, C, D and E in each row is similar. Therefore, this feature is used to sort the obtained circle contour, The code is as follows:
def sort_contours(cnts, method="left-to-right"):
    reverse = False
    i = 0
    if method == "right-to-left" or method == "bottom-to-top":
        reverse = True
    if method == "top-to-bottom" or method == "bottom-to-top":
        i = 1
    boundingBoxes = [cv2.boundingRect(c) for c in cnts]
    (cnts, boundingBoxes) = zip(*sorted(zip(cnts, boundingBoxes),
                                        key=lambda b: b[1][i], reverse=reverse))
    return cnts, boundingBoxes
After each specific contour is obtained, it is to judge whether the answer filled in for each question is the correct answer. The method used is to traverse each specific circle contour through double-layer loop, and calculate the number of non zeros through mask image to judge whether the answer is correct.
# Each row has 5 options
for (q, i) in enumerate(np.arange(0, len(questionCnts), 5)):
	# sort
	cnts = sort_contours(questionCnts[i:i + 5])[0]     #From left to right, keep the order: A B C D E
	bubbled = None

	# Traverse each result
	for (j, c) in enumerate(cnts):
		# Use the mask to judge the result
		mask = np.zeros(thresh.shape, dtype="uint8")
		cv2.drawContours(mask, [c], -1, 255, -1) #-1 indicates fill
		cv_show('mask',mask)
		# Choose this answer by calculating the number of non zeros
		mask = cv2.bitwise_and(thresh, thresh, mask=mask)
		total = cv2.countNonZero(mask)

		# Judging by threshold
		if bubbled is None or total > bubbled[0]:
			bubbled = (total, j)

	# Compare the correct answers
	color = (0, 0, 255)
	k = ANSWER_KEY[q]

	# Correct judgment
	if k == bubbled[1]:
		color = (0, 255, 0)
		correct += 1
	# mapping
	cv2.drawContours(warped, [cnts[k]], -1, color, 3)
 Figure 8 Circle contour traversal graph
3. Project results
After the experiment is completed, the experimental results are output
score = (correct / 5.0) * 100
print("[INFO] score: {:.2f}%".format(score))
cv2.putText(warped, "{:.2f}%".format(score), (10, 30),
	cv2.FONT_HERSHEY_SIMPLEX, 0.9, (0, 0, 255), 2)
cv2.imshow("Exam", warped)
cv2.waitKey(0)
Connected to pydev debugger (build 201.6668.115)
[INFO] score: 100.00%

Process finished with exit code 0
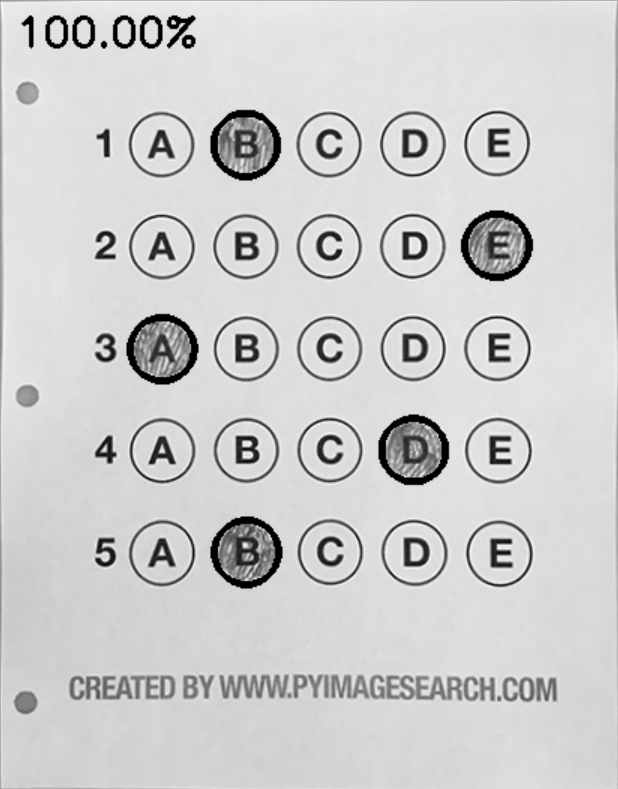 Figure 9 Answer sheet recognition result diagram
summary
In dealing with the small items identified in the answer sheet, I think the key points are as follows:
- For the morphological operation of image, each step of processing should be considered in advance and the most appropriate processing method should be selected, such as quadratic contour detection without Hough transform.
- Use the mask image to compare whether the answer is correct or not, and make a choice by judging the number of non-zero pixel values.
- Skillfully use the double-layer for loop and if statement to traverse all the circle contours, and compare the answers after sorting.