edition:
- CENTOS7.2
- CDH5.10
- Kudu1.2
2.1 general
- This article centos7 2. The process of operating system deploying CDH Enterprise Edition. The installation of Cloudera enterprise data center is mainly divided into four steps:
- Cluster server configuration, including installing operating system, closing firewall, synchronizing server clock, etc;
- External database installation
- Install Cloudera manager;
- Install CDH cluster;
- Cluster integrity check, including whether HDFS file system, MapReduce, Hive, etc. can operate normally. This document will focus on the installation of Cloudera manager and CDH, based on the following assumptions:
- Operating system version: centos7 two
- MariaDB database version is 10.2.1
- CM version: CDH 5.10.0
- CDH version: CDH 5.10.0
- EC2 user is used to deploy the cluster
- The installation package of CDH and CM has been downloaded
2.2 preliminary preparation
2.2.1 hostname and hosts configuration
- All nodes in the cluster can communicate with each other and use static IP addresses. The IP address and host name are configured through / etc/hosts, and the host name is configured through / etc/hostname.
- Take cm node (172.31.2.159) as an example:
- hostname configuration
- /The / etc/hostname file is as follows:
ip-172-31-2-159
Alternatively, the modification can take effect immediately by command
[ec2-user@ip-172-31-2-159 ~]$ sudo hostnamectl set-hostname ip-172-31-2-159
- Note: the difference between hostname and REDHAT6 is modified here
- hosts configuration
- /The etc/hosts file is as follows:
172.31.2.159 ip-172-31-2-159
172.31.12.108 ip-172-31-12-108
172.31.5.236 ip-172-31-5-236
172.31.7.96 ip-172-31-7-96
- In the above two steps, configure other nodes in the cluster accordingly
2.2.2 disable SELinux
- Execute the sudo setenforce0 command on all nodes. Here, use the batch shell to execute:
[ec2-user@ip-172-31-2-159 ~]$ sh ssh_do_all.sh node.list "sudo setenforce 0"
- Modify the / etc/selinux/config file for all nodes of the cluster as follows:
SELINUX=disabled
SELINUXTYPE=targeted
2.2.3 close the firewall
- All nodes in the cluster execute the sudo systemctl stop command. Here, execute the command in batch through the shell as follows:
[ec2-user@ip-172-31-2-159 ~]$ sh ssh_do_all.sh  node.list "sudo systemctl stop firewalld"
[ec2-user@ip-172-31-2-159 ~]$ sh ssh_do_all.sh  node.list "sudo systemctl disable firewalld"
[ec2-user@ip-172-31-2-159 ~]$ sh ssh_do_all.sh  node.list "sudo systemctl status firewalld"
Clock cluster synchronization
In centos7 On the operating system of 2, chrony has been installed by default. Configure chrony clock synchronization, take cm (172.31.2.159) service as the local chrony server, and keep the other three servers synchronized with it. Configuration fragment:
- 172.31.2.159 configuration synchronization
[ec2-user@ ip-172-31-2-159 ~]$ sudo vim  /etc/chrony.conf
server ip-172-31-2-159 iburst
#keyfile=/etc/chrony.keys
- Other nodes of the cluster: add the following configuration under the note
[ec2-user@ip-172-31-12-108 ~]$ sudo vim  /etc/chrony.conf
# Use public servers from the pool.ntp.org  project.
# Please consider joining the pool (http://www.pool.ntp.org/join.html).
server ip-172-31-2-159 iburst
#keyfile=/etc/chrony.keys
- Restart the chrony service on all machines
[ec2-user@ip-172-31-2-159 ~]$ sh ssh_do_all.sh node.list "sudo systemctl restart chronyd"
- Verify that it is always synchronized. Execute the chronycsources command on all nodes, as shown in the following script
[ec2-user@ip-172-31-2-159 ~]$ sh ssh_do_all.sh node.list "chronyc sources"
2.2.5 configure operating system repo
- Mount operating system iso files
[ec2-user@ip-172-31-2-159 ~]$ sudo mkdir  /media/DVD1
[ec2-user@ip-172-31-2-159 ~]$ sudo mount -o loop
CentOS-7-x86_64-DVD-1611.iso /media/DVD1/
- Configure operating system repo
[ec2-user@ip-172-31-2-159 ~]$ sudo vim  /etc/yum.repos.d/local_os.repo
[local_iso]
name=CentOS-$releasever - Media
baseurl=file:///media/DVD1
gpgcheck=0
enabled=1
[ec2-user@ip-172-31-2-159 ~]$ sudo yum repolist
2.2.6 installing http services
- Install httpd service
[ec2-user@ip-172-31-2-159 ~]$ sudo yum -y install httpd
- Start or stop the httpd service
[ec2-user@ip-172-31-2-159 ~]$ sudo systemctl  start httpd
[ec2-user@ip-172-31-2-159 ~]$ sudo systemctl stop  httpd
- After installing httpd, remake the operating system repo and replace it with http, which is convenient for other servers to access
[ec2-user@ip-172-31-2-159 ~]$ sudo mkdir  /var/www/html/iso
[ec2-user@ip-172-31-2-159 ~]$ sudo scp -r  /media/DVD1/* /var/www/html/iso/
[ec2-user@ip-172-31-2-159 ~]$ sudo vim  /etc/yum.repos.d/os.repo
[osrepo]
name=os_repo
baseurl=http://172.31.2.159/iso/
enabled=true
gpgcheck=false
[ec2-user@ip-172-31-2-159 ~]$ sudo yum repolist
2.2.7 installation of MariaDB
Since centros7 uses MariaDB version 5.5.52 by default, version 10.2.1 is used here( http://yum.mariadb.org/10.2.1/centos7-amd64/rpms/ ), download the rpm installation package on the official website:
MariaDB-10.2.1-centos7-x86_64-client.rpm
MariaDB-10.2.1-centos7-x86_64-common.rpm
MariaDB-10.2.1-centos7-x86_64-compat.rpm
MariaDB-10.2.1-centos7-x86_64-server.rpm
Download the package locally, put it in the same directory, and execute the createrepo command to generate rpm metadata.
Apache 2 is used here, and the above mariadb10 2.1 move the directory to / var/www/html directory, so that users can access these rpm packages through HTTP.
[ec2-user@ip-172-31-2-159 ~]$ sudo mv mariadb10.2.1 /var/www/html/
- Installing MariaDB dependencies
[ec2-user@ip-172-31-2-159 ~]$ yum install libaio perl perl-DBI perl-Module-Pluggable perl-Pod-Escapes perl-Pod-Simple perl-libs perl-version
- Make local repo
[ec2-user@ip-172-31-2-159 ~]$ sudo vim  /etc/yum.repos.d/mariadb.repo
[mariadb]
name = MariaDB
baseurl = http://172.31.2.159/ mariadb10.2.1
enable = true
gpgcheck = false
[ec2-user@ip-172-31-2-159 ~]$ sudo yum  repolist
- Install MariaDB
[ec2-user@ip-172-31-2-159 ~]$ sudo yum -y install MariaDB-server MariaDB-client
- Start and configure MariaDB
[ec2-user@ip-172-31-2-159 ~]$ sudo systemctl  start mariadb
[ec2-user@ip-172-31-2-159 ~]$ sudo /usr/bin/mysql_secure_installation
NOTE: RUNNING ALL PARTS OF THIS SCRIPT IS  RECOMMENDED FOR ALL MariaDB
       SERVERS IN PRODUCTION USE!   PLEASE READ EACH STEP CAREFULLY!
In order to log into MariaDB to secure it, we'll  need the current
password for the root user.  If you've just installed MariaDB, and
you haven't set the root password yet, the  password will be blank,
so you should just press enter here.
Enter current password for root (enter for none):
OK, successfully used password, moving on...
Setting the root password ensures that nobody can  log into the MariaDB
root user without the proper authorisation.
Set root password? [Y/n] Y
New password:
Re-enter new password:
Password updated successfully!
Reloading privilege tables..
 ...  Success!
By default, a MariaDB installation has an  anonymous user, allowing anyone
to log into MariaDB without having to have a user  account created for
them.  This  is intended only for testing, and to make the installation
go a bit smoother.  You should remove them before moving into a
production environment.
Remove anonymous users? [Y/n] Y
 ...  Success!
Normally, root should only be allowed to connect  from 'localhost'.  This
ensures that someone cannot guess at the root  password from the network.
Disallow root login remotely? [Y/n] n
 ...  skipping.
By default, MariaDB comes with a database named  'test' that anyone can
access.   This is also intended only for testing, and should be removed
before moving into a production environment.
Remove test database and access to it? [Y/n] Y
 - Dropping  test database...
 ...  Success!
 - Removing  privileges on test database...
 ...  Success!
Reloading the privilege tables will ensure that  all changes made so far
will take effect immediately.
Reload privilege tables now? [Y/n] Y
 ...  Success!
Cleaning up...
All done!   If you've completed all of the above steps, your MariaDB
installation should now be secure.
Thanks for using MariaDB!
- Create tables required by CM and Hive
[ec2-user@ip-172-31-2-159 ~]$ mysql -uroot -p
Enter password:
Welcome to the MariaDB monitor.  Commands end with ; or \g.
Your MariaDB connection id is 9
Server version: 10.2.1-MariaDB MariaDB Server
Copyright (c) 2000, 2016, Oracle, MariaDB  Corporation Ab and others.
Type 'help;' or '\h' for help. Type '\c' to clear  the current input statement.
MariaDB [(none)]>
create database metastore default character set  utf8;
CREATE USER 'hive'@'%' IDENTIFIED BY 'password';
GRANT ALL PRIVILEGES ON metastore. * TO  'hive'@'%';
FLUSH PRIVILEGES;
create database cm default character set utf8;
CREATE USER 'cm'@'%' IDENTIFIED BY 'password';
GRANT ALL PRIVILEGES ON cm. * TO 'cm'@'%';
FLUSH PRIVILEGES;
create database am default character set utf8;
CREATE USER 'am'@'%' IDENTIFIED BY 'password';
GRANT ALL PRIVILEGES ON am. * TO 'am'@'%';
FLUSH PRIVILEGES;
create database rm default character set utf8;
CREATE USER 'rm'@'%' IDENTIFIED BY 'password';
GRANT ALL PRIVILEGES ON rm. * TO 'rm'@'%';
FLUSH PRIVILEGES;
- Install jdbc Driver
[ec2-user@ip-172-31-2-159 ~]$ sudo mkdir -p  /usr/share/java/
[ec2-user@ip-172-31-2-159 ~]$ sudo mv  mysql-connector-java-5.1.37.jar /usr/share/java/
[ec2-user@ip-172-31-2-159 java]$ cd  /usr/share/java
[ec2-user@ip-172-31-2-159 java]$ sudo ln -s  mysql-connector-java-5.1.37.jar mysql-connector-java.jar
[ec2-user@ip-172-31-2-159 java]$ ll
total 964
-rw-r--r--. 1 root root 985600 Oct  6  2015  mysql-connector-java-5.1.37.jar
lrwxrwxrwx. 1 root root     31 Mar 29 14:37 mysql-connector-java.jar  -> mysql-connector-java-5.1.37.jar
2.3 Cloudera Manager installation
2.3.1 configuring local repo sources
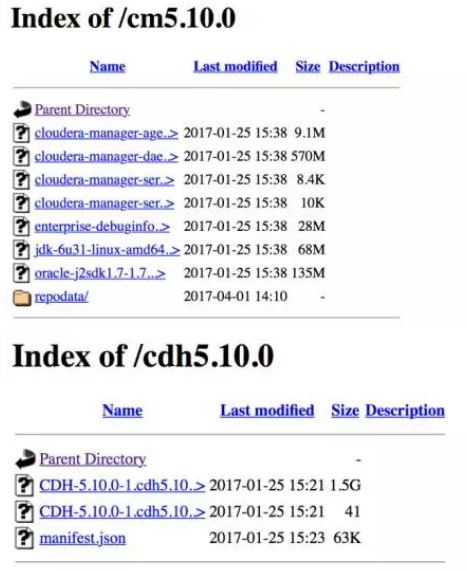
Download the seven rpm packages required for Cloudera Manager installation locally, put them in the same directory, and execute the createrepo command to generate rpm metadata.
[ec2-user@ip-172-31-2-159 cm]$ ls
cloudera-manager-agent-5.10.0-1.cm5100.p0.85.el7.x86_64.rpm
cloudera-manager-daemons-5.10.0-1.cm5100.p0.85.el7.x86_64.rpm
cloudera-manager-server-5.10.0-1.cm5100.p0.85.el7.x86_64.rpm
cloudera-manager-server-db-2-5.10.0-1.cm5100.p0.85.el7.x86_64.rpm
enterprise-debuginfo-5.10.0-1.cm5100.p0.85.el7.x86_64.rpm
jdk-6u31-linux-amd64.rpm
oracle-j2sdk1.7-1.7.0+update67-1.x86_64.rpm
[ec2-user@ip-172-31-2-159 cm]$ sudo createrepo .
Spawning worker 0 with 1 pkgs
Spawning worker 1 with 1 pkgs
Spawning worker 2 with 1 pkgs
Spawning worker 3 with 1 pkgs
Spawning worker 4 with 1 pkgs
Spawning worker 5 with 1 pkgs
Spawning worker 6 with 1 pkgs
Spawning worker 7 with 0 pkgs
Workers Finished
Saving Primary metadata
Saving file lists metadata
Saving other metadata
Generating sqlite DBs
Sqlite DBs complete
- Configure Web server
- Apache 2 is used here, and the above cdh5 10.0/cm5. The 10.0 directory is moved to the / var/www/html directory so that users can access these rpm packages through HTTP.
[ec2-user@ip-172-31-2-159 ~]$ sudo mv cdh5.10.0/ cm5.10.0/ /var/www/html/
- Create the repo source of ClouderaManager
[ec2-user@ip-172-31-2-159 ~]$ sudo vim  /etc/yum.repos.d/cm.repo
[cmrepo]
name = cm_repo
baseurl = http://172.31.2.159/cm5.10.0.0
enable = true
gpgcheck = false
[ec2-user@ip-172-31-2-159 yum.repos.d]$ sudo yum  repolist
- Verify installation of JDK
[ec2-user@ip-172-31-2-159 ~]$ sudo yum -y install oracle-j2sdk1.7-1.7.0+update67-1
2.3.2 installing Cloudera Manager Server
- Install ClouderaManager Server using yum or up2date
[ec2-user@ip-172-31-2-159 ~]$ sudo yum -y install cloudera-manager-server
- Initialize database
[ec2-user@ip-172-31-2-159 ~]$ sudo  /usr/share/cmf/schema/scm_prepare_database.sh mysql cm cm password
JAVA_HOME=/usr/java/jdk1.7.0_67-cloudera
Verifying that we can write to  /etc/cloudera-scm-server
Creating SCM configuration file in  /etc/cloudera-scm-server
Executing:   /usr/java/jdk1.7.0_67-cloudera/bin/java -cp  /usr/share/java/mysql-connector-java.jar:/usr/share/java/
oracle-connector-java.jar:/usr/share/cmf/schema/../lib/*  com.cloudera.enterprise.dbutil.DbCommandExecutor  /etc/cloudera-scm-server/db.properties com.cloudera.cmf.db.
[                          main]  DbCommandExecutor               INFO  Successfully connected to  database.
All done, your SCM database is configured  correctly!
- Start ClouderaManager Server
[ec2-user@ip-172-31-2-159 ~]$ sudo systemctl start cloudera-scm-server
- Check whether the port is listening
[ec2-user@ip-172-31-2-159 ~]$ sudo netstat -lnpt  | grep 7180
tcp         0      0 0.0.0.0:7180            0.0.0.0:*               LISTEN      6890/java
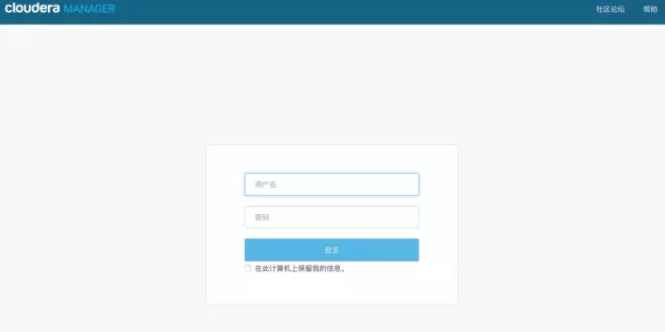
- adopt http://172.31.2.159:7180/cmf/login Access CM
2.4 CDH installation
2.4.1 CDH cluster installation wizard
- admin/admin login to CM
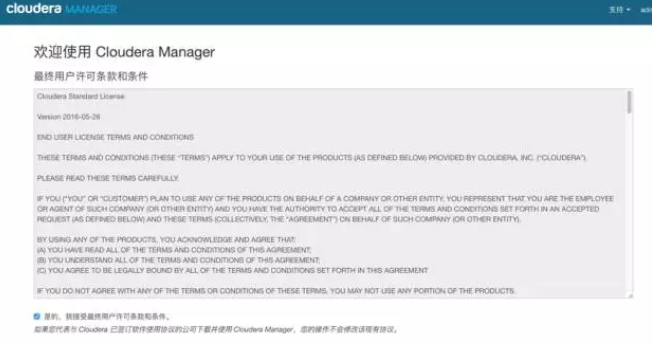
- Agree to the license agreement and click continue
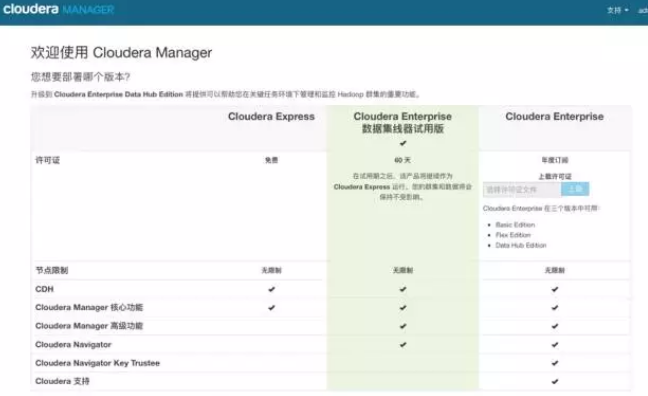
- Select 60 trial and click continue
- Click "continue"
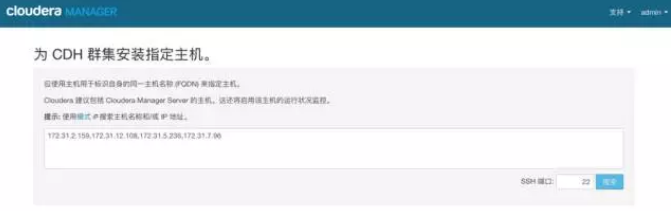
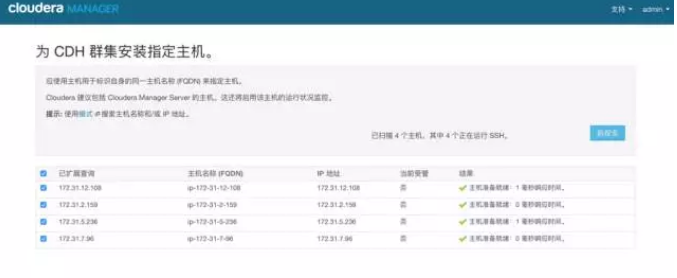
- Enter the host ip or name, click search to find the host, and then click continue
- Click "continue"
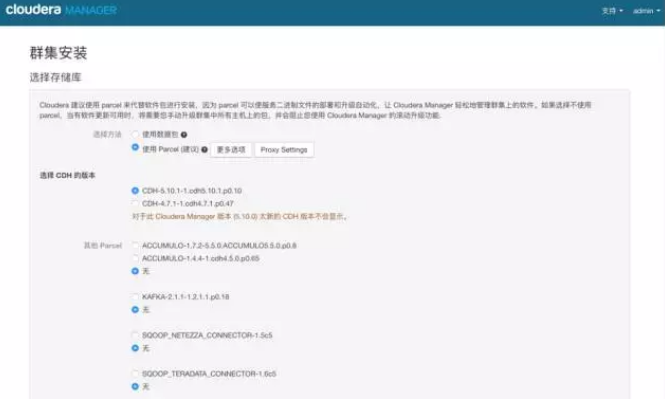
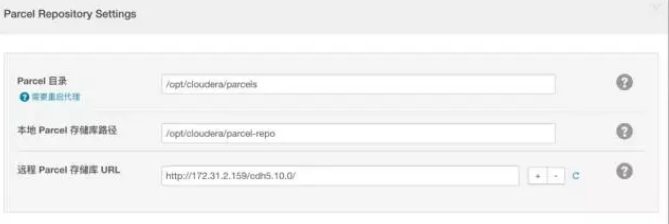
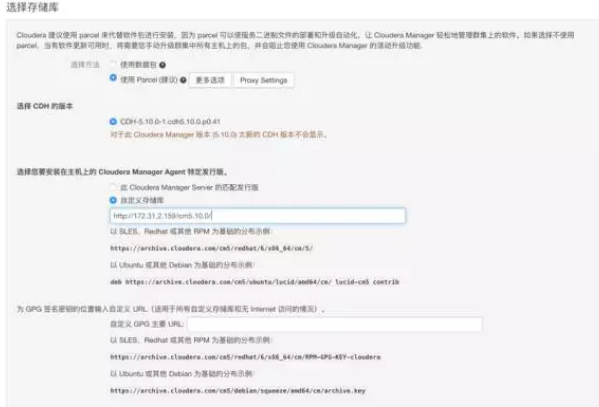
- Use parcel to select, click "more options", click "-" to delete all other addresses, and enter
http://172.31.2.159/cm5.10.0/ Click "save changes"
- Select the custom repository and enter the http address of cm
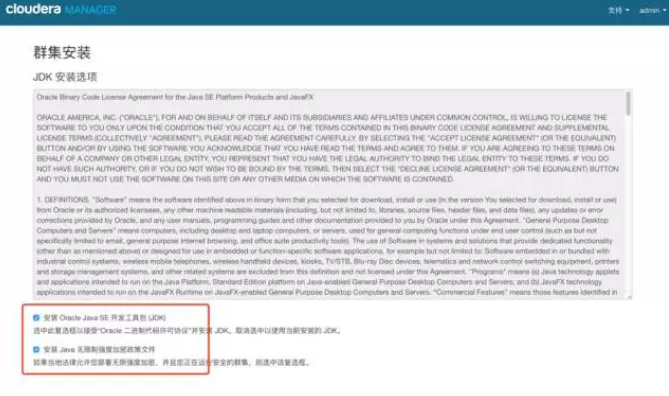
- Click "continue" to proceed to the next step of installing jdk
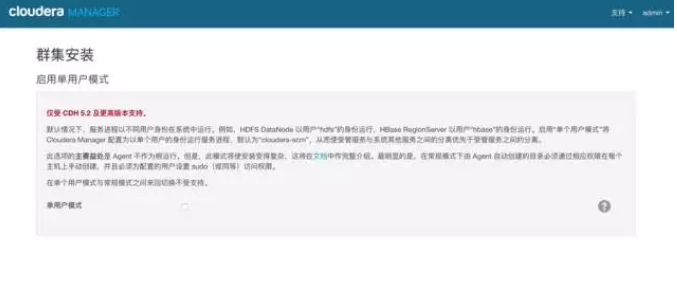
- Click "continue" to enter the next step, and the default multi-user mode
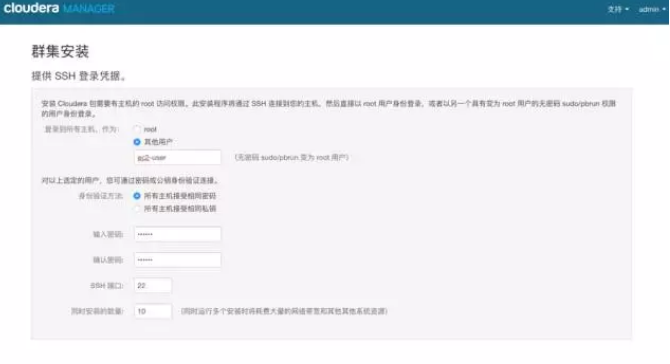
- Click "continue" to enter the next step to configure ssh account and password
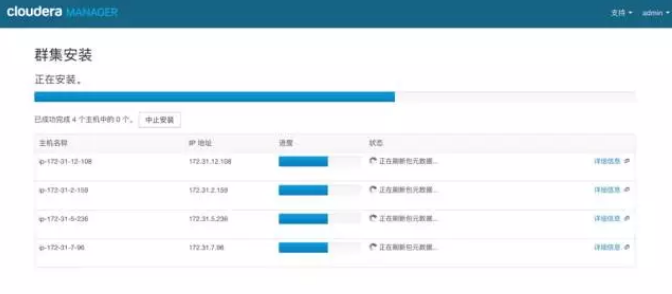
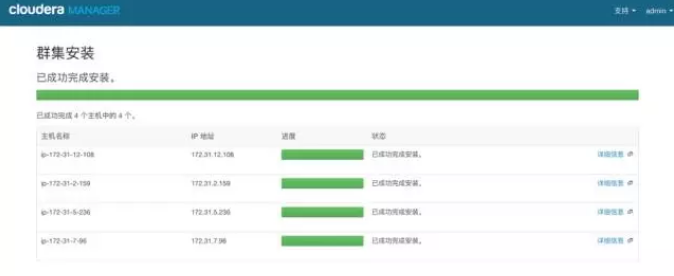
- Click "continue" to enter the next step, and install Cloudera Manager related nodes
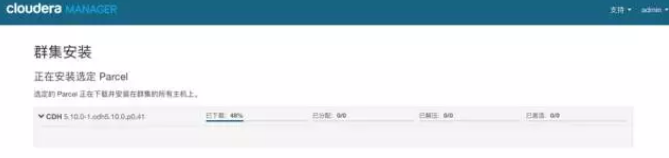
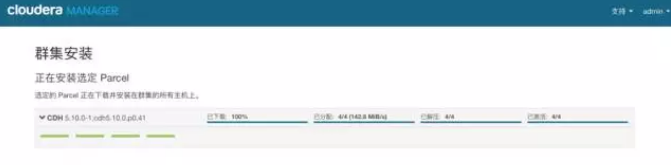
- Click "continue" to go to the next step and install cdh to each node
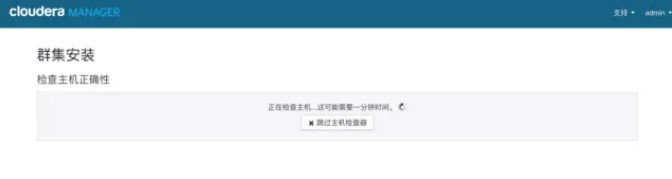
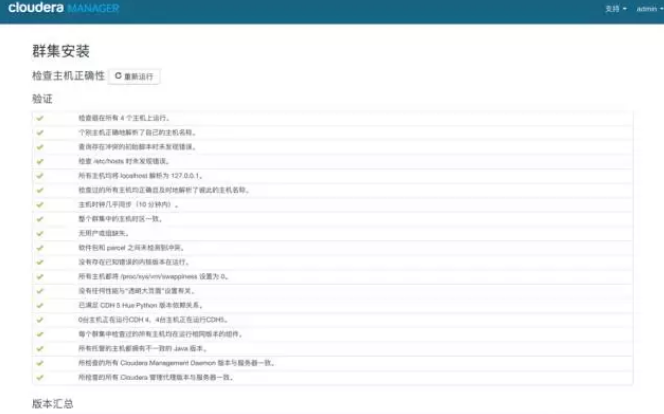
- Click "continue" to enter the next step of host inspection to ensure that all inspection items pass
- Click Finish to enter the service installation wizard.
2.4.2 cluster setup wizard
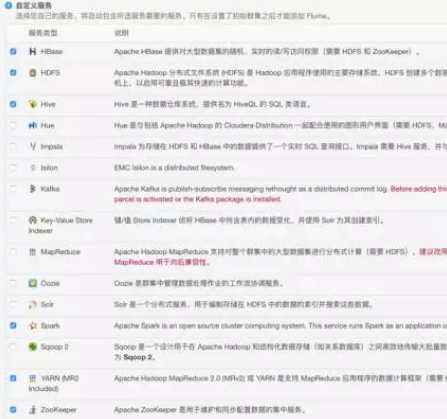
- Select the service to install
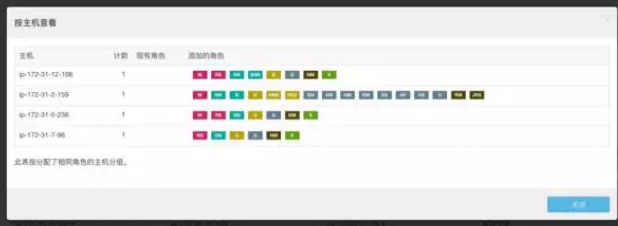
- Click "continue" to enter the cluster role assignment
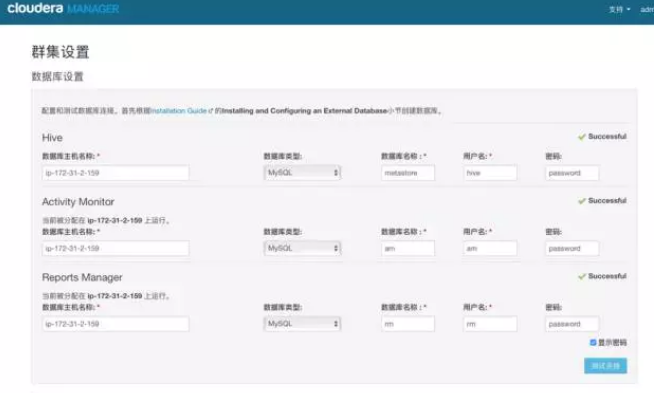
- Click "continue" to go to the next step and test the database connection
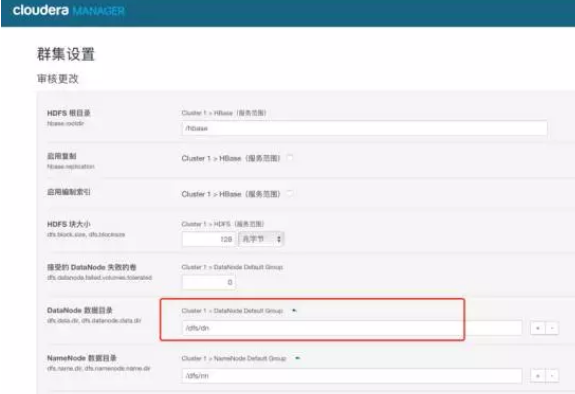
- After the test is successful, click "continue" to enter the directory setting. The default directory is used here, and the directory is modified according to the actual situation
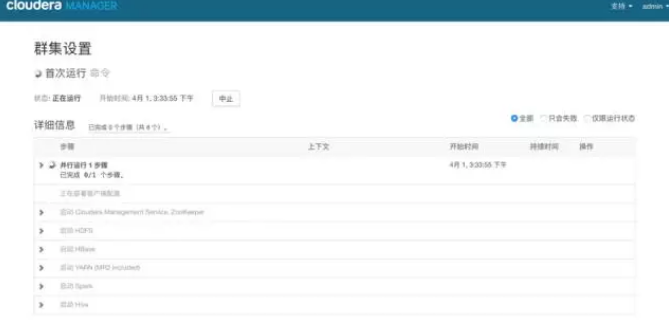
- Click "continue" to enter each service startup
- Installation succeeded

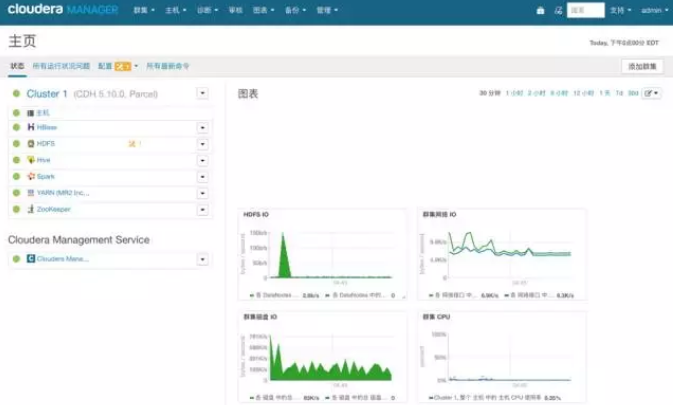
- After successful installation, enter the home management interface
Big data video recommendation:
CSDN
Big data voice recommendation:
Application of enterprise level big data technology
Recommendation system of big data machine learning cases
natural language processing
Big data foundation
Artificial intelligence: introduction to deep learning to mastery