Case summary
This article provides a project instance that uses aliice front-end framework (encapsulating React) to communicate with Spring Boot project. For specific project environment, please refer to: Alibaba ICE front end project creation process . This example does not introduce the creation and use of Spring Boot project, but only provides the corresponding Controller method as the API to communicate with the React front-end project. The related components of this instance consist of the following pages:
- UserCreateForm: provide form information for Post request to create users.
- UserListTable: used to get the user list in the database and display it.
- UserDetailForm: the user renders the details of the specified user and provides the function of modification.
The above three components are in parallel (not combined), but there are some page Jump relationships, which will be explained later.
In this example, the key points of attention and introduction are as follows:
- How to realize the Get/Post request interaction between React and Spring Boot?
- How to realize the jump between pages in ice? How to carry and obtain parameters?
- Use of props and state in React.
- How does React render lists with map s?
- Settings for cross domain requests from the server.
Project code: https://github.com/Yitian-Zhang/my-ice-start . Let's take a look at the specific instance implementation process.
Server Controller and cross domain problem settings
The server side has used Spring Boot+MyBatis+MySQL to build the project environment. Create the reactuercontroller class below to provide the following interface methods, and test that each interface function is normal.
/**
 * React(my-ice-start)Project interface Controller
 * @author yitian
 */
@RestController
@RequestMapping("/react-user")
public class ReactUserController {

    @Autowired
    private UserService userService;

    @RequestMapping("/detail")
    public CommonResult getUserDetail(Long id) {
        if (id == null) {
            return CommonResult.error("user ID Can not be empty");
        }
        return new CommonResult(true, 200, userService.getUserById(id));
    }

    @RequestMapping("/create")
    public CommonResult createUser(@RequestBody User user) {
        if (user == null) {
            return CommonResult.error("Add user is empty");
        }
        System.out.println(user);

        int result = userService.insertUser(user);
        boolean success = result == 1;
        String msgInfo = success ? "Add success" : "Add failure";
        return new CommonResult(success, msgInfo, user);
    }


    @RequestMapping("/list")
    public CommonResult userList() {
        List<User> userList = userService.getUserList();
        return new CommonResult(true, "Get success", userList);
    }


    @RequestMapping(value = "/update", method = RequestMethod.POST)
    public CommonResult updateUser(@RequestBody User user) {
        if (user == null || user.getId() == null) {
            return CommonResult.error("The user information to be updated is empty");
        }
        System.out.println(user);

        int result = userService.updateUserById(user);
        boolean success = result == 1;
        String msg = success ? "Update success" : "Update failed";
        return new CommonResult(success, msg, userService.getUserById(user.getId()));
    }

    @RequestMapping("/delete")
    public CommonResult deleteUser(Long id) {
        if (id == null) {
            return CommonResult.error("UserId Can not be empty");
        }
        int result = userService.deleteUser(id);
        boolean success = result == 1;
        String msg = success ? "Delete successful" : "Delete failed";
        return new CommonResult(success, msg, userService.getUserList());
    }
}
In addition, because the Spring Boot project is localhost:8080, and the ice boot project address is localhost:3333, there will be cross domain problems in the communication between the front and rear projects. Add the following Bean to the Spring Boot project to configure the response return header of the request to allow all requests:
    /**
     * Resolve exceptions in React cross domain requests
     */
    @Bean
    public WebMvcConfigurer webMvcConfigurer() {
        return new WebMvcConfigurer() {
            @Override
            public void addCorsMappings(CorsRegistry registry) {
                registry.addMapping("/**").allowedOrigins("*");
            }
        };
    }
So far, the method of the Spring Boot server project in this instance has been developed. Later, we will focus on how to interact with the front and back projects in the ICE project.
Create and add users
First, develop the createUser page. The components defined here are as follows:
import React, {Component} from 'react';
import {withRouter} from "react-router-dom";
import PropTypes from 'prop-types';
import axios from 'axios';

@withRouter
class UserCreateForm extends Component {
  // Page Jump static properties
  static propTypes = {
    match: PropTypes.object.isRequired,
    location: PropTypes.object.isRequired,
    history: PropTypes.object.isRequired,
  };

  constructor(props) {
    super(props);
    this.state = {
      username: '',
      sex: 'MALE',
      note: ''
    };
  }

  // Form change processing function
  handleChange = (event) => {
    const {name, value} = event.target;
    this.setState({
      [name] : value,
    })
  };

  // Create user information
  handleSubmit = (event) => {
    this.submitUser();
  };

  // post requests to submit updated user information
  submitUser() {
    const {username, sex, note} = this.state;
    const { history } = this.props;
    console.log(username + ", " + sex + ", " + note);

    // Use post request directly
    axios.post('http://localhost:8080/react-user/create', {
      // id: id,
      userName: username,
      sex: sex, // Here, you can directly pass parameters according to the enumeration name of SexEnum, without using enumeration key
      note: note
    })
      .then(function (response) {
        console.log(response);
        alert(response.data.msgInfo);

        // Jump to list page after adding
        history.push({
          pathname: '/user/list',
        });
      })
      .catch(function (error) {
        console.log(error);
      });
  };

  render() {
    const {username, sex, note} = this.state;
    return (
      <React.Fragment>
        <h1>User Detail Form</h1>
        <form>
          <table>
            <tr>
              <td>Username:</td>
              <td><input
                type="text"
                id="username"
                name="username"
                value={username}
                onChange={this.handleChange}/></td>
            </tr>
            <tr>
              <td>sex:</td>
              <td><select
                name="sex"
                value={sex}
                onChange={this.handleChange}>
                <option value="MALE">MALE</option>
                <option value="FEMALE">FEMALE</option>
              </select></td>
            </tr>
            <tr>
              <td>note:</td>
              <td><input
                type="text"
                id="note"
                name="note"
                value={note}
                onChange={this.handleChange}/></td>
            </tr>
            <tr>
              <td><input
                type="button"
                value="CreateUser"
                onClick={this.handleSubmit}/></td>
            </tr>
          </table>
        </form>
      </React.Fragment>
    )
  }
}
export default UserCreateForm;
In this part of the code, the following aspects need to be focused on:
1. Use axios in the submitUser method for post request.
ice allows you to use your encapsulated request to send requests (in fact, the encapsulated axios). It also allows you to use ajax, jquery, axios and other methods to send requests. Here, axios is used to send the post request. The format is as follows:
axios.post('/user', {
    firstName: 'Fred',
    lastName: 'Flintstone'
  })
  .then(function (response) {
    console.log(response);
  })
  .catch(function (error) {
    console.log(error);
  });
Or send the post request in the form of axios(config {...}):
    // Send a POST request
    axios({
      method: 'post',
      url: '/user/12345',
      data: { // Here, the parameter in data is the RequestBody parameter. The server needs to use the @ RequestBody annotation to get it
        firstName: 'Fred',
        lastName: 'Flintstone'
      }
    }).then(function (response) {
      console.log(response);
    }).catch(function (error) {
      console.log(error);
    });
2. How to perform page Jump after the user creates successfully (the implementation of jump page code is later).
For the implementation of the page jump process, here we use Jump between components and pages and pass parameters in aliice As mentioned in, with router is implemented.
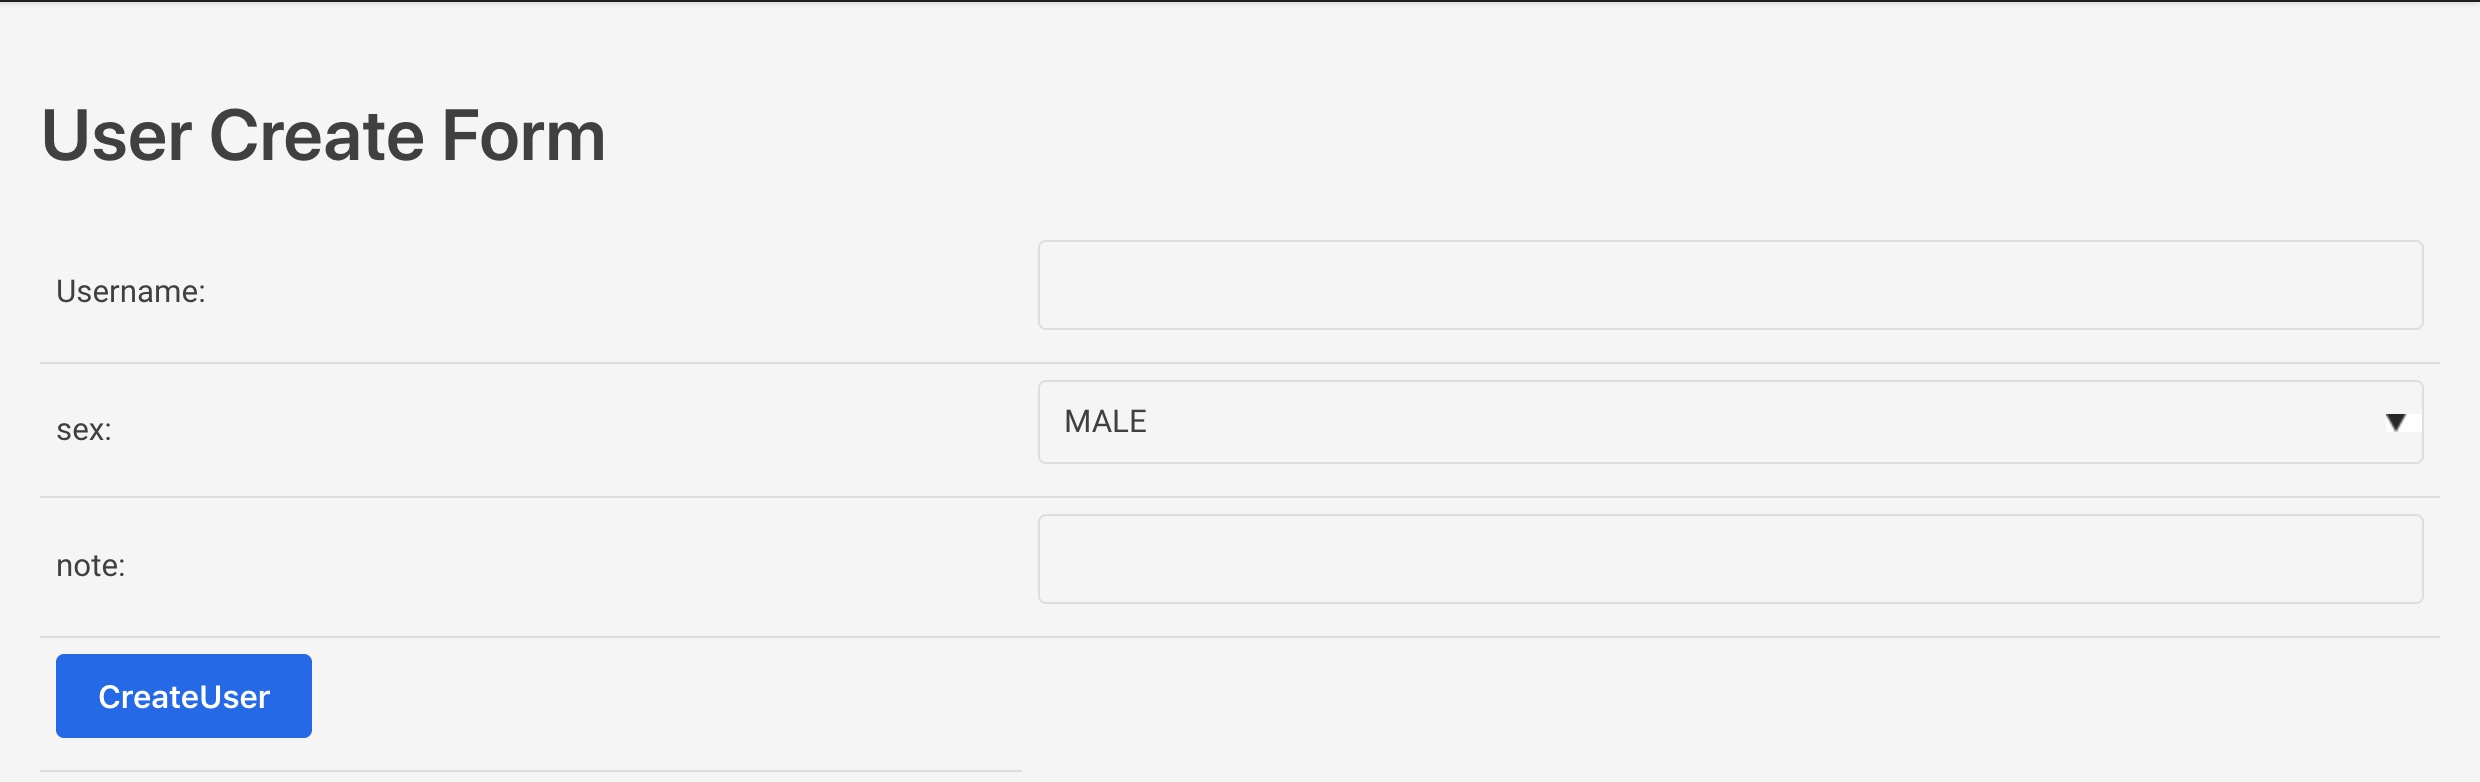
After the completion of the page implementation, the following display will be displayed. After the completion of the subsequent jump page, complete integration test will be carried out.
User list and management
User list rendering
After the user creation is completed, the page will jump to the list page of all users in the display database, which is implemented with the following components:
import React, {Component} from 'react';
import axios from 'axios';
import {List} from "@alifd/next";
import UserDetailForm from "../UserDetailForm";
import {withRouter} from "react-router-dom";
import PropTypes from 'prop-types';
import './index.css';

@withRouter
class UserListTable extends Component {
  // Page Jump static configuration
  static propTypes = {
    match: PropTypes.object.isRequired,
    location: PropTypes.object.isRequired,
    history: PropTypes.object.isRequired,
  };

  constructor(props) {
    super(props);
    this.state = {
      userList: [],
    };
  }

  componentDidMount() {
    this.getUserList();
  }

  // Get user list data
  async getUserList() {
    try {
      const response = await axios.get('http://localhost:8080/react-user/list');
      console.log(response);

      this.setState({
        userList: response.data.data,
      })
    } catch (error) {
      console.error(error);
    }
  }

  // Details and update page
  handleClickDetail = (id) => {
    console.log("ListTable id: " + id);

    // Page skipping
    const { history } = this.props;
    history.push({
      pathname: '/user/detail',
      state: { id },
    });
  };

  // Delete data
  handleClickDelete = (id) => {
    this.deleteUser(id);
  };

  // delete user
  async deleteUser(id) {
    try {
      const response = await axios.get('http://localhost:8080/react-user/delete?id=' + id);
      console.log(response);
      alert(response.data.msgInfo);

      this.setState({
        userList: response.data.data,
      });

    } catch (e) {
      console.error(e);
    }
  }

  render() {
    const {userList} = this.state;

    return (
      <div>
        <h1>User List</h1>
        <table>
          <thead>
            <tr>
              <td>Id</td>
              <td>UserName</td>
              <td>Sex</td>
              <td>Note</td>
              <td>Operate</td>
            </tr>
          </thead>
          <tbody>
          {
            userList.map((row, index) => {
              const id = row.id;
              return (
                <tr key={index}>
                  <td>{row.id}</td>
                  <td>{row.userName}</td>
                  <td>{row.sex}</td>
                  <td>{row.note}</td>
                  <td>
                    <button
                      className="listButton"
                      onClick={() => this.handleClickDetail(id)}>Detail</button>
                    <button
                      className="listButton"
                      onClick={() => this.handleClickDelete(id)}>Delete</button>
                  </td>
                </tr>
              )
            })
          }
          </tbody>
        </table>
      </div>
    );
  }
}
export default UserListTable;
For the above codes, the key points to be concerned are as follows:
1. How to use GET request of axios to operate data?
When using Axios for GET requests, it is similar to POST requests in the following two ways. The first is to directly use the encapsulated axios.get for requests. The format is as follows:
// Make a request for a user with a given ID
axios.get('/user?ID=12345')
  .then(function (response) {
    // handle success
    console.log(response);

    // update state or do something
    this.setState({
      // ...
    })
  })
  .catch(function (error) {
    // handle error
    console.log(error);
  })
  .then(function () {
    // always executed
  });

// Optionally the request above could also be done as
axios.get('/user', {
    params: { // Here, the parameters are set as URL parameters (parameters are carried according to the URL)
      ID: 12345
    }
  })
  .then(function (response) {
    console.log(response);
  })
  .catch(function (error) {
    console.log(error);
  })
  .then(function () {
    // always executed
  });

// Want to use async/await? Add the `async` keyword to your outer function/method.
async function getUser() {
  try {
    const response = await axios.get('/user?ID=12345');
    console.log(response);
  } catch (error) {
    console.error(error);
  }
}
The second is to send a GET request using axios(config {...}):
axios({
  method: 'get',
  url: 'http://bit.ly/2mTM3nY',
  params: {
    id: id,
  }
})
  .then(function (response) {
    console.log(response);
  });
2. How to transfer the required parameters during page Jump?
To transfer parameters during page Jump, you need to set the following in the history.push method:
    // Page skipping
    const { history } = this.props;
    history.push({
      pathname: '/user/detail',
      state: { id },
    });
Then, on the user details page, you can obtain the id parameter passed as follows:
  componentDidMount() {
    let id = this.props.location.state.id;
    console.log("DetailForm id: " + id);
  }
3. How to render the user's entire list page according to userList?
When rendering the entire user list circularly, you need to initialize the entire state of userList as an array in the constructor:
  constructor(props) {
    super(props);
    this.state = {
      userList: [],
    };
  }
Then use the map method in the render method to traverse the array and render the data in the list:
          <tbody>
          {
            userList.map((row, index) => {
              const id = row.id;
              return (
                <tr key={index}>
                  <td>{row.id}</td>
                  <td>{row.userName}</td>
                  <td>{row.sex}</td>
                  <td>{row.note}</td>
                  <td>
                    <button
                      className="listButton"
                      onClick={() => this.handleClickDetail(id)}>Detail</button>
                    <button
                      className="listButton"
                      onClick={() => this.handleClickDelete(id)}>Delete</button>
                  </td>
                </tr>
              )
            })
          }
          </tbody>
After completion, the page is displayed as follows:
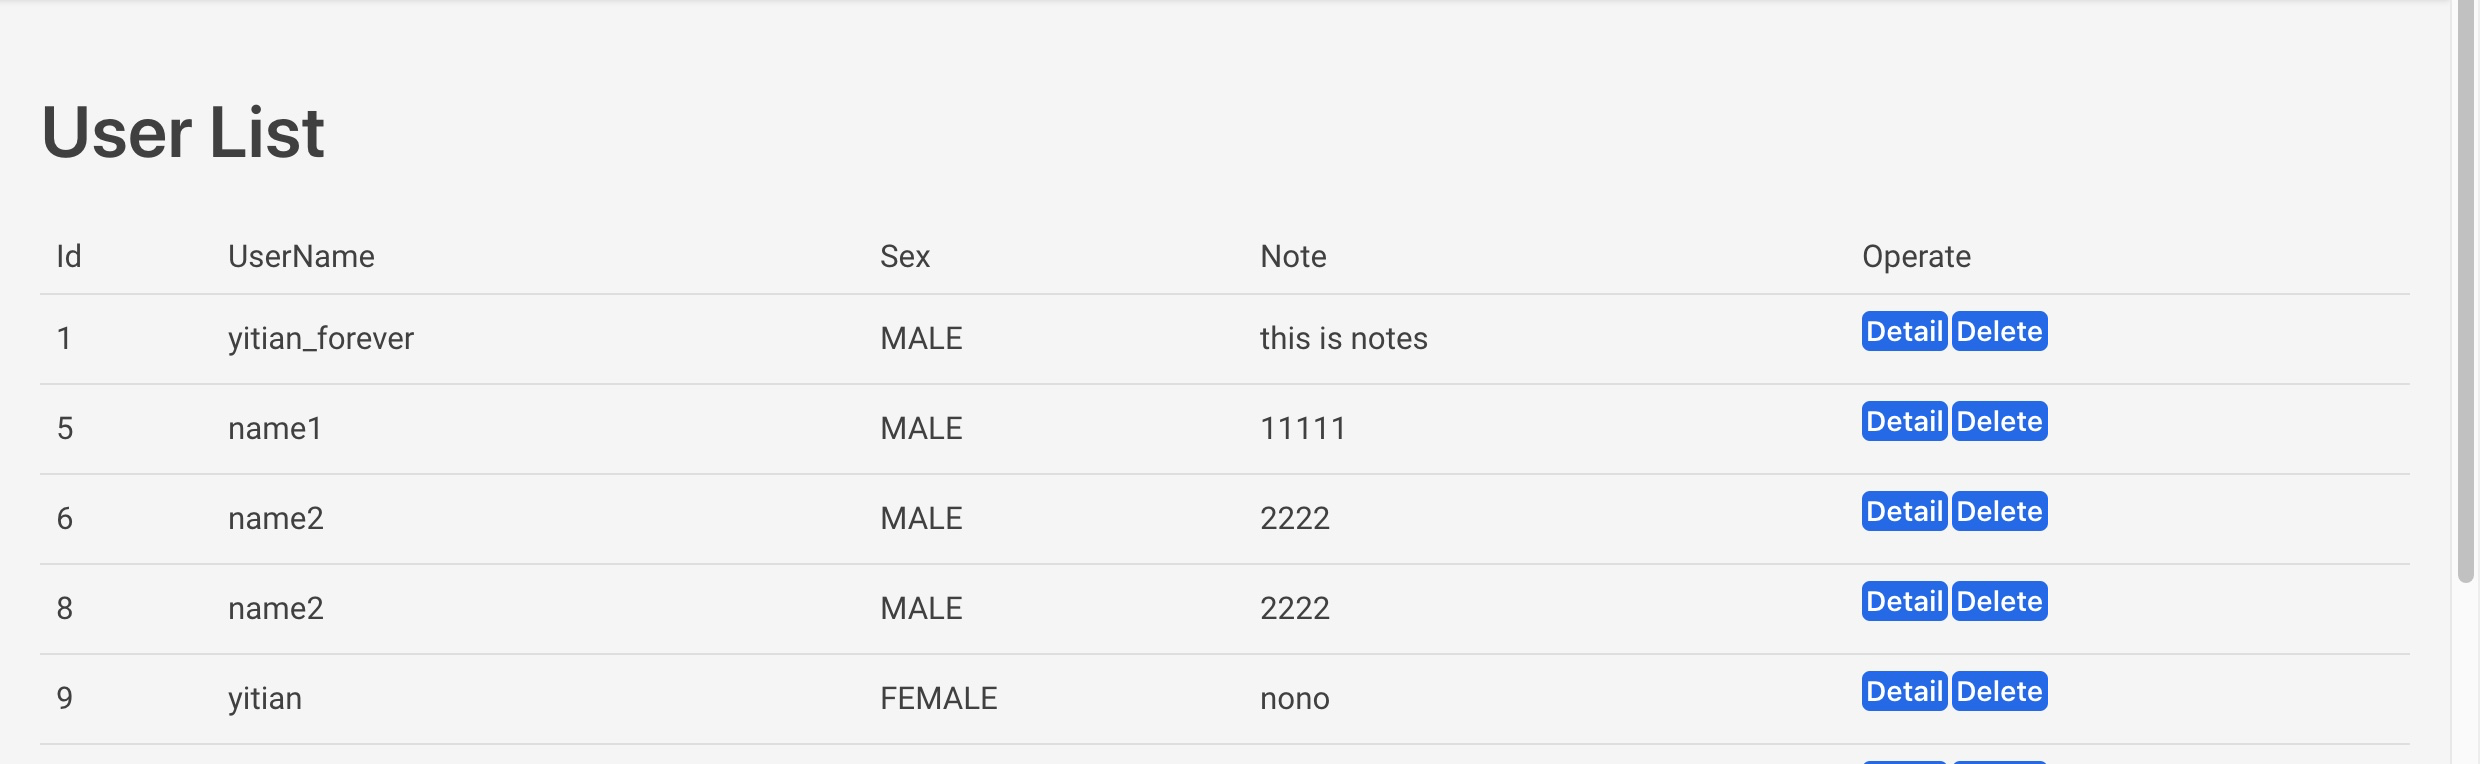
For each user, there are details and delete buttons. The details will jump to the user detail page to display the user's specific information, and the delete button will delete the user's information. Let's first look at the implementation of a simple delete method. The implementation of detail is described in the next section.
User delete implementation
When deleting users in the above list, we also use the axios.get request to delete the user data in the database, then get the new userList return value and update the state using the setState method to make the page render again. The specific code has been given in the above component code, and the implementation is relatively simple.
User details and modifications
The user details page is the page obtained by clicking the detail button for the specified user in the user list page. The implementation of the page component is as follows:
import React, {Component} from 'react';
import axios from 'axios';
import {request} from "../../../.ice";
import {withRouter} from 'react-router-dom';
import PropTypes from 'prop-types';

@withRouter
class UserDetailForm extends Component {
  static propTypes = {
    match: PropTypes.object.isRequired,
    location: PropTypes.object.isRequired,
    history: PropTypes.object.isRequired,
  };

  constructor(props) {
    super(props);
    this.state = {
      id: '',
      username: '',
      sex: '',
      note: ''
    };
  }

  componentDidMount() {
    // get and post requests using axios
    let id = this.props.location.state.id;
    console.log("DetailForm id: " + id);
    this.getUserByAxios(id);
  }

  // Using axios for get requests
  // Before use, you need to install axios: npm install axios --save and import
  async getUserByAxios(id) {
    try {
      const response = await axios.get("http://localhost:8080/react-user/detail?id=" + id);
      console.log(response);
      const user = response.data.data;

      this.setState({
        id: user.id,
        username: user.userName,
        sex: user.sex,
        note: user.note
      })
    } catch (error) {
      console.error(error);
    }
  }

  // Form change processing function
  handleChange = (event) => {
    const {name, value} = event.target;
    this.setState({
      [name] : value,
    })
  };

  // Update user information function
  handleSubmit = (event) => {
    this.submitUser();
  };

  // post requests to submit updated user information
  submitUser() {
    const {id, username, sex, note} = this.state;
    console.log(id + ", " + username + ", " + sex + ", " + note);

    axios.post('http://localhost:8080/react-user/update', {
      id: id,
      userName: username,
      sex: sex,
      note: note
    })
      .then(function (response) {
        console.log(response);
        alert(response.data.msgInfo);
        // Update list state
        const user = response.data.data;
        this.setState({
          id: user.id,
          username: user.userName,
          sex: sex,
          note: note
        });

      })
      .catch(function (error) {
        console.log(error);
      });
  };

  render() {
    const {id, username, sex, note} = this.state;
    return (
      <React.Fragment>
        <h1>User Detail Form</h1>
        <form>
          <table>
            <tr>
              <td>Id:</td>
              <td><input
                type="text"
                id="id"
                name="id"
                value={id}
                disabled="true"
                onChange={this.handleChange}/></td>
            </tr>
            <tr>
              <td>Username:</td>
              <td><input
                type="text"
                id="username"
                name="username"
                value={username}
                onChange={this.handleChange}/></td>
            </tr>
            <tr>
              <td>sex:</td>
              <td><select
                name="sex"
                value={sex}
                onChange={this.handleChange}>
                <option value="MALE">MALE</option>
                <option value="FEMALE">FEMALE</option>
              </select></td>
            </tr>
            <tr>
              <td>note:</td>
              <td><input
                type="text"
                id="note"
                name="note"
                value={note}
                onChange={this.handleChange}/></td>
            </tr>
            <tr>
              <td><input
                type="button"
                value="UpdateUser"
                onClick={this.handleSubmit}/></td>
            </tr>
          </table>
        </form>
      </React.Fragment>
    )
  }
}
export default UserDetailForm;
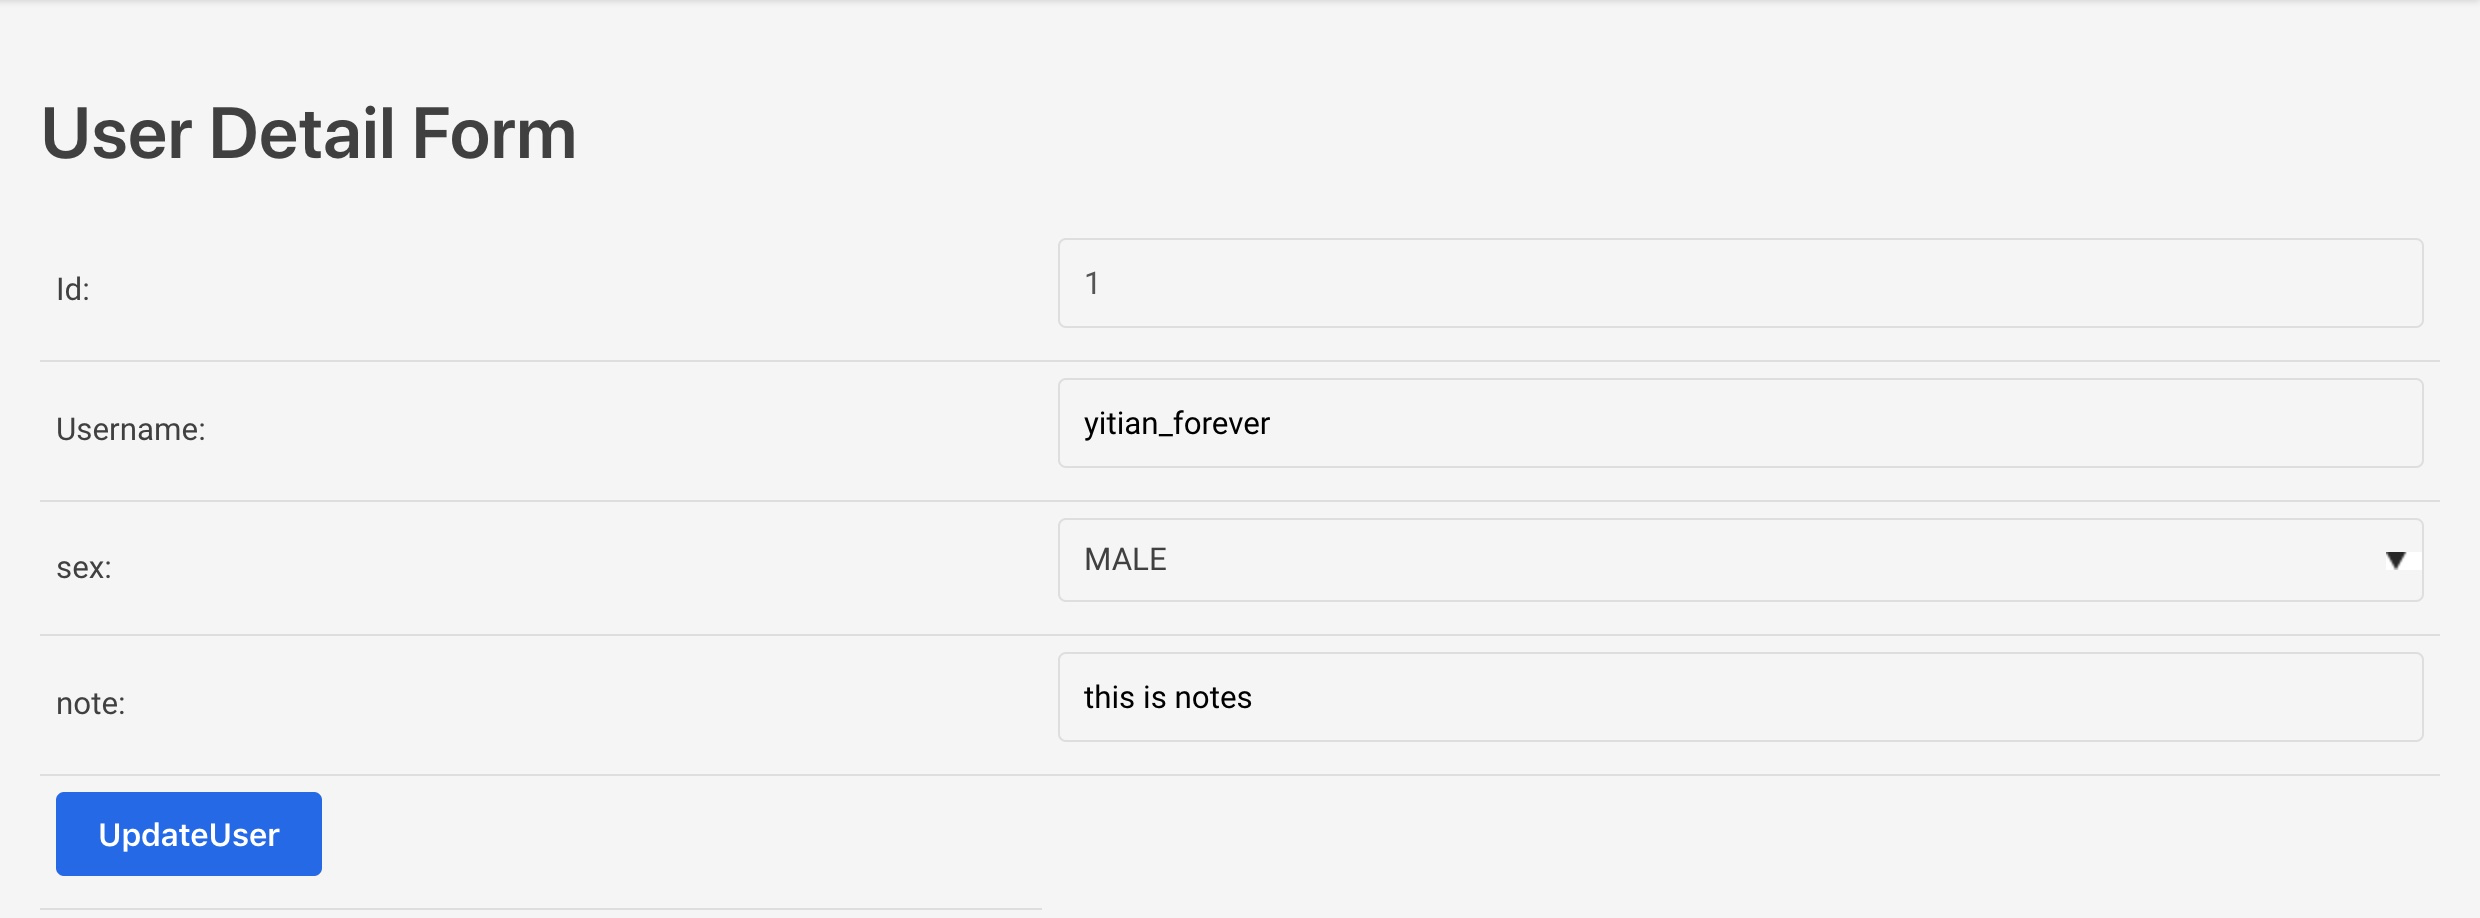
In this part of code, axios.get request is used to jump to the incoming id parameter according to the page to get the corresponding details of the user. At the same time, axios.post request is used to process the update operation of user information. In this way, the display of user's detailed information page and the update function of user's detailed information are realized.
The display of this page is:
Ice project routing configuration
In the above code, the following request path is used for page Jump:
/user/list
/user/detail
In the ice project, you need to configure declarative routes in routes.j[t]s route configuration file:
const routes = [
  {
    path: '/user/list',
    component: UserListTable,
  },
  {
    path: '/user/detail',
    component: UserDetailForm,
  },
  ...
];

export default routes;
The above is the full implementation of this instance. END.

