1. Write in front
stay Last article Flutter's wechat actual combat project has been opened in, so let's continue to write the wechat actual combat project today, the construction of my interface!

2. What are you going to do today
Last time, we built the basic framework of wechat. Today, we also built the switching of four pages. Today, we focus on my interface.
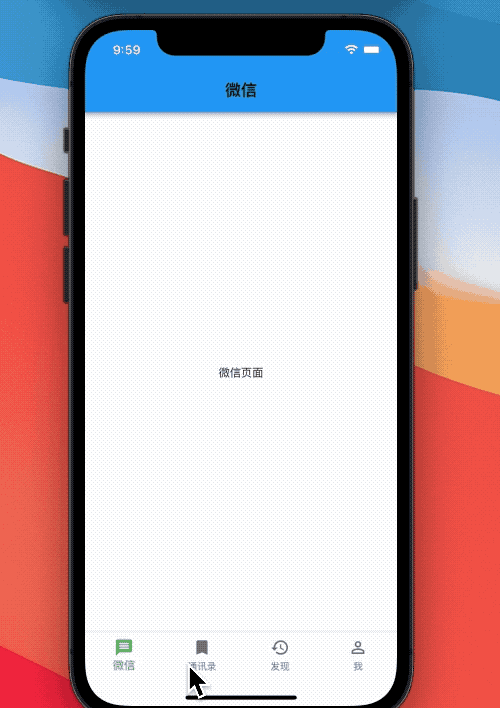
To achieve the effect of the above dynamic diagram, we first establish four interfaces.
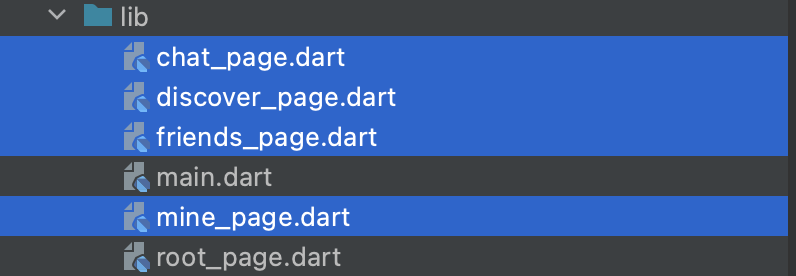
- chat_page: wechat chat page
- friends_page: address book page
- discover_page: discovery page
- mine_page: my interface
Import the four interfaces established above to the root view_ In the page, create a List to store four widgets. When switching item s, get the corresponding Widget in the List to achieve the switching effect.
import 'package:flutter_wechat/chat_page.dart';
import 'package:flutter_wechat/discover_page.dart';
import 'package:flutter_wechat/friends_page.dart';
import 'package:flutter_wechat/mine_page.dart';
- The specific codes are as follows:

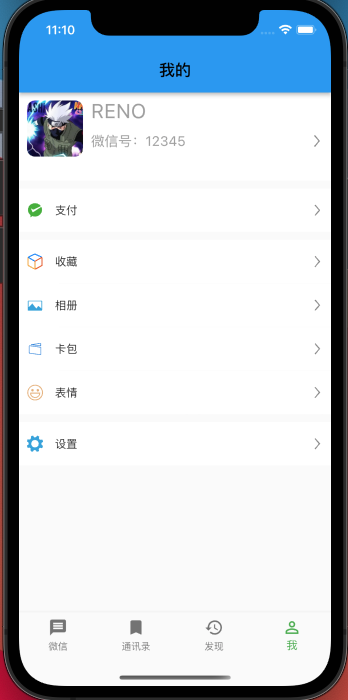
The main interface we implemented today is my interface. The effect is shown in the figure below. How to implement the change?
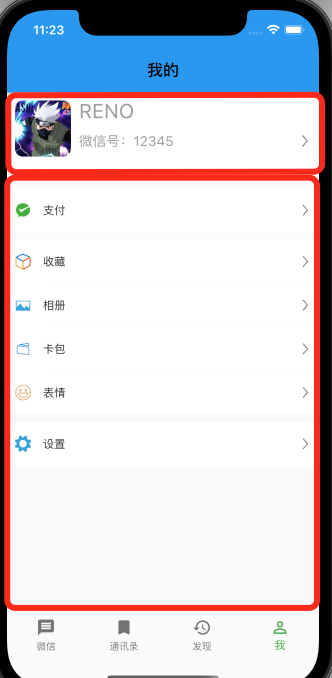
Let's implement the above header first. The following is a ListView, which is roughly divided into upper and lower parts.
3. Implement head
3.1 structural analysis
The head can also be divided into left and right and up and down. On the left is the head image, on the right is the nickname, micro signal and arrow, and on the right is the up and down structure. From this, the following structure diagram can be obtained.
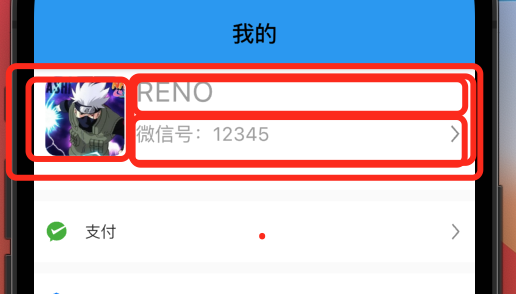
Container can be used for the head as a whole. Row is used for the left and right layout, Column is used for the up and down layout, and a container can be used for the avatar. The container on the right is also used as the up and down container. Using container can set the background color to facilitate us to see the layout. It is equivalent to View in OC, which acts as a container.
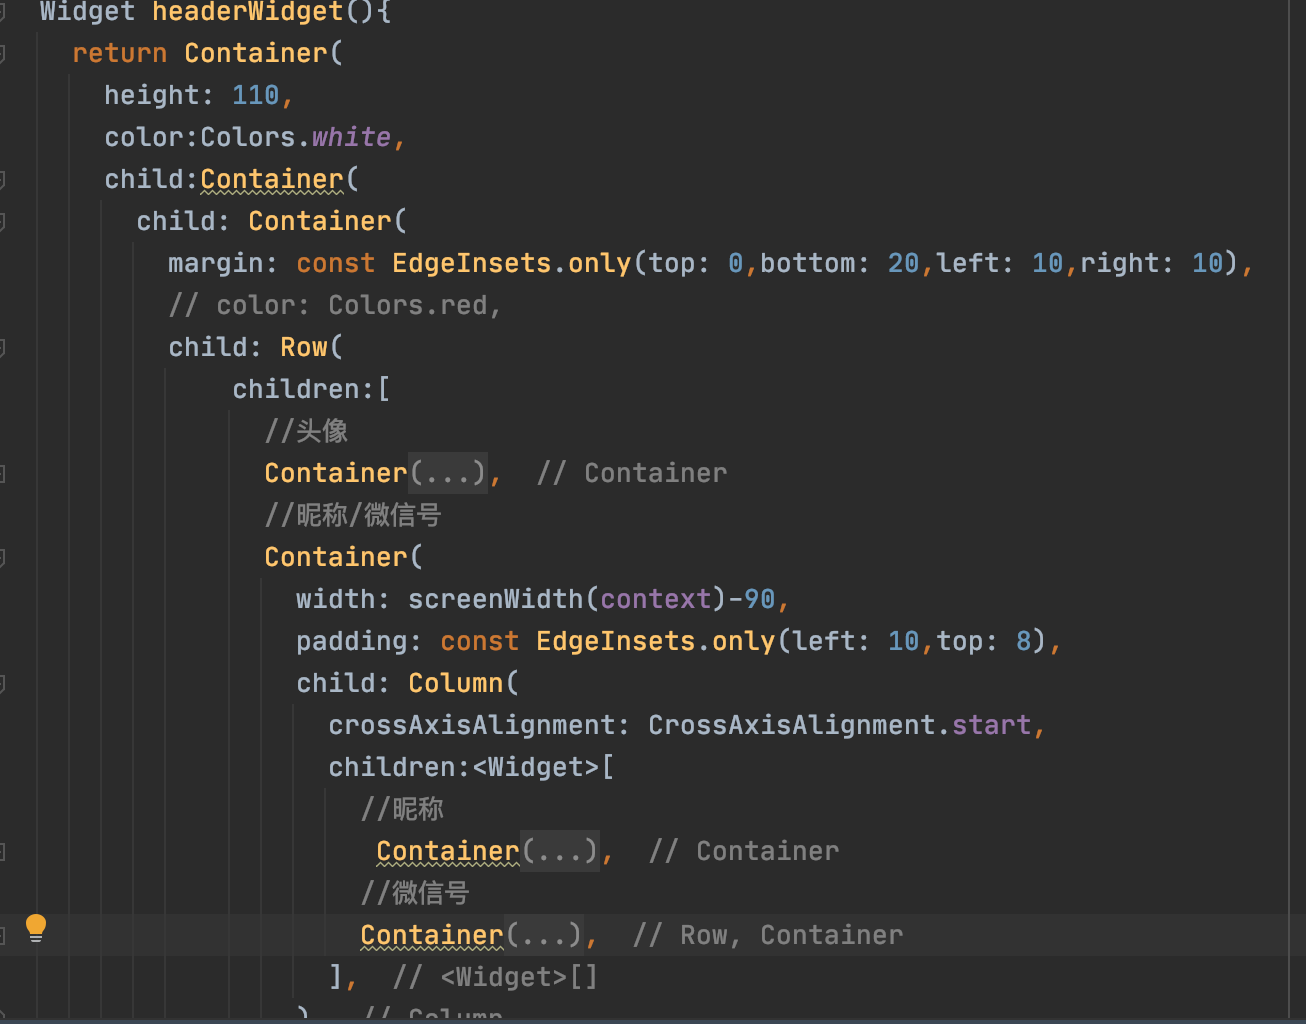
- head portrait
Container(
                  width: 70,
                  height: 70,
                  decoration: BoxDecoration(
                    // color: Colors.blue,
                      borderRadius: BorderRadius.circular(10),
                      image: const DecorationImage(
                          image: AssetImage("images/avatar.jpeg"),
                          fit:BoxFit.cover
                      )
                  ),
                ),
3.2 head image setting fillet
A decoration (decorator) is needed to set the fillet of the avatar, which can set the borderRadius and pictures. Our pictures use the local path pictures of AssetImage.
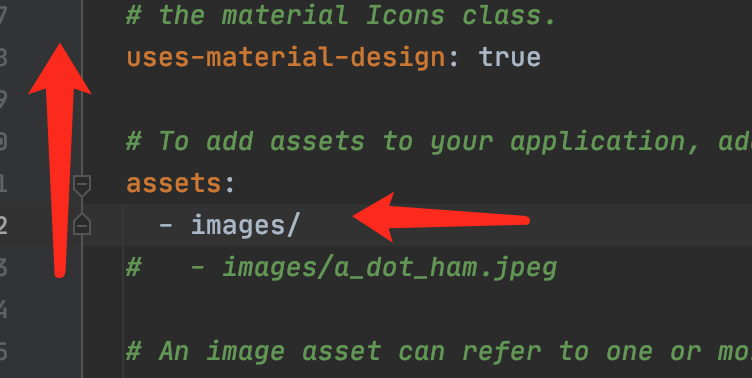
To use AssetImage, you need to set the path in the local pubspec.yaml file. Open the note and set the folder as shown in the following figure:
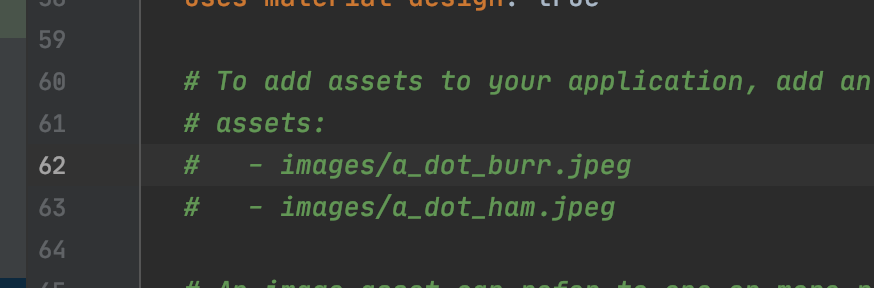
Open the comments and set the image folder. Pay attention to align the code. The images here is the folder in my local project. This is the setting path. Of course, you can set your own file path.
Set the avatar image: AssetImage("images/avatar.jpeg"), and set the wechat nickname and wechat code as follows:
Container(
                  width: screenWidth(context)-90,
                  padding: const EdgeInsets.only(left: 10,top: 8),
                  child: Column(
                    crossAxisAlignment: CrossAxisAlignment.start,
                    children:<Widget>[
                      //nickname
                       Container(
                        height: 35,
                        child:  Text("RENO",style: TextStyle(fontSize: 25,color: Colors.grey),),
                      ),
                      //wechat number
                      Container(
                        height: 35,
                        child:Row(
                          mainAxisAlignment: MainAxisAlignment.spaceBetween,
                          children: const <Widget>[
                            Text("Micro signal: 12345",style: TextStyle(fontSize: 17,color: Colors.grey),),
                            Image(image: AssetImage("images/icon_right.png"),width: 15,)
                          ],
                        ) ,),
                    ],
                  ),

                )
3.3 obtaining screen width and height
- screenWidth is the screen width. You can define a global file to use, or obtain it separately.
double screenWidth(BuildContext context){
  return MediaQuery.of(context).size.width;
}
This is the code implementation of wechat's header
The next implementation list is self customized cell
GitHubProject address
4. Write it in the back
Follow me and more content will be output continuously
[fluent] basic component [01] Text
[fluent] basic component [02] Container
[fluent] basic component [03] Scaffold
[fluent] basic component [04] Row/Column
[fluent] basic component [05] Icon
[fluent] basic component [06] Image
[fluent] basic component [07] Appbar
[fluent] basic component [08] BottomNavigationBar
[fluent] basic component [09] Button
- [project actual combat collection]
[fluent] actual combat of wechat project [01] basic framework construction
🌹 Just like it 👍🌹
🌹 If you think you have something to gain, you can have a wave of Collection + attention, so that you won't find me next time 😁🌹
🌹 Welcome to leave a message, criticize and correct, forward, please indicate the source, thank you for your support! 🌹