Hadoop cluster construction (continuous update)
The relevant resource files that are not used in this paper, the extraction code eeee
1: Preparations to be completed before starting construction
- Built Linux server
- You can access the public network (ping www.baidu.com), and you can ping it
- Xshell connection (can be omitted)
- Server version information

- Update system components
yum update
- Turn off the firewall
systemctl stop firewalld
- Turn off the firewall and start it automatically
systemctl disable firewalld
- Change host name (optional)
hostnamectl set-hostname MrBun
2: Java jdk installation
Hadoop depends on java at the bottom, so Hadoop needs java environment. All resource files are in the link at the beginning of the article. If they fail, please leave a message and update!!!
Some Linux systems come with their own Java environment. If so, you can skip this step. Of course, you can also install other versions of java jdk
- Create java directory
mkdir -p /usr/java
- Enter the java directory
cd /usr/java
- Upload Java JDK
If Xshell is used in the preparatory work, you can use yum -y install lrzsz command to install lrzsz here
Use the rz -y command to upload files, and use the sz command to pull down files locally
Of course, you can also use third-party software to upload and download, or use scp command to transfer files.
There are many methods. You can baidu by yourself
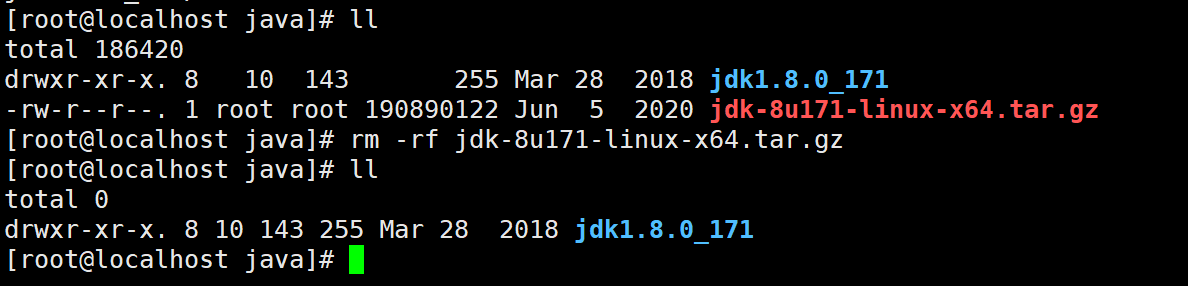
Use after uploading ll Command to view the current directory file

- Extract to current directory
tar -zxvf jdk-8u171-linux-x64.tar.gz -C /usr/java/
- Check whether the decompression is successful and delete the installation package. You can also delete it without deleting it

Delete command
rm -rf jdk-8u171-linux-x64.tar.gz
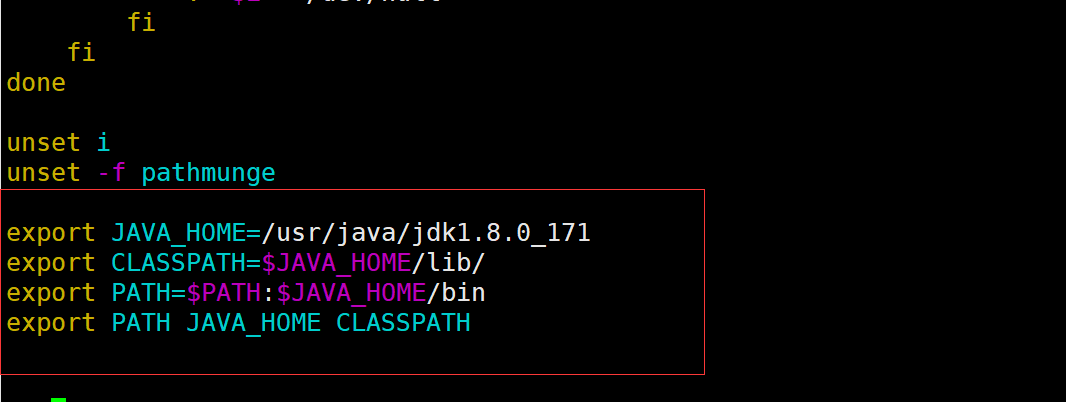
- Configure environment variables
vim /etc/profile
Add at the end of the document
export JAVA_HOME=/usr/java/jdk1.8.0_171
export CLASSPATH=$JAVA_HOME/lib/
export PATH=$PATH:$JAVA_HOME/bin
export PATH JAVA_HOME CLASSPATH
- Each time you add an environment variable, reactivate it to take effect
source /etc/profile
- Check whether java is installed successfully
java -version

3: Hadoop installation
Hadoop is a distributed architecture. Huge data tasks are completed on different machines (sub nodes) of the cluster. The Hadoop version used in this article is generation 2
Hadoop generation 2 has four basic components
1: Hadoop Common
2: Hadoop Distributed File System(HDFS)
3: MapReduce
4: YARN
Hadoop Common provides configuration information interface function support for 2, 3 and 4
HDFS provides storage for data
MapReduce provides calculations for data
YARN resource scheduling
- Create Hadoop working directory
mkdir -p /usr/hadoop
cd /usr/hadoop
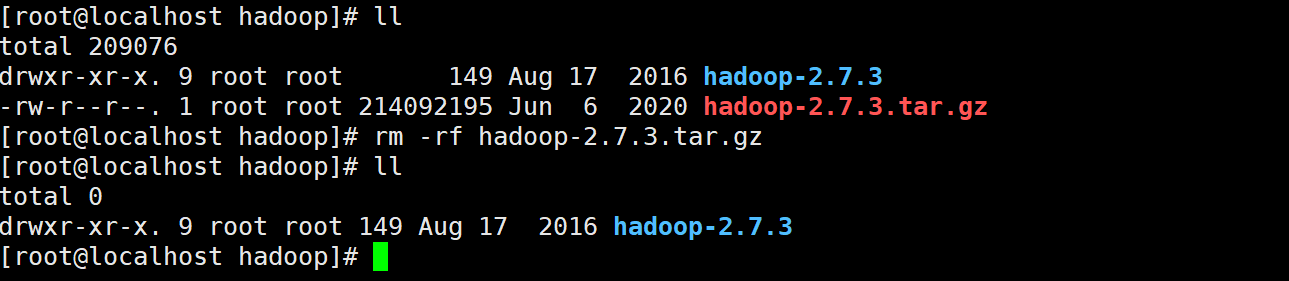
- Upload, decompress and delete the compressed package
tar -zxvf hadoop-2.7.3.tar.gz -C /usr/hadoop/
rm -rf hadoop-2.7.3.tar.gz
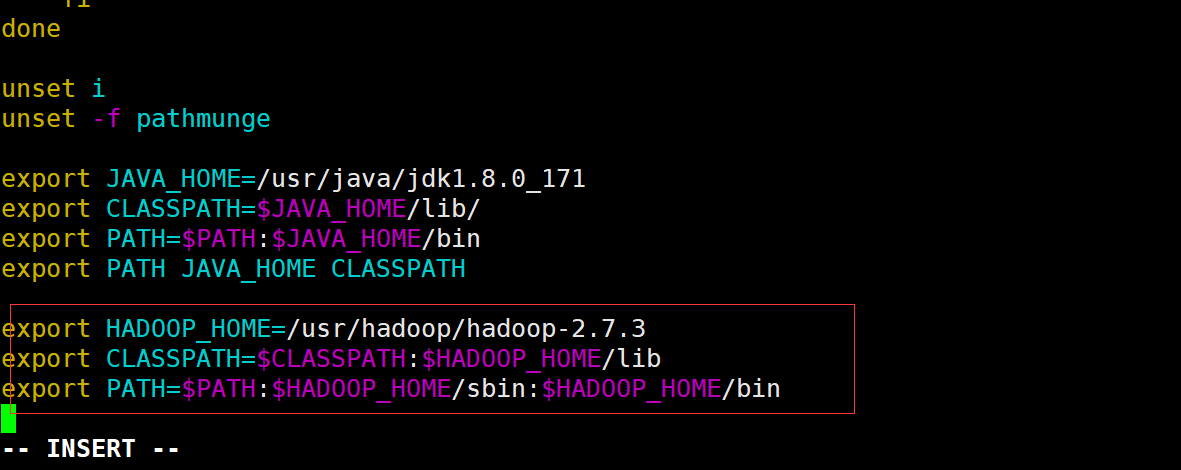
- Configure environment variables
vim /etc/profile
Add the following configuration items
export HADOOP_HOME=/usr/hadoop/hadoop-2.7.3
export CLASSPATH=$CLASSPATH:$HADOOP_HOME/lib
export PATH=$PATH:$HADOOP_HOME/sbin:$HADOOP_HOME/bin
- Activate environment variable
source /etc/profile
- Check whether the installation is successful
hadoop version

Five configuration files need to be configured after installation
1: hadoop-env.sh
hadoop runtime will find Java environment variables from this file, so you need to_ Home write it in
2: core-site.xml
This file is used to set the path of temporary files and hdfs communication mode during hadoop operation.
3: hdfs-site.xml
This file sets the path of name space metadata and data data block stored in hdfs runtime.
4: yarn-site.xml
Set information related to resource scheduling
5: mapred-site.xml
Set MapReduce working path
Enter the configuration file directory
cd /usr/hadoop/hadoop-2.7.3/etc/hadoop
- hadoop-env.sh
vim hadoop-env.sh
export JAVA_HOME=/usr/java/jdk1.8.0_171

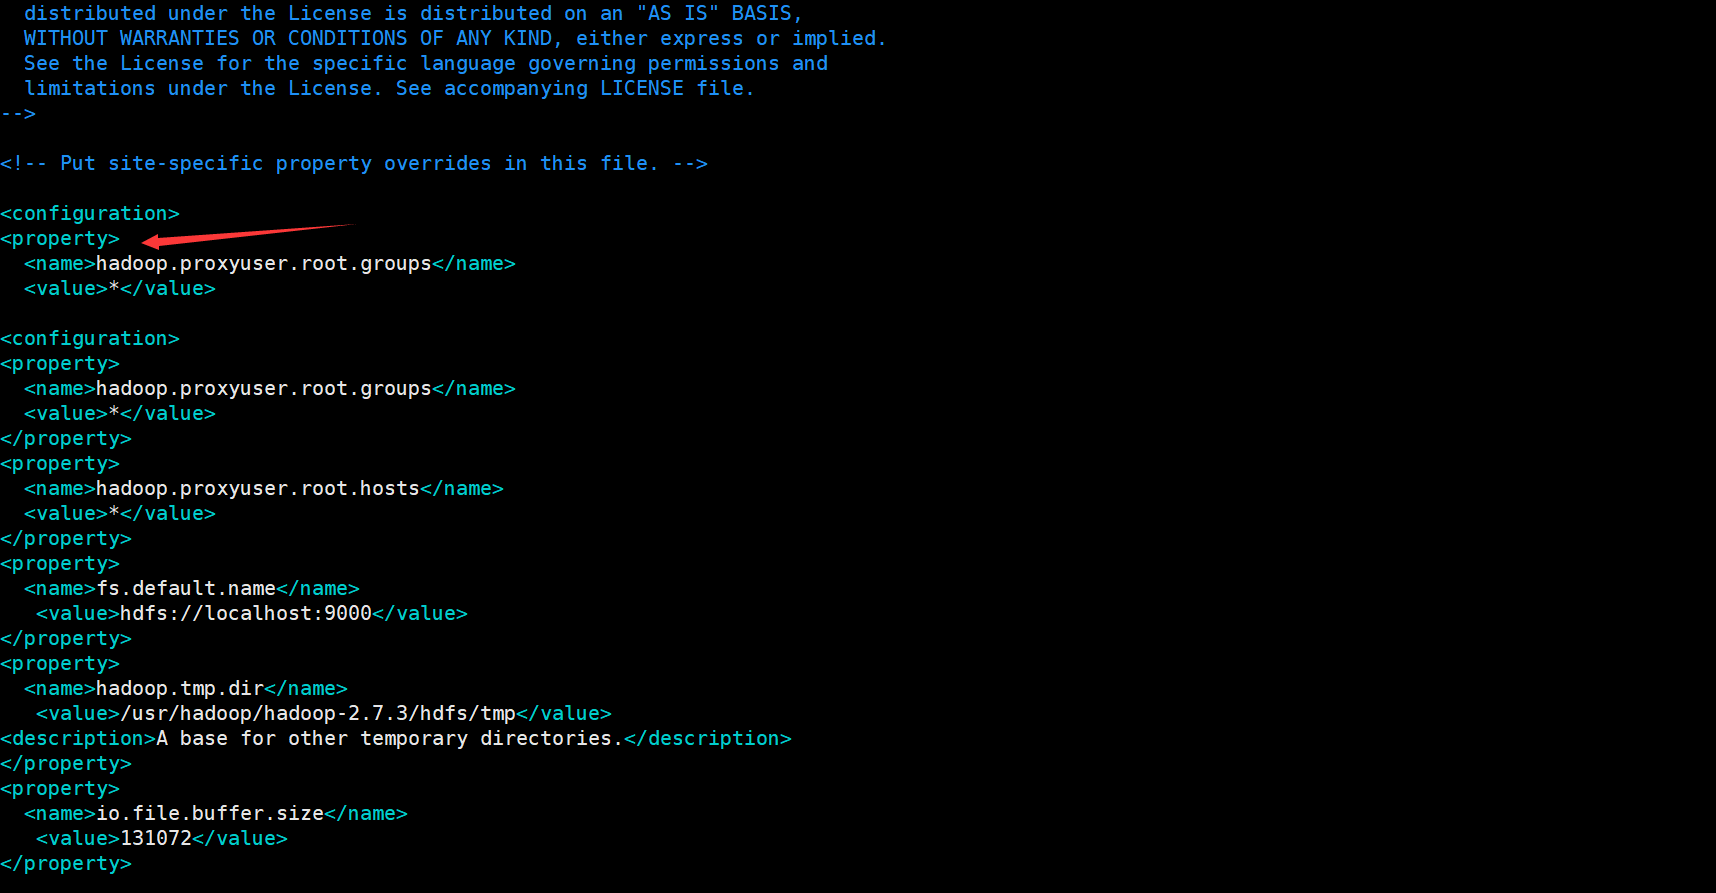
- core-site.xml
vim core-site.xml
The localhost here is the host name in the preparation. If you change it, remember to make the corresponding change. The same is true for the subsequent configuration files
<property>
  <name>hadoop.proxyuser.root.groups</name>
  <value>*</value>
</property>
<property>
  <name>hadoop.proxyuser.root.hosts</name>
  <value>*</value>
</property>
<property>
  <name>fs.default.name</name>
   <value>hdfs://localhost:9000</value>
</property>
<property>
  <name>hadoop.tmp.dir</name>
   <value>/usr/hadoop/hadoop-2.7.3/hdfs/tmp</value>
<description>A base for other temporary directories.</description>
</property>
<property>
  <name>io.file.buffer.size</name>
   <value>131072</value>
</property>
<property>
  <name>fs.checkpoint.period</name>
   <value>60</value>
</property>
<property>
  <name>fs.checkpoint.size</name>
   <value>67108864</value>
</property>
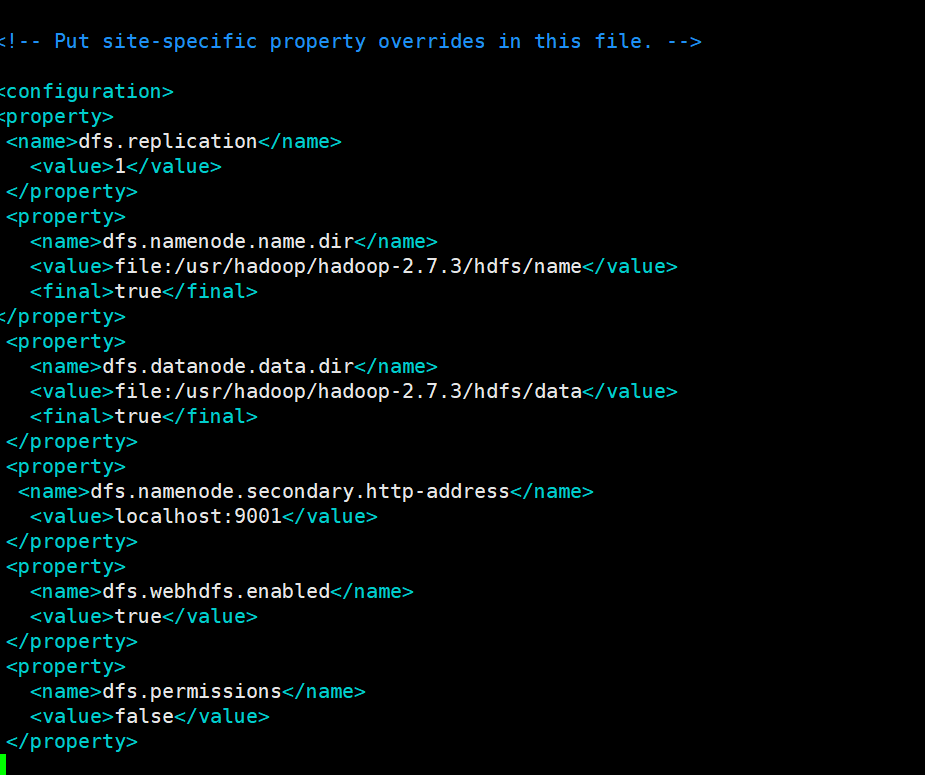
- hdfs-site.xml
vim hdfs-site.xml
<property>
 <name>dfs.replication</name>
   <value>1</value>
 </property>
 <property>
   <name>dfs.namenode.name.dir</name>
   <value>file:/usr/hadoop/hadoop-2.7.3/hdfs/name</value>
   <final>true</final>
</property>
 <property>
   <name>dfs.datanode.data.dir</name>
   <value>file:/usr/hadoop/hadoop-2.7.3/hdfs/data</value>
   <final>true</final>
 </property>
 <property>
  <name>dfs.namenode.secondary.http-address</name>
   <value>localhost:9001</value>
 </property>
 <property>
   <name>dfs.webhdfs.enabled</name>
   <value>true</value>
 </property>
 <property>
   <name>dfs.permissions</name>
   <value>false</value>
 </property>
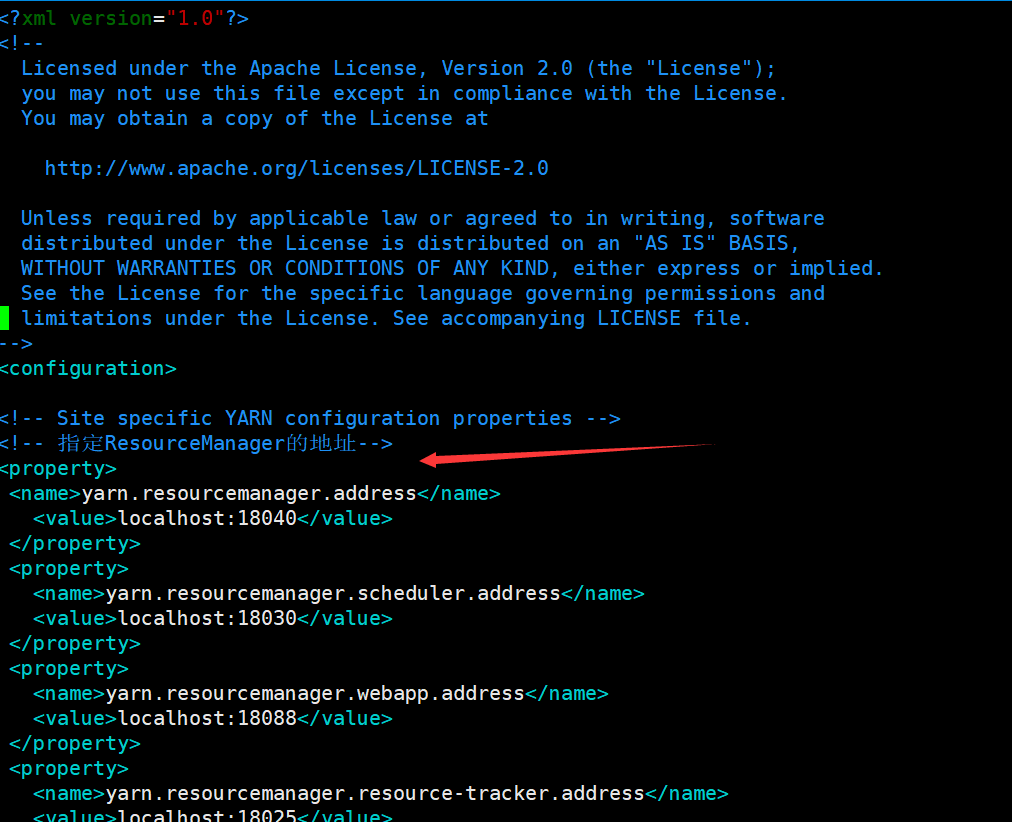
- yarn-site.xml
vim yarn-site.xml
<!-- appoint ResourceManager Address of-->
<property>
 <name>yarn.resourcemanager.address</name>
   <value>localhost:18040</value>
 </property>
 <property>
   <name>yarn.resourcemanager.scheduler.address</name>
   <value>localhost:18030</value>
 </property>
 <property>
   <name>yarn.resourcemanager.webapp.address</name>
   <value>localhost:18088</value>
 </property>
 <property>
   <name>yarn.resourcemanager.resource-tracker.address</name>
   <value>localhost:18025</value>
 </property>
 <property>
  <name>yarn.resourcemanager.admin.address</name>
  <value>localhost:18141</value>
 </property>
<!-- appoint reducer How to get data-->
 <property>
  <name>yarn.nodemanager.aux-services</name>
  <value>mapreduce_shuffle</value>
 </property>
 <property>
  <name>yarn.nodemanager.auxservices.mapreduce.shuffle.class</name>
  <value>org.apache.hadoop.mapred.ShuffleHandler</value>
</property>
- mapred-site.xml
because hadoop This file is not provided. We need to create it ourselves
cp mapred-site.xml.template mapred-site.xml
vim mapred-site.xml
<property>
<!--appoint Mapreduce Run in yarn upper-->
   <name>mapreduce.framework.name</name>
   <value>yarn</value>
 </property>
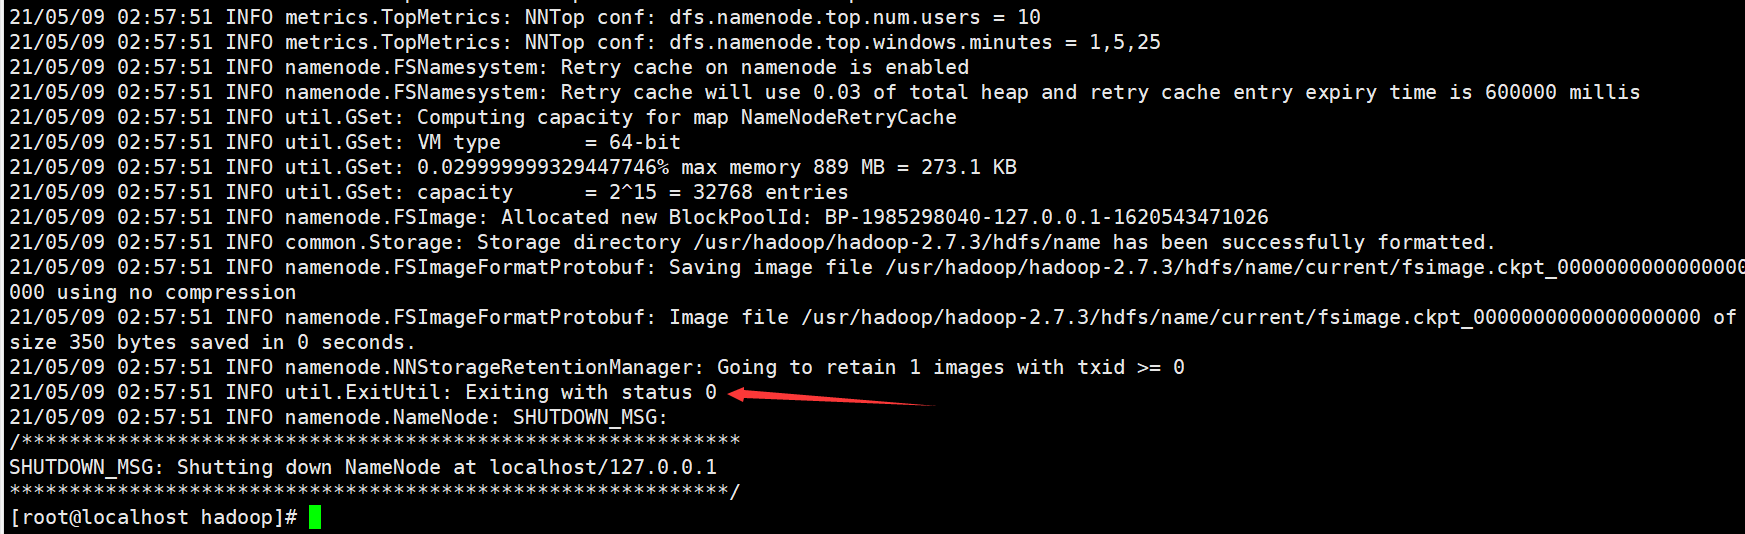
- Hadoop name node initialization
hadoop namenode -format
During the formatting process, create a name node and a temporary file storage directory for the local disk using the path set in the configuration file. That is to build a storage framework of hdfs. When no error is reported and "Exiting with status 0" appears, the format is successful.
- Open Hadoop
cd /usr/hadoop/hadoop-2.7.3/
sbin/start-all.sh
start-all.sh open all services for
stop-all.sh stop all services for
Both are in the sbin directory
Ask whether to continue the connection. Enter yes and enter. The password entered is the password of the current user. If it is the root user, enter the password of the root user. The following service will start successfully. It is annoying to enter the password every time. Next, set ssh free
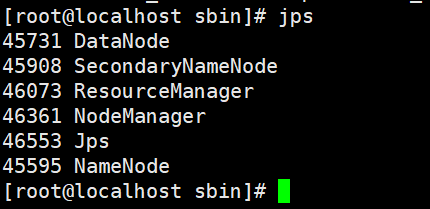
| name | effect |
|---|---|
| NameNode | NameNode is mainly responsible for managing meta information, such as file name, directory structure, attributes, data block storage location, etc |
| DataNode | DataNode is responsible for the specific access of data blocks |
| ResourceManager | The resource manager is responsible for the unified management and distribution of all computing power in the cluster |
| NodeManager | NodeManager is the agent on each machine, which is responsible for container management, monitoring their resource usage, and providing resource usage reports to resource manager |
| SecondaryNameNode | SecondaryNameNode is an auxiliary tool of NameNode. It has two functions: one is image backup, and the other is the regular combination of log and image. Note: it is not a backup of NameNode |
- ssh free
cd ~                                //Return to home directory
ssh localhost						//localhost is the host name
ll -a
cd .ssh								//get into. ssh folder
ssh-keygen -t rsa					//Create the public key and private key, and prompt to enter all the time
cat id_rsa.pub >> authorized_keys	//Write private key
chmod 600 authorized_keys			//Grant permission
After setting SSH free, you don't need to enter the password again when starting or closing the Hadoop cluster again
View the Hadoop cluster just built through the browser
In the address bar of the browser, enter the Ip address of the linux server plus 50070 port
For example:
http://192.168.25.128:50070
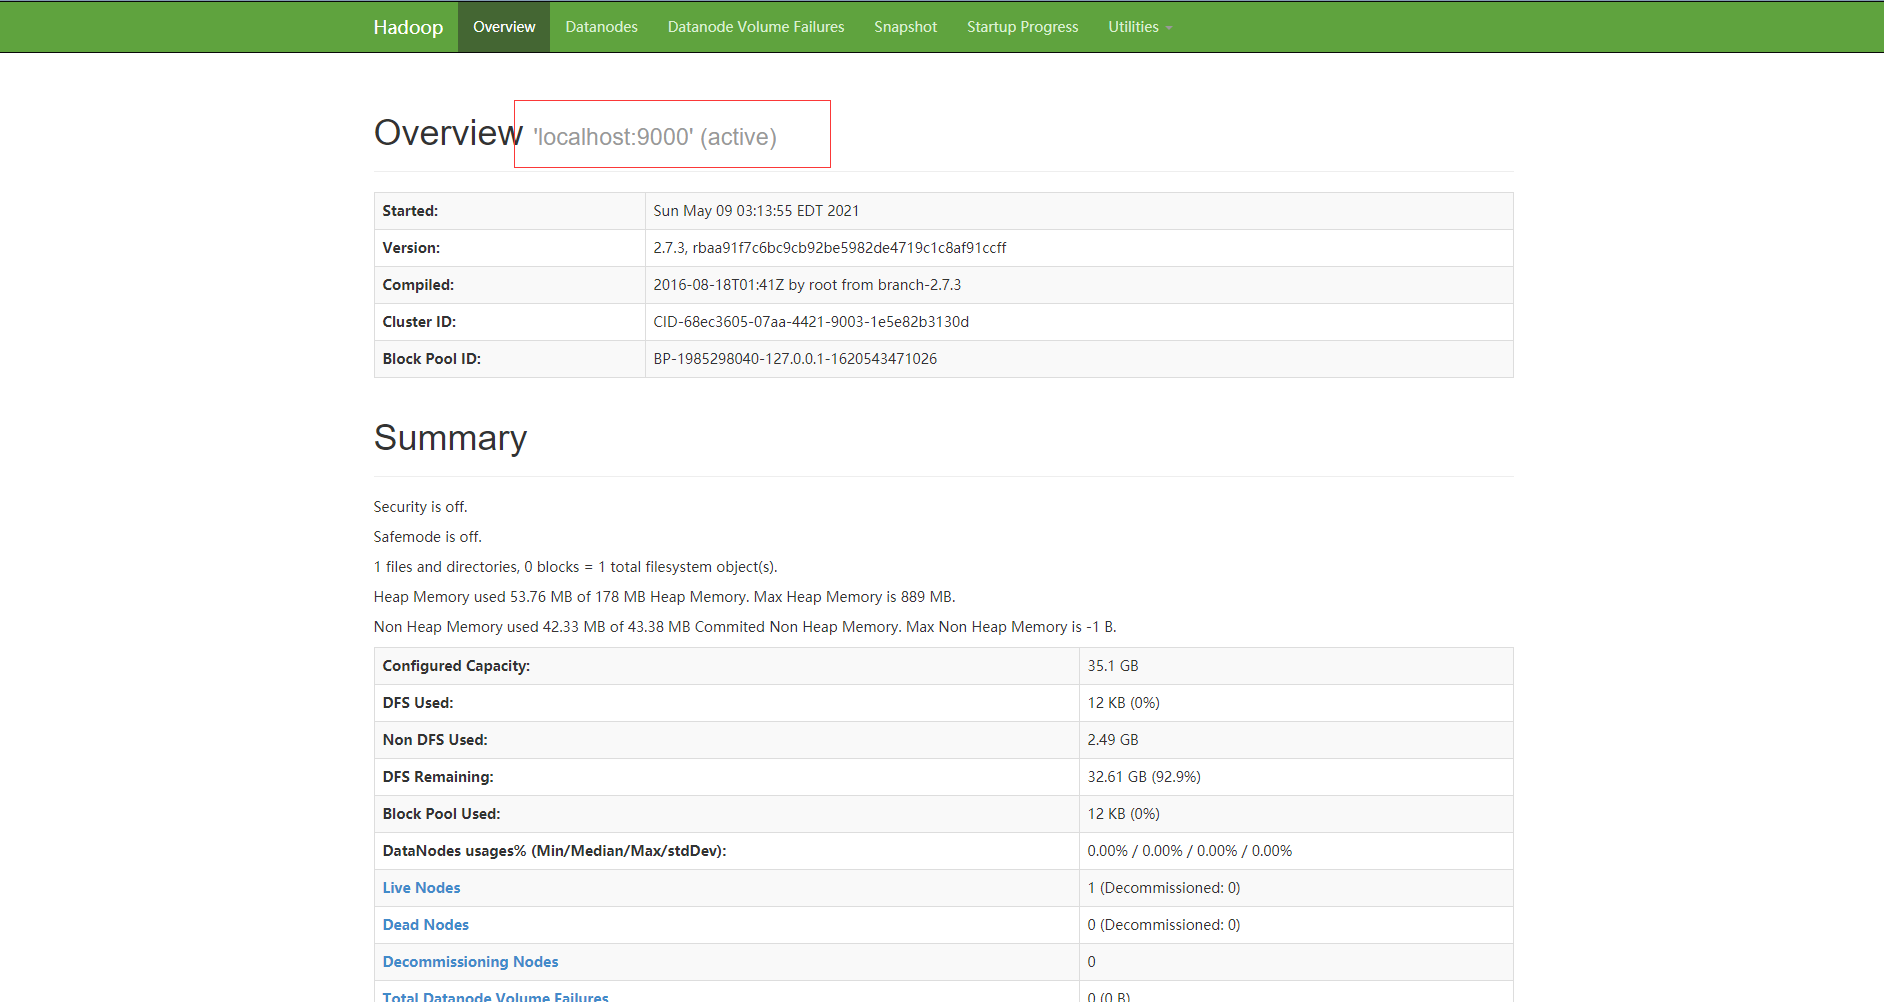
So far, the Hadoop cluster has been built
Updated on May 9, 2021