Image enhancement and model fine tuning learning essay
Image enhancement learning objectives
- Know the common methods of image enhancement
- Able to use TF Keras to complete image enhancement
Large scale data set is the premise of successful application of deep neural network. For example, we can crop the image in different ways to make the object of interest appear in different positions, so as to reduce the dependence of the model on the position of the object. We can also adjust the brightness, color and other factors to reduce the color sensitivity of the model. It can be said that in the success of AlexNet that year, image enhancement technology contributed a lot
Common image enhancement methods
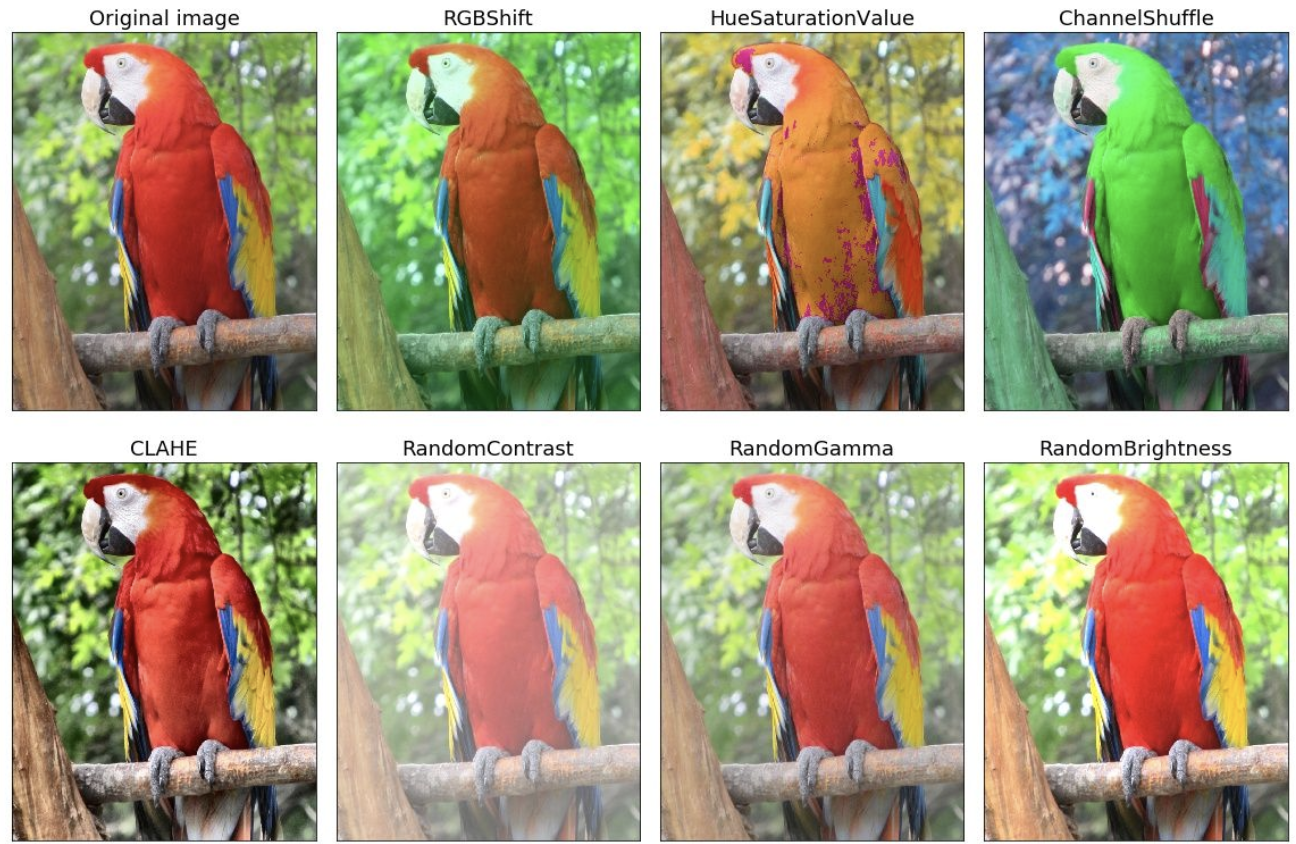
Image enhancement refers to increasing the size of the data set through one or more combined data enhancement transformations, such as clipping, rotation / reflection / Flip transformation, scaling transformation, translation transformation, scale transformation, contrast transformation, noise disturbance, color transformation and so on. The significance of image enhancement is to make a series of random changes to the training image to produce similar but different training samples, so as to expand the scale of the training data set. Moreover, randomly changing the training samples can reduce the dependence of the model on some attributes, so as to improve the generalization ability of the model.
Common image enhancement methods can be divided into two categories: geometric transformation and color transformation
- Geometric transformation class is mainly used for geometric transformation of images, including flipping, rotation, clipping, deformation, scaling, etc.
- Color transformation refers to the processing of images by means of blur, color transformation, erasure, filling, etc
Image enhancement can be realized through TF Image, or through TF keras. Imagegenerator.
tf.image for image enhancement
Import the required toolkit and read the image to be processed:
# Import Toolkit
import tensorflow as tf
import matplotlib.pyplot as plt
import numpy as np
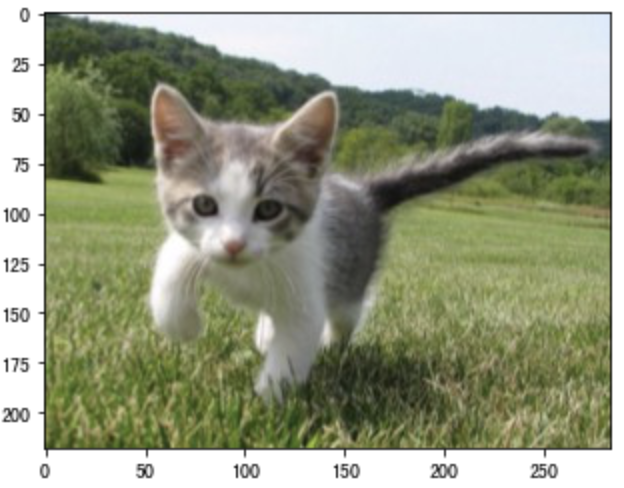
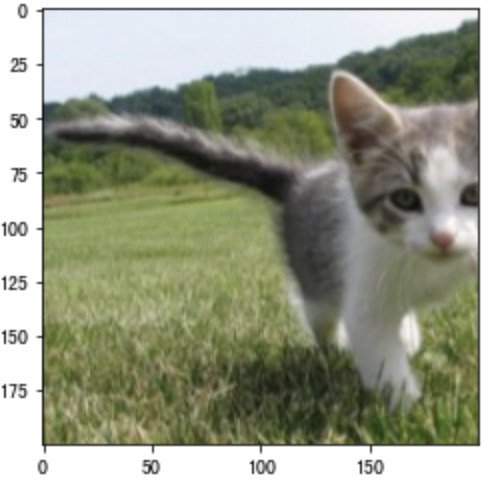
# Read image and display
cat = plt.imread('./cat.jpg')
plt.imshow(cat)
Flip and crop
Flipping left and right image is the earliest and most widely used image widening method. You can use TF image. random_ flip_ left_ Right to flip the image left and right.
# Flip left and right and display
cat1 = tf.image.random_flip_left_right(cat)
plt.imshow(cat1)
Create TF image. random_ flip_ up_ Down instance to flip the image up and down, which is less used.
# upside down
cat2 = tf.image.random_flip_up_down(cat)
plt.imshow(cat2)

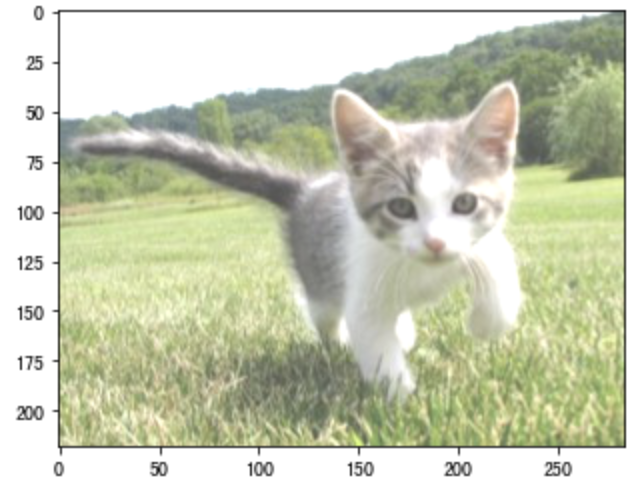
Randomly cut out an area with an area of 10% ∼ 100% of the original area, and the ratio of width and height of the area is randomly taken from 0.5 ∼ 2, and then scale the width and height of the area to 200 pixels respectively.
# Random clipping
cat3 = tf.image.random_crop(cat,(200,200,3))
plt.imshow(cat3)
Color transformation
Another kind of augmentation method is color transformation. We can change the color of the image from four aspects: brightness, contrast, saturation and hue. Next, the brightness of the image is randomly changed to 50% (i.e. 1 − 0.5) ∼ 150% (i.e. 1 + 0.5) of the brightness of the original image.
cat4=tf.image.random_brightness(cat,0.5)
plt.imshow(cat4)
Similarly, we can also randomly change the hue of the image
cat5 = tf.image.random_hue(cat,0.5)
plt.imshow(cat5)
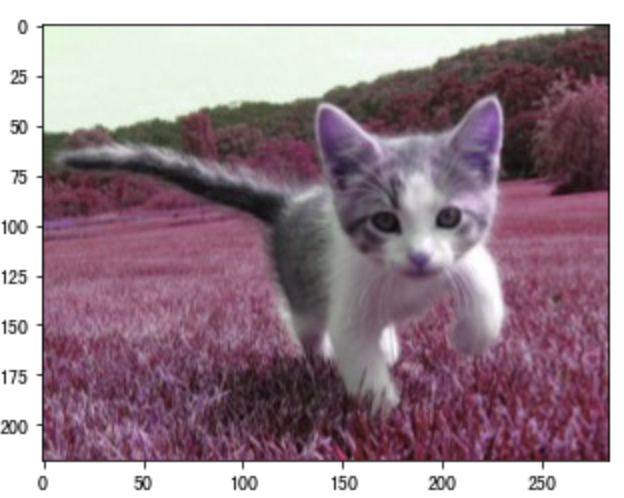
Image enhancement using ImageDataGenerator()
ImageDataGenerator() is keras preprocessing. The image generator in the image module can enhance the data in batch, expand the size of the data set and enhance the generalization ability of the model. For example, rotation, deformation, etc., as follows:
keras.preprocessing.image.ImageDataGenerator(
               rotation_range=0, #Integer. The range of degrees of random rotation.
               width_shift_range=0.0, #Floating point number, width translation
               height_shift_range=0.0, #Floating point number, height translation
               brightness_range=None, # Brightness adjustment
               shear_range=0.0, # Cutting
               zoom_range=0.0, #Floating point number or [lower, upper]. Random scaling range
               horizontal_flip=False, # Flip left and right
               vertical_flip=False, # Flip vertically
               rescale=None # Scale adjustment
            )
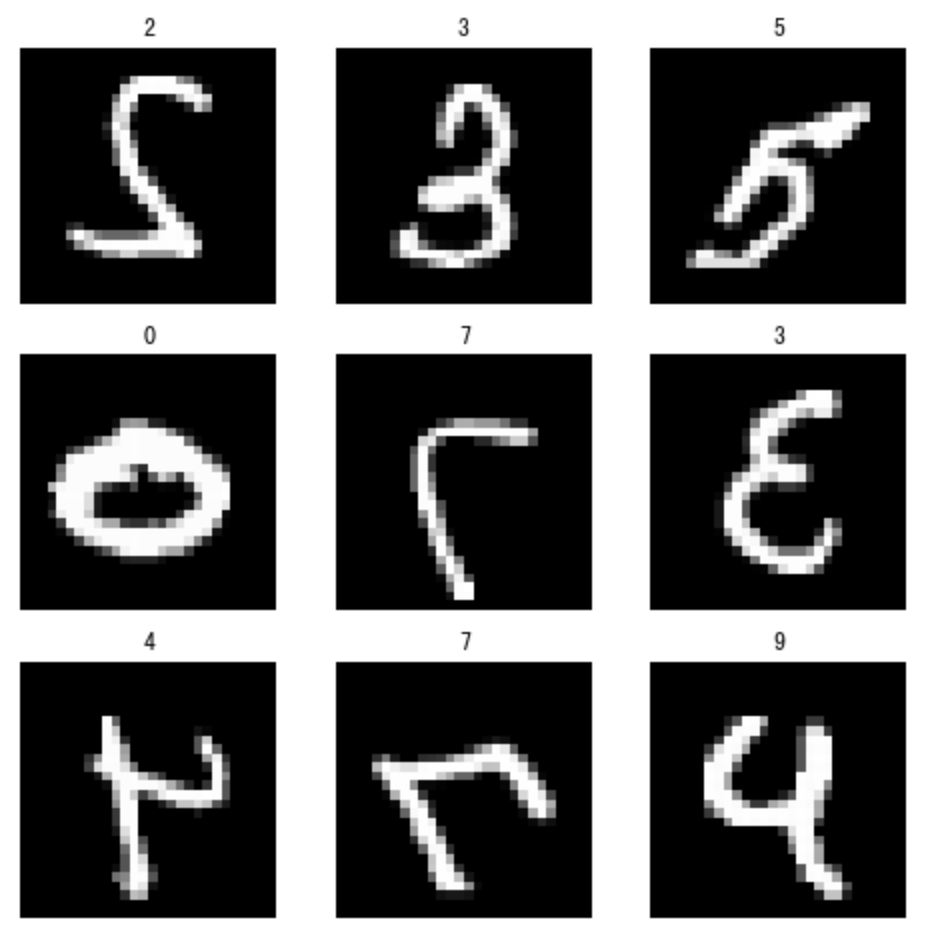
Let's look at the results of horizontal flip:
# Get dataset
(x_train, y_train), (x_test, y_test) = tf.keras.datasets.mnist.load_data()
# Convert data to 4-dimensional form
x_train = X_train.reshape(X_train.shape[0],28,28,1)
x_test = X_test.reshape(X_test.shape[0],28,28,1)
# Set image enhancement mode: flip horizontally
datagen = ImageDataGenerator(horizontal_flip=True)
# View enhanced results
for X_batch,y_batch in datagen.flow(x_train,y_train,batch_size=9):
    plt.figure(figsize=(8,8)) # Set the size of each image display
    # Generate a 3 * 3 grid image
    for i in range(0,9):
        plt.subplot(330+1+i)
        plt.title(y_batch[i])
        plt.axis('off')
        plt.imshow(X_batch[i].reshape(28,28),cmap='gray')
    plt.show()
    break
Model tuning
Learning objectives
- Know the principle of fine tuning
- Fine tuning model can be used to complete the task of image classification
Fine tuning
How to train the model on MNIST training data set with only 60000 images. ImageNet, the most widely used large-scale image data set in academia, has more than 10 million images and 1000 types of objects. However, the size of the data set we usually contact is usually between the two. Suppose we want to identify different kinds of chairs from the image, and then recommend the purchase link to the user. One possible method is to find 100 common chairs, take 1000 images from different angles for each chair, and then train a classification model on the collected image data set. Another solution is to apply transfer learning to migrate the knowledge learned from the source data set to the target data set. For example, although most of the images in the ImageNet dataset are independent of the chair, the model trained on the dataset can extract more general image features, which can help identify edges, textures, shapes and object composition. These similar features may be equally effective for identifying chairs.
Fine tuning consists of the following 4 steps.
- A neural network model is pre trained on the source data set (such as ImageNet data set), that is, the source model.
- Create a new neural network model, namely target model. It copies all model designs and their parameters on the source model except the output layer. We assume that these model parameters contain the knowledge learned from the source data set, and this knowledge is also applicable to the target data set. We also assume that the output layer of the source model is closely related to the label of the source dataset, so it is not used in the target model.
- Add an output layer whose output size is the number of target dataset categories for the target model, and randomly initialize the model parameters of this layer.
- Train the target model on the target data set (such as chair data set). We will train the output layer from scratch, and the parameters of other layers are obtained based on the parameter fine-tuning of the source model.
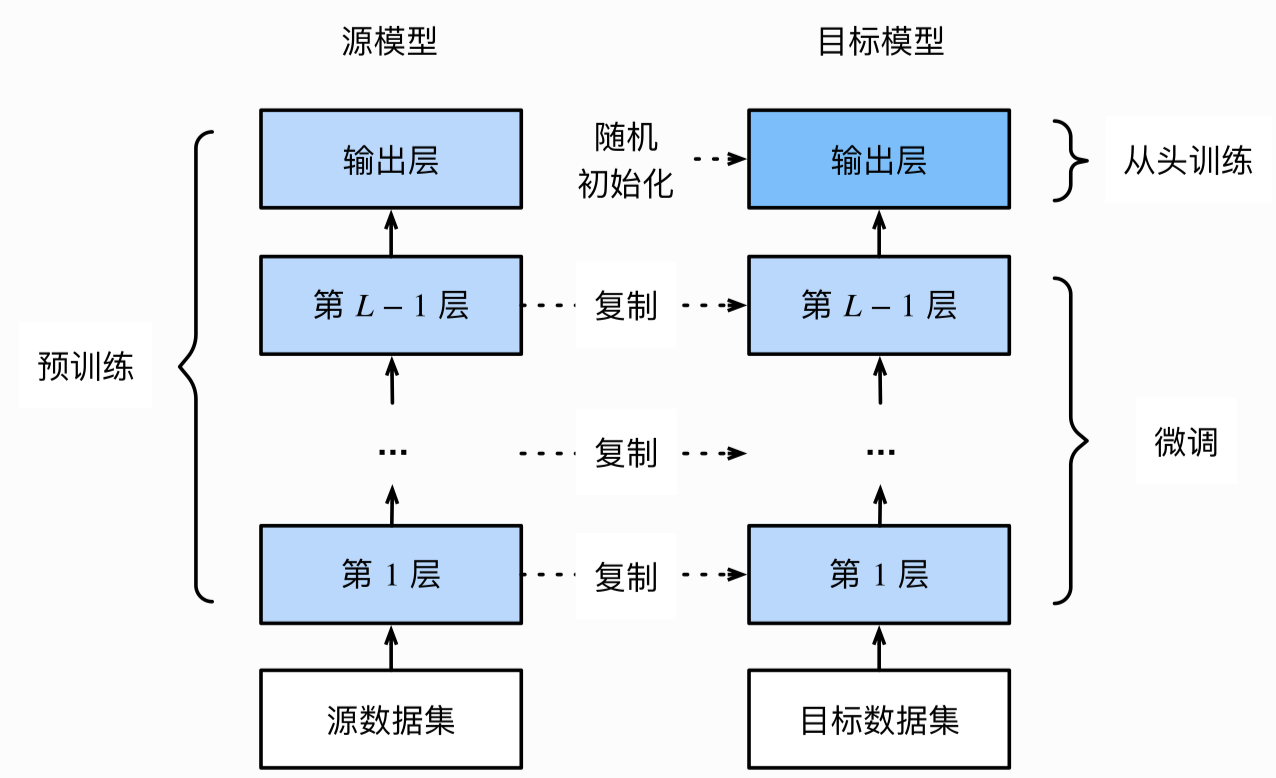
When the target dataset is much smaller than the source dataset, fine tuning helps to improve the generalization ability of the model.
Hot dog recognition
Next, let's practice a specific example: hot dog recognition. The ResNet model trained on the ImageNet dataset will be fine tuned based on a small dataset. The small data set contains thousands of images of hot dogs or other things. We will use the fine tuned model to identify whether an image contains hot dogs.
First, import the toolkit required for the experiment.
import tensorflow as tf
import numpy as np
Get dataset

Inside each category folder are image files.
In the previous section, we introduced the ImageDataGenerator for image enhancement. We can read the image file through the following method. This method takes the folder path as the parameter to generate the image enhanced results and generate batch data:
flow_from_directory(self, directory,
                            target_size=(256, 256), color_mode='rgb',
                            classes=None, class_mode='categorical',
                            batch_size=32, shuffle=True, seed=None,
                            save_to_dir=None)
Main parameters:
- directory: the path of the target folder. Each class corresponds to a subfolder in which any pictures of JPG, PNG, BNP and PPM can be read.
- target_size: the default is (256, 256), and the image will be resize d to this size.
- batch_ Size: the size of batch data. The default is 32.
- shuffle: whether to disrupt the data. The default value is True.
We create two TF keras. preprocessing. image. Imagedatagenerator instance to read all image files in the training dataset and test dataset respectively. All the training set images are processed into the input of 224 pixels in height and width. In addition, we standardize the values of RGB (red, green and blue) color channels.
# Get dataset
import pathlib
train_dir = 'transferdata/train'
test_dir = 'transferdata/test'
# Get training set data
train_dir = pathlib.Path(train_dir)
train_count = len(list(train_dir.glob('*/*.jpg')))
# Get test set data
test_dir = pathlib.Path(test_dir)
test_count = len(list(test_dir.glob('*/*.jpg')))
# Create imageDataGenerator for image processing
image_generator = tf.keras.preprocessing.image.ImageDataGenerator(rescale=1./255)
# Set parameters
BATCH_SIZE = 32
IMG_HEIGHT = 224
IMG_WIDTH = 224
# Get training data
train_data_gen = image_generator.flow_from_directory(directory=str(train_dir),
                                                    batch_size=BATCH_SIZE,
                                                    target_size=(IMG_HEIGHT, IMG_WIDTH),
                                                    shuffle=True)
# Get test data
test_data_gen = image_generator.flow_from_directory(directory=str(test_dir),
                                                    batch_size=BATCH_SIZE,
                                                    target_size=(IMG_HEIGHT, IMG_WIDTH),
                                                    shuffle=True)
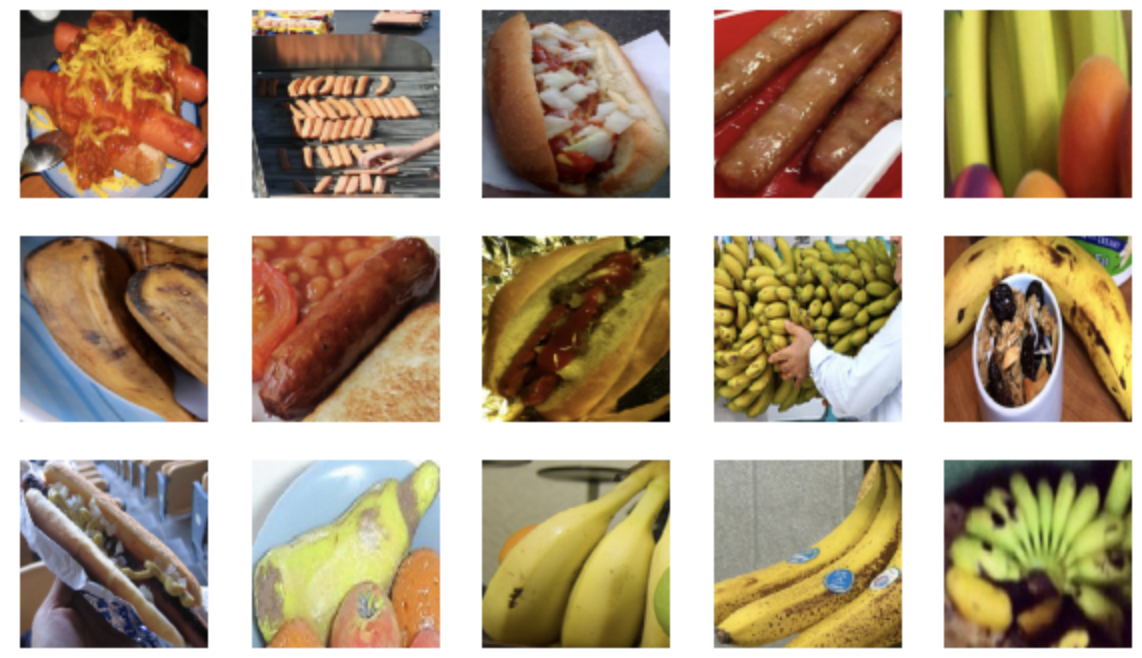
Let's take a batch picture at random and draw it.
import matplotlib.pyplot as plt
# Display image
def show_batch(image_batch, label_batch):
    plt.figure(figsize=(10,10))
    for n in range(15):
        ax = plt.subplot(5,5,n+1)
        plt.imshow(image_batch[n])
        plt.axis('off')
# Randomly select a batch image
image_batch, label_batch = next(train_data_gen)
# image display
show_batch(image_batch, label_batch)
Model construction and training
We use ResNet-50 pre trained on ImageNet dataset as the source model. Here, specify weights='imagenet 'to automatically download and load the pre trained model parameters. You need to download model parameters online when using it for the first time.
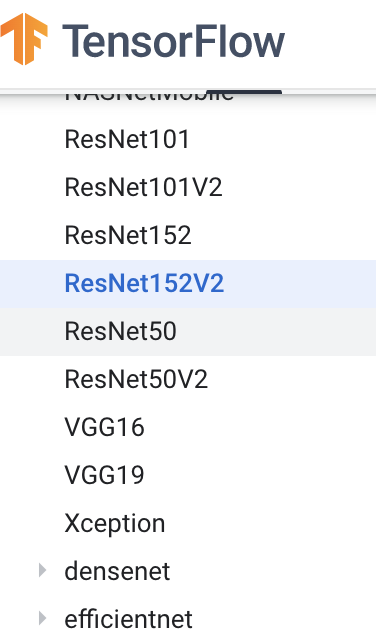
Keras applications (keras.applications) is a fixed architecture with pre training weights, which encapsulates many heavyweight network architectures, as shown in the figure below:
Instantiate the model architecture during implementation:
tf.keras.applications.ResNet50(
    include_top=True, weights='imagenet', input_tensor=None, input_shape=None,
    pooling=None, classes=1000, **kwargs
)
Main parameters:
- include_top: whether to include the full connection layer of the top layer.
- weights: None stands for random initialization, and 'ImageNet' stands for the weight of pre training loaded on ImageNet.
- input_shape: optional, enter the size tuple, only if include_ It is valid when top = false, otherwise the input shape must be (224, 224, 3) (channels_last format) or (3, 224, 224) (channels_first format). It must have three input channels, and the width and height must not be less than 32. For example, (200, 200, 3) is a legal input size.
In this case, we use resNet50 pre training model to build the model:
# Load pre training model
ResNet50 = tf.keras.applications.ResNet50(weights='imagenet', input_shape=(224,224,3))
# Set all layers untrainable
for layer in ResNet50.layers:
    layer.trainable = False
# Set model
net = tf.keras.models.Sequential()
# Pre training model
net.add(ResNet50)
# open
net.add(tf.keras.layers.Flatten())
# Full connection layer of class II
net.add(tf.keras.layers.Dense(2, activation='softmax'))
Next, we use the previously defined ImageGenerator to send the training set pictures to ResNet50 for training.
# Model compilation: specify optimizer, loss function and evaluation index
net.compile(optimizer='adam',
            loss='categorical_crossentropy',
            metrics=['accuracy'])
# Model training: specify data, run only 10 iterations in each epoch, and specify validation data set
history = net.fit(
                    train_data_gen,
                    steps_per_epoch=10,
                    epochs=3,
                    validation_data=test_data_gen,
                    validation_steps=10
                    )
Epoch 1/3
10/10 [==============================] - 28s 3s/step - loss: 0.6931 - accuracy: 0.5031 - val_loss: 0.6930 - val_accuracy: 0.5094
Epoch 2/3
10/10 [==============================] - 29s 3s/step - loss: 0.6932 - accuracy: 0.5094 - val_loss: 0.6935 - val_accuracy: 0.4812
Epoch 3/3
10/10 [==============================] - 31s 3s/step - loss: 0.6935 - accuracy: 0.4844 - val_loss: 0.6933 - val_accuracy: 0.4875
summary
-
Common image enhancement methods: geometry and color
-
In TF and keras, you can use: TF Image and ImageDataGenerator() complete image enhancement
-
Fine tuning is that the target model copies all model designs and parameters on the source model except the output layer, and fine tunes these parameters based on the target data set. The output layer of the target model needs to be trained from scratch.
-
Using TF application in keras to realize transfer learning