Image graying
What is image graying?
Image graying is not to turn a simple image into gray, but to integrate the BGR channels of the image with a certain law to make the image display bit gray.
The rules are as follows:
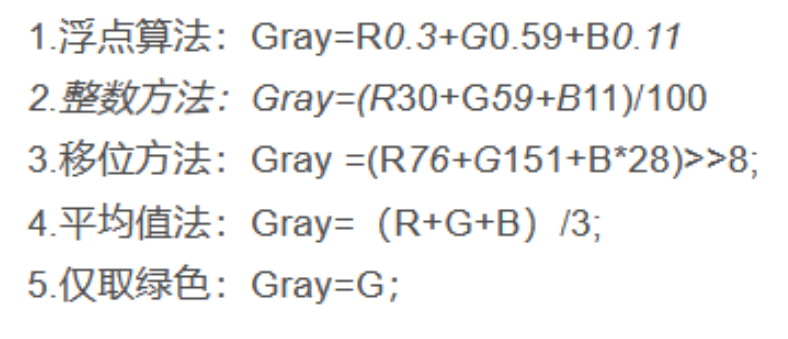
Manual graying
First, we use manual graying:
The idea is:
First create a blank picture with the same length and width as the original picture, and then fill each pixel of the original picture into the picture according to the following formula to realize graying.

import cv2
import numpy as np
from skimage.color import rgb2gray
from PIL import Image
import matplotlib.pyplot as plt


img = cv2.imread("lenna.png")   #opencv read image
#img = plt.imread("lenna.png")  #matlab read image
h,w = img.shape[:2] #Length and width of readout image
img_gray = np.zeros([h,w],img.dtype)    #Create a single channel picture with the same length and width as the current image
for i in range(h):
    for j in range(w):
        m = img[i,j]
        img_gray[i,j] = int(m[0]*0.11+m[1]*0.59+m[2]*0.3)   #Convert the BGR read by CV into gray value to the new image

print(img_gray)
cv2.imshow('gray picture ',img_gray)    #cv shows the gray image
cv2.waitKey (0) #If the wait time is not written, the image will flash
Realization of image graying with skimage
img = cv2.imread("lenna.png")
img_gray = rgb2gray(img)
cv2.imshow('gray picture ',img_gray)
cv2.waitKey (0)
Realization of image grayscale by opencv
img = cv2.imread("lenna.png")
img_gray = cv2.cvtColor(img,cv2.COLOR_BGR2GRAY)

#Output with opencv
cv2.imshow('gray picture ',img_gray)
cv2.waitKey (0)

#Output with plt: note here that cmap is a color map, which defaults to RGB(A) color space. You can also specify that gray is a gray image. If cmap is other, it will cause color difference
plt.imshow(img_gray,cmap="gray")
plt.show()
image binaryzation
What is image binarization?
The so-called image binarization is to take the value of the pixel in the image as its middle value. If it is greater than the middle value, set the value of the pixel as the maximum value. If it is less than the middle value, set the pixel as the minimum value. Make the whole picture have only two values at the end: maximum and minimum.
Realize binarization manually
img = plt.imread("lenna.png")
img_gray = rgb2gray(img)	#We still need to grayscale here
rows, cols = img_gray.shape
for i in range(rows):
    for j in range(cols):
        if (img_gray[i, j] <= 0.5):
            img_gray[i, j] = 0
        else:
            img_gray[i, j] = 1

plt.imshow(img_gray,cmap="gray")
plt.show()
numpy to realize image binarization
img = plt.imread("lenna.png")
img_gray = rgb2gray(img)#We still need to grayscale here

img_binary = np.where(img_gray >= 0.5, 1, 0)
plt.imshow(img_binary,cmap="gray")
plt.show()
Realizing image binarization with opencv
img = cv2.imread("lenna.png")
img_gray = cv2.cvtColor(img,cv2.COLOR_BGR2GRAY)#We still need to grayscale here

cv2.threshold(img_gray,127,255,0,img_gray)
cv2.imshow('img_binary',img_gray)
cv2.waitKey(0)
All codes and implementation results:
All codes:
import cv2
import numpy as np
from skimage.color import rgb2gray
from PIL import Image
import matplotlib.pyplot as plt

"""
Manually realize image graying
"""

img = cv2.imread("lenna.png")   #opencv read image
#img = plt.imread("lenna.png")  #matlab read image
h,w = img.shape[:2] #Length and width of readout image
img_gray = np.zeros([h,w],img.dtype)    #Create a single channel picture with the same length and width as the current image
for i in range(h):
    for j in range(w):
        m = img[i,j]
        img_gray[i,j] = int(m[0]*0.11+m[1]*0.59+m[2]*0.3)   #Convert the BGR read by CV into gray value to the new image. Note: this formula is internal

print(img_gray)
cv2.imshow('gray picture ',img_gray)    #cv shows the gray image
cv2.waitKey (0) #If the wait time is not written, the image will flash

"""
skimage Realize image graying
"""

img = cv2.imread("lenna.png")
img_gray = rgb2gray(img)
cv2.imshow('gray picture ',img_gray)
cv2.waitKey (0)

"""
opencv Realize image graying
"""

img = cv2.imread("lenna.png")
img_gray = cv2.cvtColor(img,cv2.COLOR_BGR2GRAY)

#Output with opencv
cv2.imshow('gray picture ',img_gray)
cv2.waitKey (0)

plt.imshow(img_gray,cmap="gray")
plt.show()

"""
Manual image binarization
"""
img = plt.imread("lenna.png")
img_gray = rgb2gray(img)
rows, cols = img_gray.shape
for i in range(rows):
    for j in range(cols):
        if (img_gray[i, j] <= 0.5):
            img_gray[i, j] = 0
        else:
            img_gray[i, j] = 1

plt.imshow(img_gray,cmap="gray")
plt.show()

"""
numpy Realize image binarization
"""
img = plt.imread("lenna.png")
img_gray = rgb2gray(img)
img_binary = np.where(img_gray >= 0.5, 1, 0)
plt.imshow(img_binary,cmap="gray")
plt.show()

"""
opencv Realize image binarization
"""

img = cv2.imread("lenna.png")
img_gray = cv2.cvtColor(img,cv2.COLOR_BGR2GRAY)
cv2.threshold(img_gray,127,255,0,img_gray)
cv2.imshow('img_binary',img_gray)
cv2.waitKey(0)
Results achieved:
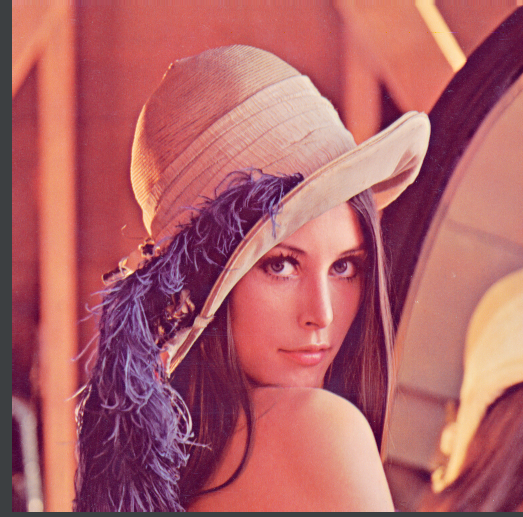
Original drawing:
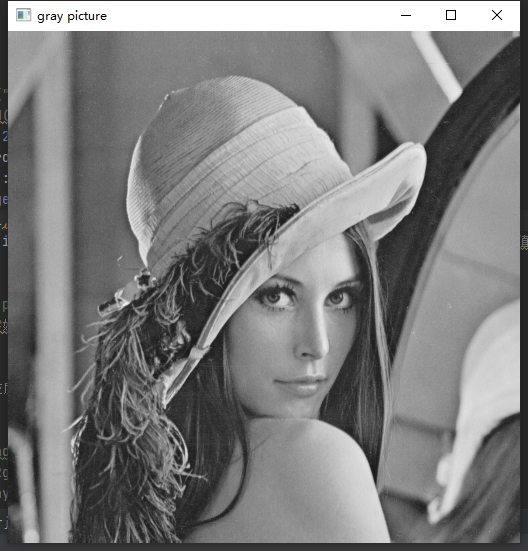
Grayscale:
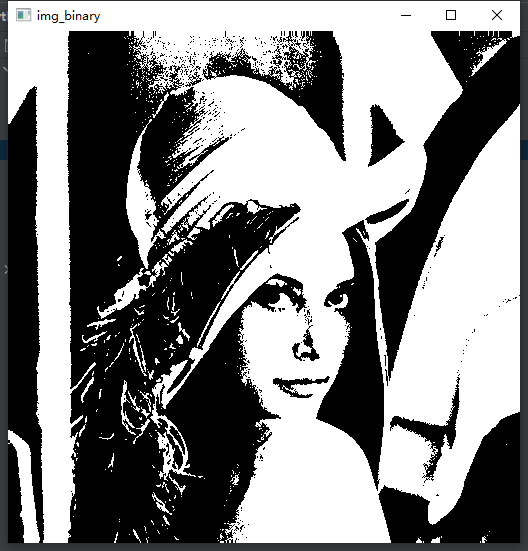
Binarization:
Thoughts and questions:
1. Different plt and cv thresholds in binarization:
After plt reads the image, each pixel value of the image is between [0,1], and after cv2 reads the image, each pixel value is between [0255]. Therefore, in binarization, plt has a threshold of 0.5 and the pixel value is divided into 0 or 1, while in cv2, the threshold is 127 and the pixel value is divided into 0 or 255.
2. Image distortion will occur when PLT and cv cross read data:
Because the interface of opencv uses BGR mode, while Matplotlib The pyplot interface uses RGB mode
The solution is:
After inputting the image in cv, change the channel sequence, just in cv2 Add after imread input
b, g, r = cv2.split(img)
img = cv2.merge([r, g, b])
3. cmap = 'gray' must be added when graying and binary images are output with plt. If the image will be distorted
cmap in plt output is the color map, which defaults to RGB(A) color space. gray can also be specified. If cmap is other, it will cause color difference
4.CV or plt disappears quickly when printing images:
Whoever outputs cv or plt needs to add cv at the end of the output Waitkey (0) or plt Show() otherwise, the output image is fleeting and will soon disappear. It cannot stay for a long time.
5.PLT and openCV reading and output methods:
PLT:
#input
img = plt.imread("lenna.png")
#output
plt.imshow(img,cmap="gray")
plt.show()
CV:
#input
img = cv2.imread("lenna.png")
#output
cv2.imshow('img',img_gray)
cv2.waitKey(0)