What is Kong
Openretry is a high-performance platform based on nginx and Lua, with a large number of lua libraries inside. Where ngx_lua_moudule enables developers to call nginx modules using Lua scripts. Kong is an openretry program, which runs on nginx and extends nginx with Lua. Therefore, it can be considered that Kong = openretry + nginx + Lua. Kong is highly extensible and can be extended through its plug-in mechanism.
Official documents: https://docs.konghq.com/
Github: https://github.com/Kong/kong
principle
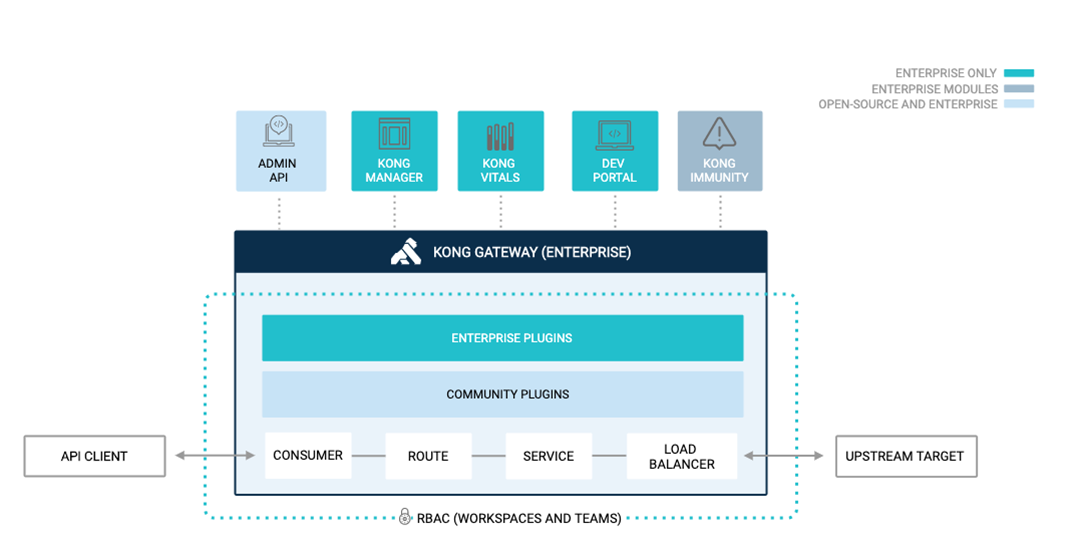
When the client request arrives at Kong, Kong identifies which Consumer it is and forwards the request to the upstream Service corresponding to the Service according to the routing rules. Let's look at the core components involved in this process
Consumer: represents an application. You can define a plugin for the consumer and formulate its request rules.
Route: the matching rule between the client and the Service, which is the entrance of Kong. Once the route rule is matched, it will be delegated to its associated Service. One route corresponds to one Service, and one Service has multiple routes
Service: manage our API or Upstream Server. The main attributes of service are url, port, protocol, etc
Upstream: the service / API behind Kong. Multi instance deployment enables load balancing
Plugin: provides advanced functionality and extends the Gateway. For example, identity authentication, rate limit, etc.
Install Kong
Official documents: https://konghq.com/install/#kong-community
You can install the enterprise version or open source version. I will install the enterprise version this time, but only use the open source function
#Pull mirror
docker pull kong/kong-gateway:2.6.0.0-alpine

#Label
docker tag kong/kong-gateway:2.6.0.0-alpine kong-ee

#Create network
docker network create kong-ee-net

#Run database container
docker run -d --name kong-ee-database --network=kong-ee-net -p 5432:5432 -e "POSTGRES_USER=kong" -e "POSTGRES_DB=kong" -e "POSTGRES_PASSWORD=kong" postgres:9.6

#Database migration
docker run --rm --network=kong-ee-net -e "KONG_DATABASE=postgres" -e "KONG_PG_HOST=kong-ee-database" -e "KONG_PG_PASSWORD=kong" -e "KONG_PASSWORD={PASSWORD}" kong-ee kong migrations bootstrap

#Run Kong
docker run -d --name kong-ee --network=kong-ee-net -e "KONG_PROXY_LISTEN=0.0.0.0:8000,0.0.0.0:9080 http2" -e "KONG_DATABASE=postgres" -e "KONG_PG_HOST=kong-ee-database" -e "KONG_PG_PASSWORD=kong" -e "KONG_PROXY_ACCESS_LOG=/dev/stdout" -e "KONG_ADMIN_ACCESS_LOG=/dev/stdout" -e "KONG_PROXY_ERROR_LOG=/dev/stderr" -e "KONG_ADMIN_ERROR_LOG=/dev/stderr" -e "KONG_ADMIN_LISTEN=0.0.0.0:8001" -e "KONG_ADMIN_GUI_URL=http://{HOSTNAME}:8002" -p 8000:8000 -p 8443:8443 -p 8001:8001 -p 8444:8444 -p 8002:8002 -p 8445:8445 -p 8003:8003 -p 8004:8004 -p 9080:9080 kong-ee
Install visual interface Konga
Official source code: https://github.com/pantsel/konga
docker pull pantsel/konga

docker run -d -p 1337:1337 --network kong-ee-net -e "TOKEN_SECRET=kongtoken" -e "DB_ADAPTER=postgres" -e "DB_HOST=kong-ee-database" -e "DB_USER=kong" -e "DB_PASSWORD=kong" --name konga pantsel/konga
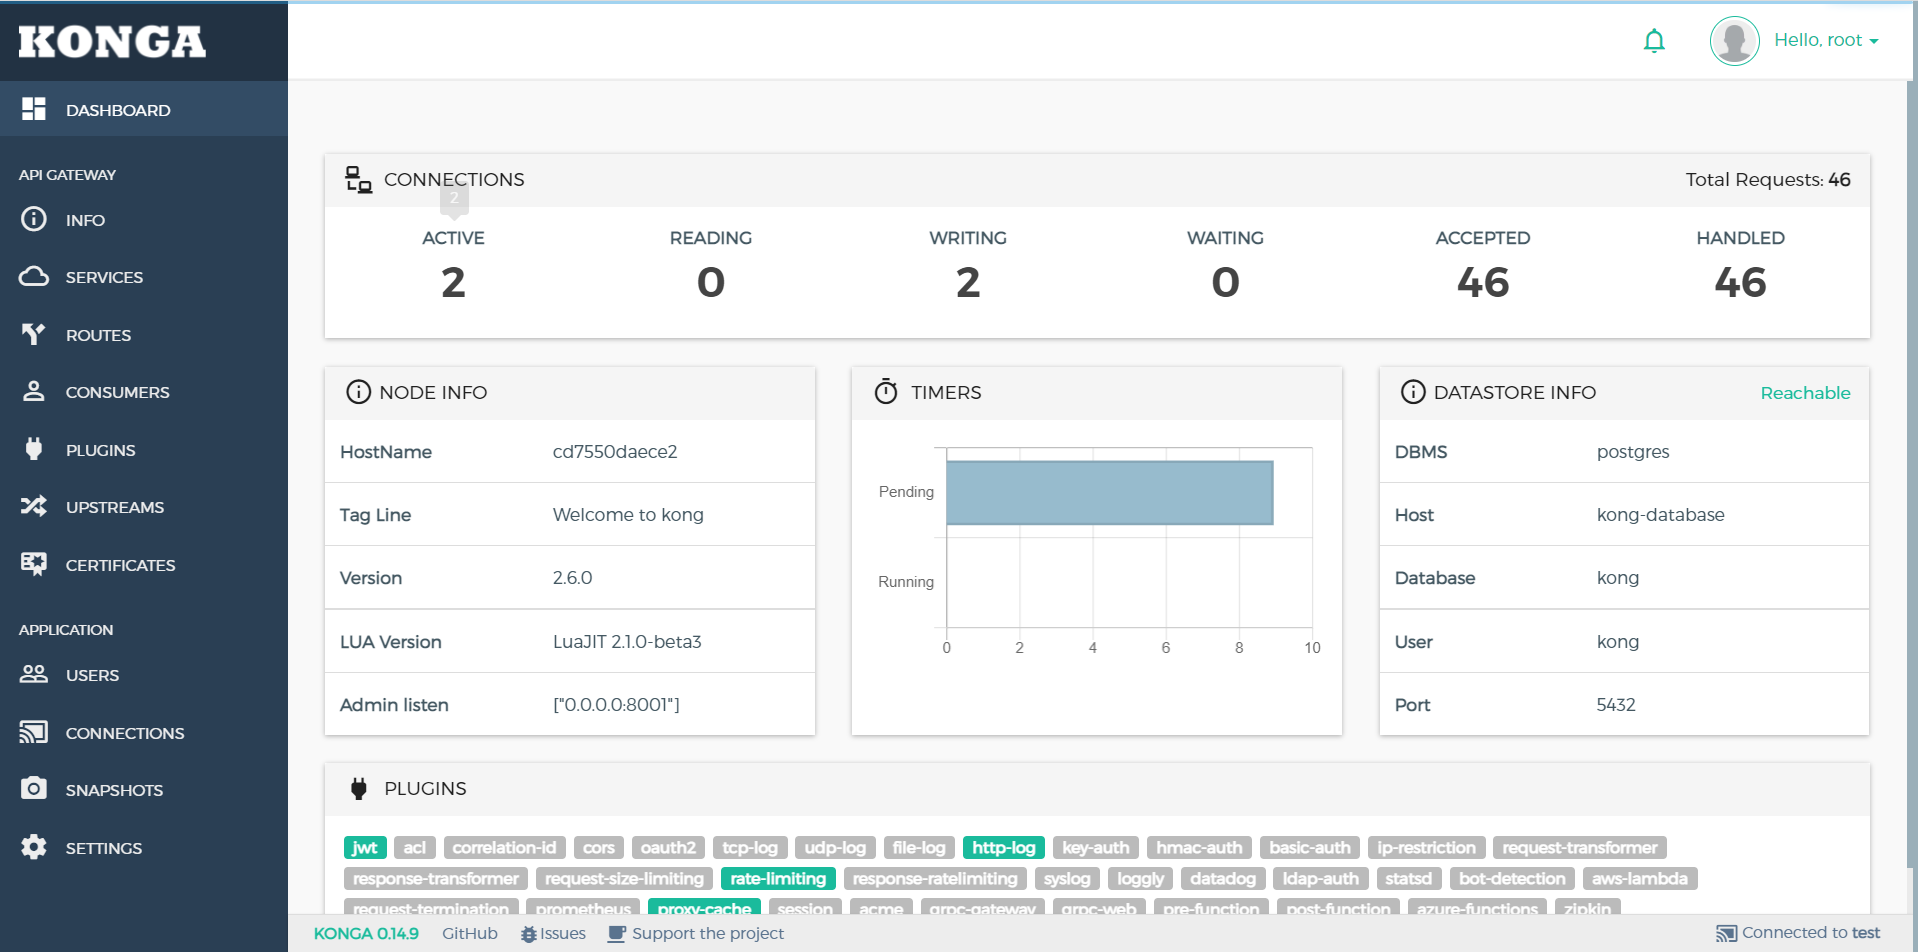
Visit localhost:1337, create a new user, log in and create a connection: test/http://192.168.43.94:8001 , specify port 8001 of the kong api
Kong proxy HTTP service
The demonstration project we use is https://github.com/cysnet/gateway-aspnetcore-demo , which includes the following
- Http services: Server1 and Server2
- Grpc service: GrpcService1 and GrpcService2
- Grpc client: GrpcClient
- IdentityServer4 service: Idstest
- Log service: LogServer
1. Proxy Http service. We use Server1 to start Server1

2. Create a Service in Kong through the admin api, or use the visual interface Konga
POST http://192.168.43.94:8001/services --data name=server1 --data url='http://192.168.43.94:5000'
3. Create routes through admin api or Konga visual interface
http://192.168.43.94:8001/services/server1/routes --data 'paths[]=/http1'--data name=http1
4. Test

Kong agent Grpc service
1. Proxy Grpc. We use GrpcService1 to start GrpcService1

2. Create a Service in Kong through the admin api, or use the visual interface Konga
POST 192.168.43.96:8001/services --data name=gserver1 --data protocol=grpc --data host=192.168.43.94 --data port=6001
3. Create routes through admin api or Konga visual interface
POST 192.168.43.94:8001/services/gserver1/routes --data protocols[]=grpc --data name=r-gserver1 --data paths[]=/greet
4. Test and run GrpcClient

Kong load Http service
1. Start Server1 and Server2

2. Create upstreams in Kong through admin api or Konga through visual interface
POST http://192.168.43.94:8001/upstreams --data name=u-http1
3. Create a target for u-http1, pointing to server1 and server2
POST http://192.168.43.94:8001/upstreams/u-http1/targets  --data target='192.168.43.94:5000'
POST http://192.168.43.94:8001/upstreams/u-http1/targets  --data target='192.168.43.94:5001'
4. Modify the http1 service to point to the u-htttp1 upstream
PATCH http://192.168.43.94:8001/services/server1 --data host='u-http1'
5. Test and call the following api
http://192.168.43.94:8000/http1/Name

Kong load Grpc service
1. Start GrpcService1 and GrpcService2

2. Create upstreams in Kong through admin api or Konga through visual interface
POST http://192.168.43.94:8001/upstreams --data name=u-gserver1
3. Create a target for u-gserver1, pointing to GrpcService1 and GrpcService2
POST http://192.168.43.94:8001/upstreams/u-gserver1/targets  --data target='192.168.43.94:6001'
POST http://192.168.43.94:8001/upstreams/u-gserver1/targets  --data target='192.168.43.94:6002'
4. Modify the direction of gsserver1 service to point to the upstream of u-gsserver1
PATCH http://192.168.43.94:8001/services/gserver1 --data host='u-gserver1'
5. Test and run GrpcClient


Integrate IdentityServer4 to realize JWT authentication
1. Open the jwt plug-in for server1
POST http://localhost:8001/services/server1/plugins -d "name=jwt " –d "config.key_claim_name=client_id"
2. Create a consumer
POST localhost:8001/consumers -d "username=c-server1"
3. Obtain the public key and private key of ids4 certificate
openssl installation https://slproweb.com/products/Win32OpenSSL.html
openssl pkcs12 -in chester.pfx -nocerts -nodes -out private_pc.key
 Extract private key from key pair(Header format:-----BEGIN RSA PUBLIC KEY-----)
openssl rsa -in  private_pc.key -out private.pem
 Extract public key from key pair(Header format:-----BEGIN PUBLIC KEY-----)
openssl rsa -in private_pc.key -pubout -out public.key
4. Create credentials for C-server1
POST localhost:8001/consumers/c-server1/jwt -d "algorithm=RS256" -d "key=big_cat" -d "secret=xxxxxx" -d "rsa_public_key=xxxxxxxxx"
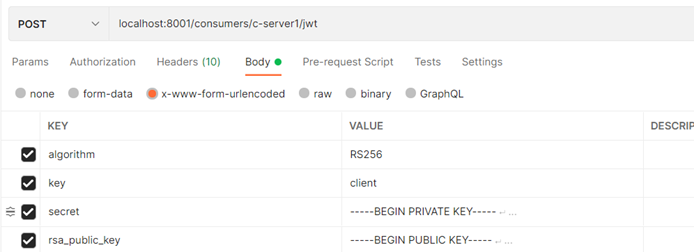
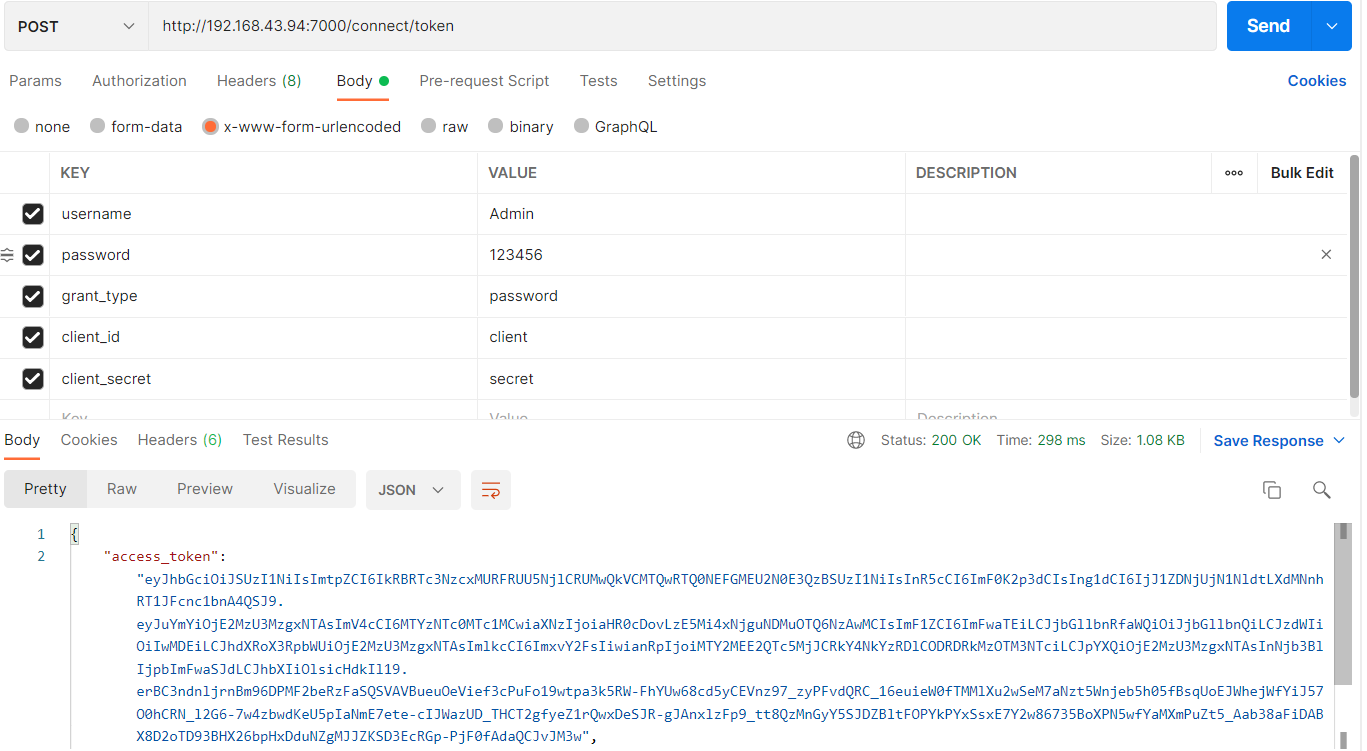
5. Start id4test to get jwttoken
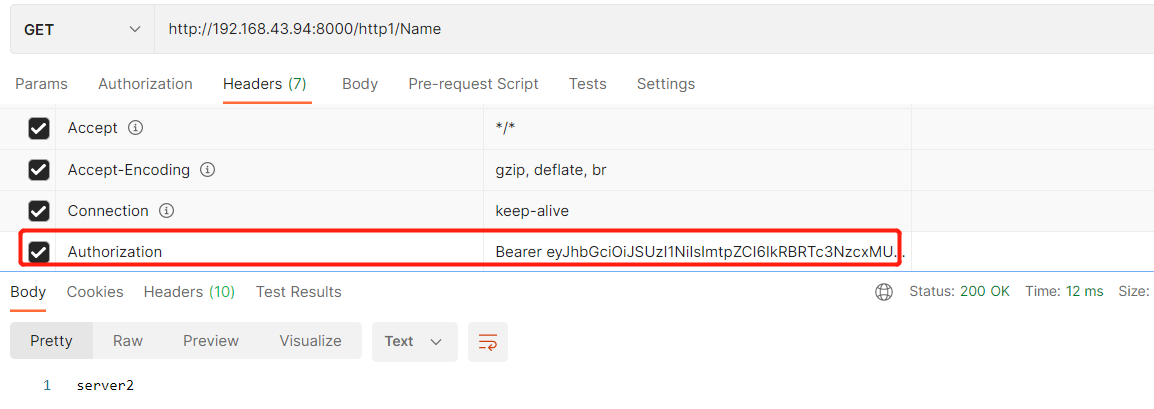
6. Call api to verify token
RateLimit current limiting plug-in
POST http://<admin-hostname>:8001/plugins --data name=rate-limiting --data config.minute=5 --data config.policy=redis --data redis_host=192.168.43.102 --data limit_by=ip –data redis_password=123456
Multiple calls trigger current limiting

Cache plug-in
POST http://localhost:8001/plugins --data name=proxy-cache --data config.content_type="text/plain; charset=utf-8" --data config.cache_ttl=30 --data config.strategy=memory
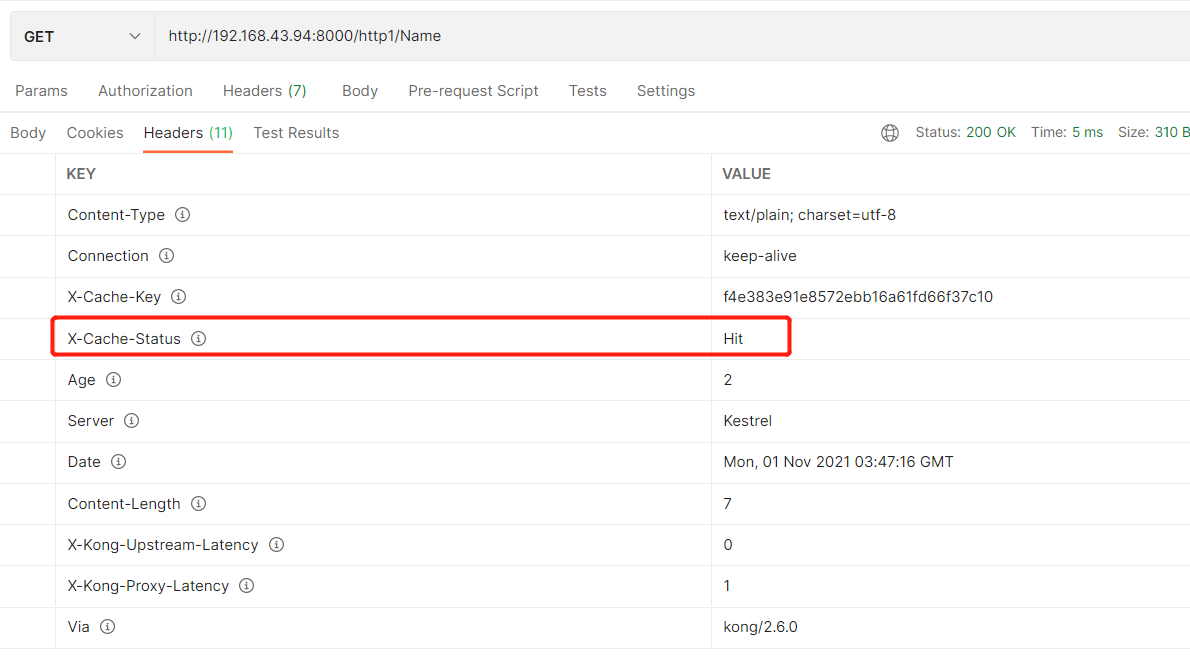
If X-Cache-Status=Hit is called multiple times, the cache is hit successfully
Log plugin
Start LogServer

Open log plug-in
POST http://localhost:8001/services/server1/plugins --data "name=http-log" --data "config.http_endpoint=http://192.168.43.94:5555/Log" --data "config.method=POST"
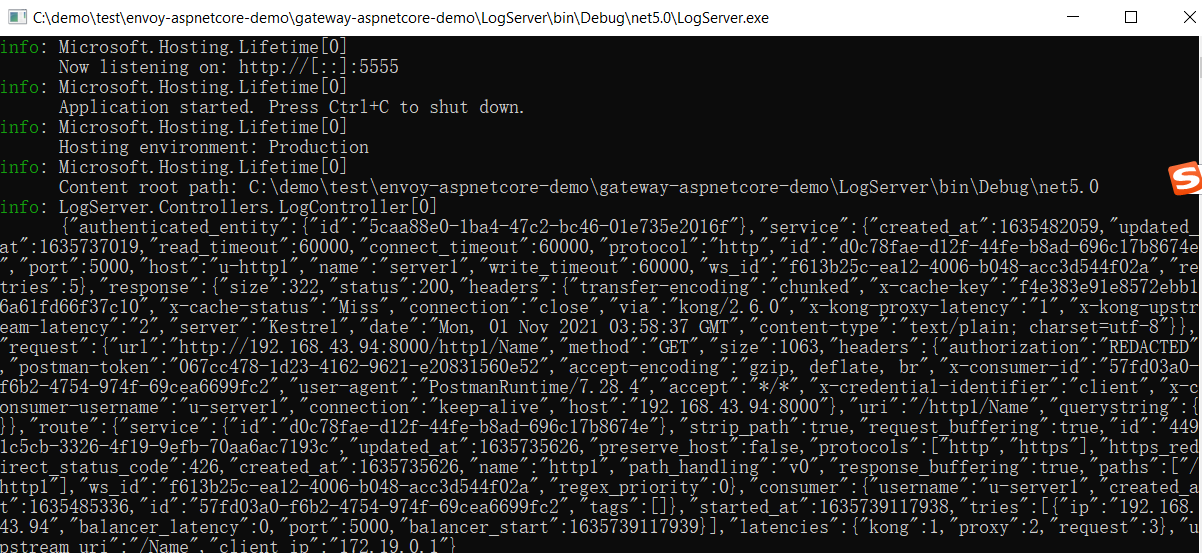
request http://192.168.43.94:8000/http1/Name , view LogServer output
