What is React?
- React is a declarative, efficient, and flexible JavaScript library for building user interfaces
1, Environment construction
Use create React app to quickly build React development environment
Create React app is from Facebook. With this command, we can quickly build the React development environment without configuration.
The project automatically created by create react app is based on Webpack + ES6.
Execute the following command to create a project:
--	install create-react-app Scaffolding
npm install -g create-react-app
--	Create project my-app
create-react-app my-app
--	Enter project directory
cd testdemo
--	Run project
npm start
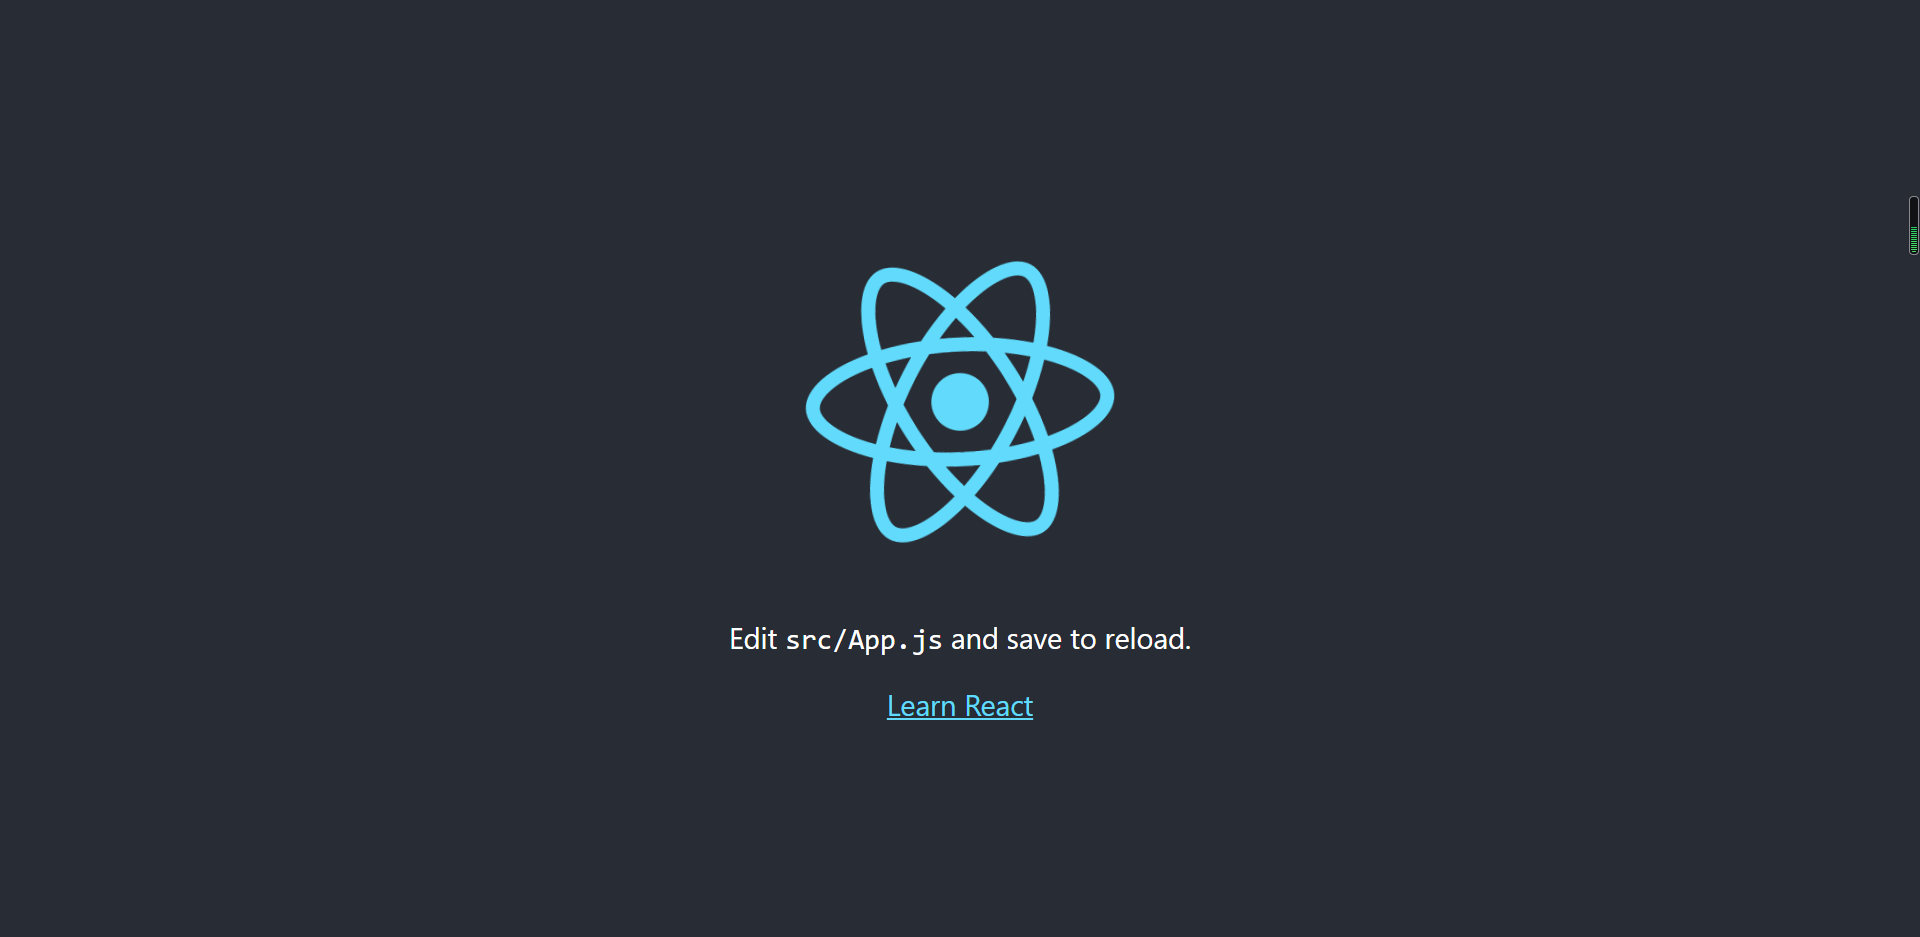
Browser open http://localhost:3000/ , the operation is successful when the following screen appears
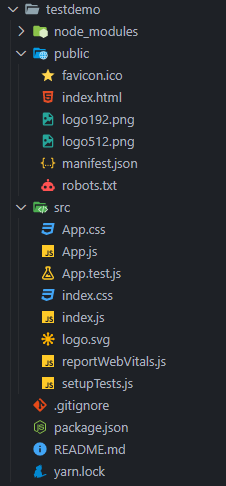
2, react directory and files
directory structure
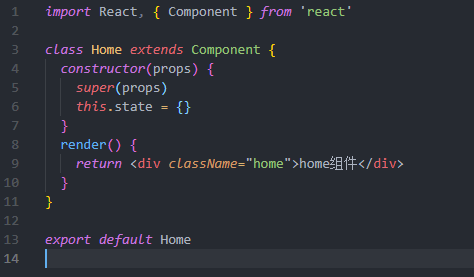
Component foundation template
3, Knowledge points of React
1.JSX syntax
class ShoppingList extends React.Componnet {
	//	Virtual DOM
    render() {
        return (
            <div className="shopping-list">
                <h1>Shoping List for {this.props.name}</h1>
                <ul>
                    <li>Instagram</li>
                    <li>WhatApp</li>
                    <li>Oculus</li>
                </ul>
            </div>
        )
    }
}
Here, ShoppingList is a React component class or a React component type. The component accepts parameters, called property props, and returns a realistic view hierarchy through the render method.
The render method returns a description of the content to render, and then React accepts the description and renders it to the screen
be careful:
Because JSX is JavaScript, some identifiers such as class and for are not recommended as XML attribute names. Instead, React DOM uses className and htmlFor as the corresponding attributes.
Custom properties
The p element in the instance adds a custom attribute data myattribute. Adding a custom attribute requires a data prefix.
ReactDOM.render(
    <div>
    	<p data-myattribute="somevalue">Custom properties</p>
    </div>
    ,
    document.getElementById('example')
);
style
React recommends inline style.
We can use camelCase syntax to set inline style React automatically adds px after specifying the element number. The following example demonstrates adding a myStyle inline style to an h1 element:
var myStyle = {
    fontSize: 100,
    color: '#FF0000'
};
ReactDOM.render(
    <h1 style={myStyle}>Rookie tutorial</h1>,
    document.getElementById('example')
);
array
JSX allows you to insert an array into a template. The array will automatically expand all elements:
var arr = [
  <h1>Rookie tutorial</h1>,
  <h2>Learning is not only technology, but also a dream!</h2>,
];
ReactDOM.render(
  <div>{ arr }</div>,
  document.getElementById('example')
);
2. Life cycle
-
componentWillMount: before rendering, the client is also on the server side.
-
componentDidMount: call after the first rendering, only on the client side.
-
componentWillReceiveProps: called when the component receives a new prop (Updated). This method will not be called when initializing render.
-
shouldComponentUpdate: returns a Boolean value. Called when the component receives a new props or state. Not called during initialization or when using forceUpdate.
-
componentWillUpdate: called when the component receives a new props or state but has not yet render ed. Is not called during initialization.
-
componentDidUpdate: called immediately after the component completes updating. Is not called during initialization.
-
componentWillUnmount: called immediately before the component is removed from the DOM.
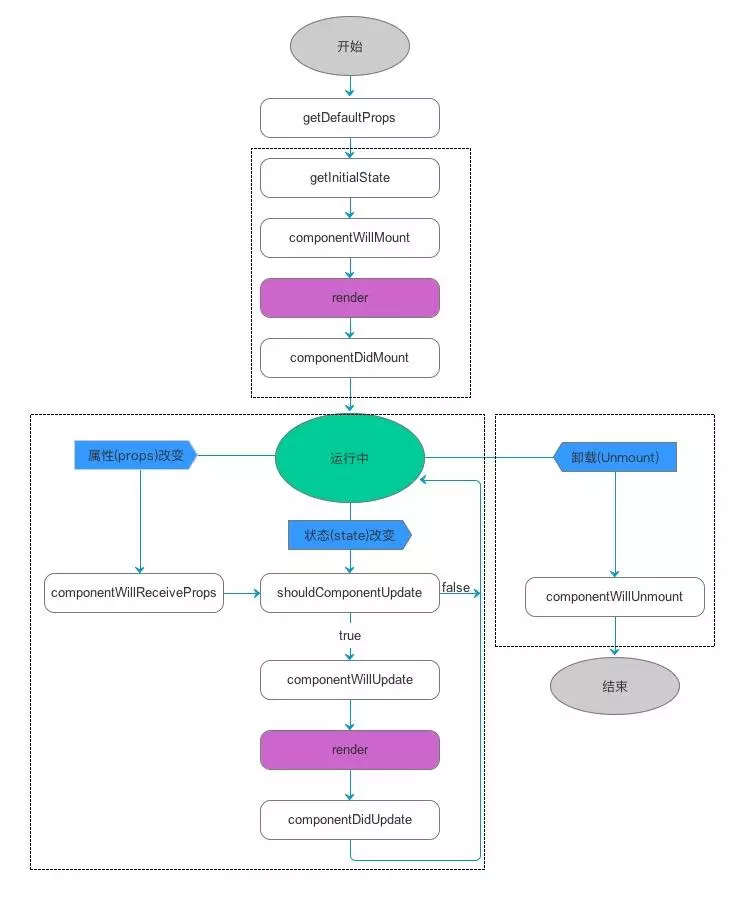
react lifecycle function details
3. Event handling
Block default behavior
The difference in React is that you cannot use return false to block the default behavior. You must explicitly use preventDefault.
In React, it is written as follows:
function ActionLink() {
  function handleClick(e) {
    e.preventDefault();
    console.log('Link clicked');
  }

  return (
    <a href="#" onClick={handleClick}>
      Point me
    </a>
  );
}
this point
In react, the method of class will not bind this by default. If you forget to bind this Handleclick and pass it into onClick. When you call this function, the value of this will be undefined.
export default class Test extends Component {
  constructor(props) {
    super(props)
    // This is to bind the current instance object
    this.testClick3 = this.testClick3.bind(this)
  }
  // No binding was made
  testClick() {
    console.log(this) // Print undefined
  }
  // Arrow function
  testClick2 = () => {
    console.log(this) // Print current instance object
  }
  // Bind this through bind in constructor
  testClick3() {
    console.log(this) // Print current instance object
  }
  testClick4() {
    console.log(this) // Print current instance object
  }
  render() {
    return (
      <>
        <button onClick={this.testClick}>click1</button>
        <button onClick={this.testClick2}>click2</button>
        <button onClick={this.testClick3}>click3</button>
        {/* Arrow function = > Print current instance object */}
        <button onClick={() => this.testClick3()}>click4</button>
      </>
    )
  }
}
Function parameter transfer
By bind:
- Function name Bind (parameter, Event)
Through the arrow function:
- (Event) = > function name (parameter, Event)
export default class Test extends Component {
  constructor() {
    super()
    this.state = { name: 'Hello world!' }
  }
  // e: Print event object | name: Hello world!
  testClick(name, e) {
    console.log(e)
    console.log(name)
  }
  render() {
    return (
      <>
        {/* Use bind to pass parameters. The first parameter is the event object and the second is the parameter required by the method */}
        <button onClick={this.testClick.bind(this, this.state.name)}>
          click1
        </button>
        {/* Use the arrow function to pass the parameter, (e) is the event object. If it is not passed in, the e printed out by the method is undefined */}
        <button onClick={(e) => this.testClick(this.state.name, e)}>
          click2
        </button>
      </>
    )
  }
}
4.Context
Context provides a method to transfer data through the component tree, thus avoiding the manual transfer of props attribute at each level
API
(1)React.createContext: create a context container (component). defaultValue can set the shared default data
const {Provider, Consumer} = React.createContext(defaultValue);
(2) Provider (producer): the same as his name. Where shared data is produced. What does it produce? It depends on what value defines. Value: place shared data.
<Provider value={/*Shared data*/}>
    /*It can render the corresponding content*/
</Provider>
(3) Consumer: this can be understood as a consumer. It is a specialized consumer provider that generates data. Consumers need to be nested under producers. To get the shared data source through callback. Of course, it can also be used alone, so it can only consume the defaultValue mentioned above
<Consumer>
  {value => /*Render the content according to the context*/}
</Consumer>
5. Component API
Setting state: setState
setState(object nextState[, function callback])
Parameter description
- nextState, the new state to be set, which will be merged with the current state
- Callback, optional parameter, callback function. This function will be successfully set in setState and will be invoked after the component is rendered again.
Merge the nextState with the current state and re render the component. setState is the main method to trigger UI update in React event handler function and request callback function.
About setState
This. Cannot be passed inside a component State modifies the state because it is replaced after calling setState().
setState() does not immediately change this State, but create a state to be processed. setState() is not necessarily synchronized. In order to improve performance, React will perform state and DOM rendering in batches.
setState() will always trigger a component redrawing unless some conditional rendering logic is implemented in shouldComponentUpdate().
Replacement status: replaceState
replaceState(object nextState[, function callback])
- nextState, the new state to be set, which will replace the current state.
- Callback, optional parameter, callback function. This function will be successfully set in replaceState and will be invoked after the component is rendered again.
**The replaceState() method is similar to setState() * * method, but it only retains the state in nextState, and the state that the original state is not in nextState will be deleted.
Setting properties: setProps
setProps(object nextProps[, function callback])
- nextProps, the new property to be set, and the state will be merged with the current props
- Callback, optional parameter, callback function. This function will be successfully set in setProps and will be invoked after the component is rendered again.
Set the component properties and re render the component.
props is equivalent to the data flow of components. It will always be passed down from the parent component to all child components. When integrating with an external JavaScript application, we may need to pass data to the component or notify react The render () component needs to be re rendered. You can use setProps().
After updating the component, I can call react again on the node Render(), you can also change the component properties through the * * setProps() * * method to trigger the component to re render.
Replacement attribute: replaceProps
replaceProps(object nextProps[, function callback])
- nextProps, the new property to be set, which will replace the current props.
- Callback, optional parameter, callback function. This function will be successfully set in replaceProps and will be invoked after the component is rendered again.
The replaceProps() method is similar to setProps(), but it deletes the original props.
Forced update: forceUpdate
forceUpdate([function callback])
Parameter description
- Callback, optional parameter, callback function. This function is called after component **render() * method invocation.
The forceUpdate() method will make the component call its own render() method to re render the component, and the component's sub components will also call their own render(). However, this is still read when the component is re rendered Props and this State, if the state does not change, React will only update the DOM.
The forceUpdate() method applies to this Props and this If a component other than state is redrawn (for example, after this.state is modified), notify React that render() needs to be called through this method
In general, you should try to avoid using forceUpdate() and only start from this Props and this The state is read from state and the render() call is triggered by React.
Get DOM node: findDOMNode
DOMElement findDOMNode()
- Return value: DOM element
If the component is already mounted in the DOM, this method returns the corresponding local browser DOM element. When render returns null or false, this Finddomnode() will also return null. This method is very useful when reading values from DOM, such as obtaining the values of form fields and doing some DOM operations.
Judge component mounting status: isMounted
bool isMounted()
- Return value: true or false, indicating whether the component has been mounted in the DOM
The isMounted() method is used to determine whether the component has been mounted in the DOM. This method can be used to ensure that the calls of setState() and forceUpdate() in asynchronous scenarios will not make mistakes.
Above reference: https://www.runoob.com/react/react-component-api.html
6.state
React regards a component as a state machine. It realizes different states through interaction with users, and then renders the UI to keep the user interface and data consistent.
In React, you only need to update the state of the component, and then re render the user interface according to the new state (do not operate the DOM).
export default class Test extends Component {
  // constructor is used to bind instances to state
  constructor(props) {
    super(props)
    // Set state
    this.state = {
      msg: 'test msg',
      msg2: 'setState msg',
    }
  }
  // Both the upper and lower segments can be used to set state, but they cannot be used together
  // state = {
  //   msg2: 'test2 msg',
  // }
  render() {
    return (
      <>
        {/* Get state */}
        {this.state.msg}
        <button
          onClick={() => {
            this.state.msg = 'new test msg'
            // When the state is changed, it will not be updated actively. You need to call this Use setstate() to render the page, and reload render()
            // this.setState() will update all the states of the current page. You don't need to repeat the settings like msg2
            this.setState({
              msg2: 'setState msg',
            })
          }}
        >
          click
        </button>
        {/* {this.state.msg2} */}
      </>
    )
  }
}
Processing input from multiple state s
export default class Test extends Component {
  constructor() {
    super()
    this.state = {
      id: '1',
      name: 'Xiao Ming',
      sex: 'male',
      tableList: {
        age: '22',
        height: '180cm',
      },
    }
  }

  // Process multiple inputs
  // The name attribute in input should correspond to the state key
  // Process multiple input s
  handleInputChange(e) {
    const target = e.target
    let name = target.name
    this.setState({
      [name]: target.value,
    })
  }

  // Process the input value in the form
  _handleInputChange(e) {
    const target = e.target
    let name = target.name
    let value = target.value
    const tableList = this.state.tableList
    tableList[name] = value
    this.setState({
      tableList,
    })
  }

  render() {
    return (
      <>
        {this.state.id}
        <br />
        {this.state.name}
        <br />
        {this.state.sex}
        <br />
        {this.state.tableList.age}
        <br />
        {this.state.tableList.height}
        <form>
          id:
          <input
            name="id"
            value={this.state.id}
            onChange={(e) => this.handleInputChange(e)}
          />
          <br />
          name:
          <input
            name="name"
            value={this.state.name}
            onChange={(e) => this.handleInputChange(e)}
          />
          <br />
          sex:
          <input
            name="sex"
            value={this.state.sex}
            onChange={(e) => this.handleInputChange(e)}
          />
          <br />
          age:
          <input
            name="age"
            value={this.state.tableList.age}
            onChange={(e) => this._handleInputChange(e)}
          />
          <br />
          height:
          <input
            name="height"
            value={this.state.tableList.height}
            onChange={(e) => this._handleInputChange(e)}
          />
        </form>
      </>
    )
  }
}
Reference for the above treatment: https://www.cnblogs.com/xfswy/p/14980918.html
7. Components
// class component
export default class Test extends Component {
  render() {
    return (
      <>
        <button onClick={(e) => { console.log(e) }}>Test1 click</button>
        {/* Expand Test2 and pass the child node < H1 > */}
        <Test2>
          <h1>open hello world</h1>
        </Test2>
      </>
    )
  }
}

// Functional component
// This function is a valid React component because it receives only "props" (representing attributes) with data
// Object and returns a React element. This type of component is called a "function component" because it is essentially a JavaScript function.
const Test2 = (props) => {
  function welcome(e) {
    console.log(e)
    console.log('hello world')
  }
  return (
    <div>
      <button onClick={(e) => welcome(e)}>Test2 click</button>
      {/* Gets the passed child node */}
      {props.children}
    </div>
  )
}
8.props
The main difference between state and props is that props is immutable, while state can be changed according to user interaction. This is why some container components need to define state to update and modify data. Sub components can only pass data through props.
// Functional component
// Here, props is obtained by passing parameters, so this is not required
const Test2 = (props) => <div>{props.msg2}</div>

// ES6 class keyword definition
class Test3 extends Component {
  render() {
    // Here, access the current instance through this to get props
    return <div>{this.props.msg3}</div>
  }
}

class Test4 extends Component {
  // Set the default value for props through the static property defaultProps
  static defaultProps = {
    msg4: 'default msg4',
  }
  render() {
    return <div>{this.props.msg4}</div>
  }
}

// The following code is equivalent to the static defaultProps in Test4 above
Test4.defaultProps = {
  msg4: 'new default msg4',
}

export default class Test extends Component {
  render() {
    return (
      <>
        <Test2 msg2="test msg2" />
        <Test3 msg3="test msg3" />
        <Test4 />
      </>
    )
  }
}
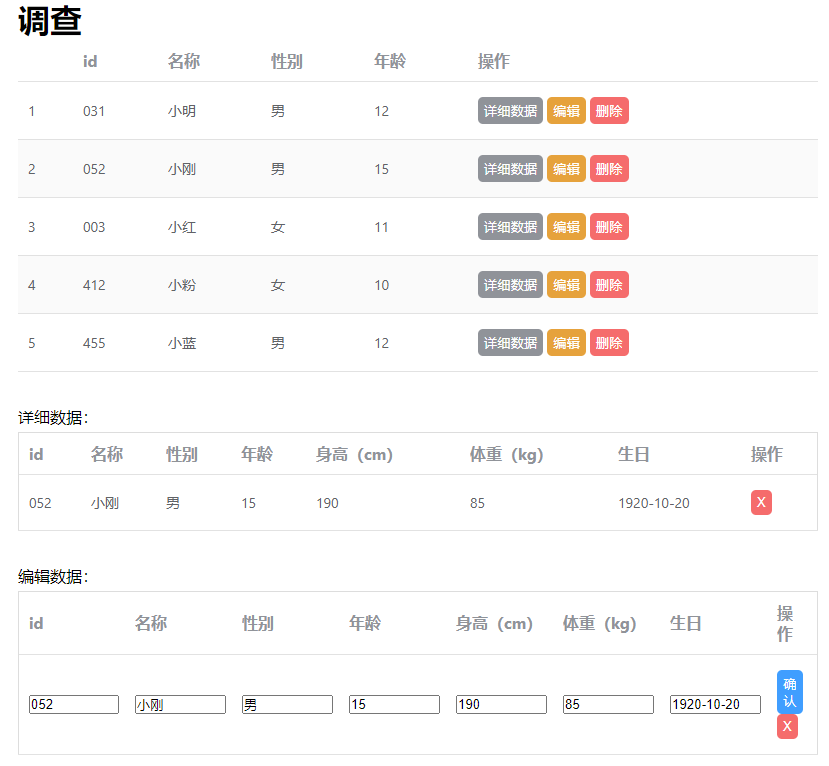
4, Small case
It involves the use of the following knowledge points
- state: status maintenance and update
- Functions and event handling
- List loop
- conditional rendering
Effect display
Source code
It's messy. Just have a look
Component home js
import React, { Component } from 'react'
import './Home.css'

class Home extends Component {
  constructor(props) {
    super(props)
    this.state = {
      // raw data
      tableList: [
        {
          id: '031',
          name: 'Xiao Ming',
          sex: 'male',
          age: '12',
          height: '180',
          weight: '79',
          birthday: '1922-10-20',
        },
        {.............}
      ],
      // Display detailed data interface
      isShowDetailed: false,
      // Display modify data interface
      isShowEdit: false,
      // Detailed data sheet
      detailedItem: {},
      // key value of current modified data
      editKey: null,
      // Modify the data interface template and store the data to be modified
      editItem: {
        id: '1',
        name: '1',
        sex: '',
        age: '',
        height: '',
        weight: '',
        birthday: '',
      },
    }
    // Bind the current object for the function so that the function can get this
    this.changeData = this.changeData.bind(this)
  }
  // Display detailed data
  showData = (data) => {
    this.setState({
      isShowDetailed: true,
      detailedItem: data,
    })
  }
  // Hide details
  hideData = () => {
    this.setState({
      isShowDetailed: !this.state.isShowDetailed,
    })
  }
  // Display modified data
  showEdit = (key) => {
    this.setState(
      {
        isShowEdit: true,
        editItem: this.state.tableList[key],
        editKey: key,
      },
      () => {
        let inputs = document
          .getElementById('editId')
          .getElementsByTagName('input')
        for (let i = 0; i < inputs.length; i++) {
          let key = Object.keys(this.state.editItem)
          inputs[i].value = this.state.editItem[key[i]]
        }
      }
    )
  }
  // Hide modified data
  hideEdit = () => {
    this.setState({
      isShowEdit: !this.state.isShowEdit,
    })
  }
  // Modify data
  changeData() {
    let data = this.state.tableList
    data[this.state.editKey] = {
      id: document.getElementById('id').value,
      name: document.getElementById('name').value,
      sex: document.getElementById('sex').value,
      age: document.getElementById('age').value,
      height: document.getElementById('height').value,
      weight: document.getElementById('weight').value,
      birthday: document.getElementById('birthday').value,
    }
    this.setState({
      editItem: this.state.tableList[this.state.editKey],
      isShowEdit: !this.state.isShowEdit,
      isShowDetailed: !this.state.isShowDetailed,
    })
  }
  // Delete data
  deleteData(key) {
    this.state.tableList.splice(key, 1)
    this.setState({
      isShowDetailed: false,
      isShowEdit: false,
    })
  }
  // Virtual DOM
  render() {
    return (
      <div className="home">
        <h1>investigation</h1>
        <table>
          <tbody>
            <tr>
              <th></th>
              <th>id</th>
              <th>name</th>
              <th>Gender</th>
              <th>Age</th>
              <th>operation</th>
            </tr>
            {this.state.tableList.map((item, key) => {
              return (
                <tr key={item.id}>
                  <td>{key + 1}</td>
                  <td>{item.id}</td>
                  <td>{item.name}</td>
                  <td>{item.sex}</td>
                  <td>{item.age}</td>
                  <td>
                    <button
                      className="info"
                      onClick={this.showData.bind(this, item)}
                    >
                      Detailed data
                    </button>
                    <button
                      className="warning"
                      onClick={this.showEdit.bind(this, key)}
                    >
                      edit
                    </button>
                    <button
                      className="danger"
                      onClick={this.deleteData.bind(this, key)}
                    >
                      delete
                    </button>
                  </td>
                </tr>
              )
            })}
          </tbody>
        </table>
        <div
          className="detailed"
          style={{ display: this.state.isShowDetailed ? 'block' : 'none' }}
        >
          <span>Detailed data:</span>
          <table>
            <tbody>
              <tr>
                <th>id</th>
                <th>name</th>
                <th>Gender</th>
                <th>Age</th>
                <th>Height( cm)</th>
                <th>Weight( kg)</th>
                <th>birthday</th>
                <th>operation</th>
              </tr>
              <tr>
                {Object.keys(this.state.detailedItem).map((obj, idx) => {
                  return <td key={idx}>{this.state.detailedItem[obj]}</td>
                })}
                <td>
                  <button
                    className="danger"
                    onClick={this.hideData}
                    title="Close form"
                  >
                    X
                  </button>
                </td>
              </tr>
            </tbody>
          </table>
        </div>
        <div
          className="edit"
          id="editId"
          style={{ display: this.state.isShowEdit ? 'block' : 'none' }}
        >
          <span>Edit data:</span>
          <table>
            <tbody>
              <tr>
                <th>id</th>
                <th>name</th>
                <th>Gender</th>
                <th>Age</th>
                <th>Height( cm)</th>
                <th>Weight( kg)</th>
                <th>birthday</th>
                <th>operation</th>
              </tr>
              <tr>
                {Object.keys(this.state.editItem).map((obj, idx) => {
                  return (
                    <td key={idx}>
                      <input id={obj} />
                    </td>
                  )
                })}
                <td>
                  <button className="smbit" onClick={this.changeData}>
                    confirm
                  </button>
                  <button
                    className="danger"
                    onClick={this.hideEdit}
                    title="Close form"
                  >
                    X
                  </button>
                </td>
              </tr>
            </tbody>
          </table>
        </div>
      </div>
    )
  }
}

export default Home
The above is a personal note, which does not mean that it is absolutely correct. Please correct any mistakes