Purpose of convolution:
Convolution is mainly used for noise reduction, which is a way of noise reduction;
Two dimensional discrete convolution includes Gaussian filtering, smoothing filtering, median filtering, bilateral filtering and guided filtering algorithms that can ensure the edge of the image;
1, Understand the source and classification of noise;
There will inevitably be noise in the image, which can be simply understood as the random change of gray value, that is, some unwanted noise is introduced in the process of taking pictures;
Noise can be divided into salt and pepper noise, Gaussian noise, additive noise and multiplicative noise;
If you want to know more about the source of noise, you can refer to Noise figure series: noise source, NF definition and impact - Zhihu
2, Convolution is also called two-dimensional discrete convolution
To understand what convolution is, please refer to:
How to explain convolution easily- Know
How to explain convolution easily- Know
Before learning image smoothing, it is necessary to understand the knowledge of lower convolution. After reading the above connection, we should know several key words about convolution in image processing: convolution kernel, anchor point, step size, inner product and convolution mode
Convolution kernel: a matrix used to smooth the image matrix, also known as a filter
Anchor point: the convolution kernel overlaps with the image matrix. After the inner product operation, the pixels at the anchor point will be replaced by the calculated value. Generally, odd convolution kernel is selected, in which the center point is used as the anchor point
Step size: the length of each movement of the convolution kernel along the image matrix
Inner product: the convolution kernel is multiplied by the corresponding pixel points of the image matrix, and then added to obtain a sum, as shown in the figure below. (not to be confused with matrix multiplication)
#include <iostream>
#include <opencv2/opencv.hpp>
#include <opencv2/core.hpp>
#include <opencv2/highgui.hpp>
#include <stdio.h>
using namespace cv;
using namespace std;
RNG rng(12345);
Scalar color[7] = {
(Scalar(0,0,255)),//gules
(Scalar(0,255,0)),//green
(Scalar(255,0,0)),//blue
(Scalar(255,255,0)),//wathet
(Scalar(255,0,255)),//purple
(Scalar(0,255,255)),//yellow
(Scalar(128,128,192)),//Light pink
};
int main()
{
Mat image,gray_img,thread_img,resize_3d_img, resize2_img,dst_img, dst2_img, dst3_img;
image = imread("../warpAffine_3d.jpg", 1);
if (image.empty()) {
cout << "no such picture" << endl;
return 0;
}
cvtColor(image, gray_img,COLOR_RGB2GRAY,0);//Convert image to grayscale image
threshold(gray_img, thread_img, 100, 255, THRESH_BINARY_INV);//Convert gray image to binary image
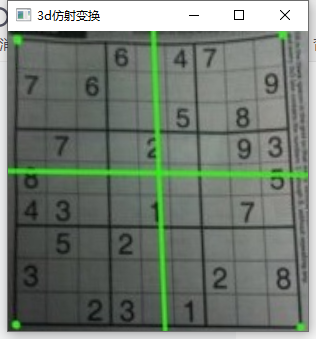
Point2f srcM[4],dstM[4];
srcM[0] = Point2f(45, 43);//Top left Green vertex
srcM[1] = Point2f(219, 39);//Top right green vertex
srcM[2] = Point2f(219, 209);//Lower right green vertex
srcM[3] = Point2f(31, 209);//Lower left Green vertex
dstM[0] = Point2f(0, 0);
dstM[1] = Point2f(300, 0);
dstM[2] = Point2f(300, 300);
dstM[3] = Point2f(0, 300);
Mat t_mat = Mat::zeros(2, 4, CV_32FC1);
while (1)
{
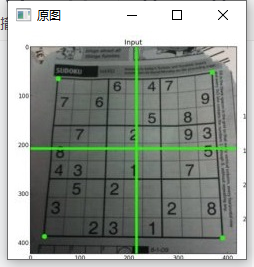
imshow("Original drawing", image);
waitKey(1);
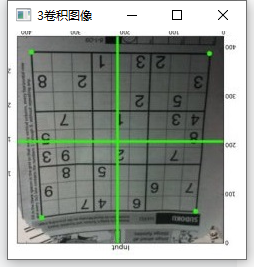
flip(image, dst_img, -1);//0 flips along the X axis, 1 flips along the Y axis, and - 1 flips along the X axis first and then along the Y axis
imshow("3 Convolution image", dst_img);
waitKey(1);
t_mat = getPerspectiveTransform(srcM, dstM, 0);
warpPerspective(image, resize_3d_img, t_mat, Size(300, 300), 1, 0, 255);
imshow("3d affine transformation ", resize_3d_img);
waitKey(1);
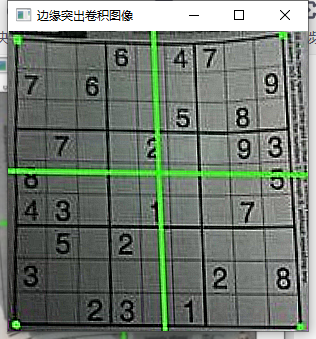
Mat board_mat = (Mat_<float>(3, 3) << -1, -1, -1,
-1, 9, -1,
-1, -1, -1);
filter2D(resize_3d_img, dst2_img, image.depth(), board_mat);
imshow("Edge prominent convolution image", dst2_img);
waitKey(1);
Mat blur_mat = (Mat_<float>(3, 3) << 1.0f / 9, 1.0f / 9, 1.0f / 9,
1.0f / 9, 1.0f / 9, 1.0f / 9,
1.0f / 9, 1.0f / 9, 1.0f / 9);
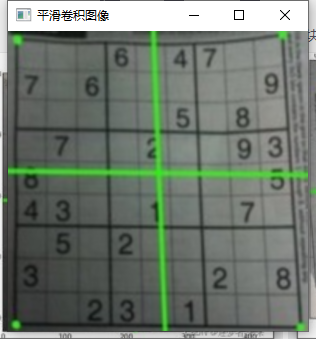
filter2D(resize_3d_img, dst3_img, image.depth(), blur_mat);
imshow("Smooth convolution image", dst3_img);
waitKey(1);
}
return 1;
}